Peruvian Roasted Chicken

This is seriously the most flavorful chicken I have ever cooked. Sweet paprika and lemon really make this peruvian chicken amazing. Use a good sweet hungarian style paprika. Roasting a whole chicken is easy, so don’t let it scare you. And it looks pretty! Buying whole chicken is cheaper than chicken breasts. If you don’t have a whole chicken, use either a whole chicken cut into pieces or several bone in breasts or thighs.  For whole chickens, rinse and pat them dry prior to applying the marinade. 

Marinading chicken for several hours prior to cooking helps keep the pieces moist and adds more flavor. However, if you are running short on time, I’m sure you can skip this part and just rub the bird down with the marinade. Did I mention that I looooove this marinade? Seriously, you can throw this on just about ANYTHING and it will make it better.

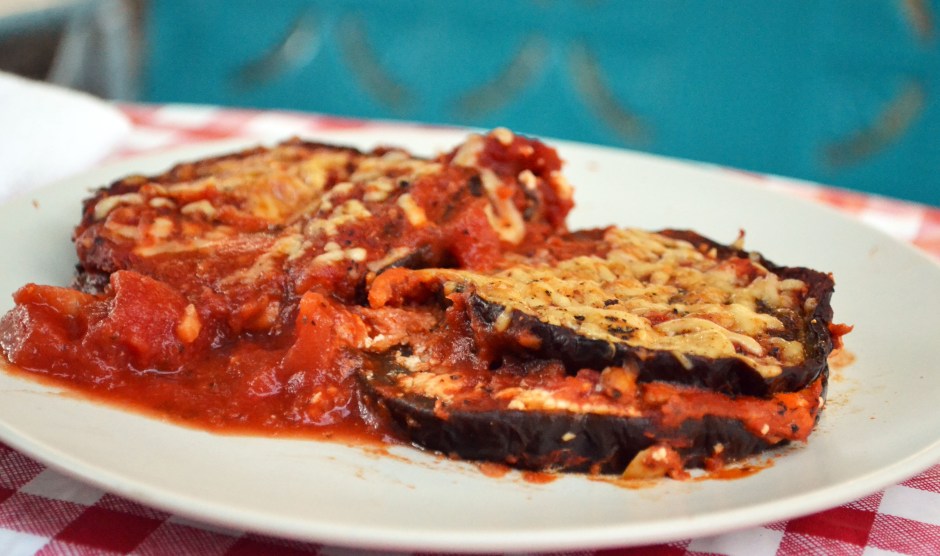
This is a great one dish meal. The paprika and lemon make this recipe pop. For the roasted vegetables, use whatever you have on hand. I happened to have several sweet potatoes from the farmers market. I will be making this dish over and over and over. The leftovers were even better.

Peruvian Roasted Chicken (serves 6)

Ingredients

  • 1 1/2 teaspoons expeller-pressed canola oil, plus more for oiling the pan
  • 1 1/2 tablespoons sweet paprika
  • 1 tablespoon ground cumin
  • 1 1/2 teaspoons fine sea salt
  • 1 1/4 teaspoons ground black pepper
  • 5 cloves garlic, finely chopped
  • 2 1/2 tablespoons white wine vinegar
  • 2 large sweet onions, peeled and thickly sliced
  • 1 chicken (about 4 lbs), whole or cut into 10 serving pieces
  • 2 red bell peppers, cored, seeded and cut into chunks
  • 1 lb of sweet potatoes or new potatoes, diced in 1/2 inch pieces
  • 2 lemons, (quarter one of the lemons and slice the other lemon in thin rounds)

Instructions 

  1. In a small bowl, combine paprika, cumin, salt, pepper, garlic, vinegar and oil to make a paste. Reserve 2 tablespoons of the paste for roasted vegetables. Place onions, peppers, and sweet potatoes in a large bowl and toss with 2 tablespoons of the paste. Reserve remaining paste for the chicken.
  2. If using a whole chicken, pull off the excess fat around the cavity of the chicken and discard. Rinse and pat the chicken dry inside and out. Place the chicken over the sink or on a plate, rub the chicken all over with 2 of the lemon quarters, and discard the used lemon. Slip a finger under the skin at the edge of the cavity and run it along each breast to gently loosen the skin from the meat of the breasts and thighs. Rub chicken with remaining paste. Gently work a little of the paste between the skin and meat, trying not to tear the skin. If running short on time or using a cut up chicken, skip this part.
  3. Place the whole chicken or chicken pieces in a 2-gallon resealable bag and pour any remaining paste/marinade on top. Seal the bag. Turn the chicken several times to coat. Refrigerate for 3 to 8 hours or overnight.
  4. Preheat oven to 425ºF (220°C). Spray a roasting pan with nonstick spray. Adjust the oven rack to the middle position.
  5. Transfer the chicken to a baking dish or roasting pan. If using a whole chicken, squeeze the 2 remaining lemon pieces into the cavity of the bird, place the pieces into the cavity and tie the legs together with kitchen string. Season the chicken all over with 1 teaspoon of salt. If using chicken pieces, just place in prepared roasting pan and season with salt.
  6. Place onions, peppers, sweet potatoes, and sliced lemon around the chicken (or in a separate roasting pan). Roast the chicken in the oven, basting occasionally with pan juices, until chicken is cooked through and vegetables are very tender, about 1 hour.  The bird will be done when the juices of the chicken run clear when the thigh is pierced with a fork and an instant-read thermometer inserted into the thickest part of the thigh reads 165ºF (74°C). Allow the chicken to rest for a few minutes after you remove it from the oven.

Chewy Chocolate Chip Gingersnap Cookies

To break the chill in the air and to add a warm spiced aroma to my home, I decided to make these cookies as a treat. They are adapted from Heidi Swanson’s ginger cookies featured in here. These are sweet and a tad bit spicy from the ginger. Now, for you ginger-aholics, these are not THAT snappy or gingery…but you can ramp up that ginger by adding more ground or fresh ginger. I added diced semisweet chocolate chips to balance the spicy ginger and because my hubby was hankering for chocolate chip cookies. And like the good domestic flower of a wife that I am (cough cough), I made the cookies that I wanted (gingersnaps) and just added chocolate….win win…right?

Now, these cookies call for 1/4 cup of molasses. Make sure you use a good unsulphured molasses. I use Plantation brand which is organic, rich, and densely flavored, not harsh. These cookies are fun and easy to whip up. I make these cookies bite sized, using about 1/2 to 1 tablespoon of dough per cookie. I love the crunch of the large turbinado sugar that the cookies are rolled in for a finishing touch.

Chewy Chocolate Chip Gingersnap Cookies (makes about 40 to 50 tiny bite sized cookies)

Ingredients

  • 2 cups whole wheat pastry flour or all purpose flour
  • 1 teaspoon baking soda
  • 1 1/4 teaspoon of ground ginger
  • 1 teaspoon ground cinnamon
  • 1/4 teaspoon ground nutmeg
  • 1/2 teaspoon fine grained sea salt
  • 1/2 cup (1 stick) unsalted butter, room temperature, cut into small cubes
  • 2/3 cup packed brown sugar
  • 1 tablespoon peeled and grated fresh ginger
  • 1 large egg, well beaten
  • 1/3 cup semisweet or bittersweet chocolate (chopped and/or shaved)
  • 1/2 cup large-grain raw sugar or turbinado sugar

Instructions

  1. Preheat oven to 350 F with racks in the top and bottom third of the oven. Line two baking sheets with parchment paper.
  2. In a large bowl, whisk together the flour, baking soda, cinnamon, salt, nutmeg, ground ginger. Set aside.
  3. Heat the butter in a saucepan or microwave until it is just barely melted. Stir in the molasses, brown sugar, and fresh ginger. The mixture should be warm, but not hot. Whisk in the egg. Pour this mixture over the flour mixture and stir until barely combined. Stir in the chocolate. Chill for about 30 minutes or long enough to let the dough firm up.
  4. Place the turbinado sugar on a plate. Shape the dough into balls (using about 1/2 to 1 tablespoon each). Roll in the sugar to coat. Place 2 to 3 inches apart on the baking sheet.
  5. Bake the cookies, rotating the baking sheets halfway through the cooking time, until the edges firm but the centers are still slightly soft. This should take 7 to 10 minutes. The cookies will puff up, darken a bit, and crack slightly. The bottoms will be deeply golden. If you make larger cookies, they will take 16 to 18 minutes. Let cool slightly on the baking sheets, then transfer to a wire rack to cool completely.

Roasted Sweet Potato, Apple, and Chicken Sausage Soup

Sweet potato time!  I love sweet potatoes any way you prepare them…except from a can. Bleck! There is a local urban farm that specializes in unique and heirloom varieties of vegetables. The typical sweet potato that is sold in the grocery store, pales in comparison to the varieties that you can find at your local farmers market which can vary with different skin colors and different flesh. Recently, I bought three different varieties of  sweet potatoes: a Japanese (red skin and white flesh…creamy, smooth, and sweet), an O’Henry (white fleshed and super sweet), and a Beauregard (orange flesh and creamy).

Sweet potatoes have a lot to offer nutritionally. They’re loaded with vitamin A and beta carotene, plus healthy amounts of vitamins C, B6 and E, as well as potassium. They are also a good source of fiber and complex carbohydrates. Like most vegetables, they contain no fat or cholesterol, and a medium-size sweet potato has only about 100 calories.

This soup is really easy. I found the original recipe in a vegan cookbook. I had a few chicken sausages left over that I threw in for added protein. For a vegetarian or even vegan version, leave out the sausage. It’s great both ways. You can easily use left over sweet potatoes in this soup.

Roasted Sweet Potato, Apple, Onion, and Chicken Sausage Soup (serves 4) adapted from Fresh and Fast Vegan

Ingredients

  • 1 teaspoon fennel seeds (dry roasted and ground using a mortar and pestal)
  • 1 teaspoon cumin seeds
  • 3 medium sweet potatoes, diced 1″ pieces
  • 2 medium apples, cored and diced (tart variety works best)
  • 1 lb small onions, quartered
  • 1 apple, cored and diced
  • 1 head of garlic, top cut off
  • 1 Tablespoon olive oil
  • 3 chicken sausages, sliced vertically 1/2 inch thick
  • 3 cups of chicken or vegetable stock
  • 2 Tablespoon of fresh chopped parsley (optional)
  • salt and pepper to taste
Instructions
  1. Preheat oven to 450 F. Dry fry the fennel and cumin seeds in a heavy skillet or frying pan over medium heat for 3 minutes or until they start to pop, stirring frequently. Coarsely crush the roasted seeds with a mortar and pestle.
  2. Place chopped sweet potatoes, onions, apples, and sausage in a shallow roasting pan. Sprinkle the crushed seeds over the vegetables and apples. Drizzle 1 to 2 tablespoons of olive oil over the top. Stir. Roast for 25 minutes, then turn the vegetables over and roast for an additional 25 minutes. The vegetables should be tender when pierced with fork. Remove 1/4 of the vegetables and all of the sausages and set aside.
  3. Puree the remaining vegetables with chicken stock in a food processor to a smooth puree. Transfer to a saucepan. Warm the soup over a gentle heat.
  4. Now add the vegetables and chicken sausage to the soup. Add chopped parsley. Season with salt and fresh cracked pepper to taste.  Now try not to eat the whole thing by yourself, like I did.

Maple Buttermilk Pie Bars

Buttermilk pie?  Have you had it? I hadn’t. It is supposedly originates in the south. With reports of creme brûlée-like creaminess and a slight tang from the buttermilk and sweetened with maple syrup, I said…SIGN ME UP.  Buttermilk makes biscuits better, pancakes better, and bread better….so why not pie!

Now, like everthything else, I can’t leave good enough alone. This recipe for maple buttermilk bars originated from a buttermilk pie recipe in a 2002 Gourmet article.  Instead of a pie, I decided to make this in bar form for easier transportability. With Thanksgiving and parties coming up, I thought bars would be easier to take than a pie. And, more than anything, I LOVE ME SOME FINGER FOOD.

For the crust, instead of a pie crust or shortbread or graham cracker crust, I went for a nutty pecan crust.  I have to say, that my favorite thing about this dessert, is the crust. This crust would be great beneath a cheesecake or fruit tart too.

The maple buttermilk filling is so easy to throw together. Make sure when baking these bars that you allow it to bake completely, or else you will have a runny goo. The filling is a bit flan-like. I find myself wishing it was creamier, but for you flan and custard lovers out there, this is a great dessert. And a great way to use that pesky extra buttermilk that is in the fridge. I like these best chilled.

Maple Buttermilk Pie Bars (serves 12) adapted from Gourmet

Ingredients:

Crust

  • 1 cup pecans
  • 1 cup whole wheat pastry flour
  • 1/4 cup dark brown sugar
  • 1/4 teaspoon fine grained sea salt
  • 4 Tablespoons butter, melted and cooled
Filling
  • Zest of 1/2 lemon
  • 2 Tablespoons of brown sugar
  • 2/3 cup of maple syrup (preferably Grade B…but if you don’t have maple syrup, you can swap for brown sugar)
  • 1/4 cup all-purpose flour
  • 4 eggs
  • 2 cups of well shaken buttermilk
  • 1 teaspoon of vanilla
  • 1/4 teaspoon of fine grained sea salt
  • dash of nutmeg
Instructions
  1. Preheat oven to 350F. Spray a 9X13 pan with nonstick spray.
  2. For crust, place all ingredients except butter in food processor. Process until a fine meal. Add melted butter and pulse until the ingredients come together to resemble a dough.
  3. Press pecan crust in the bottom of the 9X13 pan. Bake crust for 17 to 20 minutes, until golden. Remove from oven and allow to cool.
  4. Mix up filling while baking crust. In a large mixing bowl, combine the brown sugar, flour, and lemon zest. Whisk in the eggs, 1at a time. Make sure there are no lumps.
  5. Stir in the maple syrup, buttermilk, vanilla, salt, and nutmeg. Pour the buttermilk mixture over the  pre baked cuts. Bake until the top is lightly browned and the center sets, about 50 minutes. Remove from the oven and cool to room temperature. Sprinkle with turbinado sugar for an extra crunch.  Serve either at room temperature or chilled.

Spicy Black Bean Soup

This is hands down the best black bean soup I have ever had….and I have tried multiple black bean soup recipes. This one is soooo flavorful and addictive. It makes quite a bit, but you will be thankful for the leftovers because it tastes better the second day (if that is even imaginable). This recipe also freezes well. Reheat the frozen portions for a quick lunch or dinner. Or bathe in it…because it is THAT good.

Don’t let the long list of ingredients spook you. It is such a flavorful soup and so easy to throw together. If you don’t have smoked paprika, you can leave it out. But I think it adds a nice flavor along with the bacon. Mmmm. For a vegetarian version, you leave out the bacon and use vegetable broth instead of chicken broth.

(Note: Ketchup can be used in place of the tomato paste and maple syrup.)

Spicy Black Bean Soup (serves 6 to 8)

Ingredients

  • 6 slices of smoked all natural bacon, diced in 1/4″ slices
  • 2 medium onions, diced
  • 6 cloves of garlic, minced
  • 1 jalapeño, diced (keep seeds for a kick or deseed if want a milder soup)
  • 1 medium sweet bell pepper, diced
  • 1 15 oz can of chicken stock (or vegetable stock)
  • 1 15 oz can of diced tomatoes, undrained
  • 1 Tablespoon of chili powder
  • 1 teaspoon smoked paprika
  • 1 teaspoon cumin
  • 2 teaspoons of worcestershire sauce
  • 2 Tablespoons tomato paste
  • 2 teaspoons of maple syrup
  • 4 15 oz cans of black beans, drained but not rinsed
  • 1 bunch of cilantro, chopped (about 1 cup)
  • kosher salt and cracked pepper to taste
  • juice of 1/2 lime or 1 Tablespoon of lime juice
Instructions
  1. Cook bacon over medium heat in a dutch oven until bacon is cooked but not crispy, about 5 minutes. Drain a portion of the grease out, leaving just enough to sauté the onions.
  2. Add onions and cook until translucent, about 4 minutes. Add sweet bell pepper, jalapeño, and garlic. Cook for about 2 minutes.
  3. Add broth, tomatoes, spices, tomato paste, and maple syrup. Heat to boiling. Reduce heat to medium low and cook covered for 5 minutes.
  4. Add black beans. Increase heat to medium until boiling. Reduce heat to medium low and cook an additional 10 minutes, covered.
  5. Stir in 1/2 cup of the chopped cilantro, salt and pepper to taste, and lime juice. Heat until soup thickens, about 5 minutes.
  6. Allow to cool for 5 minutes. Ladle into bowls and top with remaining chopped cilantro, sour cream or greek yogurt.

Ham and Swiss Breakfast Strata

Need an easy breakfast casserole to feed a hungry brood? I took this for breakfast to work on friday. I think it will make a great breakfast for a holiday morning.  This is an adapted Martha Stewart recipe. It is called a strata (not because it sounds pretentious) because you layer the ingredients in the pan…get it… stratification…layers…ya, this is a geologists casserole. Sorry, science humor.   So the great thing about this strata (say it and hold your pinky up too, you’ll feel special) is that you can throw it all together the night before and then bake it in the morning. Love it! Like a lot of casseroles, you can swap different cheeses, add veggies, throw in more or less meat (queue gasp from Texas).

For the bread filling, I used a long fresh loaf of french bread from a local bakery. You could also use any soft good white bread (italian or ciabatta).  My only issue was that it was a bit “bready” for my taste, but plenty of coworkers liked it. If you like bread, you’ll love it, but if you are like me and want more EGG, then I recommend reducing the quantity of bread (only use 1/2 to 3/4 of the loaf) and reduce the milk by 1 cup (use 3 cups instead of 4 cups).

Ham and Swiss Breakfast Strata adapted from Martha Stewart (serves 12)

Ingredients

  • 1 pound French loaf, diced into 1-inch cubes
  • 1 cup diced smoked ham (1/4-inch dice)
  • 2 cups grated Swiss cheese
  • 2 green onions (green and white parts), diced
  • 1 Tablespoon minced chives
  • 1 15 oz can diced tomatoes (or 3 fresh), drained
  • 12 large eggs (6 whole eggs and 6 egg whites)
  • 4 cups 1% milk
  • 2 tablespoons Dijon mustard
  • 1/4 teaspoon smoked paprika
  • 2 teaspoons kosher salt
  • 1/4 teaspoon fresh cracked black pepper
Instructions
  1. Spray a 9-by-13-inch baking dish with nonstick spray. Arrange half of the diced bread in the bottom of the dish. Sprinkle half of the ham, cheese, green onions, and chives evenly on top of the diced bread.
  2. Add another layer of bread and top this layer with the remaining ham, cheese, green onions, and chives. Arrange and spread the diced tomatoes on top of the casserole.
  3. In a large bowl, whisk the eggs, egg whites, milk, mustard, smoked paprika, salt, and pepper until combined. Pour this egg mixture over the casserole layers.
  4. Cover and refrigerate overnight.
  5. Preheat oven to 350 degrees. Pull the casserole out of the refrigerator 30 minutes prior to baking so that the  casserole can come to room temperature.
  6. Bake casserole uncovered until golden and fluffy, about 60 to 70 minutes. It will be done when you insert a knife and it comes out clean. Let stand 20 minutes before serving. ENJOY!

Jalapeño Jelly Time

With just a few ingredients, we made this amazing jelly. It tastes great as a topping over goat cheese or cream cheese and served with crackers. I’m even going to be slathering it on my burgers, sandwiches…just you wait. It’s the bling that your food has been waiting for! It’ll even take a grilled cheese up 10 notches. 

Jalapeño Pepper Jelly (makes 4 to 5 8 oz jars) adapted from Ball Preserving Guide

Ingredients

  • 12 jalapeños (chopped and deseeded…depending on how hot you want your jelly, you may keep the seeds from a few of the peppers)
  • 2 red bell peppers (chopped and deseeded) (do not sub green)
  • 1 cup apple cider vinegar
  • 1 3 oz. package of pectin (liquid works best)
  • 5 cups of sugar
Instructions
  1. Chop the jalapeños and bell peppers in a food processor or by hand. If you are chopping the peppers by hand, you should probably wear rubber gloves. Because no matter how careful you are, you will end up scratching your eye and it will sting FOOOOOREVER (yes, this is personal experience talking).
  2. Combine peppers, vinegar, and sugar in a saucepan. Heat over medium until boiling. Boil for 10 minutes. Remove from heat.
  3. Add pectin and stir constantly for an additional minute.  Skim foam if necessary.
  4. Ladle hot jelly into hot sterilized jars. Leave 1/4 inch of headspace.  Assemble and adjust two piece lids. Place in fridge or process in hot water canning bath for 10 minutes. See safety instructions for hot water bath canning. 

Fresh Garden Tomato Soup

On cold days, one of my favorite cozy lunches is grilled cheese and tomato soup. It warms me down to the bone….along with a fabulous pair of wool socks. Grrrrr. Now seriously, who doesn’t love a great tomato soup. Canned varieties of tomato soup don’t hold a candle to freshly made creamy tomato soup. I bought 10 lbs of bruised tomatoes, also known as seconds, at the farmers market. I got them at a fraction of the price…$1/lb instead of the $3/lb. These are great for canning, roasting, or cooking down into sauces. However, you have to either can these suckers quickly or cook them. If you let them sit around, you will have an entire family of fruit flies moving into your kitchen.  So with all these tomatoes and the cool fall weather setting in, a huge batch of tomato soup seemed appropriate.

This is a great recipe if you have a bumper crop of tomatoes. Buuuuut, if you are like the rest of us and had a depressing tomato season then either buy seconds or you can use a large can of crushed tomatoes. Although I really love this soup, next time I will roast the tomatoes for 1 hr at 400 F before putting them in the soup to add a deeper flavor. I add a carrot and red bell pepper for extra veggie oomf, but you can leave these out for a pure tomato basil soup.

Fresh Garden Tomato Soup (4 – 6 servings)

Ingredients:

  • 1 Tbsp olive oil
  • 1 medium yellow onion, diced
  • 4 cloves of garlic, minced
  • 1 carrot, diced (optional)
  • red bell pepper, diced (optional)
  • 3 lbs tomatoes, cored and diced (or 1 28 oz can of crushed tomatoes)
  • 1 Tbsp honey
  • 1 cup vegetable broth
  • 1/4 cup fresh basil or 1 Tbsp dried basil
  • salt and fresh cracked pepper
  • Fresh parmesan (optional)
Instructions:
  1. Heat olive oil in dutch oven over medium-high heat. Add onions and cook for 5 minutes, until onions are translucent. Add minced garlic, carrots, bell pepper and cook for another 5 minutes, or until carrots begin to soften.
  2. Add diced tomatoes, honey, and broth. Bring to a boil. Reduce heat, cover, and simmer for 20 minutes.
  3. Puree the soup with an immersion blender or transfer the soup to a blender (in batches) and puree. Return to pot.
  4. Stir in basil, salt and pepper to taste.
  5. Top with fresh parmesan.

Kitchen Sink Frittata

Frittatas are basically open faced omelets or like an egg pizza. Eat them for breakfast, lunch, or dinner….quick and easy. Swap up the fillings for whatever you have on hand or whatever is in season at your local farmer’s market. I will throw just about anything and everything except the kitchen sink in a frittata (hence the name).  And like anything else….top with a good parmesan cheese or even goat cheese. I’m talking real cheese here people…put away those slices of american cheese.

For this frittata, I added the last of the cherry tomatoes and some ruby swiss chard from my garden. I finally beat the squirrels and was able to enjoy a few succulent tomatoes!!! Ha! I think their stomachs are currently bloated from devouring the pumpkins that were on my porch. My front porch looks like a pumpkin massacre. I give up.

I do have a boat load of swiss chard in my garden right now. The market is busting with them too. If you have never given chard a try, you should venture out and give it a shot. Swiss chard is a hearty winter green that I love to throw into stews, saute as a side dish, or use as a bed for poached eggs.  Any recipe that you would put cooked spinach in, you could use swiss chard. It requires a bit more cook time than spinach because it is slightly tougher. Similarly, if you don’t have swiss chard, swap in spinach.

Kitchen Sink Frittata (serves 2)

Ingredients

  • 2 tsp olive oil
  • 1 bunch of swiss chard, cleaned and sliced with stalks removed
  • 1 cup cherry tomatoes, sliced in half
  • 4 eggs
  • cheese (goat cheese, parmesan, or feta)
  • salt and pepper
Instructions
  1. Preheat broiler. Set top rack just beneath broiler.
  2. Heat an 8 to 10-inch ovenproof skillet over medium-high heat. Heat olive oil. Add tomatoes and swiss chard and saute for 5 minutes, stirring often.
  3. In a medium bowl, whisk eggs and salt and pepper.
  4. Add eggs and half of cheese to skillet. Reduce heat to medium. Stir to blend the eggs, chard, and tomatoes. Cover and cook eggs until almost set, about 5 minutes. Sprinkle with remaining cheese.
  5. Transfer skillet to oven. Broil until just set in the center and cheese is slightly browned. Do not over cook! Remove from oven.
  6. Using a rubber spatula, loosen edges of frittata from skillet. Place a large plate or serving platter over the skillet. Flip skillet and platter over so that the frittata falls onto the plate. Cut into six pieces and serve.

Healthy and Easy Eggplant Parmesan

The market is overflowing with the end of season harvest.  And when faced with a good deal, I can hardly ever walk away….like 10 eggplant for $3! well thank you….but now…I have 10 eggplants. Hrmmm.

Eggplant parmesan is typically breaded and fried. Which, yes…delicious. But, I opted for a lighter version with loads of flavor.  This recipe is so delicious and allows you to taste the eggplant instead of BREADING.  There is a debate on whether to pre-salt your eggplant to remove the bitterness and draw out excess water….do it if you have time, but it isn’t entirely necessary. To presalt the eggplant, lay eggplant slices in a single layer in a colander and apply salt liberally. Let sit for 15 to 30 minutes. Rinse and pat dry.

Now lets talk cheeeeese. I’m in deep smit with goat cheese…so I add it to EVERYTHING….egg sandwiches, pizza, burgers, quinoa, my face…. It is creamy and provides a lot of flavor for less calories than other cheeses. But, if you aren’t a fan or don’t have it on hand….leave it out and you can either sub mozzarella or even feta for a punch of flavor.

Healthy Eggplant Parmesan (serves 4)

Ingredients

  • 1 – 2 Tbsp olive oil
  • 1 large globe eggplant, sliced in 1/2 inch rounds
  • salt and fresh cracked pepper
  • 1/4 cup goat cheese crumbled
  • 1/2  cup shredded parmesan cheese
  • 1/4 cup fresh basil or 1 tsp dried basil
  • 1 25 oz jar marinara sauce
Instructions
  1. Preheat oven to 375F. Lightly brush olive oil on both sides of eggplant slices. Lightly season both sides of eggplant with salt and pepper. Spray a baking sheet with nonstick spray. Place eggplant in a single layer on baking sheet.  Bake for 10 minutes, until browned. Flip and cook an additional 5 to 10 minutes. Remove from oven.
  2. Spray an 8×8 inch baking dish with nonstick spray. Spread 1 cup of marinara sauce on bottom of baking dish. Arrange half the eggplant on top of the marinara sauce. Cover with 1/2 cup of sauce and goat cheese and 1/4 cup of parmesan. Repeat with remaining eggplant and marinara sauce and parmesan cheese.
  3. Bake for 25 minutes or until sauce is bubbling and cheese is melted. Let stand for 5 minutes before serving.