Gluten Free Nectarine and Blackberry Crumble

Gluten Free Nectarine and Blackberry Crumble // Big Eats Tiny Kitchen

A few years ago, I planted one lonely thornless blackberry twig in my backyard.  I nursed it and took care of it.  But then I ran over it with a lawnmower….then I nursed it again.  And now, I have 20 feet of blackberry bushes lining one full side of my backyard fence.   It is a race between me, the squirrels, and the birds to see who can nab the blackberries first.

Gluten Free Nectarine and Blackberry Crumble // Big Eats Tiny Kitchen

There may have been a time or two that I have stood in my backyard, gorging myself on these fresh thumb-sized blackberries. I’m too excited about the harvest and will eat so many that there isn’t any left to bring inside!  I stare at my purple soaked fingers and sort of feel bad that I haven’t shared any with my husband… so naturally I have to lie and tell him that the birds got them… ALL. yes.. All of them. right out of my hands. It was a tragedy. Crying, Thrashing. Feathers everywhere. I promise I tried. They were ferocious….. But my purple lips and seeded teeth tell the real truth.

Gluten Free Nectarine and Blackberry Crumble // Big Eats Tiny Kitchen

So needless to say I owed my husband some blackberry goodness. I gathered up a good bundle of blackberries and baked him this skillet gluten-free nectarine and blackberry crumble.  He was pretty excited… mainly because he could add ice cream to it. I swear, that man would be happy with a dirt cobbler as long as you could put ice cream on it. 🙂

This recipe is my standard crumble topping.  I use it on tons of different fruit crumbles. I added some lemon zest to the crumble to give it a light summery zip.  You could easily swap out the fruit in this filling with peaches, raspberries, blueberries, etc.  It is really easy to throw together for summer gatherings to use up all that fresh fruit produce that is flooding the markets. So give yourself and the ones you love a warm and awesome summer treat!

Gluten Free Nectarine and Blackberry Crumble // Big Eats Tiny Kitchen

Gluten Free Nectarine and Blackberry Crumble

  • Servings: 6 to 8
  • Difficulty: Easy
  • Print

Fruit Filling

  • 6 nectarines (Halved, pitted, and sliced with peel)
  • 1 cup of blackberries
  • juice from 1 lemon (about 2 tablespoons)
  • 1/4 cup maple syrup or honey
  • 2 tablespoons arrowroot powder or cornstarch

Gluten Free Oat Crumble Topping

  • 1 1/2 cups old fashioned gluten-free oats
  • 1/2 cup almond meal
  • 1/3 cup brown sugar or coconut palm sugar
  •  1 teaspoon of lemon zest
  • 5 tablespoons melted butter (plus a little extra to grease the baking dish)
  • 1/4 teaspoon kosher salt
  • 1/2 teaspoon ground cinnamon

Instructions

  1. Preheat oven to 350F.  Butter a 9-inch cast iron skillet or 8X8-inch baking dish and set aside.
  2. In a medium bowl, mix all of the fruit filling ingredients. Spoon the fruit filling into the prepared skillet or baking dish.
  3. In a medium bowl, stir together the topping ingredients. Mix the ingredients until it is crumbly and moistened. Lightly sprinkle the oat crumble mixture over the fruit filling evenly.
  4. Bake for 40 to 50 minutes (or until the filling is bubbling and the crumble top is lightly golden brown). Remove the crumble from the oven and allow to cool for 5 to 10 minutes before serving.  This is delicious with vanilla ice cream for dessert or plain greek yogurt for breakfast!

Rhubarb Strawberry Curd

Rhubarb Strawberry Curd // Big Eats Tiny Kitchen

DSC_0307

I still remember the first time that I tried rhubarb.  It was probably 10 years ago. I had wanted to try it, but just hadn’t had the chance (I guess) living in suburbia Oklahoma and just didn’t have the inclination to go hunt for it.

But one summer night, I was out working a 12 hour shift doing field work for my Master’s degree and my husband was babysitting my littlest sister who was only 6 at the time. Since they are both the adventurous type, and neither of them really knew how to cook…. they decided to make me a rhubarb cobbler as a surprise treat for when I got home.

I was so surprised when I walked in the door and smelled that amazing smell. It was seriously the best cobbler I had ever eaten. (Maybe it was because I had just worked 12 long hours in the hot summer sun.) But it really was the perfect blend of tartness and sweetness. Just like my husband and my sister Olivia. Sweet and tart! 🙂  They began my obsession with this fabulous spring plant…ooooh rhubarb!

Rhubarb Strawberry Curd // Big Eats Tiny Kitchen

Rhubarb Strawberry Curd // Big Eats Tiny Kitchen

Since that first magical cobbler that they made for me ten years ago, I have had quite a love affair with rhubarb. Rhubarb is a perennial that will come back year after year when planted in a good location. My rhubarb plant always lets me know when spring is near, because it begins to sprout its long stalks and leaves when temps rise above 40 F.

Rhubarb can be used in so many recipes: tarts, cobblers, pies, salsa, sauces, and this amazing curd! Yeaaaaaaaaah. Curd doesn’t have to be reserved for citrus! This Rhubarb Strawberry Curd is hands down my favorite. I decided to add some frozen strawberries that I had in order to boost the pink color of the curd.  Feel free to adjust the ratio of rhubarb to strawberries to suit your own tastes.

Rhubarb Strawberry Curd // Big Eats Tiny Kitchen

This Rhubarb Strawberry Curd can easily be used to fill a pie or tart crust for an easy dessert. The extra egg whites can be whipped up as a meringue for the top too! I went the easy route this time and I mixed mine in greek yogurt for a delicious breakfast and midday snack! Either way, I know that this will be a favorite for all you rhubarb lovers!

Rhubarb Strawberry Curd // Big Eats Tiny Kitchen

Rhubarb Strawberry Curd

  • Servings: 2 cups
  • Difficulty: Easy/Moderate
  • Print

Ingredients

  • 2 cups fresh rhubarb, sliced 1/2-inch thick (about 5 trimmed stalks)
  • 1 cup fresh or frozen strawberries
  • 1/4 cup water
  • 1/3 cup honey
  • 4 eggs, yolks separated (reserve whites for another use)
  • 4 tablespoons unsalted butter

Instructions

  1. In a heavy saucepan placed over medium heat, cook rhubarb, strawberries, water, and 3 tablespoons of honey for about 10 minutes, stirring frequently and smashing the fruit with the back of spoon. Mixture will begin to fall apart and look mushy. Turn off heat and allow to cool for about 5 minutes.
  2. Transfer mixture to the bowl of a food processor and puree smooth. Set aside.
  3. In a separate medium bowl, cream the butter and the honey together until fluffy.  Beat in the eggs slowly. Slowly add the rhubarb and strawberry mixture, whisking constantly until completely combined.
  4. Transfer mixture to a medium-sized, non-reactive saucepan. Place over medium-low heat and stir constantly with either a rubber spatula or wooden spoon until the mixture has thickened to jelly consistency, about 10-12 minutes.  Do not let the curd boil! Pull the pan off the stove before it gets to that stage. The curd is done when it coats the back of a spatula or leaves a clear path when pulled through the mixture.
  5. Remove from heat allow to cool for about 5 minutes. Pour curd mixture into a clean glass jar, but let it cool completely before you screw on the lid. You can even place the filled jar in the freezer (without the lid) for about 15 minutes and then remove from freezer and place the lid on the jar. Keep refrigerated until ready to use.

Note – Recipe adapted from Dolly and Oatmeal.

Four Ingredient Dark Chocolate Peanut Butter Eggs

DSC_0375

We all need a little treat now and then.  For me, my favorite treat is always peanut butter eggs or dark chocolate peanut butter cups. Swooooooon. I don’t have them often, but when I do, I prefer the mini ones because I can have more than one and not feel so bad. I also am like a squirrel and like to save them, placing them in weird places in our house (hiding them from my chocoholic husband).

We hosted a huge Easter gathering at our house this year and had 30 people in our tiny and cozy little abode.  It was a lot of fun because I had a game plan: only make stress free food! This would ensure that I could enjoy my family and not appear like a crazed woman. One of the stress free foods that I made were these amazing Dark Chocolate Peanut Butter Eggs.

Four Ingredient Dark Chocolate Peanut Butter Eggs // Big Eats Tiny Kitchen

Four Ingredient Dark Chocolate Peanut Butter Eggs // Big Eats Tiny Kitchen

My sister and I whipped up these easy peasy peanut butter eggs a day in advance. They didn’t take much time and they were a great tiny sweet treat for people to pop one, two, or five eggs into their mouth.

Did I mention that these Dark Chocolate Peanut Butter Eggs are made with only FOUR ingredients? FOUR.  They are very very very easy to make and very very very easy to eat. Too easy. But hey, on the bright side, they are made with all natural ingredients and are only 70 calories per egg. Boom!

Homemade Four Ingredient Dark Chocolate Peanut Butter Eggs

  • Servings: 60 eggs
  • Difficulty: Easy
  • Print

Ingredients

  • 2 cups creamy salted natural peanut butter
  • 1/2 cup honey
  • 1 tablespoon vanilla extract
  • 5 oz dark chocolate

Instructions

  1. Using either an electric mixer or a food processor, thoroughly mix the peanut butter, honey, and vanilla on high-speed for several minutes until the mixture turns into a thick ball of peanut butter dough. Depending on the time of year and humidity in your kitchen, a tablespoon of water may need to be added to the mixture so that it will come together like dough. You can also pull it out of the mixing bowl and work it by hand for it to come together at the end after mixing it.
  2. Place parchment paper or waxed paper on a rimmed baking sheet or inside several glass pyrex baking dishes.
  3. Take a tablespoon of the peanut butter dough and use your hands to shape into a ball or egg shape, if you are feeling eggy. Place the balls (or eggs) onto the parchment-lined baking sheet.  Continue making the peanut butter eggs or balls until all of the dough is used. Depending on the size of your eggs, this recipe makes between 50 and 60 peanut butter eggs. Chill the peanut butter eggs in the freezer for 1 hour or in the refrigerator overnight.
  4. When you are ready to coat the peanut butter eggs in chocolate, place the chocolate into a microwave safe bowl and microwave for 30 seconds, then stir. Microwave in 10 second intervals, stirring between until the chocolate is melted.
  5. Remove the peanut butter eggs from the freezer. Place one egg at a time into the chocolate and roll around until covered. Remove using a large fork placed under the egg and allow the excess chocolate to drip from the egg. Place the dipped egg on the parchment paper to harden. Store in the refrigerator until time to serve.

*Note – for a paleo-friendly version or for those that are allergic to peanuts, almond butter could be used instead.

The Best Flourless Brownies

The Best Flourless Brownies (Grain Free) // Big Eats Tiny Kitchen

I’m so sorry.

INCREDIBLY sorry.

I have been M.I.A. for a month. I need to grovel and ask for your forgiveness….

soooo….. I made brownies.

The Best Flourless Brownies (Grain Free) // Big Eats Tiny Kitchen

Nothing says I love you and I’m sorry for being away like chocolate + butter + nuts. Am I right?

The Best Flourless Brownies (Grain Free) // Big Eats Tiny Kitchen

I’ve been a little off kilter lately and super busy with life and work.  It became increasingly difficult to find additional time (and motivation) recently for posting new recipes.  Maybe it was lack of sun and seasonal depression. So I took a break. I went back to just cooking for the fun of it. I stopped worrying about whether or not it was good enough for the blog or whether I had to cook it at the right time so that I had enough natural light to photograph it.  I just cooked for me.

I think I go through this every winter. I have to realign myself with what is important to me.  Give myself a new focus. In turn, I have also given this blog a renewed purpose.

I want to thank those of you who reached out to me and encouraged me to continue cooking and creating in this space.  I received some lovely emails and words of encouragement.  This is supposed to be a space of creativity and sharing.  I want this space to be several things moving forward and not just a food blog. Don’t get me wrong, I definitely still want it to be a space where my inner grandma gets to cook, feed others, and then sit back and bask in the joy of nourishing the one’s I love.  But I also want to focus on discovering, exploring, and escaping comfort zones.

Thank you for letting me cook for you and provide nourishing recipes for the past three years. Also, thank you for giving me satisfaction and fulfillment.

The Best Flourless Brownies (Grain Free) // Big Eats Tiny Kitchen

DSC_0310

And with that…. let’s talk CHOCOLATE AND BUTTAH AND HAZELNUTS.

Get out that good butter and good chocolate. Turn on your oven. We are also going to throw in hazelnuts into our brownies to add some flare!

DSC_0307

V.D. is coming up… I mean, Valentine’s Day. And what better way to celebrate your loved ones and friends (or just you) than to serve up a plate of uuuuuuuhmazing gooey gooey brownies.  These brownies are adapted from a past recipe of mine (Paleo Flourless Brownie Bites) and a recipe from my favorite pastry chef, Dave Leibovitz.  The results are fabulously out of this world.  But, as LeVar Burton would say…. Don’t take my word for it.  Make them yourself and share the love.

The Best Flourless Brownies (Grain Free) // Big Eats Tiny Kitchen

Flourless Brownies (Grain Free)

  • Servings: 12 to 16
  • Difficulty: Easy
  • Print

  • 6 tablespoons salted butter (or use unsalted and add 1/8 teaspoon salt)
  • 10 oz semi-sweet chocolate chunks
  • 2 eggs (room temperature)
  • 2/3 cup coconut palm sugar (or unrefined cane sugar)
  • 3 tablespoons arrowroot powder (or cornstarch)
  • 1 tablespoon cocoa powder
  • 2/3 cup chopped nuts (I used roasted hazelnuts)
  • coarse or flaked sea salt

Instructions

  1. Preheat oven to 350 F. Grease a 8X8 baking dish and set aside.
  2. Add coconut palm sugar, arrowroot powder, and cocoa powder to the bowl of a food processor. Process for about 1 minute to make sugar mixture super fine. Set aside.
  3. In a metal saucepan over medium heat, melt butter until it begins to crackle.  Add 2/3 of the chocolate chunks (about 8 oz) and remove pan from heat. Whisk constantly until chocolate is completely melted.  Add eggs one at a time and whisk constantly.
  4. Pour chocolate mixture into food processor with sugar mixture.  Process for at least one minute. Mixture will be glossy and thick. Add 1/2 cup of nuts and pulse once or twice to distribute. Use a rubber spatula and spoon out mixture into greased baking dish. Sprinkle remaining nuts, chocolate chunks, and flaked sea salt on top. Bake for 30 minutes at 350 F, or until just set.  Do not overtake.

Note – If you do not have a food processor, then you will need to adapt the recipe slightly.  Add the sugar to the butter and chocolate mixture before you add the eggs. Remove the saucepan from heat. Add eggs one at a time, then add sifted cocoa powder and arrowroot powder straight to the saucepan.  Stir with a whisk briskly for at least 1 minute until the mixture becomes glossy and begins pulling away from the sides of the saucepan.  Stir in your nuts and then spread the mixture into the prepared pan. Sprinkle with nuts and chocolate and bake as directed above.

Gluten Free Pumpkin Bread

Gluten Free and Dairy Free Pumpkin Bread // Big Eats Tiny Kitchen

I was an only child until I was almost 11 years old. Then came my brother…and then a sister four years later. And then… four years later my mom asked me “Do you want another brother or another sister?” and my unfortunate response was “Neither”.

But despite my lack of enthusiasm…sixteen years ago today, my youngest sister was born. I was in college.  In the midst of college finals and stress and sleepless nights, I had just gained a new sister. I went home for Christmas break and stayed up all night with my newborn sister, watching 24-hours of Christmas Story over and over and over so that my mom could get some sleep.

And that’s when I fell in love with that little bundle of joy. I was so happy to have her in my life.

She was so tiny, so beautiful, so new.

And so LOUD! Holy crap.That kid could cry!

Newborns.

Yikes. Talk about insta-birth control for a college kid. Ovaries on shutdown mode. Thanks!

Gluten Free and Dairy Free Pumpkin Bread // Big Eats Tiny Kitchen

Gluten Free and Dairy Free Pumpkin Bread // Big Eats Tiny Kitchen

Over the years, watching her grow up has been amazing. She is a talented young girl who is super creative and has the biggest heart. I was always worried that the age difference between the two of us would be hard to stay close. When I moved away 6 years ago, it killed me to know that I wouldn’t be able to go to her sports games or see her get awards or be there for her birthdays. I was missing out on all those little moments.

Gluten Free and Dairy Free Pumpkin Bread // Big Eats Tiny Kitchen

I was really lucky this past weekend because I was able to see her and my other sister and brother for Thanksgiving! I couldn’t get enough.

I whipped up a double batch of this pumpkin bread and took it to Thanksgiving for breakfast since pumpkin is one of her favorite flavors. It is moist, light, fragrant, and nutritious! Aaaaand did I mention that it was gluten free and dairy free? Double bonus.  But seriously, friends, I was blown away by how perfect this pumpkin bread turned out.  It uses only two flours: oat flour and almond flour.  Arrowroot powder is also used to keep the loaf from being too dense. It is simply amazing.

Gluten Free and Dairy Free Pumpkin Bread // Big Eats Tiny Kitchen

This recipe makes a double batch which is super helpful during the holidays. You can always give a loaf away to a friend as a gift, or wrap it up tightly and freeze it for later. I promise that you WON’T regret having two loaves.

So Haaaaaappy Birthday to my lovely and beautiful little sister. I am so glad that you were born, because I gained a sister and a friend. Hope you have a wonderful day!

Gluten Free Pumpkin Bread (Gluten Free and Dairy Free)

  • Servings: 8
  • Difficulty: Easy
  • Print

Makes 2 loaves

Ingredients

  • 2 cups gluten free oat flour*
  • 1 cup gluten free rolled oats
  • 1 cup almond flour*
  • 1/2 cup arrowroot powder
  • 2 teaspoons baking powder
  • 1 teaspoon baking soda
  • 1 teaspoon salt
  • 2 teaspoons ground cinnamon
  • 1 teaspoon ground ginger
  • 1/2 teaspoon nutmeg
  • 4 eggs
  • 1 cup maple syrup
  • 1 teaspoon vanilla
  • one 15oz can of pumpkin (not pumpkin pie filing)
  • 6 tablespoons melted coconut oil or butter
  • 1 cup chopped pecans
  • 2 tablespoons coconut palm sugar

Instructions

  1. Preheat oven to 375F. Prepare loaf bans by applying butter and then set aside.
  2. In a large bowl, combine dry ingredients (oat flour through nutmeg). Whisk to combine.
  3. In a separate medium bowl, whisk eggs and maple syrup until slightly frothy. Stir in vanilla, canned pumpkin, and melted coconut oil (or butter). Gradually add wet ingredients to dry ingredients and stir to combine. Stir in 3/4-cup of pecans into batter.
  4. Transfer batter to the loaf pans and smooth the tops with the back of the spoon. Sprinkle remaining 1/4-cup of pecans and coconut palm sugar on the tops of the loaves. Place the loaf pans on the middle rack of the oven. Bake for about 1 hour to 1 hour 15 minutes until a toothpick or butter knife inserted into center comes out with a few moist crumbs.
  5. Remove from oven and let cool in the loaf pans for about 15 minutes. Turn out the loaves onto a wire rack and let cool completely.

*Notes

Gluten Free Apple Spice Muffins with Walnut-Oat Streusel

Gluten Free Apple Spice Muffins // Big Eats Tiny Kitchen

Apples are here! And these Gluten Free Apple Spice Muffins are healthy, delicious, moist, and sweet.

Similar to the way people are feeling about post season baseball around here is the way I feel about Apple Season.

APPLE SEASON is Post Season to me! Am I right?  Let’s get pumped, people! Summer is over and HELLOOOOO apples. Crunchy, juicy, sweet/tart Apples.

I could seriously OD on apples more than chocolate… weird, huh?  Seriously, I can’t be the only one who has fantasies about going apple picking and bringing home loads of perfect apples and then baking them up in pies, muffins, cobblers, a la mode, cinnamon-spiked applesauce, or, hell, just eating them fresh ALL the TIME.  I’m drooling right now.

DSC_0223

Gluten Free Apple Spice Muffins // Big Eats Tiny Kitchen

I also have to admit that I get SO overwhelmed with all the apple varieties. Holy pooh on a stick! How can you choose?  I’m on the hunt for some interesting varieties this year.  Here in Missouri, there are lots of apple orchards that allow you to pick your own. I’m a big fan of the local varieties of Jonathan, Ozark Gold, Goldrush, and Enterprise. These varieties are good for eating and baking, having sweet/tart flavors with plenty of crunch. They don’t mush up when baked, which is a plus as well.

I used a combination of Jonathan and Golden Delicious when I baked up these luscious Gluten Free Apple Spice Muffins, but any variety should be fine. However, depending on the quality of apples you have access to, the final flavor will vary slightly.

Gluten Free Apple Spice Muffins // Big Eats Tiny Kitchen

I used a combination of two flours: gluten free oat flour and almond flour. I really like the balance of these two flours in muffins. The combo of these flours provide both fiber and protein, which are perfect for beginning your morning and staying satiated longer. And you get a great fall spice treat to start your day.

I used an interesting technique with these muffins. Instead of using store-bought applesauce, I created my own by pureeing one of the three apples in a food processor. After it was pureed, I then added the remaining two apples to the bowl of the food processor and pulsed the apples until they were chopped. If you don’t have a food processor, you can sub 1/2-cup of applesauce for one of the apples.

DSC_0228

Gluten Free Apple Spice Muffins // Big Eats Tiny Kitchen

And let’s also talk about this Walnut-Oat Streusel topping. Walnuts, oats, maple…mmmmm. You mustn’t skimp on this step, friends. Noo no no. Do this. I typically don’t top my muffins (because I’m lazy). But I took the extra 2 minutes (seriously…why do I not do this) and holy mama was it worth it.

Gluten Free Apple Spice Muffins // Big Eats Tiny Kitchen

Gluten Free Apple Spice Muffins

  • Servings: 12
  • Difficulty: Easy/Medium
  • Print

Gluten Free Apple Spice Muffins Ingredients

  • 2 cups gluten free oat flour (ground from gluten free rolled oats or use Bob’s Red Mill gluten free oat flour)
  • 1 cup almond flour (I use Honeyville)
  • 2 teaspoon baking powder
  • 1/2 teaspoon salt
  • 2 teaspoons ground cinnamon
  • 1/2 teaspoon ground ginger
  • 1/4 teaspoon ground nutmeg
  • 3 medium apples, cored and sliced in quarters
  • 1/3 cup greek yogurt (or dairy free yogurt)
  • 1/2 cup maple syrup
  • 2 tablespoons butter, melted (or coconut oil)
  • 4 eggs (at room temperature)

Walnut-Oat Streusel Topping Ingredients

  • 1/3 cup rolled gluten free oats
  • 1/3 cup chopped walnuts (or pecans)
  • 2 tablespoons maple syrup
  • 2 tablespoons butter or coconut oil, melted
  • 1/2 teaspoon cinnamon
  • 1/4 teaspoon salt

Instructions

  1. Preheat oven to 350 F. Line or grease a 12-muffin tin with liners and set aside.
  2. Place dry ingredients in a large bowl.
  3. Combine Walnut-Oat Streusel topping ingredients in a small bowl and set aside.
  4. In the bowl of a food processor, place pieces of one apple, greek yogurt, maple syrup, melted butter, and eggs.  Puree mixture until smooth. Add remaining pieces of two apples and pulse until the apples are in small chunks. Add wet ingredients to dry ingredients. Stir mixture until just combined.
  5. Scoop 1/3-cup of batter into each lined muffin tin to 3/4 full. Sprinkle streusel topping evenly on each muffin. Bake for 30 to 40 minutes, until muffins are browned and cooked all the way through. Remove from oven. After 15 minutes, move muffins to a cooling rack.

Gluten Free Carrot-Apple Muffins

Gluten Free Carrot-Apple Muffins / Big Eats Tiny Kitchen

My man and I just celebrated our 9th wedding anniversary last month.

Nine! Where did time go?

I am utterly surprised that my husband still looks at me with amazingly bright eyes and is still in love with me. For some reason he likes being married to a neurotic woman with an obsession for ketchup and oatmeal. Not together…separate. Anyways I digress, I really think I got the better end of the deal. He is definitely the best thing that has ever happened to me. Well, except at 5am when he sings random songs like “Highway to Hell” or “Baby Got Back”. (Really…we should have no singing rules until well after 8am, right? Right? or at LEAST after coffee!)

Gluten Free Carrot-Apple Muffins / Big Eats Tiny Kitchen

But honestly, anniversaries like this remind me that time is passing so quickly. I hope that I can breathe in as many details of my life and not take things for granted.  I want to laugh more and not take things so seriously. (Except the singing before 8am…I take that very seriously.)

For our anniversary, my husband got me a Vitamix (the ridiculously amazing and over-the-top blender that does everything that you ever imagined, including make creamy nut butter, process ice cream, puree smooooooth soups, grind fine flours, clean your house, complement your hair, and check your email). This blender is sheer madness!!!!  She’s like a personal assistant…that is also your best friend and doesn’t annoy you…ever.

Gluten Free Carrot-Apple Muffins / Big Eats Tiny Kitchen

What was one of the first things I did with my Vitamix? No smoothies. I made oat flour and then made carrot and apple muffins. Ya, you heard me…muffins. Real muffins, not smoothie muffins. Well…I didn’t bake the muffins in the Vitamix.  C’mon! Ridiculous. That’s the next version…the easy bake Vitamix.

I created these quick gluten-free carrot and apple muffins by placing chunks of carrots and apples in the bottom of the high-speed blender and slowly processing them until they were finely shredded. It took 15 seconds! SECONDS! And you save your fingers! This step could also be done in a food processor, or with a grater.  But it won’t take 15 seconds….maybe 1 minute more. Not bad at all.

The resulting muffins are moist and delicate. They are perfect for breakfast. You could even top them with a cream cheese frosting and serve them as cupcakes for dessert. I will definitely be turning this recipe into a cake soon. Especially since I can cut down the prep time with my blender!

Gluten Free Carrot-Apple Muffins / Big Eats Tiny Kitchen

Needless to say, although I thought that these high-speed blenders were a bit over the top, I’m not complaining that this beauty is now sitting on my counter waiting for me to make my next magical concoction.

Gluten Free Carrot-Apple Muffins

  • Servings: 9
  • Difficulty: Medium
  • Print

Ingredients

  • 2 medium carrots, cut into 1/2-inch pieces
  • 2 medium apples, cored and cut into eighths
  • 2 eggs, room temperature
  • 1/2 cup maple syrup
  • 2 tablespoons coconut oil (or butter), melted
  • 1/3 cup greek yogurt
  • 1 teaspoon vanilla
  • 1 cup oat flour (from ground gluten-free rolled oats)
  • 1/2 cup almond flour
  • 1 teaspoon baking soda
  • 1/4 teaspoon salt
  • 1 teaspoon ground cinnamon
  • 1/2 teaspoon ground ginger
  • 1/4 teaspoon ground nutmeg
  • 1/3 cup walnut pieces

Instruction

  1. Preheat oven to 350F. Place muffin liners in 9 cups of a muffin tin. Set aside.
  2. Place carrots and apples in the bowl of a food processor or high-speed blender. Process on low until carrot and apple are diced into fine pieces. Add eggs, maple syrup, coconut oil, greek yogurt, and vanilla to food processor or blender. Process or pulse until everything is well mixed.
  3. Place all dry ingredients (except walnuts) in a separate large bowl and whisk together.  Pour wet ingredients into dry ingredients in the large bowl. Stir all together until just mixed and no dry ingredients remain. Stir in walnuts.
  4. Spoon about 1/4-cup portions into each muffin tin liner. Bake for 30 to 40 minutes at 350F, or until a toothpick comes out clean when stuck into the center of a muffin. Allow to cool on a wire rack for 10 minutes. Store in a sealed container in the refrigerator for 3 days. May be frozen for up to 3 months.

Note – Recipe adapted from Edible Perspectives.

Peanut Butter, Chocolate, and Honey No Bake Cookies (Gluten Free and Dairy Free)

No Bake Cookies // Big Eats Tiny Kitchen with Honey  (Gluten Free, Dairy Free)

These cookies are filled with my favorite flavors…Peanut Butter and Chocolate. I’m in absolute heaven.

When I was in college and times became super stressful, I would always turn to my grandma’s No-Bake Cookie recipe. It took less than 10 minutes to have a handful of devilishly delicious, misshapen, peanut butter-chocolatey goodness. And hey, it had oats in it…soooo it has to be good for me, right?

No Bake Cookies // Big Eats Tiny Kitchen with Honey  (Gluten Free, Dairy Free)
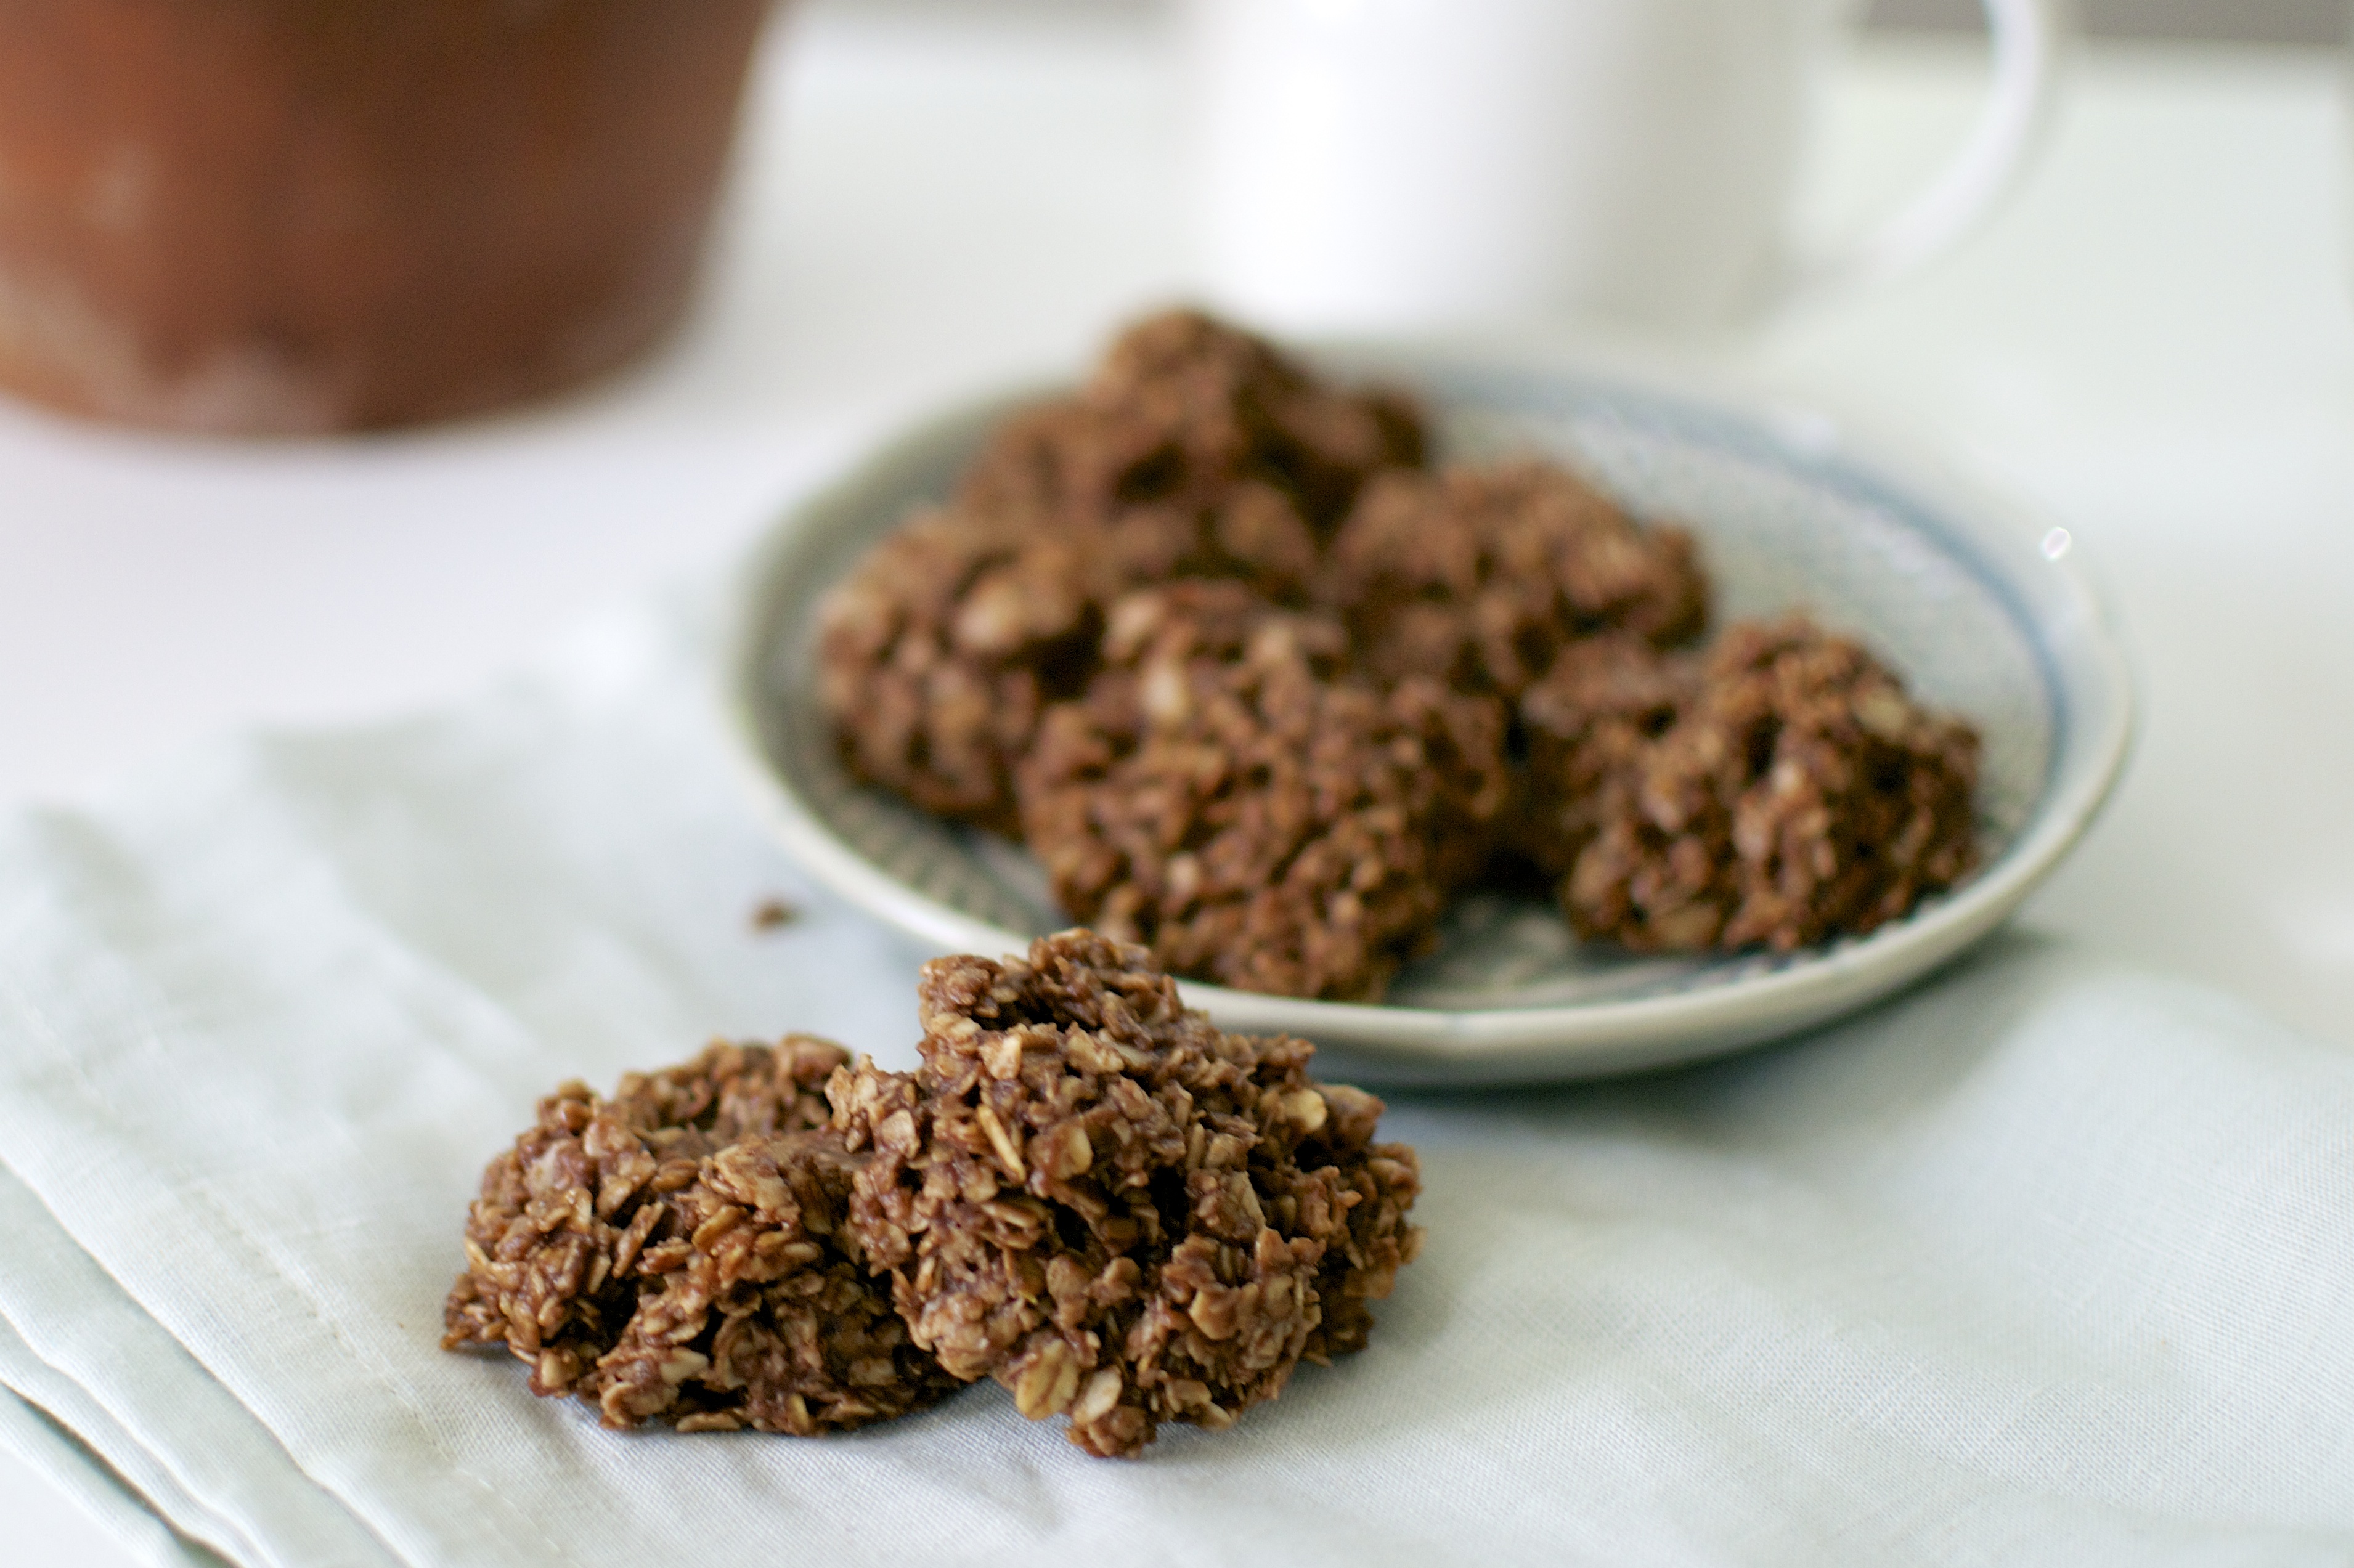
I recently had another hankering for these little oaty smorsels. But when I read her original recipe, I was shocked at the quantity of sugar! I decided to reevaluate and reinvent my grandmother’s (and so many other’s grandmothers) recipe. The original recipe contains:

  • 2 CUPS of sugar (yes…cups)
  • 1/2 cup of butter (ooooh yaaaaa)
  • 1/2 cup of milk
  • 1/4 cup of cocoa powder
  • 1 cup of peanut butter (likely Jiff)
  • 1 teaspoon vanilla
  • 3 cups of quick-cooking oats

No Bake Cookies // Big Eats Tiny Kitchen with Honey  (Gluten Free, Dairy Free)

Soooooo… whaaaa? Instead of the empty calories seen in the original cookie recipe, my reinvented cookies are full of nutritious and healthy ingredients. Honey. Coconut Oil. Cocoa Powder. Natural Peanut Butter.  Rolled Oats. Unsweetened Coconut. And my new No Bake Cookies are SO delicious. You don’t have to feel an ounce of guilt when eating one…or two…or three. Eat your feelings…and feel good about it.

No Bake Cookies // Big Eats Tiny Kitchen with Honey  (Gluten Free, Dairy Free)

Note – These cookies are made with coconut oil. Since coconut oil melts at room temperature, it is best to keep your leftover cookies in the fridge so that they are a set and solid…that is, if you have leftovers.

No Bake Cookies // Big Eats Tiny Kitchen (Gluten Free, Dairy Free)

Peanut Butter, Chocolate, and Honey No-Bake Cookies (Gluten Free, Dairy Free)

  • Servings: 30
  • Difficulty: Easy
  • Print

Ingredients

  • 1/2 Cup honey (or maple syrup)
  • 1/2 Cup coconut oil
  • 1/4 Cup cocoa powder
  • 1/2 Cup natural creamy peanut butter
  • 1/4 teaspoon salt
  • 3 Cups gluten free rolled oats
  • 1/2 Cup unsweetened shredded coconut
  • 1 teaspoon pure vanilla extract

Instructions

  1. Heat honey, coconut oil, and cocoa powder in a large pot over medium-high heat stirring constantly until boiling. Stop stirring and allow to boil for 1 minute. Remove from heat and stir in peanut butter and salt. Mix well.
  2. Add oats, shredded coconut, and vanilla extract to chocolate-peanut butter mixture. Stir well until  everything is thoroughly mixed together.
  3. Place parchment paper on a baking sheet or plate. Plop spoonfuls of the no-bake cookie mixture onto prepared pan/plate. If it is too warm in your kitchen, place the cookies in the fridge to set.  Because there is coconut oil in this recipe, the oil will tend to melt a bit at room temperature. Keeping the cookies in the fridge will ensure that they are firmer.

No Bake Cookies // Big Eats Tiny Kitchen with Honey  (Gluten Free, Dairy Free)

Gluten Free Chocolate Chip Zucchini Muffins

Gluten Free Chocolate Chip Zucchini Muffins // Big Eats Tiny Kitchen

Remember that time that you thought you tasted the best zucchini bread ever?

I think you were wrong. I’m so sorry to bust your bubble… but….

THIS gluten free zucchini bread recipe that I am presenting to you today is literally the best zucchini bread I have eeeever had. literally.

Ever. Had.

I’m serious. And I sort of think of my self as a zucchini bread expert. Not to brag, but I’m a bit of a big deal in the zucchini world. Just saying.

Gluten Free Chocolate Chip Zucchini Muffins // Big Eats Tiny Kitchen Gluten Free Chocolate Chip Zucchini Muffins // Big Eats Tiny Kitchen

But back to these muffins. These are soooooo good. And they are gluten free and only made with two types of flour: oat flour and almond flour. Ya. Gettyup!

After my first bite of these gluten free zucchini and chocolate chip studded muffins that are sweetened with pure maple syrup…I had to sit down, regain composure, and do a double take…and then shove the rest of it in my mouth. Gluten free eaters and gluten lovers alike will be amazed. They are moist, light, and fluffy.

Gluten Free Chocolate Chip Zucchini Muffins // Big Eats Tiny Kitchen

Gluten Free Chocolate Chip Zucchini Muffins // Big Eats Tiny Kitchen

I was really really really sad when I was finished with my muffin. It was the “watch your childhood best friend move away and all you could do is run to your room and write a letter as soon as possible so that she had it waiting for her when she got to her new home” kind of sad. And then I realized how thankful I was that there were 11 muffins left…shhhhhhh! I can’t say it too loud, or others will here and come steal my little precious precious precious zucchini muffins and their melty delicious chocolate chip bitsies.

Snack time just got a HUGE boost. You are welcome!

Gluten Free Chocolate Chip Zucchini Muffins // Big Eats Tiny Kitchen

Note – I made these muffins with a white skinned zucchini that I bought at the farmers market. Although the white skinned version was easier to shred, I missed the green flecks of zucchini skin in my muffins. But if you have pick eaters in your family, removing the skin of the zucchini or using a white skinned zucchini is a great way to add this vegetable to muffins without them knowing. Muahahha.

Gluten Free Chocolate Chip Zucchini Muffins // Big Eats Tiny Kitchen

Gluten Free Chocolate Chip Zucchini Muffins (Gluten Free and Dairy Free Option)

  • Servings: 12
  • Difficulty: Easy/Medium
  • Print

Ingredients

  • 2 cups grated zucchini meat (try to avoid the seeds)
  • 2 cups GF oat flour (grind 2 cups of GF rolled oats in a food processor to a fine oat flour)
  • 1 cup almond flour
  • 2 teaspoons baking powder
  • 1/2 teaspoon kosher salt
  • 1 teaspoon ground cinnamon
  • 4 eggs, at room temperature
  • 1/2 cup maple syrup (or honey)
  • 6 Tablespoons butter, softened (or melted and cooled coconut oil)
  • 1/4 cup plain greek yogurt (or applesauce)
  • 2 teaspoons pure vanilla extract
  • 1/2 cup dark chocolate chips

Instructions

  1. Remove items from refrigerator to come to room temperature.
  2. Preheat oven to 350 F. Place paper liners in 12-cup muffin tin. Set aside.
  3. Shred zucchini (with or without skin) in a bowl. Press with a clean towel to remove excess moisture. Set aside covered and allowing to drain.
  4. Place oat flour and almond flour, baking powder, salt, and cinnamon in a large bowl. Whisk together and set aside.
  5. In the bowl of a food processor or mixer, beat eggs for 1 to 2 minutes or until frothy. Add maple syrup and butter and process an additional minute until well incorporated. Add greek yogurt and vanilla. Pulse until combined.
  6. Add wet ingredients to dry ingredients. Mix together until just combined (don’t over mix). Gently stir in shredded zucchini and chocolate chips. Allow to rest for 1 minute.
  7. Fill muffin tins to 3/4 full. Place muffin tin on middle rack in preheated oven. Back for 35 to 40 minutes, or until tops are browned and slightly cracked. Remove from oven and allow to cool on cooling rack for at least 30 minutes (if you can!). Get ready for zucchini muffin heaven!

Note –

1. This recipe was inspired and adapted from Edible Perspectives Zucchini Chocolate Chip Cake.

2. Dairy Free – sub out the greek yogurt for applesauce and use coconut oil instead of butter. Dairy free chocolate chips can also be used in place of the regular chocolate chips.

3. These muffins will freeze well for up to 3 months. To thaw, place in microwave for 30 second intervals. Makes a quick and easy breakfast or after school/work snack.

Margarita Sherbet Popsicles

Margarita Sherbet Popsicles // Big Eats Tiny Kitchen

Summer colds are the worst. I guess a cold is never great to have, but it feels especially terrible when the weather is great outside but all you want to do is roll up in a ball of sheets and kleenex and NyQuil and watch The Notebook over and over and over.

Margarita Sherbet Popsicles // Big Eats Tiny Kitchen

Margarita Sherbet Popsicles

Recently I was knocked out with a cold virus that lasted over TWO weeks. I couldn’t shake it.  Just when I thought that I was getting better, it knocked me back down with a terrible hacking cough, or a sore throat from hell, or a migraine that felt like my head was run over by a ’64 Gran Turino.

When I’m sick there are a few “prescriptions” that I do religiously:

1. Saltwater gargle (it’s awful…but works)

2. Tea with honey

3. Lime popsicles

I decided to amp up my old store-bought lime popsicles and make my own…because OBVIOUSLY that is going to make me better. Why would going to a doctor or actually getting help do me any good?

Nope, I need the healing powers of lime juice, honey, and tequila…of course.

Margarita Sherbet Popsicles

Margarita Sherbet Popsicles

And these are sherbet popsicles…or sherbERRRT as I pronounce it. I used whole milk, but full fat coconut milk would work wonderfully to make these both dairy free and paleo-friendly treats. Also, the tequila is optional (why?), especially if these will be snacked on my some tiny tots.

Margarita Sherbet Popsicles // Big Eats Tiny Kitchen

Margarita Sherbet Popsicles

  • Servings: 6
  • Difficulty: Easy
  • Print

Ingredients

  • 3 limes, zested and juiced (1/2 cup lime juice and 1 Tablespoon lime zest)
  • 1/3 cup honey
  • 2 cups whole milk (or full fat coconut milk for dairy free)
  • 2 to 4 tablespoons silver tequila (optional)
  • 1/8 teaspoon salt

Instructions

  1. Whisk lime juice, lime zest, honey, and milk in a medium bowl until completely combined. Add tequila and salt to taste.
  2. Pour into popsicle molds, leaving 1/4 inch of space at the top for expansion.  Freeze for at least 4 hours. **See note below about molds.
  3. When ready to eat, run a bit of hot water over the popsicle mold and the popsicles will release!

**Note about popsicle molds – I have a simple popsicle mold that I bought at target. It comes with its own handles for each popsicle. However, this time I decided to use sticks and see how it would work for those of you without specific molds. I put the filled mold in the freezer for 1.5 hours until it began to firm up. Then I stuck the popsicle sticks into the mold. No need to soak the sticks ahead of time.