Butternut Squash, Chickpea, and Swiss Chard Stew (Three Ways)

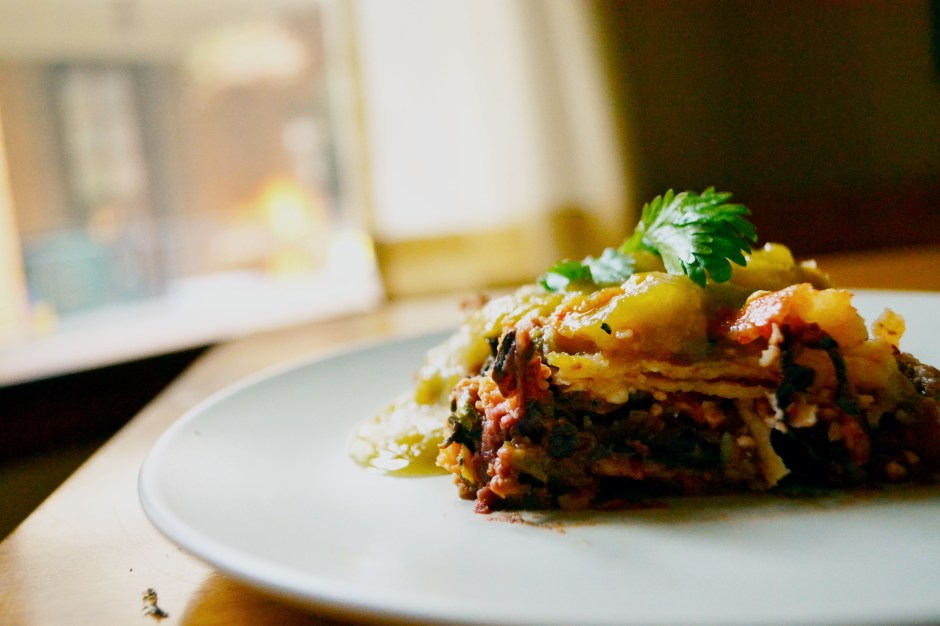
It is STEW weather!!!! The temps have dropped and I already find myself craving big bowls of comforting stews, sweatpants, a hot cup of tea, and a good book. It has been difficult to go for runs this week with temperatures in the 40s (for highs), but it makes it worthwhile when I can come home to a big steamy bowl of stew.

This stew is chocked full of nutrients and contains the best of what is in season right now….winter squash and swiss chard. If you don’t have swiss chard, you can sub spinach. Swiss chard is like king of greens and nutrients. As the seasons go cold and many of us are fighting off colds, eating these leafy greens will help boost your immune system.  Slice the leafy portion in 1 inch strips and cut the stalk in 1/4 inch sections, discarding larger portions of the stalk due to toughness.

Butternut squash is a hearty winter squash that stores very well. I successfully grew a few this year in my garden and have them stored in my basement. You could probably use sweet potatoes instead of butternut squash in this recipe, but if you have never ventured down the butternut squash path…do it. It’s surprisingly sweet when cooked. I love it roasted too, adding a caramely sweetness. Cutting one up does take a bit of effort. Slice it in half, scoop out the seeds, and slice the halves vertically and remove the rind. You can also find diced butternut squash in the freezer section of your local grocer.

Now this stew is very versatile. I made it as a curry, but it would be great with a tuscan or italian flare and even a mexican twist.  For the three varieties, here are the different combos that you could add to the stew:

  • Curry Style – Add chickpeas (garbanzo beans) and loads of curry powder.
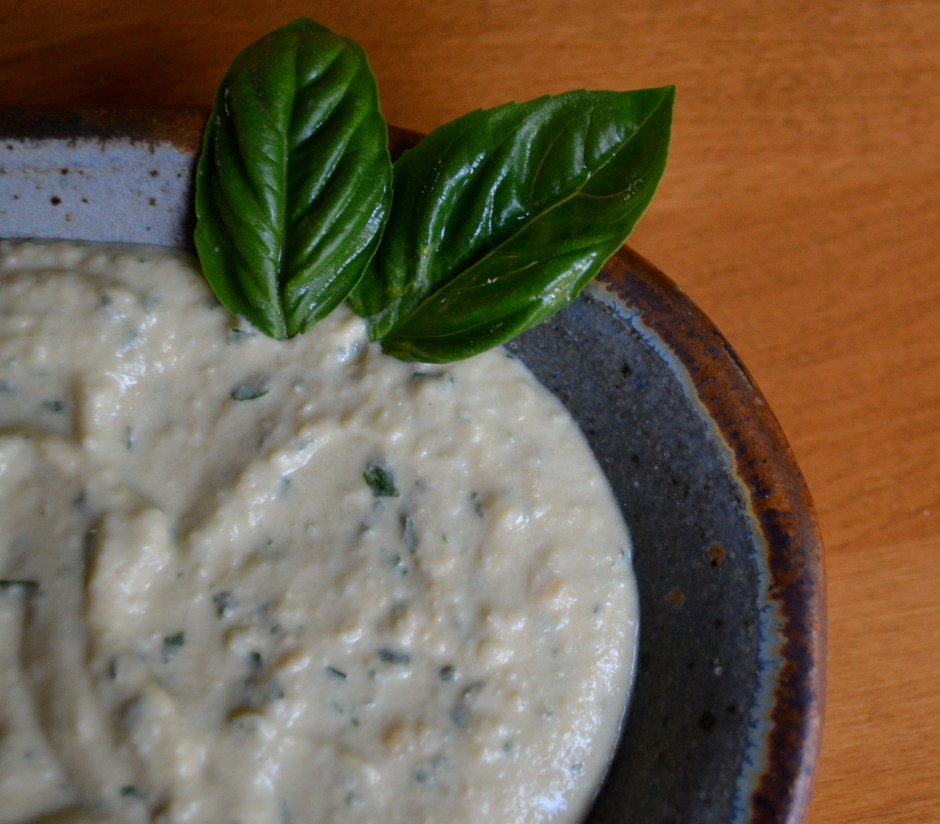
  • Tuscan Style – White beans (navy beans or cannellini), basil, and thyme.
  • Mexican Style – blackbeans, red bell pepper, green chilis, chili powder (chipotle or regular), and cumin.
To make this stew creamy, I use an immersion blender to blend part of the butternut squash into a puree. If you do not have an immersion blender, then transfer some of the soup into a blender or food processor. Pureeing part of the stew gives a creamy base to the stew without adding heavy cream.
Butternut Squash, Chickpea, and Swiss Chard Stew (serves 6 as main dish)
Ingredients
  • 1 Tbsp olive oil
  • 1 medium yellow onion, diced
  • 4 garlic cloves, minced
  • 3 cups of diced butternut squash
  • 15 oz can diced tomato, undrained
  • 3 – 4 cups of low sodium chicken broth (may sub half water)
Curry Style Add-ins:
  • 1 to 2 Tbsp curry powder
  • 15 oz can chickpeas, drained and rinsed
  • 1 bunch of swiss chard, cleaned and chopped
  • 1 tsp salt (or more to taste)
  • fresh cracked pepper to taste
  • fresh cilantro (optional)
Tuscan Style Add-ins:
  • 1 tsp thyme
  • 15 oz can of navy beans or cannellini beans, drained and rinsed
  • 1 tsp salt (or more to taste)
  • 1 bunch of swiss chard or kale, cleaned and chopped
  • fresh cracked pepper to taste
  • 1 Tbsp fresh basil or 1 tsp dried basil
  • 1/4 cup fresh parsley, chopped
  • shaved parmesan cheese (optional)
Mexican Style Add-ins:
  • diced red bell pepper
  • 8 oz can of diced green chilis
  • 1 – 2 Tbsp chili powder (chipotle or regular)
  • 1 Tbsp cumin
  • 15 oz can of black beans, drained and rinsed
  • 1 bunch of swiss chard (or spinach), cleaned and chopped
  • salt and pepper to taste
  • fresh cilantro (optional)
Instructions:
  1. Add 1 Tbsp olive oil to a large pot over medium high heat. Add diced onions and cook for approximately 5 minutes or until onions are translucent. Add garlic and sauté for 1 minute.
  2. Add diced butternut squash, stirring to coat with olive oil. Saute for approximately 5 minutes.
  3. Add broth, spices (except basil and parsley if going tuscan), beans, and tomatoes (add red pepper and chilis at this stage if going the mexican-style route). Bring stew to a boil. Reduce heat to medium-low and cover. Cook for 15 minutes or until squash becomes tender.
  4. Add chard and simmer for about 5 to 10 minutes or until chard stems become tender. Stir in the final touches…parsley, basil, or cilantro, depending on the stew that you are making.

Croque Madame (a.k.a. Best Ham, Egg, and Cheese Sandwich You Will EVER Have)

October has been crazy. I have been trying to post this amazing recipe for over a week now.  I promise I did not abandon you…. Hopefully this amazing breakfast dish will make you love me again and forgive me.  What is better than a ham and cheese sandwich….throw extra cheese sauce, butter, and an egg on top. Ya. This is the breakfast that I make for special occasions because, well, otherwise my butt would not fit through a door without being greased with butter….on the outside.  I made this for my best girl friends. It is one that they request and it is a breakfast that I loooove making.

I first had this sandwich when I was in Paris many years ago. I was tired from jet lag and stopped into a cafe. My french was terrible but I recognized the few ingredients in the Croque Madame…and I love anything with cheese and an egg. I nearly passed out from the pure divinity of this sandwich. Every bite is like falling in love. No, i’m not being dramatic…try it. you will agree. Money back guarantee.

Gruyere cheese makes this sandwich. It is a type of swiss cheese and you can find it in the specialty cheese section at your grocer. I’ve made this sandwich with expensive imported aged gruyere cheese and also with a cheaper and more affordable gruyere. Imported and aged is better, but seriously…both taste like a million bucks. So do whatever your pocket book allows….But whatever you do…just do it! You won’t regret it.

Traditionally, this sandwich is made with two slices of sourdough bread with ham, béchamel sauce, gruyere, and topped off with an egg. To cut down some of the calories, I make this an open faced sandwich and cut out one of the pieces of bread. Also, the bread is usually buttered on both sides and toasted, but again, to cut down on a few calories, I don’t butter the toast. But if you are feeling like you need more butter in your diet, feel free to butter away.

The béchamel sauce is a bit time consuming and is not something that you can walk away from. You can make this sauce ahead of time (1 hr or so) and cover with plastic wrap until you need to use it. Bechamel sauce is basically butter, flour, milk, gruyere cheese and a dash of nutmeg. mmmmm. Again…traditionally this sauce is made with whole milk….to give your badunkadunk some more dunk.  However, I use 2% milk, but I have used 1% in a pinch and I think it tasted plenty rich.  Any leftover sauce can be used towards a veggie lasagna, other sandwiches, on top of baked eggplant….on a spoon. 🙂

Now, you can also make this sandwich without the egg (who knows why you would do this), but, if you do (i’ll think you are crazy), it is referred to as a Croque Monsieur.

Croque Madame (serves 4…generously)

Ingredients

Bechamel Sauce

  • 2 Tbsp butter
  • 2 Tbsp all purpose flour
  • 1 1/4 Cup 2% milk
  • 1/8 tsp salt
  • 1/8 tsp cracked black pepper
  • dash nutmeg
  •  1/2 to 3/4 cup shredded gruyere cheese (divided)
Sandwich
  • 4 slices of good sourdough bread
  • 4 tsp dijon mustard
  • 1/2 lb thinly sliced black forest ham
Instructions
  1. Melt 2 Tbsp butter over medium to low heat in a saucepan (1 to 1 1/2 quart pan). When the butter has melted, whisk in the flour and make a roux. Stir constantly until smooth and cook for approximately 2 minutes (keep stirring).
  2. Slowly add the milk. Whisk constantly and cook until thickened. Remove from the heat and stir in the salt, pepper, and nutmeg. Stir in 1/4 cup to 1/2 cup of gruyere cheese. Set aside.
  3. Preheat broiler.  Spray 8×8 or 9×13 pyrex dish with nonstick spray.
  4. Toast four slices of sourdough bread. Place toasted bread in a single layer on the bottom of the dish.
  5. Spread approximately 1 tsp of dijon mustard on the top of each sourdough slice.
  6. Add several thin slices of ham on top of the dijon.
  7. Top the ham with appoximately 1/4 to 1/3 cup of bechamel sauce.  Sprinkle the top of the open faced sandwiches with remaining gruyere cheese.
  8. Place in oven beneath broiler for about 3 to 5 minutes or until gruyere is melted and lightly browned.
  9. While the open faced sandwiches are in the broiler. Spray a skillet with nonstick spray. Cook each egg separately to your liking. I prefer sunny side up or poached.
  10. Remove open faced sandwiches from oven. Place each one on a plate and top with your “fried” egg. 
  11. Enjoy heaven!

Apple Crisp

Now, the debate continues between desserts falling in the crisp, crumble or cobbler category. In my mind, a crisp has an oat based topping over a lot of fruit, a crumble has more flour based topping over fruit, and a cobbler is more biscuit-like or pastry topping that is mixed within the fruit.   Whatever you call it…I call it divine and “yes, I’ll have another”. I tend to like the crunchy oat-type topping desserts. But I will NEVER turn down a cobbler either.

Now, you should know that crisps and cobblers are s a weakness of mine and are a dessert that I will never share….again. I learned a valuable lesson when many moons ago, I decided to share an amazing peach cobbler with homemade ice cream with my husband. It turned into an ugly war of spoons in the middle of a restaraunt between my husband and I, ending in: (1) this amazing dessert being devoured in 0.2 seconds, (2) neither of us really knowing what the dessert actually tasted like because we were too concerned that the other person was getting MORE TOPPING!!! and the LAST BITE OF ICE CREAM EVEN THOUGH IT WAS SEGREGATED ONTO MY SIDE OF THE BOWL (I’m not bitter…well, maybe a little), and (3) Kiley teaching me a valuable lesson that you should NEVER SHARE THY COBBLER WITH A TOPPING AND ICE CREAM STEALER (eh hem…him, not me).

Anyways, since one of my best friends is getting married at the end of October, several of my oldest college girl friends got together this weekend for a bachelorette party – old school slumber party-style. To top the night off (along with plenty of candy, pizza, wine, and margaritas), I made an apple crisp, which we all dove head first into with a massive tub of vanilla ice cream. And no…i did not share my piece.

Note: This is an easy to put together dessert and you can use just about any fruit (berries, peaches, cherries, plums, rhubarb…I can go on…don’t tempt me).

Apple Crisp (serves 6)

Filling

  • 6 to 8 medium crisp tart apples, sliced (no need to remove peel)
  • 3 Tbsp lemon juice
  • 1/2 tsp cinnamon
  • dash of nutmeg
  • 3 Tbsp of brown sugar

Topping

  • 1 1/4 cup of rolled oats (not quick cooking)
  • 1 cup of whole wheat pastry flour (or all purpose)
  • 1/3 cup of brown sugar
  • 1 tsp cinnamon
  • 1/4 tsp salt
  • 4 Tbsp butter

Instructions

  1. Preheat oven to 375F and place rack in the center of the oven. Spray with a cooking spray, an 8 x 8 inch baking dish.
  2. Prepare topping by placing all of the topping ingredients (flour, spices, butter, oats) in a bowl or food processor. Mix until the mixture is crumbly (looks like coarse meal) and there are no large pieces of butter visible.  If you are not using a food processor, you can use two knives or your fingertips.  Set aside until you finish making the filling.
  3. For the filling, place the apple chunks in a large bowl. Toss with the lemon juice, cinnamon, and sugar. Transfer to the baking dish.  Spread the topping evenly over the apples.
  4. Bake for 30 to 40 minutes until the topping is brown and the filling is bubbly. mmmmm.
  5. Remove from oven and cool for 10 minutes.
  6. Keep guard for any cobbler thieves. Get the ice cream out and DIG IN!

Stewed Okra and Green Beans

The summer crops are at the end of their harvest. At the farmer’s market, zucchini, eggplant, tomatoes, green beans, corn, peppers, and okra are abundant. My garden is teaming with okra and a fabulous late harvest of green beans. Many northerners have never had okra before. It is definitely a southern veggie and generally fried in cornmeal or pickled. mmmm.

Okra is also great stewed with tomatoes.  I have oodles of green beans as well from my garden right now. I decided to add these two together in a fabulous side dish this week. You could also add zucchini or even sausage to make this a one dish meal. Serve over rice, couscous, or quinoa.

Stewed Okra and Green Beans

Ingredients:

  • 1 Tbsp olive oil
  • 1/2 medium onion
  • 1 lb okra, sliced 1/4 inch thick rounds
  • 1 clove of garlic, minced
  • 2 medium tomatoes, diced (or 15 oz can diced tomatoes undrained)
  • 1 to 2 cups fresh green beans, ends snapped and cut into 1 inch pieces
  • 1/2 tsp dried thyme
  • 1/2 tsp smoked paprika
  • 1/2 cup water (only if using fresh tomatoes)
  • 1 Tbsp red wine vinegar
  • Salt and pepper to taste
  • 1/8 tsp cayenne (optional)
Instructions:
  1. Heat oil in skillet over medium heat. Saute onion until translucent (about 5 minutes).
  2. Add sliced okra, searing the cut sides. This will seal in that oozy okra juice. Cook for 5 minutes to 10 minutes or until okra is slightly browned.
  3. Add minced garlic and sauté for 1 minute.
  4. Add tomatoes and remaining ingredients. Cook for 10 to 15 minutes covered until okra and green beans are tender but not mushy. Stir  every free minutes. If mixture becomes too dry, add water as necessary.
  5. Remove from heat. Add salt and pepper (fresh ground preferably) and cayenne (or tabasco) to taste. Serve as either a side or over rice.
To make this a one pot meal, add shredded chicken, sliced polish sausage, or andouille chicken sausage to the end of the cooking stage.

Basil Hummus

Homemade hummus is very easy and very tasty. Plus, making it at home is economical and it doesn’t have all those pesky fillers and preservatives.  It does take an initial investment in tahini (sesame seed paste), but with just a simple whirl of your food processor…BAM, an easy dip or spread. This is also great for a quick lunch with some veggies or even to take on a picnic.

Hummus also tastes great on sandwiches. One of my favorite sandwiches is hummus stuffed in pita bread with fresh tomatoes, fresh cucumbers, and feta cheese. Mmmm.

Hummus is also very versatile. I love adding roasted red peppers, roasted garlic, or cayenne. However, in this recipe, I opted for a fresh kick and added basil from my garden. If you don’t have fresh basil, I would probably opt for adding a tablespoon of pesto instead. Personally, I don’t think dried basil would be good substitute for fresh basil in this recipe. But hey, you could give it a shot and prove me wrong. I dare ya.

Basil Hummus

Ingredients

  • 1 clove garlic
  • 15 oz can of garbanzo beans (or white navy or cannellini beans), drained and rinsed
  • 3 Tbsp lemon juice
  • 2 Tbsp tahini paste
  • 1/8 to 1/4 tsp salt (depending on how salty you prefer)
  • 1 Tbsp olive oil
  • 2 to 4 Tbsp water (to thin dip as desired)
  • 1/4 to 1/2 cup fresh packed basil leaves
Instructions
  1. Combine garlic, beans, lemon juice, tahini, oil, and salt in a food processor.
  2. Process until smooth. Gradually add water until the dip has reached the level of consistency that you prefer. Scrape down sides of the food processor bowl to blend all of the ingredients as needed.
  3. Add basil and process briefly until creamy and smooth.
  4. Transfer to a bowl, cover, and chill.
  5. Serve with sliced bell peppers, carrots, celery, and pita chips.

Cinnamon Apple Oatmeal

FALL IS HERE!!! And so are apples, pumpkins, sweet potatoes, oh my! The farmer’s market was bursting with apples. Yes, I looooove apple and pumpkin season.  Just you wait…I’m obsessed with pumpkins…but that will be a later post (or ten).

I also love love love breakfast. With cool mornings, I crave a warm hearty bowl of oatmeal with apples and cinnamon. So this morning I made a hearty batch for K and I. MMMmmm. Nothing smells better to me than warm baked apples with cinnamon. Well, maybe warm baked pumpkin and cinnamon. Or pumpkin, apples, and cinnamon. Oooh. But like I said…that’s later.

Making oatmeal with milk is a great mix of carbs and protein to give you fuel for a good run or just simply to keep you full until lunch. Almond milk would work well too. Just be careful and watch the milk/water mixture when heating this up on the stove or microwave. It likes to froth and boil over if you aren’t paying attention…and evidently, I don’t pay attention….happens to me every dang time. I like to add wheat bran for an extra fiber boost, keeping you fuller longer.  You can make this on the stovetop or in the microwave.

Cinnamon Apple Oatmeal

Serves 2

Ingredients

  • 1 cup milk (or almond milk)
  • 1 cup water
  • 1/8 tsp salt
  • 1/2 cup whole rolled oats (not instant)
  • 1/2 cup wheat bran (if you don’t have wheat bran, double the oats).
  • 1 apple (organic preferably), core and diced
  • 1/2 tsp cinnamon
  • dash of nutmeg (optional)
  • 2 to 4 tsp maple syrup
  • Additional toppings (raisins, slivered almonds or chopped walnuts, extra cinnamon)
Instructions (stove top)
  1. Bring water, milk, and salt to a boil. Keep an eye on this. She likes to boil over.
  2. Add oats, wheat bran, diced apple, cinnamon, and nutmeg (if using).
  3. Cook for 5 minutes on medium heat.
  4. Divide between two bowls.
  5. Top each bowl with 1 to 2 tsp maple syrup.
  6. Pour some coffee and enjoy!
Instructions (microwave)
  1. Make these as individual servings. So cut the above recipe in half and add all ingredients except the maple syrup into separate bowls.
  2. Microwave for 2 to 3 minutes. Stirring every minute. But keep an eye on this lil’ bugger. It’ll boil out if you have too small of a bowl.
  3. Top each bowl with 1 to 2 tsp maple syrup.
  4. Now, get some coffee already!  Enjoy!

Black Bean, Sweet Corn, and Swiss Chard Enchilada Casserole

It was one of those nights. No clue what to cook. After running 5 miles, I just wanted food…NOW. So, I played a frequent game of  scouring my cabinets and fridge and try to come up with something to eat without going to the store. The easiest thing to come up with is a type of enchilada casserole. I had some ears of corn left from the farmers market and ruby red swiss chard growing in my garden. Combine those with some black beans and corn tortillas and BAM…dinner. There are endless variations to this dish. Swap spinach for the chard and many other vegetables could be added in this “dump the fridge in a casserole” type of dish. Enjoy!

Black Bean, Sweet Corn, and Swiss Chard Enchilada Casserole

Serves 4 to 6

Ingredients

  • corn cut from 1 ear of corn
  • 4 – 6 chard leaves (or spinach), ribs removed
  • 1 can of black beans
  • 1 jalapeño, diced
  • 2 Tbsp cilantro, chopped
  • 6 to 8 corn tortillas
  • Prepared salsa
  • cheese (feta, goat, cheddar, parmesan…whatever you have)
  • salt and pepper to taste
Instructions
  1. Preheat oven to 350F. Spray 8×8 pan with nonstick spray.
  2. Saute chard stems in olive oil for 5 minutes. Add diced chard leaves and cook for an additional 2 minutes until leaves begin to soften.
  3. Mix corn, cooked chard, beans, jalapeño, and cilantro in medium bowl.
  4. Spread about 1/4 cup of prepared salsa in bottom of pan. Tear 3 to 4 corn tortillas in small pieces and lay over salsa layer.
  5. Spread bean mixture over tortillas.
  6. Sprinkle cheese over bean mixture.
  7. Tear remaining corn tortillas in small strips and lay on top of bean and cheese layers.
  8. Top with 1/3 to 1/2 cup of prepared salsa on top of casserole.
  9. Bake for 20 to 30 minutes.

Upside Down Banana Chocolate Chip Cake

Someone at work brought nearly 20 bananas to give away. Because my biggest pet peeve is wasted food, I had to take them and make it my mission to come up with something to use them in besides banana bread (although I looove me some good nana bread). After the big bike ride, Kiley and I deserved a cake. Also, it was our 6th wedding anniversary…so another great reason to make a cake. And it was a rainy sunday…and hey, I wanted cake. SO there.

In this adaptation of a Dave Lebovitz cake, I used more natural foods instead of processed items. I made a few easy swaps, such as honey instead of white sugar, whole wheat pastry flour instead of all purpose (AP), and greek yogurt instead of sour cream.  I have really tried to remove white flour and white sugar from my cooking, using minimally processed natural sugars, such as honey, maple syrup, and agave nectar. Next time, I will likely use maple syrup in the caramelized topping instead of the brown sugar that is in the original recipe.  Whole wheat pastry flour is less dense than regular whole wheat flour and is perfect for baking. This cake was still very moist despite the whole wheat flour. If you don’t have access to whole wheat pastry flour, then you could use half AP and half whole wheat.

Seriously, this tastes like a banana foster cake with amazing warm bits of chocolate. I would definitely recommend eating this the day you bake it….warm….with vanilla ice cream. Be ready to get your mind blown. And for you banana haters out there….I totally feel sorry for you. This is fab.

Upside Down Banana Chocolate Chip Cake (adapted from Dave Lebovitz):

Makes 1 8×8 cake, serves 9 to 12

Topping

  • 1/3 cup brown sugar
  • 2 Tbsp water
  • 3 bananas
Cake
  • 1 1/2 cup whole wheat pastry flour
  • 1 tsp baking powder
  • 1/2 tsp baking soda
  • 1/2 tsp salt
  • 1 tsp ground cinnamon
  • 1/4 cup honey
  • 2 tbsp butter
  • 1 cup banana puree (about 2 ripe bananas)
  • 1/2 cup greek yogurt (or plain yogurt strained in cheese cloth)
  • 1/2 tsp vanilla extract
  • 1/2 cup chocolate chips or chopped bittersweet/semisweet chocolate
Instructions
  1. Preheat oven to 350 F.
  2. Topping – Spray 8X8 pan with pam. Mix brown sugar and water in pan. Place in preheated oven for 5 minutes. Remove and let cool to room temperature. Peel and slice the bananas in 1/4 inch slices. Arrange the slices over the melted brown sugar topping in tight rows. Drizzle with a few drops of lemon juice to keep the banana from browning.
  3. Whisk together the whole wheat pastry flour, baking powder, baking soda, salt, and cinnamon in a large bowl.
  4. In a small bowl, mix together the honey, melted butter (cooled…don’t want to cook the egg), egg, egg white, banana puree, yogurt, and vanilla.
  5. Make a well in the center of the dry ingredients and stir in the wet ingredients until almost combined. Gently fold in the chocolate pieces. Do not over mix or the cake will be tough.
  6. Using a spatula, scrape the banana cake mixture on top of the bananas and carefully spread over the sliced bananas.
  7. Bake for 40 minutes in an oven preheated to 350F.
  8. Cool the cake for 20 minutes (if you dare). Use a knife to separate the cake from the edge of the cake pan. Flip over and place on a platter.

Roasted Vegetables with Garlic Vinaigrette and Quinoa

Kiley and I needed a good power dinner before we embarked on the MS150 ride this weekend. The MS150 is a massive two day event which consists of either an 110 mile or 80 mile bike ride on Saturday and an 80 mile or 40 mile bike ride on Sunday.  I have recently jumped aboard the quinoa train. Toot Tooooot.  Get on, it’s fun and tasty. Quinoa is a high-protein grain-like crop which is actually a seed. It is the perfect fuel for endurance events, providing a perfect balance of carbs and protein. It also cooks fast…winner winner.

For this healthy pre-cycle dish, I  tossed in leftover roasted veggies, leftover chicken, and topped with crumbled goat cheese, basil, and a garlic vinaigrette. If you don’t have quinoa, you can also substitute brown rice, couscous, or even a whole wheat pasta.

Roasted Vegetables:

  • zucchini, squash, red bell pepper, onion, eggplant
  • olive oil
  • salt
  • balsamic vinegar

Garlic Vinaigrette: (from In The Green Kitchen by Alice Waters) 

  • 1 small clove of garlic
  • salt
  • 2 Tbsp red wine vinegar
  • black pepper
  • olive oil
Quinoa:
  • 1 cup quinoa
  • 2 cups water or broth
Optional Additions or Toppings:
  • fresh basil or thyme
  • roasted chicken
  • crumbled goat cheese or feta or parmesan cheese
Instructions
  1. Roasted Vegetables – Preheat oven to 400F. Cut up veggies in 1/4 inch pieces or slices. Toss in medium bowl. Drizzle with 1 to 2 Tbsp of olive oil. Sprinkle with salt and 1 Tbsp of balsamic vinegar. Scatter the vegetables in a layer on a roasting pan. Roast for approximately 30 minutes or until done.
  2. Garlic Vinaigrette – Using a mortar and pestal, pound one small clove of garlic until no chunks remain. Add two good pinches of salt and continue to macerate the garlic and salt. Add the red wine vinegar and fresh cracked pepper. Whisk in the olive pile (2 to 4 Tbsp) depending on the “tartness” that you desire. Taste for a good balance of salt to vinegar to oil. You can also use this vinaigrette on salads too.
  3. Quinoa – Rinse the quinoa thoroughly. Place quinoa and water in a medium saucepan over medium-high heat. Bring water to a boil, cover pot and simmer for 20 minutes.
  4. Combine roasted vegetables and quinoa. Drizzle with vinaigrette. I topped mine with slivered fresh basil, roasted chicken, and crumbled goat cheese.

Tender Pot Roast

I guarantee this pot roast will melt in your mouth. When running low on time or when making this in the middle of the week, I use my slow cooker. BUUUUT, on a lazy Sunday afternoon, I love cooking it slooooooowly in my dutch oven. For a 3 pound roast, it will usually take 2.5 to 3 hours in a 200 to 225F oven. If you are cooking for a bigger crowd, go for a 5 pounder, but it will take 4 hours, at least. The big problem is having a house smell THIS TASTY and having to wait for the dang thing to finish. But honestly, this is one of the easiest and most impressive meals to make.

Start with a good roast, grass-fed if possible. It really does make a difference and it’s better for you and Mr Cow. I usually use chuck roast, but arm roast or shoulder roast work as well. The chuck roast has more marbling which does best when slow cooked, making it good and tender. Prior to placing in the oven, brown it on all sides in the dutch oven over med-high heat. This seals in the juices and gives extra flavor.

Now when it comes to veggies in my roast, there are many ways to do this. I’m a big fan of onions, carrots, and red potatoes. Personally, I only cook onions with the meat because I hate mushy carrots and mealy potatoes. I add the potatoes and carrots with about 1 hr to 30 minutes left in the cook cycle. OR, I will roast them separately, allowing them to caramelize in a roasting pan…mmmmm!!!!

Tender Pot Roast

Prep Time: 20 min

Cook Time: 3 hours

  • Olive oil
  • 2 whole onions, quartered (or 1 bag of frozen pearled onions)
  • 3 lb chuck roast
  • Kosher salt
  • Fresh cracked pepper
  • 2 garlic cloves
  • 1/2 cup red wine (optional)
  • 2 bay leaves
  • 1 sprig of fresh rosemary or 1 tsp dried rosemary (optional)
  • 1 sprig of fresh thyme or 1 tsp dried rosemary (optional)
  • 1 cup beef broth or water
  • 4 large carrots, unpeeled and cut into 1/2 inch thick pieces
  • 1 lb red potatoes (or whatever color fits your fancy), cut into 1/2 inch thick pieces
PREP: Preheat oven to 200 F. Place rack in the bottom third of the oven. You may have to remove the top rack if you have a tiny oven like ME. Wash and pat dry the roast. Sprinkle with salt and pepper LIBERALLY…aaaaaall over.
COOK: Add about 1 Tbsp of olive oil to your dutch oven. Heat over medium heat until the oil is hot, but not sizzling. Add onions and brown for 5 minutes. Remove onions and set aside. Keep dutch oven over medium heat. Add another tablespoon of olive oil. Add roast and brown on all sides.
Once meat is browned on all sides, turn off heat. Add onions and garlic back to dutch oven. Pour wine over roast and into dutch oven. Because the pot is hot, a majority of the wine will cook down, leaving approximately 1/4 cup left. Add the herbs and beef broth, making sure the herbs are submerged in the broth. Make sure the onions are placed around the roast or underneath the roast.
Place lid on dutch oven. Set into the oven on the bottom rack. Set your timer for 2.5 hours. NOW STEP AWAY FROM THE OVEN…..and enjoy that awesome aroma.
With about 45 minutes left in the cook cycle, add diced carrots and potatoes directly to the dutch oven. Seal back up…and step away.