Rhubarb Strawberry Curd

Rhubarb Strawberry Curd // Big Eats Tiny Kitchen

DSC_0307

I still remember the first time that I tried rhubarb.  It was probably 10 years ago. I had wanted to try it, but just hadn’t had the chance (I guess) living in suburbia Oklahoma and just didn’t have the inclination to go hunt for it.

But one summer night, I was out working a 12 hour shift doing field work for my Master’s degree and my husband was babysitting my littlest sister who was only 6 at the time. Since they are both the adventurous type, and neither of them really knew how to cook…. they decided to make me a rhubarb cobbler as a surprise treat for when I got home.

I was so surprised when I walked in the door and smelled that amazing smell. It was seriously the best cobbler I had ever eaten. (Maybe it was because I had just worked 12 long hours in the hot summer sun.) But it really was the perfect blend of tartness and sweetness. Just like my husband and my sister Olivia. Sweet and tart! 🙂  They began my obsession with this fabulous spring plant…ooooh rhubarb!

Rhubarb Strawberry Curd // Big Eats Tiny Kitchen

Rhubarb Strawberry Curd // Big Eats Tiny Kitchen

Since that first magical cobbler that they made for me ten years ago, I have had quite a love affair with rhubarb. Rhubarb is a perennial that will come back year after year when planted in a good location. My rhubarb plant always lets me know when spring is near, because it begins to sprout its long stalks and leaves when temps rise above 40 F.

Rhubarb can be used in so many recipes: tarts, cobblers, pies, salsa, sauces, and this amazing curd! Yeaaaaaaaaah. Curd doesn’t have to be reserved for citrus! This Rhubarb Strawberry Curd is hands down my favorite. I decided to add some frozen strawberries that I had in order to boost the pink color of the curd.  Feel free to adjust the ratio of rhubarb to strawberries to suit your own tastes.

Rhubarb Strawberry Curd // Big Eats Tiny Kitchen

This Rhubarb Strawberry Curd can easily be used to fill a pie or tart crust for an easy dessert. The extra egg whites can be whipped up as a meringue for the top too! I went the easy route this time and I mixed mine in greek yogurt for a delicious breakfast and midday snack! Either way, I know that this will be a favorite for all you rhubarb lovers!

Rhubarb Strawberry Curd // Big Eats Tiny Kitchen

Rhubarb Strawberry Curd

  • Servings: 2 cups
  • Difficulty: Easy/Moderate
  • Print

Ingredients

  • 2 cups fresh rhubarb, sliced 1/2-inch thick (about 5 trimmed stalks)
  • 1 cup fresh or frozen strawberries
  • 1/4 cup water
  • 1/3 cup honey
  • 4 eggs, yolks separated (reserve whites for another use)
  • 4 tablespoons unsalted butter

Instructions

  1. In a heavy saucepan placed over medium heat, cook rhubarb, strawberries, water, and 3 tablespoons of honey for about 10 minutes, stirring frequently and smashing the fruit with the back of spoon. Mixture will begin to fall apart and look mushy. Turn off heat and allow to cool for about 5 minutes.
  2. Transfer mixture to the bowl of a food processor and puree smooth. Set aside.
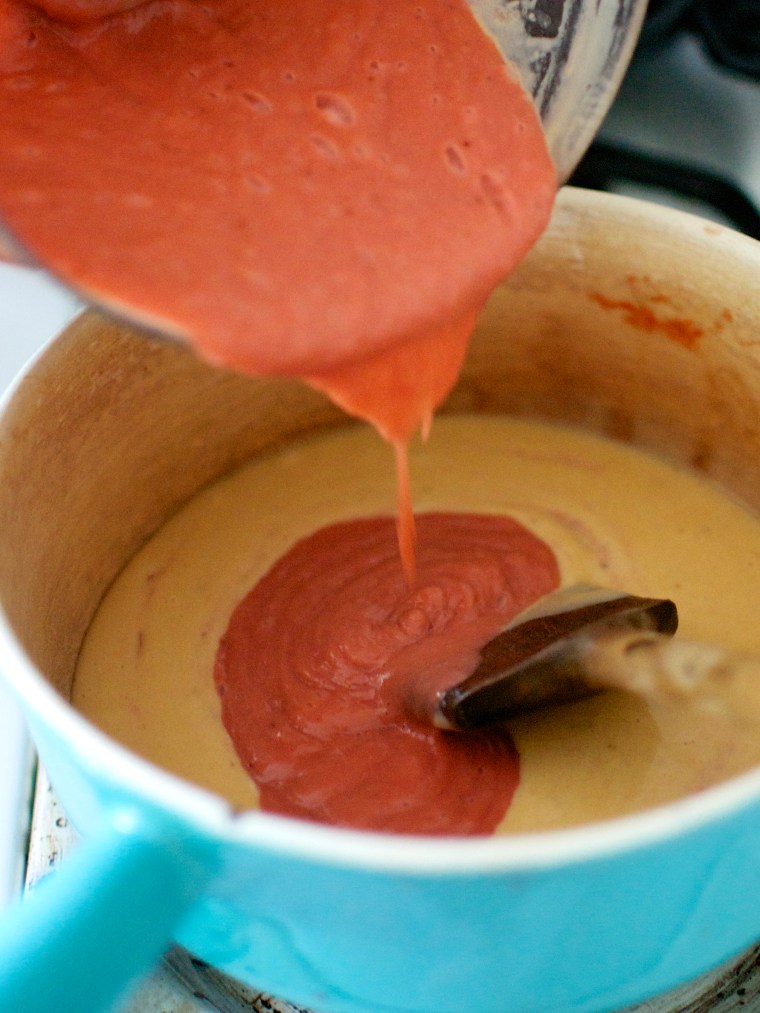
  3. In a separate medium bowl, cream the butter and the honey together until fluffy.  Beat in the eggs slowly. Slowly add the rhubarb and strawberry mixture, whisking constantly until completely combined.
  4. Transfer mixture to a medium-sized, non-reactive saucepan. Place over medium-low heat and stir constantly with either a rubber spatula or wooden spoon until the mixture has thickened to jelly consistency, about 10-12 minutes.  Do not let the curd boil! Pull the pan off the stove before it gets to that stage. The curd is done when it coats the back of a spatula or leaves a clear path when pulled through the mixture.
  5. Remove from heat allow to cool for about 5 minutes. Pour curd mixture into a clean glass jar, but let it cool completely before you screw on the lid. You can even place the filled jar in the freezer (without the lid) for about 15 minutes and then remove from freezer and place the lid on the jar. Keep refrigerated until ready to use.

Note – Recipe adapted from Dolly and Oatmeal.

Four Ingredient Dark Chocolate Peanut Butter Eggs

DSC_0375

We all need a little treat now and then.  For me, my favorite treat is always peanut butter eggs or dark chocolate peanut butter cups. Swooooooon. I don’t have them often, but when I do, I prefer the mini ones because I can have more than one and not feel so bad. I also am like a squirrel and like to save them, placing them in weird places in our house (hiding them from my chocoholic husband).

We hosted a huge Easter gathering at our house this year and had 30 people in our tiny and cozy little abode.  It was a lot of fun because I had a game plan: only make stress free food! This would ensure that I could enjoy my family and not appear like a crazed woman. One of the stress free foods that I made were these amazing Dark Chocolate Peanut Butter Eggs.

Four Ingredient Dark Chocolate Peanut Butter Eggs // Big Eats Tiny Kitchen

Four Ingredient Dark Chocolate Peanut Butter Eggs // Big Eats Tiny Kitchen

My sister and I whipped up these easy peasy peanut butter eggs a day in advance. They didn’t take much time and they were a great tiny sweet treat for people to pop one, two, or five eggs into their mouth.

Did I mention that these Dark Chocolate Peanut Butter Eggs are made with only FOUR ingredients? FOUR.  They are very very very easy to make and very very very easy to eat. Too easy. But hey, on the bright side, they are made with all natural ingredients and are only 70 calories per egg. Boom!

Homemade Four Ingredient Dark Chocolate Peanut Butter Eggs

  • Servings: 60 eggs
  • Difficulty: Easy
  • Print

Ingredients

  • 2 cups creamy salted natural peanut butter
  • 1/2 cup honey
  • 1 tablespoon vanilla extract
  • 5 oz dark chocolate

Instructions

  1. Using either an electric mixer or a food processor, thoroughly mix the peanut butter, honey, and vanilla on high-speed for several minutes until the mixture turns into a thick ball of peanut butter dough. Depending on the time of year and humidity in your kitchen, a tablespoon of water may need to be added to the mixture so that it will come together like dough. You can also pull it out of the mixing bowl and work it by hand for it to come together at the end after mixing it.
  2. Place parchment paper or waxed paper on a rimmed baking sheet or inside several glass pyrex baking dishes.
  3. Take a tablespoon of the peanut butter dough and use your hands to shape into a ball or egg shape, if you are feeling eggy. Place the balls (or eggs) onto the parchment-lined baking sheet.  Continue making the peanut butter eggs or balls until all of the dough is used. Depending on the size of your eggs, this recipe makes between 50 and 60 peanut butter eggs. Chill the peanut butter eggs in the freezer for 1 hour or in the refrigerator overnight.
  4. When you are ready to coat the peanut butter eggs in chocolate, place the chocolate into a microwave safe bowl and microwave for 30 seconds, then stir. Microwave in 10 second intervals, stirring between until the chocolate is melted.
  5. Remove the peanut butter eggs from the freezer. Place one egg at a time into the chocolate and roll around until covered. Remove using a large fork placed under the egg and allow the excess chocolate to drip from the egg. Place the dipped egg on the parchment paper to harden. Store in the refrigerator until time to serve.

*Note – for a paleo-friendly version or for those that are allergic to peanuts, almond butter could be used instead.

The Best Flourless Brownies

The Best Flourless Brownies (Grain Free) // Big Eats Tiny Kitchen

I’m so sorry.

INCREDIBLY sorry.

I have been M.I.A. for a month. I need to grovel and ask for your forgiveness….

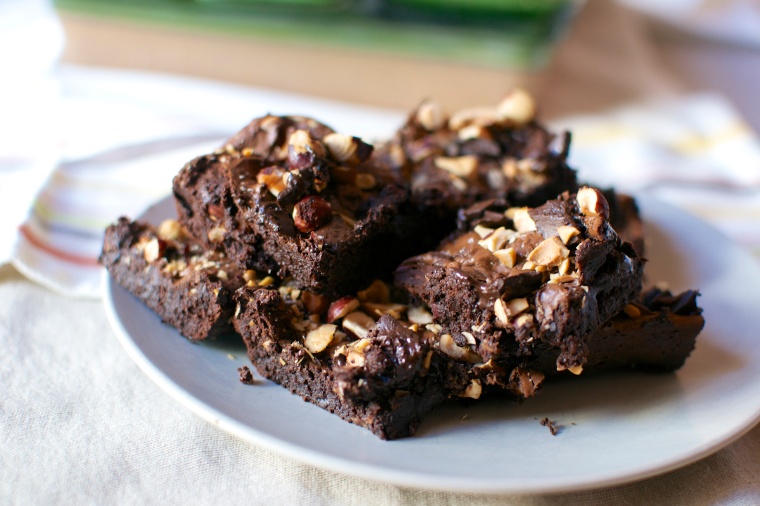
soooo….. I made brownies.

The Best Flourless Brownies (Grain Free) // Big Eats Tiny Kitchen

Nothing says I love you and I’m sorry for being away like chocolate + butter + nuts. Am I right?

The Best Flourless Brownies (Grain Free) // Big Eats Tiny Kitchen

I’ve been a little off kilter lately and super busy with life and work.  It became increasingly difficult to find additional time (and motivation) recently for posting new recipes.  Maybe it was lack of sun and seasonal depression. So I took a break. I went back to just cooking for the fun of it. I stopped worrying about whether or not it was good enough for the blog or whether I had to cook it at the right time so that I had enough natural light to photograph it.  I just cooked for me.

I think I go through this every winter. I have to realign myself with what is important to me.  Give myself a new focus. In turn, I have also given this blog a renewed purpose.

I want to thank those of you who reached out to me and encouraged me to continue cooking and creating in this space.  I received some lovely emails and words of encouragement.  This is supposed to be a space of creativity and sharing.  I want this space to be several things moving forward and not just a food blog. Don’t get me wrong, I definitely still want it to be a space where my inner grandma gets to cook, feed others, and then sit back and bask in the joy of nourishing the one’s I love.  But I also want to focus on discovering, exploring, and escaping comfort zones.

Thank you for letting me cook for you and provide nourishing recipes for the past three years. Also, thank you for giving me satisfaction and fulfillment.

The Best Flourless Brownies (Grain Free) // Big Eats Tiny Kitchen

DSC_0310

And with that…. let’s talk CHOCOLATE AND BUTTAH AND HAZELNUTS.

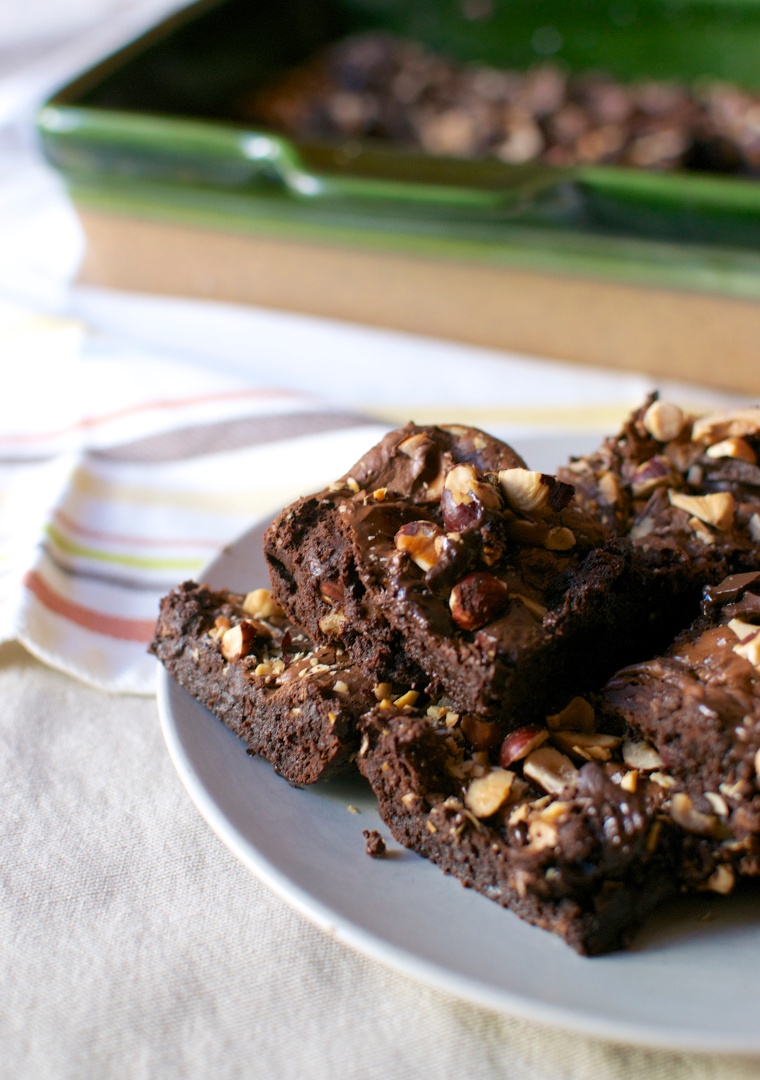
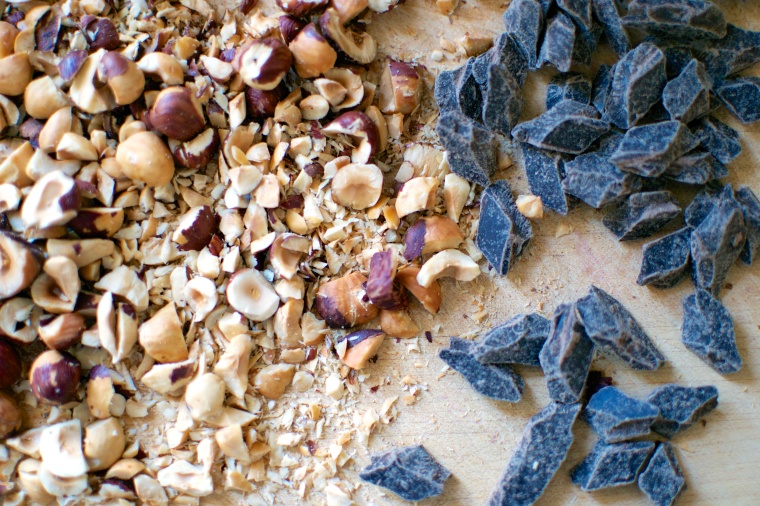
Get out that good butter and good chocolate. Turn on your oven. We are also going to throw in hazelnuts into our brownies to add some flare!

DSC_0307

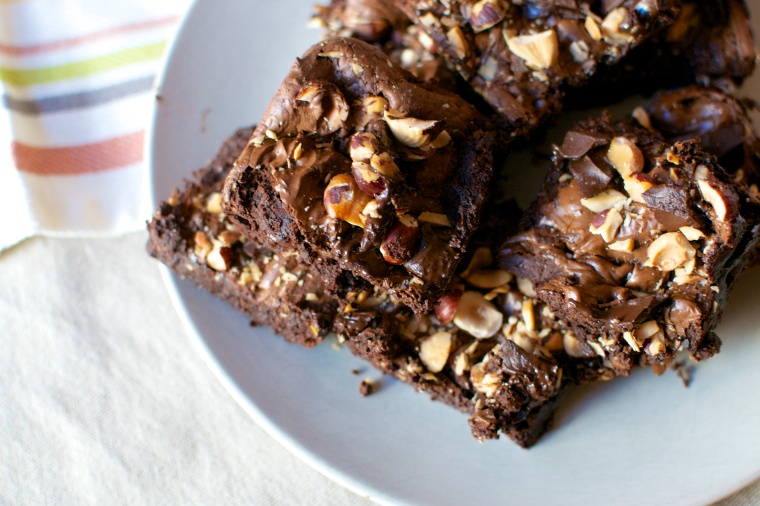
V.D. is coming up… I mean, Valentine’s Day. And what better way to celebrate your loved ones and friends (or just you) than to serve up a plate of uuuuuuuhmazing gooey gooey brownies.  These brownies are adapted from a past recipe of mine (Paleo Flourless Brownie Bites) and a recipe from my favorite pastry chef, Dave Leibovitz.  The results are fabulously out of this world.  But, as LeVar Burton would say…. Don’t take my word for it.  Make them yourself and share the love.

The Best Flourless Brownies (Grain Free) // Big Eats Tiny Kitchen

Flourless Brownies (Grain Free)

  • Servings: 12 to 16
  • Difficulty: Easy
  • Print

  • 6 tablespoons salted butter (or use unsalted and add 1/8 teaspoon salt)
  • 10 oz semi-sweet chocolate chunks
  • 2 eggs (room temperature)
  • 2/3 cup coconut palm sugar (or unrefined cane sugar)
  • 3 tablespoons arrowroot powder (or cornstarch)
  • 1 tablespoon cocoa powder
  • 2/3 cup chopped nuts (I used roasted hazelnuts)
  • coarse or flaked sea salt

Instructions

  1. Preheat oven to 350 F. Grease a 8X8 baking dish and set aside.
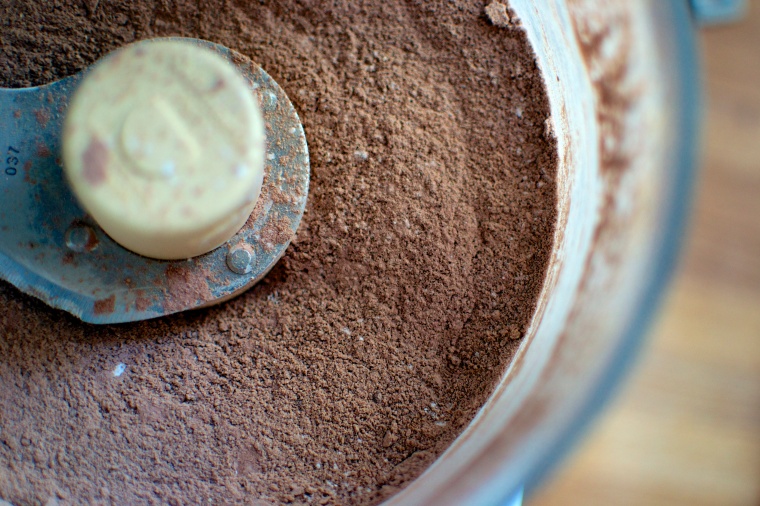
  2. Add coconut palm sugar, arrowroot powder, and cocoa powder to the bowl of a food processor. Process for about 1 minute to make sugar mixture super fine. Set aside.
  3. In a metal saucepan over medium heat, melt butter until it begins to crackle.  Add 2/3 of the chocolate chunks (about 8 oz) and remove pan from heat. Whisk constantly until chocolate is completely melted.  Add eggs one at a time and whisk constantly.
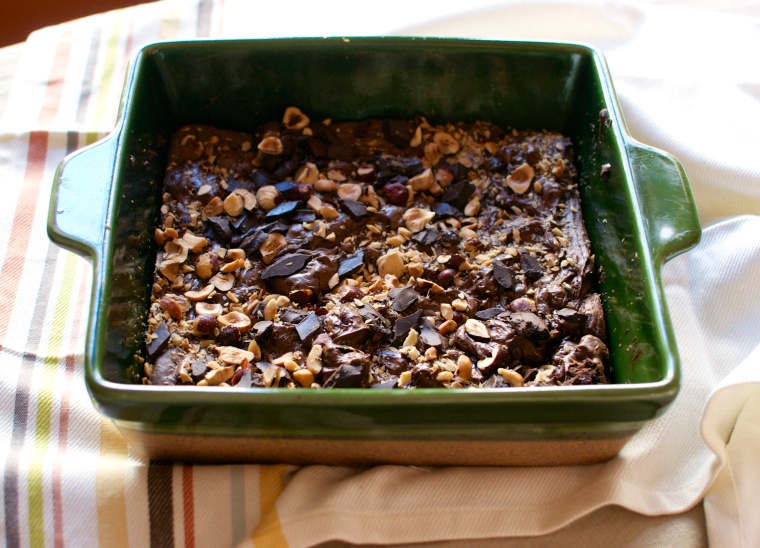
  4. Pour chocolate mixture into food processor with sugar mixture.  Process for at least one minute. Mixture will be glossy and thick. Add 1/2 cup of nuts and pulse once or twice to distribute. Use a rubber spatula and spoon out mixture into greased baking dish. Sprinkle remaining nuts, chocolate chunks, and flaked sea salt on top. Bake for 30 minutes at 350 F, or until just set.  Do not overtake.

Note – If you do not have a food processor, then you will need to adapt the recipe slightly.  Add the sugar to the butter and chocolate mixture before you add the eggs. Remove the saucepan from heat. Add eggs one at a time, then add sifted cocoa powder and arrowroot powder straight to the saucepan.  Stir with a whisk briskly for at least 1 minute until the mixture becomes glossy and begins pulling away from the sides of the saucepan.  Stir in your nuts and then spread the mixture into the prepared pan. Sprinkle with nuts and chocolate and bake as directed above.

Broccoli, Apple, and Shaved Brussels Sprout Salad with Tahini-Maple Dressing

Broccoli, Apple, and Brussels Sprout Salad with Tahini-Maple Dressing // Big Eats Tiny Kitchen

Welcome the season of “How Many Parties, Booze, Snacks, Sweets, Treats, and Good Times Can I Shove Into My Face and Schedule”.

But there is one big problem with this season.

My stomach. She’s such a fun killer.

Broccoli, Apple, and Brussels Sprout Salad with Tahini-Maple Dressing // Big Eats Tiny Kitchen

Broccoli, Apple, and Brussels Sprout Salad with Tahini-Maple Dressing // Big Eats Tiny Kitchen

Given my cranky belly and gluten intolerance, I often go to holiday parties and find that there is hardly anything that I can eat without severe consequences. Lately, my trick for getting through party after party is to bring a delicious, healthy, and festive dish that I can eat and enjoy. By doing this I hopefully won’t be the one over in the corner munching on a pound of carrots and staring like a voracious dog at others eating seven layer bars, molasses cookies, sausage balls, and chocolate covered pretzels…. “No no no, I’m good. I LOOOOVE carrots. I hate other delicious things. No go on. Please keep eating. Please, I’m fine. I’m FIIIINE.”

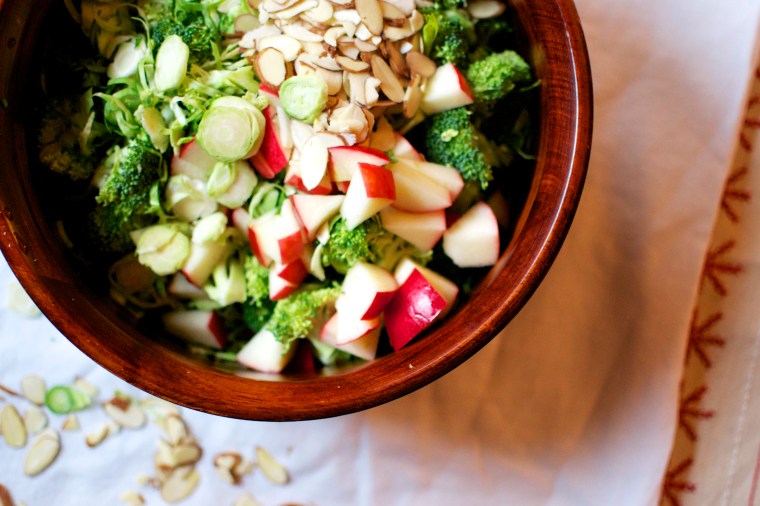
This Broccoli, Apple, and Shaved Brussels Sprout Salad with Tahini-Maple Dressing has been my go to Christmas salad this season.  It’s incredibly delicious with great crunch from the broccoli and brussels sprouts and crisp apple. Plus the savory tahini-maple dressing will have you wanting to lick the spoon! I have taken this salad to four different parties and have had great responses. It also holds up very well as leftovers for lunch the next day.

Broccoli, Apple, and Brussels Sprout Salad with Tahini-Maple Dressing // Big Eats Tiny Kitchen

Oh and look how festive this salad looks! Greed, Red, and White! Sometimes I even add dried cranberries for more red pop!

So Happy Holidays to you and yours!  Make a plan during this holiday season and don’t get overwhelmed!  You can do it!

Broccoli, Apple, and Shaved Brussels Sprout Salad with Tahini-Maple Dressing

  • Servings: 6
  • Difficulty: Easy
  • Print

Ingredients

  • 2 broccoli crowns, florets only, chopped
  • 1/2 lb brussels sprouts (about 2 big handfuls), stems removed and discolored leaves discarded
  • 1 large honey crisp apple, cored and chopped
  • 1/4 cup crumbled feta (do not include for dairy free option)
  • 1/4 cup sliced almonds

Tahini-Maple Dressing

  • 1/3 cup tahini
  • 2 tablespoons lemon juice
  • 1 tablespoon maple syrup
  • 2 tablespoons water

Instructions

  1. Chop the broccoli into small bite size pieces and place in a large bowl. Use a sharp chef’s knife or mandolin slicer to slice the brussels sprouts as thin as possible. Alternately, a food processor’s slicing disk could be used. Add the brussels sprouts to the large bowl with the broccoli.
  2. In a separate small jar or bowl, whisk the tahini, lemon juice, and maple syrup together to form a paste. Add water one tablespoon at a time until the mixture is creamy and pourable like vinaigrette (not too watery). Pour the dressing over the broccoli and brussels sprouts and toss to combine.  (The salad can be made a few hour ahead of time to this point and refrigerated).
  3. Add the chopped apple, feta, and sliced almonds to the salad and toss lightly.  Serve immediately.

Notes

  • For paleo friendly, vegan friendly, and dairy free, do not include the feta cheese.
  • If you don’t have tahini, almond butter could be used.
  • For added protein and a complete meal, add some cooked quinoa or shredded chicken.

Gluten Free Pumpkin Bread

Gluten Free and Dairy Free Pumpkin Bread // Big Eats Tiny Kitchen

I was an only child until I was almost 11 years old. Then came my brother…and then a sister four years later. And then… four years later my mom asked me “Do you want another brother or another sister?” and my unfortunate response was “Neither”.

But despite my lack of enthusiasm…sixteen years ago today, my youngest sister was born. I was in college.  In the midst of college finals and stress and sleepless nights, I had just gained a new sister. I went home for Christmas break and stayed up all night with my newborn sister, watching 24-hours of Christmas Story over and over and over so that my mom could get some sleep.

And that’s when I fell in love with that little bundle of joy. I was so happy to have her in my life.

She was so tiny, so beautiful, so new.

And so LOUD! Holy crap.That kid could cry!

Newborns.

Yikes. Talk about insta-birth control for a college kid. Ovaries on shutdown mode. Thanks!

Gluten Free and Dairy Free Pumpkin Bread // Big Eats Tiny Kitchen

Gluten Free and Dairy Free Pumpkin Bread // Big Eats Tiny Kitchen

Over the years, watching her grow up has been amazing. She is a talented young girl who is super creative and has the biggest heart. I was always worried that the age difference between the two of us would be hard to stay close. When I moved away 6 years ago, it killed me to know that I wouldn’t be able to go to her sports games or see her get awards or be there for her birthdays. I was missing out on all those little moments.

Gluten Free and Dairy Free Pumpkin Bread // Big Eats Tiny Kitchen

I was really lucky this past weekend because I was able to see her and my other sister and brother for Thanksgiving! I couldn’t get enough.

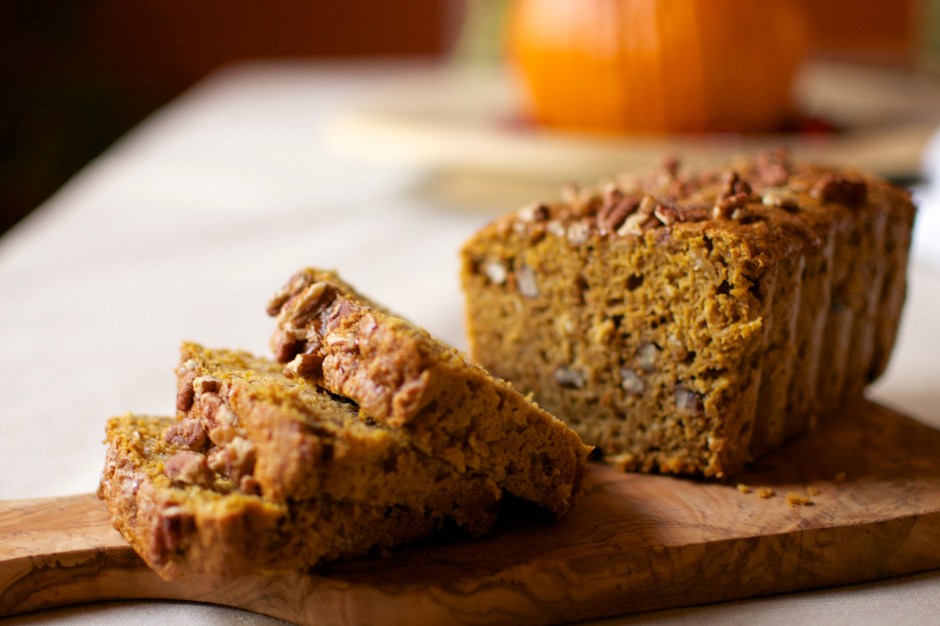
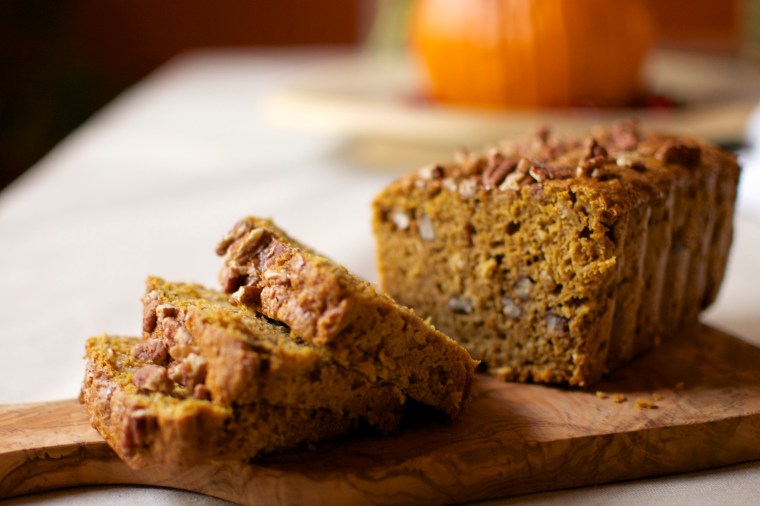
I whipped up a double batch of this pumpkin bread and took it to Thanksgiving for breakfast since pumpkin is one of her favorite flavors. It is moist, light, fragrant, and nutritious! Aaaaand did I mention that it was gluten free and dairy free? Double bonus.  But seriously, friends, I was blown away by how perfect this pumpkin bread turned out.  It uses only two flours: oat flour and almond flour.  Arrowroot powder is also used to keep the loaf from being too dense. It is simply amazing.

Gluten Free and Dairy Free Pumpkin Bread // Big Eats Tiny Kitchen

This recipe makes a double batch which is super helpful during the holidays. You can always give a loaf away to a friend as a gift, or wrap it up tightly and freeze it for later. I promise that you WON’T regret having two loaves.

So Haaaaaappy Birthday to my lovely and beautiful little sister. I am so glad that you were born, because I gained a sister and a friend. Hope you have a wonderful day!

Gluten Free Pumpkin Bread (Gluten Free and Dairy Free)

  • Servings: 8
  • Difficulty: Easy
  • Print

Makes 2 loaves

Ingredients

  • 2 cups gluten free oat flour*
  • 1 cup gluten free rolled oats
  • 1 cup almond flour*
  • 1/2 cup arrowroot powder
  • 2 teaspoons baking powder
  • 1 teaspoon baking soda
  • 1 teaspoon salt
  • 2 teaspoons ground cinnamon
  • 1 teaspoon ground ginger
  • 1/2 teaspoon nutmeg
  • 4 eggs
  • 1 cup maple syrup
  • 1 teaspoon vanilla
  • one 15oz can of pumpkin (not pumpkin pie filing)
  • 6 tablespoons melted coconut oil or butter
  • 1 cup chopped pecans
  • 2 tablespoons coconut palm sugar

Instructions

  1. Preheat oven to 375F. Prepare loaf bans by applying butter and then set aside.
  2. In a large bowl, combine dry ingredients (oat flour through nutmeg). Whisk to combine.
  3. In a separate medium bowl, whisk eggs and maple syrup until slightly frothy. Stir in vanilla, canned pumpkin, and melted coconut oil (or butter). Gradually add wet ingredients to dry ingredients and stir to combine. Stir in 3/4-cup of pecans into batter.
  4. Transfer batter to the loaf pans and smooth the tops with the back of the spoon. Sprinkle remaining 1/4-cup of pecans and coconut palm sugar on the tops of the loaves. Place the loaf pans on the middle rack of the oven. Bake for about 1 hour to 1 hour 15 minutes until a toothpick or butter knife inserted into center comes out with a few moist crumbs.
  5. Remove from oven and let cool in the loaf pans for about 15 minutes. Turn out the loaves onto a wire rack and let cool completely.

*Notes

Crockpot Beef and Mushroom Stew (Gluten Free and Paleo-Friendly)

DSC_0258

I have been in an alternate universe, my friends. A universe where people never sleep, the air smells like strawberry perfume, puke, and alcohol and no one seems to care that a burger costs $22. Ya….I speak of Vegas.

One of my oldest friends was getting hitched last weekend there. It was great to see him and his new wife as well as many old friends from college.  It’s funny getting back together with friends that you don’t see that often, but when you do see them, it is as if no time has passed. But then the problem is that I feel like I have to cram so much fun into a condensed time span.

So what do you get when you concentrate fun in Vegas?  Drinks that should never be THAT big, beer pong rallies (be sure close to your eyes when the ball hits the floor so that you don’t vom in your mouth), mechanical bull riding that felt like it lasted 10 minutes (I pulled a groin muscle doing this because I’m OLD), no sleep no sleep no sleep.  It took only 12 hours for me and my husband to quickly realize that we were in our mid 30s, not early 20s. Ouch.

Crockpot Beef and Mushroom Stew // Big Eats Tiny Kitchen

As a result, mama is in major decompression mode. No bright lights, no floral smells, no alcohol, no loud noises. All I need right now is to be wrapped up in a blanket like a human burrito while I listen to soul music on the record player. Put it on repeat please.

I also need a massive helping of this warm comfy soup to combat the outside temps that are in the teens!

Crockpot Beef and Mushroom Stew (Gluten Free and Paleo-Friendly)

  • Servings: 4 to 6
  • Difficulty: Easy
  • Print

Ingredients

  • 2 lbs beef stew meat (seasoned with salt and pepper)
  • 2 onions, sliced in 1/4-inch slivers
  • 10 oz baby bella mushrooms, quartered
  • 1 large carrot, sliced
  • 2 cups diced potatoes
  • 1 Tablespoon thyme
  • 6 cups beef stock
  • 1/2 cup dry sherry (optional)
  • 2 tablespoons arrowroot powder (or cornstarch)
  • Salt and pepper to taste

Instructions

  1. Place first six ingredients (stew through beef stock) in a crockpot. Cook on low for at least 8 hours.
  2. In a small bowl, stir arrowroot powder into sherry until a smooth paste is formed. Add sherry mixture to the crockpot and stir to combine. Add salt and pepper as needed.

Gluten Free Apple Spice Muffins with Walnut-Oat Streusel

Gluten Free Apple Spice Muffins // Big Eats Tiny Kitchen

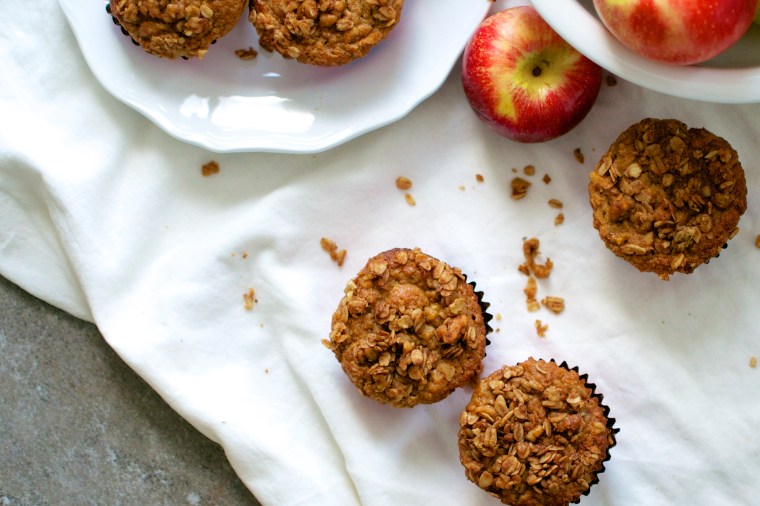
Apples are here! And these Gluten Free Apple Spice Muffins are healthy, delicious, moist, and sweet.

Similar to the way people are feeling about post season baseball around here is the way I feel about Apple Season.

APPLE SEASON is Post Season to me! Am I right?  Let’s get pumped, people! Summer is over and HELLOOOOO apples. Crunchy, juicy, sweet/tart Apples.

I could seriously OD on apples more than chocolate… weird, huh?  Seriously, I can’t be the only one who has fantasies about going apple picking and bringing home loads of perfect apples and then baking them up in pies, muffins, cobblers, a la mode, cinnamon-spiked applesauce, or, hell, just eating them fresh ALL the TIME.  I’m drooling right now.

DSC_0223

Gluten Free Apple Spice Muffins // Big Eats Tiny Kitchen

I also have to admit that I get SO overwhelmed with all the apple varieties. Holy pooh on a stick! How can you choose?  I’m on the hunt for some interesting varieties this year.  Here in Missouri, there are lots of apple orchards that allow you to pick your own. I’m a big fan of the local varieties of Jonathan, Ozark Gold, Goldrush, and Enterprise. These varieties are good for eating and baking, having sweet/tart flavors with plenty of crunch. They don’t mush up when baked, which is a plus as well.

I used a combination of Jonathan and Golden Delicious when I baked up these luscious Gluten Free Apple Spice Muffins, but any variety should be fine. However, depending on the quality of apples you have access to, the final flavor will vary slightly.

Gluten Free Apple Spice Muffins // Big Eats Tiny Kitchen

I used a combination of two flours: gluten free oat flour and almond flour. I really like the balance of these two flours in muffins. The combo of these flours provide both fiber and protein, which are perfect for beginning your morning and staying satiated longer. And you get a great fall spice treat to start your day.

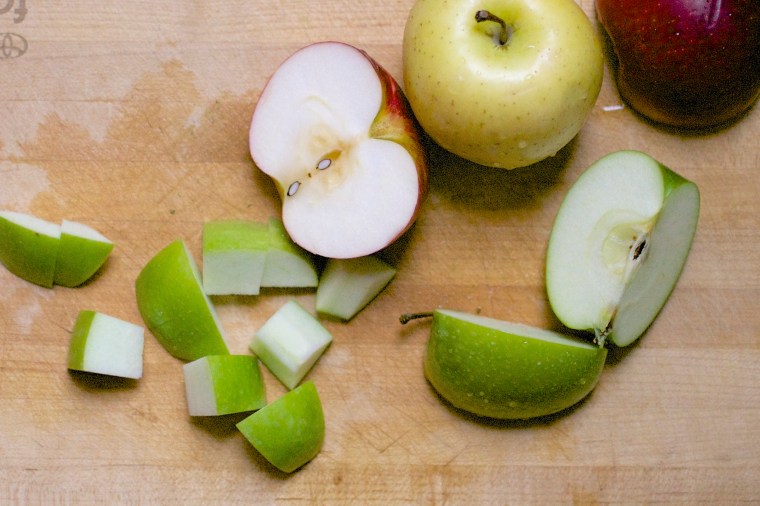
I used an interesting technique with these muffins. Instead of using store-bought applesauce, I created my own by pureeing one of the three apples in a food processor. After it was pureed, I then added the remaining two apples to the bowl of the food processor and pulsed the apples until they were chopped. If you don’t have a food processor, you can sub 1/2-cup of applesauce for one of the apples.

DSC_0228

Gluten Free Apple Spice Muffins // Big Eats Tiny Kitchen

And let’s also talk about this Walnut-Oat Streusel topping. Walnuts, oats, maple…mmmmm. You mustn’t skimp on this step, friends. Noo no no. Do this. I typically don’t top my muffins (because I’m lazy). But I took the extra 2 minutes (seriously…why do I not do this) and holy mama was it worth it.

Gluten Free Apple Spice Muffins // Big Eats Tiny Kitchen

Gluten Free Apple Spice Muffins

  • Servings: 12
  • Difficulty: Easy/Medium
  • Print

Gluten Free Apple Spice Muffins Ingredients

  • 2 cups gluten free oat flour (ground from gluten free rolled oats or use Bob’s Red Mill gluten free oat flour)
  • 1 cup almond flour (I use Honeyville)
  • 2 teaspoon baking powder
  • 1/2 teaspoon salt
  • 2 teaspoons ground cinnamon
  • 1/2 teaspoon ground ginger
  • 1/4 teaspoon ground nutmeg
  • 3 medium apples, cored and sliced in quarters
  • 1/3 cup greek yogurt (or dairy free yogurt)
  • 1/2 cup maple syrup
  • 2 tablespoons butter, melted (or coconut oil)
  • 4 eggs (at room temperature)

Walnut-Oat Streusel Topping Ingredients

  • 1/3 cup rolled gluten free oats
  • 1/3 cup chopped walnuts (or pecans)
  • 2 tablespoons maple syrup
  • 2 tablespoons butter or coconut oil, melted
  • 1/2 teaspoon cinnamon
  • 1/4 teaspoon salt

Instructions

  1. Preheat oven to 350 F. Line or grease a 12-muffin tin with liners and set aside.
  2. Place dry ingredients in a large bowl.
  3. Combine Walnut-Oat Streusel topping ingredients in a small bowl and set aside.
  4. In the bowl of a food processor, place pieces of one apple, greek yogurt, maple syrup, melted butter, and eggs.  Puree mixture until smooth. Add remaining pieces of two apples and pulse until the apples are in small chunks. Add wet ingredients to dry ingredients. Stir mixture until just combined.
  5. Scoop 1/3-cup of batter into each lined muffin tin to 3/4 full. Sprinkle streusel topping evenly on each muffin. Bake for 30 to 40 minutes, until muffins are browned and cooked all the way through. Remove from oven. After 15 minutes, move muffins to a cooling rack.

Roasted Red Pepper and Tomato Soup

Roasted Red Pepper and Tomato Soup (gluten free, paleo, and dairy free) // Big Eats Tiny Kitchen

My husband and I ran the KC half marathon this past Saturday. One of the best things about running in the early morning is getting to see the city wake up as the sun rises. You see a view that is typically missed while enjoying the coziness of bed. Chilly morning runs sound so much better, right? I’ll tell ya, that the early morning air was perfectly crisp for me. Plus the trees were all in full amazing bloom of color like they saved all their peak beauty just for us!

Roasted Red Pepper and Tomato Soup (gluten free, paleo, and dairy free) // Big Eats Tiny Kitchen

It’s crazy to realize that five years ago I completed the full marathon. *shudder* I will say that I definitely enjoy running half marathons MUCH better than full marathons….obvi. The full marathon is a torturous journey that I’m glad I did once…and will likely never repeat.  (Similar to trying to drink a pint of vinegar on a dare….great to do once, but never again.  Am I right?)

For some reason, I really like running half marathons. It’s a decent length of race to push my training and fitness level a little higher, while not ruining my life or body. Usually. This past training season I pulled a calf muscle three weeks ago but since I gave myself three weeks off from running, I was able to bust out the race. Needless to say, after running 13.1 miles this weekend, I’m in super recovery mode. Give me carbs, give me nutrients….more importantly, give me ice cream!

On Sunday, I did a lot of stretching, drank plenty of water, and worked in my yard enjoying the fall day. I also harvested the end of season crops and late bloomer tomatoes and peppers. I wasn’t sure what to do with my bounty until I remembered this delicious Smoky Red Pepper Soup in one of my favorite new cookbooks, Vibrant Food by Kimberly Hasselbrink. I decided to adapt the soup a bit and roast the peppers and tomatoes in the oven together and whip up this nutrient-dense soup to aide my recovery. Winner winner.

Roasted Red Pepper and Tomato Soup (gluten free, paleo, and dairy free) // Big Eats Tiny Kitchen

Roasted Red Pepper and Tomato Soup (gluten free, paleo, and dairy free) // Big Eats Tiny Kitchen

This soup is the easiest thing I’ve done all weekend.  It is so easy since all of the vegetables are roasted together on a single baking sheet under a broiler.  Then all of the roasted vegetables are then pureed with spices in either a high speed blender or in a stockpot using an immersion blender. So easy I could sleep and do this. Maybe I am.

The broiler gives a great smoky flavor to the tomatoes and peppers. It is also spiced with both smoked paprika and chipotle powder which add extra smoky punch of flavor.  If you are sensitive to spice or serving this to lil tikes, then I would recommend skipping the chipotle powder since it is a bit spicy.  This is perfect as a main meal with a dollop of greek yogurt or served as a first course with this kale salad with garlic tahini dressing or this Peruvian Roasted Chicken.

Oooh….or grilled cheeeeeeese pleeeeeease.  Sorry folks. As you can tell I’m in carbo load mode.  I’ll get back to being a green machine tomorrow.

You don’t have to run a half or full marathon to deserve this soup. It’s easy, light, and provides your body the nutrients it needs to get through these fall days. Get on it!

Roasted Red Pepper and Tomato Soup (gluten free, paleo, and dairy free) // Big Eats Tiny Kitchen

Roasted Red Pepper and Tomato Soup (Gluten Free and Dairy Free)

  • Servings: about 10 cups
  • Difficulty: Easy
  • Print

Ingredients

  • 4 medium sweet red bell peppers (about 2 pounds), quartered with seeds/membranes removed
  • 3 whole cloves of garlic (skins on)
  • 1 medium onion, quartered
  • 2 pounds of whole tomatoes (about 8 Roma tomatoes or 4 larger tomatoes)
  • 4 cups of vegetable broth
  • 2 teaspoons kosher salt
  • 2 teaspoons smoked paprika
  • 1 teaspoon ground cumin
  • 1/4 teaspoon chipotle powder (optional if you don’t like spicy dishes)
  • Optional toppings: plain greek yogurt, fresh cilantro, roasted pumpkin seeds

Instructions

  1. Preheat the broiler. Place oven rack in the upper portion of the oven about 6 to 8 inches from broiler.
  2. Place cut peppers skin side up, whole roma tomatoes, whole garlic, and quartered onions in a single layer on a rimmed baking sheet. Place the baking sheet in the oven on the top rack. Broil the veggies, watching carefully, for about 10 to 15 minutes until the pepper and tomato skins are mostly blackened on top.
  3. When the peppers are cool enough to touch, remove the pepper skins by running them under running water. Peel and remove the skin from the garlic as well.
  4. In a large dutch oven or stock pot over medium heat, heat the roasted vegetables, vegetable broth, salt, and spices.  Puree the soup smooth using an immersion blender. This step also can be performed using a high speed blender or food processor.
  5. Serve soup topped with greek yogurt, chopped cilantro, and toasted pumpkin seeds.

Note – Recipe adapted from Kimberley Hasselbrink’s Vibrant Food.

Gluten Free Carrot-Apple Muffins

Gluten Free Carrot-Apple Muffins / Big Eats Tiny Kitchen

My man and I just celebrated our 9th wedding anniversary last month.

Nine! Where did time go?

I am utterly surprised that my husband still looks at me with amazingly bright eyes and is still in love with me. For some reason he likes being married to a neurotic woman with an obsession for ketchup and oatmeal. Not together…separate. Anyways I digress, I really think I got the better end of the deal. He is definitely the best thing that has ever happened to me. Well, except at 5am when he sings random songs like “Highway to Hell” or “Baby Got Back”. (Really…we should have no singing rules until well after 8am, right? Right? or at LEAST after coffee!)

Gluten Free Carrot-Apple Muffins / Big Eats Tiny Kitchen

But honestly, anniversaries like this remind me that time is passing so quickly. I hope that I can breathe in as many details of my life and not take things for granted.  I want to laugh more and not take things so seriously. (Except the singing before 8am…I take that very seriously.)

For our anniversary, my husband got me a Vitamix (the ridiculously amazing and over-the-top blender that does everything that you ever imagined, including make creamy nut butter, process ice cream, puree smooooooth soups, grind fine flours, clean your house, complement your hair, and check your email). This blender is sheer madness!!!!  She’s like a personal assistant…that is also your best friend and doesn’t annoy you…ever.

Gluten Free Carrot-Apple Muffins / Big Eats Tiny Kitchen

What was one of the first things I did with my Vitamix? No smoothies. I made oat flour and then made carrot and apple muffins. Ya, you heard me…muffins. Real muffins, not smoothie muffins. Well…I didn’t bake the muffins in the Vitamix.  C’mon! Ridiculous. That’s the next version…the easy bake Vitamix.

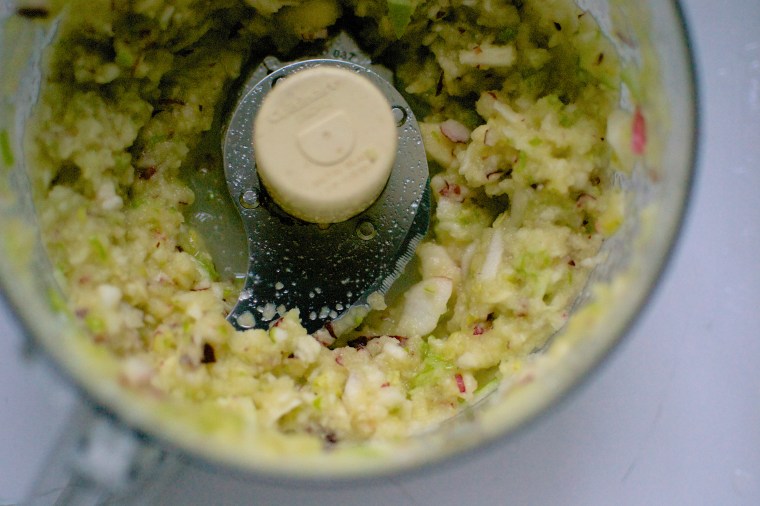
I created these quick gluten-free carrot and apple muffins by placing chunks of carrots and apples in the bottom of the high-speed blender and slowly processing them until they were finely shredded. It took 15 seconds! SECONDS! And you save your fingers! This step could also be done in a food processor, or with a grater.  But it won’t take 15 seconds….maybe 1 minute more. Not bad at all.

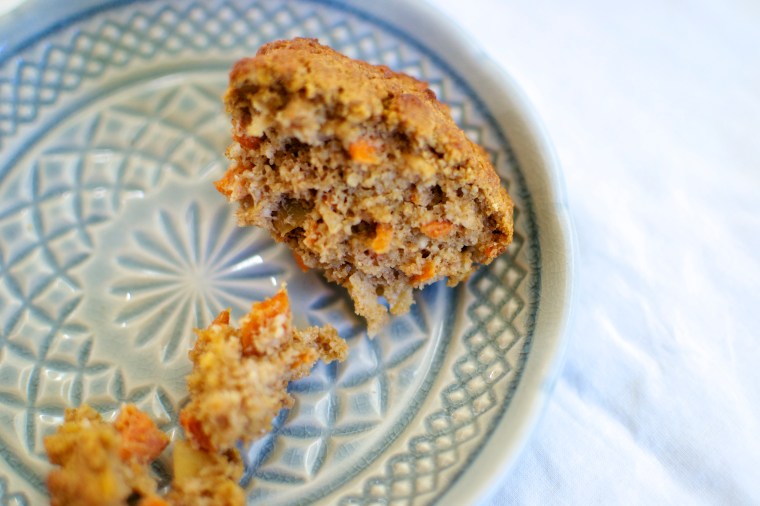
The resulting muffins are moist and delicate. They are perfect for breakfast. You could even top them with a cream cheese frosting and serve them as cupcakes for dessert. I will definitely be turning this recipe into a cake soon. Especially since I can cut down the prep time with my blender!

Gluten Free Carrot-Apple Muffins / Big Eats Tiny Kitchen

Needless to say, although I thought that these high-speed blenders were a bit over the top, I’m not complaining that this beauty is now sitting on my counter waiting for me to make my next magical concoction.

Gluten Free Carrot-Apple Muffins

  • Servings: 9
  • Difficulty: Medium
  • Print

Ingredients

  • 2 medium carrots, cut into 1/2-inch pieces
  • 2 medium apples, cored and cut into eighths
  • 2 eggs, room temperature
  • 1/2 cup maple syrup
  • 2 tablespoons coconut oil (or butter), melted
  • 1/3 cup greek yogurt
  • 1 teaspoon vanilla
  • 1 cup oat flour (from ground gluten-free rolled oats)
  • 1/2 cup almond flour
  • 1 teaspoon baking soda
  • 1/4 teaspoon salt
  • 1 teaspoon ground cinnamon
  • 1/2 teaspoon ground ginger
  • 1/4 teaspoon ground nutmeg
  • 1/3 cup walnut pieces

Instruction

  1. Preheat oven to 350F. Place muffin liners in 9 cups of a muffin tin. Set aside.
  2. Place carrots and apples in the bowl of a food processor or high-speed blender. Process on low until carrot and apple are diced into fine pieces. Add eggs, maple syrup, coconut oil, greek yogurt, and vanilla to food processor or blender. Process or pulse until everything is well mixed.
  3. Place all dry ingredients (except walnuts) in a separate large bowl and whisk together.  Pour wet ingredients into dry ingredients in the large bowl. Stir all together until just mixed and no dry ingredients remain. Stir in walnuts.
  4. Spoon about 1/4-cup portions into each muffin tin liner. Bake for 30 to 40 minutes at 350F, or until a toothpick comes out clean when stuck into the center of a muffin. Allow to cool on a wire rack for 10 minutes. Store in a sealed container in the refrigerator for 3 days. May be frozen for up to 3 months.

Note – Recipe adapted from Edible Perspectives.

Cranberry, Ginger, and Maple Granola (Gluten Free)

Cranberry, Ginger, and Maple Granola (Gluten Free) / Big Eats Tiny Kitchen

Granola is where it’s at people! I’m in deep smit with this stuff…. but first let me tell you about my week!

My life was relaxing and simple this past week. I spent four gloriously relaxing days in Boothbay Harbor, Maine with friends in a seaside house that my amazing friend Lisa rented. It’s her favorite happy place and I’m eternally grateful that she shared the experience.

photo 4

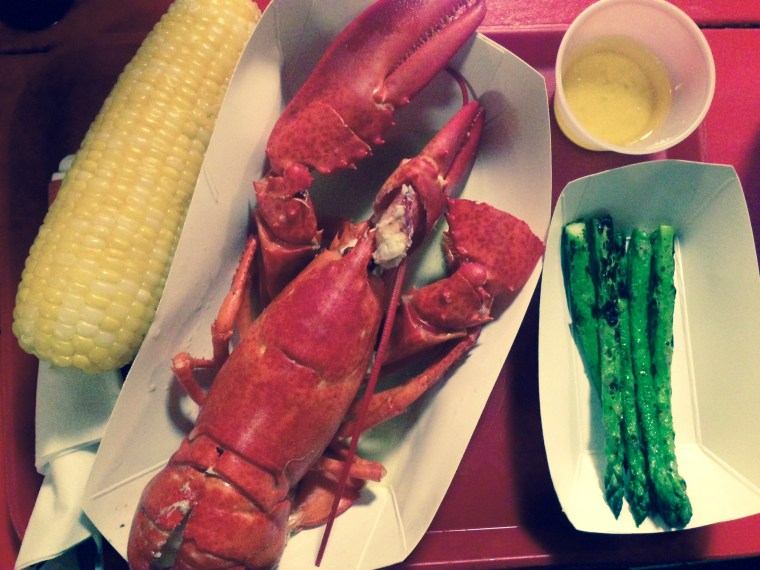
I would wake up to a crisp breeze and the smell of the ocean. I would meander downstairs to the side room where light poured in through the million windows that faced the ocean and side yard.  I relaxed with fresh coffee, cool air, and great company. Breakfast consisted of greek yogurt, fresh fruit, and a friend’s homemade granola. This was perfectly light and fresh and served as the perfect fuel for each day. Then we would begin our days with long and beautiful walks along the seaside, over the ocean-worn rocks, and through forested trails. We would end the days sitting on a seaside dock with cool breeze, fresh lobstahs, wine, and plenty of laughter. It was perfect.

photo 1

photo 3

It’s ok to be jealous… I’m jealous of my memories. I want more of it. Four days wasn’t enough!

I was so thankful that my friend Susan brought her granola along to share! Everyone needs a great granola recipe in their pocket. It’s the perfect topping for yogurt and also a great portable snack to bring along hikes or…. to Maine! Never leave home without it. It should on the top of a list of the 10 essentials to bring on a trip….right up there with your compass. Am I right?

Cranberry, Ginger, and Maple Granola (Gluten Free) / Big Eats Tiny Kitchen

I decided to share my person granola recipe that I have tweaked and twisted around through the years. I really like adding as many goodies in my granola as possible.  From batch to batch, they taste different depending on what I have on hand in my cupboards.  This recipe is an adaptation of many many many recipes that I have used over the years. The main twist is that I use a trick from the Smitten Kitchen Cookbook, where an egg white is used to retain large clusters in the granola. The protein in the egg white are a great binding agent and cut down on the amount of oil needed.

Also, I like to kick up the nuts and seeds ratio and lower the amount of sweetener. Nuts and seeds increase the protein content of the granola which helps keep you satiated and controls blood sugar spikes. This recipe also only has 1/2 cup of sweetener.  I prefer to use maple syrup as the sweetener because it adds a great warming aroma and flavor to the granola, while being a 100%-natural sweetener.  You could also use honey or coconut palm sugar.

DSC_0056

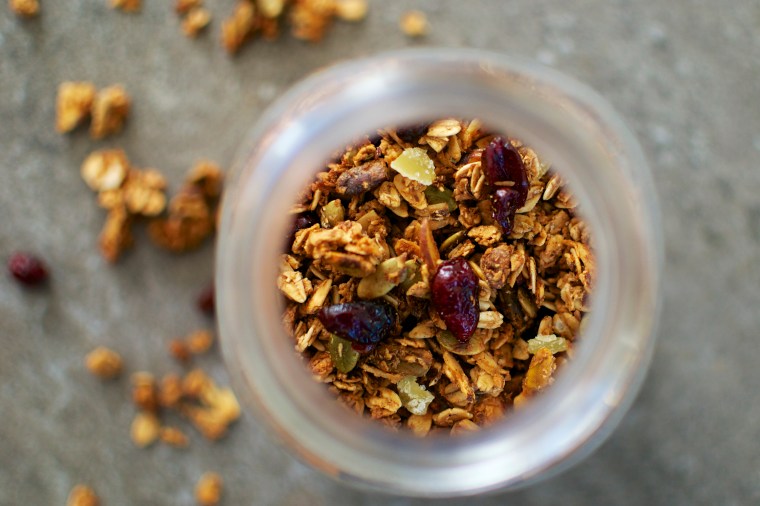
And let’s NOT forget about the spices! Cinnamon, nutmeg, ground ginger and crystallized ginger are great additions, providing a warm punch of autumnal love to this healthy granola.  I added a handful of dried cranberries to the end mixture for great tart/sweet combo.  Dried cherries and/or dried apple chunks would also be great additions.

Cranberry, Ginger, and Maple Granola (Gluten Free) / Big Eats Tiny Kitchen

I love this granola in fist fulls or sprinkled on top of greek yogurt with fresh fruit or applesauce. I have also eaten it as homemade cereal.  It’s also an easy and quick dessert option sprinkled on baked fruit.
Cranberry, Ginger, and Maple Granola (Gluten Free)

  • Difficulty: Easy
  • Print

Ingredients

  • 3 cups gluten free rolled oats
  • 2 cups assorted nuts and seeds (I like a variation/mixture of different nuts and seeds such as pistachios, pumpkin seeds, slivered almonds, sunflower seeds, sesame seeds, and walnuts)
  • 1/2 cup ground flax seed
  • 1/2 cup unsweetened shredded coconut
  • 1 teaspoon ground cinnamon
  • 1/2 teaspoon ground ginger
  • 1/4 teaspoon salt
  • 1/2 cup maple syrup
  • 2 tablespoon coconut oil
  • 1 egg white
  • 1/2 cup dried cranberries
  • 1/4 cup diced candied ginger

Instructions

  1. Preheat oven to 275 F. Spray a rimmed baking sheet with nonstick spray. Set aside.
  2. Place all ingredients except egg white, cranberries, and candied ginger in a large bowl and mix well. Whisk the egg white in a separate small bowl until lightly frothy. Pour over granola and mix well.
  3. Spread out the granola mixture evenly onto prepared baking sheet. Place on middle rack in oven for 20 minutes.
  4. Remove from oven, lightly mix and try to not break up too many of the yummy granola clusters. Return to oven and bake an additional 20 minutes. Remove from oven and allow to cool completely.  Mix in cranberries and candied ginger. Place in an airtight container and keep tasty for up to 3 weeks!