Green Chili Chicken and Kobucha Squash Enchilada Casserole

Green Chili Chicken and Kobucha Squash Enchiladas (Gluten Free) // Big Eats Tiny Kitchen

Are you feeling adventurous? Of course you are. It’s after Christmas and we are revving up for the New Year. It is time for those New Year’s resolutions…such as trying new veggies!!!!

Drum roll please……….First up is Kobucha Squash!

Green Chili Chicken and Kobucha Squash Enchiladas (Gluten Free) // Big Eats Tiny Kitchen

This amazing and delightful winter squash looks like a green pumpkin and is actually referred to as a Japanese pumpkin. It is often used in Thai curry and is quite flavorful. In fact, I think it tastes better than butternut squash and WAY better than regular orange pumpkin.

*GASP* Yah you heard me.  I’ve just found the better pumpkin replacement. Get on it, friends.  It even packs a lower calorie count than butternut squash with only 40 calories in a single cup compared to 60 calories per cup for butternut squash. It also has half the carbs of butternut squash (7 grams versus 16 grams). This puppy is WAY healthier than sweet potatoes too!

Once you cut into this green pumpkin, you are greeted with bright orange flesh which provides a fabulous dose of beta-carotene and vitamin A! The Kobucha contains plenty of other awesome attributes such as being loaded with fiber, iron, vitamin C, and some B vitamins. Can I get an AMEN!

Green Chili Chicken and Kobucha Squash Enchiladas (Gluten Free) // Big Eats Tiny Kitchen

Green Chili Chicken and Kobucha Squash Enchiladas (Gluten Free) // Big Eats Tiny Kitchen

Well-stocked grocery stores or farmers markets will have Kobucha Squash. If you are unable to locate this awesome gem of a veg, you can substitute the Kobucha Squash for Butternut Squash.  If you don’t have butternut squash, you also could use sweet potatoes.

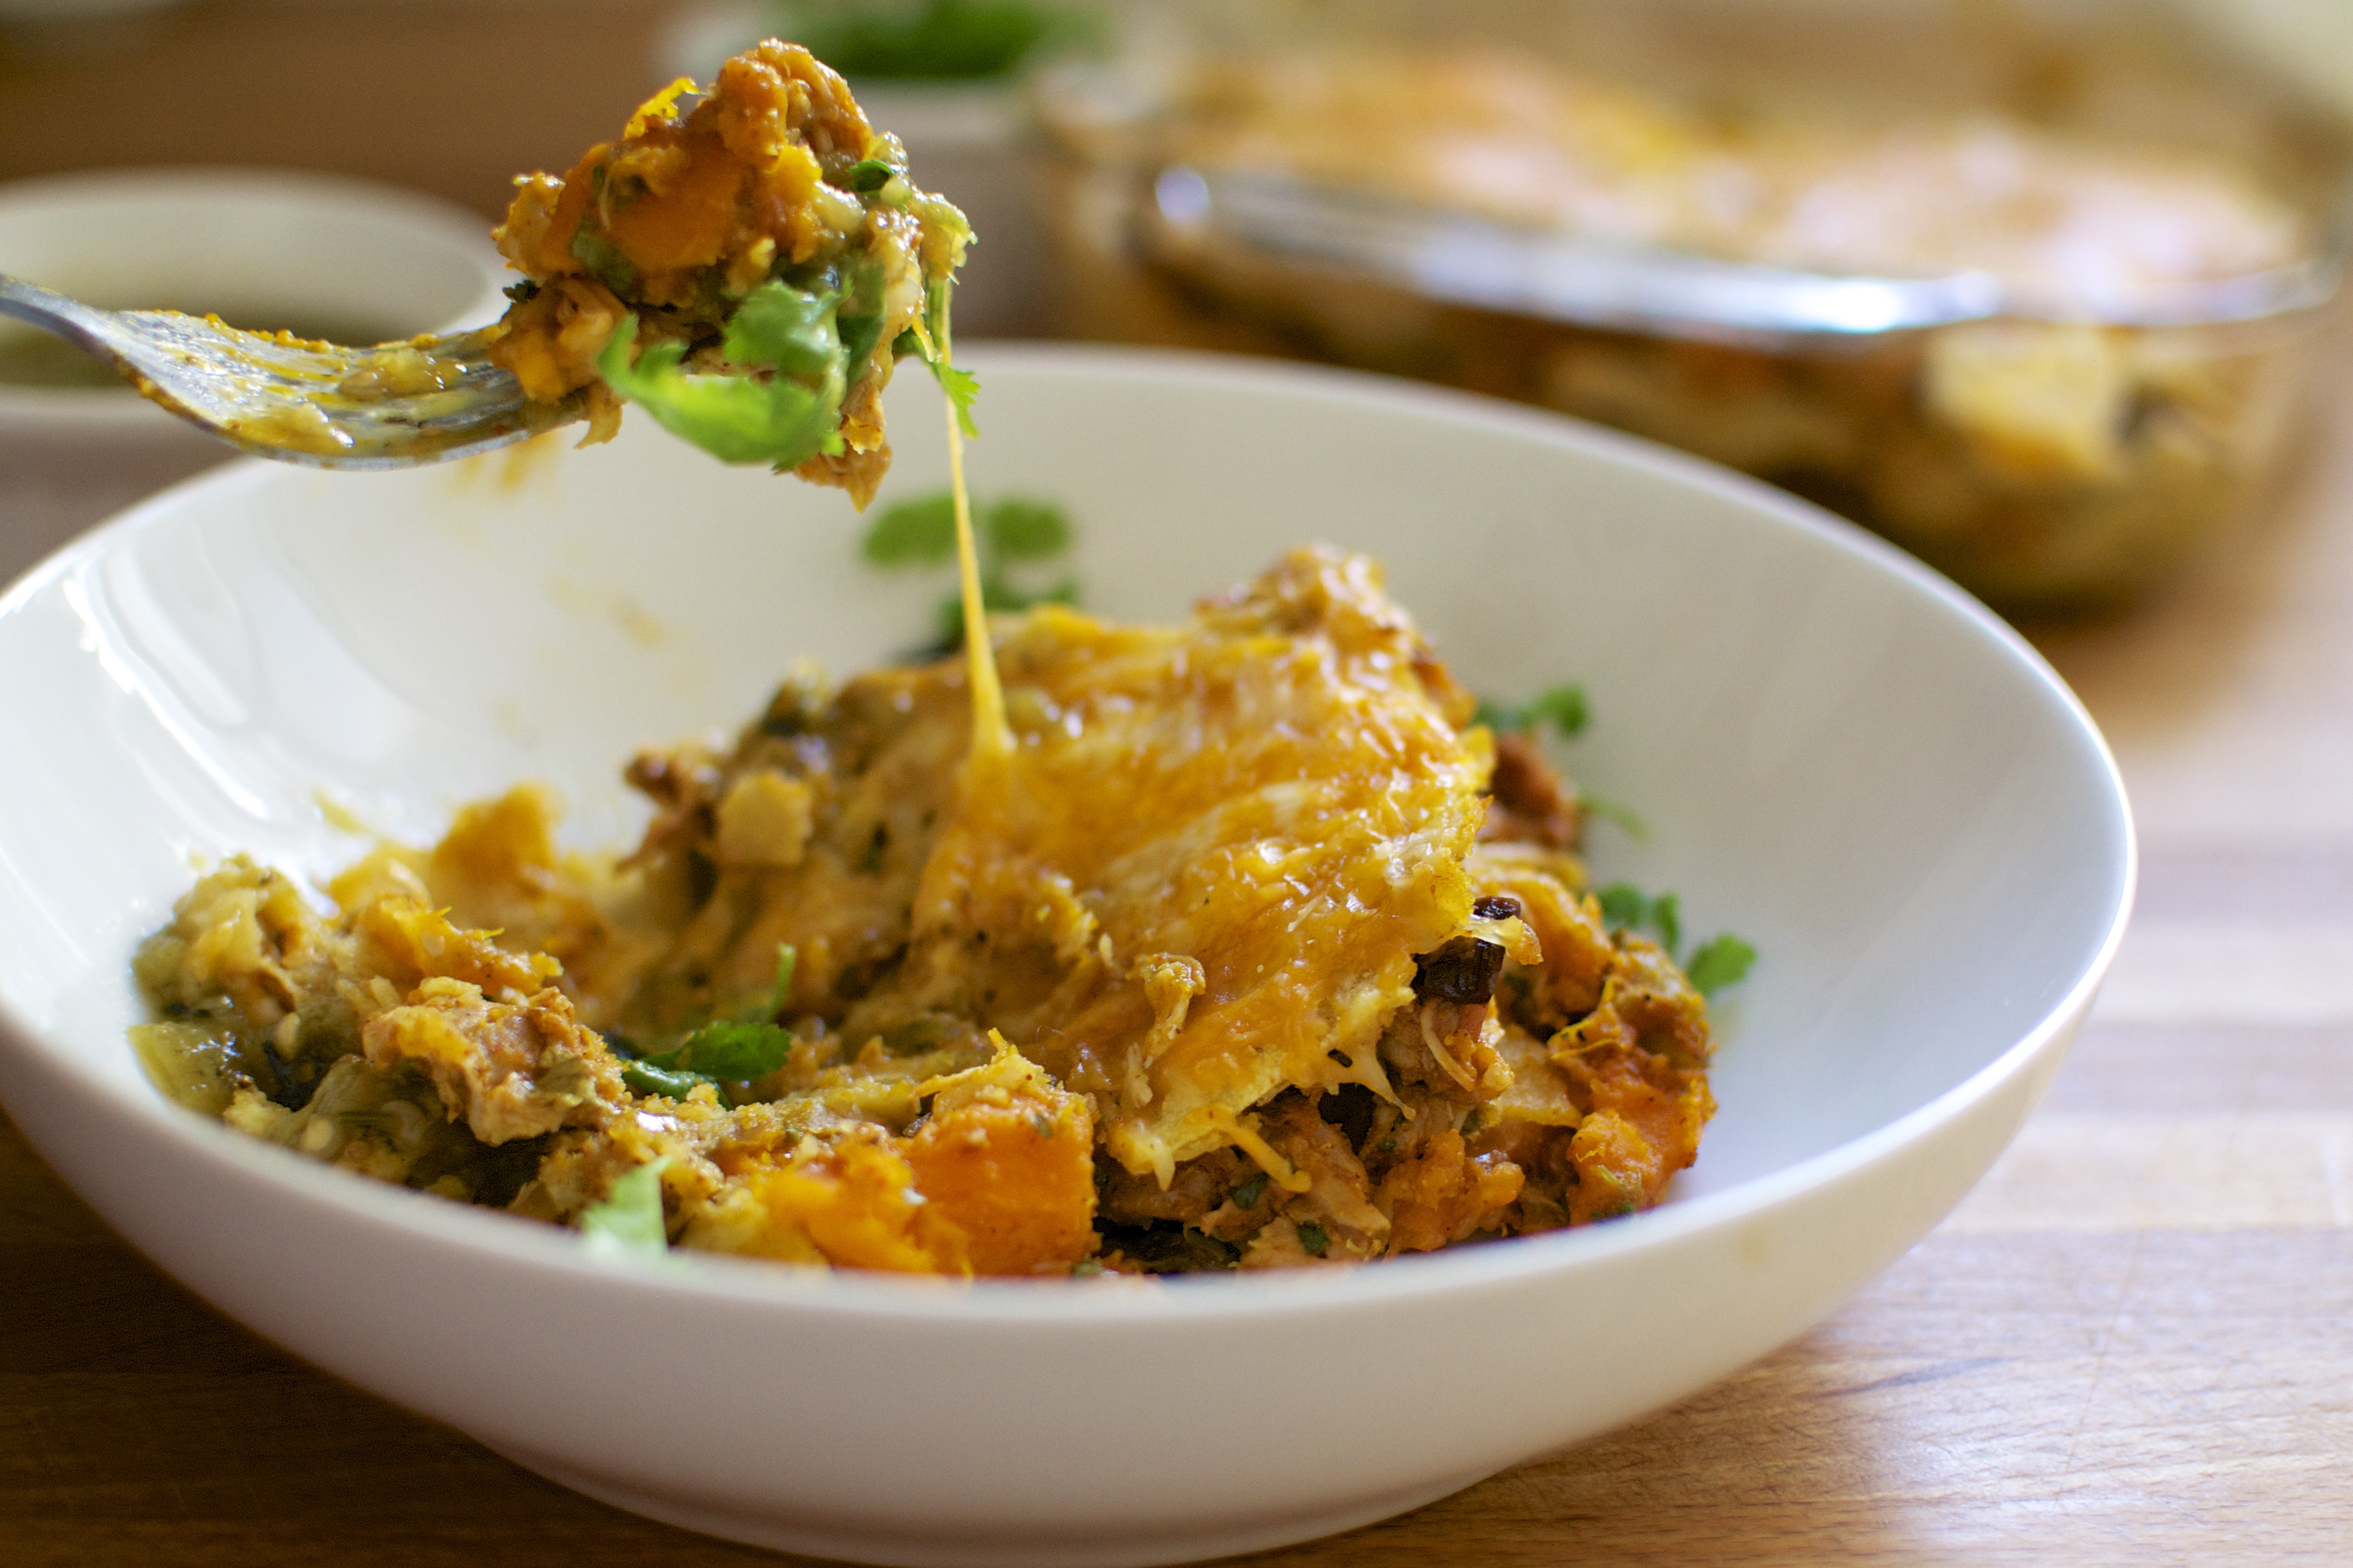
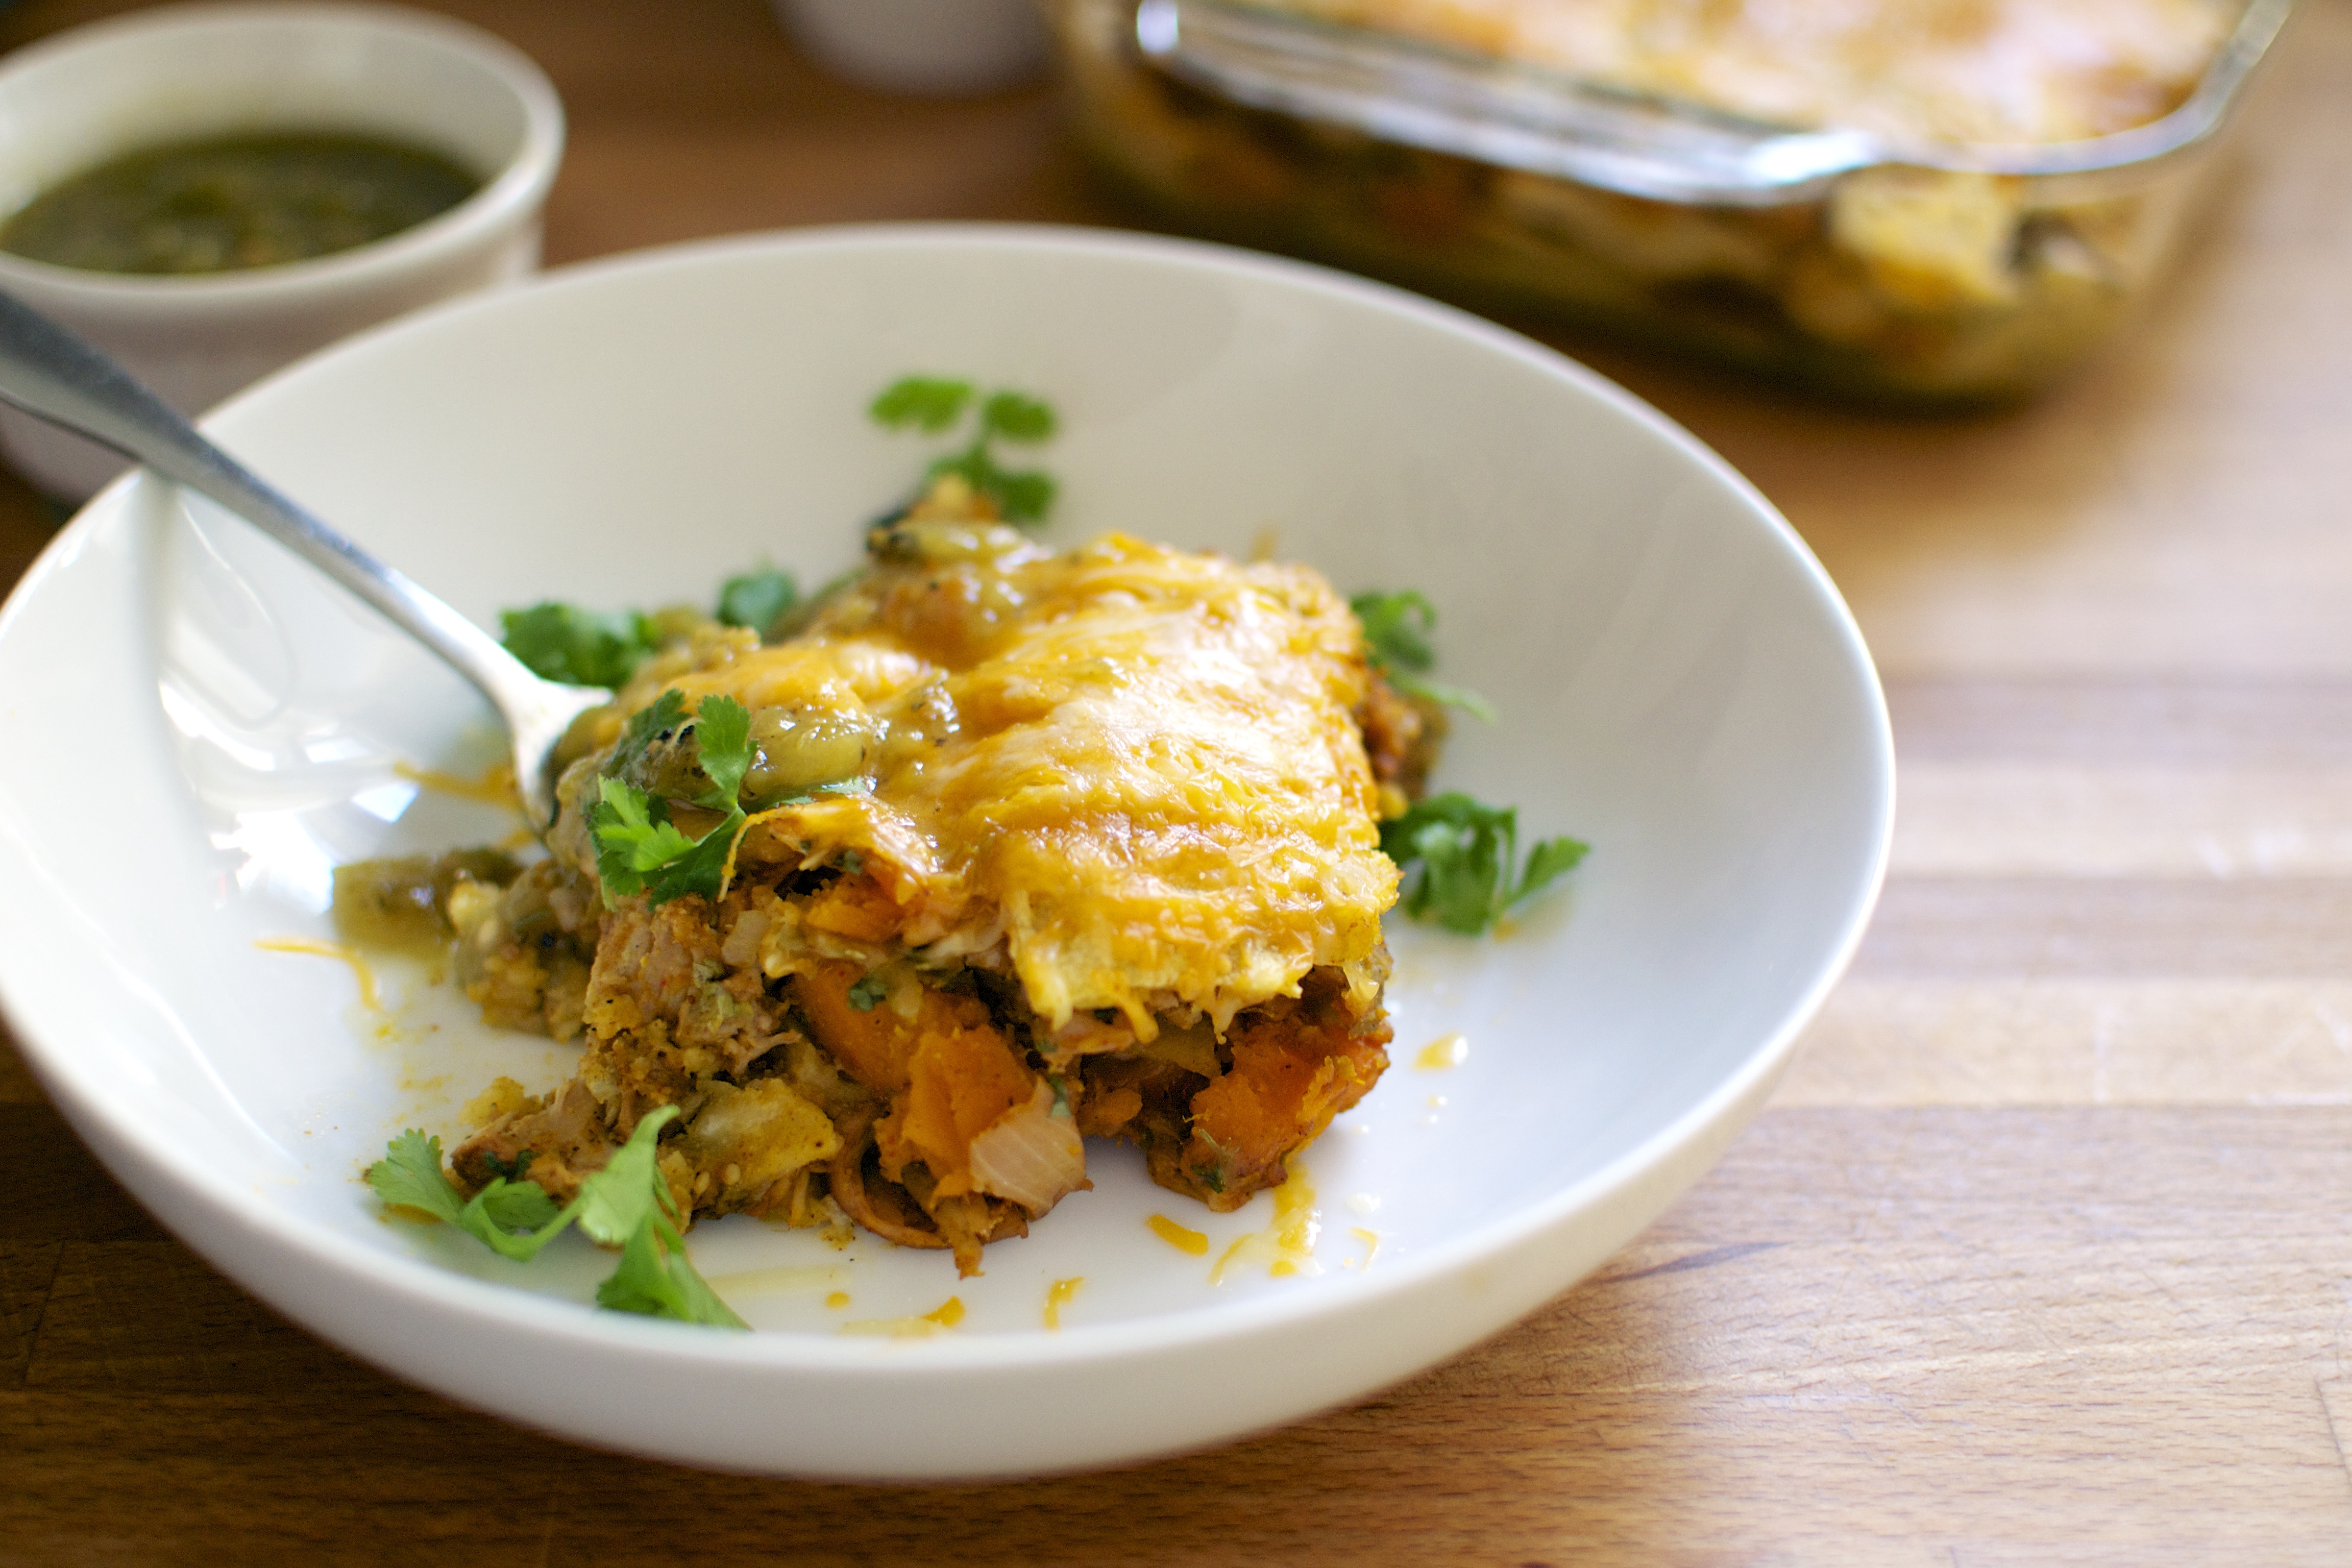
Now lets talk about this Green Chili Chicken and Kobucha Squash Enchilada Casserole. They are literally the best enchiladas I have EVER made. Literally. The roasted Kobucha Squash help make these comforting and creamy without being doused in tons of cheese. Also, I like making this dish more lasagna style with layers of tortillas, filling, cheese, and sauce instead of nice and neat rolled up enchiladas. To me, it is much easier and just as super tasty.
Green Chili Chicken and Kobucha Squash Enchiladas (Gluten Free) // Big Eats Tiny Kitchen

These enchiladas do take some prep time.  However, most of the steps can be done ahead of time. You can marinate the chicken up to one day ahead of time. The Kobucha Squash can be carved and cubed several days in advance, placed in a container, and refrigerated. (Note – I recommend microwaving the Kobucha Squash for 2 minutes to make it easier to carve up.) You can even roast the chicken, shred it, and refrigerate it in advance too. To be honest, this whole casserole can be assembled up to one day in advance and cooked the next day, making it the perfect dish for entertaining or for an easy weeknight meal.

I hope you enjoy this amazingly flavorful, delicious, and nutritious dish. And give yourself a big pat on the back for branching out and trying a new veggie!

Green Chili Chicken and Kobacha Squash Enchiladas (Gluten Free)

  • Servings: 6
  • Difficulty: Easy
  • Print

Ingredients

  • 1.5 lbs chicken thighs or chicken breast (preferably organic)
  • 1 1/2 teaspoons ground coriander
  • 1 1/2 teaspoons ground cumin
  • 1 1/2 teaspoons chili powder
  • 1 1/2 teaspoons salt
  • juice of 1 lime (about 4 tablespoons)
  • 3 cups cubed Kobucha squash (butternut squash or sweet potatoes could be substituted)
  • 1 large yellow onion, diced
  • 1 tablespoon olive oil
  • 1 bunch of cilantro
  • 4 oz canned diced green chilis
  • 16 oz gluten-free tomatillo salsa verde
  • 1 cup shredded Mexican cheese blend
  • 8 to 10 gluten-free corn tortillas, cut into quarter sections

Instructions

  1. Preheat oven to 400 degrees. Spray two rimmed baking sheets with nonstick spray and set aside.
  2. Place chicken thighs in a medium bowl. Combine coriander, cumin, chile powder, and salt in a small bowl. Add half of spice mixture to chicken and reserve the other half.  Add half of lime juice to chicken. Toss chicken with spices and allow to marinate for at least 15 minutes or refrigerate for up to 8 hours.
  3. Place cubed kobucha squash and diced onion in a separate large bowl and drizzle with olive oil. Stir in remaining spice mixture. Place cubed winter squash as a single layer on rimmed baking sheet and bake in preheated oven for 15 minutes. Stir vegetables and place back in oven to cook for an additional 25 minutes. At this time, add chicken to a rimmed baking sheet and cook for 25 minutes. Remove both the roasted squash and baked chicken from oven. Turn down the oven to 350 degrees.
  4. Using two forks, shred baked chicken. Place shredded chicken, roasted squash and onions, juice of half a lime, 1/4 cup diced cilantro, canned green chilis, and 1/3 cup salsa verde in a large bowl and stir to combine.
  5. Spray or grease an 8X11 baking dish. Place 1/3 cup salsa verde in bottom of baking dish. place 10 to 12 quarter sections of tortillas in bottom of dish on top of salsa verde in a single layer, slightly overlapping each other.  Spoon out half of shredded chicken mixture and smooth over the tortillas. Sprinkle 1/3 cup of salsa verde and 1/2 cup cheese on top. Layer with 10 more tortilla wedges. Spread out remaining chicken filling on top of tortilla wedges. Top with remaining tortilla wedges. Sprinkle with 1/2 cup shredded cheese and remaining salsa verde.
  6. Place baking dish into preheated oven and bake for 20 minutes or until cheese is melted and bubbly. Remove from oven and allow to cool for 5 minutes. Serve with extra salsa verde, chopped cilantro, and greek yogurt.

Notes:

  • For dairy free version, do not use cheese.
  • For vegetarian version, replace chicken with 2 cups cooked black beans.
  • These enchiladas can be prepared up to 1 day ahead of time through step 5. Cover and refrigerate. When ready to cook, remove from refrigerator for at least 30 minutes before placing in middle rack of preheated oven. Cook for at least 30 minutes.

Broccoli, Apple, and Shaved Brussels Sprout Salad with Tahini-Maple Dressing

Broccoli, Apple, and Brussels Sprout Salad with Tahini-Maple Dressing // Big Eats Tiny Kitchen

Welcome the season of “How Many Parties, Booze, Snacks, Sweets, Treats, and Good Times Can I Shove Into My Face and Schedule”.

But there is one big problem with this season.

My stomach. She’s such a fun killer.

Broccoli, Apple, and Brussels Sprout Salad with Tahini-Maple Dressing // Big Eats Tiny Kitchen

Broccoli, Apple, and Brussels Sprout Salad with Tahini-Maple Dressing // Big Eats Tiny Kitchen

Given my cranky belly and gluten intolerance, I often go to holiday parties and find that there is hardly anything that I can eat without severe consequences. Lately, my trick for getting through party after party is to bring a delicious, healthy, and festive dish that I can eat and enjoy. By doing this I hopefully won’t be the one over in the corner munching on a pound of carrots and staring like a voracious dog at others eating seven layer bars, molasses cookies, sausage balls, and chocolate covered pretzels…. “No no no, I’m good. I LOOOOVE carrots. I hate other delicious things. No go on. Please keep eating. Please, I’m fine. I’m FIIIINE.”

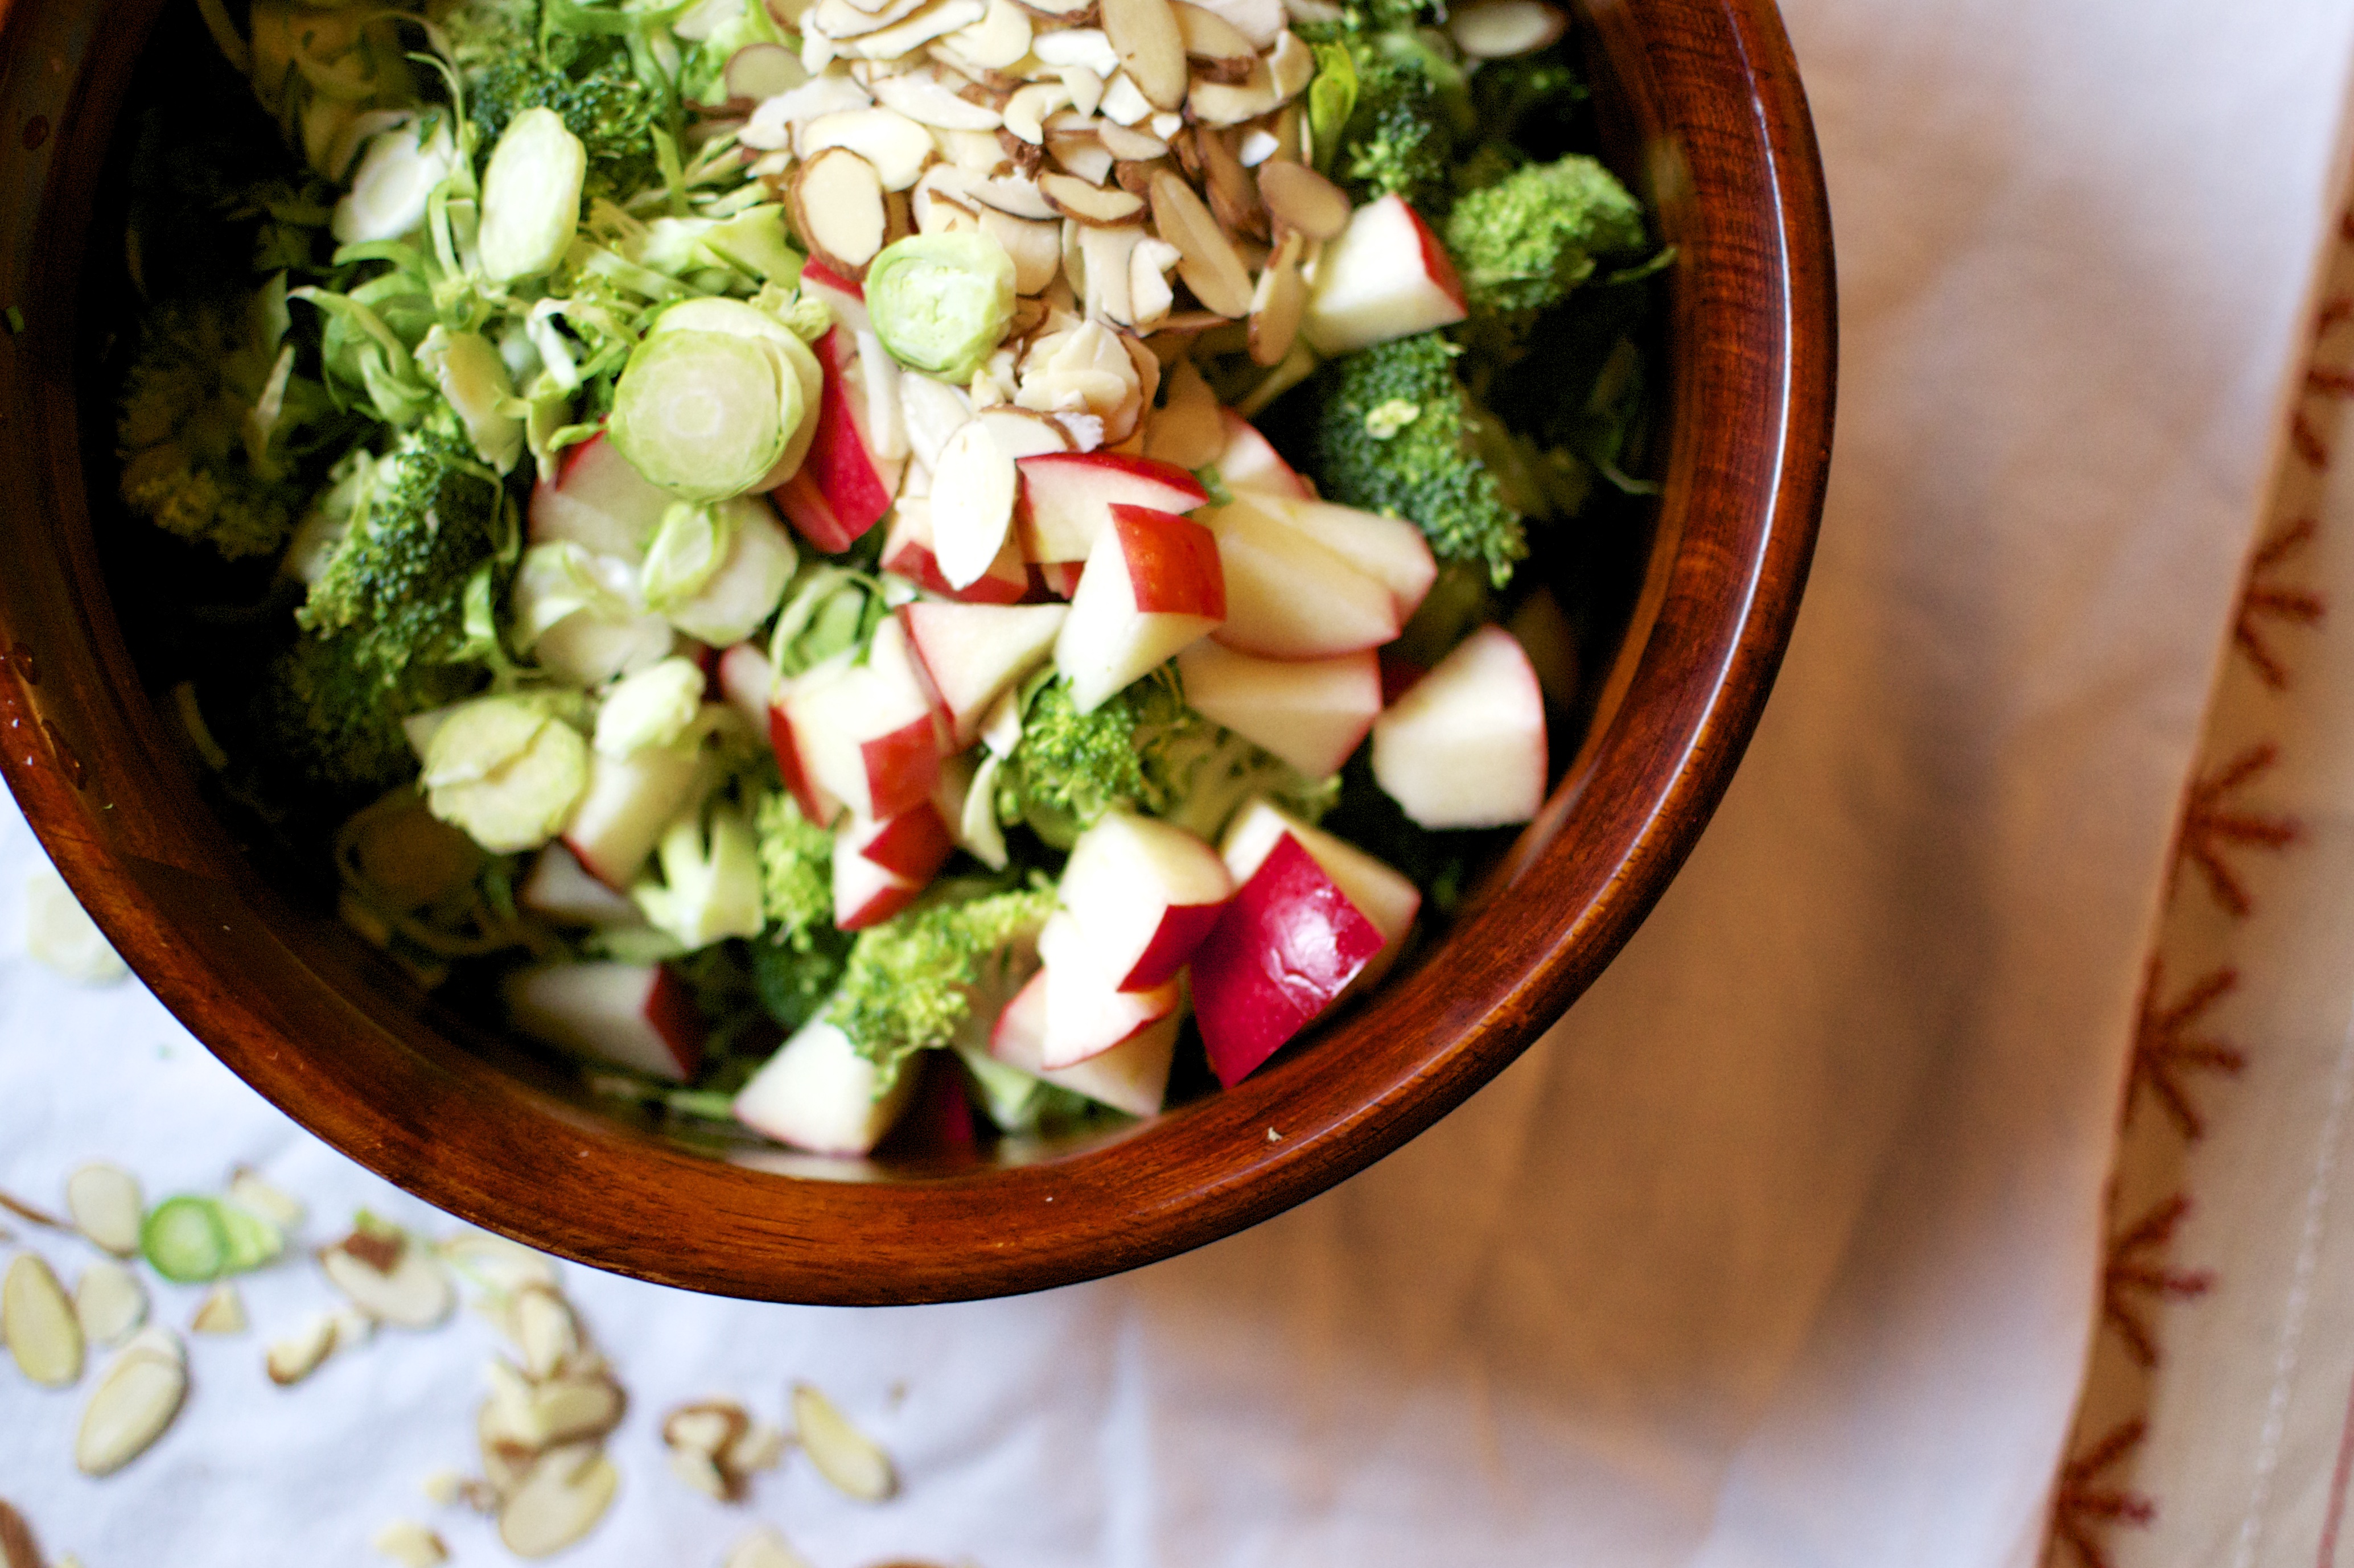
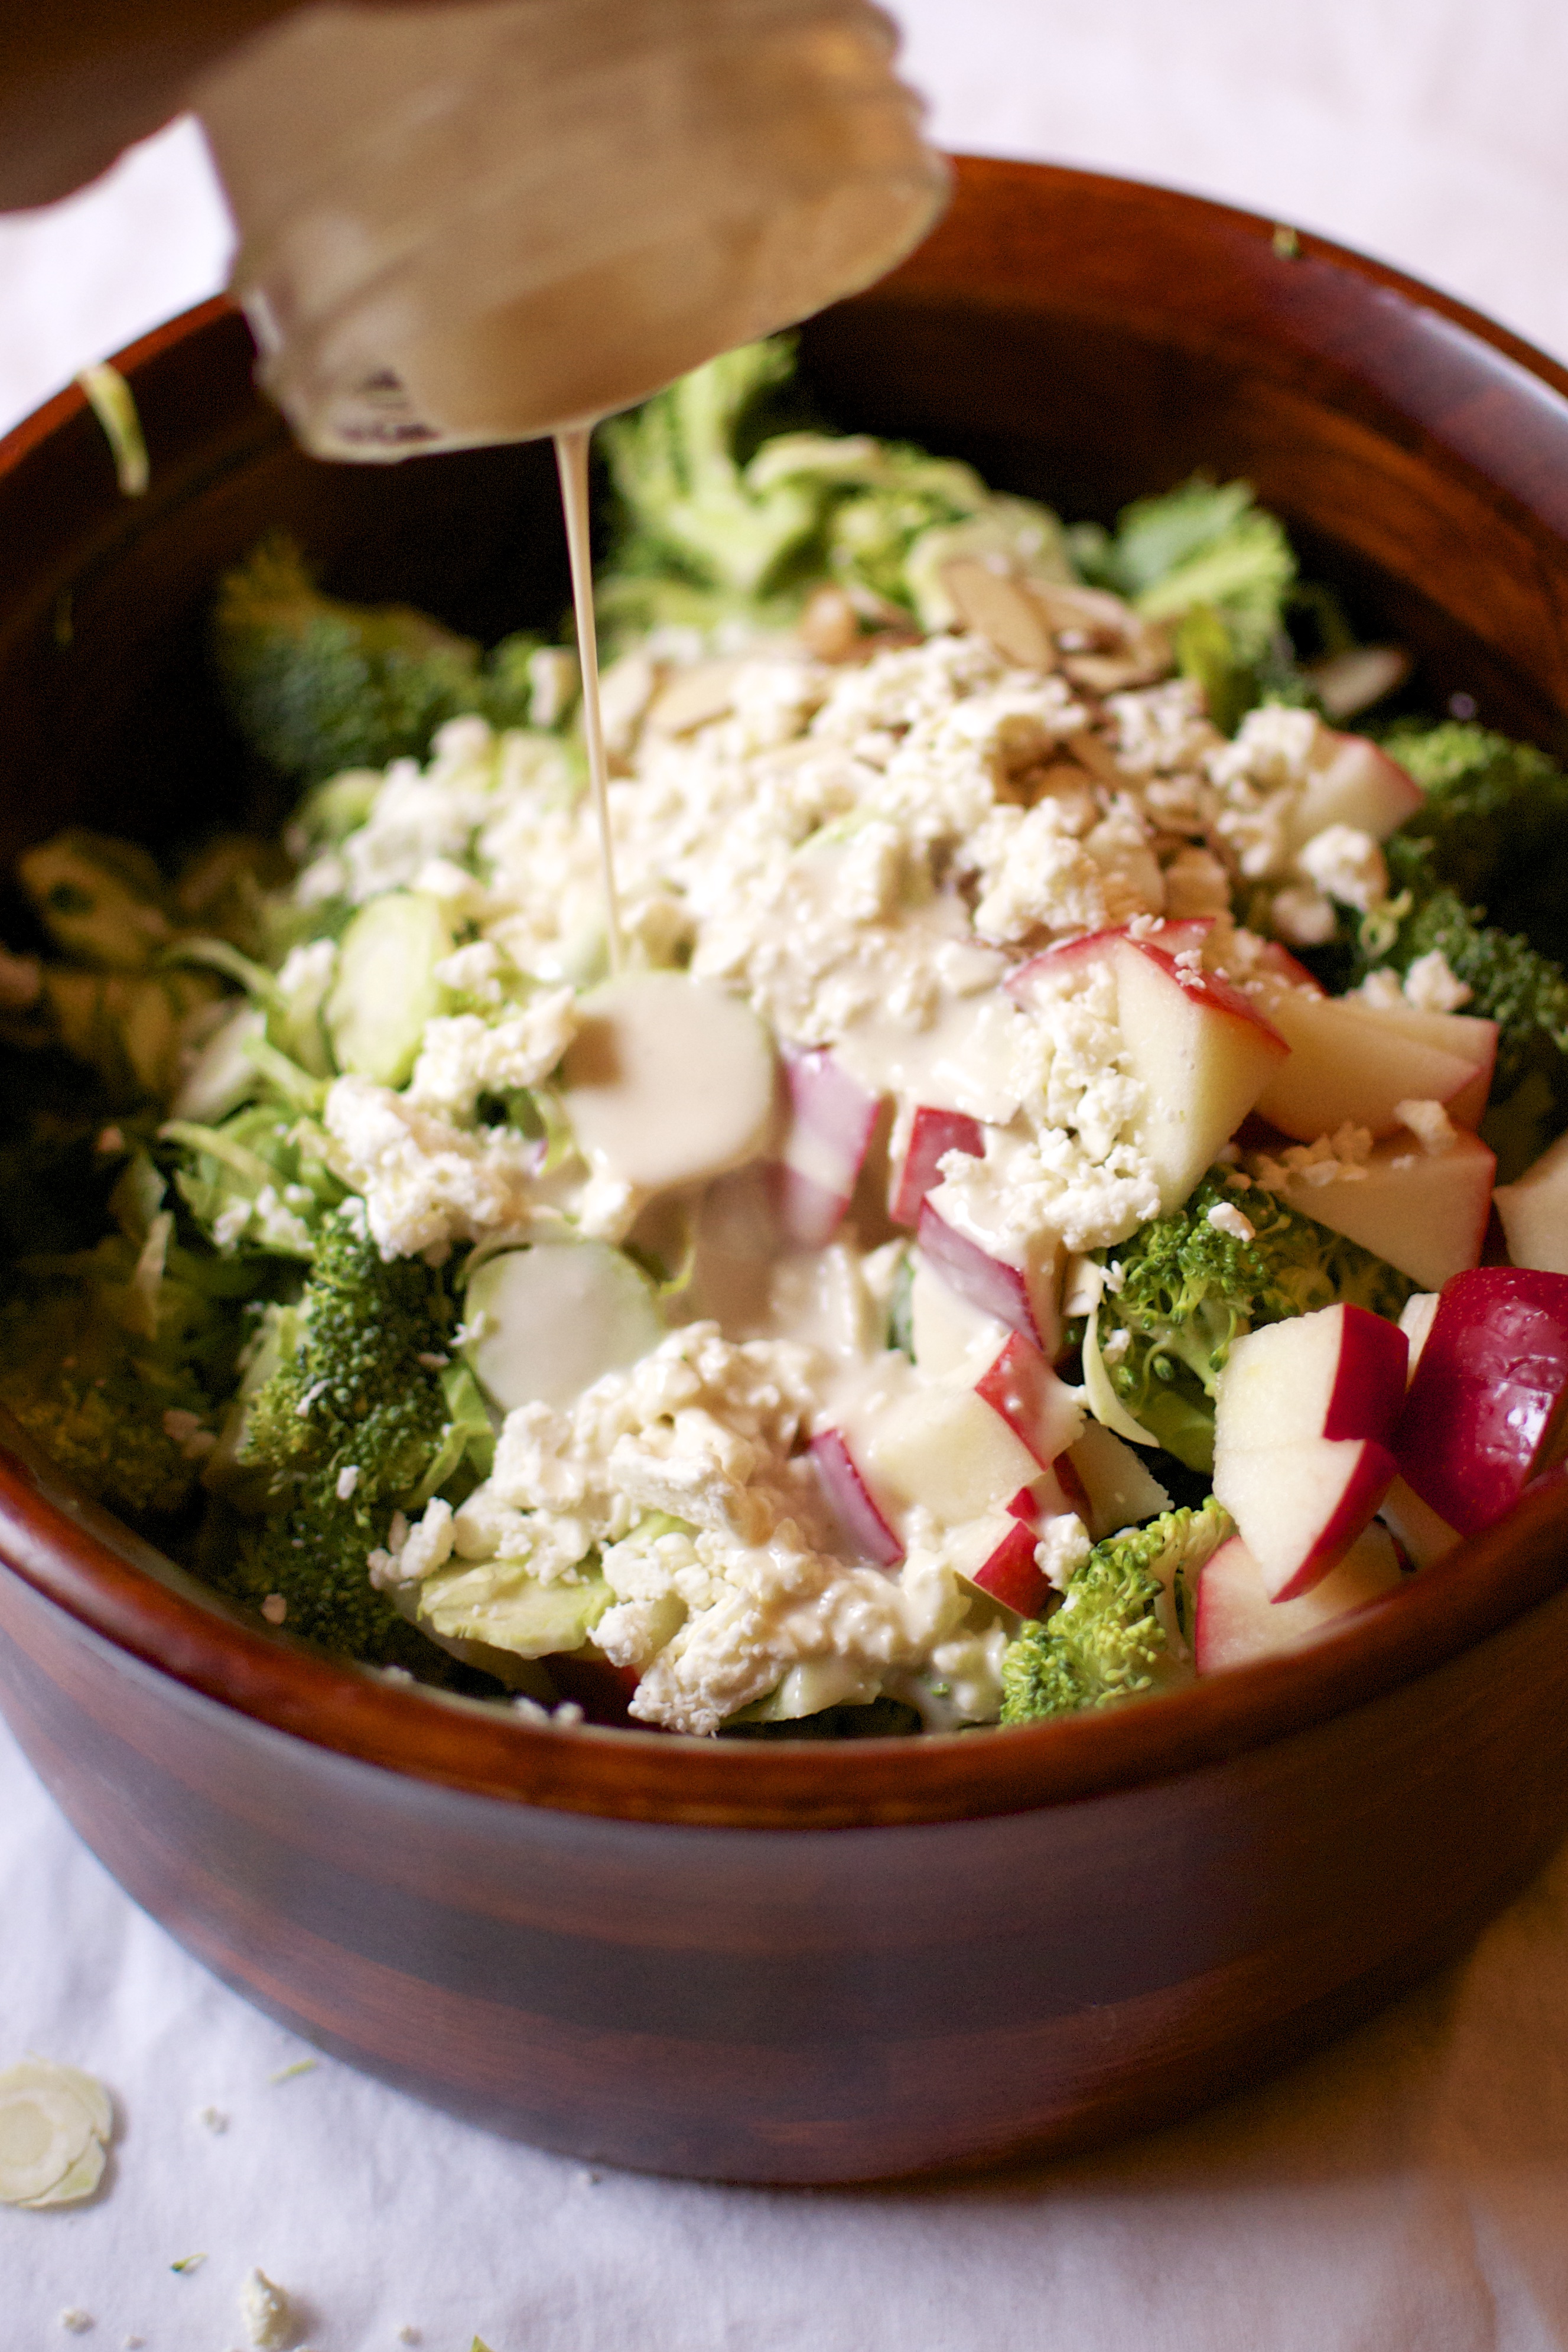
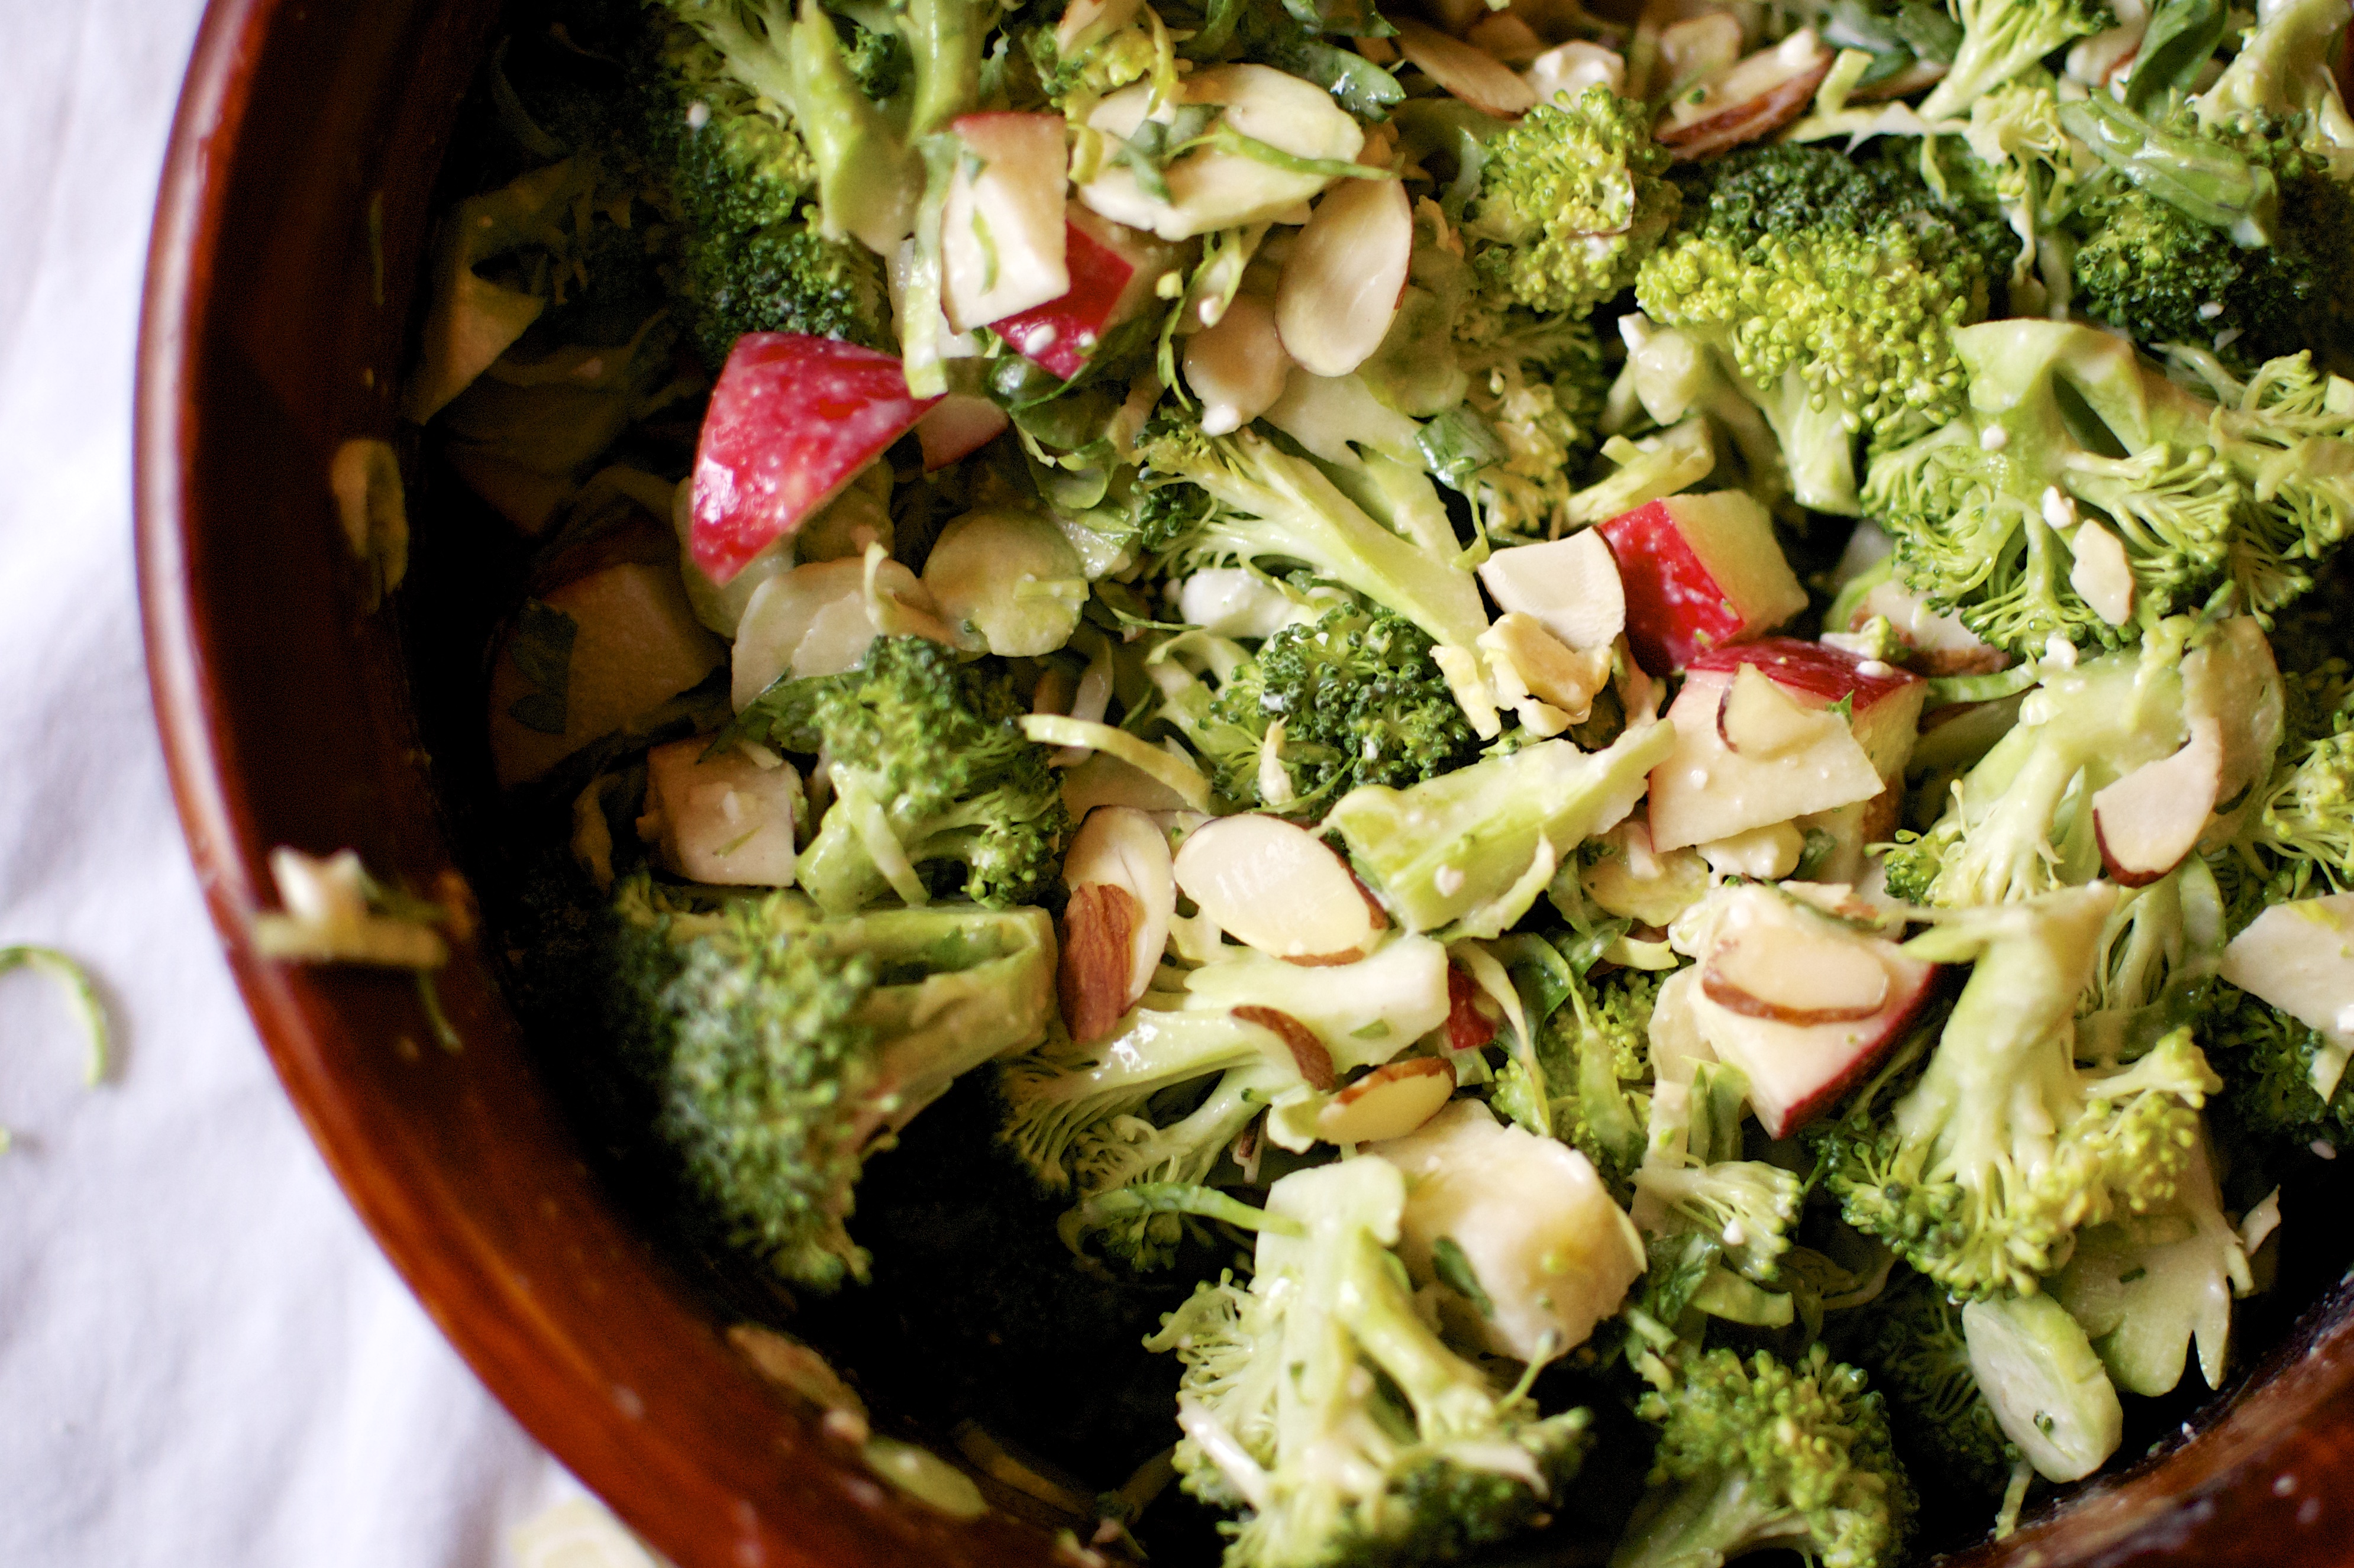
This Broccoli, Apple, and Shaved Brussels Sprout Salad with Tahini-Maple Dressing has been my go to Christmas salad this season.  It’s incredibly delicious with great crunch from the broccoli and brussels sprouts and crisp apple. Plus the savory tahini-maple dressing will have you wanting to lick the spoon! I have taken this salad to four different parties and have had great responses. It also holds up very well as leftovers for lunch the next day.

Broccoli, Apple, and Brussels Sprout Salad with Tahini-Maple Dressing // Big Eats Tiny Kitchen

Oh and look how festive this salad looks! Greed, Red, and White! Sometimes I even add dried cranberries for more red pop!

So Happy Holidays to you and yours!  Make a plan during this holiday season and don’t get overwhelmed!  You can do it!

Broccoli, Apple, and Shaved Brussels Sprout Salad with Tahini-Maple Dressing

  • Servings: 6
  • Difficulty: Easy
  • Print

Ingredients

  • 2 broccoli crowns, florets only, chopped
  • 1/2 lb brussels sprouts (about 2 big handfuls), stems removed and discolored leaves discarded
  • 1 large honey crisp apple, cored and chopped
  • 1/4 cup crumbled feta (do not include for dairy free option)
  • 1/4 cup sliced almonds

Tahini-Maple Dressing

  • 1/3 cup tahini
  • 2 tablespoons lemon juice
  • 1 tablespoon maple syrup
  • 2 tablespoons water

Instructions

  1. Chop the broccoli into small bite size pieces and place in a large bowl. Use a sharp chef’s knife or mandolin slicer to slice the brussels sprouts as thin as possible. Alternately, a food processor’s slicing disk could be used. Add the brussels sprouts to the large bowl with the broccoli.
  2. In a separate small jar or bowl, whisk the tahini, lemon juice, and maple syrup together to form a paste. Add water one tablespoon at a time until the mixture is creamy and pourable like vinaigrette (not too watery). Pour the dressing over the broccoli and brussels sprouts and toss to combine.  (The salad can be made a few hour ahead of time to this point and refrigerated).
  3. Add the chopped apple, feta, and sliced almonds to the salad and toss lightly.  Serve immediately.

Notes

  • For paleo friendly, vegan friendly, and dairy free, do not include the feta cheese.
  • If you don’t have tahini, almond butter could be used.
  • For added protein and a complete meal, add some cooked quinoa or shredded chicken.

Smoky Brussels Sprout and Sweet Potato Breakfast Skillet

Brussels Sprouts and Sweet Potato Breakfast Skillet // Big Eats Tiny Kitchen

Breakfast is a hallowed time in our home. Not brunch…breakfast. I primarily blame my husband for this tradition. He isn’t one for typical traditions but when it comes to breakfast on the weekend, it is sacred, it has to be from a skillet, and it happens before 9AM.  He was the crazy friend in college that would wake up one too many friends knocking on their door at 7 AM saying “it’s BREAKFAST TIME”.

AT SEVEN AM…

in COLLEGE. uuuuuh.

God bless him.

But now that we are in our mid-thirties, 7 AM is not that early to me anymore. My hubby still wakes up bright-eyed and bushy-tailed (ugh) on Saturday or Sunday morning and says, “It’s BREAKFAST TIME”.  Usually there is a dance that goes with this statement as he pulls out his most prized flea-market find, an old Griswold cast iron skillet that he lugged back from MARFA, TEXAS on a PLANE.

God bless him.

Brussels Sprouts and Sweet Potato Breakfast Skillet // Big Eats Tiny Kitchen

Brussels Sprouts and Sweet Potato Breakfast Skillet // Big Eats Tiny Kitchen

Sunday mornings in our home consist of putting on a record, firing up the cast iron skillet, and brewing a pot of coffee. Currently, I have Sturgill Simpson on repeat and this Brussels Sprout and Sweet Potato Breakfast Skillet heating up. This breakfast skillet is similar to a breakfast hash that I get at my favorite breakfast spot in KC called Urban Table. There is something about getting breakfast served to you in a skillet, am I right?

Brussels Sprouts and Sweet Potato Breakfast Skillet // Big Eats Tiny Kitchen

I love the flavors of this breakfast with the smokey bacon, seared brussels sprouts, caramelized onions, and sweet potatoes.  I season the whole shabang with a spicy kick from the chipotle powder and smoked paprika, adding to the smokiness of the bacon.

Oh and a few cook’s notes –

1. Be sure to dice your sweet potatoes rather small so that they cook all the way through quickly.

2. If your brussels sprouts are humongous, just quarter them. Basically you want them to be just a bit larger than the sweet potatoes because the brussels sprouts will cook faster than the sweet potatoes. Cooking pieces that are slightly larger will allow them to be done at about the same time.

3. If you are serving this to tiny tots or people with a spice intolerance, I would hold off on the chipotle powder and use chili powder or nothing.  Chipotle powder is quite spicy.

4. To finish the whole thing off, cook the eggs separately to each persons desired consistency.  I love my eggs either poached or sunny side up, but the Breakfast Man likes over-easy eggs.

5. If you don’t have a cast iron skillet, cry yourself to sleep and hope that santa brings you one. But never fear, you can make this in a regular skillet OR you could even roast your veggies (tossed with olive oil) in a 450F preheated oven for 20 minutes, stirring halfway through cooking time.

Brussels Sprouts and Sweet Potato Breakfast Skillet // Big Eats Tiny Kitchen

So throw on some warm socks, brew a pot of coffee, and pull out your skillet. BECAUSE IT IS BREAKFAST TIME!!!!!

Brussels Sprouts and Sweet Potato Breakfast Skillet

  • Servings: 2 to 4
  • Difficulty: Easy/Medium
  • Print

Ingredients

  • 2 to 3 slices of smoky thick cut bacon, sliced
  • 1/2 red onion, sliced thin
  • 1 large sweet potato, peeled and diced into 1/4-inch to 1/2-inch cubes
  • 1 cup of small brussels sprouts, trimmed and halved
  • 1/8 teaspoon chipotle powder (optional)
  • 1/4 teaspoon smoked paprika
  • 2 to 4 large eggs
  • salt and pepper to taste

Instructions

  1. Heat a large cast iron skillet over medium heat.  Add bacon and cook until the fat is rendered and the pieces are just crisp (not burned!). Remove the bacon slices using a slotted spoon and place on a paper-towel lined plate to drain.
  2. Reduce the heat under the skillet, add the sliced, sweet potato cubes, and halved brussels sprouts and stir to coat with the bacon grease. Cook for about 10 to 15 minutes, stirring often, until the sweet potato has softened. Add bacon and spices to the veggie skillet and stir to coat. Turn off heat.
  3. In a separate skillet, poach or fry eggs to desired consistency. Spoon out portions of the brussels sprouts and sweet potatoes onto separate plates and top with eggs.

Cook’s Notes

1. Adapted from my favorite breakfast at Urban Table and How Sweet Eats’ Brussels Sprouts Breakfast Hash.

2. This dish serves 2 GENEROUSLY or 4 smaller portions. If serving a crowd, serve with a fruit salad.

Gluten Free Pumpkin Bread

Gluten Free and Dairy Free Pumpkin Bread // Big Eats Tiny Kitchen

I was an only child until I was almost 11 years old. Then came my brother…and then a sister four years later. And then… four years later my mom asked me “Do you want another brother or another sister?” and my unfortunate response was “Neither”.

But despite my lack of enthusiasm…sixteen years ago today, my youngest sister was born. I was in college.  In the midst of college finals and stress and sleepless nights, I had just gained a new sister. I went home for Christmas break and stayed up all night with my newborn sister, watching 24-hours of Christmas Story over and over and over so that my mom could get some sleep.

And that’s when I fell in love with that little bundle of joy. I was so happy to have her in my life.

She was so tiny, so beautiful, so new.

And so LOUD! Holy crap.That kid could cry!

Newborns.

Yikes. Talk about insta-birth control for a college kid. Ovaries on shutdown mode. Thanks!

Gluten Free and Dairy Free Pumpkin Bread // Big Eats Tiny Kitchen

Gluten Free and Dairy Free Pumpkin Bread // Big Eats Tiny Kitchen

Over the years, watching her grow up has been amazing. She is a talented young girl who is super creative and has the biggest heart. I was always worried that the age difference between the two of us would be hard to stay close. When I moved away 6 years ago, it killed me to know that I wouldn’t be able to go to her sports games or see her get awards or be there for her birthdays. I was missing out on all those little moments.

Gluten Free and Dairy Free Pumpkin Bread // Big Eats Tiny Kitchen

I was really lucky this past weekend because I was able to see her and my other sister and brother for Thanksgiving! I couldn’t get enough.

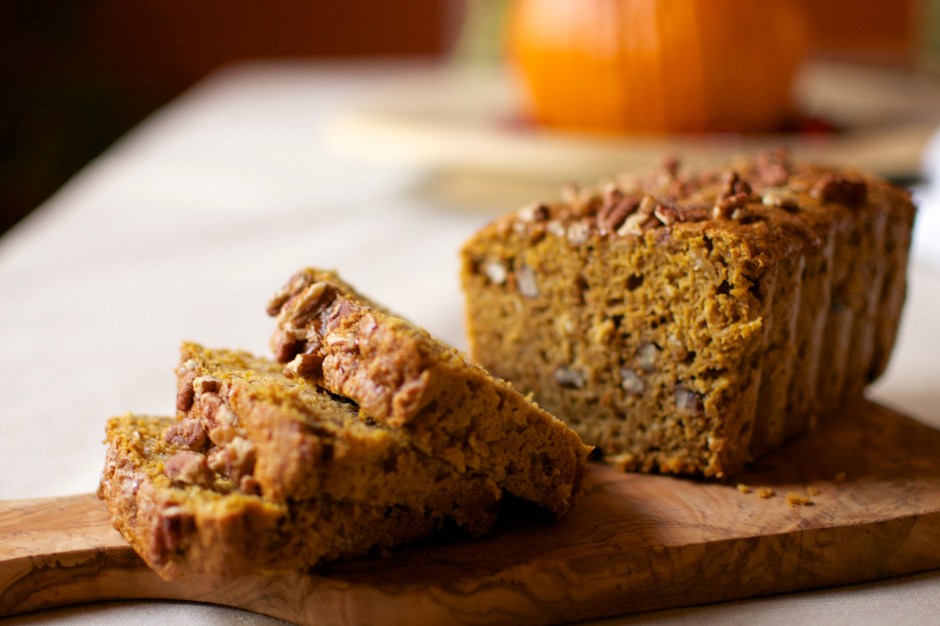
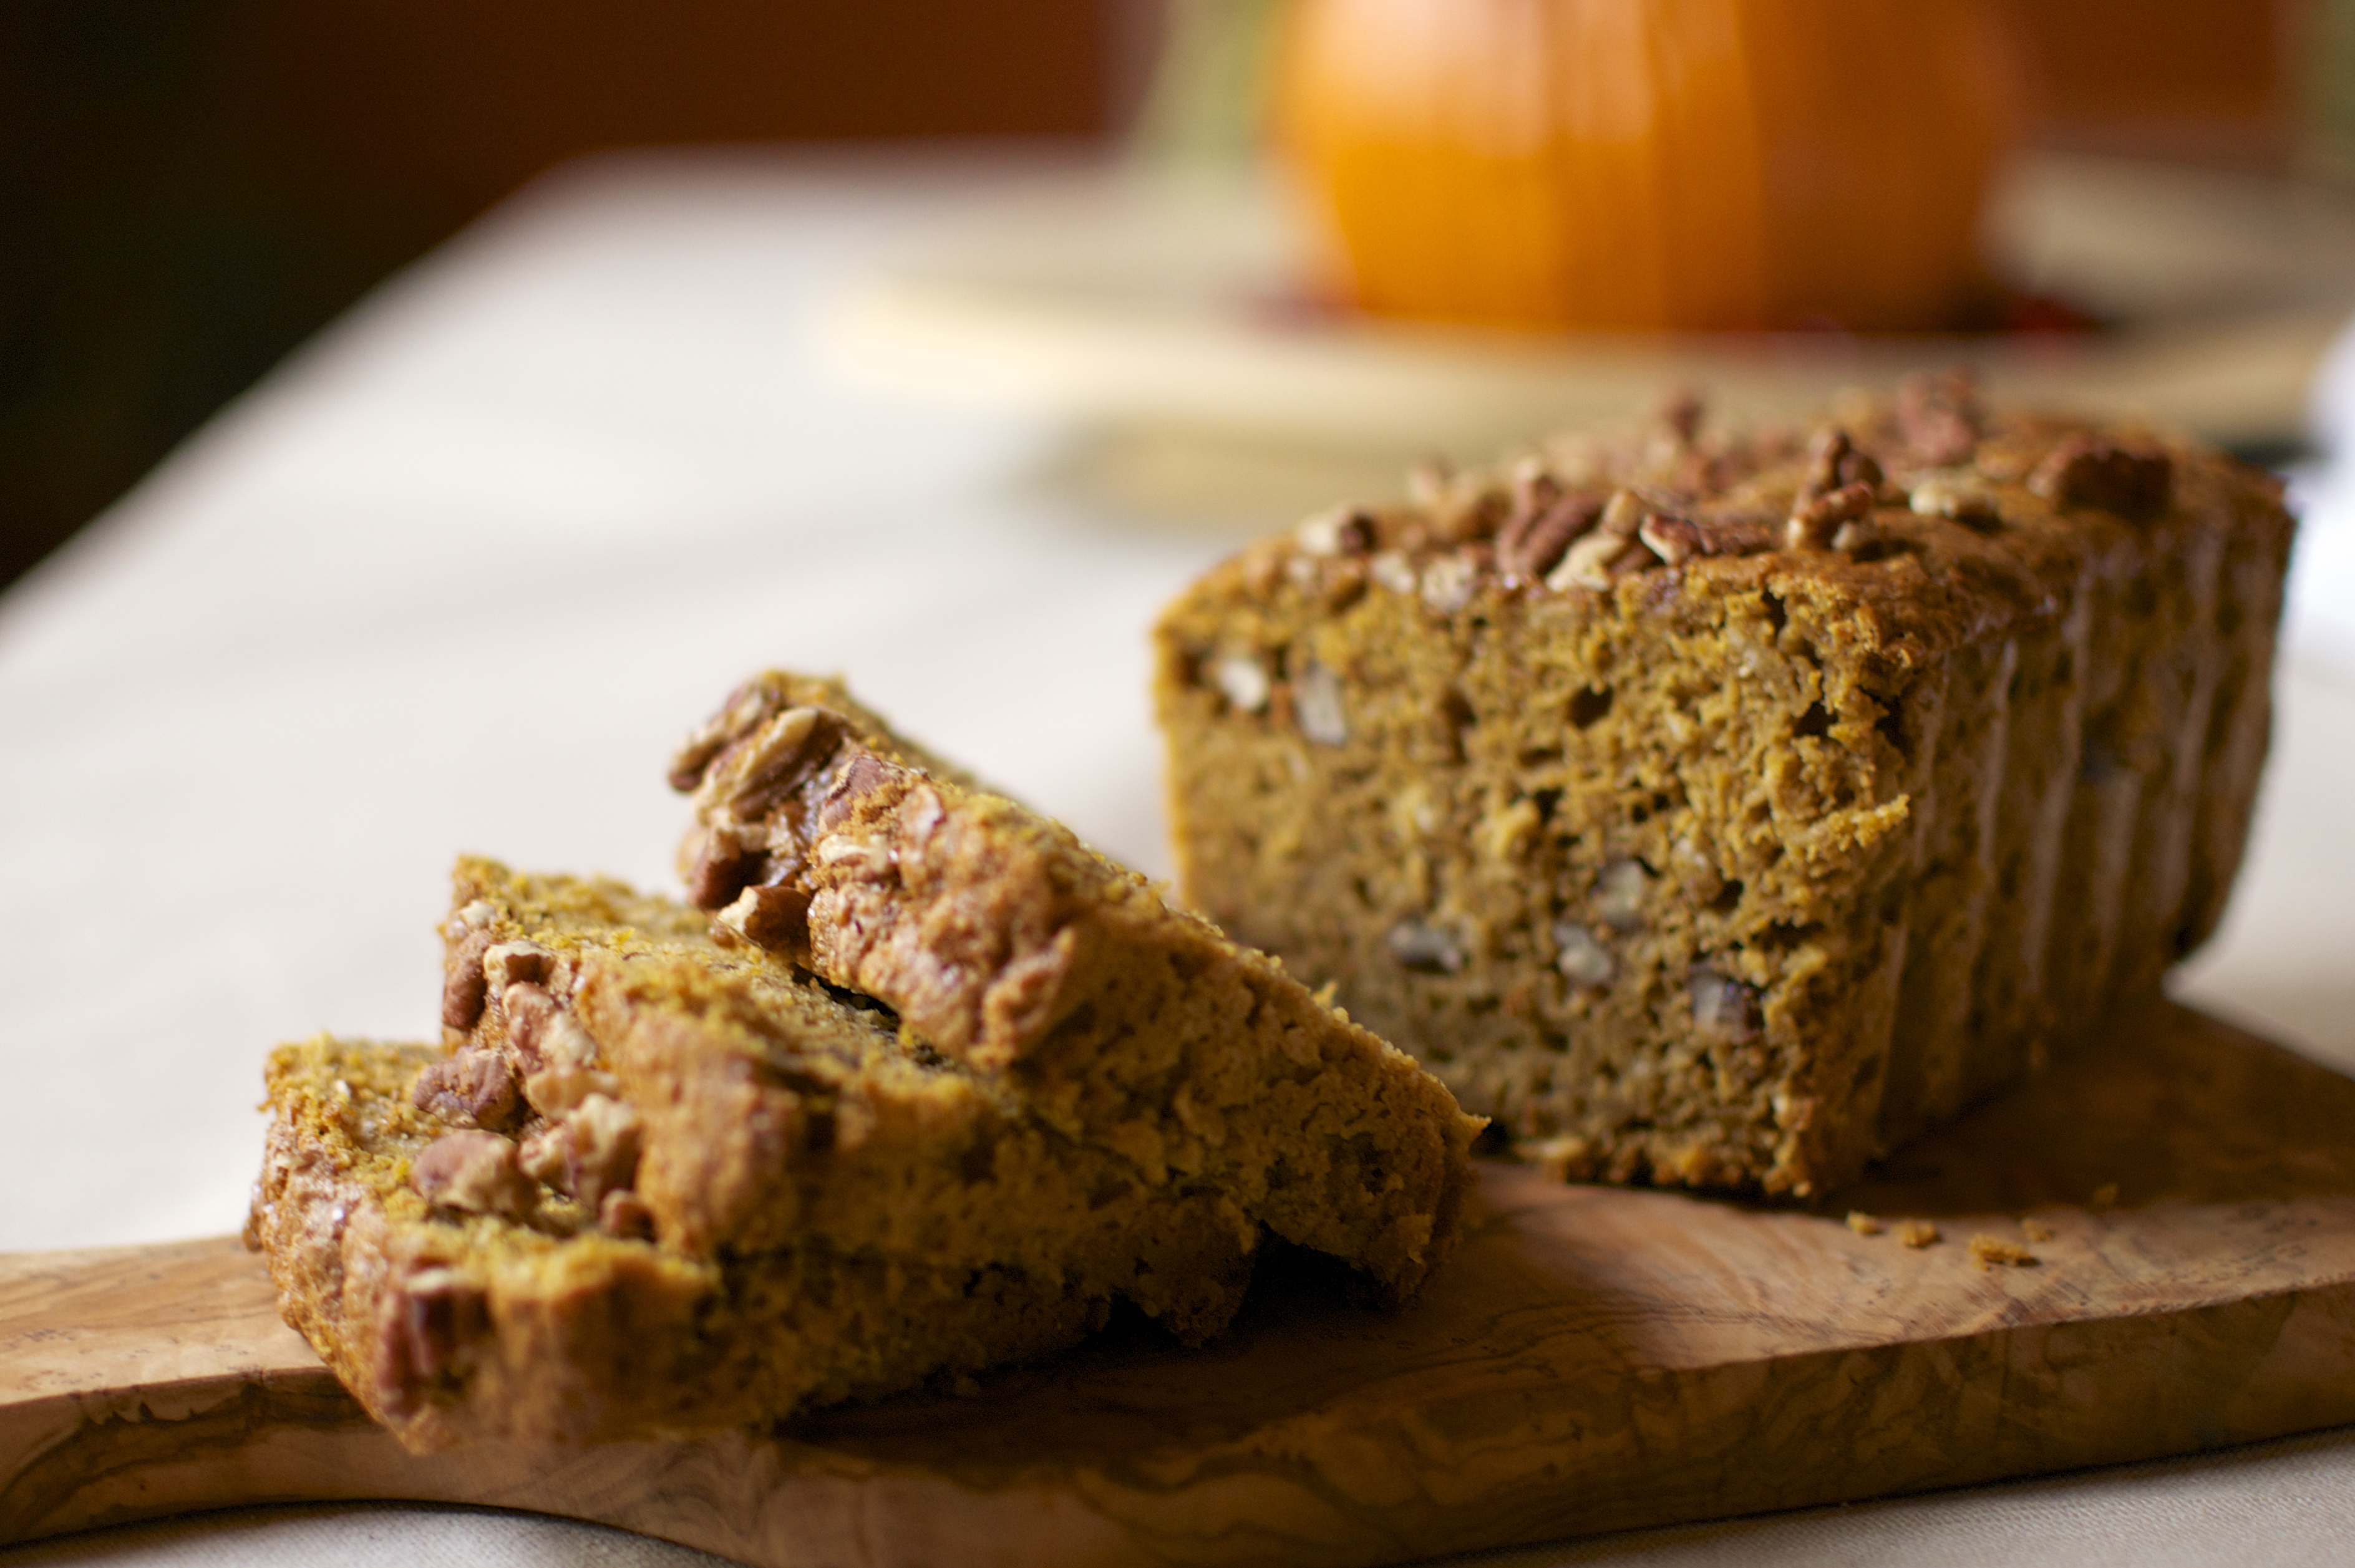
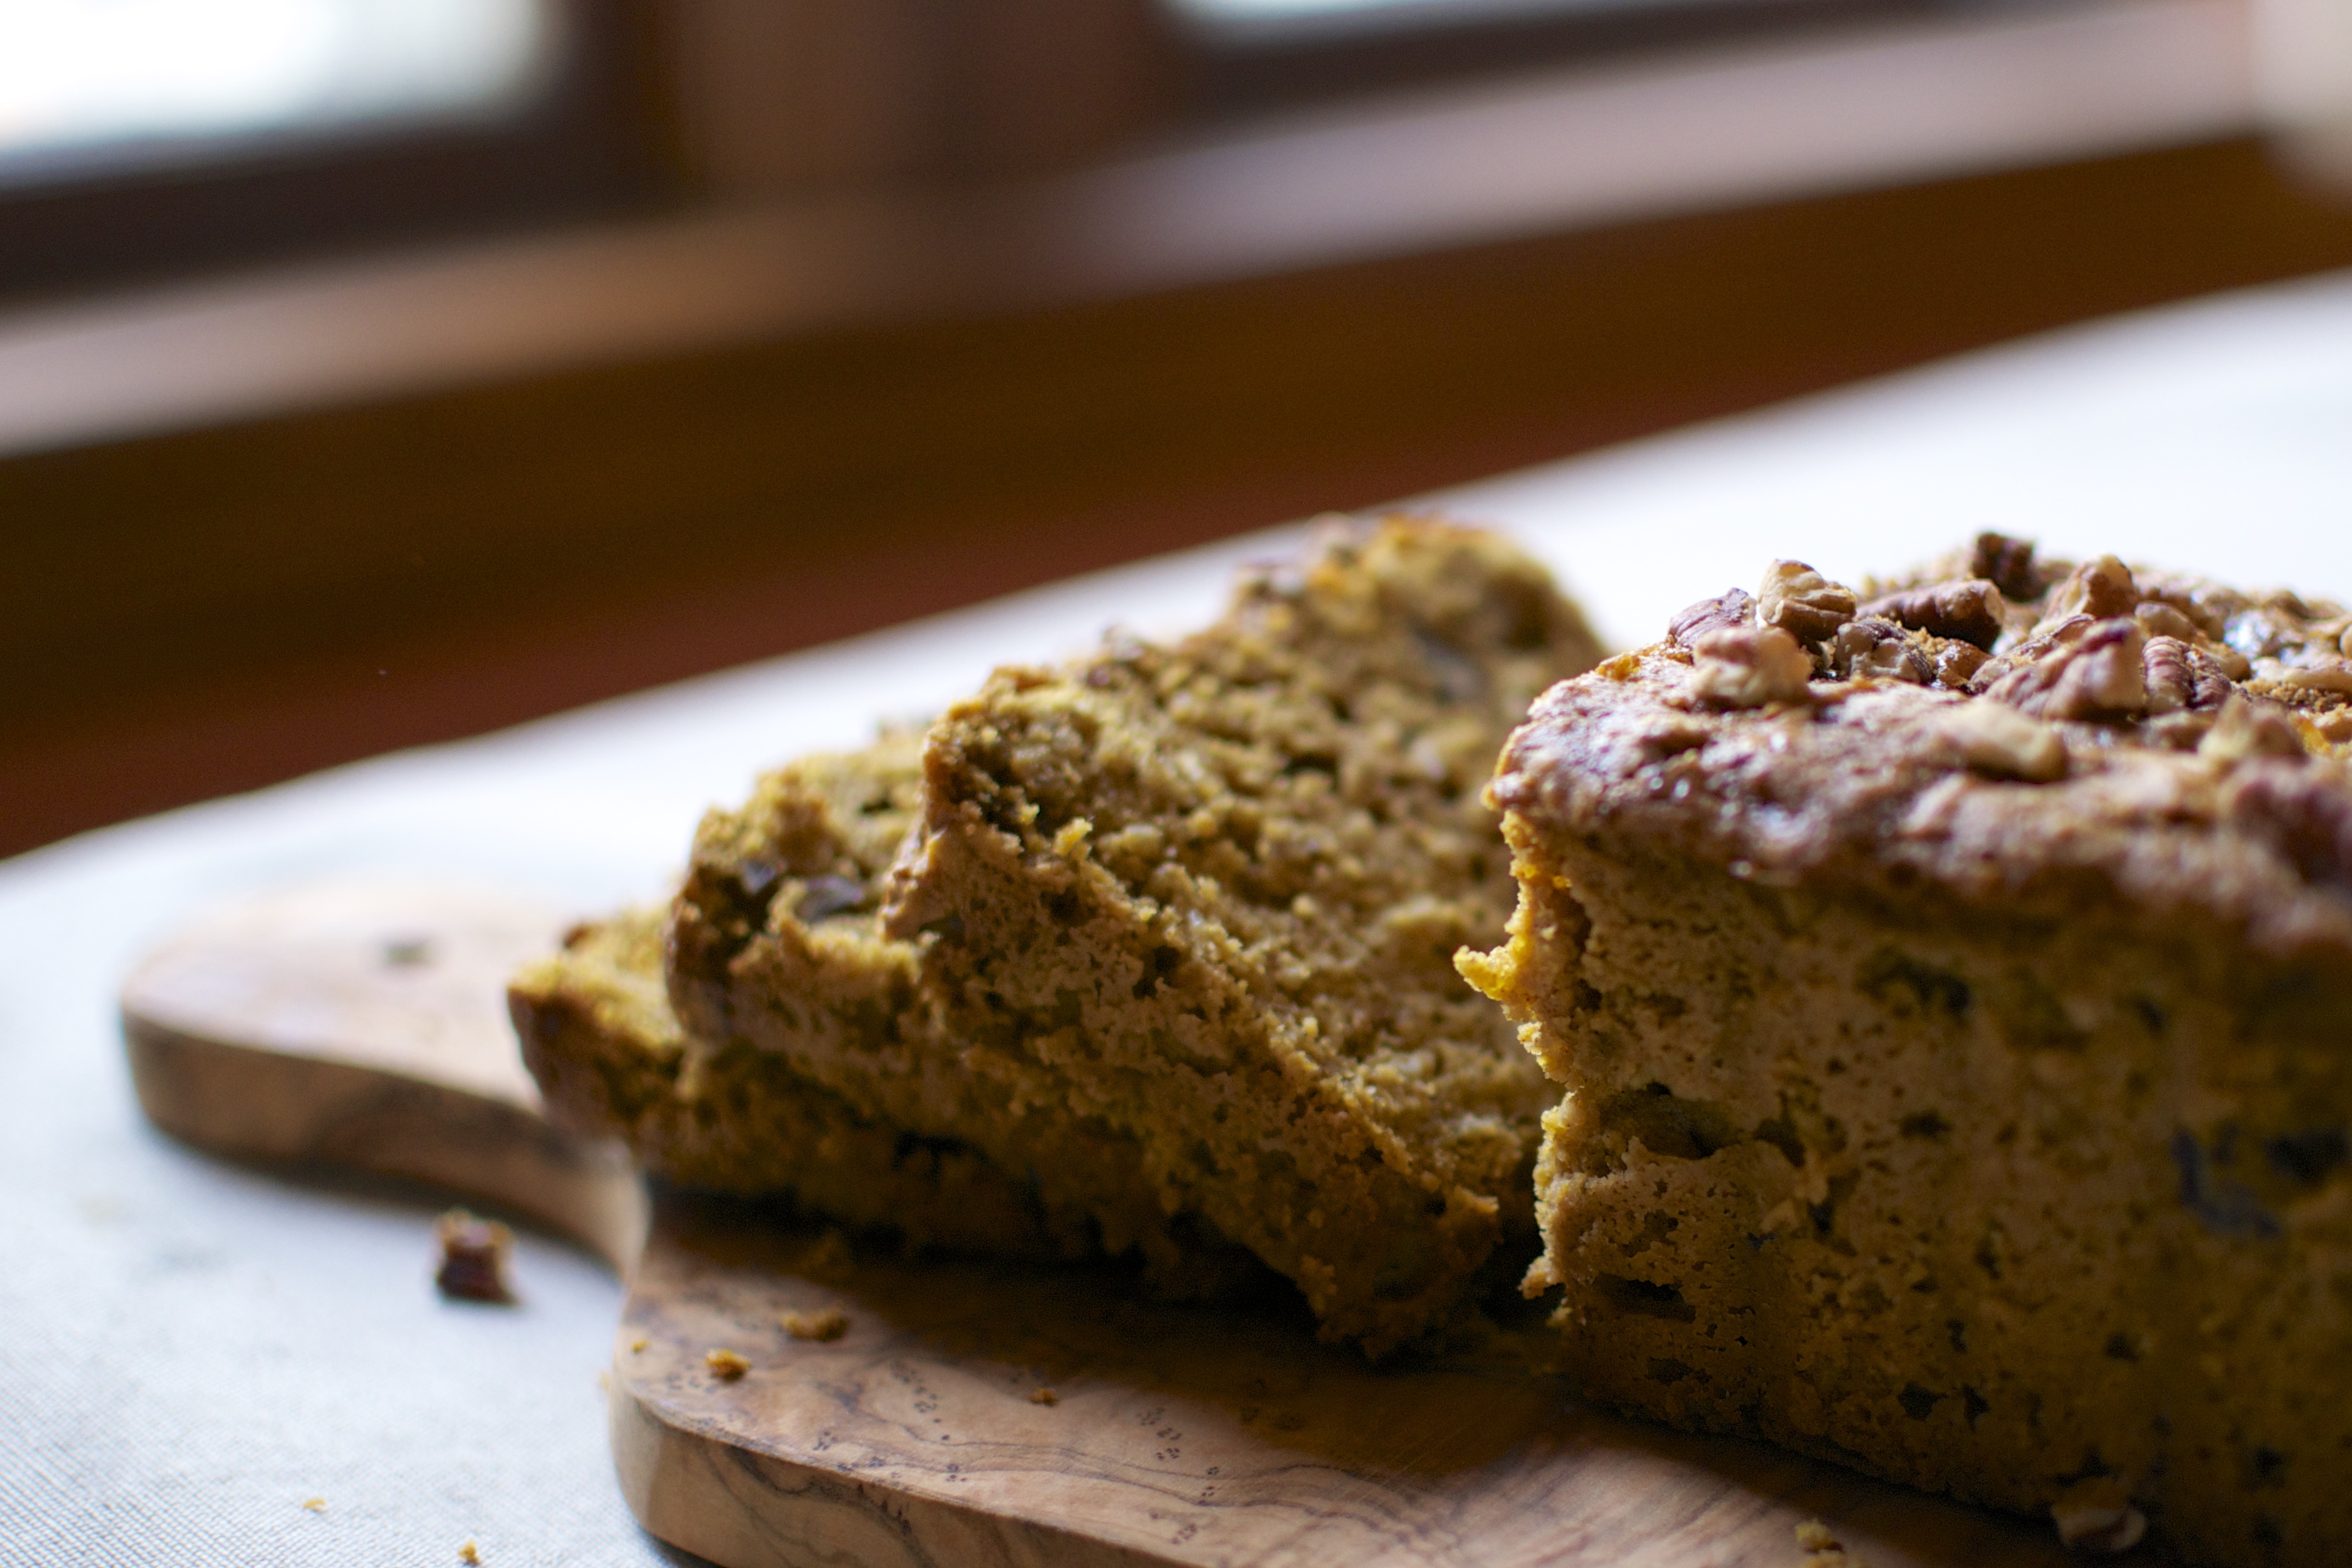
I whipped up a double batch of this pumpkin bread and took it to Thanksgiving for breakfast since pumpkin is one of her favorite flavors. It is moist, light, fragrant, and nutritious! Aaaaand did I mention that it was gluten free and dairy free? Double bonus.  But seriously, friends, I was blown away by how perfect this pumpkin bread turned out.  It uses only two flours: oat flour and almond flour.  Arrowroot powder is also used to keep the loaf from being too dense. It is simply amazing.

Gluten Free and Dairy Free Pumpkin Bread // Big Eats Tiny Kitchen

This recipe makes a double batch which is super helpful during the holidays. You can always give a loaf away to a friend as a gift, or wrap it up tightly and freeze it for later. I promise that you WON’T regret having two loaves.

So Haaaaaappy Birthday to my lovely and beautiful little sister. I am so glad that you were born, because I gained a sister and a friend. Hope you have a wonderful day!

Gluten Free Pumpkin Bread (Gluten Free and Dairy Free)

  • Servings: 8
  • Difficulty: Easy
  • Print

Makes 2 loaves

Ingredients

  • 2 cups gluten free oat flour*
  • 1 cup gluten free rolled oats
  • 1 cup almond flour*
  • 1/2 cup arrowroot powder
  • 2 teaspoons baking powder
  • 1 teaspoon baking soda
  • 1 teaspoon salt
  • 2 teaspoons ground cinnamon
  • 1 teaspoon ground ginger
  • 1/2 teaspoon nutmeg
  • 4 eggs
  • 1 cup maple syrup
  • 1 teaspoon vanilla
  • one 15oz can of pumpkin (not pumpkin pie filing)
  • 6 tablespoons melted coconut oil or butter
  • 1 cup chopped pecans
  • 2 tablespoons coconut palm sugar

Instructions

  1. Preheat oven to 375F. Prepare loaf bans by applying butter and then set aside.
  2. In a large bowl, combine dry ingredients (oat flour through nutmeg). Whisk to combine.
  3. In a separate medium bowl, whisk eggs and maple syrup until slightly frothy. Stir in vanilla, canned pumpkin, and melted coconut oil (or butter). Gradually add wet ingredients to dry ingredients and stir to combine. Stir in 3/4-cup of pecans into batter.
  4. Transfer batter to the loaf pans and smooth the tops with the back of the spoon. Sprinkle remaining 1/4-cup of pecans and coconut palm sugar on the tops of the loaves. Place the loaf pans on the middle rack of the oven. Bake for about 1 hour to 1 hour 15 minutes until a toothpick or butter knife inserted into center comes out with a few moist crumbs.
  5. Remove from oven and let cool in the loaf pans for about 15 minutes. Turn out the loaves onto a wire rack and let cool completely.

*Notes