Gluten Free Nectarine and Blackberry Crumble

Gluten Free Nectarine and Blackberry Crumble // Big Eats Tiny Kitchen

A few years ago, I planted one lonely thornless blackberry twig in my backyard.  I nursed it and took care of it.  But then I ran over it with a lawnmower….then I nursed it again.  And now, I have 20 feet of blackberry bushes lining one full side of my backyard fence.   It is a race between me, the squirrels, and the birds to see who can nab the blackberries first.

Gluten Free Nectarine and Blackberry Crumble // Big Eats Tiny Kitchen

There may have been a time or two that I have stood in my backyard, gorging myself on these fresh thumb-sized blackberries. I’m too excited about the harvest and will eat so many that there isn’t any left to bring inside!  I stare at my purple soaked fingers and sort of feel bad that I haven’t shared any with my husband… so naturally I have to lie and tell him that the birds got them… ALL. yes.. All of them. right out of my hands. It was a tragedy. Crying, Thrashing. Feathers everywhere. I promise I tried. They were ferocious….. But my purple lips and seeded teeth tell the real truth.

Gluten Free Nectarine and Blackberry Crumble // Big Eats Tiny Kitchen

So needless to say I owed my husband some blackberry goodness. I gathered up a good bundle of blackberries and baked him this skillet gluten-free nectarine and blackberry crumble.  He was pretty excited… mainly because he could add ice cream to it. I swear, that man would be happy with a dirt cobbler as long as you could put ice cream on it. 🙂

This recipe is my standard crumble topping.  I use it on tons of different fruit crumbles. I added some lemon zest to the crumble to give it a light summery zip.  You could easily swap out the fruit in this filling with peaches, raspberries, blueberries, etc.  It is really easy to throw together for summer gatherings to use up all that fresh fruit produce that is flooding the markets. So give yourself and the ones you love a warm and awesome summer treat!

Gluten Free Nectarine and Blackberry Crumble // Big Eats Tiny Kitchen

Gluten Free Nectarine and Blackberry Crumble

  • Servings: 6 to 8
  • Difficulty: Easy
  • Print

Fruit Filling

  • 6 nectarines (Halved, pitted, and sliced with peel)
  • 1 cup of blackberries
  • juice from 1 lemon (about 2 tablespoons)
  • 1/4 cup maple syrup or honey
  • 2 tablespoons arrowroot powder or cornstarch

Gluten Free Oat Crumble Topping

  • 1 1/2 cups old fashioned gluten-free oats
  • 1/2 cup almond meal
  • 1/3 cup brown sugar or coconut palm sugar
  •  1 teaspoon of lemon zest
  • 5 tablespoons melted butter (plus a little extra to grease the baking dish)
  • 1/4 teaspoon kosher salt
  • 1/2 teaspoon ground cinnamon

Instructions

  1. Preheat oven to 350F.  Butter a 9-inch cast iron skillet or 8X8-inch baking dish and set aside.
  2. In a medium bowl, mix all of the fruit filling ingredients. Spoon the fruit filling into the prepared skillet or baking dish.
  3. In a medium bowl, stir together the topping ingredients. Mix the ingredients until it is crumbly and moistened. Lightly sprinkle the oat crumble mixture over the fruit filling evenly.
  4. Bake for 40 to 50 minutes (or until the filling is bubbling and the crumble top is lightly golden brown). Remove the crumble from the oven and allow to cool for 5 to 10 minutes before serving.  This is delicious with vanilla ice cream for dessert or plain greek yogurt for breakfast!

Super Green Spring Salad

Super Green Spring Salad // Big Eats Tiny Kitchen

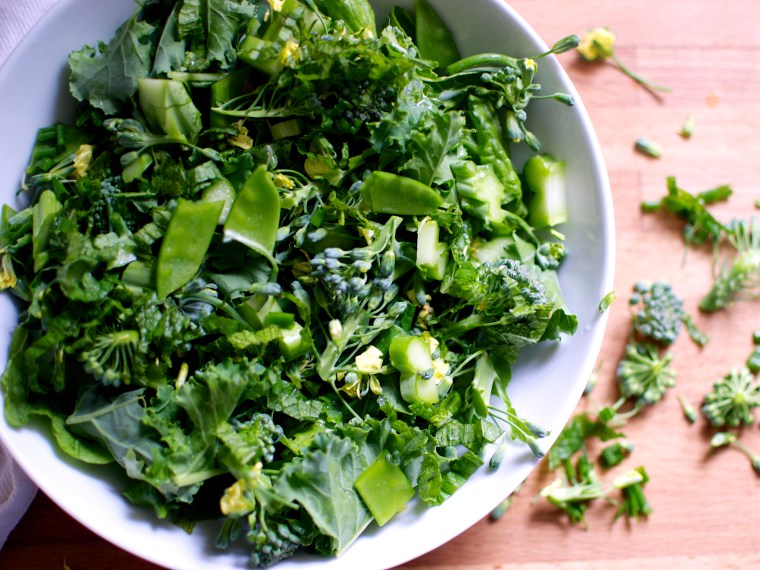
It’s spring! And my garden is blooming and booming. I’ve been eating this Super Green Spring Salad every chance I get since all of the ingredients are directly from my garden… delicate lettuce, baby kale, bright broccoli with pretty tiny yellow flowers, crisp sugar peas, mint, chives. This salad is less of a recipe, and more of a throw-together spring green treat!

Super Green Spring Salad // Big Eats Tiny Kitchen

Super Green Spring Salad // Big Eats Tiny Kitchen

But, I should pause and preface this delicious garden post with the fact that I am not a good gardener. Seriously. I’m bad. Plants shrivel at my touch. They tell their other plant friends to run and hide when I decide to buy them. Any success I have at gardening is not my doing. Plants thrive in my garden in spite of me. I just wish I was a good gardener like my grandmother was. She could make anything grow and she could make you think that you could do it too. *sigh*

The first year we moved to Kansas City, I decided that I wanted to BE A GARDENER! (p.s. I said this with both hands on my hips and in a booming voice).  This is a laughable statement because at the time I killed anything in a pot in my house and at one point was scared to even get a pet because I couldn’t even keep a plant alive!

But, dangit, I was going to finally try to grow a garden and feed myself and eat healthy and get dirt in my fingers and sweat and love it and bring bushels of food in at the end of the day and sigh and say “way to go me!”.  So I bought three tomato plants and marched into the backyard of our new rent house with a shovel and a prideful grin on my face.  Like a blind settler deciding on their perfect plot of land, I just shoved my shovel into the hard clay ground next to the fence and dug three holes. That’s it. I just stuck the tomato plants in the ground as if I were planting flowers.  But, despite my ineptitude and lack of reading up on “how to grow tomatoes“, I ended up with some darn good tomatoes that year. Those plants grew over 8 feet tall! I even canned tomato sauce! Yeah. All that from just digging three holes…..and praying like hell and battling thieving squirrels!

Super Green Spring Salad // Big Eats Tiny Kitchen

Basically, I kill any plant that is not in the ground. If it is up to me, all plants would die. However, after I put the plant in the ground, I cross my fingers that mother nature will take over and that she’ll be the true gardener.  I depend on her to water my garden too. I’m not saying that’s the right thing to do…it’s just what I do…as a bad gardener!

Also, as a bad gardener, I don’t weed. I should…but I don’t. I feel like everything should be given a fighting chance.  My husband goes out to my garden and tries to weed things and I freak out. FREAK out. I’m scared that he’s going to pull a baby beet or a baby kale or maybe just a baby, hell I don’t know. “NOOOOO! That’s a blah blah blah and I wanted it there…. yeah. I WANTED that weed.”

Sorry, I’m super protective of my garden… even if it’s a weed box. Back off!

As a bad gardener, I plant things too close together. My husband always tries to correct my eagerness to cram as much as possible into our tiny raised beds. But I tend to say, “Space shmace. If you want to survive, you gotta try harder Mr tomato!!!!”.   This doesn’t always work out….buuuut, I won’t admit that to him.

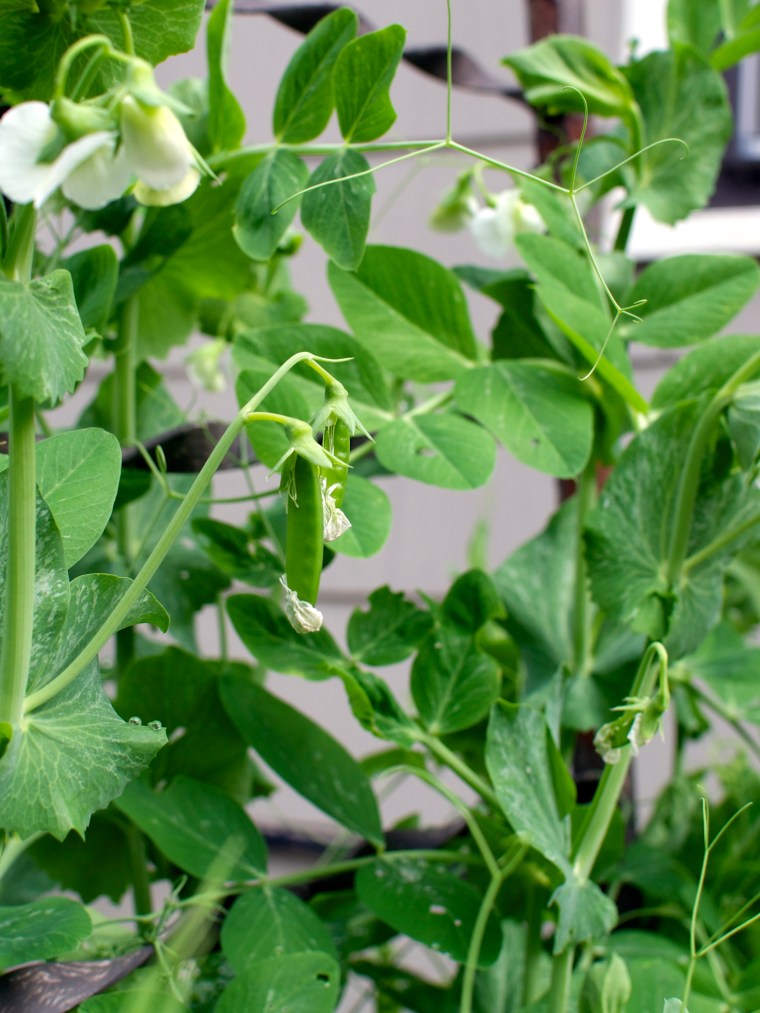
But this year, six years into BEING A GARDENER, my garden is growing like a REAL garden!  Thank you again, mother nature. I have one of the biggest lettuce crops (which love these cool temps and tons of rain that KC has gotten this spring). I also have gorgeous broccoli heads! Oh and peas! I have snow peas climbing a trellis (actually it’s a defunct hand rain I pulled off my outdoor stairs) and tiny pea pods dangling everywhere! Kale is coming up like a champ! Baby beets are gearing up and their greens are getting taller.  I’m even growing brussels sprouts and cauliflower for the first time. Way to go me! I hope my grandma would be proud. I think she’d also really love this Super Green Spring Salad that I’ve been making from all of my garden goodies!
Super Green Spring Salad // Big Eats Tiny Kitchen

I mention my lack of gardening skills in order to encourage anyone that loves fresh produce but may be scared to begin their own garden because, like me, they are terrible with plants. But don’t be scared. Just go do it!  What do you have to lose? A few bucks on a pack of seeds? You’ll fail, but you will also succeed and learn from those mistakes.  Man, I sure sound like an after school special, don’t I?  Anyways, I love seeing what new things I can grow. Nothing is better to me than walking outside my door to my own farmer’s market!

On this Memorial Day weekend, I encourage you to branch out, dig a whole, plant something.  Plant something in honor of the one’s that you have loved and in their memory.  And then every time you go out to tend to it and get dirt on your fingers and sweat on your brow and harvest your fresh amazing produce, you can remember them and realize that their memory lives on. But also, don’t forget to give yourself a high-five from them and say “way to go!” (but say it with both hands on your hips and in a booming voice).

Super Green Spring Salad // Big Eats Tiny Kitchen

Super Green Spring Salad

  • Servings: 4
  • Difficulty: Easy
  • Print

Note – This salad does not really have a set list of ingredients and can morph into whatever you have on hand. I have provided a gentle guide for what I like to use, but feel free to mix and match with whatever greens you have on hand or can spot at your local farmer’s market.  

Ingredients for the Salad

  • Four generous handfuls of spring greens mix (such as, leaf lettuce, baby kale, arugula, beet greens, etc.), gently rinse and dry
  • Handful of fresh sugar snap peas or snow peas
  • Two small heads of broccoli
  • Handful of fresh herbs (such as mint, dill, chives, cilantro)

Ingredients for the Lemon Vinaigrette 

  • Juice of 1 large lemon (about 1/4 cup)
  • 1 teaspoon of finely grated lemon zest
  • 1/3 cup olive oil
  • 1 teaspoon Dijon mustard
  • 1/4 teaspoon of kosher salt
  • 1/8 teaspoon ground black pepper

Instructions

  1. Slice the snow peas or sugar peas in half or into bite-size pieces if they are large. If they are small, you can keep them whole. Whatever you choose.
  2. Chop the broccoli florets from the stalk. Chop the florets into small portions. Cut off the bottom fibrous portion of the stalk and chop the tender portion into 1/4-inch bite-size pieces.
  3. Place the lettuce, peas, broccoli, and herbs into a large bowl.
  4. Place all vinaigrette ingredients into a lidded jar. Shake vigorously until well mixed. Just before serving, drizzle about 1/3 cup of the dressing over the salad and toss gently. Place leftover dressing in the fridge or add more if needed.

Suggested toppings:

  • Optional Protein Toppings: chicken, quinoa, boiled egg, chicken sausage, fish
  • Optional Misc Toppings: sunflower seeds, roasted nuts, crumbled feta, shaved parmesan, goat cheese

Rhubarb Strawberry Curd

Rhubarb Strawberry Curd // Big Eats Tiny Kitchen

DSC_0307

I still remember the first time that I tried rhubarb.  It was probably 10 years ago. I had wanted to try it, but just hadn’t had the chance (I guess) living in suburbia Oklahoma and just didn’t have the inclination to go hunt for it.

But one summer night, I was out working a 12 hour shift doing field work for my Master’s degree and my husband was babysitting my littlest sister who was only 6 at the time. Since they are both the adventurous type, and neither of them really knew how to cook…. they decided to make me a rhubarb cobbler as a surprise treat for when I got home.

I was so surprised when I walked in the door and smelled that amazing smell. It was seriously the best cobbler I had ever eaten. (Maybe it was because I had just worked 12 long hours in the hot summer sun.) But it really was the perfect blend of tartness and sweetness. Just like my husband and my sister Olivia. Sweet and tart! 🙂  They began my obsession with this fabulous spring plant…ooooh rhubarb!

Rhubarb Strawberry Curd // Big Eats Tiny Kitchen

Rhubarb Strawberry Curd // Big Eats Tiny Kitchen

Since that first magical cobbler that they made for me ten years ago, I have had quite a love affair with rhubarb. Rhubarb is a perennial that will come back year after year when planted in a good location. My rhubarb plant always lets me know when spring is near, because it begins to sprout its long stalks and leaves when temps rise above 40 F.

Rhubarb can be used in so many recipes: tarts, cobblers, pies, salsa, sauces, and this amazing curd! Yeaaaaaaaaah. Curd doesn’t have to be reserved for citrus! This Rhubarb Strawberry Curd is hands down my favorite. I decided to add some frozen strawberries that I had in order to boost the pink color of the curd.  Feel free to adjust the ratio of rhubarb to strawberries to suit your own tastes.

Rhubarb Strawberry Curd // Big Eats Tiny Kitchen

This Rhubarb Strawberry Curd can easily be used to fill a pie or tart crust for an easy dessert. The extra egg whites can be whipped up as a meringue for the top too! I went the easy route this time and I mixed mine in greek yogurt for a delicious breakfast and midday snack! Either way, I know that this will be a favorite for all you rhubarb lovers!

Rhubarb Strawberry Curd // Big Eats Tiny Kitchen

Rhubarb Strawberry Curd

  • Servings: 2 cups
  • Difficulty: Easy/Moderate
  • Print

Ingredients

  • 2 cups fresh rhubarb, sliced 1/2-inch thick (about 5 trimmed stalks)
  • 1 cup fresh or frozen strawberries
  • 1/4 cup water
  • 1/3 cup honey
  • 4 eggs, yolks separated (reserve whites for another use)
  • 4 tablespoons unsalted butter

Instructions

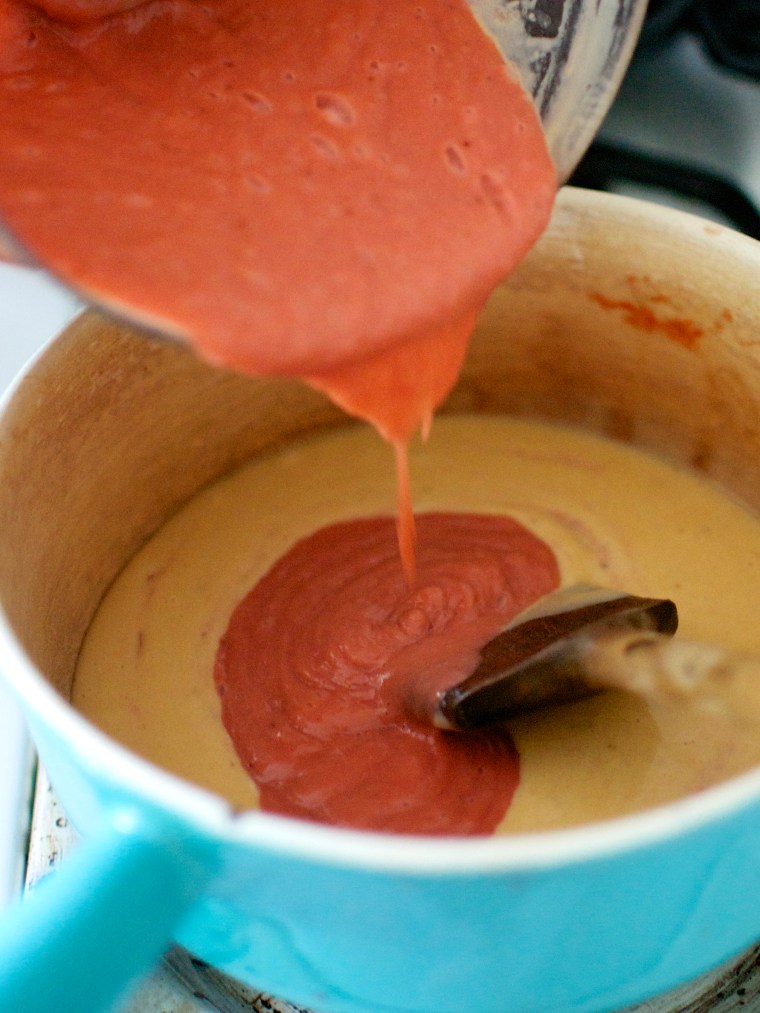
  1. In a heavy saucepan placed over medium heat, cook rhubarb, strawberries, water, and 3 tablespoons of honey for about 10 minutes, stirring frequently and smashing the fruit with the back of spoon. Mixture will begin to fall apart and look mushy. Turn off heat and allow to cool for about 5 minutes.
  2. Transfer mixture to the bowl of a food processor and puree smooth. Set aside.
  3. In a separate medium bowl, cream the butter and the honey together until fluffy.  Beat in the eggs slowly. Slowly add the rhubarb and strawberry mixture, whisking constantly until completely combined.
  4. Transfer mixture to a medium-sized, non-reactive saucepan. Place over medium-low heat and stir constantly with either a rubber spatula or wooden spoon until the mixture has thickened to jelly consistency, about 10-12 minutes.  Do not let the curd boil! Pull the pan off the stove before it gets to that stage. The curd is done when it coats the back of a spatula or leaves a clear path when pulled through the mixture.
  5. Remove from heat allow to cool for about 5 minutes. Pour curd mixture into a clean glass jar, but let it cool completely before you screw on the lid. You can even place the filled jar in the freezer (without the lid) for about 15 minutes and then remove from freezer and place the lid on the jar. Keep refrigerated until ready to use.

Note – Recipe adapted from Dolly and Oatmeal.

Slow Cooker Black Eyed Pea, Wild Rice, and Kale Stew (Gluten Free and Dairy Free)

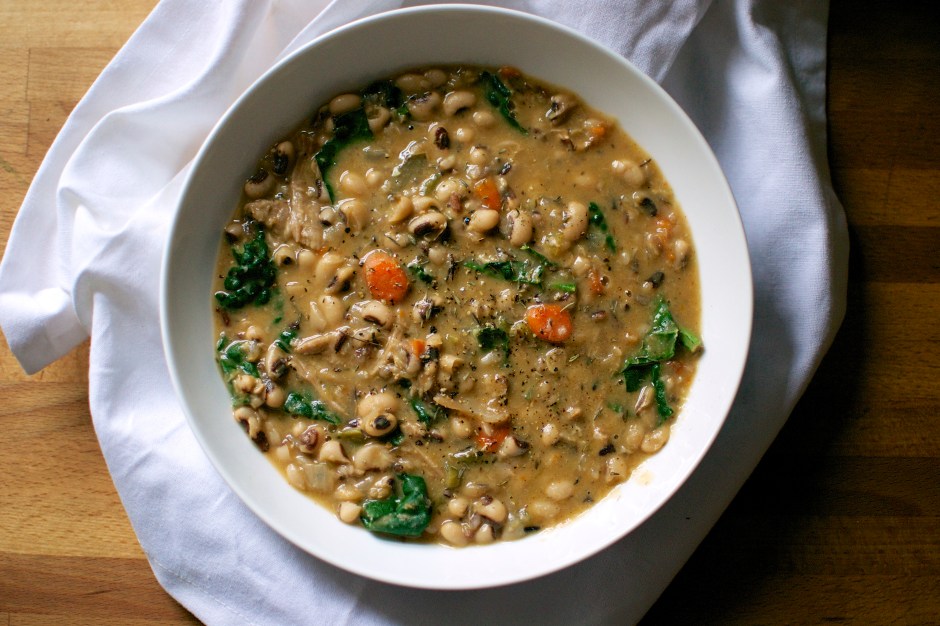
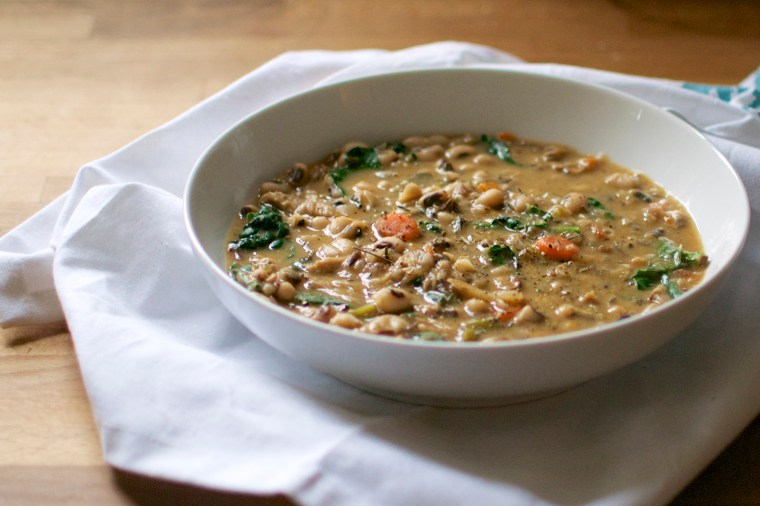
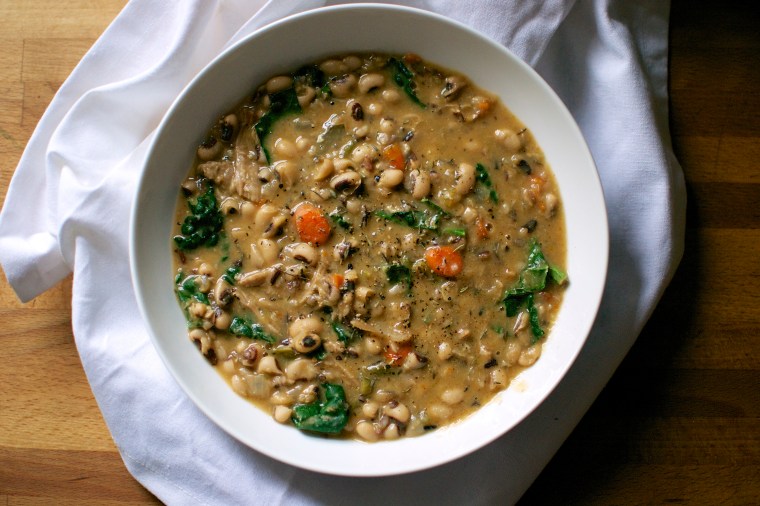
Slow Cooker Black Eyed Pea, Wild Rice, and Kale Stew // Big Eats Tiny Kitchen

This Black Eyed Pea stew provides all the good luck that you’ll need for the new year.  Well, don’t quote me on that. You may need some other luck besides this stew.  So cross your toes and buy a rabbit foot.

Southern tradition is to eat black eyed peas for luck and greens for wealth.  This Slow Cooker Black Eyed Pea, Wild Rice, and Kale Stew has both, plus it is cooked in a slow cooker so you’ll free up plenty of time to do other things, like catch up on some light readings or past episodes of New Girl or really nothing at all.

In fact, I barely put pants on today. *yaaawn* Best. day. ever.

I feel extremely lucky to be able to laze around with my favorite person and my favorite dog while this delicious stew cooked away in the background. It is the perfect bowl of lucky and hearty goodness on a super sleepy and chilly day.

Slow Cooker Black Eyed Pea, Wild Rice, and Kale Stew // Big Eats Tiny Kitchen

Cheers to everyone. I hope 2015 brings warmth and love to everyone! I’m truly lucky to have so many wonderful people in my life. Now I’ve gotta go serve me up a big bowl of stew!

Slow Cooker Black Eyed Pea, Wild Rice, and Kale Stew (Gluten Free and Dairy Free)

  • Servings: 6
  • Difficulty: Easy
  • Print

Ingredients

  • 1 pound dried black eyed peas
  • 1 large ham hock
  • 1 large onion, chopped
  • 1 large green bell pepper, chopped
  • 2 medium carrots, chopped
  • 3 celery stalks, chopped
  • 3 cloves of garlic, minced
  • 2 bay leaves
  • 1 tablespoon dried thyme
  • 1/4 teaspoon smoked paprika
  • 1/4 teaspoon cayenne (optional)
  • 1 cup dried wild rice mix
  • 1 quart low sodium chicken stock
  • 2 cups of chopped kale leaves, stems removed
  • salt and pepper to taste

Instructions

  1. Soak dried black eyed peas overnight by placing them in a large stockpot and filling with 6 to 8 cups of water.  Pick out any bad black eyed peas that look shriveled and float up to the top. After soaking overnight, drain and rinse the black eyed peas.
  2. Add soaked black eyed peas and remaining ingredients (except kale) to large slow cooker (crockpot). Stir to combine. Place lid on slow cooker and cook on low for 8 to 10 hours or on high for 4 to 6 hours.
  3. Remove the bay leaves and the ham hock from slow cooker. Carefully use two forks to shred off the cooked ham from the bone. Return shredded ham and kale to slow cooker.  Stir to combine and allow the kale to wilt, about 5 to 10 minutes. Season with salt and pepper to taste.

Green Chili Chicken and Kobucha Squash Enchilada Casserole

Green Chili Chicken and Kobucha Squash Enchiladas (Gluten Free) // Big Eats Tiny Kitchen

Are you feeling adventurous? Of course you are. It’s after Christmas and we are revving up for the New Year. It is time for those New Year’s resolutions…such as trying new veggies!!!!

Drum roll please……….First up is Kobucha Squash!

Green Chili Chicken and Kobucha Squash Enchiladas (Gluten Free) // Big Eats Tiny Kitchen

This amazing and delightful winter squash looks like a green pumpkin and is actually referred to as a Japanese pumpkin. It is often used in Thai curry and is quite flavorful. In fact, I think it tastes better than butternut squash and WAY better than regular orange pumpkin.

*GASP* Yah you heard me.  I’ve just found the better pumpkin replacement. Get on it, friends.  It even packs a lower calorie count than butternut squash with only 40 calories in a single cup compared to 60 calories per cup for butternut squash. It also has half the carbs of butternut squash (7 grams versus 16 grams). This puppy is WAY healthier than sweet potatoes too!

Once you cut into this green pumpkin, you are greeted with bright orange flesh which provides a fabulous dose of beta-carotene and vitamin A! The Kobucha contains plenty of other awesome attributes such as being loaded with fiber, iron, vitamin C, and some B vitamins. Can I get an AMEN!

Green Chili Chicken and Kobucha Squash Enchiladas (Gluten Free) // Big Eats Tiny Kitchen

Green Chili Chicken and Kobucha Squash Enchiladas (Gluten Free) // Big Eats Tiny Kitchen

Well-stocked grocery stores or farmers markets will have Kobucha Squash. If you are unable to locate this awesome gem of a veg, you can substitute the Kobucha Squash for Butternut Squash.  If you don’t have butternut squash, you also could use sweet potatoes.

Now lets talk about this Green Chili Chicken and Kobucha Squash Enchilada Casserole. They are literally the best enchiladas I have EVER made. Literally. The roasted Kobucha Squash help make these comforting and creamy without being doused in tons of cheese. Also, I like making this dish more lasagna style with layers of tortillas, filling, cheese, and sauce instead of nice and neat rolled up enchiladas. To me, it is much easier and just as super tasty.

Green Chili Chicken and Kobucha Squash Enchiladas (Gluten Free) // Big Eats Tiny Kitchen

These enchiladas do take some prep time.  However, most of the steps can be done ahead of time. You can marinate the chicken up to one day ahead of time. The Kobucha Squash can be carved and cubed several days in advance, placed in a container, and refrigerated. (Note – I recommend microwaving the Kobucha Squash for 2 minutes to make it easier to carve up.) You can even roast the chicken, shred it, and refrigerate it in advance too. To be honest, this whole casserole can be assembled up to one day in advance and cooked the next day, making it the perfect dish for entertaining or for an easy weeknight meal.

I hope you enjoy this amazingly flavorful, delicious, and nutritious dish. And give yourself a big pat on the back for branching out and trying a new veggie!

Green Chili Chicken and Kobacha Squash Enchiladas (Gluten Free)

  • Servings: 6
  • Difficulty: Easy
  • Print

Ingredients

  • 1.5 lbs chicken thighs or chicken breast (preferably organic)
  • 1 1/2 teaspoons ground coriander
  • 1 1/2 teaspoons ground cumin
  • 1 1/2 teaspoons chili powder
  • 1 1/2 teaspoons salt
  • juice of 1 lime (about 4 tablespoons)
  • 3 cups cubed Kobucha squash (butternut squash or sweet potatoes could be substituted)
  • 1 large yellow onion, diced
  • 1 tablespoon olive oil
  • 1 bunch of cilantro
  • 4 oz canned diced green chilis
  • 16 oz gluten-free tomatillo salsa verde
  • 1 cup shredded Mexican cheese blend
  • 8 to 10 gluten-free corn tortillas, cut into quarter sections

Instructions

  1. Preheat oven to 400 degrees. Spray two rimmed baking sheets with nonstick spray and set aside.
  2. Place chicken thighs in a medium bowl. Combine coriander, cumin, chile powder, and salt in a small bowl. Add half of spice mixture to chicken and reserve the other half.  Add half of lime juice to chicken. Toss chicken with spices and allow to marinate for at least 15 minutes or refrigerate for up to 8 hours.
  3. Place cubed kobucha squash and diced onion in a separate large bowl and drizzle with olive oil. Stir in remaining spice mixture. Place cubed winter squash as a single layer on rimmed baking sheet and bake in preheated oven for 15 minutes. Stir vegetables and place back in oven to cook for an additional 25 minutes. At this time, add chicken to a rimmed baking sheet and cook for 25 minutes. Remove both the roasted squash and baked chicken from oven. Turn down the oven to 350 degrees.
  4. Using two forks, shred baked chicken. Place shredded chicken, roasted squash and onions, juice of half a lime, 1/4 cup diced cilantro, canned green chilis, and 1/3 cup salsa verde in a large bowl and stir to combine.
  5. Spray or grease an 8X11 baking dish. Place 1/3 cup salsa verde in bottom of baking dish. place 10 to 12 quarter sections of tortillas in bottom of dish on top of salsa verde in a single layer, slightly overlapping each other.  Spoon out half of shredded chicken mixture and smooth over the tortillas. Sprinkle 1/3 cup of salsa verde and 1/2 cup cheese on top. Layer with 10 more tortilla wedges. Spread out remaining chicken filling on top of tortilla wedges. Top with remaining tortilla wedges. Sprinkle with 1/2 cup shredded cheese and remaining salsa verde.
  6. Place baking dish into preheated oven and bake for 20 minutes or until cheese is melted and bubbly. Remove from oven and allow to cool for 5 minutes. Serve with extra salsa verde, chopped cilantro, and greek yogurt.
Notes:

  • For dairy free version, do not use cheese.
  • For vegetarian version, replace chicken with 2 cups cooked black beans.
  • These enchiladas can be prepared up to 1 day ahead of time through step 5. Cover and refrigerate. When ready to cook, remove from refrigerator for at least 30 minutes before placing in middle rack of preheated oven. Cook for at least 30 minutes.
Gluten Free Apple Spice Muffins with Walnut-Oat Streusel

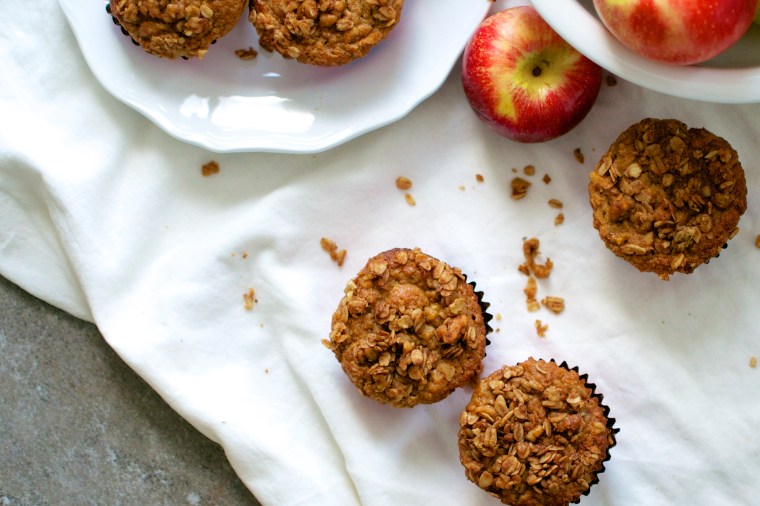
Gluten Free Apple Spice Muffins // Big Eats Tiny Kitchen

Apples are here! And these Gluten Free Apple Spice Muffins are healthy, delicious, moist, and sweet.

Similar to the way people are feeling about post season baseball around here is the way I feel about Apple Season.

APPLE SEASON is Post Season to me! Am I right?  Let’s get pumped, people! Summer is over and HELLOOOOO apples. Crunchy, juicy, sweet/tart Apples.

I could seriously OD on apples more than chocolate… weird, huh?  Seriously, I can’t be the only one who has fantasies about going apple picking and bringing home loads of perfect apples and then baking them up in pies, muffins, cobblers, a la mode, cinnamon-spiked applesauce, or, hell, just eating them fresh ALL the TIME.  I’m drooling right now.

DSC_0223

Gluten Free Apple Spice Muffins // Big Eats Tiny Kitchen

I also have to admit that I get SO overwhelmed with all the apple varieties. Holy pooh on a stick! How can you choose?  I’m on the hunt for some interesting varieties this year.  Here in Missouri, there are lots of apple orchards that allow you to pick your own. I’m a big fan of the local varieties of Jonathan, Ozark Gold, Goldrush, and Enterprise. These varieties are good for eating and baking, having sweet/tart flavors with plenty of crunch. They don’t mush up when baked, which is a plus as well.

I used a combination of Jonathan and Golden Delicious when I baked up these luscious Gluten Free Apple Spice Muffins, but any variety should be fine. However, depending on the quality of apples you have access to, the final flavor will vary slightly.

Gluten Free Apple Spice Muffins // Big Eats Tiny Kitchen

I used a combination of two flours: gluten free oat flour and almond flour. I really like the balance of these two flours in muffins. The combo of these flours provide both fiber and protein, which are perfect for beginning your morning and staying satiated longer. And you get a great fall spice treat to start your day.

I used an interesting technique with these muffins. Instead of using store-bought applesauce, I created my own by pureeing one of the three apples in a food processor. After it was pureed, I then added the remaining two apples to the bowl of the food processor and pulsed the apples until they were chopped. If you don’t have a food processor, you can sub 1/2-cup of applesauce for one of the apples.

DSC_0228

Gluten Free Apple Spice Muffins // Big Eats Tiny Kitchen

And let’s also talk about this Walnut-Oat Streusel topping. Walnuts, oats, maple…mmmmm. You mustn’t skimp on this step, friends. Noo no no. Do this. I typically don’t top my muffins (because I’m lazy). But I took the extra 2 minutes (seriously…why do I not do this) and holy mama was it worth it.

Gluten Free Apple Spice Muffins // Big Eats Tiny Kitchen

Gluten Free Apple Spice Muffins

  • Servings: 12
  • Difficulty: Easy/Medium
  • Print

Gluten Free Apple Spice Muffins Ingredients

  • 2 cups gluten free oat flour (ground from gluten free rolled oats or use Bob’s Red Mill gluten free oat flour)
  • 1 cup almond flour (I use Honeyville)
  • 2 teaspoon baking powder
  • 1/2 teaspoon salt
  • 2 teaspoons ground cinnamon
  • 1/2 teaspoon ground ginger
  • 1/4 teaspoon ground nutmeg
  • 3 medium apples, cored and sliced in quarters
  • 1/3 cup greek yogurt (or dairy free yogurt)
  • 1/2 cup maple syrup
  • 2 tablespoons butter, melted (or coconut oil)
  • 4 eggs (at room temperature)

Walnut-Oat Streusel Topping Ingredients

  • 1/3 cup rolled gluten free oats
  • 1/3 cup chopped walnuts (or pecans)
  • 2 tablespoons maple syrup
  • 2 tablespoons butter or coconut oil, melted
  • 1/2 teaspoon cinnamon
  • 1/4 teaspoon salt

Instructions

  1. Preheat oven to 350 F. Line or grease a 12-muffin tin with liners and set aside.
  2. Place dry ingredients in a large bowl.
  3. Combine Walnut-Oat Streusel topping ingredients in a small bowl and set aside.
  4. In the bowl of a food processor, place pieces of one apple, greek yogurt, maple syrup, melted butter, and eggs.  Puree mixture until smooth. Add remaining pieces of two apples and pulse until the apples are in small chunks. Add wet ingredients to dry ingredients. Stir mixture until just combined.
  5. Scoop 1/3-cup of batter into each lined muffin tin to 3/4 full. Sprinkle streusel topping evenly on each muffin. Bake for 30 to 40 minutes, until muffins are browned and cooked all the way through. Remove from oven. After 15 minutes, move muffins to a cooling rack.

Fresh Corn, Tomato, and Quinoa Salad (Gluten Free)

Fresh Corn, Tomato, and Quinoa Salad // Big Eats Tiny Kitchen (Gluten Free)

I want to begin with an apology to my 8 year old self for this post because I’m breaking a BIG commandment with myself.

Thou shall NOT cut corn OFF the cob…ever.

My kid self would be appalled. I mean…WHY would anyone ever cut corn OFF of the cob. They are taking ALL of the fun out of eating corn.

When I was little and we had corn on the cob for dinner, it felt like a holiday. I would ask for more corn over a slice of pie any day. Weird child, I know. There was also a period in my young life when I think I didn’t have front teeth for over a year, but continued to gnaw down ear after ear of corn, while projecting kernel after kernel into the air in front of me like a machine gun.

Fresh Corn, Tomato, and Quinoa Salad // Big Eats Tiny Kitchen (Gluten Free)

Plus, when I was a kid and corn wasn’t on a cob, that it meant it came in a can…*shudder*. I haaaate canned corn. Sorry to all you canned corn eaters. But if you have ever had FRESH FRESH FRESH corn straight from the cob, it will change your life. So I feel like my childhood self might forgive me if she had ever had fresh corn directly from the farm.  To satisfy my inner child, I bought 12 ears so that most of them could be eaten directly from the cob.

Fresh Corn, Tomato, and Quinoa Salad // Big Eats Tiny Kitchen (Gluten Free)

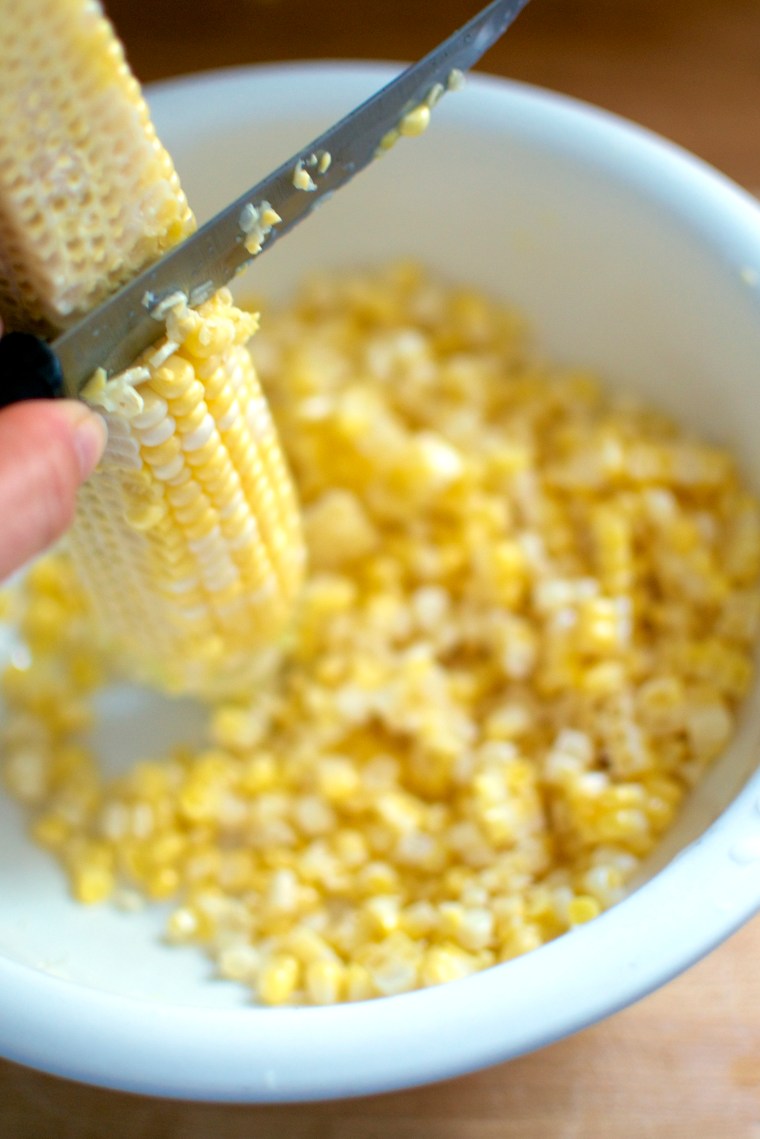
A lesson in cutting corn from the cob. Place the cob slightly angled up and down OVER a bowl. Cut the kernels off with the blade of the knife pointed awaaaay from you, allowing the kernels to fall lovingly into the bowl. Otherwise, your kernels will catapult off of a plate onto the ground. We can’t let those kernels go to waste! All kernels need a home…a.k.a my belly!

Fresh Corn, Tomato, and Quinoa Salad // Big Eats Tiny Kitchen (Gluten Free)

Fresh Corn, Tomato, and Quinoa Salad // Big Eats Tiny Kitchen (Gluten Free)

Next thing about this salad is that it is a substantial and gluten free feast. It has quinoa which is a super food, or so I’ve been told. I love that bit of crunch that the cooled quinoa and fresh corn provide to this lush herby and fresh salad. It’s perfect for a gluten free and vegetarian option at a picnic lunch or a cool weeknight meal. You can make the quinoa ahead of time and just throw everything together prior to serving. Easy peasy. It also would be good with some grilled chicken on top, for those meat lovers like my dear hubby.

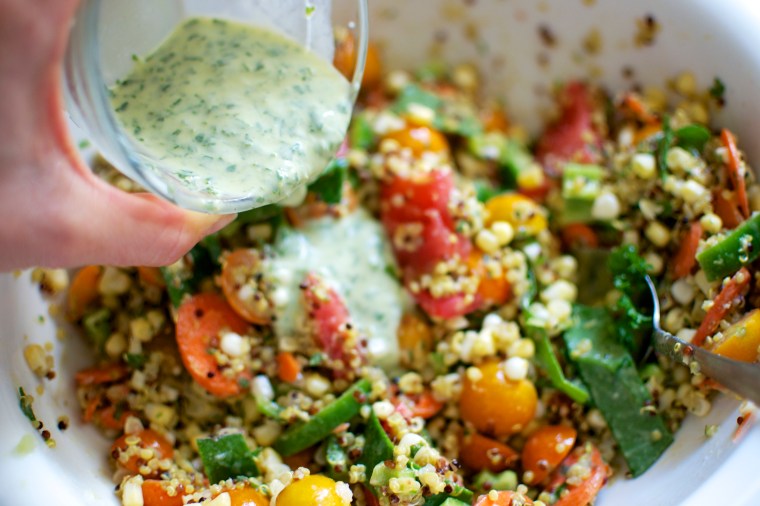
P.S. One or two or three things about the dressing! It is VERY good….like hide in a closet and drink it good. I was going for a type of green goddess style of herbaciousness. Feel free to mix up the herbs…cilantro, mint, tarragon, basil..whatevs. If you don’t have yogurt on hand, I think half an avocado would do well in this dressing. Aaaaand if you don’t have yogurt OR an avocado, throw in some soaked and drained nuts or sunflower seeds instead and give them a whirl in the food processor. You will just need to add water to make it the desired consistency.

Fresh Corn, Tomato, and Quinoa Salad // Big Eats Tiny Kitchen (Gluten Free)

Fresh Corn, Tomato, and Quinoa Salad (gluten free)

  • Servings: 4 as a main dish, 8 as a side dish
  • Difficulty: Easy/Medium
  • Print

Salad Ingredients

  • 1/2 cup quinoa, rinsed and drained (I used mixed quinoa, but any color would work here)
  • 2 ears of fresh corn, kernels removed from cob (about 2 cups)
  • 1 pint of cherry tomatoes, cut in half (I also added a big heirloom tomato because I loooove tomatoes)
  • 1 sweet bell pepper, thinly chopped
  • 1 medium carrot, thinly sliced
  • 2 cups of assorted greens (spinach, baby kale)
  • feta crumbles
  • Fresh basil and cilantro
  • salt and pepper to taste

Dressing Ingredients

  • 1/3 fresh basil and cilantro
  • 1/4 cup fresh chives
  • Juice of 2 limes
  • 2 tablespoons olive oil
  • 2 tablespoons greek yogurt
  • pinch of salt

Instructions

  1. Place rinsed quinoa and 1 cup of water in a small pot over medium heat. Allow to come to a boil. Cover, reduce heat, and cook for 10 to 15 minutes until water is fully absorbed. Remove quinoa from heat. Place cooked quinoa in a covered dish and refrigerate until cooled. Can be made several days ahead of time.
  2. In a medium bowl combine corn kernels, halved cherry tomatoes, carrot, sweet bell pepper, and greens.
  3. In a small food processor, add all dressing ingredients and process until desired consistency is achieved. Place dressing in a jar and refrigerate until ready to use.
  4. After the quinoa is cooled, add the quinoa and the dressing to the corn and tomato salad. Toss well. Sprinkle with feta, additional basil and cilantro. Season with additional salt and pepper to taste.

Fresh and Easy Salsa

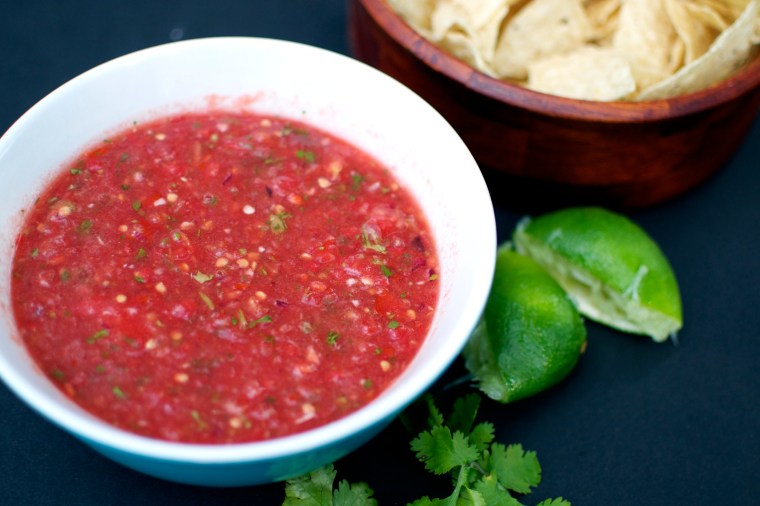
Fresh and Easy Salsa / Big Eats Tiny Kitchen

Put me in front of a bowl of chips and salsa, and it would take the strength of ten mules on steroids to pull me away. I’m serious. Chips and salsa are my go to snack…

Not saying it’s a good thing. Just sayin that your hand maaaaaay get gnawed on if you go for a chip or scoop of salsa while I’m diving in. Seriously. I can’t stop this dipping train!

And now that tomatoes are so prevalent in my garden, it’s time to get this crazy SALSA train started!!!

Fresh and Easy Salsa / Big Eats Tiny Kitchen

Fresh and Easy Salsa / Big Eats Tiny Kitchen

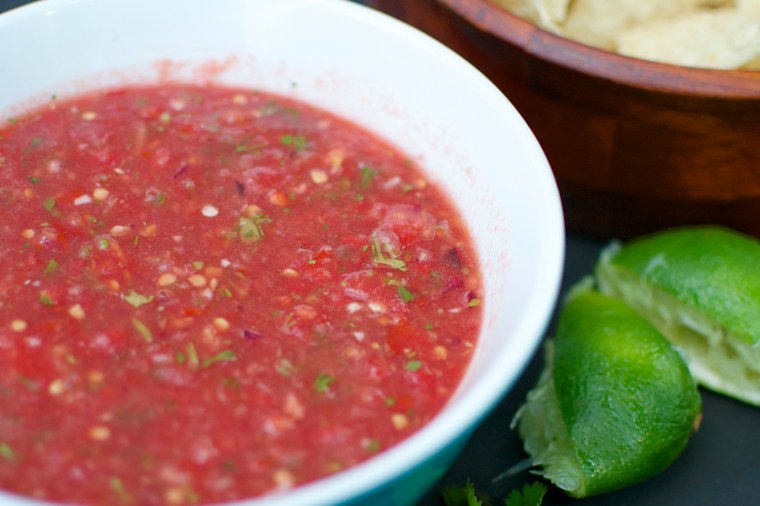
I used fresh roma tomatoes, but other varieties are juuuust fine. Plus, I’ll tell you a secret. This recipe can even be made in the winter with (gasp) canned tomatoes.  I have used some that I canned from my garden, but if you only have store-bought, go for the good kind! Muir Glen is my fave. The secret to this salsa is definitely good tomatoes AND lime juice.

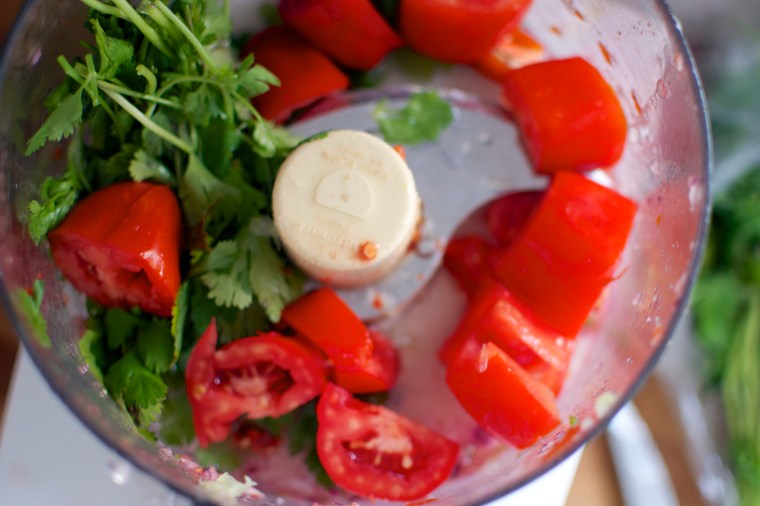
I whip up my salsa using a food processor but if you love to chop chop chop, then feel free to dice away. I like to reserve my energy for diving head first into the salsa bowl. If you do end up chopping up the ingredients, your salsa will just be more chunky….which is what I’m going to be if I don’t get my face out of this bowl of chips and salsa soon!

Give me more!

Fresh and Easy Salsa / Big Eats Tiny Kitchen

Fresh and Easy Salsa

  • Servings: 4 Cups
  • Difficulty: Easy
  • Print

Ingredients

  • 4 cups diced fresh tomatoes (about 15 roma tomatoes)
  • 1 small onion, chopped
  • 3 cloves of garlic
  • 2 jalapeños (chopped and seeds removed if you want mild salsa)
  • 1/4 bunch of cilantro
  • juice of 2 limes
  • 2 teaspoons salt (or to taste)

Instructions

  1. Place tomatoes in bowl of food processor and pulse a few times until tomatoes are fine diced. Transfer tomatoes to a medium-sized bowl.
  2. Place chopped onion, garlic, jalapeños, cilantro, and lime juice to bowl of food processor. Pulse for 15 seconds or until everything is chopped fine. Transfer contents to the medium bowl with the tomatoes. Stir well and add salt to taste. Cover and refrigerate until ready to serve. Can be made ahead of time.

Carne Asada Salad (Paleo Friendly and Gluten Free)

Carne Asada Salad / Big Eats Tiny Kitchen

Have you ever lost your mojo? Felt lost?

If you are frequent reader or friend of mine or even someone I have passed on the street, it has been a bit too obvious that I have lost my mojo.  I’m typically so goal-driven, mega type A, and awesome…or anal, whichever you deem it. But not for sometime. For a while I have felt like a feather in the wind with no direction, which is TERRIFYING to me. I think we all have a threshold of how much willpower we have and how much we can endure. And then one day you snap…for me it was the lack of ketchup in our house when I had made sweet potato fries…. FOR THE LOVE OF PETE WHY CAN”T I HAVE WHAT I WANT!

Too dramatic? naaaah.

Carne Asada Salad / Big Eats Tiny Kitchen

But there has to be a certain point when you just have to realize that life just is what it is. We get handed certain things in life and we can either roll around in it like a stinky pile of poop or we can make poop pie and throw it at someone that deserves it. I’ve decided to quite rolling in poop and throw it. Wait…I don’t think that came out right.

Well, you get what I’m saying right?  Take out your frustrations on others, am I right? That’s what friends are for? right? Friends? Thanks for being there for me. 🙂 No really. Thanks.

This week has been operation “get my mojo back”. If you have often felt like your mojo is gone, I challenge you to get it back by realizing that we can’t compare ourselves to others (even past versions of ourselves). We are where we are and we have to try to enjoy these moments, even the hard ones, because our time is short and our love is vast.

Carne Asada Salad / Big Eats Tiny Kitchen

Here are a few of the things I did to get mojo back this week that you can try:

  • Exercise – Go for a walk. Listen to the birds, see the trees in bloom, embrace the now.
  • Treat Yo’ self – Hello mani/pedi.
  • Cook – Try something simple and fresh for yourself and family. Your belly will thank you.
  • Laugh – This is the most important thing of all.

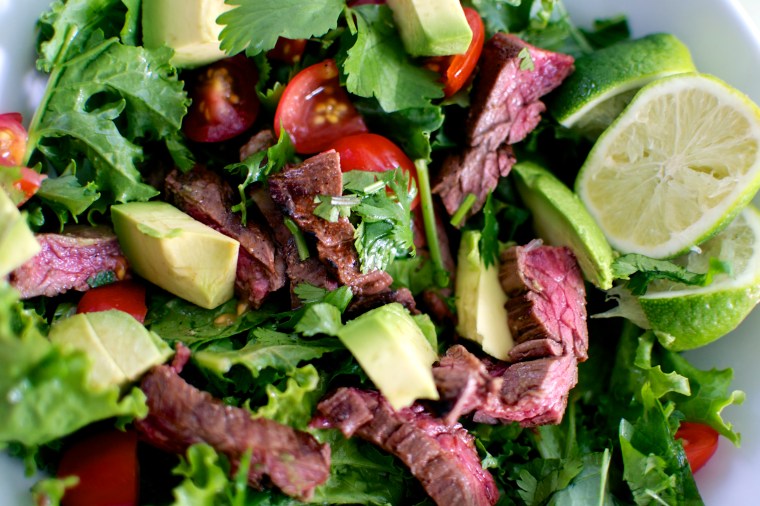
As part of my “get my mojo back” week, I decided to cook something fresh and simple. I thawed out a strip steak from our purchase of 1/4 of a COW. (I don’t know which fourth I got, but he’s tasty.)  Strip steaks are nice and thin and are great for carne asada! So I whipped up a quick carne asada marinade when I got home from work. Fresh limes are key to the marinade. Let your steak marinade for at least an hour and up to 4 hours. Fresh greens are abundant in the farmers market and in my garden so I decided to create a fresh salad instead of tacos.  I used fresh baby butter lettuce, baby kale, and cilantro that is growing in our garden and some other goodies that I picked up at the market to create a Carne Asada Salad that was quick, delicious, and something that I will be making many times during this grilling season. Feel free to modify your toppings, but focus on fresh and good quality items.

Carne Asada Salad / Big Eats Tiny Kitchen

Carne Asada Salad / Big Eats Tiny Kitchen

Strip steaks are thin and will not require a long time on the grill. For medium, you will likely only need to grill it 4 to 5 minutes per side, or less. Keep an eye on it. You could even cook your steaks inside in a cast iron skillet or grill pan if you don’t have a grill.

Carne Asada Salad (Gluten Free, Dairy Free, Paleo Friendly)

  • Servings: 2-4
  • Difficulty: Easy
  • Print

Marinade Ingredients

  • 1 lb strip steak (flank steak would work too)
  • 1 large clove of garlic, smashed and minced
  • juice of 1 large lime
  • 1 tablespoon apple cider vinegar
  • 1 teaspoon cumin
  • 1 teaspoon smoked paprika
  • 1/2 teaspoon coriander
  • 1/4 teaspoon cayenne powder
  • salt and pepper
  • 2 tablespoons olive oil

Salad Ingredients

  • Mixed greens (baby kale, spinach, arugula, butter lettuce, etc)
  • 1 bunch of cilantro, chopped
  • green onions, diced
  • 1 cup grape tomatoes, diced
  • crumbled feta (optional)
  • fresh limes
  • avocado
  • salsa

Instructions

  1. Place the strip steak in a large glass bowl or baking dish.  Do not use metal because it may react with the acids in the marinade. Salt and pepper on both sides. Combine the marinade ingredients in a small bowl and pour over the steak. Make sure that all of is covered and saturated with the marinade. Cover the bowl with plastic wrap and allow to marinate in the refrigerator for 1 to 4 hours. Pull out of the refrigerator and allow the steak to come to room temperature (about 30 minutes). 
  2. Preheat your grill or grill pan using medium-high heat or flame. Brush the grates of your grill with a bit of olive oil so that the steak does not stick to the grates. Remove the steak from the marinade and place onto the hottest part of the grill and cover the grill. Grill until the underside of the steak is browned, about 4 minutes depending on the thickness of your steak.  Flip the steak and cook on the other side for another 4 minutes.
  3. Remove the steak from the grill and allow to rest for 5 minutes. Thinly slice the steak across the grain on a diagonal. This will help the steak from being chewy.
  4. Prepare four salad bowls and place sliced steak on top. As another option, prepare these as tacos using grilled corn tortillas. Mmmmm! Happy eating!


Tilapia Fish Tacos

Tilapia Fish Tacos  / Big Eats Tiny Kitchen
Tilapia Fish Tacos / Big Eats Tiny Kitchen

I still remember the first time I heard someone mention fish tacos. It was nearly 15 years ago. My face contorted and I wanted to vom in my mouth. Tasty, huh.  They didn’t sound appetizing…at…all. I imagined tacos that were a combo of Long John Silvers and Taco Bell…bleeeeeeh. But I went for it and took the fish taco challenge.

Thank goodness that was not what they turned out to be. They were fresh. They were NOT breaded. They were spicy with a fresh vinegary slaw on top. And did I mention the cilantro? and lime juice? And grilled corn tortillas? Ya, there was no turning back. I was a fish taco convert. I wanted to tell everyone about the magic of wrapping a blackened tilapia filet into a corn tortilla with cilantro and lime juice. I was ready to shove them in any doubters face.

Tilapia Fish Tacos (Gluten Free)

But now it is hard to go to a restaurant and NOT find fish tacos on their menu. I don’t have to convince anyone that they aren’t a greasy batch of deep fried fish wrapped in a gordita. Not a taco!

I make fish tacos all the time for solo dinners and for guests, blowing their minds and introducing them to the great fish taco movement. I make them similar to the first ones that I had in California so many years ago. Bursts of freshness are with every bite. Definitely don’t skimp on the lime or the cilantro! Top them with a great fresh vinegary slaw, such as this brussels sprout slaw or this cabbage slaw. I also love whipping up a mango salsa to accompany them.  Mmmmm. So what are you waiting for? Go start converting people to the fish taco revolution!

Tilapia Fish Tacos (Gluten Free)

Tilapia Fish Tacos

Serves 4

Ingredients

  • 1 tablespoons smoked paprika
  • 1 teaspoon garlic powder
  • 2 teaspoons ground thyme
  • 2 teaspoons ground oregano
  • 1 Tablespoon chile powder
  • 1 Tablespoon ground cumin
  • 1/2 teaspoon salt
  • 12 oz tilapia filets
  • 1/2 cup chopped fresh cilantro
  • 3 limes
  • crumbled feta
  • Slaw – such as Brussels sprout and cabbage slaw
  • 8 corn tortillas

Instructions

  1. Preheat oven to 350F.
  2. Combine seasonings in a small bowl (paprika through salt).
  3. Pat the tilapia dry and then sprinkle seasoning on top and bottom of filets. Place tilapia filets on a parchment paper lined baking sheet. Bake for 10 to 15 minutes, or until fish begins to flake apart with a fork.
  4. Remove the fish from the oven. Flake into large chunks.
  5. To prepare the tortillas, either place them in a single layer in the oven for just 1 to 2 minutes or place over an open gas flame to grill them slightly on the edges. I don’t like to microwave my tortillas because they turn out rubbery.
  6. Now it’s time to MAKE YOUR TACOS! Place fish into tortilla and top with slaw, fresh cilantro, and a generous fresh squeeze of lime juice.