Roasted Beets with Apples and Greens

I have a confession.

I have a Friday ritual.

I cry.

I cry every damn Friday morning…not because I want to cry. No, I cry because Story Corps comes on NPR’s Morning Edition every Friday morning while I am on my way to work. And I’m not a cryer, folks,…I’m tough…I’m strong…I do what I want….Rargh!!!!

But on Fridays, there I am….crying at the stop sign or crying by a playground or crying in the parking lot of my office.  I have mascara smeared across my face because this little old man is being interviewed by his granddaughters and he is talking about his wife of 70+ years that just passed away and he remembers dancing with her the first day that they met and how beautiful she was and how she sparkled and now life just doesn’t have that sparkle anymore because she was his sparkle and….damnit…here those stupid tears come again.

This morning those tears streamed down again as I heard an amazing story of a young woman that was homeless in highschool. She shared a room in a Chicago shelter with 6 other family members. She rode the bus 1.5 hrs one way every day to school. She currently is in college, working hard and continuing to take care of her family.  And here those tears come again…it kills me knowing how common this story is. So many Americans are well below the poverty line. So many children are homeless. They have so much to overcome and many are able to but many do not have the chance.

So here is where I give an interweb high five *BAM* to all you educators (my husband included) for fighting for these kids and working long hours and believing and loving and opening your homes and hearts. Keep trucking, because what you do matters.

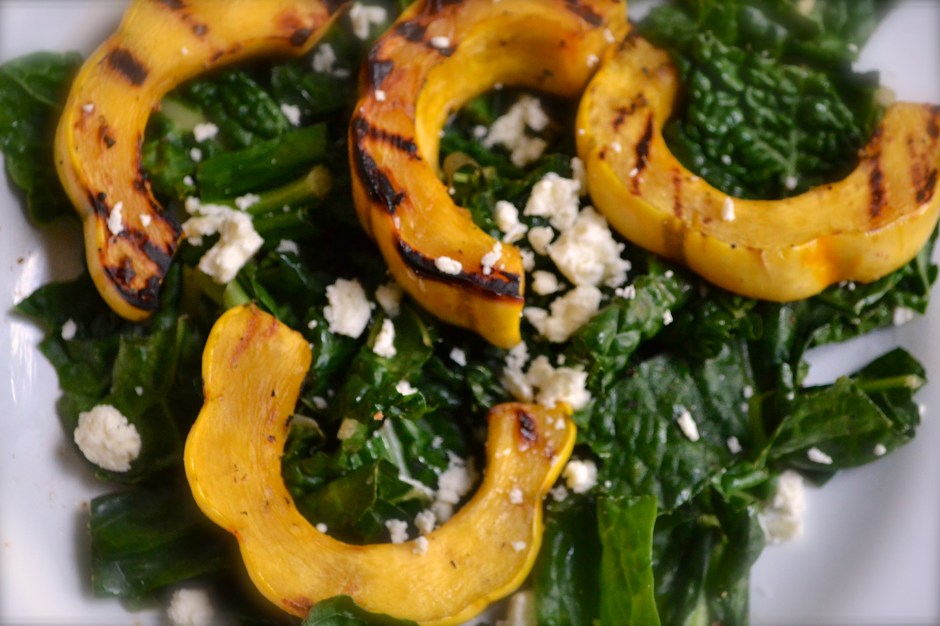
Doh! There I go again. Telling ya’ll a story and forgetting to go into much detail on the featured recipe.  So lets talk beets and fall apples!  A dear friend of mine from grad school sent me a recipe for an apple and kale saute.  I drooled and immediately made it the next night but added two roasted beets that I had bought at the market. Winner!

Roasting beets is super duper easy. It is way better than boiling…ew!  Read below for a short tutorial on roasting and removing the outer skin of the beet. I always run my roasted beets under running water and the skins rub off easily. Oh and USE THOSE GREENS!!!!  I added the beet greens with the kale. The tart apples and earthy roasted beets are a perfect pair. A dijon vinegerette drizzled on top really seals the deal!  Serve as a side with grilled salmon, pork chops, or chicken. Or for a vegetarian or vegan dish, serve over quinoa and maybe add some toasted walnuts. Mmmmm fall.

Roasted Beets with Apples and Greens (adapted from Whole Foods Market)

Serves 4 as a side

Ingredients

  • 1 bunch of beets with beet greens (about 1 lb)
  • 2 small apples
  • 1/4 medium red onion, thinly sliced
  • 1 bunch of kale, stems removed
  • 1 Tablespoon olive oil, divided
  • 1 Tablespoon apple cider vinegar, divided
  • 1 teaspoon stone ground mustard or dijon mustard
  • salt and pepper to taste

Instructions

  1. Preheat oven to 400 F. Let’s roast some beets! Remove greens from beets. Set beet greens aside to use later. Scrub beets well and do not dry off. Wrap beets loosely in aluminum foil. If beets are similar size, then they can all be wrapped together. If the beets are very large, then wrap them separately. Transfer the wrapped beets to a baking sheet and roast for 1 hour for large beets and 45 minutes for smaller beets. Beets are done when a fork slides easily to the middle of the beet. Allow the beets to cool for 5 minutes, or cool enough to handle. Hold the beets under running water and rub the outer skin away easily. Note – if the skin doesn’t come off easily then it is likely that the beets need to cook a little longer.  Peel and slice all the beets. Set aside.
  2. While the beets are roasting in the oven and they have about 20 minutes until they are done, start cooking the rest of your ingredients. Wash and remove the stems from the beet greens and kale.
  3. Heat 1/2 Tablespoon of olive oil in a skillet. Saute red onion for 5 minutes or until translucent and browned. Add thinly sliced apples and cook for 5 minutes, stirring frequently. Add 1/2 tablespoon of apple cider, kale, and beet greens. Place lid on top of skillet and allow to steam for about 5 minutes, stirring frequently. Remove from heat when greens are wilted.
  4. In a small bowl, mix remaining 1/2 tablespoon olive oil, 1/2 tablespoon apple cider vinegar, and mustard. Set aside.
  5. Divide the kale and apple mixture among 4 plates. Place sliced beats on top of kale and apples. Season with salt and pepper. Drizzle with vinaigrette. Serve warm or at room temperature. Note – If you don’t use all of the roasted beets, they can be stored whole or sliced for up to a week in the refrigerator.

Spiced Zucchini and Apple Cake and an Anniversary

Seven years ago today, I walked down the isle to Johnny Cash’s Ring of Fire and married a crazy man. I call him crazy only because he fell in love with me. What is even crazier is that he has continued to love me amazingly. He is my best friend. I’m one lucky gal. The luckiest in fact.

We make an odd pair. A great team, but an odd pair. He is total left brain and spontaneous and fun and boisterous and ADD and passionate and people oriented. Me? None of those things. Opposite. This man allows me to be crazy and anal retentive. He has taught me to go with the flow…well…to TRY to go with the flow. I’m a Type A engineer…I do as good as I can. I’ve come a long way.

Case in point – On our first anniversary, we took a road trip from Oklahoma to Nantucket. My cousin lived there and we decided to head up there to see her. We were broke (I was getting layed off from my job and going back to school to get my masters). We decided to camp the whole way and eat packed food. We had a tight budget. Well, correction…I had a tight budget.

We spent the first night at a friend’s place in Chicago. We ate turkey sandwiches that night at their house. Budget accomplished. Check. Next day, we headed to New York. Around 9 am it became apparent that we have left our turkey meat in Chicago. Kiley was hungry. I offered him the only option we had….mustard sandwich. He was not a fan. He pulled over to get a sausage biscuit. “But…that’s not a part of the budget,” I said. He asks if I want one. And of course I said no…because it was not in the budget…I mean, in my defense that dollar could make or break this thing, people!!!! SO there he is…eating his hot and steamy and fresh and awesome breakfast sausage biscuit…and there I am…eating my cold and floppy and soggy mustard sandwich. My mustard sandwich was awesome. He was totally jealous.

Do you now know why I think he is crazy….for putting up with me! Seriously.

But that was year 1…and now, 7 years later, he has totally relaxed. Ha…I mean, I have relaxed. A bit. We now own a 1974 VW camper van called Annabelle that we “drive” all over America. Well, sometimes we do not drive her back (she gets towed)…but it’s always a good time and always an adventure.

Right now we are on yet another adventure. This time Kiley surprised me with a train ride to Hermann, Missouri….Missouri’s very own wine country. It’s a quaint German town nestled on the banks of the Missouri River an hour or so west of St Louis. So cheers and I hope you are having a wonderful Monday, because I am.

Oh…this cake! I nearly forgot with all the gooshy anniversary talk. Typically on Mondays I present a Food Matter’s Project (FMP) recipe. Today’s recipe was Apricot Polenta Cake which appears to be rather easy and tasty. However, apricots are not around right now at the market and Kiley does not eat grains…so no polenta. Womp womp. But, in an attempt to stick with the “cake” theme of the FMP, I baked this lovely zucchini spice cake. It is adapted from one of my new favorite flood blogs, Against All Grains. She cooks great recipes for individuals that have sensitivities to grains and dairy. This cake is adapted from her zucchini bread recipe which is made with almond flour. My adaptation amps up with fall spices (cinnamon, ginger, nutmeg) and tops it with local apples.

Enjoy this cake for breakfast, dessert, snack, or on a road trip (slices are coming with us on the train). Take it from me, these cake slices are SO much better than eating mustard sandwiches. 😛

Almond Flour Zucchini and Apple Cake (adapted from Against All Grains)

Ingredients

  • 1.5 cups blanched almond flour
  • 1 Tablespoon ground cinnamon
  • 1 teaspoon baking soda
  • 1/2 teaspoon salt
  • 1/2 teaspoon ground nutmeg
  • 1/2 teaspoon ground ginger
  • 3 eggs
  • 1/4 cup maple syrup
  • 2 Tablespoons coconut oil
  • 1 to 2 cups shredded, unpeeled zucchini
  • 2 apples (dice one apple and thinly slice the other to place on top)

Instructions

  1. Preheat oven to 350F. Spray an 8-inch or 9-inch cake pan with nonstick spray. Set aside.
  2. Combine the dry ingredients (almond flour through ginger) in a small bowl. Set aside.
  3. In a separate medium bowl, mix wet ingredients (eggs through oil) and beat for about 1 minute. Stir in zucchini and one of the diced apples.
  4. Slowly add the dry ingredients to the wet ingredients. Mix until all of the dry ingredients have been incorporated.
  5. Pour into prepared pan. Place sliced apple on top in a circle pattern. Bake at 350F for 35 to 40 minutes or until the middle is set. A toothpick comes out clean when the cake is done.

Pumpkin and Apple Almond Flour Muffins (Grain Free)

So I have a crush. And not a little one. A BIG one…a huge, gushy, get red, giggle, snort, blow chocolate milk out of my nose kind of crush. His name…. Pumpkin…that’s Mr. Pumpkin. Ya….you know him. You all love him.  He’s like the Matthew McConaughey of fall produce.  Whatever he is in, it’s golden, perfect, never disappoints and always shirtless.

Such is my crush….mmmmm pumpkin. I’ve been collecting and dreaming about amazing recipes: pumpkin bourbon ice cream, pumpkin bars, pumpkin bread, pumpkin coconut soup, pumpkin latte, pumpkin butter, pumpkin oatmeal, pumpkin pancakes, pumpkin smoothie, pumpkin cheesecake, pumpkin curry. The list goes on and on and on and on, people. It’s bad. I’ve got a pumpkin fever!

And then I stumbled upon this great pumpkin muffin recipe made with almond flour. As soon as the calendar hit September 1st, my oven went on and in went these delicious pumpkin muffins.  I had just picked up some local golden delicious apples at the market and decided to throw one into the mix. I’d been dreaming of these puppies and boy howdy they did not disappoint…much like Matthew McConaughey.  Pull the muffin liner off and they too will be shirtless. Whoah!

I honestly have to say these are hands down the best pumpkin muffins I have had…gluten free or not. It’s a double bonus that they are not only gluten free but grain free. So if you are on the fence about experimenting with almond flour, give these puppies a go. You will forever be in deep smit. You can even eat them shirtless. I won’t tell.

I should note that I made these with my newest purchase of Honeyville blanched almond flour.  I’m super impressed with the light texture.  Trader Joe’s offers almond meal and it is made from unblanched (skins still on) almonds. Bob’s Redmill also sells almond flour. Although Bob’s is blanched,  it has a more coarse texture but still tastes gooooooood. So if you are looking for a lighter texture to baked goods, I’d invest in a better almond flour such as Honeyville or go to Nuts.com.  Store your flour in the fridge or freezer. I also think Whole Foods offers bulk almond flour.   Another option is to regrind Bob’s almond flour in a coffee grinder. Just be careful to not let it process to long or you will end up with almond butter. DOH!

Pumpkin and Apple Almond Flour Muffins (Grain Free) (Slightly adapted from the Urban Poser)

Ingredients

  • 1/2 cup pumpkin puree
  • 2 large eggs, beaten
  • 1/3 cup maple syrup (or honey)
  • 2 Tablespoons coconut oil, melted
  • 3 Tablespoons apple sauce
  • 1 diced apple, leave skin on if organic
  • 2 1/2 cups blanched almond flour (I use Honeyville or go to Nuts.com)
  • 1/2 tsp baking soda
  • 1/4 tsp salt
  • 1 Tablespoon ground cinnamon
  • 1/2 teaspoon ground nutmeg
  • 1/4 teaspoon ground ginger
  • 1/8 teaspoon ground cloves
  • 1/4 cup of walnuts or pecans
Instructions
  1. Preheat oven to 350F. Spray 12 cup muffin tin or place muffin liners within tin. Set aside.
  2. In a large mixing bowl, combine wet ingredients (eggs, pumpkin, maple syrup, coconut oil, and applesauce). Combine until well mixed. Add diced apple. Set aside.
  3. In a separate bowl, combine dry ingredients (almond flour, baking soda, salt, and spices). If you do not have blanched finely ground almond flour, you may need to regrind your almond flour in a blender.
  4. Add the dry ingredients to the wet ingredients. Mix until combined where there are no visible lumps. Add nuts and mix until combined. The batter will be rather thick.
  5. Spoon the batter into the prepared muffin liners or muffin tin. Fill to about 2/3 full, smoothing the tops with the bottom of a spatula or spoon.
  6. Bake in 350F preheated oven for 25 to 30 minutes or until golden brown. Check doneness by inserting a toothpick into the center of a muffin. It will come out clean when done. Allow to cool on a rack, if you dare. Dive in. These freeze well.

Raw Zucchini Salad with Sesame Ginger Sauce

This weekend was a bit tough for me to study. The fall air poured through our open windows. Every time I opened my book, other things called my name: the farmers market, flea market, the garden, zucchini bread, OU football, wine, lunch, wine, dinner, cleaning the bathroom, going for a 7 mile run, getting my toes painted, more wine, walking my dog, another glass of wine….are you seeing a pattern?  Maybe it was the wine that made it difficult? Naaaaaah.

While at the farmers market this weekend, we picked up a poop ton of sweet potatoes, zucchini, peaches, and apples!  So, when this week’s Food Matters Project recipe was Edamame Cakes with Soy Drizzle I decided to take this asian-inspired recipe to Zucchini Land and use up my new bounty of zucchini! This raw salad is uber easy, so fresh and quite beautiful too.  Use the shredder attachment of a food processor to make quick work of shredding up these veggies! Save those knuckles, people!

Note: Don’t add the sesame-ginger dressing until you are ready to serve the salad. The zucchini tends to “weep” and get soggy if it sits with the dressing on it for too long.

To see the original Food Matters Project recipe for Edamame Cakes with Soy Drizzle, check out Life with the Lushers. And be sure to see what the other bloggers came up with here.

Raw Zucchini Salad with Sesame Ginger Sauce

Serves 4 to 6 as a side

Raw Zucchini Salad Ingredients

  • 1 large zucchini, shredded (about 3 cups)
  • 1 red bell pepper, julienned
  • 1 carrot, shredded
  • 1 scallion, green and white parts chopped
  • 1/4 cup cilantro, chopped

Sesame-Ginger Sauce

  • 1 tablespoon coconut aminos or soy sauce
  • 1 tablespoon apple cider vinegar or rice wine vinegar
  • 1 teaspoon sesame oil
  • 1 teaspoon fresh grated ginger
  • 1 clove of garlic minced
  • juice of 1/2 fresh lime
  • salt and pepper to taste

Instructions

  1.  If you have a food processor with a shredding attachment, it will make shredding the zucchini and carrot a breeze. Place the shredded zucchini in a colander and allow to drain for about 30 minutes. Slice the red bell pepper really thin. Combine the zucchini, carrot, bell pepper, and cilantro in a medium bowl. Set aside.
  2. In a small bowl, mix sesame-ginger sauce ingredients and set aside.
  3. When you are ready to serve the salad, add the sesame-ginger sauce to the zucchini mixture. Season with salt and pepper. Serve immediately sprinkled with sesame seeds.

Grilled Delicata Squash with Kale

Do you smell that? Ya…that’s fall people. IT is HERE! Well almost.  The weather man is taunting us. There are 90s in the forecast for the coming week but I have my fingers in my ears and I am not listening because my windows are open, it is in the 60s outside, and I am ready to pull out my BOXES O’ SWEATERS! Yes…that was plural….boxes.

Mmmmmmmmm….sweaters.

Also… winter squash is edging its way onto farmer’s tables at the market. Pumpkins, gourds, acorn squash, butternut squash, spaghetti squash, cinderella pumpkins.

Mmmmm…pumpkin. Oh, be ready people…pumpkin recipes are going to blow this place up! We are going to be swimming in pumpkin at this hacienda. But until then, let’s get back to winter squash, shall we?

One of my favorite winter squash varieties is the delicata squash. It is slightly larger than an acorn squash, but smaller than a butternut.  And did I mention that it is SOOO much easier to cut in half due to the thinner outside skin. The other beauty to this squash (besides those awesome trendy stripes) is that the skin is edible after it is cooked!  Now don’t get me wrong. I love butternut squash like the next bloke, but carving off all that stupid skin and hacking and chopping and nearly taking off my fingers and ear lobes in the process to just get a few measly cups makes me a bitter woman. More bitter than normal. And that’s bitter, people.

The inside flesh is smooth and similar to butternut in texture.  It caramelizes when roasted or grilled.  This dish can easily be adapted for roasting in an oven.  In an oven preheated to 425F, Roast for about 40 minutes. Around 30 or 35 minutes, keep an eye on them and test with a fork. They are done when the fork slides through with no resistance, like a potato.

You could serve the squash alone, but I topped them on top of a fresh lacinato kale salad. A perfect fall salad! Now, where’s my sweater?


Grilled Delicata Squash with Kale

Serves 4 as a side

Ingredients

  • 1 delicata squash, deseeded, halved and sliced in 1/2-inch slices (keep skin on)
  • olive oil
  • salt and pepper
  • 1 bunch of kale (or swiss chard), stems or ribs removed and leaves cut into 1-inch strips and gently massaged. (Read this article to see why and how to massage that beautiful kale.)
  • feta (leave off for vegan and paleo)

Instructions

  1. Prepare and heat grill for direct grill method.
  2. Toss squash slices in olive oil and season with salt and pepper. Grill over medium heat for 5 minutes. Then carefully flip to the other side. Continue grilling for another 5 minutes.
  3. Meanwhile, back on the ranch, add kale strips to a medium bowl. Sprinkle with salt and gently massage so that the kale slightly breaks down and becomes dark in color.
  4. Divide kale between 4 bowls. Place grilled squash rings on top of kale. Top with crumbled feta.

Basil Chicken Stir Fry

Life.

It is something that we are all given.  With that life, we make choices. With those choices, we affect our life but more importantly, we affect the lives of others.

This weekend was a hard one. My husband’s family suffered a great loss. An unexpected loss at that. Times like these reaffirm my belief that we should always let people know how much they mean to us.

After such a long weekend out of town, we arrived home this afternoon and I was hungry for fresh vegetables. A basic stir fry is the easiest way to use up whatever vegetables you have lingering in your fridge. Feel free to sub any fresh or frozen vegetables that you may have around or in the garden.

Stir Fry Tip Numero Uno – Cut all your veggies up in advance and have everything prepped and ready to go.

Stir Fry Tip Numero Dos – Have a good stir fry sauce recipe.

I have also included my basic stir fry sauce recipe which is adapted from the Moosewood Cookbook. Because we have recently given up soy products, I used coconut aminos in place of soy sauce.  It is available at any natural food grocer or online. This recipe would also taste great with coconut milk and curry. Mmmm.

For other stir fry ideas, check out the Food Matters Project here.

Basil Chicken Stir Fry

Serves 4

Basic Stir Fry Sauce:

  • 1/4 cup raw coconut aminos (or soy sauce)
  • 1/4 water
  • 1 teaspoon sesame oil
  • 1 tablespoon fresh ginger, grated
  • 2 to 3 cloves of garlic, minced
  • 1 tablespoon fresh lime juice

Basil Chicken Stir Fry Ingredients:

  • 2 to 3 tablespoons coconut oil (or grapeseed oil)
  • 1 lb chicken breast or thighs, cut into 1/2-inch pieces
  • 1/2 medium-sized onion, chopped
  • 1/4 teaspoon salt
  • 4 cups of vegetables: bell peppers (cut into 1/4-inch strips),  carrot (cut into thin slices), mushrooms (sliced), kale (chopped), spinach, green beans, cauliflower, cabbage, tomatoes, broccoli, etc.
  • 1/8 teaspoon red pepper flakes (or more depending on desired spiciness)
  • 1/3 cup fresh basil, sliced (plus more for topping)
  • sesame seeds (optional)

Instructions

  • Combine stir fry sauce ingredients in a small bowl and set aside.
  • Over medium heat, heat 1 tablespoon of coconut oil in a large skillet. Place diced chicken in skillet with half of the stir fry sauce. Cook until browned and cooked through (about 10 minutes). Stir frequently. When cooked through, remove chicken from skillet and place in a separate bowl.
  • In same skillet that the chicken just was removed from, add another tablespoon of coconut oil. Allow to melt (30 seconds). Turn heat to medium-high. Add onions and salt and stir fry for about 2 minutes.
  • Add all other vegetables except leafy greens (spinach, kale, chard) and tomatoes. Stir fry until they begin to get tender. Add tomatoes, leafy greens, and the remaining stir fry sauce to the skillet. Keep the heat medium-high. Stir frequently. The sauce will begin to thicken.
  • Add chicken, red pepper flakes, and basil. Stir until heated through and incorporated. Remove from heat. Top with additional basil and sesame seeds.

Swiss Chard Wraps

Quick and easy meals are the focus in my house lately. And for the coming future….well, for the next three months.  I am feverishly preparing to take the professional engineering (P.E.) exam this coming October. The PE exam is the final step in the licensure process for engineers.

It’s a massive 8 hour exam and I am quite out of practice in the studying department.  SO to dedicate the most time and be as efficient as possible, I study every ounce that I can and end up taking only a few breaks to eat and squeeze in a few runs. I’m basically M.I.A. So if you need me in the coming months, send smoke signals or slide a note under the door.

My recipes and posts in the coming months will likely reduce in quantity but not quality. I will be featuring quick breakfast/lunch/dinner recipes for folks on the go (or chained to a desk studying).  I got ya’lls back people.

These swiss chard wraps were a quick linner (lunch/dinner) that we enjoyed over the weekend using leftover smoked chicken and a few chard leaves.  They are similar to burritos, except the chard leaf serves as a fresh “tortilla”, making it both gluten free and grain free. They come together in a snap.  You could use whatever leftovers you have on hand such as taco meat, or grilled veggies, or even scrambled eggs.  Top similar to tacos, using avocados, fresh tomatoes, salsa, and cilantro. 

Swiss Chard Wraps 

Serves 4

Ingredients

  • 8 large swiss chard leaves, cleaned and extra stem removed
  • 2 cups of grilled veggies (red bell pepper, zucchini, onion, etc) 
  • 2 cups shredded chicken or beef
  • 1 tomato, diced
  • 1 avocado
  • cilantro
  • salsa

Instructions

  1. In a medium skillet or microwave, reheat veggies and meat.
  2. Assemble the swiss chard wraps like tacos, layering the shredded chicken mixture with the desired toppings. Wrap the chard leaf around the filling and dive in!

Make Ahead Mexican Breakfast Casserole (Gluten Free, Grain Free, and Dairy Free)

A typical weekday morning involves me making a mad dash to get ready and out the door in time. I typically try to squeeze in a morning run, pushing my timeframe and running out the door with barely my hair fixed and DEFINITELY nothing ironed and praying that I thought ahead the night before to pack something for breakfast to eat on the road or in the office.

Most people suffer from the dash and go morning routine. Whether it is because you try to cram a morning workout in or get your kids ready or are just hitting that snoozypooze buttom one too many times, a healthy breakfast is likely the last on your list. I find that if I don’t eat a good solid, protein rich breakfast, the rest of my day has me STARVING AND EATING MY ARMS. Try going the rest of your day with only bloody nubs….not good. Gross, I know. I used to toast whole grain bread and slather almond butter on it for a quick breakfast, but lately I’ve been trying to eliminate gluten and grains from my diet.  Finding quick make-ahead gluten and grain free breakfast alternatives has been the hardest challenge. Until now….

As a fabulous solution to the gluten and grain free breakfast conundrum (and to preserving my poor arms from being eaten), I present to you the great make ahead breakfast casserole! (Imagine glitter flying around right now and echoing god-like voices because this thing is awesome…like you just-won-a-trip-to-Bali awesome or you are-smaller-than-your-favorite-skinny-jeans awesome or you have-a-years-supply-of-ketchup awesome….or is that just me? fine…just me…well it would be friggin awesome.)

I call it “make ahead” for two reasons:

(1) All of the ingredients can be combined the evening or day before, refridgerated, and then baked the morning you plan to serve, and/or

(2) the casserole can be baked ahead of time and the leftovers taste just as delish as if it were fresh baked.

Whip one of these casseroles up on a Sunday evening…go ahead, eat B for D (breakfast for dinner)… and then eat the leftovers for breakfast throughout the week. Brilliant! This gluten-free casserole serves a crowd (10 at least) or it can feed 2 peeps for a full week. It is also a great way to use up excess ground beef!

This recipe is really just a building block. Any meat or veggies could be interchanged. I shredded a sweet potato as the starch.  But if you have picky eaters in your house and they are not down with the sweet potato, then go tell them to make their own breakfast…OR you could be nice and use a shredded potato instead. This casserole is not too spicy but could be amped up by adding an additional jalapeño and chili powder, or using chorizo sausage instead of the ground beef.

Make Ahead Mexican Breakfast Casserole (Gluten Free, Grain Free, Dairy Free, Paleo-Friendly)

Serves 8 to 10 

Ingredients

  • 12 eggs, whisked
  • 1/2 medium onion, diced
  • 1 lb ground beef
  • 1 sweet potato*, shredded with skin on
  • 1 jalapeno, deseeded and chopped
  • 2 cloves of garlic, minced
  • 1 teaspoon chili powder
  • 1 teaspoon smoked paprika
  • 1 teaspoon salt
  • 2 cups diced fresh tomatoes (or 1 can of diced tomatoes, drained)
  • 2 cups fresh spinach (or chard or any leafy green you choose)

*Note – if you have picky eaters in your house, you can substitute regular potatoes for the sweet potato. And if you are _really_ in a pinch, you can substitute frozen hashbrowns.

Instructions

  1. Preheat oven to 375 F. Spray a 9″X13″ baking dish with nonstick spray and set aside.
  2. Whisk eggs in a medium bowl and set aside.
  3. Shred sweet potato using a food processor with shredding attachment or by hand. Set aside.
  4. Cook ground beef in a large skillet over medium-high heat until no pink remains. Break into crumbly pieces using a spatula. Drain off extra grease. Add onion, shredded sweet potato, garlic, jalapeño, chili powder, salt, and paprika into skillet. Cook until onions are translucent (about 5 to 7 minutes).  Add tomatoes and spinach into skillet and cook for about 2 minutes or until spinach begins to wilt.
  5. Pour beef and sweet potato mixture into the prepared 9″X13″ pan and spread evenly along the bottom. Pour whisked eggs over the top, making sure to mix the eggs into the sweet potato mixture with a spoon or spatula. (The casserole can be made ahead 1 day in advance up to this point and covered and refrigerated. Remove from fridge 15 minutes before cooking.)
  6. Place in preheated oven and bake for 30 to 40 minutes or until middle of casserole is set (not jiggly) and edges are lightly browned. Remove from oven and allow to cool for 5 minutes. Feeds a crowd of 8 to 10 or it feeds 2 people over the course of a week!!!!

Creamy Herb Cashew Dip

I think my husband is part fish. When the temperatures begin to increase, he craaaaaves water. Not to drink, but to swim and frolic. Well, I should clarify…he doesn’t really frolic, but he does squeel…a manly squeel and dance…a manly dance.  It’s a good squeel…like a kid discovering a never-ending stash of gummy bears…or me discovering a never ending stash of kale. Don’t judge.

He scoured the web for swimming pools in KC as the temperatures climbed higher and higher, topping at 107 F over the weekend. Luckily a friend allowed us to crash her apartment pool this weekend, quenching his need to be submerged in liquid. It was wonderful. I had forgotten how luxruious it feels to lay by a quiet pool sipping a cocktail, wearing big Jackie-O sunglasses, and munching on snacks.  

This weekend has solidified that my next purchase will be a kiddie pool to place in my tiny tiny tiny yard…Oh and to get some tiny unbrellas for my cocktails. Every girl deserves these two things! Wait..we also deserve pedicures…and great friends….and brunch…and…ok, ladies deserve a lot.

For a pool-side snack, I whipped up an easy dairy-free dip that gets its creaminess from pureed raw cashews. I made the dip dairy-free for two reasons: (1) dairy and the hot afternoon sun do not play well together and (2) my cute manly-squeeling-non-frolicing husband does not consume dairy. 

The dip is basically a vegan ranch dip that can be served with veggie sticks (or crudites for all you unbrella-adorned-cocktail-drinking Jackie-O glass-wearing ladies) or crackers or spread on a sandwich or even watered down and added to KALE as a dressing. It also would be great with these easy homemade beet chips from Meg at My Whole Food Romance, which was this weeks recipe for the Food Matters Project. Mmmmm…

Creamy Herb Cashew Dip (dairy free, gluten free, grain free, paleo, vegan, vegetarian)

Makes 1 1/4 cups

Ingredients

  • 1 cup raw cashews
  • 1/4 cup water
  • 1/4 cup unsweetened coconut milk or almond milk
  • 2 to 3 tablespoons fresh lemon juice
  • 2 teaspoons each of fresh dill, parsley, and chives (save a little bit to sprinkle on top)
  • 1 to 2 cloves of garlic, sliced
  • 1/4 teaspoon cumin
  • 1/2 teaspoon onion powder
  • 1/4 teaspoon kosher salt

Instructions

  1. Add all ingredients to the bowl of a powerful food processor fitted with the steel blade. Process for 2 minutes or until smooth.
  2. Refrigerate until chilled (about an hour). Sprinkle with fresh dill and chives. Serve with plenty of veggies for dipping!

Grilled Cabbage with Cilantro-Mint Chimichurri Sauce

Grill it. Anything….grill it. No ovens. Pop open that grill. Look in your fridge…what do you have?  Me? besides ketchup….

Kale (of course…i’m obsessed)

Beets (another new obsession)…..red cabbage from my CSA….squash, onion, cilantro, cucumbers from the garden, and a whole chicken from the CSA. Hrmmm….

I am of the belief that when nearly anything is roasted or grilled, it makes it better…..like bacon.  Grilled romaine is awesome, so why not cabbage?

This is the easiest side dish. Cut a head of cabbage in 8 equal segments, keeping the core intact! This keeps all your pretty cabbage leaves together. Drizzle with olive oil and season with salt and pepper. Throw it on a preheated grill for 5 to 10 minutes per side. Delicious. Any cabbage would work…green, red, nappa….uhm. I’m sure there are others. Try it.

I served the cabbage with a delicious cilantro-mint chimichurri sauce adapted from Mark Bittman’s Food Matters Cookbook.  As part of the Food Matters Project, the featured Mark Bittman recipe was Mixed Grill with Chimichurri chosen by Lexi of Lexi’s kitchen.  Check it out. Chimichurri is an Argentinian herby sauce similar to pesto, but is typically made from parsely. It amps up anything.   I’m a cilantro and mint whore, and they are taking over my garden. So these two fab herbs went into the chimichurri.

Side note. Does anyone else like to say chimichurri like I do? NO? anyone? just me? Sounds like a dance move. hrmmm…do the chimimimimichurri.

Anyways, I used the leftover chimimimimichurri as a salad dressing for kale the next day.  It’s like a secret power sauce and will make you want to do the chimichurri while you eat it. Note to self, add chimimimichurri to new food loves.

Grilled Cabbage with Cilantro-Mint Chimichurri Sauce

Serves 8

Ingredients

  • 1 head of cabbage, sliced into 8 equal portion making sure to keep the core intact! This keeps your cabbage segments from falling apart.
  • 1/4 cup plus 1 tablespoon of olive oil
  • 1 bunch of cilantro leaves
  • 2 tablespoons of fresh mint
  • juice of 1 lemon
  • 3 garlic cloves
  • 1 teaspoon kosher salt , divided
  • 1/8 teaspoon coarse ground black pepper

Instructions

  1. Preheat grill for direct heat.
  2. Drizzle about 1 to 2 tablespoons of olive oil over cabbage segments. Season generously with salt and pepper.
  3. Carefully place cabbage onto grill, allowing to cook on one side for 5 to 10 minutes. You want those lovely grill marks. Carefully flip and cook on the other side for about 5 minutes, making sure to not completely char your cabbage. I like the edges slightly roasted. Remove from grill.
  4. Meanwhile, back at the ranch (or your kitchen), place the remaining ingredients (cilantro through black pepper) into a food processor or blender. Whirl and whirl until finely chopped. Pour into a jar.
  5. Spoon sauce over grilled cabbage and anything else that you want.