The Best Flourless Brownies

The Best Flourless Brownies (Grain Free) // Big Eats Tiny Kitchen

I’m so sorry.

INCREDIBLY sorry.

I have been M.I.A. for a month. I need to grovel and ask for your forgiveness….

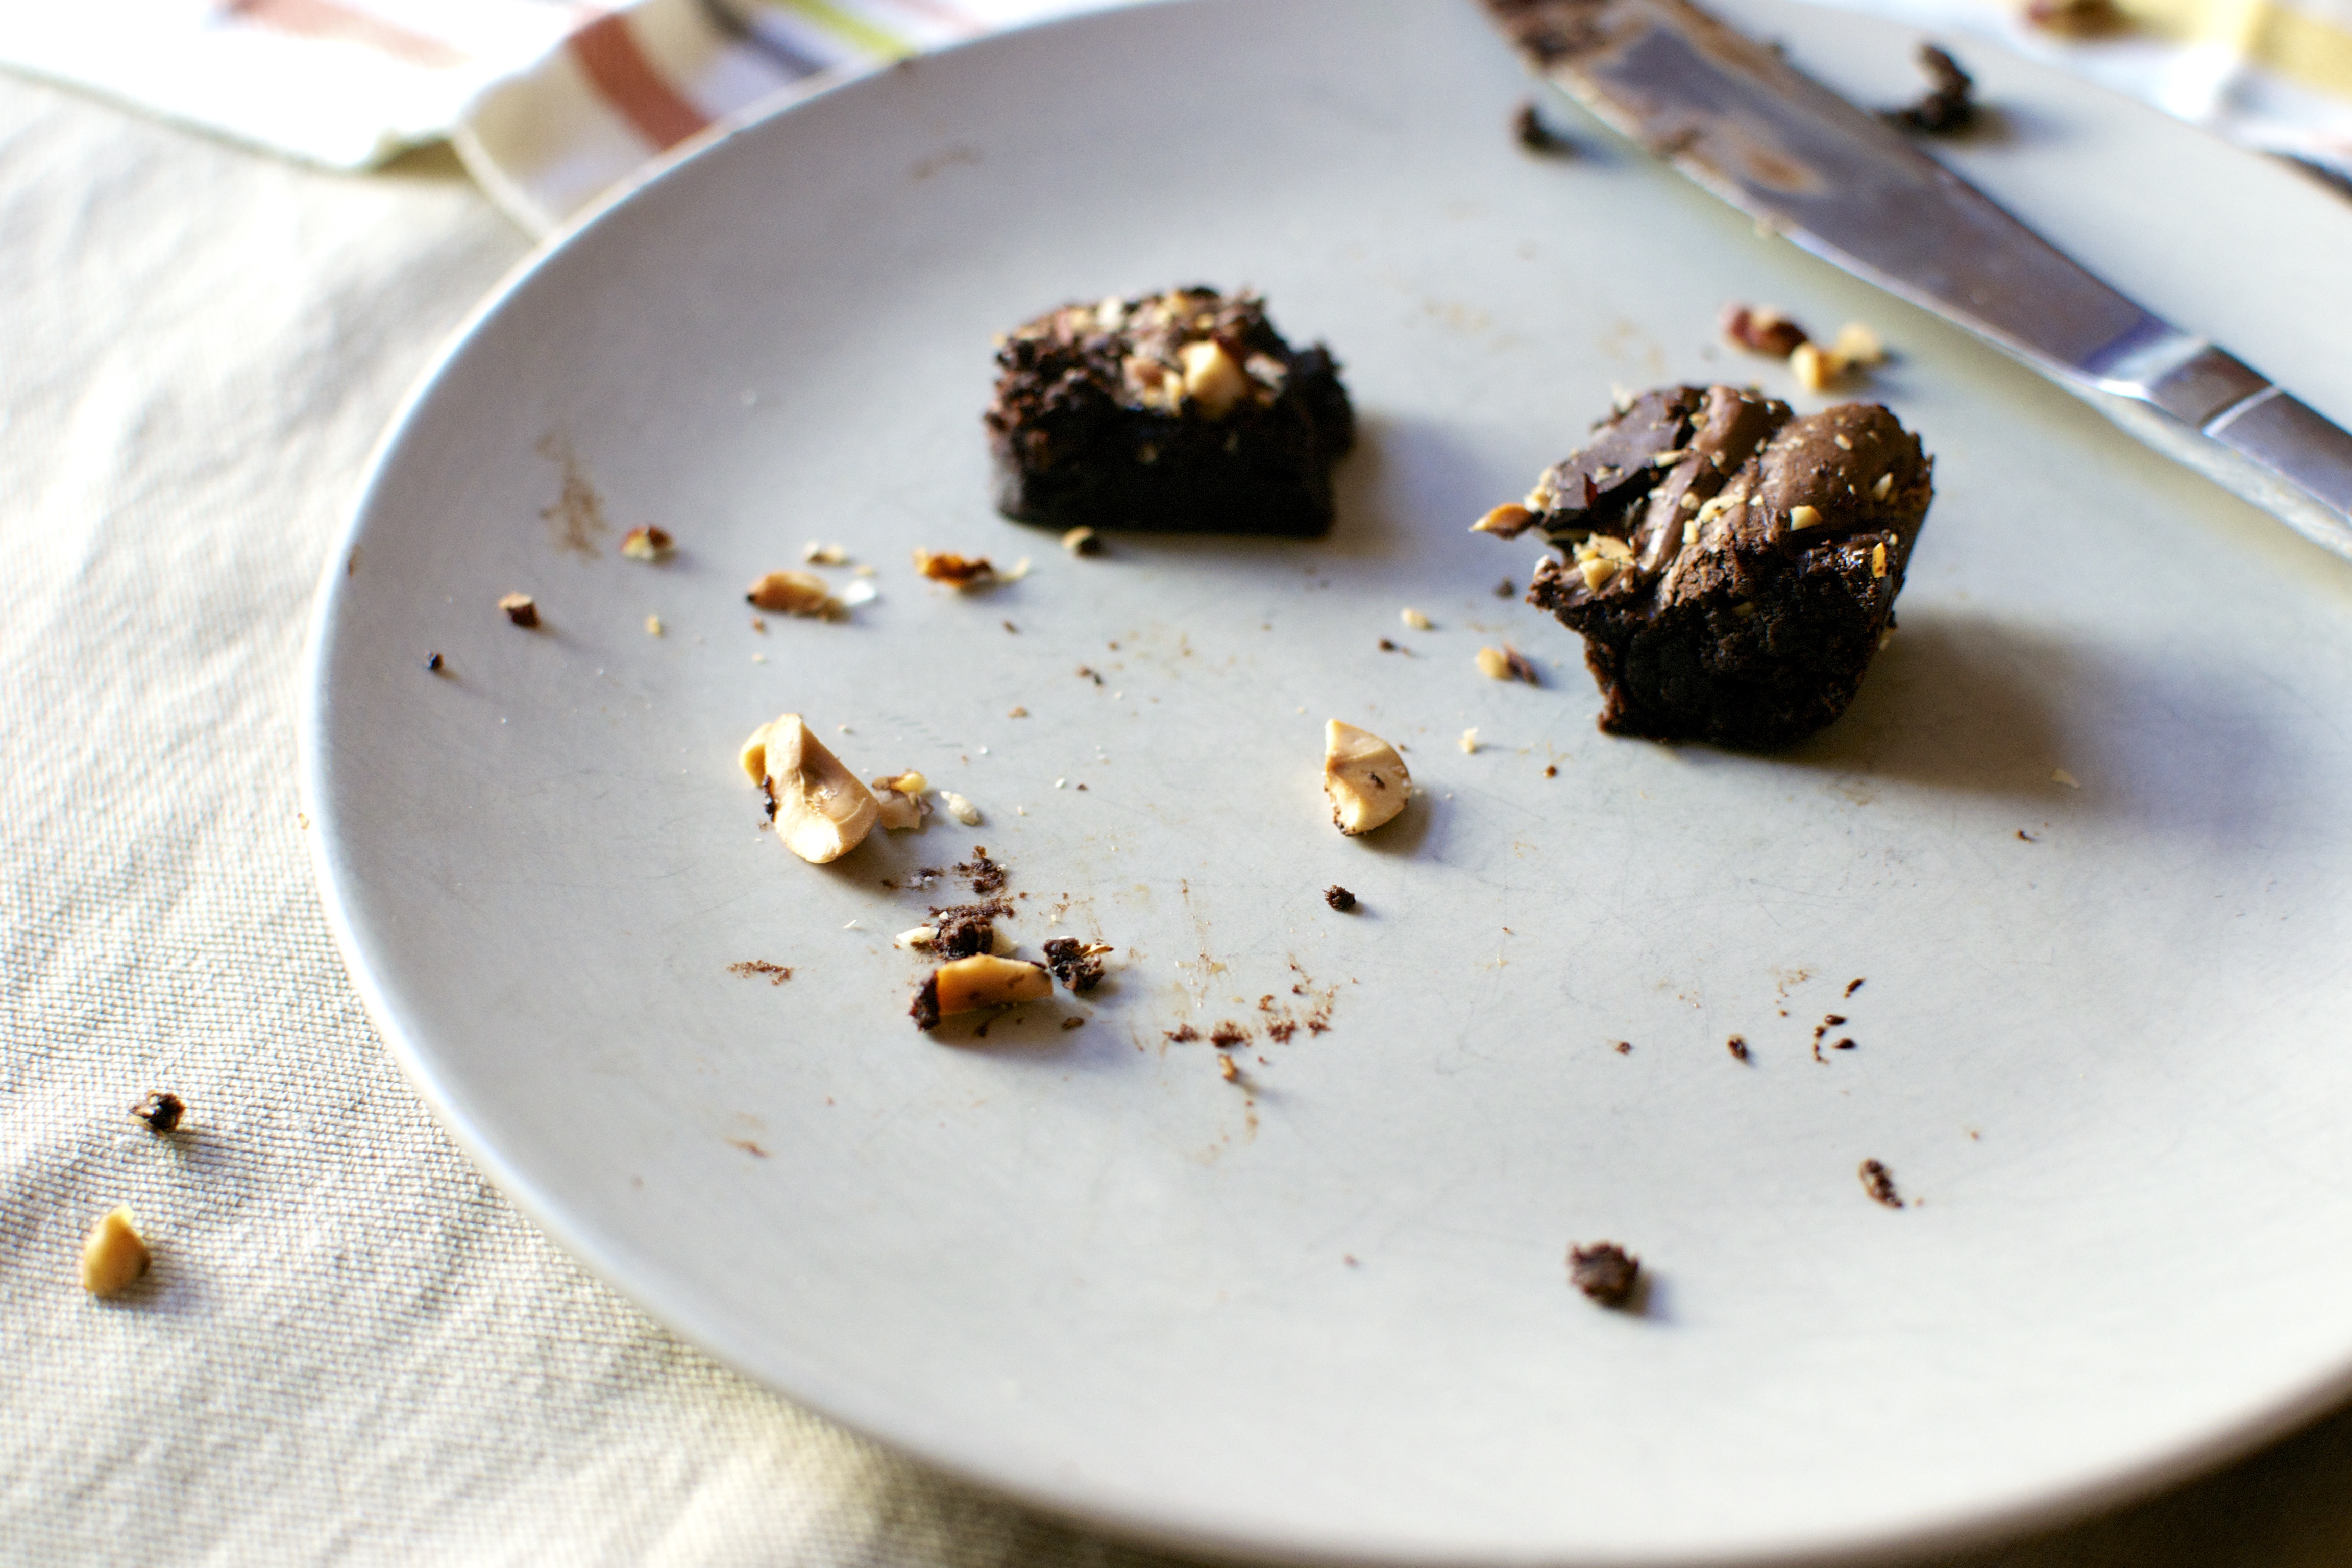
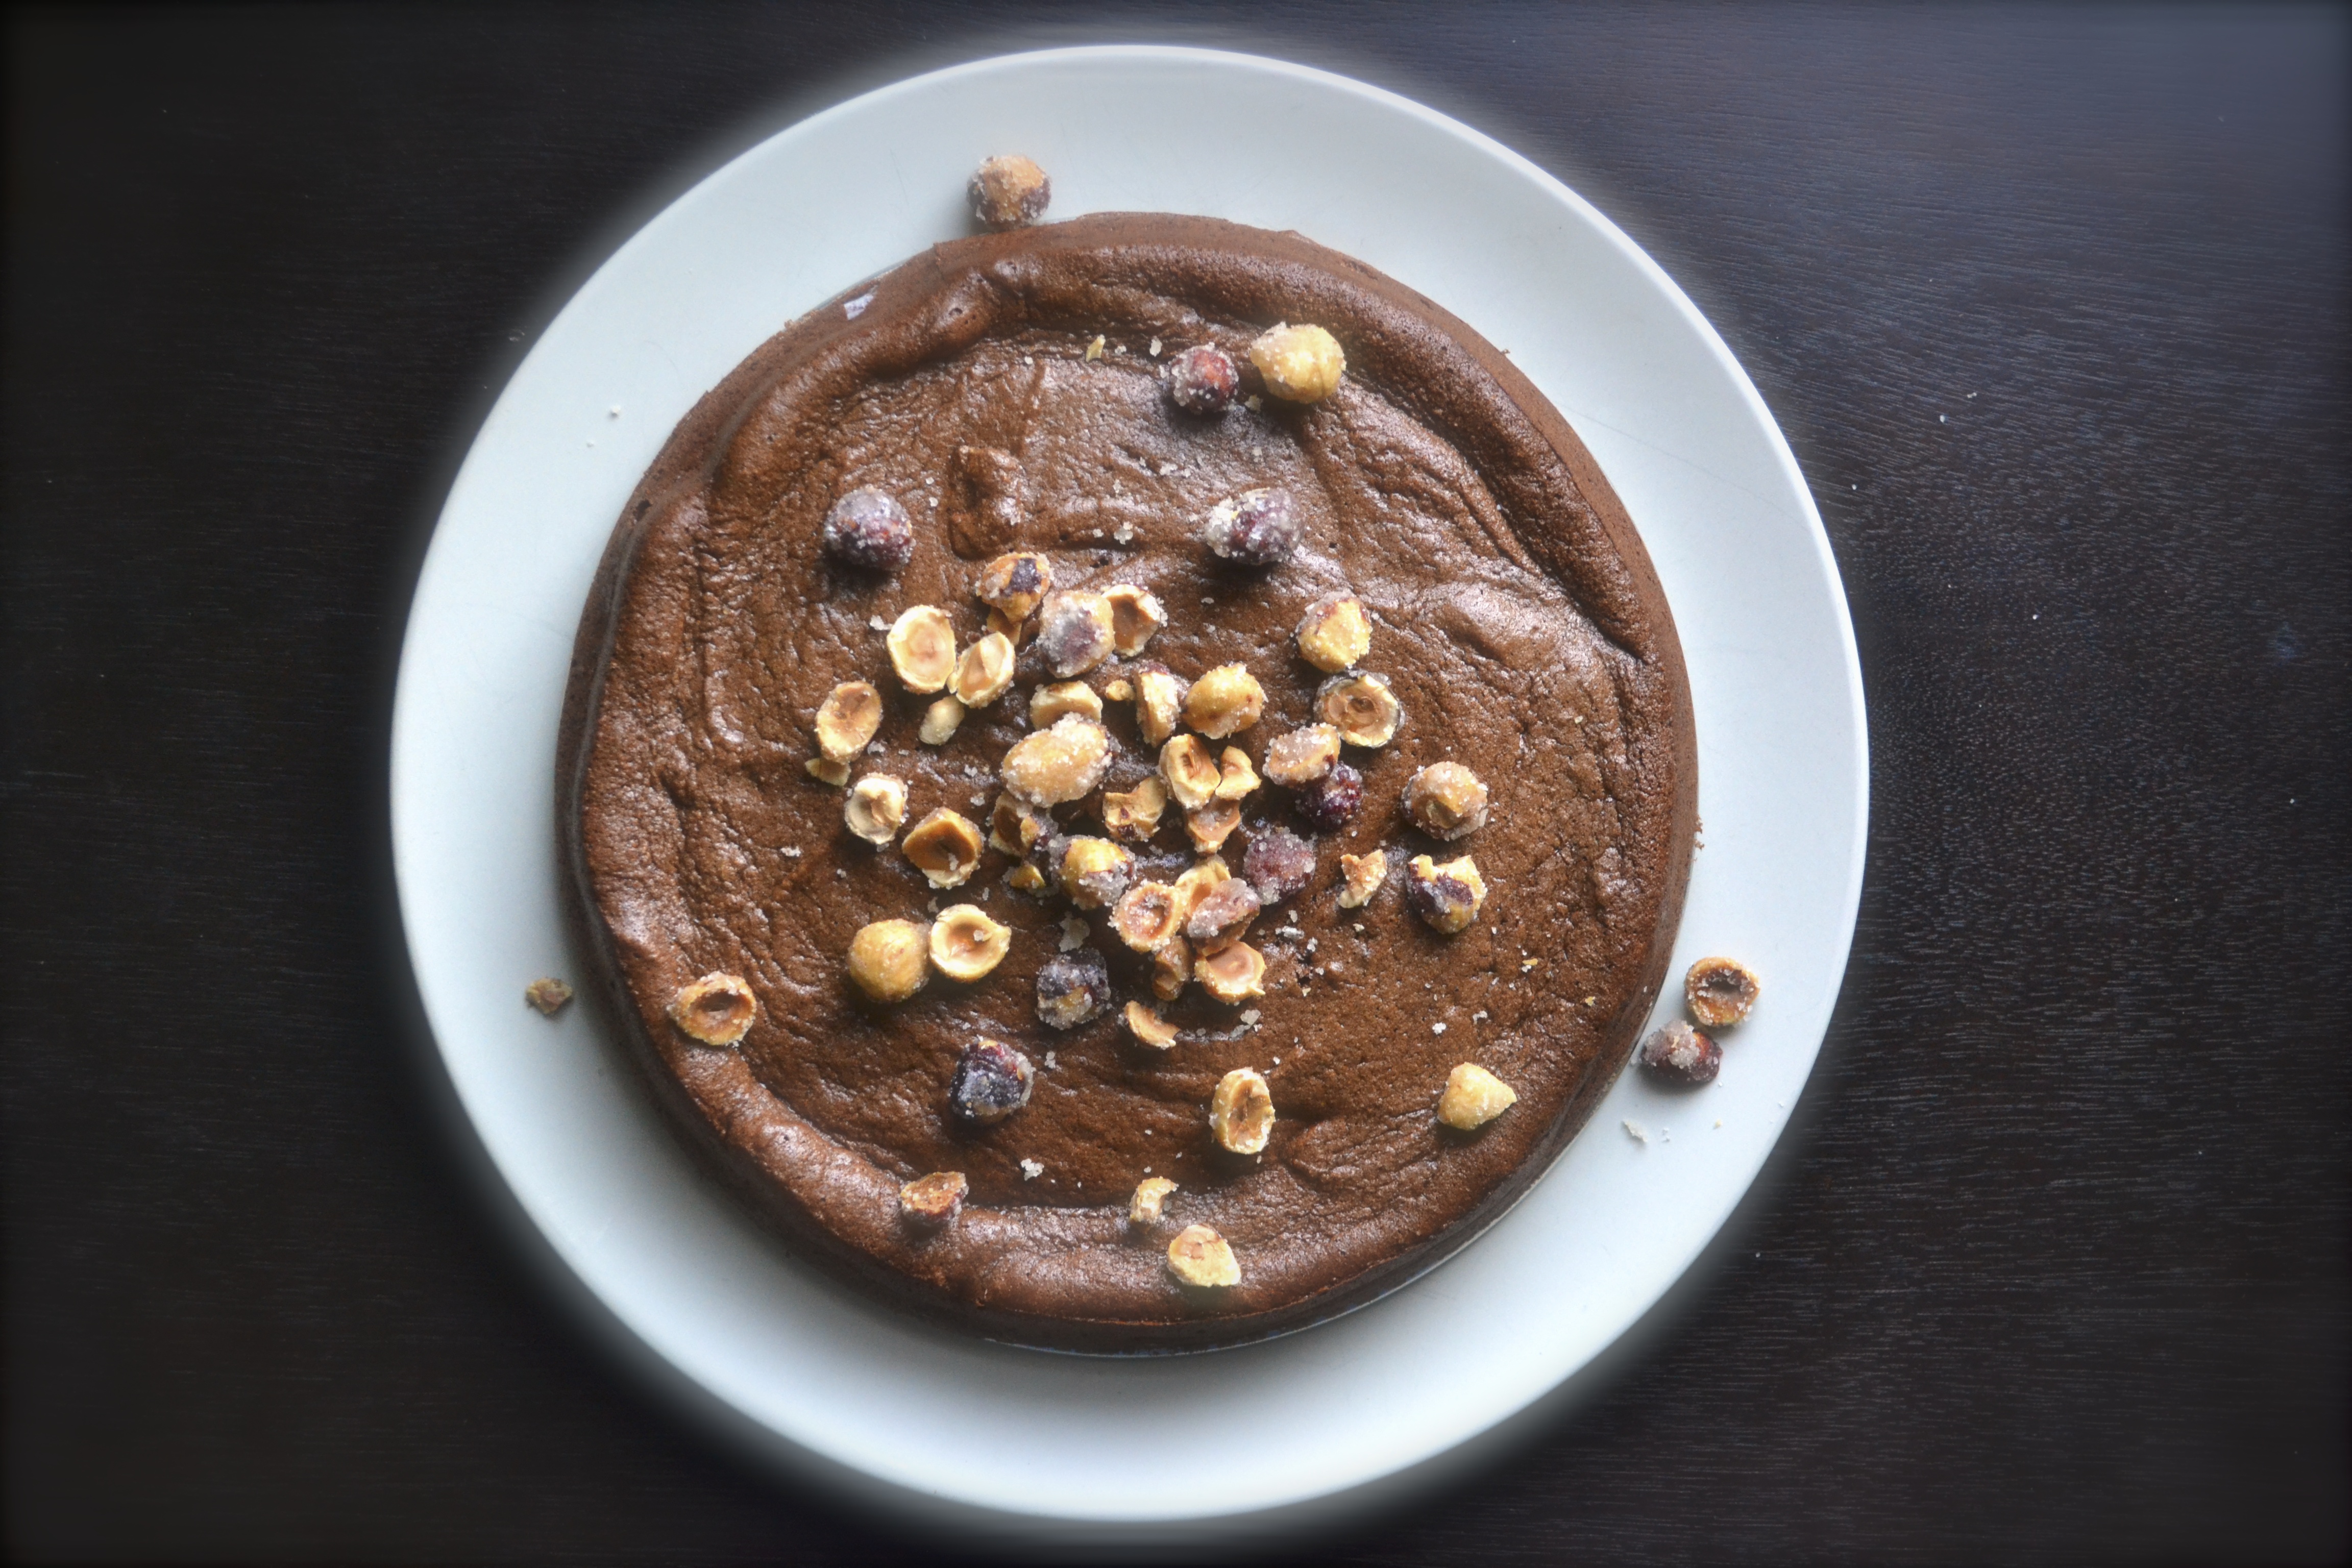
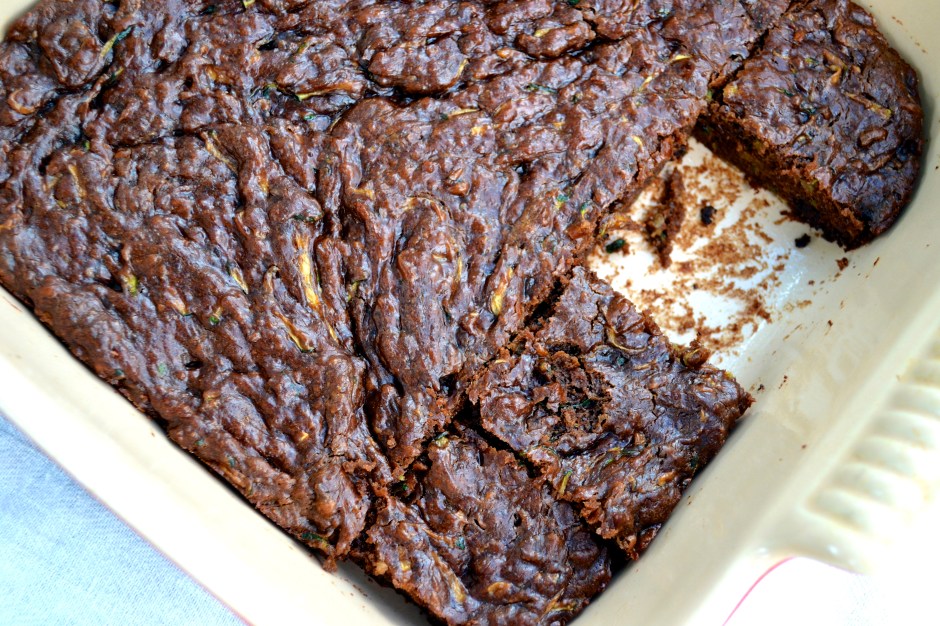
soooo….. I made brownies.

The Best Flourless Brownies (Grain Free) // Big Eats Tiny Kitchen

Nothing says I love you and I’m sorry for being away like chocolate + butter + nuts. Am I right?

The Best Flourless Brownies (Grain Free) // Big Eats Tiny Kitchen

I’ve been a little off kilter lately and super busy with life and work.  It became increasingly difficult to find additional time (and motivation) recently for posting new recipes.  Maybe it was lack of sun and seasonal depression. So I took a break. I went back to just cooking for the fun of it. I stopped worrying about whether or not it was good enough for the blog or whether I had to cook it at the right time so that I had enough natural light to photograph it.  I just cooked for me.

I think I go through this every winter. I have to realign myself with what is important to me.  Give myself a new focus. In turn, I have also given this blog a renewed purpose.

I want to thank those of you who reached out to me and encouraged me to continue cooking and creating in this space.  I received some lovely emails and words of encouragement.  This is supposed to be a space of creativity and sharing.  I want this space to be several things moving forward and not just a food blog. Don’t get me wrong, I definitely still want it to be a space where my inner grandma gets to cook, feed others, and then sit back and bask in the joy of nourishing the one’s I love.  But I also want to focus on discovering, exploring, and escaping comfort zones.

Thank you for letting me cook for you and provide nourishing recipes for the past three years. Also, thank you for giving me satisfaction and fulfillment.

The Best Flourless Brownies (Grain Free) // Big Eats Tiny Kitchen

DSC_0310

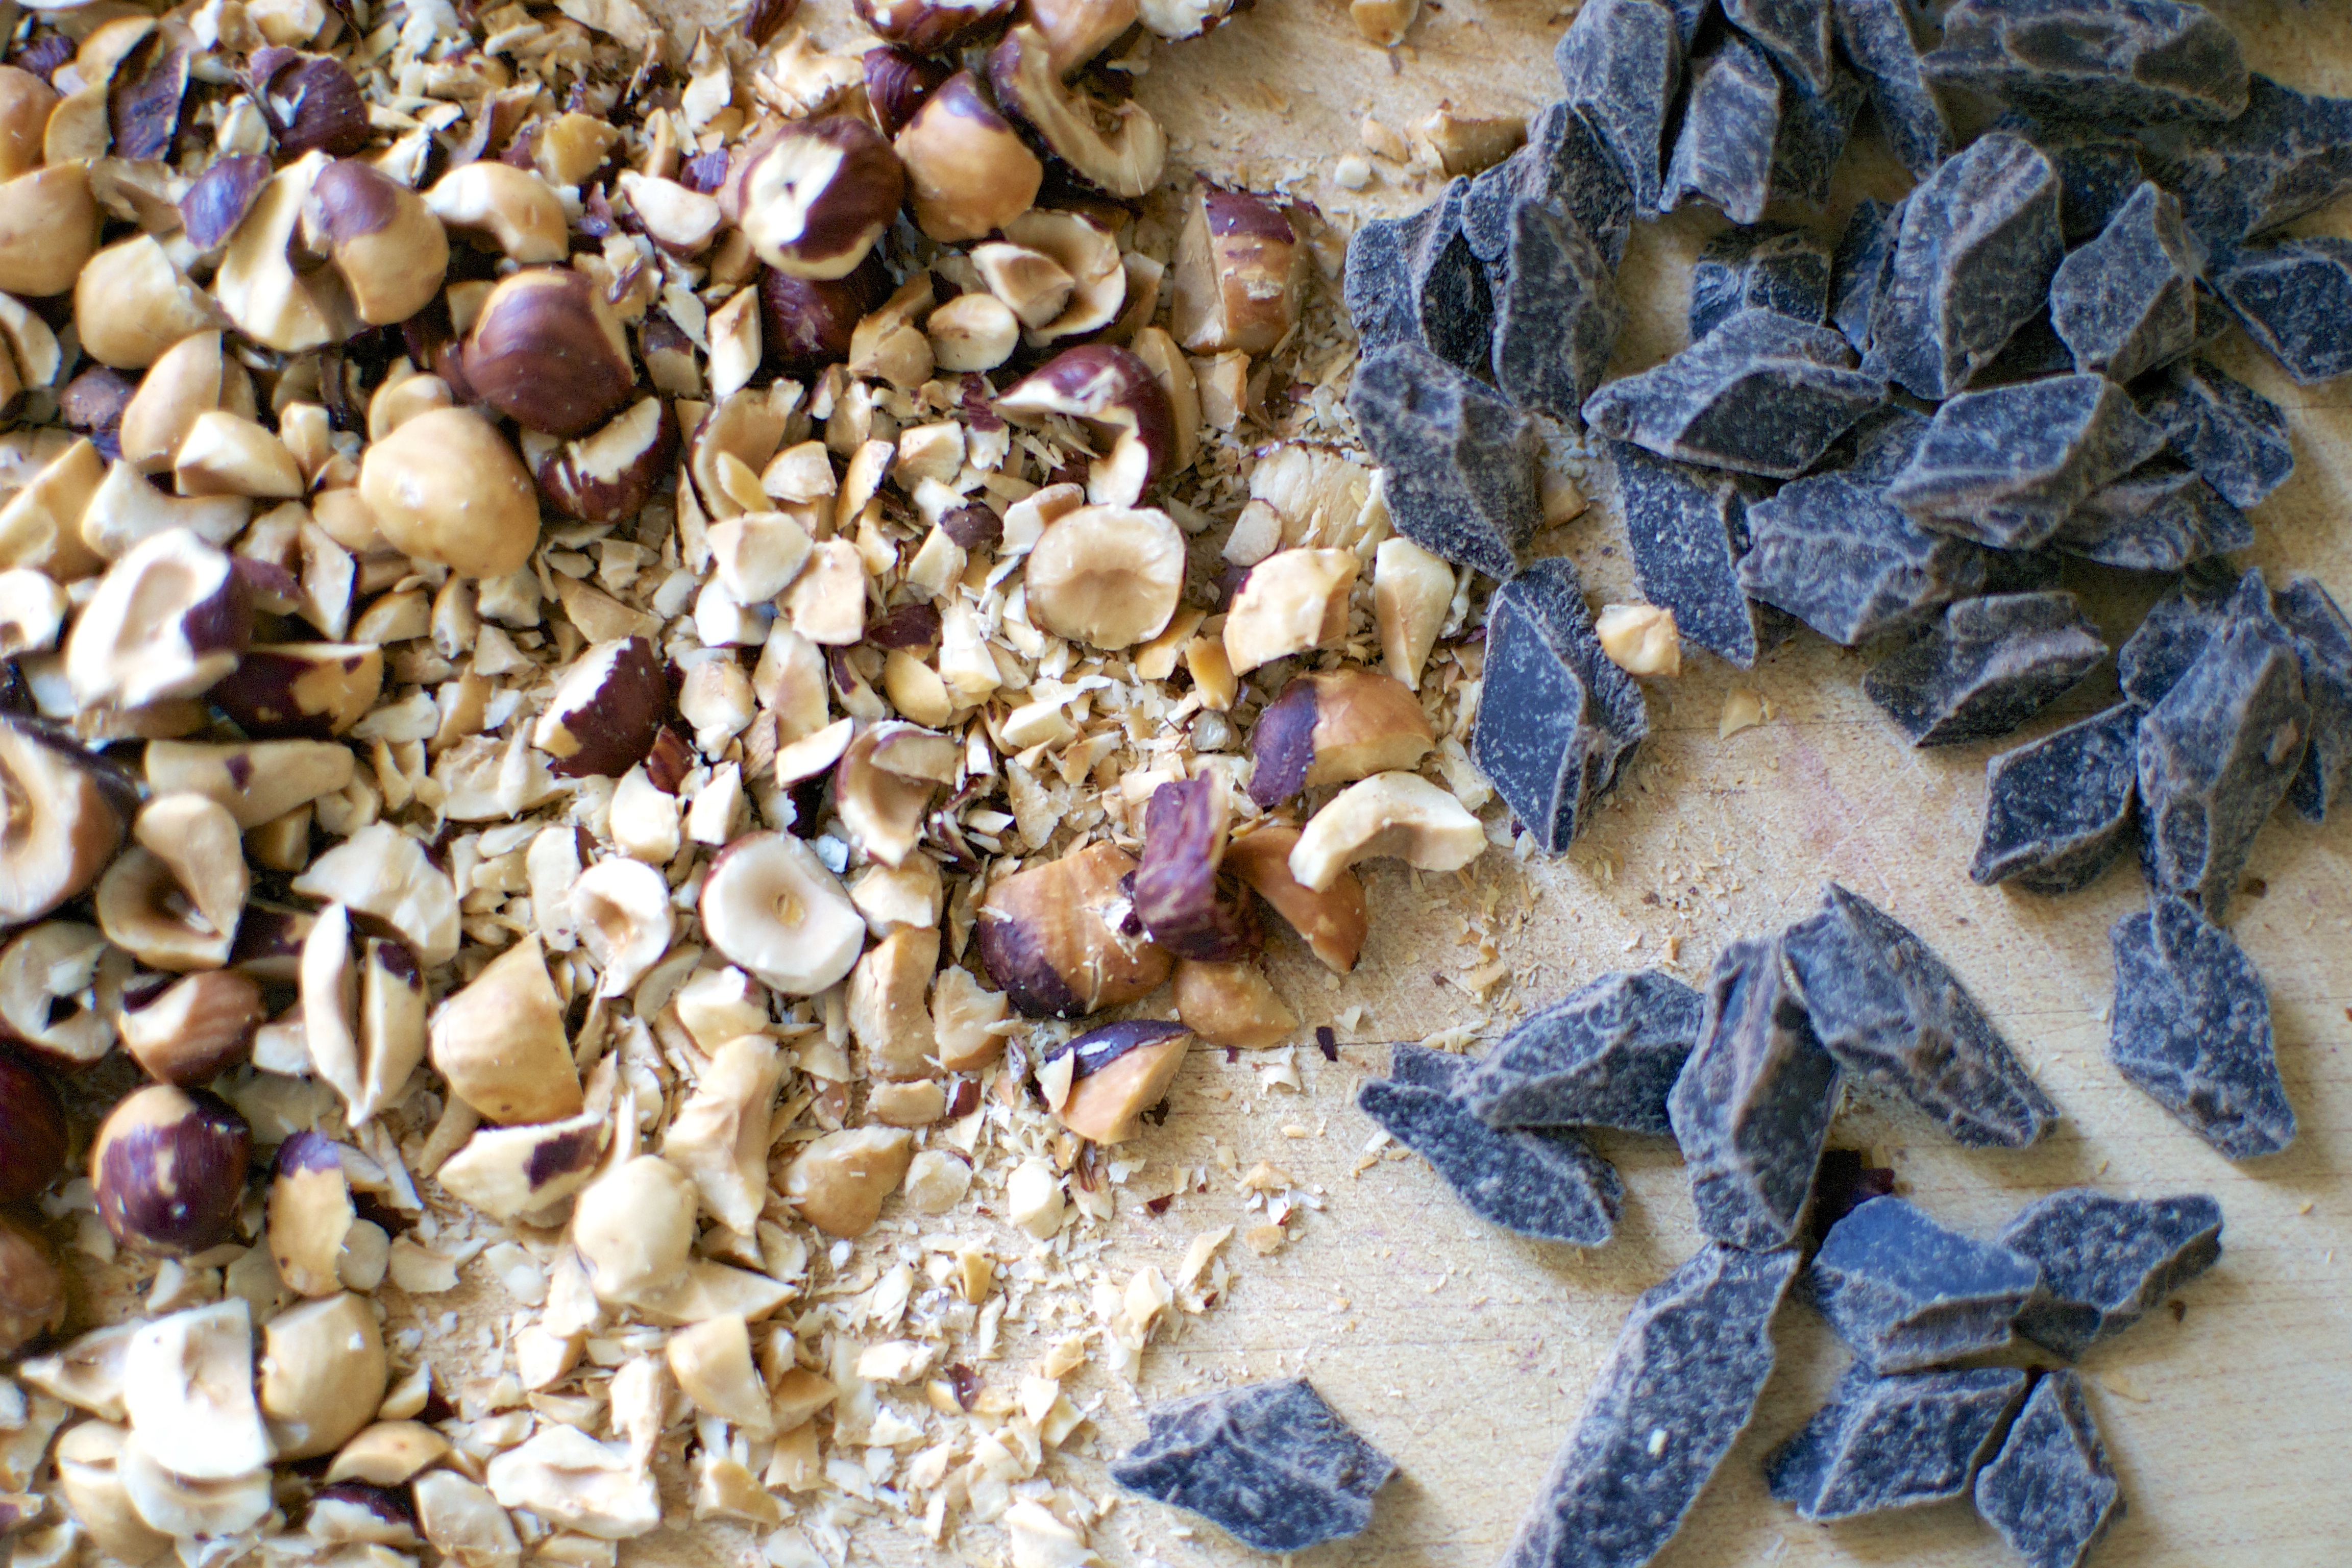
And with that…. let’s talk CHOCOLATE AND BUTTAH AND HAZELNUTS.

Get out that good butter and good chocolate. Turn on your oven. We are also going to throw in hazelnuts into our brownies to add some flare!

DSC_0307

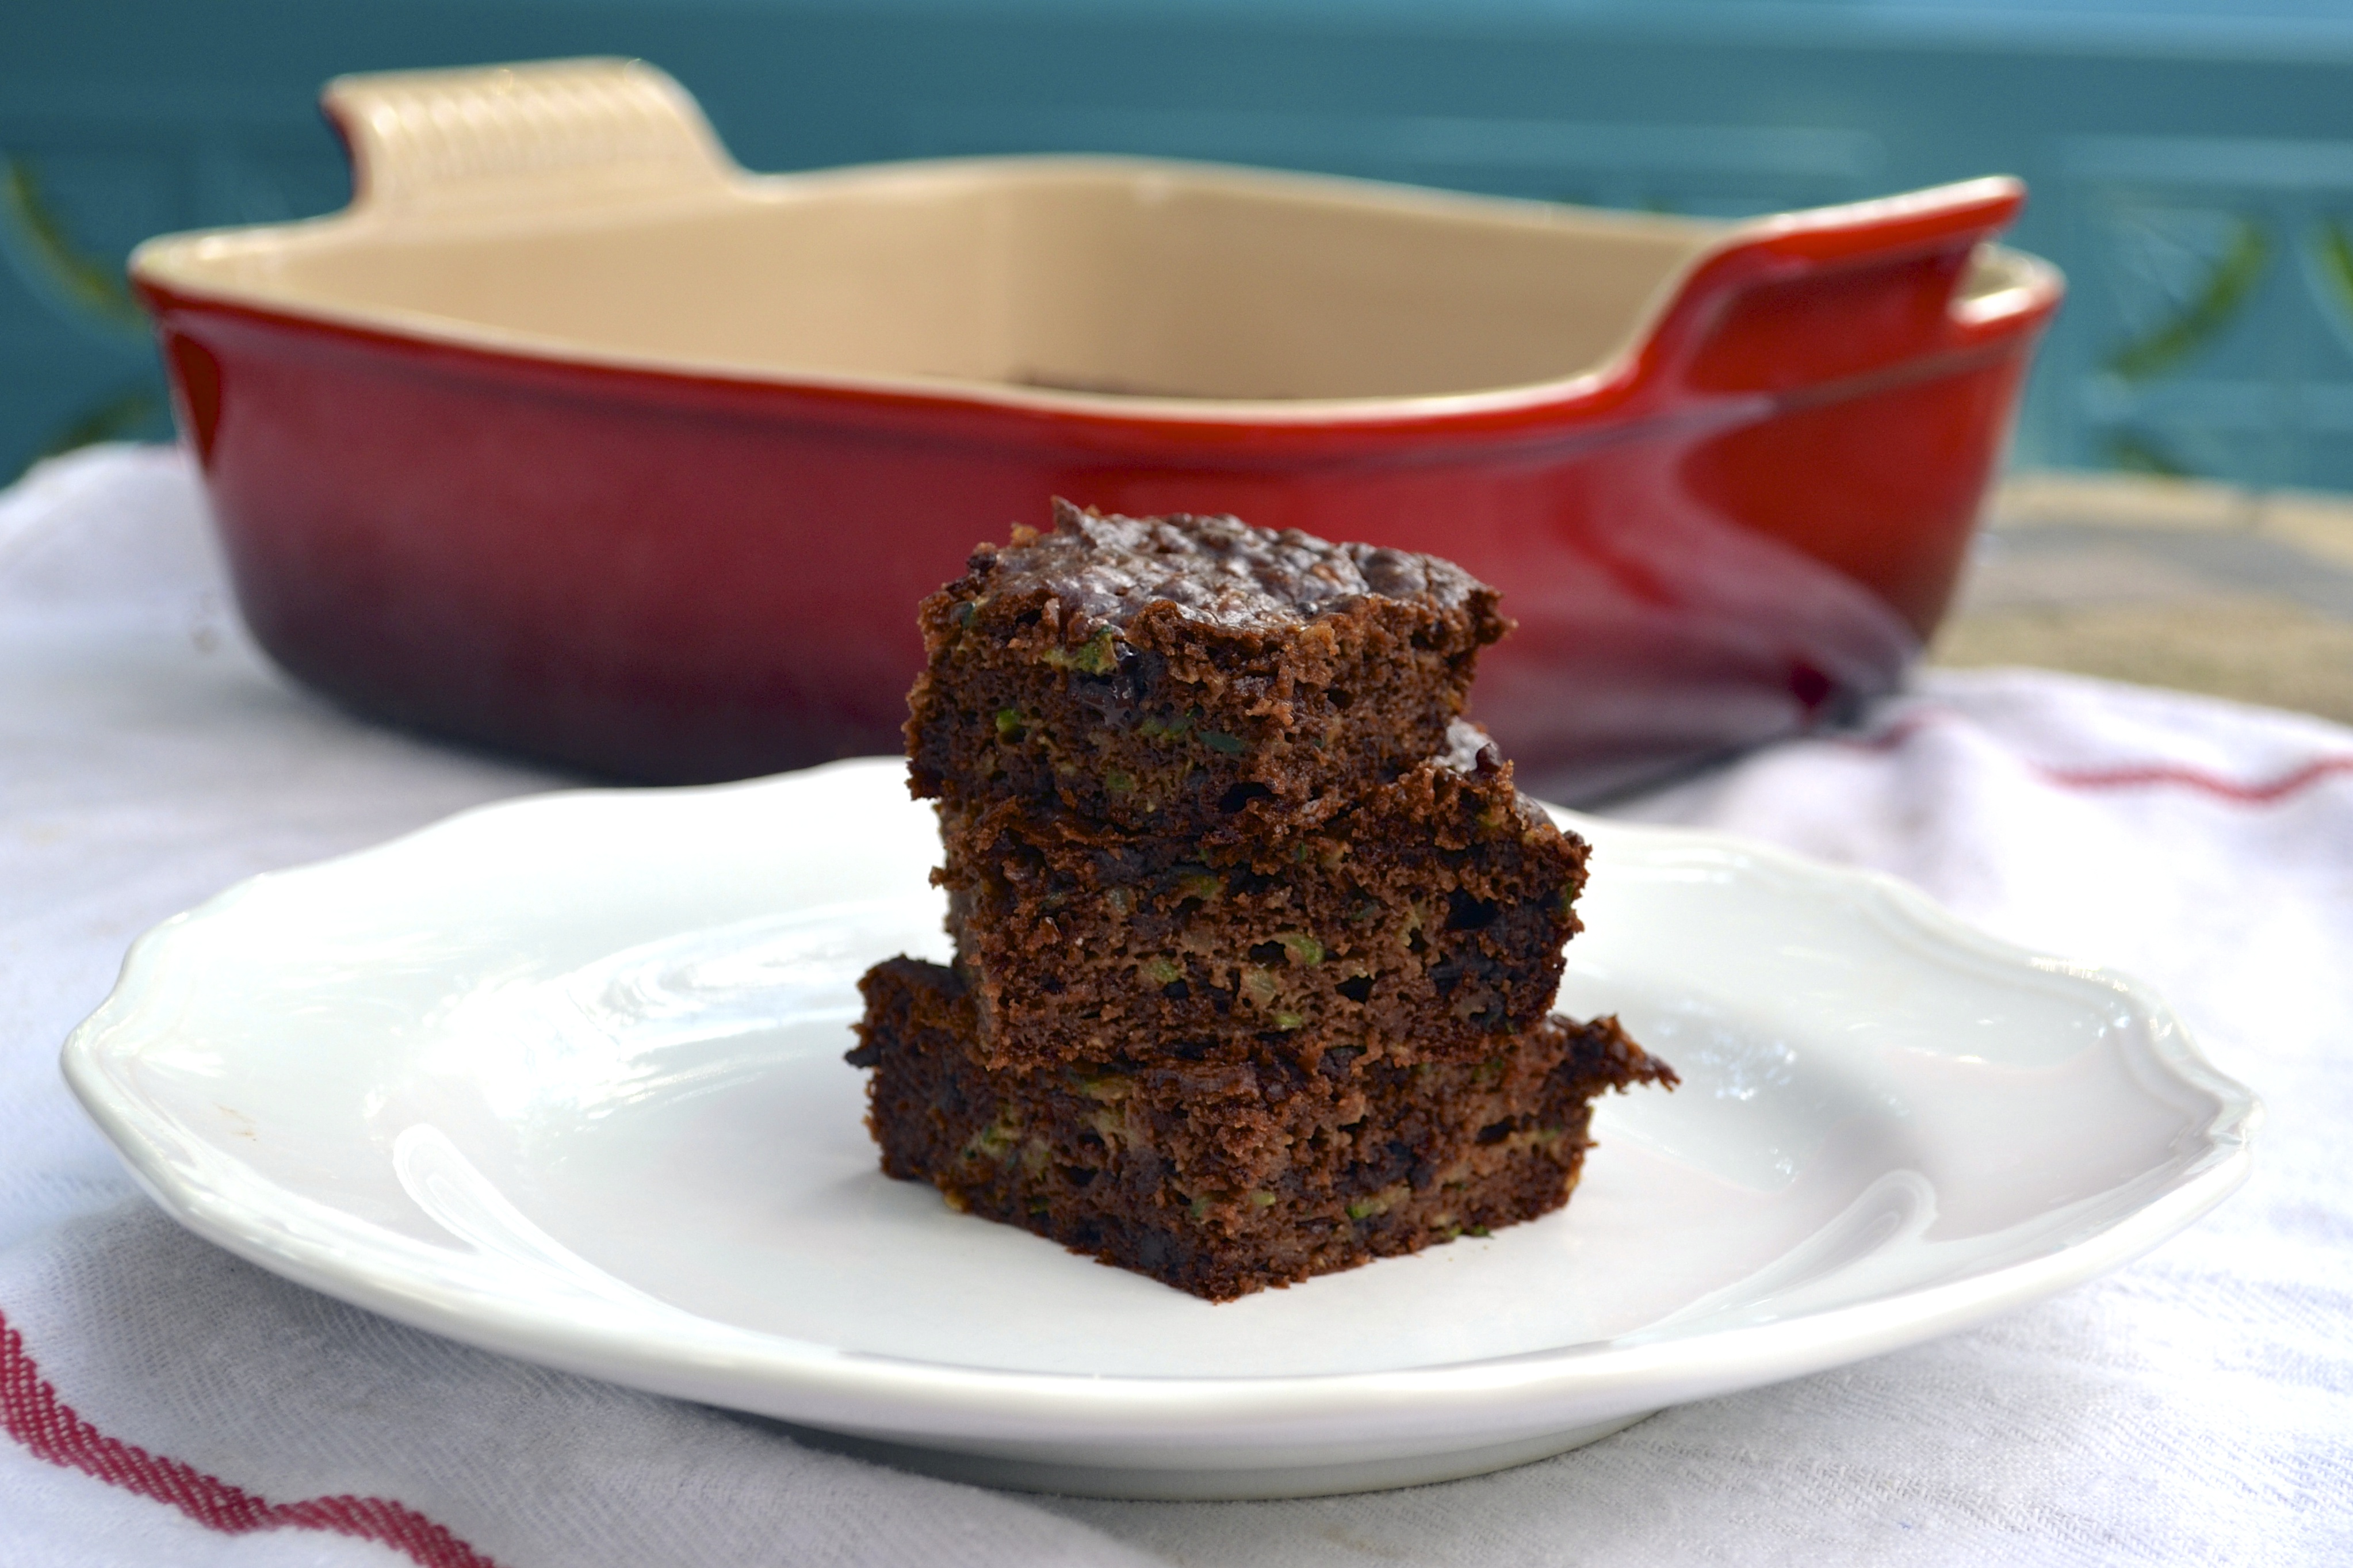
V.D. is coming up… I mean, Valentine’s Day. And what better way to celebrate your loved ones and friends (or just you) than to serve up a plate of uuuuuuuhmazing gooey gooey brownies.  These brownies are adapted from a past recipe of mine (Paleo Flourless Brownie Bites) and a recipe from my favorite pastry chef, Dave Leibovitz.  The results are fabulously out of this world.  But, as LeVar Burton would say…. Don’t take my word for it.  Make them yourself and share the love.

The Best Flourless Brownies (Grain Free) // Big Eats Tiny Kitchen

Flourless Brownies (Grain Free)

  • Servings: 12 to 16
  • Difficulty: Easy
  • Print

  • 6 tablespoons salted butter (or use unsalted and add 1/8 teaspoon salt)
  • 10 oz semi-sweet chocolate chunks
  • 2 eggs (room temperature)
  • 2/3 cup coconut palm sugar (or unrefined cane sugar)
  • 3 tablespoons arrowroot powder (or cornstarch)
  • 1 tablespoon cocoa powder
  • 2/3 cup chopped nuts (I used roasted hazelnuts)
  • coarse or flaked sea salt

Instructions

  1. Preheat oven to 350 F. Grease a 8X8 baking dish and set aside.
  2. Add coconut palm sugar, arrowroot powder, and cocoa powder to the bowl of a food processor. Process for about 1 minute to make sugar mixture super fine. Set aside.
  3. In a metal saucepan over medium heat, melt butter until it begins to crackle.  Add 2/3 of the chocolate chunks (about 8 oz) and remove pan from heat. Whisk constantly until chocolate is completely melted.  Add eggs one at a time and whisk constantly.
  4. Pour chocolate mixture into food processor with sugar mixture.  Process for at least one minute. Mixture will be glossy and thick. Add 1/2 cup of nuts and pulse once or twice to distribute. Use a rubber spatula and spoon out mixture into greased baking dish. Sprinkle remaining nuts, chocolate chunks, and flaked sea salt on top. Bake for 30 minutes at 350 F, or until just set.  Do not overtake.

Note – If you do not have a food processor, then you will need to adapt the recipe slightly.  Add the sugar to the butter and chocolate mixture before you add the eggs. Remove the saucepan from heat. Add eggs one at a time, then add sifted cocoa powder and arrowroot powder straight to the saucepan.  Stir with a whisk briskly for at least 1 minute until the mixture becomes glossy and begins pulling away from the sides of the saucepan.  Stir in your nuts and then spread the mixture into the prepared pan. Sprinkle with nuts and chocolate and bake as directed above.

Advertisement

Chocolate and Peanut Butter Macaroons (Grain Free)

Chocolate and Peanut Butter Macaroons / Big Eats Tiny Kitchen

Sorry for the long delay in between posts. Recently life has been tough at times but life also has been very good. When I am going through a roller coaster of emotions and dead lines and choices and what not, I consume chocolate and peanut butter. Doctors orders.

But when life is good…I also eat chocolate and peanut butter.

Chocolate and Peanut Butter Macaroons / Big Eats Tiny Kitchen

Chocolate and Peanut Butter Macaroons / Big Eats Tiny Kitchen

The combination sends warm fuzzies through my body. It’s a choco-pb hug for my soul. I get my best soul hugs from those crack-like addictive Reese’s PB eggs that spring forth from every corner around this time of year. I can stay away from Reese’s (nearly) the rest of the year, but throw them in an egg shape! Holy frijoles, I can’t stop. My eyes pop out of my head all googley and I froth at the mouth and I protect them like a squirrel, hiding my Reese’s eggs in weird and unassuming places.

These cookies are the wonderful love child of two of my favorite cookies: No bake cookies + macaroons. Whoa. Whoa.

Let this happen.

Make them egg shaped. They are better for you than those other choco-pb eggs and just as addictive.

Chocolate and Peanut Butter Macaroons / Big Eats Tiny Kitchen

It will make you love life even when there are a few major down moments.

Chocolate and Peanut Butter Macaroons (Grain Free and Diary Free)

Adapted from Against All Grain

Makes 2 dozen cookies

Ingredients

  • 2 1/2 cups unsweetened shredded coconut
  • 1/3 cup honey
  • 1/2 cup unsweetened cocoa powder
  • 2 tablespoons natural creamy unsweetened peanut butter*
  • 1 egg white
  • salt

Instructions

  1. Preheat oven to 325F. Place a piece of parchment paper onto a rimmed baking sheet. Set the baking sheet aside.
  2. In a large bowl, combine the coconut, honey, cacao powder, peanut butter, and a pinch of salt.
  3. Place egg white and another pinch of salt in a medium bowl. Using a whisk or electric beaters, beat the egg white for about 2 minutes until soft peaks form. Combine meringue with other ingredients in the large bowl.
  4. Using a melon baller, scoop out cookies and place them onto the parchment paper. Bake for 30 minutes. Remove from oven and allow to cool for at least 1 hour on a wire cooling wrack.

*Note – To make these Paleo friendly, use either almond butter or sunflower seed butter in place of the peanut butter. 

Lemony Coconut Tapioca Pudding

Lemony Tapioca Pudding / Big Eats Tiny Kitchen

I am in need of a vacation. It’s mid February and the skies are dismal and the temperatures are even more dismal.

So I have decided to create a vacation atmosphere in my home. Cozy, comfy, and relaxing. I curl up with a great record, a cozy blanket, and something creamy….like pudding. This tapioca pudding has the bright flavor of lemon. It reminds me of a random warm day in the 50s or 60s that comes along in the middle of winter and makes you want to run wild outside after having been locked inside from snow mounds and drifts of snow. Actually, at this point, I would go running around outside like a lunatic if it hit 40 degrees outside. I’ve got my bongos ready…I think it might hit 42 today. YES.

Lemony Tapioca Pudding / Big Eats Tiny Kitchen

So like I was saying. Lemons. Nothing is more refreshing and spring-like in flavor like lemons. This tapioca pudding has what every dismal winter day needs…a ray of sunshine and a warm breeze. But combine that with creamy tapioca pudding and you have comfort in a bowl.

Lemony Tapioca Pudding / Big Eats Tiny Kitchen

DSC_0295

I prefer to use small pearl tapioca, fresh honey, and a mixture of coconut milk and 2 percent milk. But for a completely dairy free version, by all means, use combination of other dairy free milks.

Lemony Coconut Tapioca Pudding

Adapted from Smitten Kitchen

Ingredients

  • 3 cups of coconut milk (or half coconut milk and half 2% milk)
  • 1/4 teaspoon kosher salt
  • 1/3 cup small pearl tapioca or granulated tapioca (I used this type)
  • 1 egg yolk, lightly beaten
  • 1/4 cup honey
  • 1/2 teaspoon gluten free vanilla extract
  • 1 tablespoon of lemon juice
  • zest from 1 lemon
  • toasted coconut (optional)

Instructions

  1. Combine coconut milk, salt, tapioca pearls, egg yolk, and honey in a medium saucepan. Place over medium heat and bring to a simmer while stirring frequently.  Turn heat down and allow to simmer softly for 20 minutes, stir frequently and make sure the bottom does not burn.  The tapioca will begin to thicken quickly at the end.
  2. Once the tapioca mixture is thick like gravy, remove from heat. Stir in the vanilla and lemon zest. Portion out 1/2 cup servings into separate pudding cups. Allow to cool in the refrigerator for a few hours or overnight. Serve alone or with extra lemon zest and/or toasted coconut on top.

Lemony Tapioca Pudding / Big Eats Tiny Kitchen

Grain Free Meyer Lemon Pudding Cake

Meyer Lemon Pudding Cakes (Paleo Friendly, Diary Free, Grain Free) - Big Eats Tiny Kitchen

I tend to have issues with making big decisions. I freeze when provided with too many choices. I try to logically narrow down the choices. I over think it. I marinate and choke over it.

I do this with nearly e.v.e.r.y.t.h.i.n.g. Cars. Houses. Jobs. Kids. Men. Shoes. Food. Does this come with a picture menu?

Apples at the store…. Pink lady? Gala? Fuji? Granny smith? wait..what do Rome apples taste like? or Empire? crap… or do I like Jonathon? no…wait… golden delicious are on sale… sold.

Meyer Lemon Pudding Cakes (Paleo Friendly, Diary Free, Grain Free) - Big Eats Tiny Kitchen

Sometimes I want cake. Other times I want something more creamy…pudding? Ugh… decisions. So here is where this cake is a winner on all fronts in my mind. It gives me the best of both worlds. This cake is the amazing love child between the most airy cake and the creamiest lemon curd-like pudding. I get pudding AND cake all in one bite. I get sweet AND tart all at once. I made these little Meyer lemon pudding cakes in two small 6-ounce ramekins and 1 larger gratin dish.

Meyer Lemon Pudding Cakes (Paleo Friendly, Diary Free, Grain Free) - Big Eats Tiny Kitchen

There is one tiny problem: trying to not devour the whole cake at once. They taste like sunshine bursting through a cold blustery day and warming you to the bone. Meyer lemons have a thinner rind, are slightly orangish in color, and are a bit sweeter than their bright yellow typical lemon counterparts. The first bite of these Meyer lemon pudding cakes was like capturing childhood in tiny ramekins. Cabin fever shmabin fever! These Meyer lemon pudding cakes will make you forget the dull skies that loom.

Meyer Lemon Pudding Cakes (Paleo Friendly, Diary Free, Grain Free) - Big Eats Tiny Kitchen

I loosely based my recipe on a Food and Wine recipe. To make this recipe grain free and dairy free (paleo friendly), I used coconut oil instead of butter, palm sugar instead of white sugar, almond milk instead of dairy milk, and a combination of almond flour/coconut flour in place of AP flour.  The cakes have a carmel-like color which I attribute to the dark coconut palm sugar.  Despite the caramel and faint yellow color of the pudding, these lil’ cuties are ridiculously good and will surely perk you up from any winter blues that you may be experiencing.  Cheers.

Meyer Lemon Pudding Cakes (Paleo Friendly, Diary Free, Grain Free) - Big Eats Tiny Kitchen

Grain Free Meyer Lemon Pudding Cake

Adapted from Food and Wine

Serves 6

Ingredients

  • 2 Tablespoons coconut oil (or grass fed butter), at room temperature
  • 2/3 cup coconut palm sugar
  • 3 large eggs, yolks separated from whites in separate bowls
  • 1 cup non-dairy milk (such as coconut milk or unsweetened almond milk)
  • 1/3 cup fresh Meyer lemon juice (from 2 lemons)
  • 1 Tablespoon fresh Meyer lemon zest (plus extra for serving)
  • 1/3 cup almond flour (such as Honeyville)
  • 1 Tablespoon coconut flour
  • 1/4 teaspoon salt
  • Optional Toppings: lemon zest, powdered sugar, coconut whip, or greek yogurt

Instructions

  1. Preheat the oven to 350ºF. Lightly butter six 6-ounce individual ramekins or a 9-inch pie dish. Set  the dishes inside a larger roasting pan and bring a kettle of water to a boil to create a bain-marie to evenly cook the pudding cakes.
  2. In another bowl, whisk the coconut oil (or butter) and palm sugar until creamed. Add one egg yolk at a time until combined. Gently whisk in the almond milk, lemon juice, and lemon zest until well combined. Stir in the almond flour and coconut flour and whisk until smooth.
  3. In the bowl of an electric mixer fitted with a whisk attachment, beat egg whites and salt until  stiff and soft peaks form. Gently fold in half of the beaten egg whites into the cake batter using a rubber spatula to lighten it. Carefully fold in the remaining egg whites. The batter should be light and fluffy at this point and will not resemble normal cake batter.
  4. Pour the cake batter into the prepared baking dishes. Since this cake will not rise, fill the dishes to the top if necessary.  Place the baking dishes into the larger roasting pan. Pour the boiling water from the kettle (step 1) into the roasting pan so that the water comes halfway up the outside of the ramekins or pie dish.  You can also fill the roasting pan with water while it is in the oven to keep from splashing water into the filled ramekins.
  5. Bake until the cake is puffed and golden, 50 to 60 minutes for a single pie dish, or 30 to 35 minutes for 6 small cakes. The top will become golden and the middle of the cake will barely jiggle when shaken. Pull out of the oven and allow to cool for 20 to 30 minutes on a wire rack. Serve the cake warm and fresh from the oven sprinkled with extra lemon zest.

Flourless Chocolate Cake with Candied Hazelnuts

Grain Free Chocolate Flourless Cake

We moved to Kansas City nearly five years ago. FIVE years. what?

When we moved here, we knew no one. It was just me, Kiley, and our furry son Guinness. My aunt and uncle live within an hour from KC, which helped the transition of moving away from my family in Oklahoma. Our first winter was long and cold. Ice crystals formed on the INSIDE of the windows in our drafty rent house. Kiley and I sat around in matching blue Snuggies hoping that our fingers would thaw out eventually.

Grain Free Chocolate Flourless Cake

Trying to make friends as you get older is a funny and actually hard thing. It’s like dating all over again. But we don’t have college as a buffer. I found myself trying to pick up strangers in the grocery store… “So…you like avocados too? Ya…. Want to be friends?”

I didn’t know how to make friends. I’m awkward. I’m an engineer. I suck at small talk. My cousin gave me pointers on making friends…I kid you not.

Grain Free Chocolate Flourless Cake

Grain Free Chocolate Flourless Cake

Join a club. Go to a class. Ya. Ok… I knew I could do it, right? I’m friendly. I like people. Right?

So I went to a gardening class, a cooking class, canning and preserving classes, knitting classes. Basically I met every 70 year old in KC. I planted sweet potatoes with all of them too. They are awesome (the sweet potatoes and my grannies), but they don’t make great “couple” friends. And they eat dinner at 4pm. I eat at 5pm people…who eats at 4pm and at a buffet. I do NOT do buffets. They have jello surprise. *Shudder*

Candied Hazelnuts

Grain Free Chocolate Flourless Cake Needless to say, after five years I feel incredibly lucky to have developed quite a family of friends. Friends that feel as though we known each other for ever. Friends that feel more like family ever day. Friends that all wear blue on the same day by accident to have a great joint birthday celebration for my girlfriend Tessa and my husband.

DSC_0384

And just like my 70 year BFFs taught me, you always have to make birthdays special. My grandma taught me well and that’s why I always like to make a fabulous birthday cake for anyone on their special day! This Flourless Chocolate Cake was adapted from the ever inspiring and talented Deb Perelman of Smitten Kitchen.  I tweaked a few things, added a pinch of cayenne and also topped with addictive candied hazelnuts. This cake has a wow factor that will impress anyone. So consider whipping this up for anyone that is special in your life that you want to just say….

“I’m so thankful that you are alive. This world is a better place because of you…so let’s have CAKE.”

Grain Free Chocolate Flourless Cake

Flourless Chocolate Cake with Candied Hazelnuts

(adapted from the Smitten Kitchen Cookbook)

Cake Ingredients

  • 6 tablespoons unsalted grass-fed butter
  • 5 ounces semisweet or dark chocolate (I used 70% cocoa), diced into pieces
  • 4 large eggs, separated (at room temperature)
  • 1/3 cup maple syrup
  • 1/4 teaspoon gluten-free vanilla extract
  • 1/4 teaspoon flaky sea salt
  • 1/8 teaspoon ground cinnamon (optional)
  • 1/8 teaspoon ground cayenne (optional)
  • candied hazelnuts for topping (see recipe below)

Instructions

  1. Preheat oven to 350 F. Line an 8-inch round springform pan with a circle of parchment paper and generously butter the sides of the pan. Set aside.
  2. In a medium saucepan over medium-high heat, brown the butter by melting it and stirring frequently. Allow the butter to continue to cook and foam. Brown bits will begin to form at the bottom of the saucepan after about 3 minutes. Remove the saucepan with the browned butter from the heat and add the chocolate pieces. Stir until the chocolate is entirely melted. To cool the chocolate mixture to room temperature, transfer the melted chocolate mixture to a heat resistant bowl (glass is best) and nest it in a larger bowl of cold or ice water. Be careful to not allow the cooling water to get into the melted chocolate. Stir the cooling chocolate frequently so that it cools evenly.
  3. In a large bowl, beat the room temperature egg yolks, maple syrup, and vanilla together until the mixture becomes thick. Slowly mix in the chocolate mixture, cinnamon, and cayenne to the egg yolk mixture until it becomes extremely thick.
  4. In the bowl of an electric mixture, beat the four egg whites and salt until firm peaks form. Gently stir in one third of the egg white mixture into the chocolate mixture until evenly combined. Gently fold in the remaining egg white mixture and try to keep the batter as light as possible.
  5. Pour the batter into the prepared pan. Bake in the preheated oven in the middle rack for 20 to 25 minutes, or until the top has formed a thin domed crust. To test, stick a skewer in the middle of the cake and it will come out clean when done. Cool for five minutes and then invert the cake onto a serving plate. Sprinkle with crushed candied hazelnuts.

Candied Hazelnuts

(Note – can be made up to 1 day ahead of time and stored in an airtight container)

  • 1/3 cup raw hazelnuts
  • 1/2 cup palm sugar or evaporated cane sugar
  • 2 tablespoons water
  • pinch flaky sea salt

Instructions

  1. Preheat oven to 350 F. Spread the hazelnuts onto a baking sheet and toast them for 10 minutes, stirring every few minutes to allow for even toasting. Remove the hazelnuts from the oven and allow to cool. Remove the skins by rubbing the nuts in a dry dish towel or between the palms of your hands.
  2. Place parchment paper over a plate and have a set of small tongs ready to be used. In a small heavy saucepan, cook the sugar and water (do not stir) over medium heat until the sugar melts and turns a caramel color (about 3 to 5 minutes). Add the sea salt and hazelnuts. Stir and allow the caramel to coat the hazelnuts. Turn the heat off. Remove the hazelnuts one by one with the tongs and place them onto the parchment paper, making sure that they do not touch each other. Cool the nuts completely (or place in the fridge). Once cooled, the nuts will easily fall off of the parchment paper.
  3. To break into pieces, place the candied hazelnuts into a ziplock bag and seal. Use the bottom of a glass or a hammer, and smash them (don’t pulverize) into large chunks. Keep in an airtight container until ready to use.

Paleo Roasted Banana Creamsicles

DSC_0213

In April, winter would not let go. We had two massive snow storms that dumped over 15 inches of snow each.  And now, it is nearing mid September and summer is being just as pesky and stubborn as winter. We have had the hottest days ALL summer this week with temps breaking triple digits. Really? Why can’t spring or fall be stubborn? Get feisty, fall! Take over…strong arm summer! Who’s the Boss? Not Tony Danza…It’s you, fall. Come ON!

*Stomp* *Stomp* I want to wear sweaters, eat chili, watch football!

DSC_0224

But alas…the heat persists. No rain. Just muggy and sweaty and sticky and mosquito heaven. Fine. SO instead of chili, I will settle for POPSICLES! And I suggest you do the same. Popsicles are really the best sweet treat there is because they are cheap, portable, kid-friendly, and healthy. The other thing I dig about popsicles is that they have built-in portion control.

DSC_0200 DSC_0205

These popsicles are really swoon-worthy. I highly recommend roasting your bananas. It offers a whole new level and depth of bananananana-ness. Roasting bananas also is a great way to get under ripe bananas über sweet. They can either be roasted in an oven for 15 minutes or can be placed directly over an open gas flame (as shown above). There is no added sweetener in the popsicles because the roasted bananas take on a luscious caramelized flavor.  If you want much sweeter popsicles, you can add 1 tablespoon of honey. For the “cream” part of the creamsicles, I used light coconut milk to make it dairy free. You could also sub any dairy or nondairy milk instead.

DSC_0227

So cheers to the (hopefully) last days of summer. Tip your cups and popsicles and remember this sweaty weather when winter hits in a few months.

Note – I purchased my popsicle molds from World Market, but there are several BPA-free brands offered on amazon as well. Here is a great article on the Kitchn about top popsicle molds. If you do not have molds, have no fear. You can easily make popsicles with plastic cups and wooden popsicle sticks, as shown here

Paleo Roasted Banana Creamsicles

Ingredients

  • 3 bananas
  • 1 cup coconut milk
  • 1 teaspoon vanilla
  • pinch of salt

Instructions

  1. There are a few ways to roast bananas. (1) Place whole and unpeeled bananas on a foil lined roasting pan. Roast in a 350 F oven for 10 to 15 minutes. Remove and allow to cool. OR (2) Place whole and unpeeled banana directly on a gas flame of your oven. Use tongs to turn and blacken the banana evenly. This will take about 5 minutes per banana.
  2. Peel bananas and place them in a medium bowl. Mash bananas thoroughly with a potato masher or place in a blender and puree. Stir in coconut milk, salt, and vanilla.
  3. Pour banana mixture into popsicle molds leaving 1/4-inch before the top to leave room for expansion.  For popsicle molds that contain bases with sticks or hold wooden sticks in place, snap on popsicle base and freeze until solid, about 4 to 5 hours. If you do not have popsicle mods, glasses or open paper cups can be used. For these types, pour popsicle mixture into the glasses or open cups and freeze until the popsicle is beginning to set (about 1 1/2 to 2 hours). Then insert wooden sticks and freeze until fully solid (another 3 to 4 hours).

Paleo Zucchini Brownies

I like surprises. Do you like surprises? Good. I have one for you.  Be ready to have your mind space blown.

Zucchini brownies.

DSC_0235

We are gettin’ craaaaazy today. Adding veggies to brownies. Ya, you heard me. I know stuffing a brownie with healthy zucchini might not be your idea of a great surprise, but I promise this brownie won’t disappoint you.

These are cakey-style brownies. So for you fudgey-style brownie lovers (like me) these are not those, buuuuut they are incredibly delicious. Plus, they are stuffed with wholesome nutritious zucchini, almond butter, maple syrup, and raw cacao powder! Ya, these are likely the healthiest brownies out there. They are really close to zucchini bread but with a double chocolate edge that comes from the cacao powder and diced dark chocolate bites. Mmmmmm. Can I get an AMEN?!?

DSC_0226

DSC_0239

If you don’t have almond butter, any nut butter would work. For the nonPaleo peeps and those not allergic to peanuts, these would be delish with peanut butter swapped in for the almond butter. But if your nut butter is not all natural (or has salt and added sweetener), be sure to eliminate the salt and reduce the sweetener in the below recipe to account for it.

Don’t worry. I won’t tell anyone that you ate these for breakfast.

DSC_0238

Paleo Zucchini Brownies (adapted from Fast Paleo)

Ingredients

  • 1 cup creamy unsalted and unsweetened almond butter (or any nut butter)
  • 1 egg
  • 1/3 cup honey or maple syrup
  • 1 teaspoon vanilla
  • 1 teaspoon baking soda
  • 1/8 teaspoon kosher salt
  • 2 Tablespoons cacao or cocoa powder
  • 1 1/2 cups shredded zucchini
  • 1/4 cup chopped dark chocolate or chocolate chips

Instructions

  1. Preheat oven to 350 F. Grease an 8 X 8 baking dish and set aside.
  2. Shred 1 to 2 zucchini with either a grater or a shredder attachment on a food processor. Set aside.
  3. In a medium bowl, combine almond butter, egg, maple syrup, and vanilla. Mix well. Stir in baking soda, salt, and cacao powder. After well mixed, stir in shredded zucchini and chopped dark chocolate.
  4. Pour into prepared 8X8 baking dish. Bake for 20 to 25 minutes in preheated 350 F oven. The brownies are done with the center is set. Remove from oven and allow to cool for 5 to 10 minutes.

Blackberry Cashew Cheesecake (Vegan, Dairy Free, Gluten Free, Paleo)

DSC_0041

I like surprises.  Well…good surprises. This week has been full of some unpleasant surprises but it has also been filled with amazing surprises like…friends dropping by to say hey for no reason but just to visit, a letter from an amazing friend telling me how they cherished our friendship, random hugs, dinner ready when I get home from work, coffee ready when I get up (what a blessing), random dance parties downtown…

DSC_0001

DSC_0015

I also like having intimate gatherings at our place and surprising people with a healthy dessert.  When it comes to a dessert that surprises most folks because it is both gluten-free and dairy free, this cashew cheesecake takes the “cake”. I have made multiple versions including strawberry-vanilla, chocolate-banana, and now blackberry.

This blackberry cashew cheesecake was the BEST so far.  I made the cashew cheesecake filling using my high-powered Cuisinart Pro Plus food processor.  If you have a Vitamix or Blendtec, use it. I’m jealous. But seriously, a great food processor will do the trick but it just may take a bit more time.

DSC_0008

DSC_0017

Instead of mixing whole blackberries into the filling, I made a blackberry sauce and strained out those pesky seeds that looooove to stick around in your teeth while you are trying to be sexy and suave but no one tells you that you have a massive black seed the size of a minivan lodged in your front teeth.  So, I just amped up your sex appeal and created a seedless sauce to mix into the blackberry cheesecake layer. You are welcome!

DSC_0021

The blackberry sauce is easy and takes only an extra 10 minutes. I used 2 cups of blackberries that I froze last summer.  You could also use a bag of frozen blackberries (completely thawed and use organic if possible) or fresh blackberries when they are in season. Boil the blackberries and juices in a saucepan until it begins to thicken (about 5 minutes).  Add a tablespoon of arrowroot powder mixed with water to make a slurry. Arrowroot powder is a grain-free starch alternative to cornstarch. If you aren’t worried about grains, then you could swap cornstarch for the arrowroot powder. Adding the starch will make the sauce even thicker.  Strain the cooked blackberries through a strainer and reserve about 1/3 to 1/2 cup of the sauce. This sauce is amazing in yogurt, on pancakes, waffles, my face.

DSC_0027

DSC_0037

So go surprise your face and someone you love or maybe even just tolerate and make this cheesecake. I promise you won’t be disappointed. Plus, it is gorgeous!

Blackberry Cashew Cheesecake (Paleo, Gluten Free, Grain Free, Dairy Free)  (adapted from My New Roots, serves 8)

Note – You will need a very powerful food processor or blender (such as a Vitamix). I have a Cuisinart Pro Plus food processor that works like a champ and a half. 

Crust Ingredients

  • 1/2 cup raw pecans
  • 1/2 cup pitted dates
  • 1/4 teaspoon sea salt

Filling Ingredients

  • 1 1/2 cups raw cashews (soaked at least 4 hours)
  • 1/3 cup coconut oil (melted)
  • 1/3 cup maple syrup (or honey for non vegan)
  • juice of 2 lemons (about 1/4 cup)
  • 1 teaspoon vanilla extract
  • 1 to 2 cups fresh or frozen blackberries (thawed if frozen and retain the juices)
  • 1 tablespoon arrowroot powder + 2 tablespoons of water

Instructions

  1. Crust – In a food processor, place nuts, salt, and pitted dates and pulse until the ingredients combine into a paste.  The mixture should hold together when you pinch a small amount between your fingers.  Place Saran wrap in a 7″ pie pan (spring form pans work best but aren’t necessary) or 8×8″ square baking dish. Spoon crust mixture into pan and press evenly and firmly, making sure that the edges are well packed. Wash and rinse the food processor.
  2. Blackberry Sauce – Place the blackberries and thawed blackberry juices in a heavy saucepan and heat over medium heat. Stir frequently, and bring to a low boil.  In a small bowl, mix the arrowroot powder with 2 tablespoons of cold water until it forms a slurry. Slowly stir the arrowroot slurry into the blackberries. Simmer for about 5 to 10 minutes until the homemade blackberry sauce thickens to coat the back of a metal spoon. Remove from heat. To get separate the seeds from the blackberries, set a strainer over a heat-proof bowl. Pour the blackberry sauce into the strainer and mash with the back of a spoon to get all of the juices from the blackberries. You should get about 1/2 cup of sauce. Reserve the sauce for later use in the filling. You can keep the blackberry mash for either a topping or another use (stirred into oatmeal? in yogurt?).
  3. Cashew Cheesecake Filling – Microwave the coconut oil in a small Pyrex dish for 30 seconds until mostly melted. Whisk in maple syrup to combine. Place all of the filling ingredients (except the blackberries) into the bowl of the processor and blend on high-speed for several minutes until very smooth.
  4. Assembly – remove the crust from the freezer. Pour about two-thirds of the cashew mixture onto the crust and smooth evenly with a rubber spatula. To the remaining third of the cashew filling mixture, add the blackberry sauce (about 1/3 cup). Blend on high until smooth. Pour this mixture onto the first layer of filling. I drizzled an additional 1/4 cup of sauce on the top of the blackberry layer and made a swirl pattern with a butter knife. Place in freezer for about 2 hours or until solid.
  5. Serving – To serve, remove from freezer about 30 minutes before serving.  Heat a smooth and sharp knife under hot water and cut the pie into 8 slices. Serve with any additional blackberry sauce. Store any remaining pie in the freezer.

Grain Free Lemon Tart

Are you ready?  Like REEEEEALLY ready? Because this isn’t your standard lemon tart. It is a TART tart.  A creamy tart with pucker power but tempered with sweet agave nectar. It is the princess of tarts that will make you dream of fresh flowers, warm picnics, and lemon trees even when it is still stupid cold outside.

DSC_0407

I have been slightly obsessed with lemon tarts lately.  I made piss poor lemon bars last weekend and was out for vengeance.  I didn’t like the filling and was dead set on making a creamier version that could be placed into a tart crust.  So the hunt began for a lemon tart recipe that satisfied my obsession.  I studied several recipes and finally settled on an amalgamation of Julia Child’s Tarte Au Citron, Cookie and Kate’s Honey-Sweetened Citrus Curd, and Dave Lebovitz’s Lime Meringue Tart.

In the end, the curd recipe was adapted from Kathryn’s recipe.  I swapped agave nectar for the honey because I didn’t have honey on hand.  Kathryn’s curd was a bit sweeter than this lemon curd, which could be due to the sweetener swap. If you prefer a sweeter lemon curd, you might stick with honey which will provide that pronounced honey flavor or you could increase the quantity from 1/3 cup to 1/2 cup.  But I liked using the neutral-flavored agave nectar which allowed the tartness of the lemons to be the leading lady of the lemon curd. I also love tart things over sweet. Give me Sour Patch Kids any day of the week over Smarties. EEW.

DSC_0421

DSC_0431

When making the curd, be careful when using the direct heat method to thicken the curd. Use nonreactive saucepan and either a wooden spoon or metal wire whisk. Plastic will make your curd curdle like curdly curdy curd. Hehe.  Just keep your heat on low and STIR constantly with a wire whisk. It’ll be fine.  However, if you get a little bit of cooked egg or lemon pulp in the curd, you can always strain the curd before placing it into the tart crust.  This lemon curd can also be made in advance and refrigerated for several weeks. It’s SO dreamy stirred into greek yogurt.

The almond flour-based tart crust pairs incredibly well with the lemon curd filling.  This grain free tart crust is amazing and can be used as a basic crust for a multitude of fillings.  I adapted the recipe from the Gluten-Free Almond Flour Cookbook by Elana Amsterdam.  I used Dave Lebovitz’s method for making a basic french tart crust where he places butter, oil, water, sugar, and salt in a bowl and melts it in a hot oven before adding the flour. The butter begins to brown, giving it a wonderful complex and nutty flavor. So simple!

DSC_0422

I also should note that this is a prebaked tart crust. Because almond flour tends to burn easily, keep the heat slightly lower when prebaking and allow the shell to slightly brown.  After filling it with the prepared lemon curd, bake the filled tart until the filling has set (about 10 minutes).  If the edges of the tart begin to brown too quickly, place aluminum foil around the crust edge to protect it from burning.

You can top the lemon tart with meringue (like me) or fresh seasonal fruit. Once my blueberry and raspberry bushes begin to fruit, you can bet your butt that I will be topping these tarts with a gaggle of berries. But in the mean time, I piped a small amount of meringue around the edge of the tart using 2 reserved egg whites. I made a metric poop-ton (actual measurement) of meringue and was sad to see it go to waste.  I nearly made a second and third tart JUST to give that beautiful meringue a home.

DSC_0437

Grain Free Lemon Tart (adapted from recipes from Cookie and Kate and Dave Lebovitz)

Serves 8

Tart Crust Ingredients

  • 3 Tablespoons unsalted grass-fed butter, cut into pieces
  • 1 Tablespoon coconut oil
  • 1 Tablespoon water
  • 2 Tablespoons agave nectar or honey
  • 1/2 teaspoon sea salt
  • 1 1/2 cups almond flour
  • 1/4 teaspoon baking soda
  • 1/2 teaspoon vanilla extract

Lemon Curd Filling Ingredients

  • 4 tablespoons unsalted butter, cut into small pieces
  • 3 large eggs
  • 3 egg yolks (reserve whites for meringue)
  • 1/3 cup agave nectar (or honey)
  • 2/3 cup fresh lemon juice (about 3 to 4 large lemons)
  • 1 Tablespoon lemon zest
  • pinch of salt

Meringue Ingredients

  • 2 reserved egg whites 
  • pinch of salt
  • 3 Tablespoons agave nectar or honey

Tart Crust Instructions:

  1. Preheat oven to 350F. 
  2. Place butter, coconut oil, water, agave nectar, and salt in a Pyrex bowl.
  3. Place bowl in preheated oven for 10 to 15 minutes.  Allow the butter and coconut oil to begin bubbling. The butter will begin to brown on the edges (a.k.a. browned butter).
  4. Remove the Pyrex bowl from the oven.  Be careful because the bowl will be hot.  Add almond flour, vanilla extract, and baking soda and stir quickly until a ball forms.
  5. Transfer dough ball to a 9-inch tart mold with a removable bottom. Use your fingers to spread dough into the base and up the edges of the tart pan. Prick the bottom all over with the tines of a fork.
  6. Partially bake for 7 to 10 minutes at 350 F.  You don’t want to fully bake or it will get too brown when later baking the filled tart.
  7. Remove the partially baked tart shell from the oven. Set aside and allow to fully cool before filling.

Lemon Curd Instructions:

  1. In a saucepan over low heat, heat butter, lemon juice, zest, and salt until butter is melted, but not boiling.
  2. In a medium bowl, whisk eggs, egg yolks, and agave nectar for 1 to 2 minutes until combined and slightly frothy.
  3. Temper the egg mixture by adding a bit of the heated butter-lemon juice mixture to the eggs and whisking constantly.  This will warm the egg mixture without cooking your eggs.  After the eggs are slightly warmed and tempered, add them slowly to the warm butter-lemon juice mixture, whisking constantly.
  4. Increase the heat and cook over medium-low heat, whisking constantly until the lemon curd mixture begins to thickens with a consistency of jelly. DO NOT LET IT BOIL!!! It is done the whisk is lifted from the curd and the mixture holds its shape when it falls back into the saucepan from the whisk (see picture below).
  5. Remove the curd from heat. Place the prebaked tart shell onto a rimmed baking tray.  (Be careful with the tart shell and the removable bottom!!! I have ruined a few tart crusts by accidentally pushing through the mold.) Scrape the filling into the prebaked tart shell.
  6. Bake at 350 F for 10 minutes. Remove from the oven.  You can either top with marshmallowy meringue (recipe below) or fresh seasonal fruit. Allow to cool completely before slicing.

DSC_0412

DSC_0416

Marshmallowy Meringue (makes 3 cups):

  1. Heat 3 tablespoons of agave nectar in a microwave safe dish for 30 seconds (watch out because this might boil over).
  2. Add 2 egg whites and a pinch of salt to the bowl of a mixer. Turn on high and whip with whisk attachment until soft peaks form. Gradually drizzle in the heated agave nectar and a few drops of vanilla. The meringue will become shiny and slightly stiff.
  3. Scrape the meringue either into a pastry bag fitted with a fancy tip or (like me) scoop it into a Ziploc bag and cut the end off of the corner. Pipe the meringue in a ring around the tart. Or you can also spread the meringue with a spatula around the tart. (You will have meringue left over which either can be used for a second tart or stored in a mason jar in the refrigerator for 24 hours).
  4. Turn on the broiler in the oven. Place the tart under the broiler, watching VERY carefully because it will brown quickly! After the top begins to brown and darken, remove the tart from the oven and cool completely before slicing.

Paleo Cranberry and Apple Cobbler

My heart is heavy on this last day of December and this last day of 2012. I’m staying in my pajamas and watching the snow fall. The snow falls so peaceful outside my window, yet I know that sometimes there is no peace and life is just not fair.  

DSC_0234

My thoughts go out to everyone who has lost someone this year. My thoughts go out to those that are lost. My thoughts go out to those that are enduring hardships that are unfathomable. 

There are so many cruel and unfair things that occur and I always ask “why?”…but sometimes there is no reason. It’s just the way it is.  I only hope that there is something better that hopefully will come out of tragedy.

DSC_0239

DSC_0253

So I make this cobbler for my friends that are struggling right now, my friends that are enduring an unfathomable loss, my friends that are lost in life.  I make this cobbler to hopefully bring comfort into their hearts and to warm their souls.

Paleo Cranberry and Apple Cobbler (Grain Free, Gluten Free, and Diary Free) (adapted from Beeckman 1802 Heirloom Cookbook)

Filling:

  • 12 oz bag of fresh cranberries
  • 3 medium apples, cored and diced
  • 1/4 cup crystallized ginger, diced
  • 1 cup water
  • 1/3 cup honey
  • 2 tablespoons arrowroot powder

Topping:

  • 1 cup almond flour
  • 1/4 cup chopped walnuts
  • 1 teaspoon ground cinnamon
  • 1/8 teaspoon sea salt
  • 1/4 cup coconut oil, melted

Instructions:

  1. Preheat oven to 350F.  Grease a 9X9-inch baking dish with butter, coconut oil or nonstick spray.  Set aside.
  2. In a medium saucepan, combine cranberries, apples, crystallized ginger, water, and honey. Heat over medium heat until the mixture begins to boil and the cranberries pop. Cook for 5 to 10 minutes.  Remove from heat and stir in arrowroot powder. Pour the hot cranberry mixture into the baking dish and set aside.
  3. In a separate medium bowl, combine all of the topping ingredients. Mix well.  Spoon the topping mixture evenly over the filling.
  4. Bake at 350F for 30 to 40 minutes. The cobbler will begin to bubble and the topping should lightly brown.  Remove from oven and allow to cool for a few minutes.  Best when served with vanilla coconut ice cream!