Gluten Free Carrot-Apple Muffins

Gluten Free Carrot-Apple Muffins / Big Eats Tiny Kitchen

My man and I just celebrated our 9th wedding anniversary last month.

Nine! Where did time go?

I am utterly surprised that my husband still looks at me with amazingly bright eyes and is still in love with me. For some reason he likes being married to a neurotic woman with an obsession for ketchup and oatmeal. Not together…separate. Anyways I digress, I really think I got the better end of the deal. He is definitely the best thing that has ever happened to me. Well, except at 5am when he sings random songs like “Highway to Hell” or “Baby Got Back”. (Really…we should have no singing rules until well after 8am, right? Right? or at LEAST after coffee!)

Gluten Free Carrot-Apple Muffins / Big Eats Tiny Kitchen

But honestly, anniversaries like this remind me that time is passing so quickly. I hope that I can breathe in as many details of my life and not take things for granted.  I want to laugh more and not take things so seriously. (Except the singing before 8am…I take that very seriously.)

For our anniversary, my husband got me a Vitamix (the ridiculously amazing and over-the-top blender that does everything that you ever imagined, including make creamy nut butter, process ice cream, puree smooooooth soups, grind fine flours, clean your house, complement your hair, and check your email). This blender is sheer madness!!!!  She’s like a personal assistant…that is also your best friend and doesn’t annoy you…ever.

Gluten Free Carrot-Apple Muffins / Big Eats Tiny Kitchen

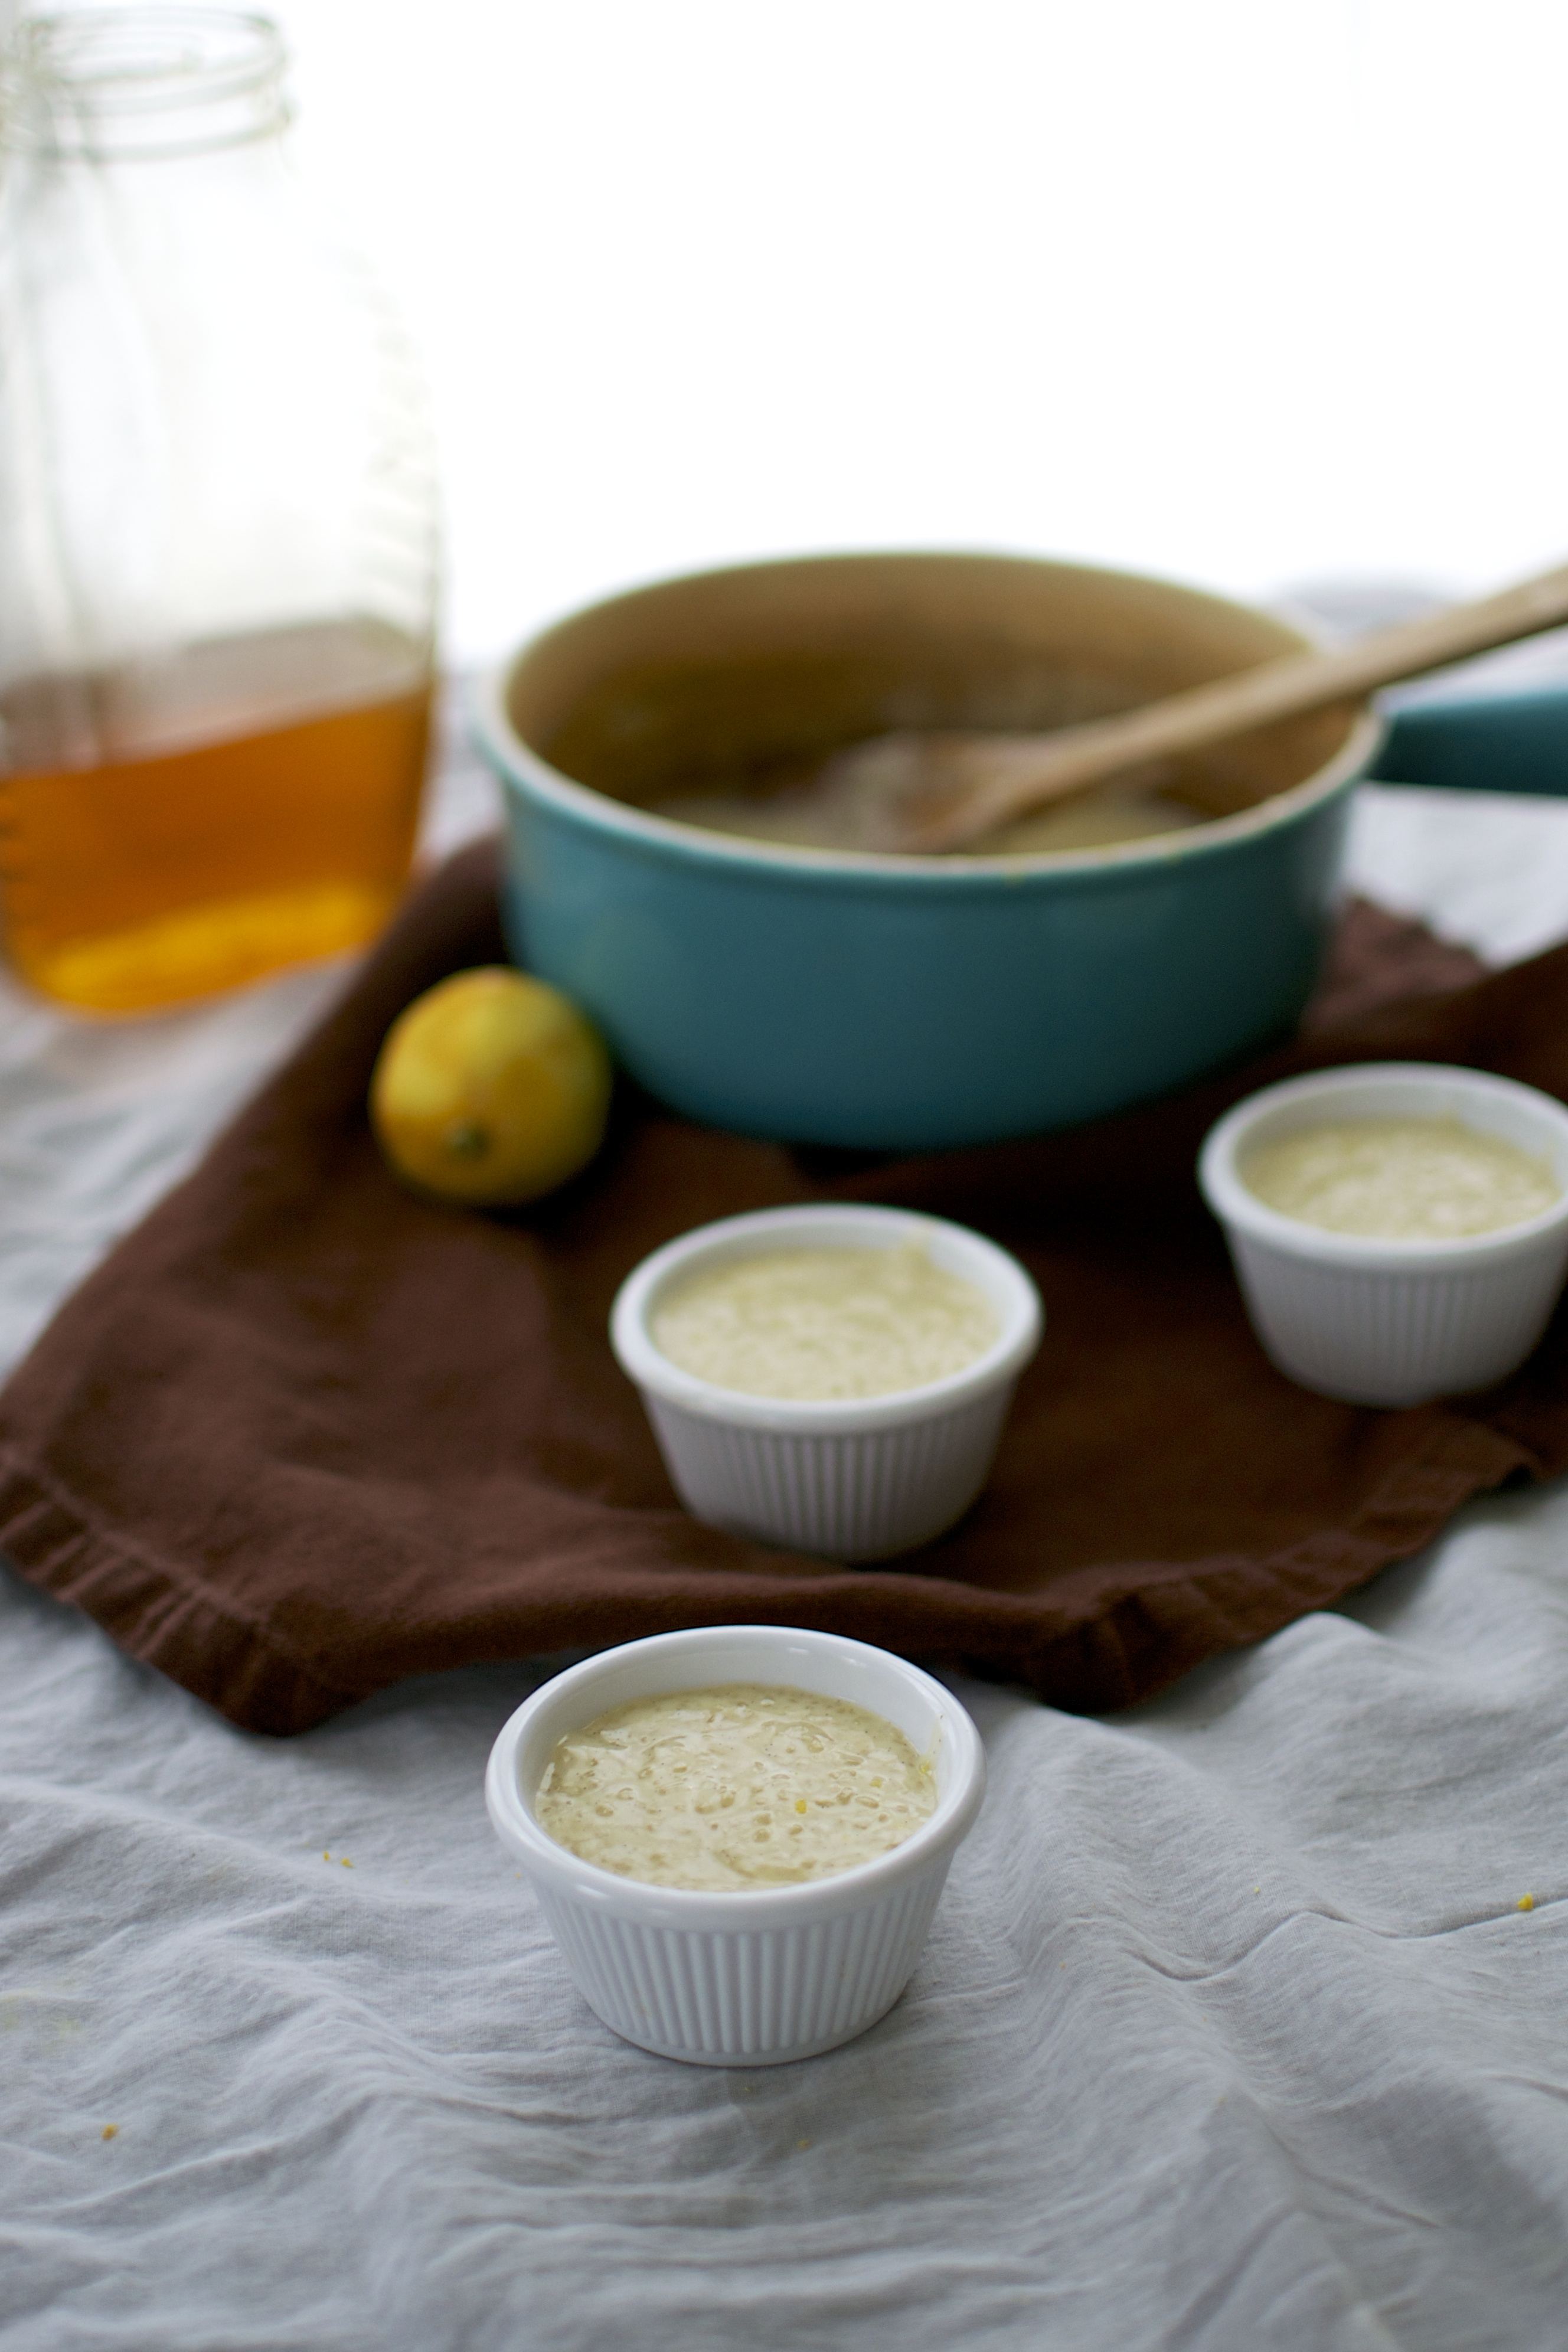
What was one of the first things I did with my Vitamix? No smoothies. I made oat flour and then made carrot and apple muffins. Ya, you heard me…muffins. Real muffins, not smoothie muffins. Well…I didn’t bake the muffins in the Vitamix.  C’mon! Ridiculous. That’s the next version…the easy bake Vitamix.

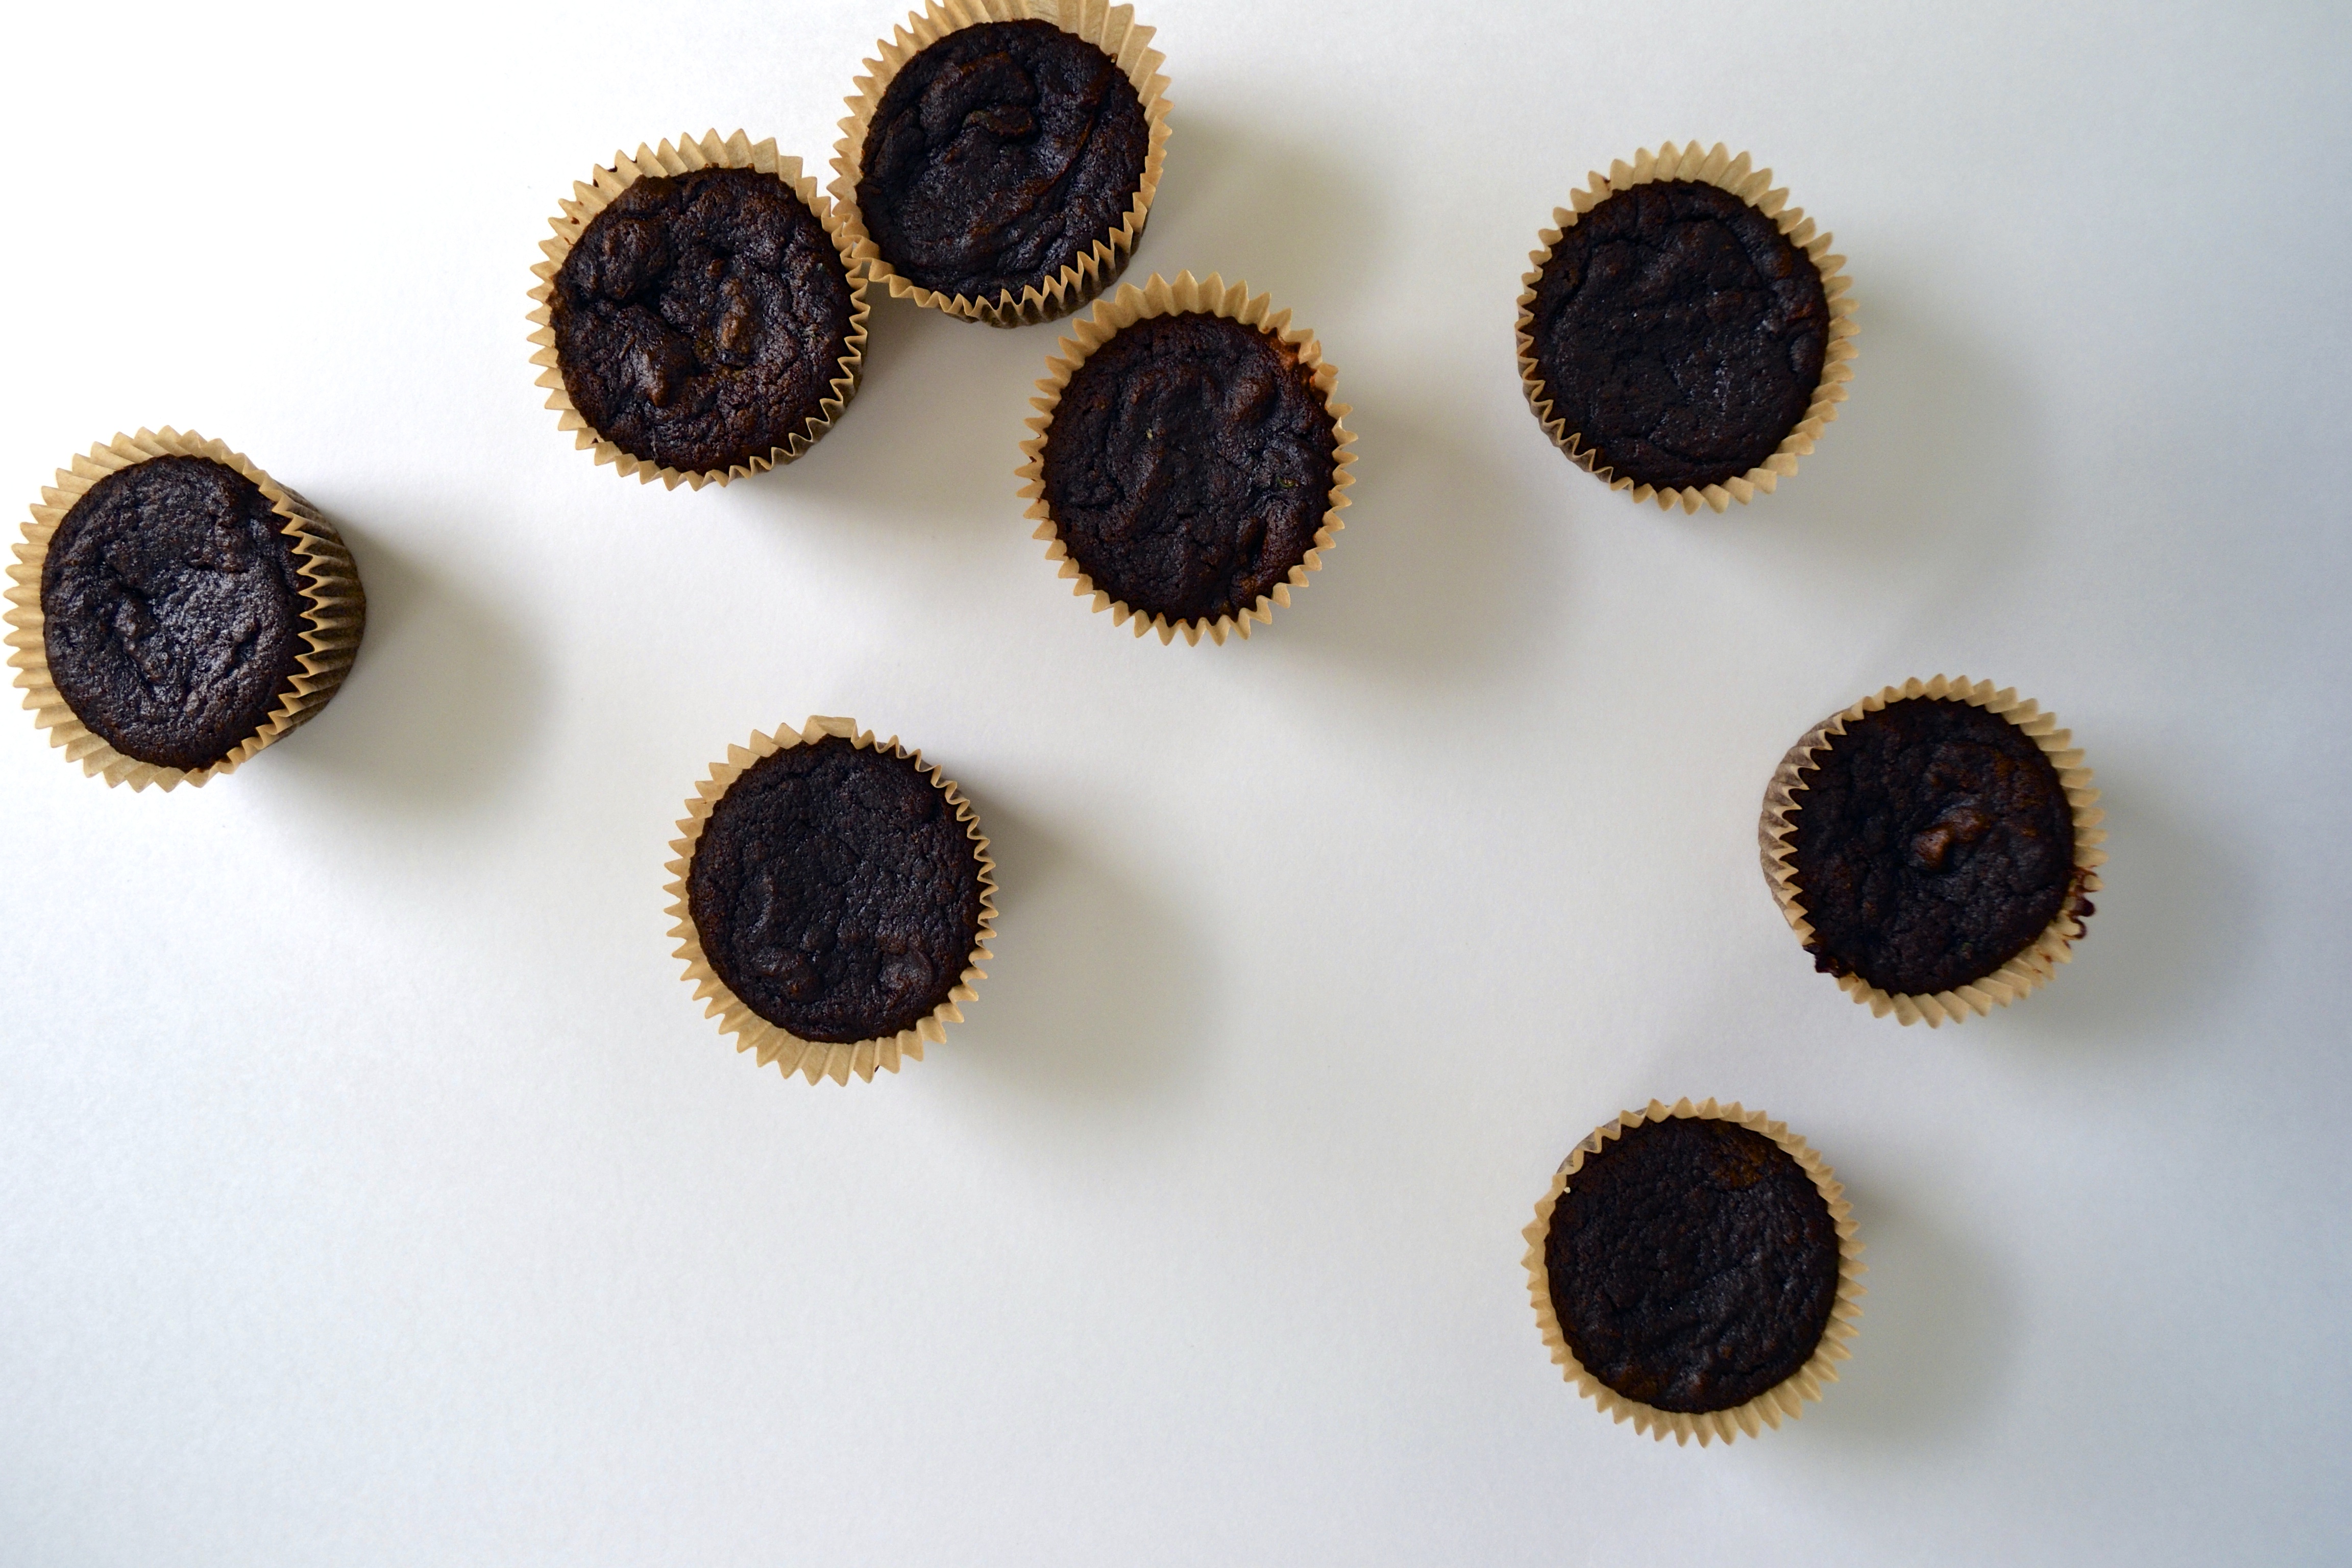
I created these quick gluten-free carrot and apple muffins by placing chunks of carrots and apples in the bottom of the high-speed blender and slowly processing them until they were finely shredded. It took 15 seconds! SECONDS! And you save your fingers! This step could also be done in a food processor, or with a grater.  But it won’t take 15 seconds….maybe 1 minute more. Not bad at all.

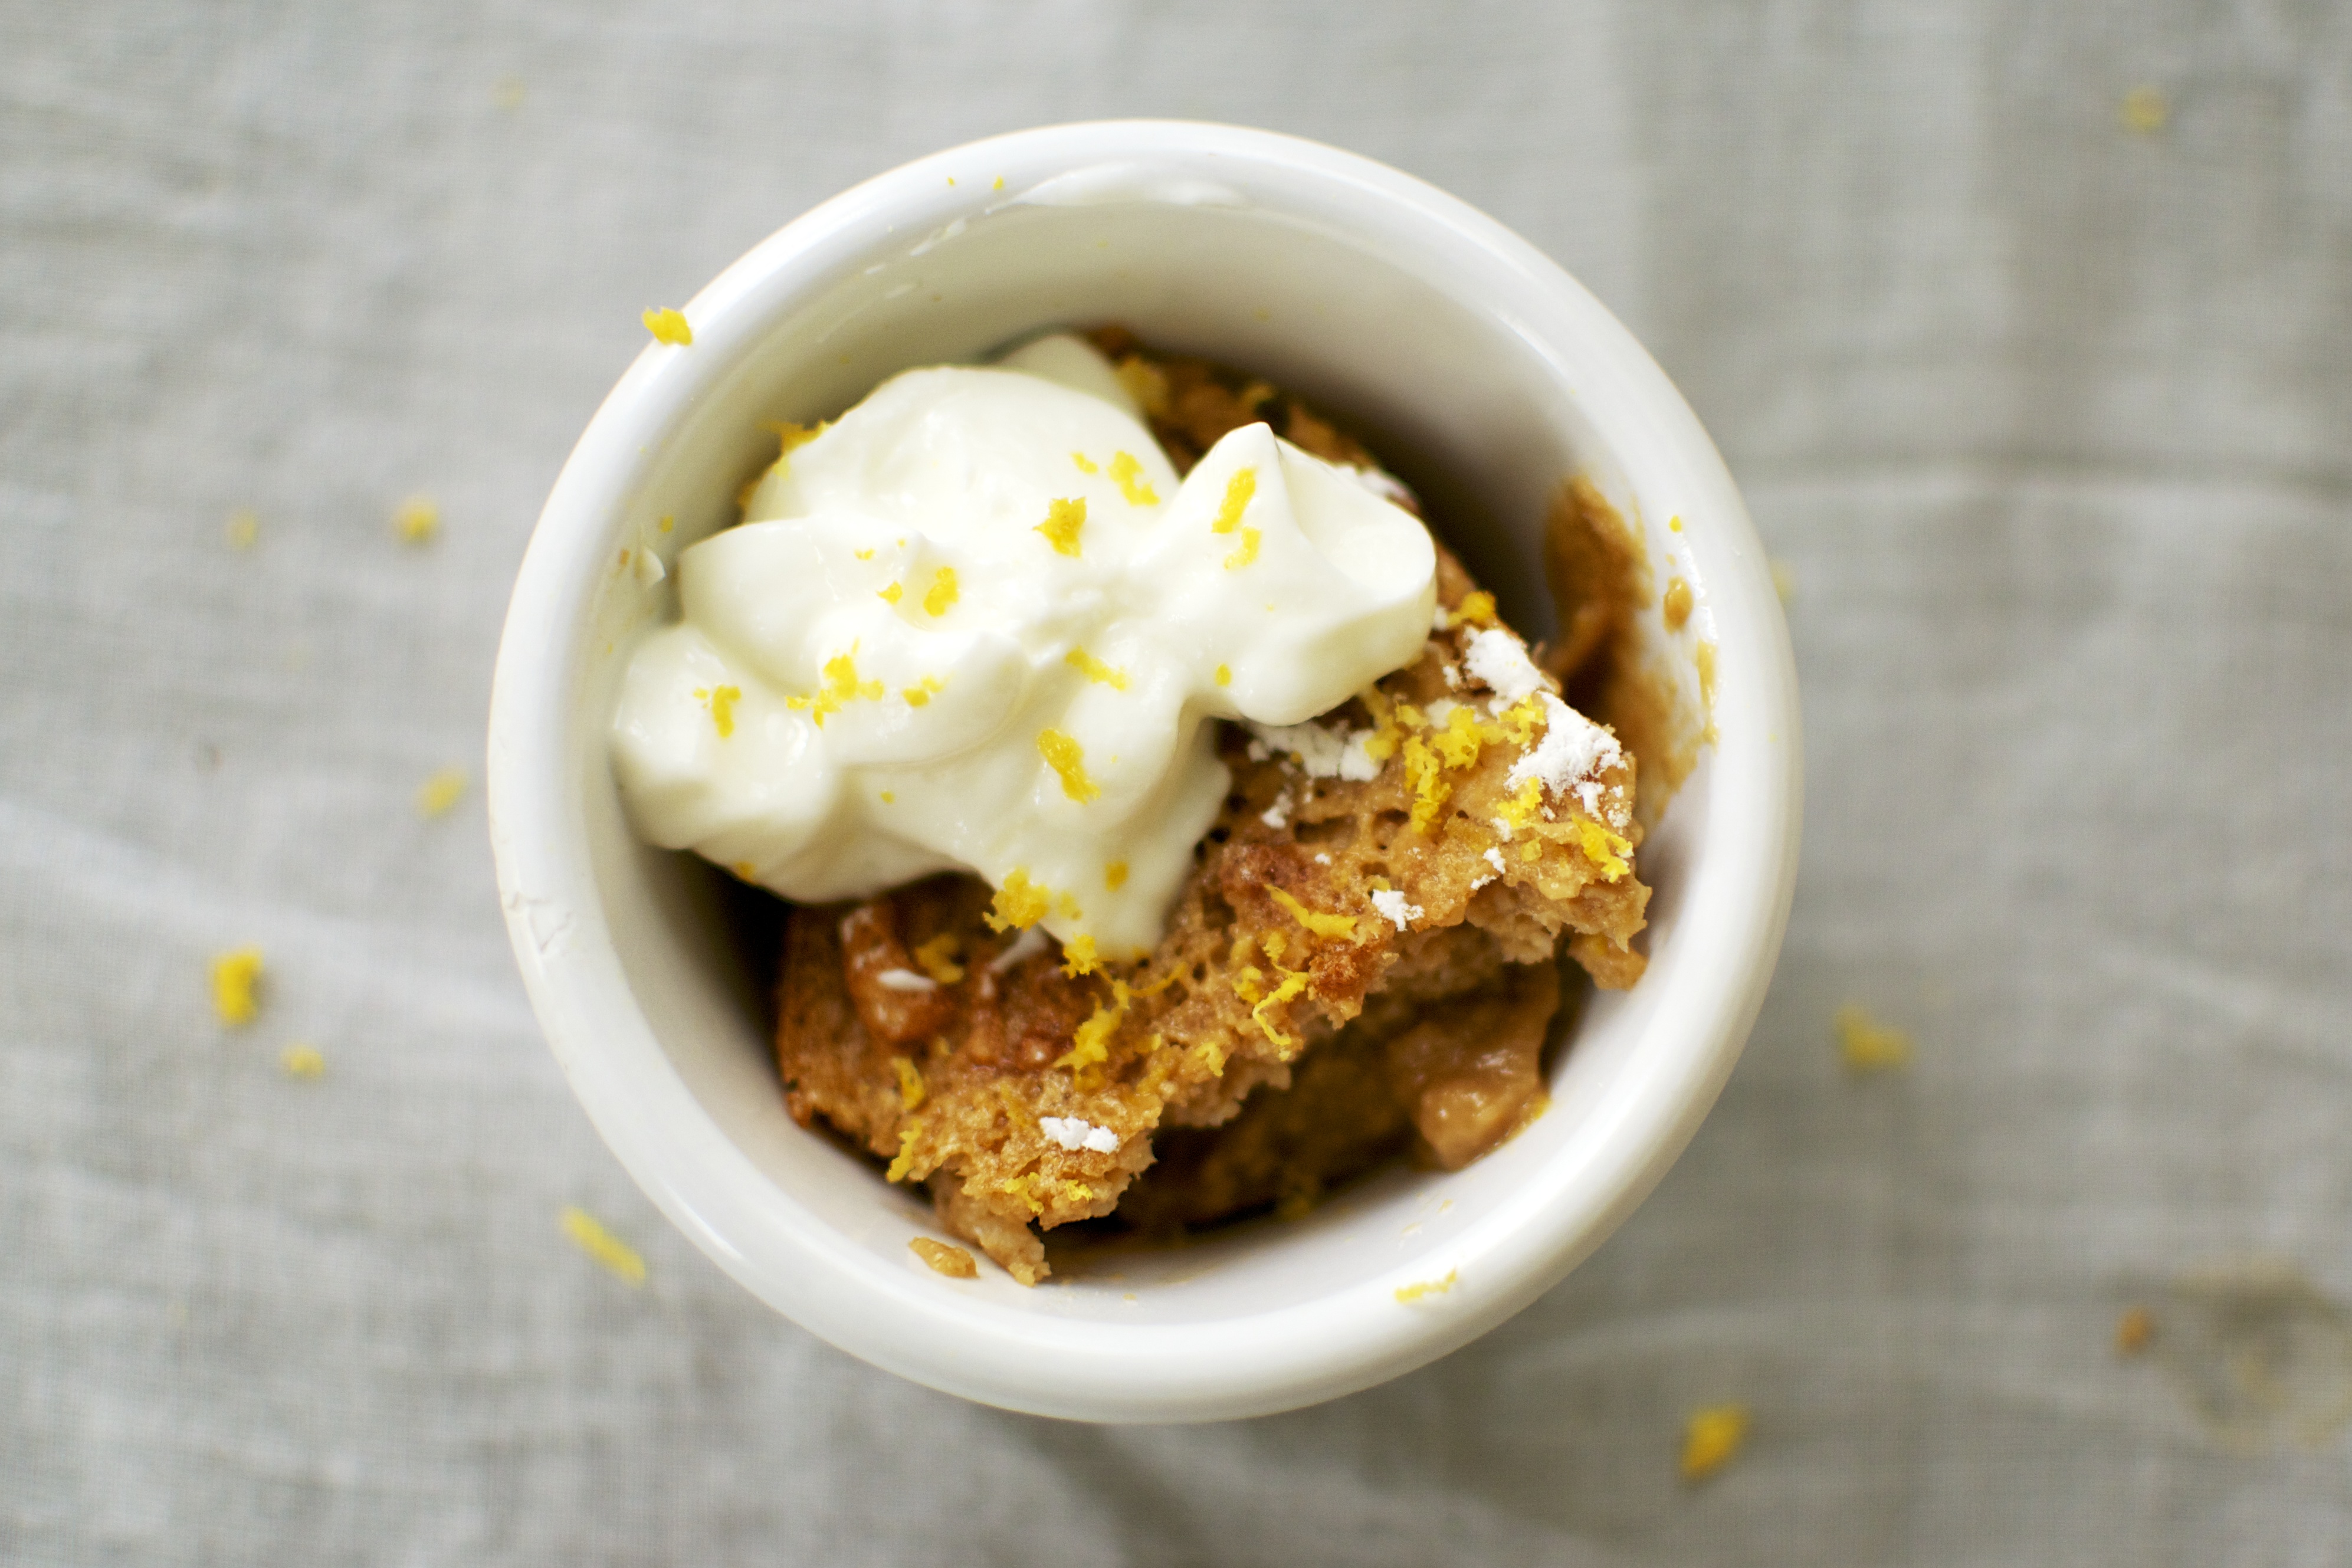
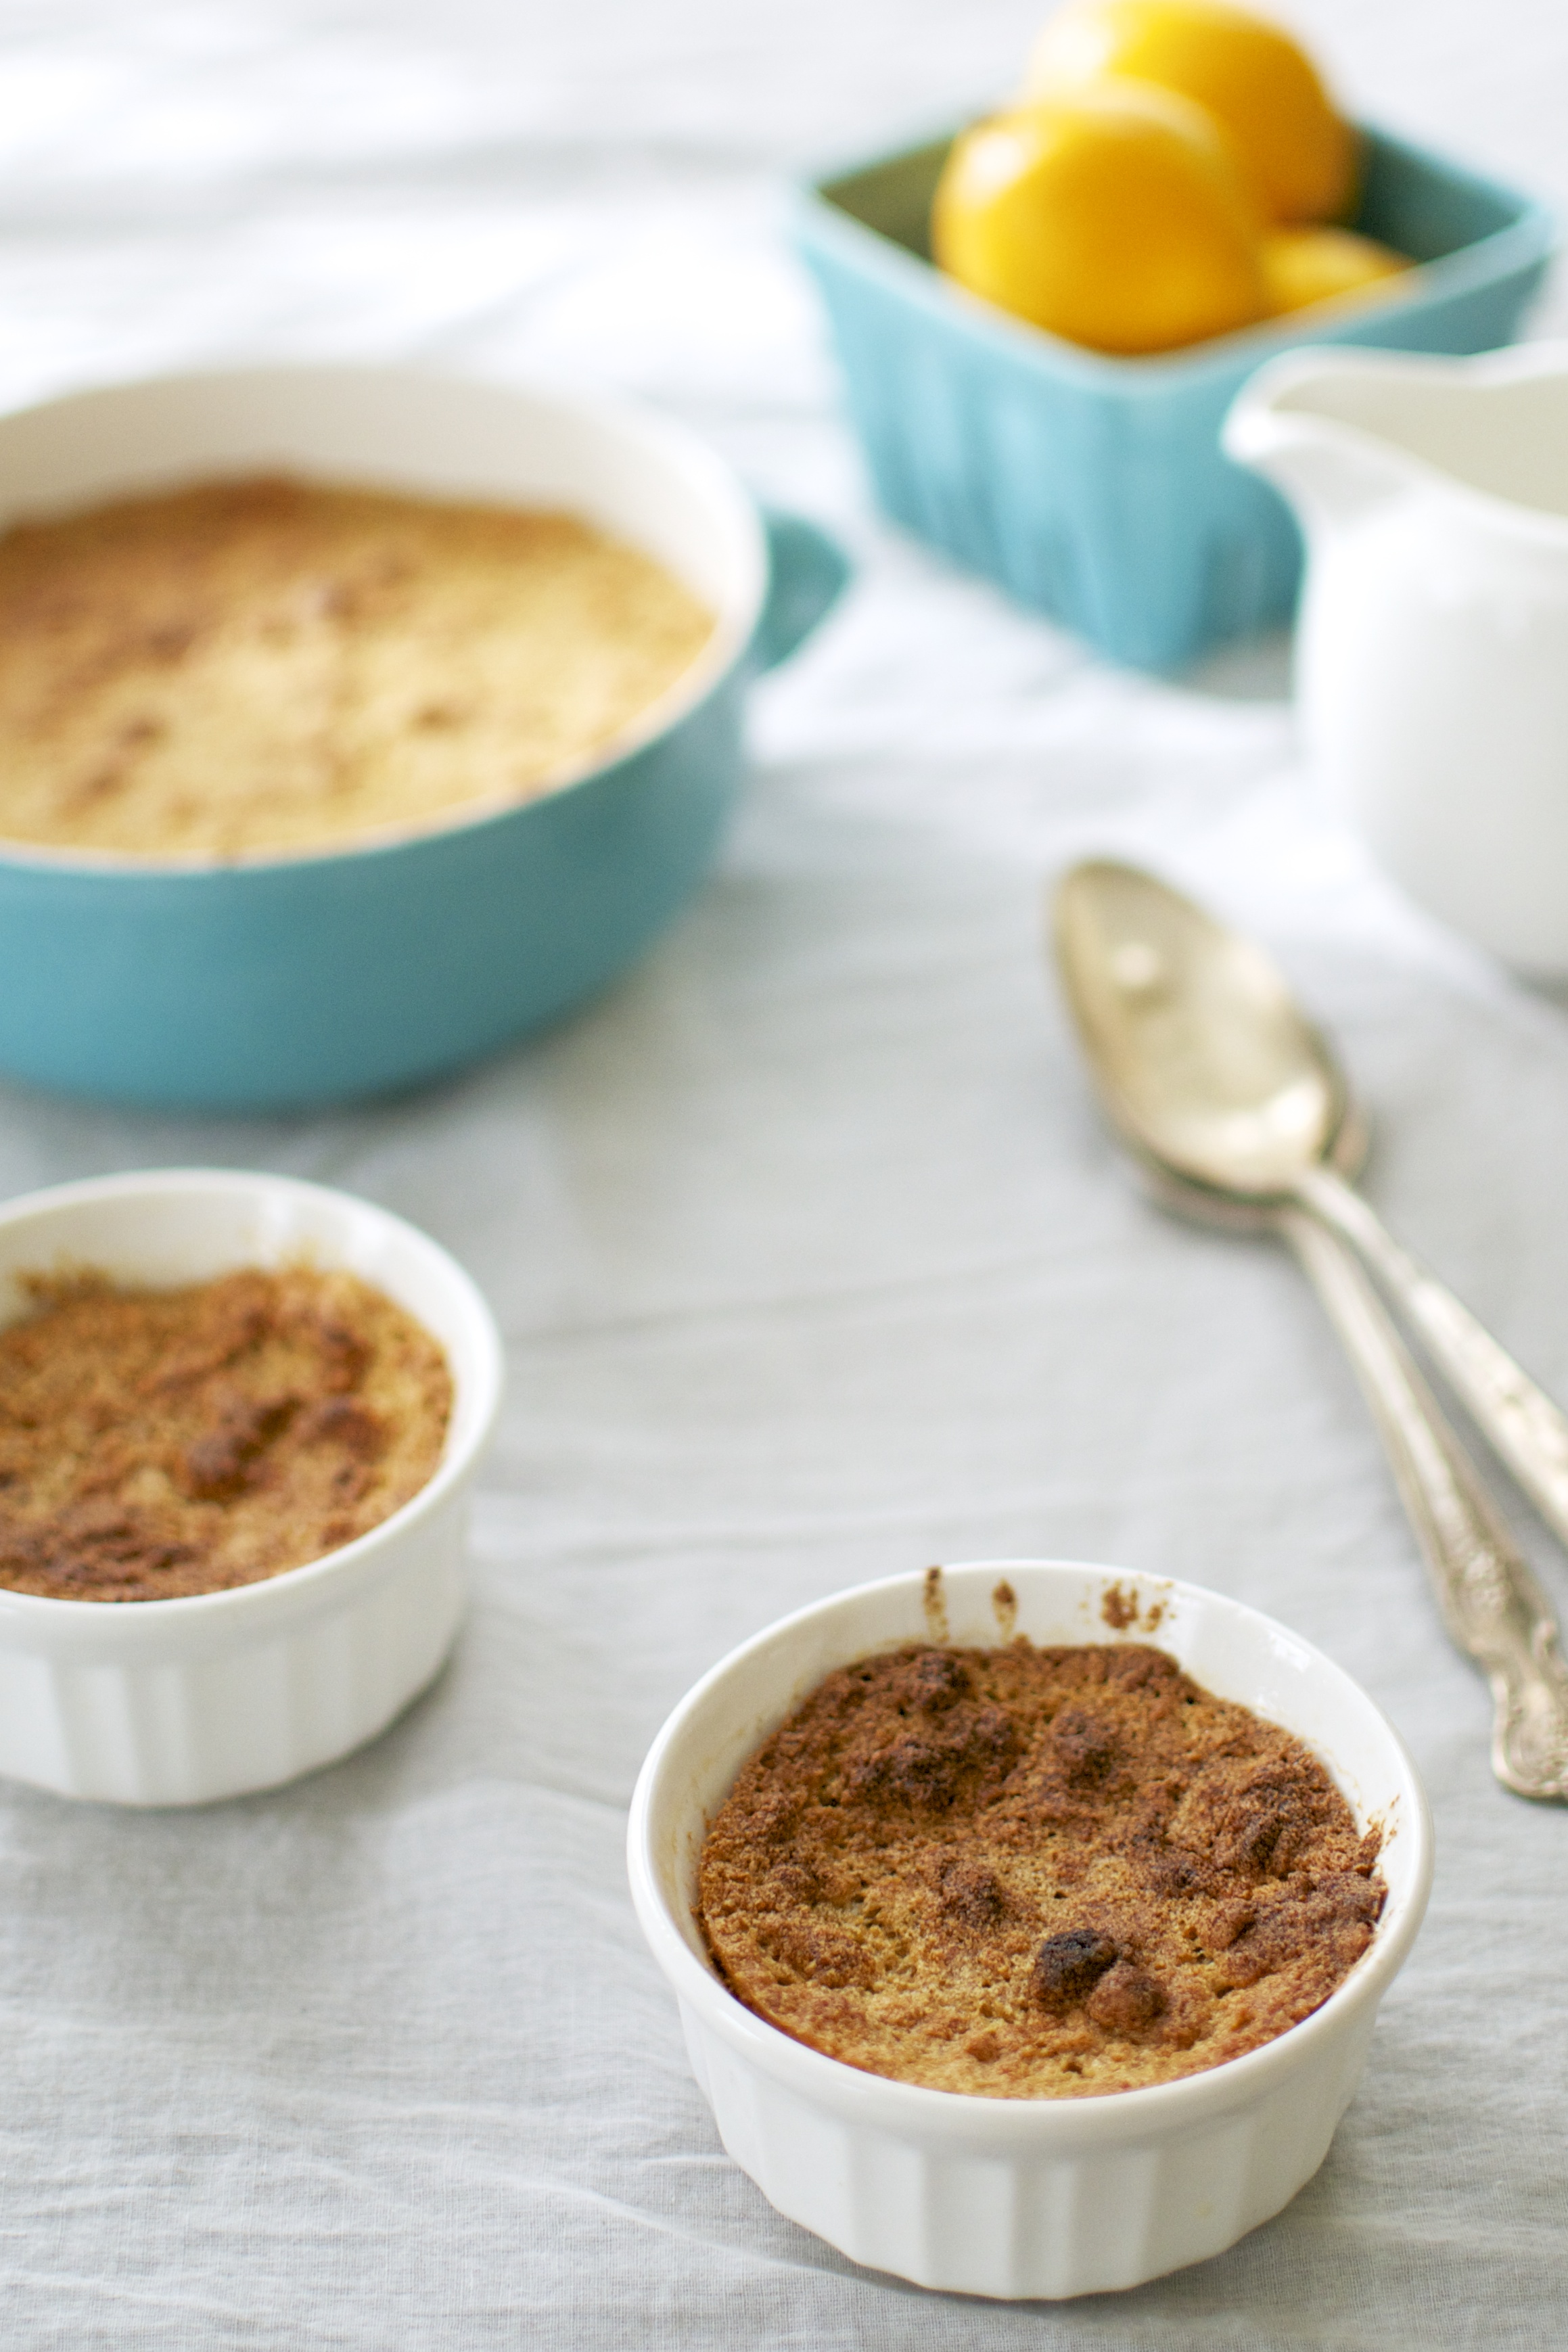
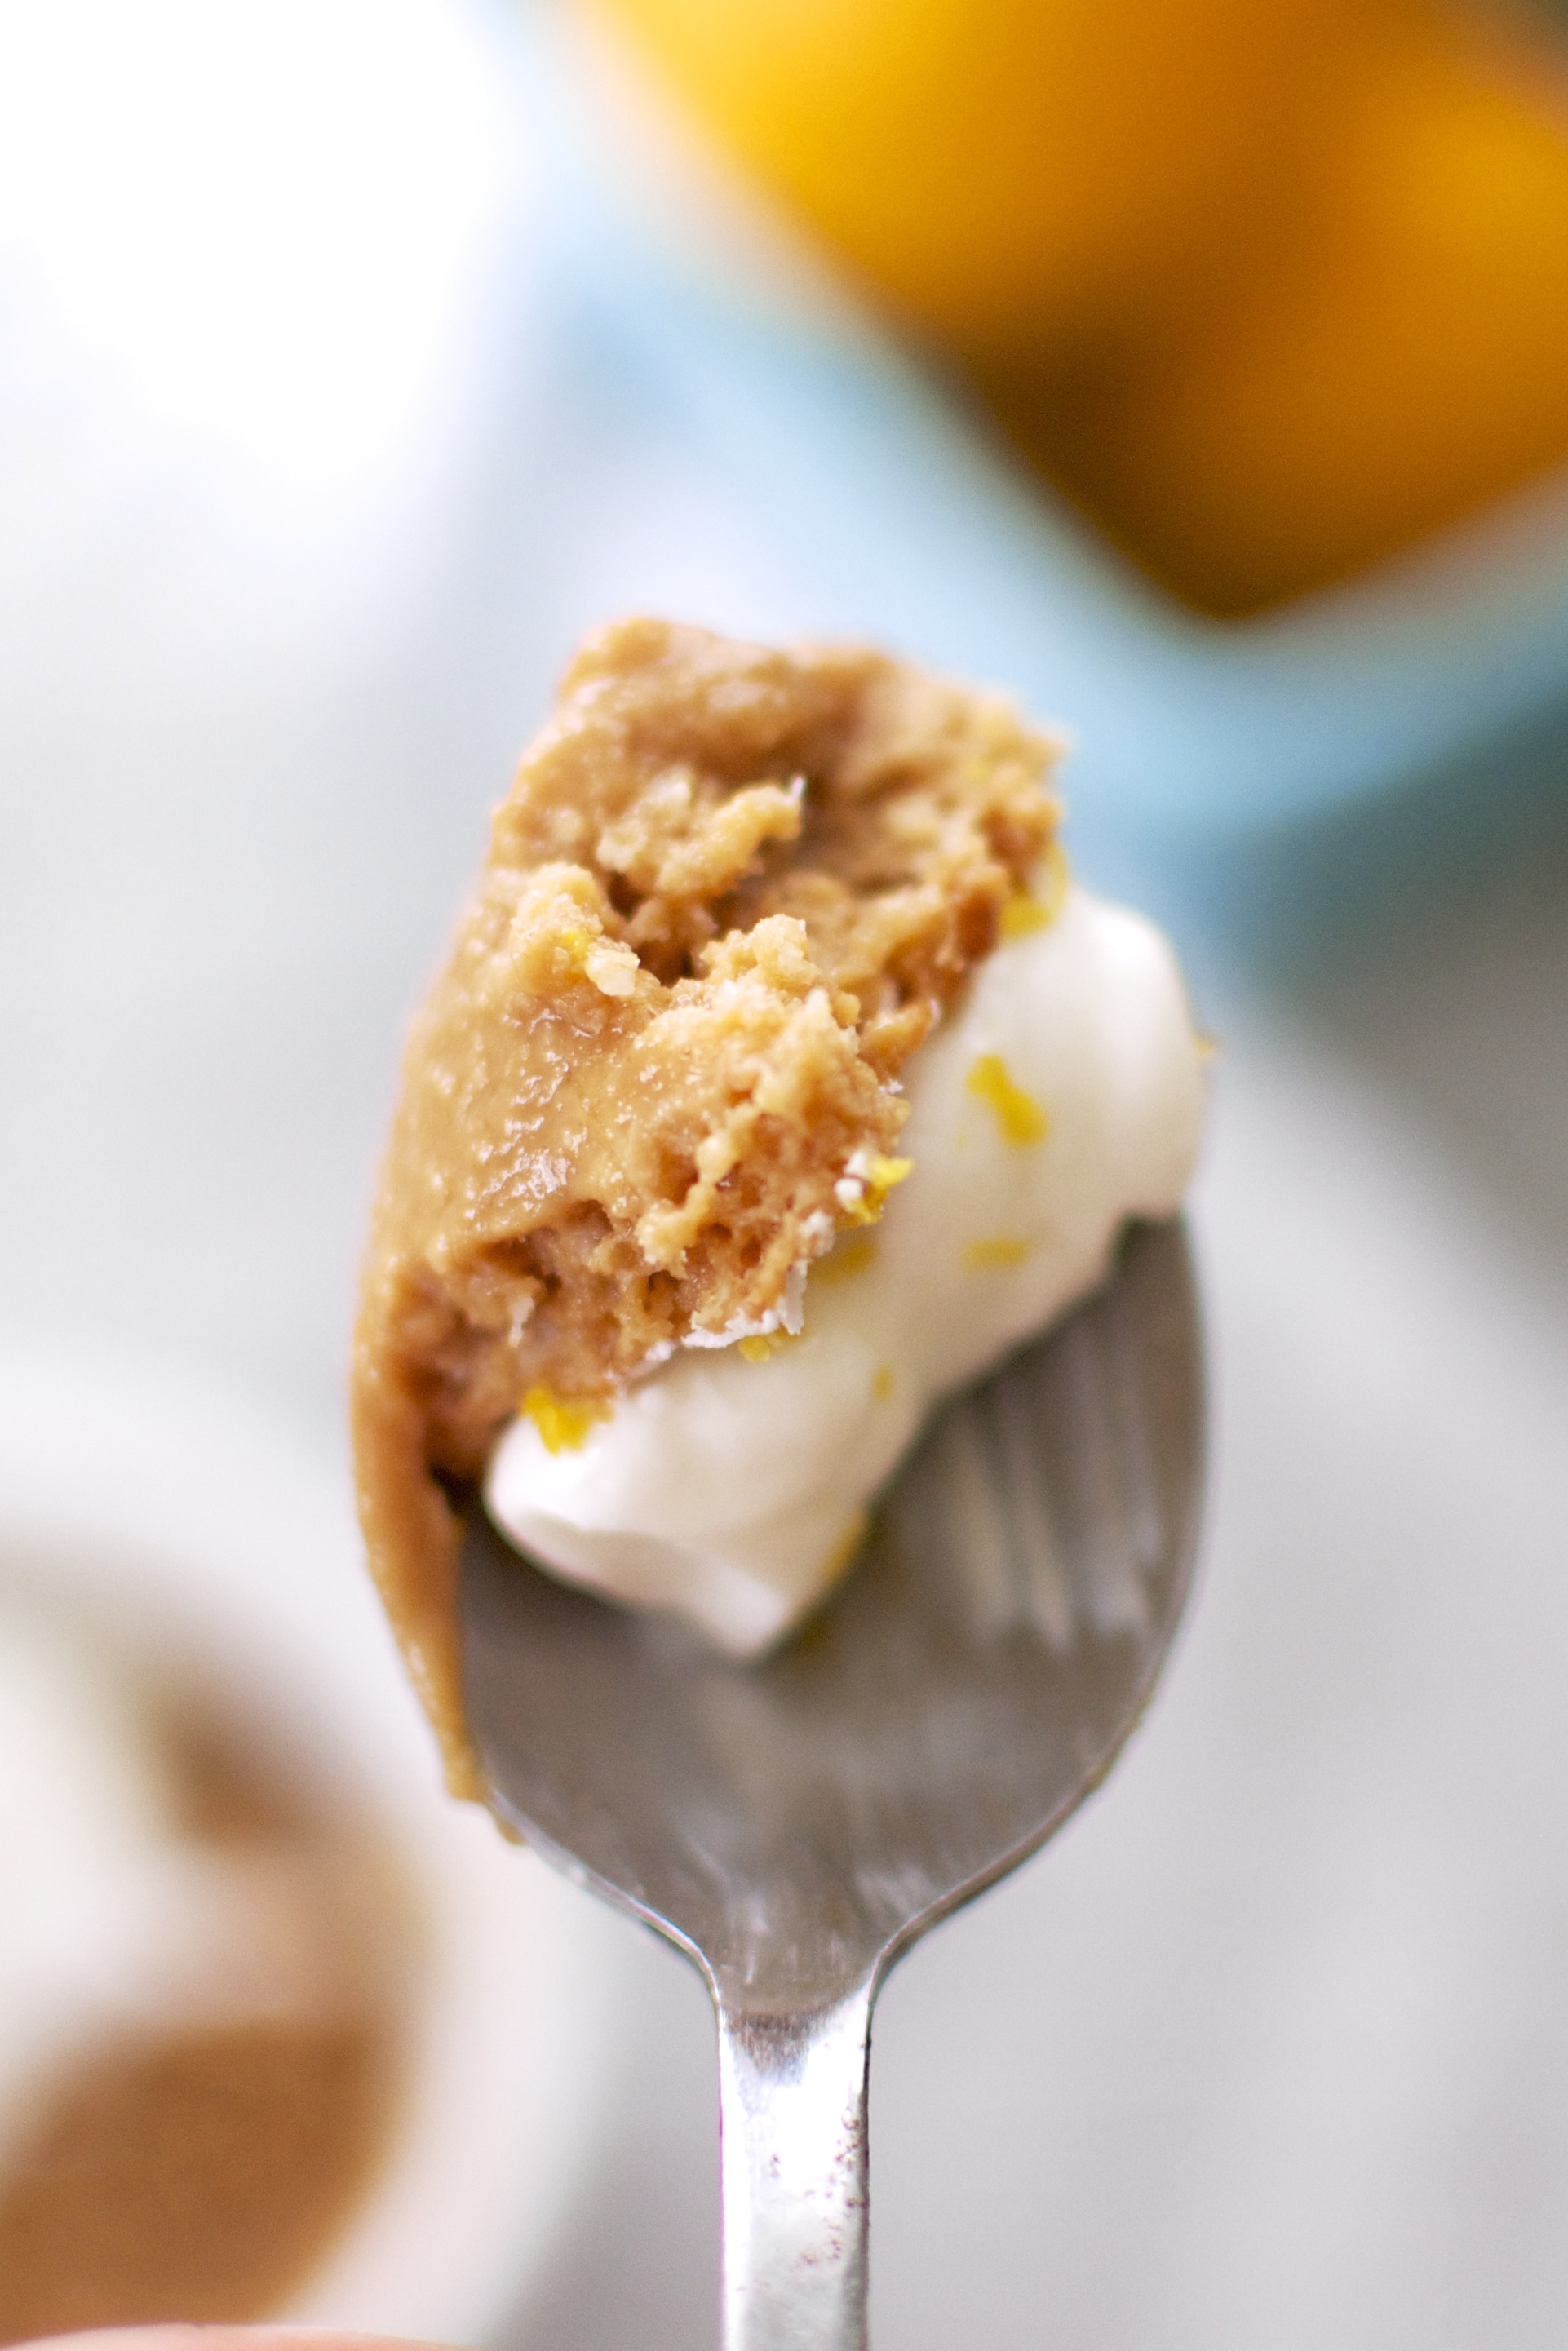
The resulting muffins are moist and delicate. They are perfect for breakfast. You could even top them with a cream cheese frosting and serve them as cupcakes for dessert. I will definitely be turning this recipe into a cake soon. Especially since I can cut down the prep time with my blender!

Gluten Free Carrot-Apple Muffins / Big Eats Tiny Kitchen

Needless to say, although I thought that these high-speed blenders were a bit over the top, I’m not complaining that this beauty is now sitting on my counter waiting for me to make my next magical concoction.

Gluten Free Carrot-Apple Muffins

  • Servings: 9
  • Difficulty: Medium
  • Print

Ingredients

  • 2 medium carrots, cut into 1/2-inch pieces
  • 2 medium apples, cored and cut into eighths
  • 2 eggs, room temperature
  • 1/2 cup maple syrup
  • 2 tablespoons coconut oil (or butter), melted
  • 1/3 cup greek yogurt
  • 1 teaspoon vanilla
  • 1 cup oat flour (from ground gluten-free rolled oats)
  • 1/2 cup almond flour
  • 1 teaspoon baking soda
  • 1/4 teaspoon salt
  • 1 teaspoon ground cinnamon
  • 1/2 teaspoon ground ginger
  • 1/4 teaspoon ground nutmeg
  • 1/3 cup walnut pieces

Instruction

  1. Preheat oven to 350F. Place muffin liners in 9 cups of a muffin tin. Set aside.
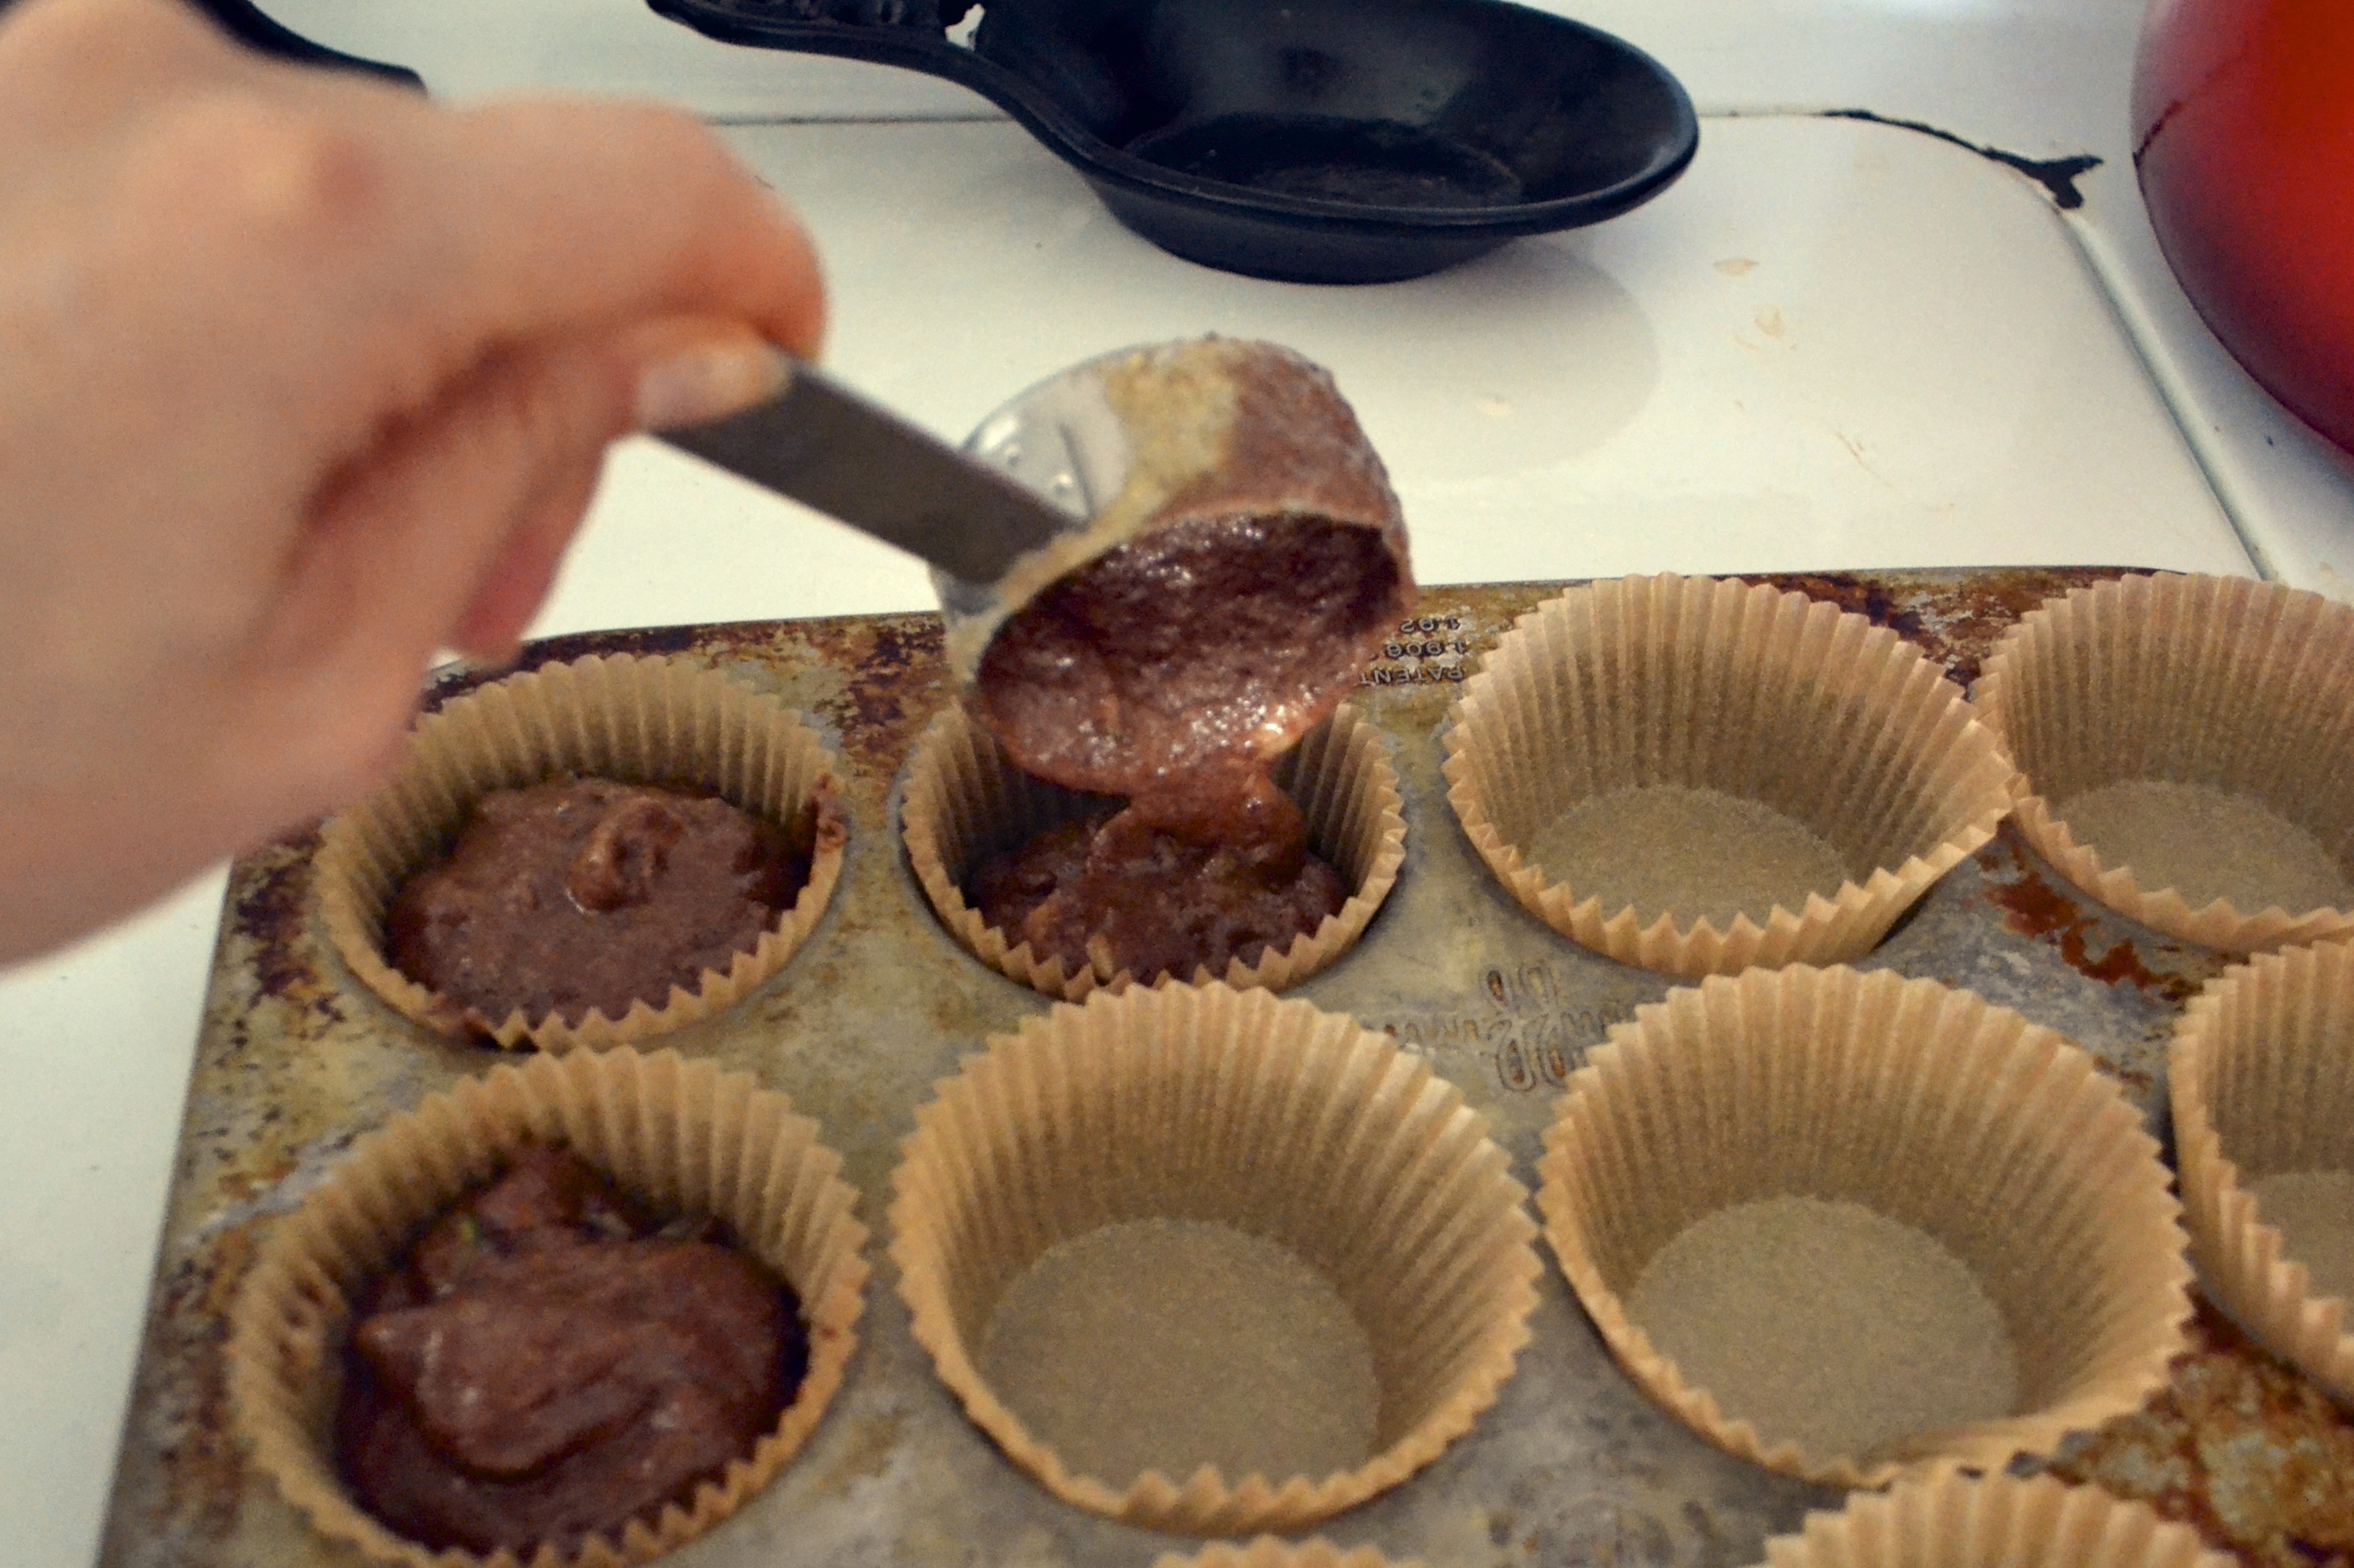
  2. Place carrots and apples in the bowl of a food processor or high-speed blender. Process on low until carrot and apple are diced into fine pieces. Add eggs, maple syrup, coconut oil, greek yogurt, and vanilla to food processor or blender. Process or pulse until everything is well mixed.
  3. Place all dry ingredients (except walnuts) in a separate large bowl and whisk together.  Pour wet ingredients into dry ingredients in the large bowl. Stir all together until just mixed and no dry ingredients remain. Stir in walnuts.
  4. Spoon about 1/4-cup portions into each muffin tin liner. Bake for 30 to 40 minutes at 350F, or until a toothpick comes out clean when stuck into the center of a muffin. Allow to cool on a wire rack for 10 minutes. Store in a sealed container in the refrigerator for 3 days. May be frozen for up to 3 months.

Note – Recipe adapted from Edible Perspectives.

Advertisement

Lemony Coconut Tapioca Pudding

Lemony Tapioca Pudding / Big Eats Tiny Kitchen

I am in need of a vacation. It’s mid February and the skies are dismal and the temperatures are even more dismal.

So I have decided to create a vacation atmosphere in my home. Cozy, comfy, and relaxing. I curl up with a great record, a cozy blanket, and something creamy….like pudding. This tapioca pudding has the bright flavor of lemon. It reminds me of a random warm day in the 50s or 60s that comes along in the middle of winter and makes you want to run wild outside after having been locked inside from snow mounds and drifts of snow. Actually, at this point, I would go running around outside like a lunatic if it hit 40 degrees outside. I’ve got my bongos ready…I think it might hit 42 today. YES.

Lemony Tapioca Pudding / Big Eats Tiny Kitchen

So like I was saying. Lemons. Nothing is more refreshing and spring-like in flavor like lemons. This tapioca pudding has what every dismal winter day needs…a ray of sunshine and a warm breeze. But combine that with creamy tapioca pudding and you have comfort in a bowl.

Lemony Tapioca Pudding / Big Eats Tiny Kitchen

DSC_0295

I prefer to use small pearl tapioca, fresh honey, and a mixture of coconut milk and 2 percent milk. But for a completely dairy free version, by all means, use combination of other dairy free milks.

Lemony Coconut Tapioca Pudding

Adapted from Smitten Kitchen

Ingredients

  • 3 cups of coconut milk (or half coconut milk and half 2% milk)
  • 1/4 teaspoon kosher salt
  • 1/3 cup small pearl tapioca or granulated tapioca (I used this type)
  • 1 egg yolk, lightly beaten
  • 1/4 cup honey
  • 1/2 teaspoon gluten free vanilla extract
  • 1 tablespoon of lemon juice
  • zest from 1 lemon
  • toasted coconut (optional)

Instructions

  1. Combine coconut milk, salt, tapioca pearls, egg yolk, and honey in a medium saucepan. Place over medium heat and bring to a simmer while stirring frequently.  Turn heat down and allow to simmer softly for 20 minutes, stir frequently and make sure the bottom does not burn.  The tapioca will begin to thicken quickly at the end.
  2. Once the tapioca mixture is thick like gravy, remove from heat. Stir in the vanilla and lemon zest. Portion out 1/2 cup servings into separate pudding cups. Allow to cool in the refrigerator for a few hours or overnight. Serve alone or with extra lemon zest and/or toasted coconut on top.

Lemony Tapioca Pudding / Big Eats Tiny Kitchen

Grain Free Meyer Lemon Pudding Cake

Meyer Lemon Pudding Cakes (Paleo Friendly, Diary Free, Grain Free) - Big Eats Tiny Kitchen

I tend to have issues with making big decisions. I freeze when provided with too many choices. I try to logically narrow down the choices. I over think it. I marinate and choke over it.

I do this with nearly e.v.e.r.y.t.h.i.n.g. Cars. Houses. Jobs. Kids. Men. Shoes. Food. Does this come with a picture menu?

Apples at the store…. Pink lady? Gala? Fuji? Granny smith? wait..what do Rome apples taste like? or Empire? crap… or do I like Jonathon? no…wait… golden delicious are on sale… sold.

Meyer Lemon Pudding Cakes (Paleo Friendly, Diary Free, Grain Free) - Big Eats Tiny Kitchen

Sometimes I want cake. Other times I want something more creamy…pudding? Ugh… decisions. So here is where this cake is a winner on all fronts in my mind. It gives me the best of both worlds. This cake is the amazing love child between the most airy cake and the creamiest lemon curd-like pudding. I get pudding AND cake all in one bite. I get sweet AND tart all at once. I made these little Meyer lemon pudding cakes in two small 6-ounce ramekins and 1 larger gratin dish.

Meyer Lemon Pudding Cakes (Paleo Friendly, Diary Free, Grain Free) - Big Eats Tiny Kitchen

There is one tiny problem: trying to not devour the whole cake at once. They taste like sunshine bursting through a cold blustery day and warming you to the bone. Meyer lemons have a thinner rind, are slightly orangish in color, and are a bit sweeter than their bright yellow typical lemon counterparts. The first bite of these Meyer lemon pudding cakes was like capturing childhood in tiny ramekins. Cabin fever shmabin fever! These Meyer lemon pudding cakes will make you forget the dull skies that loom.

Meyer Lemon Pudding Cakes (Paleo Friendly, Diary Free, Grain Free) - Big Eats Tiny Kitchen

I loosely based my recipe on a Food and Wine recipe. To make this recipe grain free and dairy free (paleo friendly), I used coconut oil instead of butter, palm sugar instead of white sugar, almond milk instead of dairy milk, and a combination of almond flour/coconut flour in place of AP flour.  The cakes have a carmel-like color which I attribute to the dark coconut palm sugar.  Despite the caramel and faint yellow color of the pudding, these lil’ cuties are ridiculously good and will surely perk you up from any winter blues that you may be experiencing.  Cheers.

Meyer Lemon Pudding Cakes (Paleo Friendly, Diary Free, Grain Free) - Big Eats Tiny Kitchen

Grain Free Meyer Lemon Pudding Cake

Adapted from Food and Wine

Serves 6

Ingredients

  • 2 Tablespoons coconut oil (or grass fed butter), at room temperature
  • 2/3 cup coconut palm sugar
  • 3 large eggs, yolks separated from whites in separate bowls
  • 1 cup non-dairy milk (such as coconut milk or unsweetened almond milk)
  • 1/3 cup fresh Meyer lemon juice (from 2 lemons)
  • 1 Tablespoon fresh Meyer lemon zest (plus extra for serving)
  • 1/3 cup almond flour (such as Honeyville)
  • 1 Tablespoon coconut flour
  • 1/4 teaspoon salt
  • Optional Toppings: lemon zest, powdered sugar, coconut whip, or greek yogurt

Instructions

  1. Preheat the oven to 350ºF. Lightly butter six 6-ounce individual ramekins or a 9-inch pie dish. Set  the dishes inside a larger roasting pan and bring a kettle of water to a boil to create a bain-marie to evenly cook the pudding cakes.
  2. In another bowl, whisk the coconut oil (or butter) and palm sugar until creamed. Add one egg yolk at a time until combined. Gently whisk in the almond milk, lemon juice, and lemon zest until well combined. Stir in the almond flour and coconut flour and whisk until smooth.
  3. In the bowl of an electric mixer fitted with a whisk attachment, beat egg whites and salt until  stiff and soft peaks form. Gently fold in half of the beaten egg whites into the cake batter using a rubber spatula to lighten it. Carefully fold in the remaining egg whites. The batter should be light and fluffy at this point and will not resemble normal cake batter.
  4. Pour the cake batter into the prepared baking dishes. Since this cake will not rise, fill the dishes to the top if necessary.  Place the baking dishes into the larger roasting pan. Pour the boiling water from the kettle (step 1) into the roasting pan so that the water comes halfway up the outside of the ramekins or pie dish.  You can also fill the roasting pan with water while it is in the oven to keep from splashing water into the filled ramekins.
  5. Bake until the cake is puffed and golden, 50 to 60 minutes for a single pie dish, or 30 to 35 minutes for 6 small cakes. The top will become golden and the middle of the cake will barely jiggle when shaken. Pull out of the oven and allow to cool for 20 to 30 minutes on a wire rack. Serve the cake warm and fresh from the oven sprinkled with extra lemon zest.

Paleo Chocolate Zucchini Banana Muffins

DSC_0296

Eight years ago, I walked barefoot down the aisle to a crazy man. A crazy man who was in love with me. For the past 8 years, he has been my strength through some very difficult times. He has kept me sane (sort of), been my cheerleader, held my hand through illness, hugged me through tears, and made me laugh even when I’d rather be mad.

I’m an amazingly lucky woman. This year we celebrated early with a trip to Paris. So this week we are playing it low key with gluten-free jalapeno-bacon pizza from our fave pizza joint and a few beers. Cheers to my man.

DSC_0298

DSC_0276

Speaking of amazing, I also made these Chocolate Zucchini Banana Muffins for quick treats and snacks.  They taste fabulous with a dollop of almond butter. If you do not have almond flour, these muffins can be made by replacing the almond flour with 2 cups of almond butter.

DSC_0280

DSC_0285

Honestly, you can’t go wrong with these muffins. The recipe is very versatile. I created a double dose of chocolate (cacao powder AND chocolate chips). However, you could leave out the cacao powder and just make Zucchini Chocolate Chip Banana muffins. I also delivered these muffins to several of our friends that are new parents. Huge thumbs up by all…and no one knew they were grain free. Muahahha.

DSC_0307

Paleo Chocolate Zucchini Banana Muffin

Adapted from Against All Grain

Makes 24 muffins (Note – This recipe can easily be cut in half to make 12 muffins…or freeze the extras for quick breakfasts and snacks.)

Ingredients

  • 3 cups almond flour (or 2 cups of creamy natural almond butter)
  • 2 teaspoons baking soda
  • 1/4 cup cacao powder
  • 1 teaspoon sea salt
  • 2 Tablespoons cinnamon
  • 1/2 teaspoon ground ginger
  • 4 eggs
  • 3 ripe bananas, mashed
  • 1/2 cup honey or maple syrup
  • 2 teaspoons vanilla
  • 4 cups shredded zucchini
  • 1/2 cup dark chocolate chips (for dairy free, use Enjoy Life Chocolate Chips)

Instructions

  1. Preheat oven to 350F. Place 24 muffin liners in two 12-cup muffin tins. Set aside.
  2. Combine dry ingredients (almond flour, baking soda, cacao powder, powder, sea salt, cinnamon, ginger) in a large bowl. Stir with a whisk and set aside.
  3. In either a large food processor or a stand mixer, beat eggs, bananas, vanilla, and honey together for 1 to 2 minutes, until egg mixture becomes slightly frothy. Combine wet and dry ingredients. Stirring until just combined. Stir in zucchini and chocolate chips.
  4. Scoop 1/4 cup of batter into lined muffin tins. Place in preheated oven for 25-30 minutes or until toothpick comes out clean and centers are cooked through. Ovens are variable, so this time may need to be adjusted based on your location (altitude) and oven.
  5. Remove from oven and allow to cool for 5 minutes in muffin tins. Remove from muffin tins and place on cooling racks.

Paleo Roasted Banana Creamsicles

DSC_0213

In April, winter would not let go. We had two massive snow storms that dumped over 15 inches of snow each.  And now, it is nearing mid September and summer is being just as pesky and stubborn as winter. We have had the hottest days ALL summer this week with temps breaking triple digits. Really? Why can’t spring or fall be stubborn? Get feisty, fall! Take over…strong arm summer! Who’s the Boss? Not Tony Danza…It’s you, fall. Come ON!

*Stomp* *Stomp* I want to wear sweaters, eat chili, watch football!

DSC_0224

But alas…the heat persists. No rain. Just muggy and sweaty and sticky and mosquito heaven. Fine. SO instead of chili, I will settle for POPSICLES! And I suggest you do the same. Popsicles are really the best sweet treat there is because they are cheap, portable, kid-friendly, and healthy. The other thing I dig about popsicles is that they have built-in portion control.

DSC_0200 DSC_0205

These popsicles are really swoon-worthy. I highly recommend roasting your bananas. It offers a whole new level and depth of bananananana-ness. Roasting bananas also is a great way to get under ripe bananas über sweet. They can either be roasted in an oven for 15 minutes or can be placed directly over an open gas flame (as shown above). There is no added sweetener in the popsicles because the roasted bananas take on a luscious caramelized flavor.  If you want much sweeter popsicles, you can add 1 tablespoon of honey. For the “cream” part of the creamsicles, I used light coconut milk to make it dairy free. You could also sub any dairy or nondairy milk instead.

DSC_0227

So cheers to the (hopefully) last days of summer. Tip your cups and popsicles and remember this sweaty weather when winter hits in a few months.

Note – I purchased my popsicle molds from World Market, but there are several BPA-free brands offered on amazon as well. Here is a great article on the Kitchn about top popsicle molds. If you do not have molds, have no fear. You can easily make popsicles with plastic cups and wooden popsicle sticks, as shown here

Paleo Roasted Banana Creamsicles

Ingredients

  • 3 bananas
  • 1 cup coconut milk
  • 1 teaspoon vanilla
  • pinch of salt

Instructions

  1. There are a few ways to roast bananas. (1) Place whole and unpeeled bananas on a foil lined roasting pan. Roast in a 350 F oven for 10 to 15 minutes. Remove and allow to cool. OR (2) Place whole and unpeeled banana directly on a gas flame of your oven. Use tongs to turn and blacken the banana evenly. This will take about 5 minutes per banana.
  2. Peel bananas and place them in a medium bowl. Mash bananas thoroughly with a potato masher or place in a blender and puree. Stir in coconut milk, salt, and vanilla.
  3. Pour banana mixture into popsicle molds leaving 1/4-inch before the top to leave room for expansion.  For popsicle molds that contain bases with sticks or hold wooden sticks in place, snap on popsicle base and freeze until solid, about 4 to 5 hours. If you do not have popsicle mods, glasses or open paper cups can be used. For these types, pour popsicle mixture into the glasses or open cups and freeze until the popsicle is beginning to set (about 1 1/2 to 2 hours). Then insert wooden sticks and freeze until fully solid (another 3 to 4 hours).

Grain Free Chocolate Chip Walnut Cookies

Sometimes we all just need a cookie.

DSC_0266

DSC_0277

Sometimes nothing else cures a long day or a rough week like homemade chocolate chip cookies.

But being gluten free, warm chocolate chip cookies became a ghostly memory that haunted me with melty goodness.  Were they that good? Maybe not. Maybe I just beefed it up in my imagination. Like ALF…I mean really…that show could NOT have been as great as I remember it. A hand puppet alien? Really.  Anyone?

And then my girlfriend Tessa made a fresh batch of chocolate chip cookies made with almond flour. I was floored. It was like a hug wrapped up in a cookie. It was soft. It was chewy. It tasted like the real thing! Like the kind that my mom would make on cold winter days.

And then it happened…

I snapped. I couldn’t stop thinking about those COOKIES. Those amazing cookies.

DSC_0255

DSC_0258

I woke up in the middle of the night. COOKIES.

I smelled them in my dreams. COOKIES.

I kept coming up with bad excuses to make them. HEY, Let’s celebrate me getting gas in my car! COOKIES? Hey honey, you look great in plaid…COOKIES???  I’m so sorry that you worked on a Saturday….COOKIES?????

DSC_0274

They solved all my problems last week.  I had to hide a few in the freezer so that my cookie-monster husband didn’t eat them all.  So for special occasions I will warm a few up….like “hey, I organized my sock drawer and found most of the missing socks”….Time for a cookie and a milk stout!

DSC_0271

Grain Free Chocolate Chip Walnut Cookies (slightly adapted from Against All Grain)

Makes 2 dozen small cookies

Ingredients

  • 1/4 cup butter or ghee
  • 1/3 cup honey
  • 1 large egg, room temperature
  • 2 teaspoons vanilla
  • 1 1/2 cups blanched almond flour (such as Honeyville)
  • 2 tablespoons coconut flour
  • 1/2 teaspoon baking soda
  • 1/2 teaspoon sea salt
  • 1/2 cup chocolate chips (use Enjoy Life chocolate chips for dairy free)
  • 1/4 cup walnut pieces

Instructions

  1. Preheat oven to 350 degrees F. Prepare a baking sheet with parchment paper or a silpat mat. Set aside. 
  2. In a large bowl, combine melted butter, eggs, and honey. Whip with a fork until combined and creamy.  Add almond flour, coconut flour, baking soda, and salt. Mix until a dough forms. Stir in the chocolate chip pieces and walnut pieces until combined.
  3. Using a tablespoon, scoop out dough and place on parchment paper or silpat mat on prepared baking sheet. Flatten out cookie dough slightly with either the back of the spoon or your fingers. The cookies won’t spread during the cooking process. Therefore create the shape that you want before you bake the cookies.
  4. Bake for 12 to 15 minutes at 350 degrees F until lightly browned on edges.  Remove from baking sheet and allow to cool on wire rack.