Gluten Free Nectarine and Blackberry Crumble

Gluten Free Nectarine and Blackberry Crumble // Big Eats Tiny Kitchen

A few years ago, I planted one lonely thornless blackberry twig in my backyard.  I nursed it and took care of it.  But then I ran over it with a lawnmower….then I nursed it again.  And now, I have 20 feet of blackberry bushes lining one full side of my backyard fence.   It is a race between me, the squirrels, and the birds to see who can nab the blackberries first.

Gluten Free Nectarine and Blackberry Crumble // Big Eats Tiny Kitchen

There may have been a time or two that I have stood in my backyard, gorging myself on these fresh thumb-sized blackberries. I’m too excited about the harvest and will eat so many that there isn’t any left to bring inside!  I stare at my purple soaked fingers and sort of feel bad that I haven’t shared any with my husband… so naturally I have to lie and tell him that the birds got them… ALL. yes.. All of them. right out of my hands. It was a tragedy. Crying, Thrashing. Feathers everywhere. I promise I tried. They were ferocious….. But my purple lips and seeded teeth tell the real truth.

Gluten Free Nectarine and Blackberry Crumble // Big Eats Tiny Kitchen

So needless to say I owed my husband some blackberry goodness. I gathered up a good bundle of blackberries and baked him this skillet gluten-free nectarine and blackberry crumble.  He was pretty excited… mainly because he could add ice cream to it. I swear, that man would be happy with a dirt cobbler as long as you could put ice cream on it. 🙂

This recipe is my standard crumble topping.  I use it on tons of different fruit crumbles. I added some lemon zest to the crumble to give it a light summery zip.  You could easily swap out the fruit in this filling with peaches, raspberries, blueberries, etc.  It is really easy to throw together for summer gatherings to use up all that fresh fruit produce that is flooding the markets. So give yourself and the ones you love a warm and awesome summer treat!

Gluten Free Nectarine and Blackberry Crumble // Big Eats Tiny Kitchen

Gluten Free Nectarine and Blackberry Crumble

  • Servings: 6 to 8
  • Difficulty: Easy
  • Print

Fruit Filling

  • 6 nectarines (Halved, pitted, and sliced with peel)
  • 1 cup of blackberries
  • juice from 1 lemon (about 2 tablespoons)
  • 1/4 cup maple syrup or honey
  • 2 tablespoons arrowroot powder or cornstarch

Gluten Free Oat Crumble Topping

  • 1 1/2 cups old fashioned gluten-free oats
  • 1/2 cup almond meal
  • 1/3 cup brown sugar or coconut palm sugar
  •  1 teaspoon of lemon zest
  • 5 tablespoons melted butter (plus a little extra to grease the baking dish)
  • 1/4 teaspoon kosher salt
  • 1/2 teaspoon ground cinnamon

Instructions

  1. Preheat oven to 350F.  Butter a 9-inch cast iron skillet or 8X8-inch baking dish and set aside.
  2. In a medium bowl, mix all of the fruit filling ingredients. Spoon the fruit filling into the prepared skillet or baking dish.
  3. In a medium bowl, stir together the topping ingredients. Mix the ingredients until it is crumbly and moistened. Lightly sprinkle the oat crumble mixture over the fruit filling evenly.
  4. Bake for 40 to 50 minutes (or until the filling is bubbling and the crumble top is lightly golden brown). Remove the crumble from the oven and allow to cool for 5 to 10 minutes before serving.  This is delicious with vanilla ice cream for dessert or plain greek yogurt for breakfast!

Rhubarb Strawberry Curd

Rhubarb Strawberry Curd // Big Eats Tiny Kitchen

DSC_0307

I still remember the first time that I tried rhubarb.  It was probably 10 years ago. I had wanted to try it, but just hadn’t had the chance (I guess) living in suburbia Oklahoma and just didn’t have the inclination to go hunt for it.

But one summer night, I was out working a 12 hour shift doing field work for my Master’s degree and my husband was babysitting my littlest sister who was only 6 at the time. Since they are both the adventurous type, and neither of them really knew how to cook…. they decided to make me a rhubarb cobbler as a surprise treat for when I got home.

I was so surprised when I walked in the door and smelled that amazing smell. It was seriously the best cobbler I had ever eaten. (Maybe it was because I had just worked 12 long hours in the hot summer sun.) But it really was the perfect blend of tartness and sweetness. Just like my husband and my sister Olivia. Sweet and tart! 🙂  They began my obsession with this fabulous spring plant…ooooh rhubarb!
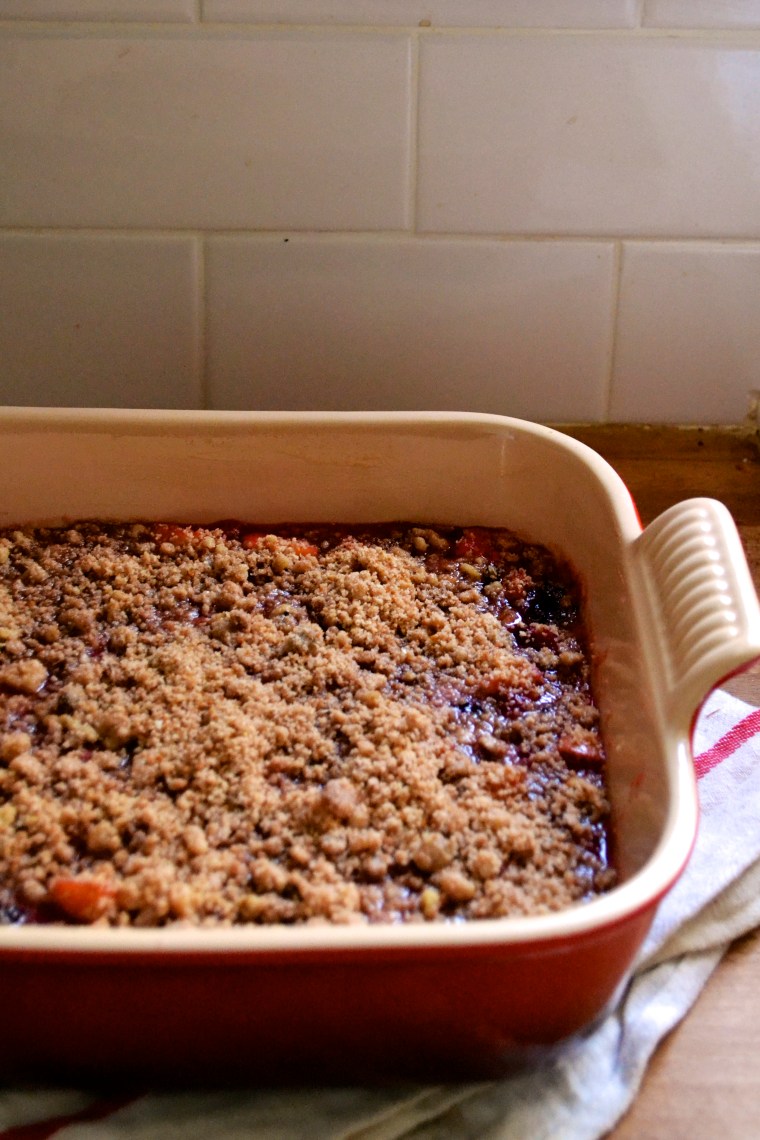
Rhubarb Strawberry Curd // Big Eats Tiny Kitchen

Rhubarb Strawberry Curd // Big Eats Tiny Kitchen

Since that first magical cobbler that they made for me ten years ago, I have had quite a love affair with rhubarb. Rhubarb is a perennial that will come back year after year when planted in a good location. My rhubarb plant always lets me know when spring is near, because it begins to sprout its long stalks and leaves when temps rise above 40 F.

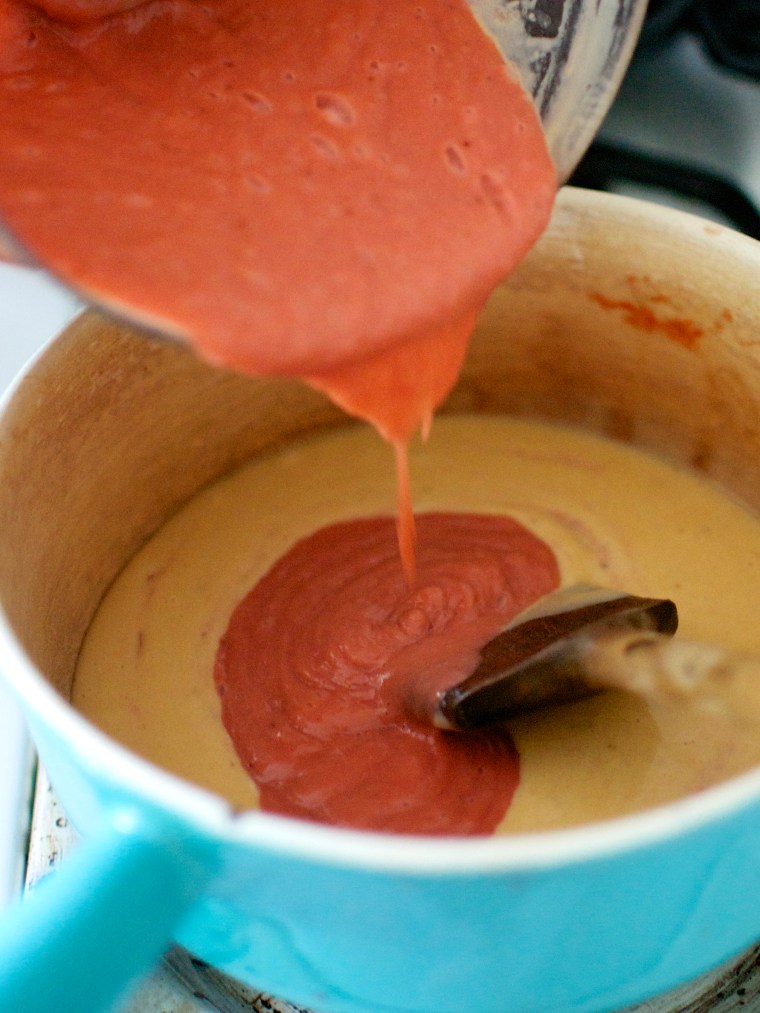
Rhubarb can be used in so many recipes: tarts, cobblers, pies, salsa, sauces, and this amazing curd! Yeaaaaaaaaah. Curd doesn’t have to be reserved for citrus! This Rhubarb Strawberry Curd is hands down my favorite. I decided to add some frozen strawberries that I had in order to boost the pink color of the curd.  Feel free to adjust the ratio of rhubarb to strawberries to suit your own tastes.

Rhubarb Strawberry Curd // Big Eats Tiny Kitchen

This Rhubarb Strawberry Curd can easily be used to fill a pie or tart crust for an easy dessert. The extra egg whites can be whipped up as a meringue for the top too! I went the easy route this time and I mixed mine in greek yogurt for a delicious breakfast and midday snack! Either way, I know that this will be a favorite for all you rhubarb lovers!

Rhubarb Strawberry Curd // Big Eats Tiny Kitchen

Rhubarb Strawberry Curd

  • Servings: 2 cups
  • Difficulty: Easy/Moderate
  • Print

Ingredients

  • 2 cups fresh rhubarb, sliced 1/2-inch thick (about 5 trimmed stalks)
  • 1 cup fresh or frozen strawberries
  • 1/4 cup water
  • 1/3 cup honey
  • 4 eggs, yolks separated (reserve whites for another use)
  • 4 tablespoons unsalted butter

Instructions

  1. In a heavy saucepan placed over medium heat, cook rhubarb, strawberries, water, and 3 tablespoons of honey for about 10 minutes, stirring frequently and smashing the fruit with the back of spoon. Mixture will begin to fall apart and look mushy. Turn off heat and allow to cool for about 5 minutes.
  2. Transfer mixture to the bowl of a food processor and puree smooth. Set aside.
  3. In a separate medium bowl, cream the butter and the honey together until fluffy.  Beat in the eggs slowly. Slowly add the rhubarb and strawberry mixture, whisking constantly until completely combined.
  4. Transfer mixture to a medium-sized, non-reactive saucepan. Place over medium-low heat and stir constantly with either a rubber spatula or wooden spoon until the mixture has thickened to jelly consistency, about 10-12 minutes.  Do not let the curd boil! Pull the pan off the stove before it gets to that stage. The curd is done when it coats the back of a spatula or leaves a clear path when pulled through the mixture.
  5. Remove from heat allow to cool for about 5 minutes. Pour curd mixture into a clean glass jar, but let it cool completely before you screw on the lid. You can even place the filled jar in the freezer (without the lid) for about 15 minutes and then remove from freezer and place the lid on the jar. Keep refrigerated until ready to use.

Note – Recipe adapted from Dolly and Oatmeal.

Plum Sorbet

Plum Sorbet / Big Eats Tiny Kitchen

This week, I was the lucky recipient of a metric boat load of bite-sized cherry plums from a friend’s plum tree in her front yard!!!

So, what would YOU do with sacks and sacks of fresh tasty plums?  Well, besides pop them directly in your mouth…which happened a lot around here.

Plum Sorbet / Big Eats Tiny Kitchen

I decided to try something new….

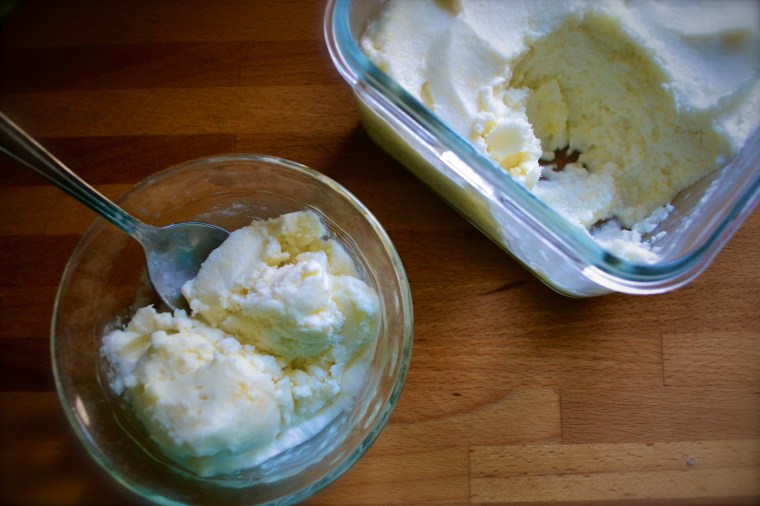
Plum sorbet, ya’ll! Come and get it! It’s muggy and sticky outside. That means it is perfect weather for a tangy scoop of honey-sweetened Plum sorbet! And it’s dairy free!

You could easily replace the plums in this recipe with another in season fruit, like blueberries or strawberries or peaches! This is So delicious.

Plum Sorbet / Big Eats Tiny Kitchen

These plums that I used were perfectly tart and the honey provided juuuuust enough sweet balance. Also, I added a splash or two or three of champagne in the sorbet! Booze it up! Champagne or white wine in the sorbet provide the finished product a bubbly tang and help with the scoopability! Boom Boom!

Wait. This would be great as a Champagne Float! What? Yes please! If that is not a thing, it should be. Tip that pinky up, honey. Put your fancy hats on and get a big ol’ scoop of Plum Sorbet! Cheers!

DSC_0067

Plum Sorbet

  • Servings: 6
  • Difficulty: Easy
  • Print

Ingredients

  • 2 to 3 cups sliced plums, pits removed
  • 1/4 cup honey
  • pinch of salt
  • 1/3 cup champagne or white wine (or water)
  • 1/3 cup water

Instructions

  1. Add all ingredients to a blender or food processors. Purée until the mixture becomes smooth. Pour the plum puree through a fine mesh sieve to catch large pieces of skin. Place mixture into refrigerator for 30 minutes (or overnight) to chill.
  2. Place the plum purée into the bowl of a chilled ice cream machine and process according to the manufacturer’s instructions. It will take about 25 to 30 minutes. While the mixture is churning away, place a glass container into the freezer that will be big enough to place the processed sorbet into. After the sorbet is finished, either serve immediately or place into the air tight pre-chilled container and freeze for at least 2 hours to firm up.  The wine will help keep the sorbet from getting icy and will assist with scoopability if serving at a later time. Allow to sit out at room temperature for about 5 minutes after removing from the freezer, then scoop away!

Grain Free Meyer Lemon Pudding Cake

Meyer Lemon Pudding Cakes (Paleo Friendly, Diary Free, Grain Free) - Big Eats Tiny Kitchen

I tend to have issues with making big decisions. I freeze when provided with too many choices. I try to logically narrow down the choices. I over think it. I marinate and choke over it.

I do this with nearly e.v.e.r.y.t.h.i.n.g. Cars. Houses. Jobs. Kids. Men. Shoes. Food. Does this come with a picture menu?

Apples at the store…. Pink lady? Gala? Fuji? Granny smith? wait..what do Rome apples taste like? or Empire? crap… or do I like Jonathon? no…wait… golden delicious are on sale… sold.

Meyer Lemon Pudding Cakes (Paleo Friendly, Diary Free, Grain Free) - Big Eats Tiny Kitchen

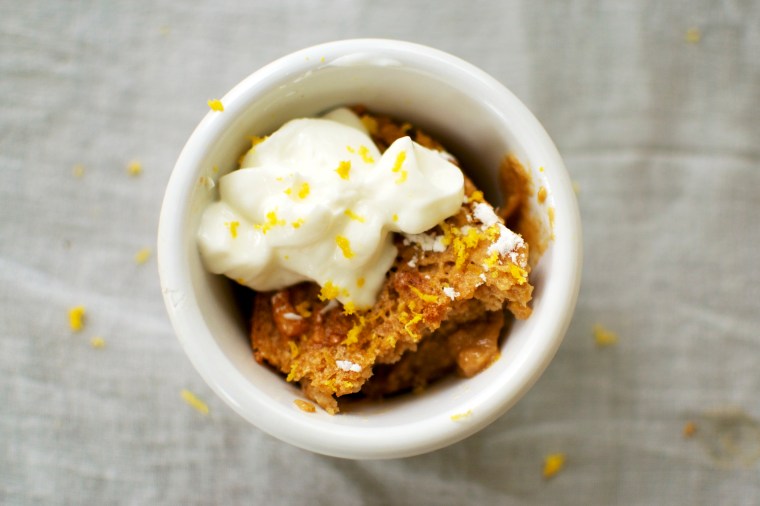
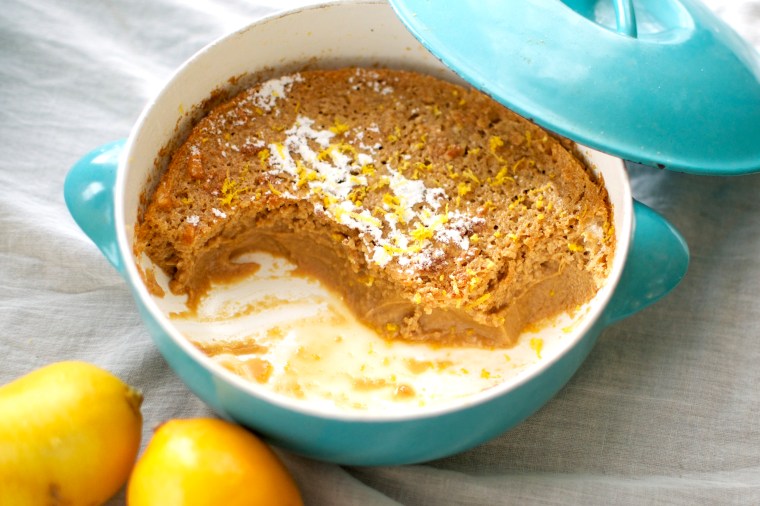
Sometimes I want cake. Other times I want something more creamy…pudding? Ugh… decisions. So here is where this cake is a winner on all fronts in my mind. It gives me the best of both worlds. This cake is the amazing love child between the most airy cake and the creamiest lemon curd-like pudding. I get pudding AND cake all in one bite. I get sweet AND tart all at once. I made these little Meyer lemon pudding cakes in two small 6-ounce ramekins and 1 larger gratin dish.

Meyer Lemon Pudding Cakes (Paleo Friendly, Diary Free, Grain Free) - Big Eats Tiny Kitchen

There is one tiny problem: trying to not devour the whole cake at once. They taste like sunshine bursting through a cold blustery day and warming you to the bone. Meyer lemons have a thinner rind, are slightly orangish in color, and are a bit sweeter than their bright yellow typical lemon counterparts. The first bite of these Meyer lemon pudding cakes was like capturing childhood in tiny ramekins. Cabin fever shmabin fever! These Meyer lemon pudding cakes will make you forget the dull skies that loom.

Meyer Lemon Pudding Cakes (Paleo Friendly, Diary Free, Grain Free) - Big Eats Tiny Kitchen

I loosely based my recipe on a Food and Wine recipe. To make this recipe grain free and dairy free (paleo friendly), I used coconut oil instead of butter, palm sugar instead of white sugar, almond milk instead of dairy milk, and a combination of almond flour/coconut flour in place of AP flour.  The cakes have a carmel-like color which I attribute to the dark coconut palm sugar.  Despite the caramel and faint yellow color of the pudding, these lil’ cuties are ridiculously good and will surely perk you up from any winter blues that you may be experiencing.  Cheers.

Meyer Lemon Pudding Cakes (Paleo Friendly, Diary Free, Grain Free) - Big Eats Tiny Kitchen

Grain Free Meyer Lemon Pudding Cake

Adapted from Food and Wine

Serves 6

Ingredients

  • 2 Tablespoons coconut oil (or grass fed butter), at room temperature
  • 2/3 cup coconut palm sugar
  • 3 large eggs, yolks separated from whites in separate bowls
  • 1 cup non-dairy milk (such as coconut milk or unsweetened almond milk)
  • 1/3 cup fresh Meyer lemon juice (from 2 lemons)
  • 1 Tablespoon fresh Meyer lemon zest (plus extra for serving)
  • 1/3 cup almond flour (such as Honeyville)
  • 1 Tablespoon coconut flour
  • 1/4 teaspoon salt
  • Optional Toppings: lemon zest, powdered sugar, coconut whip, or greek yogurt

Instructions

  1. Preheat the oven to 350ºF. Lightly butter six 6-ounce individual ramekins or a 9-inch pie dish. Set  the dishes inside a larger roasting pan and bring a kettle of water to a boil to create a bain-marie to evenly cook the pudding cakes.
  2. In another bowl, whisk the coconut oil (or butter) and palm sugar until creamed. Add one egg yolk at a time until combined. Gently whisk in the almond milk, lemon juice, and lemon zest until well combined. Stir in the almond flour and coconut flour and whisk until smooth.
  3. In the bowl of an electric mixer fitted with a whisk attachment, beat egg whites and salt until  stiff and soft peaks form. Gently fold in half of the beaten egg whites into the cake batter using a rubber spatula to lighten it. Carefully fold in the remaining egg whites. The batter should be light and fluffy at this point and will not resemble normal cake batter.
  4. Pour the cake batter into the prepared baking dishes. Since this cake will not rise, fill the dishes to the top if necessary.  Place the baking dishes into the larger roasting pan. Pour the boiling water from the kettle (step 1) into the roasting pan so that the water comes halfway up the outside of the ramekins or pie dish.  You can also fill the roasting pan with water while it is in the oven to keep from splashing water into the filled ramekins.
  5. Bake until the cake is puffed and golden, 50 to 60 minutes for a single pie dish, or 30 to 35 minutes for 6 small cakes. The top will become golden and the middle of the cake will barely jiggle when shaken. Pull out of the oven and allow to cool for 20 to 30 minutes on a wire rack. Serve the cake warm and fresh from the oven sprinkled with extra lemon zest.

Paleo Roasted Banana Creamsicles

DSC_0213

In April, winter would not let go. We had two massive snow storms that dumped over 15 inches of snow each.  And now, it is nearing mid September and summer is being just as pesky and stubborn as winter. We have had the hottest days ALL summer this week with temps breaking triple digits. Really? Why can’t spring or fall be stubborn? Get feisty, fall! Take over…strong arm summer! Who’s the Boss? Not Tony Danza…It’s you, fall. Come ON!

*Stomp* *Stomp* I want to wear sweaters, eat chili, watch football!

DSC_0224

But alas…the heat persists. No rain. Just muggy and sweaty and sticky and mosquito heaven. Fine. SO instead of chili, I will settle for POPSICLES! And I suggest you do the same. Popsicles are really the best sweet treat there is because they are cheap, portable, kid-friendly, and healthy. The other thing I dig about popsicles is that they have built-in portion control.

DSC_0200 DSC_0205

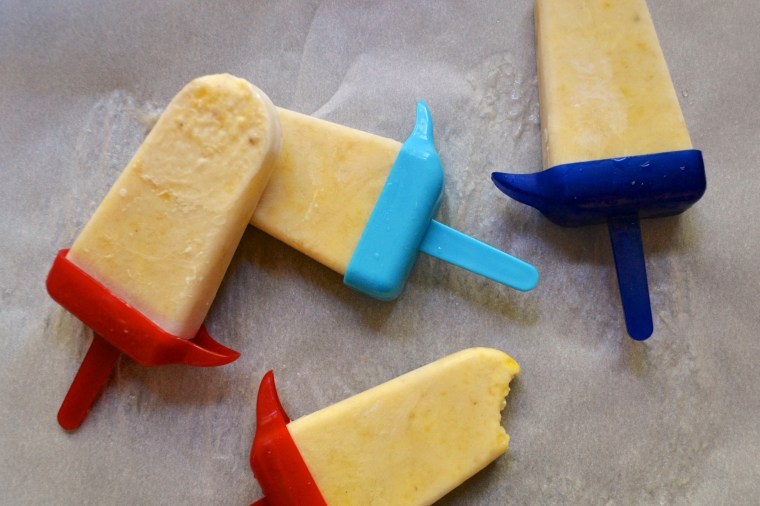
These popsicles are really swoon-worthy. I highly recommend roasting your bananas. It offers a whole new level and depth of bananananana-ness. Roasting bananas also is a great way to get under ripe bananas über sweet. They can either be roasted in an oven for 15 minutes or can be placed directly over an open gas flame (as shown above). There is no added sweetener in the popsicles because the roasted bananas take on a luscious caramelized flavor.  If you want much sweeter popsicles, you can add 1 tablespoon of honey. For the “cream” part of the creamsicles, I used light coconut milk to make it dairy free. You could also sub any dairy or nondairy milk instead.

DSC_0227

So cheers to the (hopefully) last days of summer. Tip your cups and popsicles and remember this sweaty weather when winter hits in a few months.

Note – I purchased my popsicle molds from World Market, but there are several BPA-free brands offered on amazon as well. Here is a great article on the Kitchn about top popsicle molds. If you do not have molds, have no fear. You can easily make popsicles with plastic cups and wooden popsicle sticks, as shown here

Paleo Roasted Banana Creamsicles

Ingredients

  • 3 bananas
  • 1 cup coconut milk
  • 1 teaspoon vanilla
  • pinch of salt

Instructions

  1. There are a few ways to roast bananas. (1) Place whole and unpeeled bananas on a foil lined roasting pan. Roast in a 350 F oven for 10 to 15 minutes. Remove and allow to cool. OR (2) Place whole and unpeeled banana directly on a gas flame of your oven. Use tongs to turn and blacken the banana evenly. This will take about 5 minutes per banana.
  2. Peel bananas and place them in a medium bowl. Mash bananas thoroughly with a potato masher or place in a blender and puree. Stir in coconut milk, salt, and vanilla.
  3. Pour banana mixture into popsicle molds leaving 1/4-inch before the top to leave room for expansion.  For popsicle molds that contain bases with sticks or hold wooden sticks in place, snap on popsicle base and freeze until solid, about 4 to 5 hours. If you do not have popsicle mods, glasses or open paper cups can be used. For these types, pour popsicle mixture into the glasses or open cups and freeze until the popsicle is beginning to set (about 1 1/2 to 2 hours). Then insert wooden sticks and freeze until fully solid (another 3 to 4 hours).

Blackberry Cashew Cheesecake (Vegan, Dairy Free, Gluten Free, Paleo)

DSC_0041

I like surprises.  Well…good surprises. This week has been full of some unpleasant surprises but it has also been filled with amazing surprises like…friends dropping by to say hey for no reason but just to visit, a letter from an amazing friend telling me how they cherished our friendship, random hugs, dinner ready when I get home from work, coffee ready when I get up (what a blessing), random dance parties downtown…

DSC_0001

DSC_0015

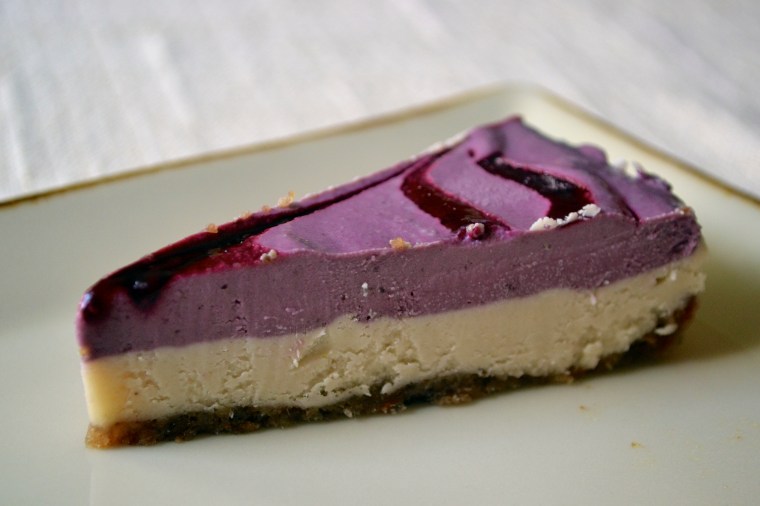
I also like having intimate gatherings at our place and surprising people with a healthy dessert.  When it comes to a dessert that surprises most folks because it is both gluten-free and dairy free, this cashew cheesecake takes the “cake”. I have made multiple versions including strawberry-vanilla, chocolate-banana, and now blackberry.

This blackberry cashew cheesecake was the BEST so far.  I made the cashew cheesecake filling using my high-powered Cuisinart Pro Plus food processor.  If you have a Vitamix or Blendtec, use it. I’m jealous. But seriously, a great food processor will do the trick but it just may take a bit more time.

DSC_0008

DSC_0017

Instead of mixing whole blackberries into the filling, I made a blackberry sauce and strained out those pesky seeds that looooove to stick around in your teeth while you are trying to be sexy and suave but no one tells you that you have a massive black seed the size of a minivan lodged in your front teeth.  So, I just amped up your sex appeal and created a seedless sauce to mix into the blackberry cheesecake layer. You are welcome!

DSC_0021

The blackberry sauce is easy and takes only an extra 10 minutes. I used 2 cups of blackberries that I froze last summer.  You could also use a bag of frozen blackberries (completely thawed and use organic if possible) or fresh blackberries when they are in season. Boil the blackberries and juices in a saucepan until it begins to thicken (about 5 minutes).  Add a tablespoon of arrowroot powder mixed with water to make a slurry. Arrowroot powder is a grain-free starch alternative to cornstarch. If you aren’t worried about grains, then you could swap cornstarch for the arrowroot powder. Adding the starch will make the sauce even thicker.  Strain the cooked blackberries through a strainer and reserve about 1/3 to 1/2 cup of the sauce. This sauce is amazing in yogurt, on pancakes, waffles, my face.

DSC_0027

DSC_0037

So go surprise your face and someone you love or maybe even just tolerate and make this cheesecake. I promise you won’t be disappointed. Plus, it is gorgeous!

Blackberry Cashew Cheesecake (Paleo, Gluten Free, Grain Free, Dairy Free)  (adapted from My New Roots, serves 8)

Note – You will need a very powerful food processor or blender (such as a Vitamix). I have a Cuisinart Pro Plus food processor that works like a champ and a half. 

Crust Ingredients

  • 1/2 cup raw pecans
  • 1/2 cup pitted dates
  • 1/4 teaspoon sea salt

Filling Ingredients

  • 1 1/2 cups raw cashews (soaked at least 4 hours)
  • 1/3 cup coconut oil (melted)
  • 1/3 cup maple syrup (or honey for non vegan)
  • juice of 2 lemons (about 1/4 cup)
  • 1 teaspoon vanilla extract
  • 1 to 2 cups fresh or frozen blackberries (thawed if frozen and retain the juices)
  • 1 tablespoon arrowroot powder + 2 tablespoons of water

Instructions

  1. Crust – In a food processor, place nuts, salt, and pitted dates and pulse until the ingredients combine into a paste.  The mixture should hold together when you pinch a small amount between your fingers.  Place Saran wrap in a 7″ pie pan (spring form pans work best but aren’t necessary) or 8×8″ square baking dish. Spoon crust mixture into pan and press evenly and firmly, making sure that the edges are well packed. Wash and rinse the food processor.
  2. Blackberry Sauce – Place the blackberries and thawed blackberry juices in a heavy saucepan and heat over medium heat. Stir frequently, and bring to a low boil.  In a small bowl, mix the arrowroot powder with 2 tablespoons of cold water until it forms a slurry. Slowly stir the arrowroot slurry into the blackberries. Simmer for about 5 to 10 minutes until the homemade blackberry sauce thickens to coat the back of a metal spoon. Remove from heat. To get separate the seeds from the blackberries, set a strainer over a heat-proof bowl. Pour the blackberry sauce into the strainer and mash with the back of a spoon to get all of the juices from the blackberries. You should get about 1/2 cup of sauce. Reserve the sauce for later use in the filling. You can keep the blackberry mash for either a topping or another use (stirred into oatmeal? in yogurt?).
  3. Cashew Cheesecake Filling – Microwave the coconut oil in a small Pyrex dish for 30 seconds until mostly melted. Whisk in maple syrup to combine. Place all of the filling ingredients (except the blackberries) into the bowl of the processor and blend on high-speed for several minutes until very smooth.
  4. Assembly – remove the crust from the freezer. Pour about two-thirds of the cashew mixture onto the crust and smooth evenly with a rubber spatula. To the remaining third of the cashew filling mixture, add the blackberry sauce (about 1/3 cup). Blend on high until smooth. Pour this mixture onto the first layer of filling. I drizzled an additional 1/4 cup of sauce on the top of the blackberry layer and made a swirl pattern with a butter knife. Place in freezer for about 2 hours or until solid.
  5. Serving – To serve, remove from freezer about 30 minutes before serving.  Heat a smooth and sharp knife under hot water and cut the pie into 8 slices. Serve with any additional blackberry sauce. Store any remaining pie in the freezer.

Paleo Cranberry and Apple Cobbler

My heart is heavy on this last day of December and this last day of 2012. I’m staying in my pajamas and watching the snow fall. The snow falls so peaceful outside my window, yet I know that sometimes there is no peace and life is just not fair.  

DSC_0234

My thoughts go out to everyone who has lost someone this year. My thoughts go out to those that are lost. My thoughts go out to those that are enduring hardships that are unfathomable. 

There are so many cruel and unfair things that occur and I always ask “why?”…but sometimes there is no reason. It’s just the way it is.  I only hope that there is something better that hopefully will come out of tragedy.

DSC_0239

DSC_0253

So I make this cobbler for my friends that are struggling right now, my friends that are enduring an unfathomable loss, my friends that are lost in life.  I make this cobbler to hopefully bring comfort into their hearts and to warm their souls.

Paleo Cranberry and Apple Cobbler (Grain Free, Gluten Free, and Diary Free) (adapted from Beeckman 1802 Heirloom Cookbook)

Filling:

  • 12 oz bag of fresh cranberries
  • 3 medium apples, cored and diced
  • 1/4 cup crystallized ginger, diced
  • 1 cup water
  • 1/3 cup honey
  • 2 tablespoons arrowroot powder

Topping:

  • 1 cup almond flour
  • 1/4 cup chopped walnuts
  • 1 teaspoon ground cinnamon
  • 1/8 teaspoon sea salt
  • 1/4 cup coconut oil, melted

Instructions:

  1. Preheat oven to 350F.  Grease a 9X9-inch baking dish with butter, coconut oil or nonstick spray.  Set aside.
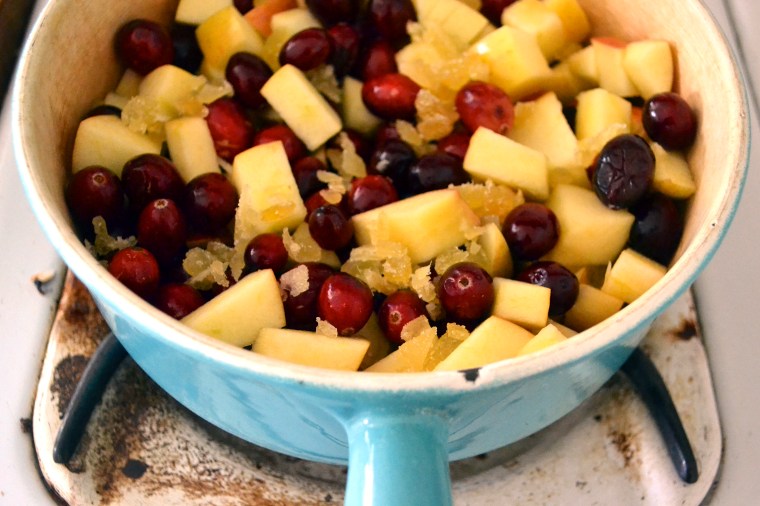
  2. In a medium saucepan, combine cranberries, apples, crystallized ginger, water, and honey. Heat over medium heat until the mixture begins to boil and the cranberries pop. Cook for 5 to 10 minutes.  Remove from heat and stir in arrowroot powder. Pour the hot cranberry mixture into the baking dish and set aside.
  3. In a separate medium bowl, combine all of the topping ingredients. Mix well.  Spoon the topping mixture evenly over the filling.
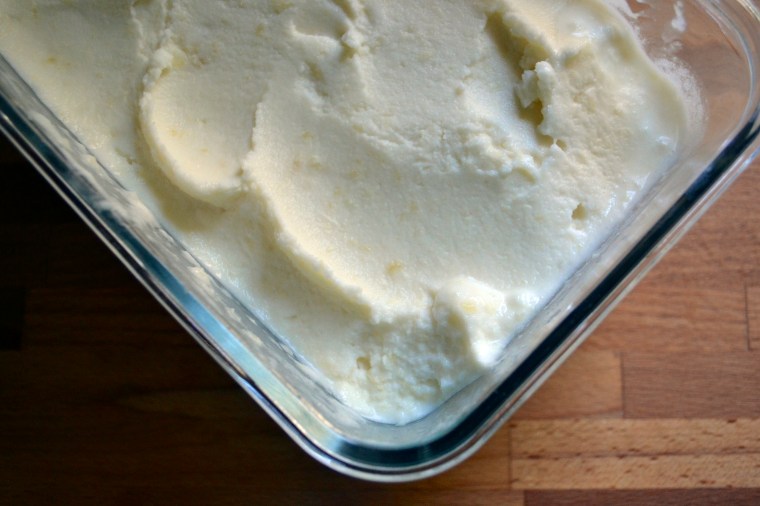
  4. Bake at 350F for 30 to 40 minutes. The cobbler will begin to bubble and the topping should lightly brown.  Remove from oven and allow to cool for a few minutes.  Best when served with vanilla coconut ice cream!

Grain-Free Chewy Ginger Chocolate Chip Cookies

I’m so excited. Christmas is getting closer. We went and picked out our tree a week ago. Even though it feels like Christmas in California (temps are in the 70s!!!), we still decorated the tree, drank bourbon-spiked egg nog, and watched Home Alone.

We pulled out all of our old and favorite childhood ornaments, placing them strategically on each limb.   We have many ornaments that have special meaning, but some are just funny.

Grain Free Ginger Chocolate Chip_04

For instance, we have a ceramic ornament that came from some craft show ages ago that has Santa’s face painted on what appears to be tree bark but instead looks like Santa is floating on poop. We lovingly refer to this ornament as “Terd Santa”. Terd Santa has a high priority placement on the tree. He is usually placed near the 1980 Avon classic Bear Bell (a mama bear whose legs are the swinging bell) and the Headless Paper-mache Angel.

Now that it looks like Christmas has vomited throughout my house, leaving poinsettia and pine cones everywhere….it was time to make it SMELL like it too! I cooked up a batch of ginger chocolate chip cookies to make the house smell of gingerbread and spice.  These are inspired by this amazing cookie that I made last year, which unfortunately contains gluten from the wheat flour. In order to make those cookies grain free, I used almond flour as the base.  If you don’t have almond flour on hand, I have also made these cookies using almond butter, making them slightly more dense and chewy but still scrumptious.

Ginger Chocolate Chip

Even if you are not gluten-free, I seriously recommend this grain free cookies for the following reasons:

(1) The nuts give them protein…GOOD.

(2) They ooze of chocolate…DOUBLE GOOD.

(3) The ginger gives a nice spicy kick in your mouth….YES.

(4) And they are a COOKIE! Hellooooo. Nuff said, peeps.

I made these cookies bite-sized and rolled each one in turbinado sugar. The crunch of the sugar in contrast to the gooey, chewy, chocolatey cookie is divine.  WARNING – these suckers are so easy to pop in your mouth like popcorn. They can be quite addictive.

SO HIDE THEM IF YOU WANT TO EAT ANY!!!!  Because as soon as you tell anyone else that you made them, they will disappear and you may not get any…booooh. At least that is what happens in my house!!!

Ginger Chocolate Chip

Grain-Free Chewy Ginger Chocolate Chip Cookies (Gluten Free, Vegan, Paleo Friendly)

Makes 2 dozen tiny, bite-sized cookies

Ingredients

  • 1½ cups almond flour*
  • 2 Tablespoons coconut oil, softened
  • 4 Tablespoons maple syrup or honey
  • 2 Tablespoons unsulphured blackstrap molasses
  • 3 teaspoons ground ginger
  • 1/8 teaspoon fine sea salt
  • 1/4 teaspoon baking soda
  • 1/4 cup dark chocolate chips or bar, chopped into tiny pieces
  • 1/3 cup turbinado sugar or coconut palm sugar (optional)

Instructions

  1. Preheat oven to 350F. Line a baking sheet with unbleached parchment paper or a Silpat mat. Place the large-grain turbinado sugar or coconut palm sugar in a small bowl and set aside.
  2. In a medium bowl, combine almond flour, coconut oil, maple syrup, ginger, salt, and baking soda. Mix until a thick batter is formed. Chill the batter in the refrigerator for at least 30 minutes which will make it easier to scoop and form cookies.
  3. I like these cookies tiny and barely bite-sized.  Scoop out the dough in exact, level tablespoons. Then tear those pieces of dough in two before rolling each 1/2 tablespoon of dough into a ball shape. From there, grab a small handful of the large-grained sugar that was set aside earlier and roll each ball between your palms to coat the outside of each dough ball.  Place dough a few inches apart on prepared baking sheets.  Use a wet fork to flatten each dough ball into your desired cookie thickness. 
  4. Bake for 7 to 10 minutes or until firm around the edges, but still soft in the center. Allow to cool on the pan for 5 to 10 minutes before transferring to a wire rack to cool completely before serving.
  5. Hide a few for your secret stash!

*NOTE – I use Honeyville almond flour. I have also made these cookies using 1 cup of almond butter instead of the 1.5 cups of almond flour. The cookies tasted great but were a little more dense.  I personally liked them both! So feel free to sub out for almond butter if you do not have access to almond flour.

Coconut Pineapple Sorbet

When I was little, my dad and I would take long drives during sticky hot humid summer nights with the windows down and the radio blasting. He would come to a stop sign and would let me choose the direction. The cicadas would sing in the tall elm trees that lined those back roads of Oklahoma. But somehow, no matter where we would end up on our random winding drives, we would always stumble upon a Braum’s, an ice cream and dairy chain in Oklahoma that rivals Dairy Queen.

My eyes would light up at the sight of the ice cream mecca. It was a welcomed cold treat, providing respite from the heat. He would always order a buttered pecan mix and I would always order a pineapple or lime sherbet freeze. It was our Sunday evening ritual.

This recipe is a diary free homage to that pineapple sherbet that I used to enjoy during those hot humid nights. This recipe is also inspired by this week’s recipe for the Food Matters Project – Raspberry Cabernet Sorbet chosen by Jenny of Simple and Amazing. Be sure to check out the original recipe which uses frozen fruit to create the sorbet and does not require an ice cream maker.

So what is the difference between sherbet and sorbet?

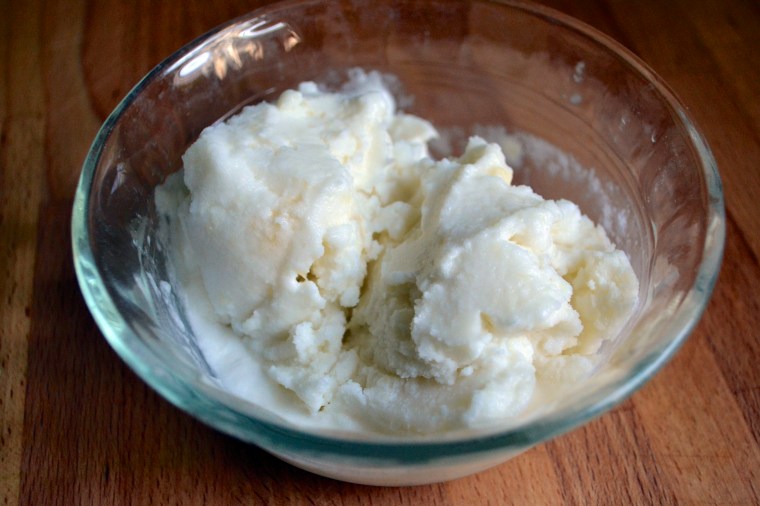
Sherbets typically have dairy and quite a bit of sugar whereas sorbets are dairy free but still typically have quite a bit of added refined white sugar. I am always looking to lower or eliminate refined sugar from recipes. So I decided to use canned pineapple in 100% pineapple juice and added full fat organic coconut milk, making it a paleo-friendly, refined sugar free, and dairy free sherbet/sorbet.  The added lime juice provides a punchy tang similar to sherbet. This is a guilt free summer treat that has become my new Sunday evening ritual! Mmmm…

I used an ice cream maker to make this sorbet. However, you can make this without an ice cream maker. Simply add to a shallow pan and place in the freezer. Stir the mixture with a fork every thirty minutes for about 4 hours. Or another method is to freeze the mixture in a shallow metal pan or ice cube tray until solid (6 hours). Break into chunks and process in a food processor until smooth.

Freeze leftovers….if you have any.  Remove the sorbet container from the freezer 10 to 15 minutes before serving for scoopability. Yes…that’s a word. It’s mine. Use it. I don’t mind. Impress folks. You are welcome.

Coconut Pineapple Sorbet (Paleo-Friendly, Dairy Free, Vegan)

Ingredients

  • 15 oz can unsweetened coconut milk (full fat)
  • 20 oz can of sliced pineapple in 100% pineapple juice
  • juice from 1/2 lime

Instructions

  1. Puree pineapple in blender or food processor. Add coconut milk and lime juice to blender/food processor. Mix well.
  2. Add to ice cream maker and freeze according to instructions.
  3. Serve immediately or transfer to a storage container and let harden in the freezer for 1 hour.
  4. Freeze leftovers (what leftovers). Remove from the freezer 10 to 15 minutes before serving.

Flourless Fudge Brownies with Butterscotch Chips (Gluten Free)

I recently realized that I have been taking something small for granted. My thumbs. Ya. Those puppies are really useful.

This past weekend, I cut myself pretty bad on the knuckle of my thumb on my left hand. My whole left hand is bandaged up with butterfly sutures and gauze. Little things like brushing my teeth, tying my running shoes, and drinking coffee have become quite challenging.

So the lesson of the story, don’t take the little things for granted.

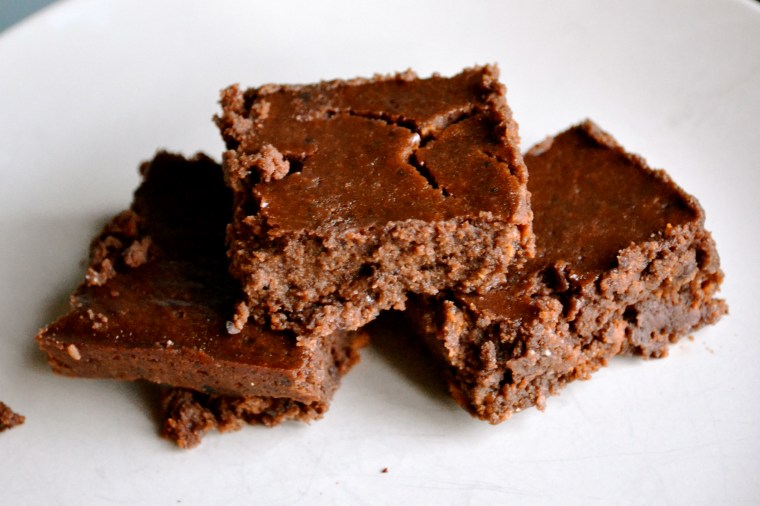
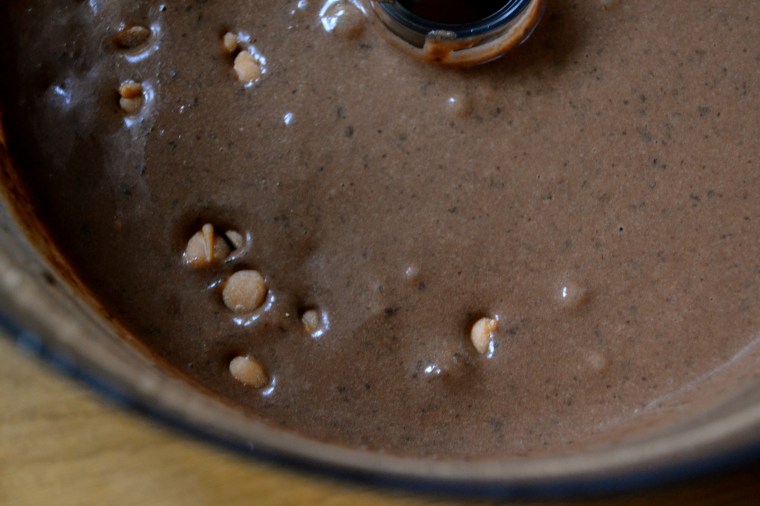
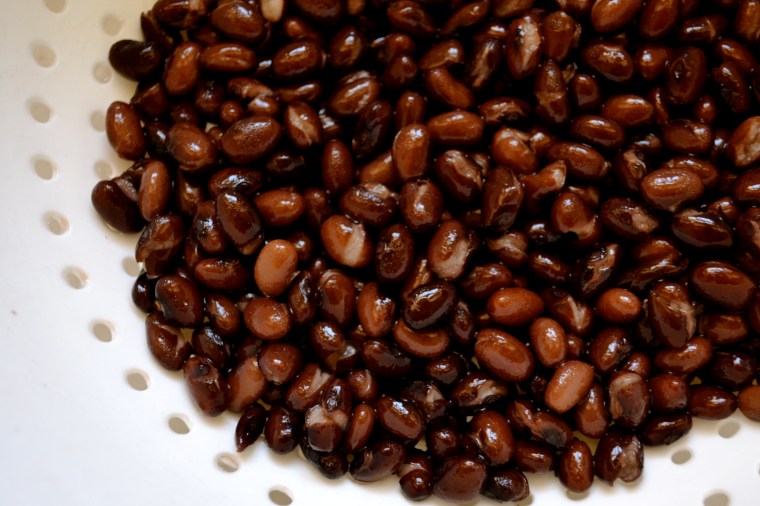
Like black beans, for example. I know, I know, I know….weird comparison, but black beans can be used for more than savory dishes like tacos, side dishes, and salads. They are the magic and secret ingredient in my flourless brownies. Shhhhhhhh!

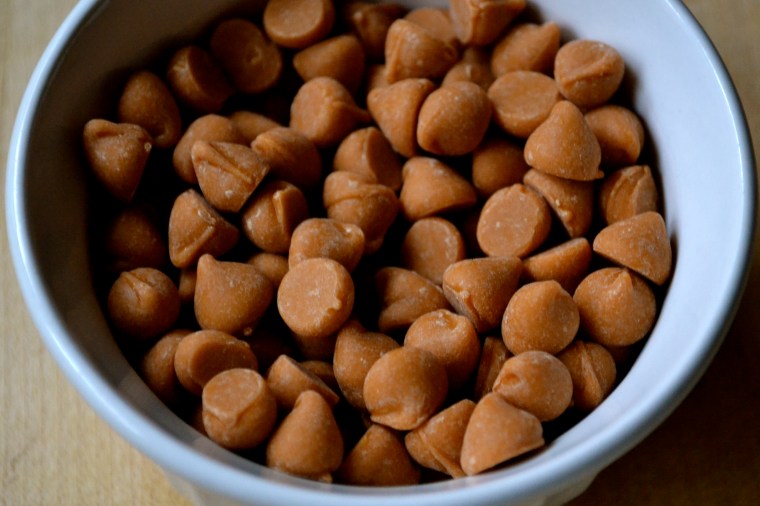
I swear you would NEVER know if I didn’t tell you.  I adapted this recipe from a Whole Foods recipe and swapped the chocolate chips for butterscotch chips. I also cut down the quantity of butter, adding applesauce instead to keep them moist. The consistency of these brownies is more fudge-like.

These sweet treats taste amazing and have protein and fiber. They are so good that you will want to make these to show that you do not take black beans for granted. It’s also a great dessert to serve if you have any friends that have a gluten intolerance. To make this truly gluten free, make sure you use gluten free vanilla extract and gluten free butterscotch chips. Chocolate chips can be swapped for the butterscotch chips.  But seriously folks, go grab that extra can of black beans in your pantry and whirl up a batch of these.

Flourless Fudge Brownies with Butterscotch Chips (Gluten Free) (adapted from Whole Foods Recipes)

Makes: 16 servings

Ingredients

  • 1 15oz can of black beans, rinsed and rained
  • 1/4 cup butter, melted
  • 1/4 cup applesauce
  • 1/4 cup unsweetened cocoa powder
  • 1/2 sugar (I used turbinado sugar)
  • 2 eggs
  • 1 1/2 teaspoons vanilla extract
  • 1/8 teaspoon salt
  • 1/2 cup butterscotch chips

Instructions

  1. Preheat oven to 350 F. Spray an 8X8 dish with nonstick spray and set aside.
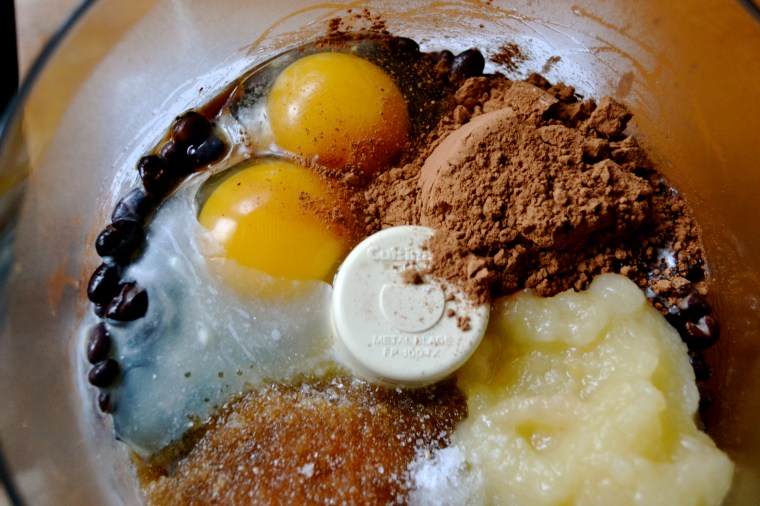
  2. Combine black beans, butter, applesauce, cocoa powder, eggs, and salt in a food processor. Puree until smooth.
  3. Remove blade from food processor. Stir in butterscotch chips.
  4. Pour into prepared pan. Bake for 35 minutes or until middle is set. Remove from oven and allow to cool for 5 to 10 minutes.