Pumpkin and Apple Almond Flour Muffins (Grain Free)

So I have a crush. And not a little one. A BIG one…a huge, gushy, get red, giggle, snort, blow chocolate milk out of my nose kind of crush. His name…. Pumpkin…that’s Mr. Pumpkin. Ya….you know him. You all love him.  He’s like the Matthew McConaughey of fall produce.  Whatever he is in, it’s golden, perfect, never disappoints and always shirtless.

Such is my crush….mmmmm pumpkin. I’ve been collecting and dreaming about amazing recipes: pumpkin bourbon ice cream, pumpkin bars, pumpkin bread, pumpkin coconut soup, pumpkin latte, pumpkin butter, pumpkin oatmeal, pumpkin pancakes, pumpkin smoothie, pumpkin cheesecake, pumpkin curry. The list goes on and on and on and on, people. It’s bad. I’ve got a pumpkin fever!

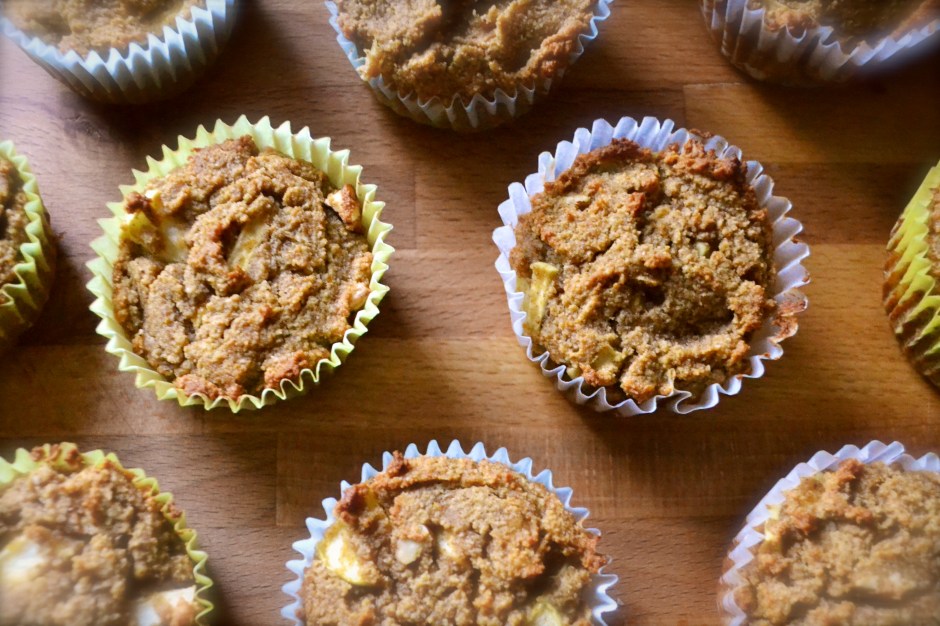
And then I stumbled upon this great pumpkin muffin recipe made with almond flour. As soon as the calendar hit September 1st, my oven went on and in went these delicious pumpkin muffins.  I had just picked up some local golden delicious apples at the market and decided to throw one into the mix. I’d been dreaming of these puppies and boy howdy they did not disappoint…much like Matthew McConaughey.  Pull the muffin liner off and they too will be shirtless. Whoah!

I honestly have to say these are hands down the best pumpkin muffins I have had…gluten free or not. It’s a double bonus that they are not only gluten free but grain free. So if you are on the fence about experimenting with almond flour, give these puppies a go. You will forever be in deep smit. You can even eat them shirtless. I won’t tell.

I should note that I made these with my newest purchase of Honeyville blanched almond flour.  I’m super impressed with the light texture.  Trader Joe’s offers almond meal and it is made from unblanched (skins still on) almonds. Bob’s Redmill also sells almond flour. Although Bob’s is blanched,  it has a more coarse texture but still tastes gooooooood. So if you are looking for a lighter texture to baked goods, I’d invest in a better almond flour such as Honeyville or go to Nuts.com.  Store your flour in the fridge or freezer. I also think Whole Foods offers bulk almond flour.   Another option is to regrind Bob’s almond flour in a coffee grinder. Just be careful to not let it process to long or you will end up with almond butter. DOH!

Pumpkin and Apple Almond Flour Muffins (Grain Free) (Slightly adapted from the Urban Poser)

Ingredients

  • 1/2 cup pumpkin puree
  • 2 large eggs, beaten
  • 1/3 cup maple syrup (or honey)
  • 2 Tablespoons coconut oil, melted
  • 3 Tablespoons apple sauce
  • 1 diced apple, leave skin on if organic
  • 2 1/2 cups blanched almond flour (I use Honeyville or go to Nuts.com)
  • 1/2 tsp baking soda
  • 1/4 tsp salt
  • 1 Tablespoon ground cinnamon
  • 1/2 teaspoon ground nutmeg
  • 1/4 teaspoon ground ginger
  • 1/8 teaspoon ground cloves
  • 1/4 cup of walnuts or pecans
Instructions
  1. Preheat oven to 350F. Spray 12 cup muffin tin or place muffin liners within tin. Set aside.
  2. In a large mixing bowl, combine wet ingredients (eggs, pumpkin, maple syrup, coconut oil, and applesauce). Combine until well mixed. Add diced apple. Set aside.
  3. In a separate bowl, combine dry ingredients (almond flour, baking soda, salt, and spices). If you do not have blanched finely ground almond flour, you may need to regrind your almond flour in a blender.
  4. Add the dry ingredients to the wet ingredients. Mix until combined where there are no visible lumps. Add nuts and mix until combined. The batter will be rather thick.
  5. Spoon the batter into the prepared muffin liners or muffin tin. Fill to about 2/3 full, smoothing the tops with the bottom of a spatula or spoon.
  6. Bake in 350F preheated oven for 25 to 30 minutes or until golden brown. Check doneness by inserting a toothpick into the center of a muffin. It will come out clean when done. Allow to cool on a rack, if you dare. Dive in. These freeze well.

Coconut Pineapple Sorbet

When I was little, my dad and I would take long drives during sticky hot humid summer nights with the windows down and the radio blasting. He would come to a stop sign and would let me choose the direction. The cicadas would sing in the tall elm trees that lined those back roads of Oklahoma. But somehow, no matter where we would end up on our random winding drives, we would always stumble upon a Braum’s, an ice cream and dairy chain in Oklahoma that rivals Dairy Queen.

My eyes would light up at the sight of the ice cream mecca. It was a welcomed cold treat, providing respite from the heat. He would always order a buttered pecan mix and I would always order a pineapple or lime sherbet freeze. It was our Sunday evening ritual.

This recipe is a diary free homage to that pineapple sherbet that I used to enjoy during those hot humid nights. This recipe is also inspired by this week’s recipe for the Food Matters Project – Raspberry Cabernet Sorbet chosen by Jenny of Simple and Amazing. Be sure to check out the original recipe which uses frozen fruit to create the sorbet and does not require an ice cream maker.

So what is the difference between sherbet and sorbet?

Sherbets typically have dairy and quite a bit of sugar whereas sorbets are dairy free but still typically have quite a bit of added refined white sugar. I am always looking to lower or eliminate refined sugar from recipes. So I decided to use canned pineapple in 100% pineapple juice and added full fat organic coconut milk, making it a paleo-friendly, refined sugar free, and dairy free sherbet/sorbet.  The added lime juice provides a punchy tang similar to sherbet. This is a guilt free summer treat that has become my new Sunday evening ritual! Mmmm…

I used an ice cream maker to make this sorbet. However, you can make this without an ice cream maker. Simply add to a shallow pan and place in the freezer. Stir the mixture with a fork every thirty minutes for about 4 hours. Or another method is to freeze the mixture in a shallow metal pan or ice cube tray until solid (6 hours). Break into chunks and process in a food processor until smooth.

Freeze leftovers….if you have any.  Remove the sorbet container from the freezer 10 to 15 minutes before serving for scoopability. Yes…that’s a word. It’s mine. Use it. I don’t mind. Impress folks. You are welcome.

Coconut Pineapple Sorbet (Paleo-Friendly, Dairy Free, Vegan)

Ingredients

  • 15 oz can unsweetened coconut milk (full fat)
  • 20 oz can of sliced pineapple in 100% pineapple juice
  • juice from 1/2 lime

Instructions

  1. Puree pineapple in blender or food processor. Add coconut milk and lime juice to blender/food processor. Mix well.
  2. Add to ice cream maker and freeze according to instructions.
  3. Serve immediately or transfer to a storage container and let harden in the freezer for 1 hour.
  4. Freeze leftovers (what leftovers). Remove from the freezer 10 to 15 minutes before serving.

Raw Cashew Cream Pie (Gluten-Free)

I love to experiment…especially with food.  Of course, nothing makes me happier than a successful creation and seeing other people enjoy it.  It’s my inner 80 yr old grandma, I show my love by feeding you.  So if you need love and are hungry, then come over…I got plenty to spare. 🙂

But here’s the caveat….I always try to make recipes a bit more “healthy” by swapping out refined sugar for natural sugars like honey, agave nectar or maple syrup. Recently I have been experimenting with gluten-free and dairy-free foods in a quest to tackle allergen free cooking for my husband.

Recently I stumbled upon a secret that vegans and nondairy consumers have known for quite some time….cashew “cheese”. Soak raw unsalted cashews overnight (or at least 4 hrs), puree them in a STRONG food processor or Vita-mix blender, and holy hell, you will get a beautiful cashew custard cream sauce that can be used in a multitude of ways. Ya. I’m not kidding. Those crazy vegans are totally on to something.  Cashew cream is the base for this Raw Cashew Cream Pie which is basically a vegan cheesecake.

I have struggled with calling this dessert a cheesecake, because really…it isn’t. I wish there was a better name for it, maybe Casheesecake?  Cheeshew pie? Come on people…help me out.  I have settled with Cashew Cream Pie. If you have something better, throw it out there and we will discuss it over a slice.

Well whatever it is, it’s deeeelicious. The crust is a combination of pureed Medjool dates (pitted of course), almonds, pecans, cocoa powder, and salt. I’ve experimented with three different flavor variations: (1) Raspberry and Vanilla, (2) Strawberry and Lemon, and (3) Chocolate and Banana. My favorite so far is the Raspberry and Vanilla, but all were fabulous. Because this dessert contains no processed sugars or gluten and is low carb, it will not spike your glucose or sit heavy on your gut (or butt) like most cheesecakes. It’s light yet so filling due to the protein from the nuts.

I hope you enjoy this refreshing and healthier take on cheesecake.

Raw Cashew Cream Pie (adapted from My New Roots), serves 8

Ingredients

Crust:

  • 1/2 cup nuts (I used half almonds and half pecans)
  • 1/2 cup dates, pitted
  • 1 Tbsp cocoa powder
  • 1/4 tsp kosher salt

Vanilla Cashew Cream Filling:

  • 1 1/2 to 2 cups (pre-soaked) raw unsalted cashews, soaked overnight
  • 1/4 cup fresh lemon juice
  • 1/4 cup coconut oil, melted
  • 1/4 cup maple syrup (honey or agave nectar would also work)
  • 1 teaspoon of pure vanilla extract

Flavor Options:

  • Berry – Reserve half of vanilla filling and add 1 cup of fresh or frozen berries, such as blueberries, strawberries, blackberries, or raspberries (if using frozen berries, make sure they are thawed and well drained).
  • Banana – Reserve half of vanilla filling and add 1 to 2 ripe pureed bananas.
  • Chocolate – Reserve half of the vanilla filling and add 2 to 4 tablespoons of cocoa powder.
  • Lime – Replace the lemon juice with lime juice.

Instructions

  1. In a food processor, place nuts, salt, and pitted dates and pulse until the ingredients combine into a paste.  The mixture should hold together when you pinch a small amount between your fingers.  Place saran wrap in a 7″ pie pan (spring form pans work best but aren’t necessary) or 8×8″ square baking dish. Spoon crust mixture into pan and press evenly and firmly, making sure that the edges are well packed. Wash and rinse the food processor.
  2. Microwave the coconut oil in a small pyrex dish for 30 seconds until mostly melted. Whisk in maple syrup to combine.
  3. In the most powerful food processor or blender that you own (a Vitamix blender works great but I have a Cuisinart Pro Plus food processor that processed this mixture like a champ and a half), place cashews, maple syrup, coconut oil, lemon juice, and vanilla and blend on high for several minutes or until very smooth.
  4. For a plain vanilla layer, pour half of the mixture onto the crust and smooth with a spatula. With the remaining filling, add berries or banana or chocolate into the processor and blend on high until smooth. Pour this mixture onto the first layer of filling. Place in freezer for about 2 hours or until solid.
  5. To serve, remove from freezer about 30 minutes before serving.  Heat a smooth and sharp knife under hot water and cut the pie into 8 slices.  Store any remaining pie in the freezer.

Roasted Cauliflower

Cauliflower….oh you bland vegetable. I so often discount you. I generally choose more colorful vegetables over you…but you have shown me the err in my ways. By simply roasting you in an oven, you transform into delicious, addictive, and caramelized veggie poppers.

I drizzled a good olive oil over the florets and sprinkled them with sea salt and fresh cracked pepper. Threw them in a preheated oven that was set at 425 F and roasted them for 35 to 45 minutes. Holy Moses, I PROMISE you will NOT be disappointed. One head should serve 4 as a side, but I have to admit that two of us destroyed an ENTIRE head of cauliflower in one sitting.  Next time I will experiment with other seasonings such as smoked paprika, chili powder, or even curry. Mmmm.

So, quite ignoring cauliflower…go out there and give that veggie a new purpose in life!  You are welcome.

Roasted Cauliflower

Ingredients

  • 1 head of cauliflower, cut into florets
  • 1 to 2 tablespoons of olive oil
  • 1/2 to 1 teaspoon sea salt (or kosher salt)
  • 1/4 teaspoon fresh cracked pepper

Instructions

  1. Preheat oven to 425 F. Oil or spray a roasting pan with nonstick spray.
  2. Put cauliflower in a large bowl. Drizzle olive oil, salt, and pepper over the florets. Mix until well coated. Lay the florets in a single layer on the roasting pan. Place in oven and bake for 35 to 45 minutes, stirring halfway through the cooking time. Pull out of the oven, and try to let them cook before burning your mouth off by eating them directly from the roasting pan (I speak from experience, people).