Baked Curry-Spiced Falafel Sliders

Hellooooo summer. I went on a lazy bike ride one evening this weekend and watched families grill on their patios, kids running through water sprinklers, in promptu baseball games in neighborhood streets, old couples walking hand in hand down the trail by our house, and dogs playing fetch with their owners. Lightning bugs danced around me and the first chirps of cicadas filled the air. It was magical and classic.

The change between seasons and its effect on people is so curious to me. During the short cold days of winter, we stay tucked away in our homes, hybernating and watching reality TV. But as spring and summer hit, bringing with them longer and warmer days, people bloom like the vegetables and flowers in gardens.  They open up their homes and patios to their freinds and family, communing with one another and experiencing the outdoors. Neighborhoods turn into blockparties every night. It sometimes feels like a scene out of a Norman Rockwell painting. 

Another awesome thing about summer versus winter is that food turns from heafty casseroles to finger foods! And oh how I looooove finger foods. Huge burgers leave me lethargic, but sliders….I can have two DIFFERENT kinds. This is perfect for a gal like me that can not make up her mind when it comes to food or anything really.

If you are looking for a handy dandy finger food to take or serve at a party, these falafel sliders are perf.  This recipe is adapted from “Braised Chickpea Fritters and Vegetables” from Mark Bittman’s Food Matters Cookbook and was chosen as part of the Food Matters Project by Lena of Mrs Garlic Head.

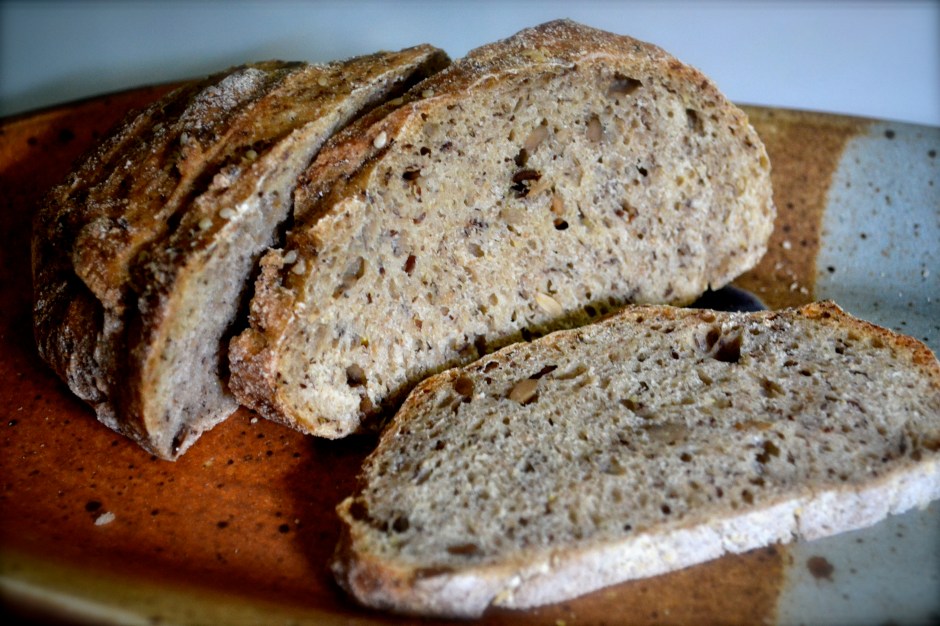
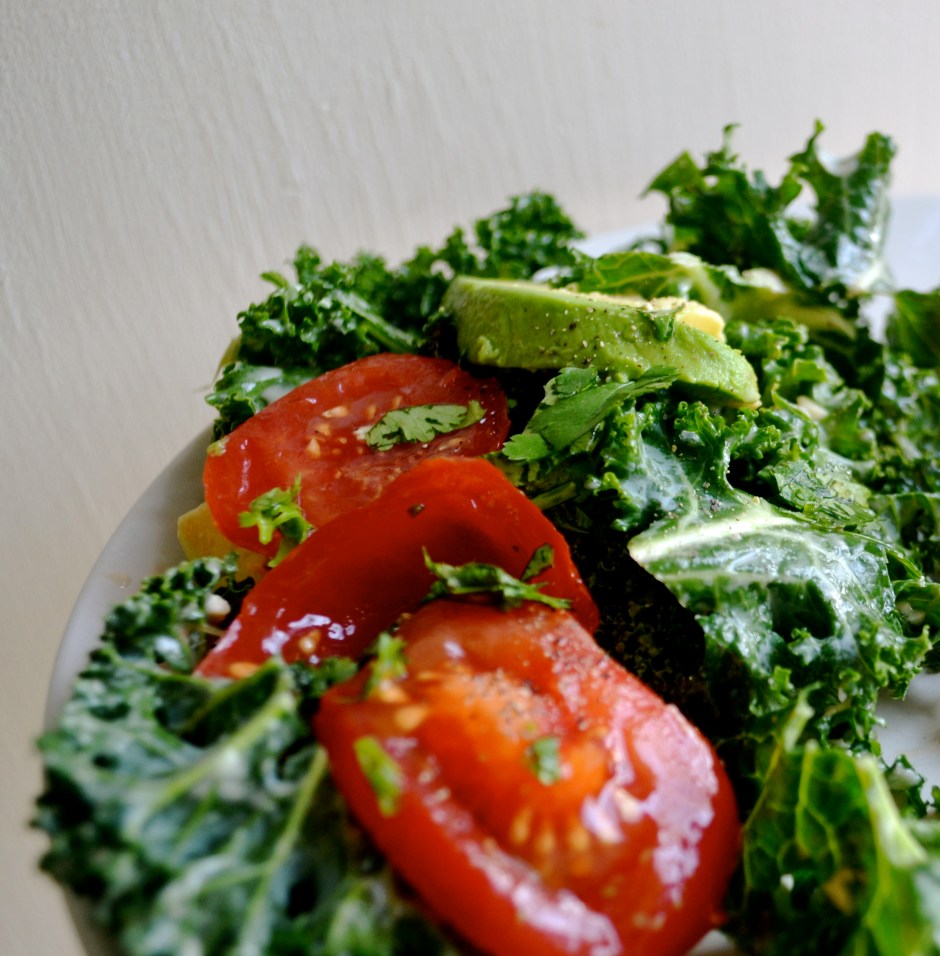
I adapted them to be spiced with curry and carrots, plus turned them into a picnic totin finger food. The curry kick makes them a winner for even meat lovers.  For this falafel, use uncooked chickpeas that have soaked overnight. You will need a good food processor to create the chickpea “flour” and mix in the additional ingredients. Baking the falafel makes them a bit crumbly, but still delicious. If you prefer, you can pan fry them in a bit of olive oil or coconut oil. The leftovers can either be frozen or refridgerated. I ate the leftovers cumbled over a delicious kale salad.

Baked Curry-Spiced Falafel Sliders

Ingredient

  • 1 cup dried chickpeas, rinsed, picked over and soaked for at least one hour and up to overnight (do not cook and do not substitute canned beans)
  • 1 small red onion, quartered
  • 1 cup fresh cilantro
  • 3 garlic cloves
  • 1 tablespoon ground cumin
  • 1 teaspoon curry powder
  • 1 teaspoon kosher salt
  • 1/2 teaspoon freshly ground black pepper
  • 1/2 teaspoon baking soda
  • 2 medium carrots
  • coconut oil or olive oil
  • Slider fixings (12 whole grain rolls or pita, cucumbers, crumbled feta, cilantro, cucumber-mint raita*)

Instructions

  1. Preheat oven to 375F.  Oil a roasting pan with 1 to 2 tablespoons of olive oil or coconut oil.
  2. In a food processor, combine soaked and drained chickpeas, onion, cilantro, garlic cloves, cumin, curry powder, carrots, baking powder, salt, and pepper. Process until smooth, about 1 to 2 minutes.
  3. Scoop out 1 tablespoon at a time and shape the falafel into small 1-inch patties at 1/4 inch thick. Place each falafel pattie in the well oiled roasting pan.
  4. Bake for 10 minutes. Remove the roasting pan and flip the patties carefully. Place the roasting pan back into the oven (middle rack) for another 10 minutes. The patties will be light brown.
  5. Assemble your sliders with small whole grain rolls or pita flats, sliced cucumbers, red peppers, and cucumber-mint raita (recipe below).

*Cucumber-Mint Raita

  • 1 cup greek yogurt
  • 1 cup of peeled and diced cucumber, pressed with a paper towel to remove excess moisture
  • 1 tablespoon fresh lime or lemon juice
  • 1 tablespoon fresh mint leaves, chopped
  • pinch of garlic powder
  • Salt to taste

Instructions – Mix above ingredients together in a medium bowl. Season with salt to taste.

Spicy Mango and Coconut Quinoa Salad

Fresh. Sweet. Spicy. Sassy.

No, not me…this quinoa salad. Well…yes, me too, but also this salad.

This dish is basically mango salsa mixed with quinoa…oh and flaked coconut, because we all need more flaked coconut in our lives.  Flaked coconut makes me feel fancy and on vacation. Adding it to this salad was just an extra bonus.

I’m a huge fan of quinoa salads. They are probably my second fav next to kale salads.  Quinoa is an amazing grain, or seed rather, packed full of protein and fiber.  This quinoa salad feeds 4 to 6 as a side dish. It’s great served along side grilled wild alaskan salmon.  To make a more substantial meal and serve it as a main course, the addition of 1/2 cup of roughly chopped roasted salted peanuts or almonds will add protein and make it a bit more hearty.  

This recipe started out as just mango salsa, which was adapted from this week’s Food Matters Project recipe, Mexican-Style Fruit Salad with Grilled or Broiled Fish which was chosen by Food and Frederick.  However, my salsa was taken to superhuman status after I was inspired by the Mango and Coconut Black Rice Salad in my new fav cookbook, Plenty from London’s Ottolenghi.  Holy cow, I have never seen such great veg-tastic food porn in my life. It’s gorgeous. It’s inspiring. It’s a must. I love this book, like I love mason jars….and that’s a lot of love people. Because, seriously, mason jars are about the most useful thing in the world. And duct tape. But duct tape is not beautiful.

Spicy Mango and Coconut Quinoa Salad

Serves 6 as a side dish

Ingredients

  • 2 cups of cooked quinoa* (see note on cooking instructions)
  • 1 jalapeño, seeds removed and diced
  • 2 green onions, diced
  • 1 red bell pepper, thinly sliced
  • grated zest and juice of 1 lime
  • 2 tablespoons of chopped fresh mint
  • 1/4 cup of chopped fresh cilantro
  • 1/4 cup of chopped fresh basil
  • 1 large mango (or 2 small mangos), chopped into 1/2-inch chunks
  • 1/4 cup flaked unsweetened coconut

Instructions

  1. Add all ingredients, except the diced mango and flaked coconut, into a bowl. Toss to combine.
  2. Add mango and coconut, and stir just to mix. Do not over stir or the mango pieces will disintegrate and become too mushy. Taste and adjust the seasonings.

*Cooking Quinoa- Rinse 1 cup of uncooked quinoa thoroughly, until water is no longer milky. Place rinsed quinoa in a saucepan with 2 cups of water or broth. Cook on medium-high heat until it comes to a rolling boil. Reduce heat, cover and simmer for 15 minutes or until tender and the water has been cooked out. Remove from heat and fluff with a fork. I like to double this, cooking extra to eat throughout the week.

A Tale of Two Salsas: Basic Salsa and Rhubarb Salsa

Oh salsa…so quick. So easy. It makes the best of times. (too cliche?)

With just a few ingredients, you can make dip-heaven. Salsa can take any dish up a notch or three.  Tomatoes are just a starting point for basic salsa. Later in this post, I’ll let you in on some secrets on how to use seasonal produce to make different types of salsa.  Basically, I’m going to change your life.

Yes, it is true.  I love to dip things. I often choose a meal based on its “dipability”.  Don’t judge! It’s one of my oddities….Ok many oddities, but people…it’s a party at every meal!!! And having a great basic salsa recipe is key for anyone to have tucked up their sleeve to pull out for impromptu events.

Because this was my week to host for the Food Matters Project and because of my love for all things dip-able, I chose the easy fresh salsa recipe from Mark Bittman’s the Food Matters Cookbook.  Paaaahrtay!  If you have never made fresh salsa, you are doing it today (or as soon as you can). Ya, I know you may have other crap planned, but guess what….salsa calls….”make me”.  And it’s easy. Dip it or throw it on tacos, or a salad, or on a spoon. Fresh salsa is perfect party food (for my solo party) or perfect to bring along for such occasions as Cinco de Mayo or you can bring it to my house for me to dip!

Garden tomatoes make the best salsa. But even when tomatoes are out of season, you can use canned tomatoes, which is what I did. Mark Bittman’s basic salsa is technically pico de gallo.  I chose to puree the salsa since I used canned tomatoes and because I like the smooth consistency. However, you can leave it chunky, if you prefer.

So let’s break it down. Really there are a few base ingredients that go into making salsa.

Onions + jalapeño + cilantro + lime juice (or any acidic juice really…vinegar works well too).

From this basic formula, you can add several ingredients to make fresh salsa.  Tomatoes are the basic salsa, of course. It will keep for up to a week in the fridge. But I doubt it will even linger that long. I used this salsa on top of eggs, on top of a spinach mushroom quesadilla (so dippable), and with homemade tortilla chips.

But, if you are feeling adventurous, there are other ingredients that you can add to salsa besides tomatoes….. such as seasonal fruit, black beans, or corn.

With spring in full force, RHUBARB has finally flooded the farmers market!!!!  To take full advantage of rhubarb at its peak, I decided to also try to make a rhubarb salsa.  I know, I know, I know…what about rhubarb pie, rhubarb tart?  Just trust me and branch out from the sweet desserts. Rhubarb salsa beckons you. I was so impressed with the outcome. Using the basic salsa recipe as a starting point, I replaced the tomatoes with rhubarb and sweet bell pepper, and then added a tad bit of honey mixed with apple cider vinegar and lime juice. The tartness in the rhubarb salsa is balanced by the sweet honey and complimented by the spicy kick from the jalapeño.

I ate this on fish tacos (so devine and sorry no pictures….they disappeared in my mouth). I also topped my fresh spring salad with it. Heavenly.

In summer, swap out tomatoes for peaches or mangos. In the fall, use granny smith or any other tart variety of apples. You can also swap orange or lemon juice for the lime juice.  Seriously, the options are endless when making salsa. After you make these salsa recipes, you are going to be in deep smit with them. You are welcome.

Don’t forget to check out the other FMP bloggers creations!

Basic Salsa (from the Food Matters Cookbook by Mark Bittman)

  • 1 1/2 cups of tomatoes (or 1 15 oz canned tomatoes, undrained)
  • 1/2 white or red onion
  • 1 jalapeño, seeds removed and diced
  • 1/4 cup to 1/2 cup of cilantro, diced
  • 2 tablespoons of lime juice
  • 1 garlic clove, minced
  • salt and pepper to taste
Instructions for Basic Salsa
  1. Combine all ingredients in a food processor. Puree until well combined.
  2. Taste and add salt/pepper. Chill covered for at least 30 minutes.
Rhubarb Salsa 
  • 1 stalk of rhubarb (1 to 1 1/2 cups), diced
  • 1/4 cup of sweet bell pepper, diced
  • 2 tablespoons of diced white or red onion
  • 2 tablespoons of diced scallions
  • 1 jalapeño, seeds removed and diced
  • 1 to 2 tablespoons of cilantro, diced
  • 1 tablespoon of lime juice
  • 1 tablespoon of apple cider vinegar
  • 2 teaspoons of honey
  • 1/4 teaspoon kosher salt
  • pepper to taste
Instructions for Rhubarb Salsa
  1. Heat 2 cups of water in a saucepan to boiling. Blanch rhubarb by placing in the boiling water for 10 to 20 seconds. Quickly remove the rhubarb and place in a colander. Run cold water over the rhubarb to stop the cooking process. Blot the rhubarb with a paper towel to dry.
  2. In a separate bowl, combine the bell pepper, onion, scallions, jalapeño, and cilantro. Add rhubarb and mix ingredients.
  3. In a small separate bowl, dissolve the honey in the lime juice and apple cider vinegar. Drizzle this dressing over the rhubarb salsa and stir. Add the salt and pepper. Mix well.
  4. Chill for at least 30 minutes.

Easy 100% Whole Wheat Seedtastic Bread

So, I have had quite a busy few weeks. I was supposed to have this bread ready to post yesterday for Food Matters Monday, but I failed and got behind. But I totally ate this bread for breakfast, lunch, dinner, and dessert for the last several days.  So without much further ado……

I have always romanticized about owning a bakery….waking up early to bake fresh bread and pastries.  Locals coming to get their fresh baked breads every morning…but then there is the problem with me not being a baker of breads.  I had never quite gotten the knack until I learned the No-Knead meathod that Jim Lahey (of famed Sullivan Street Bakery) founded years ago. Since learning this method, I have never gone back. It’s genius. Throw all the flour, yeast, and salt in a bowl…add water…stir…let the shaggy mess rest for several hours (best if is allowed to rise for 12 to 24 hours)…then pull it out of the bowl, roughly shape into a ball or football, then bake. Bam. Delicous, house warming, belly craving bread. Slather butter on it or PB or eat it plain. Daaang.

No kneading and no waiting to see if your bread has risen and fallen then risen and fallen again…none of it….none. It’ll change your life (and your waistband if you bake too many loaves like me..hehe) and save you a poop ton of money. That’s right…a poop ton. Make your own bread and impress friends and family.

Or impress yourself, because really that is all that matters.

Mark Bittman has also used this no-knead method in his Food Matters Cookbook. His recipe, Real Whole Wheat Bread, was chosen this week for the Food Matters Project by Melissa of the Faux Martha. What is great about this recipe, is that there is so many variations…herbs, seeds, fruit…you name it…you can make it. So stop doubting yourself and make some BREAD. Nothing smells better than fresh baked bread. Mmmm…

Now, although the primary recipe is Mark Bittman’s, my baking method is not technically Mark Bittman’s method. I prefer an artisinal appearance or free form with a crusty exterior. I also like smaller loaves, which is why I divided the recipe below into two beautiful football shaped loaves. You can definitely bake this in a loaf pan if you want. But a few years ago, I found a book at an estate sale called “Health Bread in Five Minutes a Day” by Jeff Hertzberg and Zoe Francois that takes the no-knead method to another level, cooking the bread on a baking stone in a super hot oven (450F) and trying to mimik hearth-style baking. You will get professional looking loaves every time and it is super easy.

Before you jump elbows first into bread baking, here are a few notes about bread and the primary ingredients….

1. Yeast hates hot water…it will kill those suckers. So use luke-warm water. This means that the water feels just a little warm to the touch (no hotter than 100 degrees F). Cold water from the tap will work also, but the initial rise time will take much longer. If your water at home has a funky flavor, I recommend buying distilled or filtered water, because your bread will then get the funk…and not a good funk. Otherwise, tap water will be fine.

2. Make sure your yeast is fresh. Store in the fridge to make it last longer. Initial rise times are slower if you use less yeast (1/2 teaspoon versus 2 teaspoons). If you want to speed up the rise time, increase the quantity of yeast up to a 2 teaspoons (one full packet) for the below recipe. If you double the below recipe, use 1 1/2 tablespoons of yeast. If you plan on making a lot of bread, buying yeast in bulk (a jar instead of those pesky packets) will save you money.

3. Boost nutritional value in your breads by using 100% whole wheat and adding healthy seeds within or on top of the bread. Seeds can include sesame, flaxseed, caraway, pumpkin, sunflower, poppy, and anise. To top the bread, paint the surface of the loaf with water before sprinkling the seeds on the loaf.

4. Baking stone – A baking stone will give you the best results for a professional-looking free form loaf. The stone absorbs excess moisture from the wet dough, allowing the crust to become crisp. Mmmm.  Also the weight of the stone helps with heat retention and provides even heating and heat transfer to the loaf.

Sorry for the excessively long post, but it is worth it!  This is why I’m late in posting it. Also, don’t forget to see what the other FMP foodies did with this recipe at the Food Matters Project home page.

Easy 100% Whole Wheat Seed Bread

Yield: Two 1-lb loaves (or one big mama jamma loaf)

Ingredients (this recipe can easily be doubled to make 4 1-lb loaves in order to feed an army)

  • 3 cups whole wheat flour
  • 2 teaspoons of kosher salt
  • 1/4 cup flaxseed meal
  • 1/4 cup sunflower seeds (optional to add additional seeds such as pumpkin, poppy, sesame)
  • 1/2 teaspoon active yeast
  • 1 1/2 cups lukewarm water (must be less than 100 F)
  • Topping: sesame seeds, poppy seeds, sunflower (or whatever you have on hand)

Instructions (seems like a lot of instructions but it is uber easy)

  1. Combine flour, salt, flaxseed, sunflower seeds, and yeast in a medium 5 qt bowl.
  2. Add water and stir with a wooden spoon till combined. The dough should be wet and shaggy and resemble biscuit dough or batter.  Cover (not airtight) with plastic wrap or damp towel. Allow it to rest at room temperature until it rises and collapses (or flattens on top with bubbles) at least 2 hours, but it is best when left 12 to 24 hours. (If your house is cold, turn the oven on to 200 F then turn it off, placing the  dough on the oven to rise).
  3. The dough can be used immediately after the initial rise, or it can be refrigerated in a lidded (not airtight) container and used over the next week. You can lop off smaller pieces and bake smaller portions, storing the rest in the fridge until you are ready for fresh baked bread.
  4. When you are ready to bake the bread, dust the surface of the refrigerated dough with flour and shape into a ball by stretching the surface of the dough around to the bottom on all four sides, rotating the ball a quater-turn as you go.  At this point you can either place in a loaf pan or bake on a pizza peel for an artisinal loaf. For the artisinal loaf, place the loaf to rest on a greased cookie sheet (can also dust the cookie sheet with cornmeal). Loosely cover the dough with plastic wrap and allow to rest for 1 1/2 hours.
  5. At leasat 30 minutes before baking, preheat oven to 450 F with a baking stone placed on the middle rack of the oven. Place an empty metal broiler tray on the lowest rack, making sure that it won’t interfere with the rising bread.
  6. Just before baking, dust the top of the loaf with flour and then slash the loaf with a razor or serrated knife with 1/4-inch-deep parallel cuts.
  7. Slide the loaf directly onto the hot preheated pizza stone (or you can place the greased cookie sheet directly on the stone if you can’t slide the loaf off of it). Pour 1 cup of hot tap water into the preheated broiler tray and quickly close the oven door.
  8. Bake for 30 to 35 minutes, or until the loaf is browned and firm. Note: If you used a cookie sheet, remove the bread from the cookie sheet at 20 minutes and bake the rest of the way on the pizza stone.
  9. Remove from the oven and allow to cool on a wire rack before slicing and eating.

Easy Whole Wheat Pizza Dough

Years ago, the Jimy Lahey (the owner of Sullivan Street Bakery) released his amazing no-knead method for making bread. It does require planning and allowing the flour-salt-yeast-water mixture to sit in a warm draft-free environment and ferment for 12 to 24 hours.  But it is simply and I have made several amazing batches of bread this way.  Mark Bittman adopted Jim Lahey’s method in the Food Matters Cookbook, slightly adapting it to a whole wheat version of pizza dough. In fact, the March issue of Bon Apetit did the cover story on Lahey’s no-knead pizza dough.

It really doesn’t take much time. In the morning, throw 3 cups of whole wheat flour (I used half white whole wheat and half whole wheat pastry flour), some salt, and 1/2 teaspoon of yeast in a bowl then add 1 1/2 cups of water. Stir with a wooden spoon. Put plastic wrap over it. Set aside. Done.

The pizza dough will be ready for you to work your magic once you get home from work. It will have bubbles on top from the fermentation process. Place the dough on a floured surface and work into small individual pizzas.

No need to spend extra “dough” on take out. Make this a fun experience with kids or friends or yourself. As you can see, I had two great helpers tonight in making individual pizzas. The kids chose their own toppings and they even experimented with an interesting guacamole pizza. Hrmmm.

If you don’t use all of the dough, or change your mind on dinner that night, the pizza dough will keep in the fridge for up to 3 days or in the freezer for up to a month.

See what everyone did with this recipe at the Food Matters Project. The original recipe was chosen by Niki of Salt and Pepper.

Easy Whole Wheat Pizza Dough

Notes: I recommend investing in a good pizza stone! It makes a difference.

Makes: 2  10″ pizzas or 4 individual mini pizzas

Dough Ingredients

  • 3 cups whole wheat flour (I used whole wheat white flour and whole wheat pastry flour)
  • 1 teaspoon fine sea salt
  • 1/2 teaspoon active yeast
  • Optional Toppings (olive oil, spicy tomato sauce, fresh mushrooms, goat cheese, fresh herbs, etc.)

Instructions

  1. Place flour, salt, and yeast in a medium bowl. Add 1 1/2 cups of luke warm water. Stir with a wooden spoon until mixture comes together. Should resemble biscut dough. Cover with plastic wrap. Set aside in a warm draft-free spot for at least 8 hours, but preferably 12 to 18 hours. The longer it sits, the better the taste. The dough will keep in the refridgerator for up to 3 days at this point.
  2. When you are ready to cook the dough, preheat oven to 500 to 550 F (or as high as it will go), placing a rack in the upper third portion of the oven and place a pizza stone on the rack. Preheat oven for at least 30 minute (45 minutes to 1 hour is preferable to recreate wood-fired pizza). If you are not using a pizza stone and are using a baking sheet, there is no need to preheat the baking sheet.
  3. Meanwhile, put the dough on a floured work surface. Shape into a rectangle and divide into several small pizzas, gently molding into appropriate sizes.  Dust with flour and set aside on rimless baking sheet or pizza peel that has about 1/4 cup of corn meal on the baking sheet (easy to slide the uncooked pizza dough off). Allow dough to rest while oven preheats
  4. Top pizza with desired toppings (sauce, cheese, veggies). Remember, the lighter the toppings, the better this will be. Loading a pizza with too many toppings can result in a soggy pizza.
  5. To transfer the pizza from the rimless baking sheet to the hot pizza stone in the oven, use small and quick back-forth motions. Slide the pizza from the rimless baking sheet (or pizza peel) onto the hot stone.  Bake pizza for 8 to 10 minutes, then broil on high for 2 minutes, or until bottom is crisp and top is melted and done.
  6. Using the rimless baking sheet, remove pizza from hot stone and  transfer to a work surface to slice. If you have another pizza to cook, allow the pizza stone to reheat under the broiler or at 550 F for 5 minutes. Repeat steps 5 and 6 with remaining pizzas.

Roasted Cauliflower

Cauliflower….oh you bland vegetable. I so often discount you. I generally choose more colorful vegetables over you…but you have shown me the err in my ways. By simply roasting you in an oven, you transform into delicious, addictive, and caramelized veggie poppers.

I drizzled a good olive oil over the florets and sprinkled them with sea salt and fresh cracked pepper. Threw them in a preheated oven that was set at 425 F and roasted them for 35 to 45 minutes. Holy Moses, I PROMISE you will NOT be disappointed. One head should serve 4 as a side, but I have to admit that two of us destroyed an ENTIRE head of cauliflower in one sitting.  Next time I will experiment with other seasonings such as smoked paprika, chili powder, or even curry. Mmmm.

So, quite ignoring cauliflower…go out there and give that veggie a new purpose in life!  You are welcome.

Roasted Cauliflower

Ingredients

  • 1 head of cauliflower, cut into florets
  • 1 to 2 tablespoons of olive oil
  • 1/2 to 1 teaspoon sea salt (or kosher salt)
  • 1/4 teaspoon fresh cracked pepper

Instructions

  1. Preheat oven to 425 F. Oil or spray a roasting pan with nonstick spray.
  2. Put cauliflower in a large bowl. Drizzle olive oil, salt, and pepper over the florets. Mix until well coated. Lay the florets in a single layer on the roasting pan. Place in oven and bake for 35 to 45 minutes, stirring halfway through the cooking time. Pull out of the oven, and try to let them cook before burning your mouth off by eating them directly from the roasting pan (I speak from experience, people).

Healthy Banana and Chocolate Swirl Almond Flour Muffins (Gluten-Free)

Recently, my husband has gone not only gluten-free, but grain-free, dairy-free, and sugar-free. That’s a lot of ‘free’ in my house. But he has never felt better. The ‘diet’ (for lack of better terms) is called Paleo, referring to our paleolithic ancestors…also known as the Caveman Diet.  He eats anything his ancestors would have hunted or gathered, such as meat, vegetables, nuts, and fruit. It is based on the concept that our bodies have not evolved to digest the products that modern man and modern agriculture has developed (corn syrup, wheat, processed food, milk products, etc).

A good gluten-free substitute in baking is almond flour!  Even if you gluten and wheat lovers will dig this! Using almond flour instead of wheat flour will make your muffins lighter and give your muffins more protein, providing you sustained energy throughout the day. You can make your own almond flour by taking raw almonds and processing them in a food processor for a few minutes until a light and fluffy flour occurs. Be careful, if you process for too long, you will get almond butter…which is delicious, but will not help you when baking up these delicious muffins. I bought my almond flour in the bulk section of Whole Foods.

I slightly adapted these muffins from a recipe from Honest Fare, using honey instead of processed sugar.  They are AWESOME as a dessert, breakfast, or a snack. Love! They are light and fluffy too! I ate one this morning with a tablespoon of almond butter…mmmmmm.

When mixing up the batter, if you want to do the chocolate swirl, divide the batter into two bowls. Mix 2 teaspoons of unsweetened cocoa powder into one of the bowls. Layer the banana muffin mix and then dollop the chocolate muffin mix on top, alternating layers until the muffin mixtures are gone.

I topped my muffins with sliced bananas that caramelize when baked.

Healthy Banana and Chocolate Swirl Almond Flour Muffins (Gluten-Free, Dairy-Free, Sugar-Free, Grain-Free) adapted from Honest Fare

Makes: 12 muffins

Ingredients

  • 1 3/4 cup of almond flour (or about 9 oz of raw almonds processed into a flour)
  • 1/2 teaspoon baking powder
  • 1/2 teaspoon ground cinnamon
  • 1/8 teaspoon salt
  • 2 eggs
  • 3 tablespoons honey
  • 1 tablespoon of ground flax meal
  • 3 bananas (save half of one to use as slices on top of the muffins)
  • 2 heaping teaspoons unsweetened cocoa powder

Instructions

  1. Preheat oven to 300 F. Grease 12 muffin tins or place muffin liners. Set aside.
  2. Mix almond flour, baking powder, salt and cinnamon in a medium bowl. Set aside.
  3. In a food processor or mixer, mix eggs, honey, 2 1/2 bananas, and flax meal on medium-high for 5 minutes, or until mixture is pale and very fluffily.
  4. Pour banana batter over almond flour and mix until just combined.
  5. Separate 1 cup of batter into a separate bowl. Add cocoa to the separated batter.
  6. Place a large spoonful of banana batter into muffin liners. Top with a spoonful of cocoa-banana muffin batter. Pour the remaining original banana batter on top of the cocoa batter. Top the muffins with thinly sliced bananas and slivered almonds, if you want.
  7. Bake muffins for 30 to 35 minutes (or until tops are browned and a skewer comes out clean when placed in the center of the muffin).
  8. Remove from oven and place on wire rack to cool.

Kale Salad with Garlic Tahini Dressing

Lately, I can’t get enough of kale salad. It’s crunchy. It’s flavorful. It’s a party in the mouth.

This kale salad is topped with an awesome tahini dressing. The recipe is based on a salad that is featured at the Whole Foods salad bar. A friend shared their recipe with me and I have made this salad for three nights in a row now. And may or may not have licked the bowl….and dreamed about this salad….and then ate it at midnight. OK, I have a problem. I know. Don’t judge.

This salad will totally make up for the fact that I also hoovered a rack of ribs, right?

If you can, mix the kale and the dressing together and allow to sit for an hour or two before serving.

Kale Salad with Garlic Tahini Dressing

Ingredients

  • 3 cups of kale, ribs removed and torn into 1-inch pieces
  • 1 tablespoon of tahini paste (sesame seed paste)
  • 1 tablespoon of soy sauce
  • 1 tablespoon of apple cider vinegar
  • 2 tablespoons of lemon juice
  • 1 clove of garlic, minced and mashed
  • 1 teaspoon of good olive oil
  • 2 tablespoons of cilantro, chopped

Instructions

  1. Wash and remove center ribs from kale. Tear into pieces and place in a large bowl.
  2. In a small bowl, add tahini paste through olive oil. Mix until well blended.
  3. Pour dressing over kale and massage into kale. Let sit for at least 30 minutes and up to 3 hours.  Mix before serving. Sprinkle cilantro on top.  Eating this with an avocado on the side makes a perfect lunch.

Fruit-on-Bottom Yogurt Cups

I’m a snacker. I love to snack throughout the day, eating one snack around 10am and another one around 3pm.  Snacking keeps my blood sugar in check and also keeps me from eating everything in sight once I get home.  One of my favorite snacks is yogurt!

Prepackaged yogurt cups have a lot of added sugar and preservatives. You can save money and have a tastier treat by making your own. I buy organic plain yogurt. Plain greek yogurt is also a great alternative which has over twice the protein as plain yogurt and is ultra creamy. Buying bulk plain yogurt is a lot cheaper and you can keep it on hand to use in other recipes (as an alternative to sour cream in dips, on tacos).

Fruit-on-Bottom Yogurt Cups

Ingredients

Organic plain yogurt (greek style, whole fat, or low fat)

Yogurt Option Add-ins:

  • unsweetened applesauce (add a dash of cinnamon for a kick)
  • 1/4 cup fruit (blueberry, strawberry, blackberry, peaches, whatever you have), frozen or fresh
  • 1 teaspoon no added sugar fruit preserves
  • dried fruit (cranberries, figs, apples, apricots)
  • vanilla extract
  • fresh sliced or chopped nuts (almonds, walnuts, pecans, etc)

Instructions

  1. If using frozen fruit, thaw in the microwave for 15 to 30 seconds. Add fruit, preserves, or applesauce  (or combination of these ingredients) to the bottom of a container.
  2. Add 1/2 cup to 1 cup of plain yogurt. Top with a sprinkle of nuts, vanilla extract, or dried cranberries.

Warm Hummus Dip with Sweet Potato Chips

Today, I am going to share some recipes that are big money savers and healthy.  You will learn to cook dried beans, prepare a dip from those beans, and make sweet potato chips (from scratch) to transport that bean dip to your mouth.  This is, of course, Food Matters Monday and the main recipe (warm hummus) is brought to you by the Food Matters Project.

Number 1COOK BEANS FROM SCRATCH. Seriously. Easy and cheap. Yes, canned beans are cheap anyways, but cooking your own is cheaper, tastier, and healthier (no added salt and BPA from cans). One pound of dried beans (about 2.5 cups) will make over 6 cups of cooked beans. One pound of dried beans costs the same as one can (less than 2 cups) of beans.  Rinse and pick through 1 pound of dried beans (any variety), removing rocks and bad beans. Soak the beans overnight (at least 8 hours). Drain and rins, refilling the crockpot with the soaked beans and water (no salt) until the water is about 1 inch over the beans.  Cook in your crockpot on low all day while you are at work (8 to 10 hours).  Now, you will have a crap ton of beans. Separate the beans in freezer safe ziplock bags, placing 2 cup portions in each bag. Freeze. Pull them out when you need them in a dish, soup, or dip.

Number 2MAKE YOUR OWN HUMMUS. Stop buying store bought dips. Now. After you have made your own huge pot of garbanzo beans following the directions above, throw three cups of those beans, some of the cooking liquid, two heaping tablespoons of tahini (sesame paste), two tablespoons of olive oil, salt to taste, and several tablespoons of lemon juice into a food processor and whirl until smooth. Done. Hummus can be served both warm or cold. Really. Try it warm. You’ll dig it.

Hummus can be spiced a meriad of ways: roasted garlic, basil, roasted red peppers, curry powder…. I chose to separate my hummus into two dishes, adding smoked paprika to one batch and siracha garlic chili paste to the other. Following Mark Bittman’s recommendations in “Hummus Served Hot”, I warmed the paprika hummus over the stove for a new spin. I loved the creaminess that it added.

Number 3MAKE YOUR OWN CHIPS. I chose to do some sweet potato chips, seasoned with cumin, smoked paprika, and sea salt. So so so so addictive and delicious. They were great alone or dipped in the hummus. It is best to have a mandoline slicer to slice your vegetable about 1/8 inch thick. Also, another tip, keep the chips in a single layer on the baking sheet to keep them from getting soggy. They will crisp up much better when they are not crowded (speaking from experience).

So, branch out and try to make these things from scratch. Best treat in the world. You deserve it.

Check out Naturally Ella for the featured FMP recipe of Hummus Served Hot. Also, don’t forget to stop by the FMP website to see the other delicious spins on this recipe. Have a great Monday!

Warm Hummus Dip with Sweet Potato Chips (adapted from Mark Bittman’s The Food Matters Cookbook)

Hummus Ingredients

  • 3 cups of garbanzo beans (chickpeas)
  • 1/4 cup of reserved cooking liquid from beans (or water)
  • 2 heaping tablespoons of tahini (sesame paste)
  • 2 tablespoons of olive oil
  • 3 tablespoons of lemon juice
  • 1/2 to 3/4 teaspoon of sea salt

Hummus Instructions:

  1. Combine all ingredients in food processor. Process until smooth. Add salt to taste.
  2. Optional mix ins: Saute garlic in olive oil and add garlic-flavored olive oil. Add 1/2 tablespoon smoked paprika.

Sweet Potato Chips Ingredients:

  • 2 sweet potatoes, peeled and sliced on a mandolin slicer 1/8 inch thick
  • 1 tablespoon olive oil
  • 1/4 teaspoon smoked paprika
  • 1/8 teaspoon cumin
  • 1/8 teaspoon cayenne (optional)
  • 1 teaspoon of salt

Sweet Potato Chips Instructions:

  1. Preheat oven to 400 F.
  2. Combine sliced sweet potatoes and remaining ingredients in a medium bowl. Toss until all are covered with seasonings and olive oil.
  3. Place sweet potato chips in a single layer on two nonstick baking sheets, lined with parchment paper or sprayed with nonstick spray.
  4. Place on middle and top racks. Cook for 25 minutes, rotating sheets half way through cooking process.
  5. Remove from oven and allow to cool for 5 minutes. Sprinkle with salt, if necessary.