Gluten Free Nectarine and Blackberry Crumble

Gluten Free Nectarine and Blackberry Crumble // Big Eats Tiny Kitchen

A few years ago, I planted one lonely thornless blackberry twig in my backyard.  I nursed it and took care of it.  But then I ran over it with a lawnmower….then I nursed it again.  And now, I have 20 feet of blackberry bushes lining one full side of my backyard fence.   It is a race between me, the squirrels, and the birds to see who can nab the blackberries first.

Gluten Free Nectarine and Blackberry Crumble // Big Eats Tiny Kitchen

There may have been a time or two that I have stood in my backyard, gorging myself on these fresh thumb-sized blackberries. I’m too excited about the harvest and will eat so many that there isn’t any left to bring inside!  I stare at my purple soaked fingers and sort of feel bad that I haven’t shared any with my husband… so naturally I have to lie and tell him that the birds got them… ALL. yes.. All of them. right out of my hands. It was a tragedy. Crying, Thrashing. Feathers everywhere. I promise I tried. They were ferocious….. But my purple lips and seeded teeth tell the real truth.

Gluten Free Nectarine and Blackberry Crumble // Big Eats Tiny Kitchen

So needless to say I owed my husband some blackberry goodness. I gathered up a good bundle of blackberries and baked him this skillet gluten-free nectarine and blackberry crumble.  He was pretty excited… mainly because he could add ice cream to it. I swear, that man would be happy with a dirt cobbler as long as you could put ice cream on it. 🙂

This recipe is my standard crumble topping.  I use it on tons of different fruit crumbles. I added some lemon zest to the crumble to give it a light summery zip.  You could easily swap out the fruit in this filling with peaches, raspberries, blueberries, etc.  It is really easy to throw together for summer gatherings to use up all that fresh fruit produce that is flooding the markets. So give yourself and the ones you love a warm and awesome summer treat!

Gluten Free Nectarine and Blackberry Crumble // Big Eats Tiny Kitchen

Gluten Free Nectarine and Blackberry Crumble

  • Servings: 6 to 8
  • Difficulty: Easy
  • Print

Fruit Filling

  • 6 nectarines (Halved, pitted, and sliced with peel)
  • 1 cup of blackberries
  • juice from 1 lemon (about 2 tablespoons)
  • 1/4 cup maple syrup or honey
  • 2 tablespoons arrowroot powder or cornstarch

Gluten Free Oat Crumble Topping

  • 1 1/2 cups old fashioned gluten-free oats
  • 1/2 cup almond meal
  • 1/3 cup brown sugar or coconut palm sugar
  •  1 teaspoon of lemon zest
  • 5 tablespoons melted butter (plus a little extra to grease the baking dish)
  • 1/4 teaspoon kosher salt
  • 1/2 teaspoon ground cinnamon

Instructions

  1. Preheat oven to 350F.  Butter a 9-inch cast iron skillet or 8X8-inch baking dish and set aside.
  2. In a medium bowl, mix all of the fruit filling ingredients. Spoon the fruit filling into the prepared skillet or baking dish.
  3. In a medium bowl, stir together the topping ingredients. Mix the ingredients until it is crumbly and moistened. Lightly sprinkle the oat crumble mixture over the fruit filling evenly.
  4. Bake for 40 to 50 minutes (or until the filling is bubbling and the crumble top is lightly golden brown). Remove the crumble from the oven and allow to cool for 5 to 10 minutes before serving.  This is delicious with vanilla ice cream for dessert or plain greek yogurt for breakfast!

Rhubarb Strawberry Curd

Rhubarb Strawberry Curd // Big Eats Tiny Kitchen

DSC_0307

I still remember the first time that I tried rhubarb.  It was probably 10 years ago. I had wanted to try it, but just hadn’t had the chance (I guess) living in suburbia Oklahoma and just didn’t have the inclination to go hunt for it.

But one summer night, I was out working a 12 hour shift doing field work for my Master’s degree and my husband was babysitting my littlest sister who was only 6 at the time. Since they are both the adventurous type, and neither of them really knew how to cook…. they decided to make me a rhubarb cobbler as a surprise treat for when I got home.

I was so surprised when I walked in the door and smelled that amazing smell. It was seriously the best cobbler I had ever eaten. (Maybe it was because I had just worked 12 long hours in the hot summer sun.) But it really was the perfect blend of tartness and sweetness. Just like my husband and my sister Olivia. Sweet and tart! 🙂  They began my obsession with this fabulous spring plant…ooooh rhubarb!
Rhubarb Strawberry Curd // Big Eats Tiny Kitchen

Rhubarb Strawberry Curd // Big Eats Tiny Kitchen

Since that first magical cobbler that they made for me ten years ago, I have had quite a love affair with rhubarb. Rhubarb is a perennial that will come back year after year when planted in a good location. My rhubarb plant always lets me know when spring is near, because it begins to sprout its long stalks and leaves when temps rise above 40 F.

Rhubarb can be used in so many recipes: tarts, cobblers, pies, salsa, sauces, and this amazing curd! Yeaaaaaaaaah. Curd doesn’t have to be reserved for citrus! This Rhubarb Strawberry Curd is hands down my favorite. I decided to add some frozen strawberries that I had in order to boost the pink color of the curd.  Feel free to adjust the ratio of rhubarb to strawberries to suit your own tastes.

Rhubarb Strawberry Curd // Big Eats Tiny Kitchen

This Rhubarb Strawberry Curd can easily be used to fill a pie or tart crust for an easy dessert. The extra egg whites can be whipped up as a meringue for the top too! I went the easy route this time and I mixed mine in greek yogurt for a delicious breakfast and midday snack! Either way, I know that this will be a favorite for all you rhubarb lovers!

Rhubarb Strawberry Curd // Big Eats Tiny Kitchen

Rhubarb Strawberry Curd

  • Servings: 2 cups
  • Difficulty: Easy/Moderate
  • Print

Ingredients

  • 2 cups fresh rhubarb, sliced 1/2-inch thick (about 5 trimmed stalks)
  • 1 cup fresh or frozen strawberries
  • 1/4 cup water
  • 1/3 cup honey
  • 4 eggs, yolks separated (reserve whites for another use)
  • 4 tablespoons unsalted butter

Instructions

  1. In a heavy saucepan placed over medium heat, cook rhubarb, strawberries, water, and 3 tablespoons of honey for about 10 minutes, stirring frequently and smashing the fruit with the back of spoon. Mixture will begin to fall apart and look mushy. Turn off heat and allow to cool for about 5 minutes.
  2. Transfer mixture to the bowl of a food processor and puree smooth. Set aside.
  3. In a separate medium bowl, cream the butter and the honey together until fluffy.  Beat in the eggs slowly. Slowly add the rhubarb and strawberry mixture, whisking constantly until completely combined.
  4. Transfer mixture to a medium-sized, non-reactive saucepan. Place over medium-low heat and stir constantly with either a rubber spatula or wooden spoon until the mixture has thickened to jelly consistency, about 10-12 minutes.  Do not let the curd boil! Pull the pan off the stove before it gets to that stage. The curd is done when it coats the back of a spatula or leaves a clear path when pulled through the mixture.
  5. Remove from heat allow to cool for about 5 minutes. Pour curd mixture into a clean glass jar, but let it cool completely before you screw on the lid. You can even place the filled jar in the freezer (without the lid) for about 15 minutes and then remove from freezer and place the lid on the jar. Keep refrigerated until ready to use.

Note – Recipe adapted from Dolly and Oatmeal.

Chicken with Morel Mushroom Sauce (Gluten Free)

Chicken with Morel Mushroom Sauce

I really have to admit that, honestly, this Chicken with Morel Mushroom Sauce is one of my favorite dishes that I have ever made.

Honestly. Ever. I don’t know whether the magic of the sauce is from the morels or from the sherry-based sauce..or the heavy cream. Who knows. It’s good. Real good.

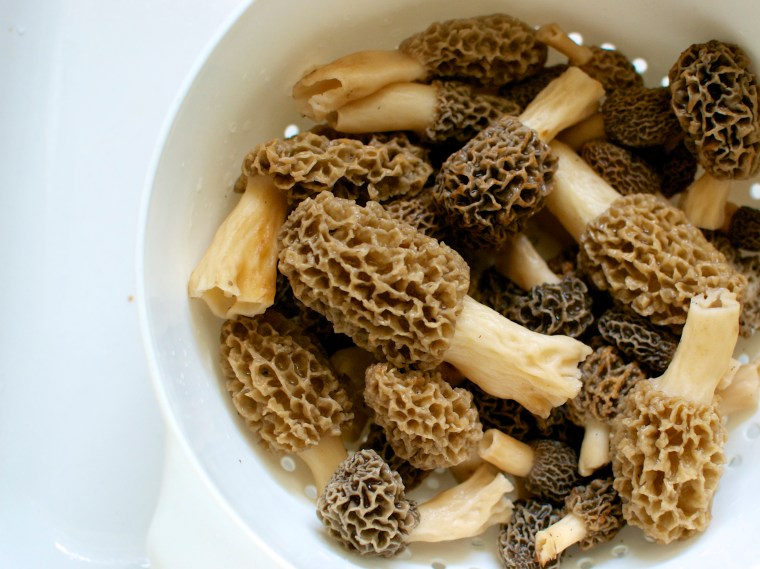
I came home to a huge bag of fresh picked morel mushrooms on my doorstep! A friend of mine foraged for them and thankfully decided to share his treasure! These puppies can go for as much as $40 per pound! We are eating like royalty over here!

Chicken with Morel Mushroom Sauce

Chicken with Morel Mushroom Sauce

With such a large bundle of morel mushroom-delights, I decided to prepare a recipe that was provincial and special: a french morel mushroom sauce.  This sauce deserves a trumpet of announcement. It deserves to be served in a bowl with amazing a crusty baguette, if you can have it. Sop it up. Don’t waste this sauce. With only 1/2 cup of heavy cream added at the end, the sauce is not heavy but it is substantial. I also think that adding champagne vinegar or lemon juice at the end really brings this sauce home with a small acidic kick.

Note – If you are unable to get fresh morel mushrooms, either substitute the mushrooms for equal quantity of cremini or shiitake OR go online and purchase about 2 oz of dry morels. If using dry morels, you will need to rehydrate them. In a small saucepan, bring 2 cups water to a boil over high heat. Turn the heat off and add the morels to the saucepan. Cover the saucepan and soak the mushrooms for 30 minutes to rehydrate. Remove the rehydrated mushrooms out of the soaking liquid using a slotted spoon, gently squeezing out the excess liquid back into the saucepan. Reserve the soaking liquid. 

Chicken with Morel Mushroom Sauce

Chicken with Morel Mushroom Sauce

  • Servings: 4 to 6
  • Difficulty: Moderate
  • Print

  • 1 tablespoon olive oil or butter
  • 3 pounds of bone in chicken thighs or breasts (skin removed)
  • Salt and pepper
  • 1/2 cup minced red onion or shallot
  • 1 pound fresh morel mushrooms, washed and cut in half if large (this is how I wash my morels)*
  • 1 cup dry sherry
  • 1 cup low sodium chicken broth
  • 1/2 cup heavy cream
  • 1 teaspoon Champagne vinegar or lemon juice
  • 1 teaspoon fresh thyme

Instructions

  1. Season both sides of chicken with salt and pepper up to one day in advance.
  2. Add olive oil (or butter) in a large skillet placed over medium-high heat. Add chicken to skillet bone side up, and cook about 6 minutes per side, turning once.  Allow the chicken to become golden brown on both sides. Remove the chicken and place on a plate.
  3. Lower the heat to medium. If needed, add another tablespoon of olive oil and then add onion (or shallots). Sauté until soft and translucent, about 2 to 3 minutes. Then add washed morel mushrooms and sauté for a few more minutes. Use a slotted spoon and transfer the mushrooms to a separate plate. Add dry sherry to skillet and bring to a boil. Allow the sherry to reduce by half (about 2 minutes). Add chicken stock and chicken to skillet and bring mixture to a boil. Reduce the heat to a simmer and cover the skillet with a lid placed slightly ajar. Simmer until chicken is cooked through, about 20 minutes. Check chicken after 20 minutes. After cooked through, transfer the chicken to a platter.
  4. Add the mushrooms back to the skillet. Add cream, vinegar, and thyme. Simmer uncovered for about 5 minutes or until sauce begins to thicken. Add salt and pepper to taste. To serve, pour the sauce over the chicken on the platter. Sprinkle with additional cracked pepper and fresh thyme, if desired.

Notes – recipe adapted from here and here.

Four Ingredient Dark Chocolate Peanut Butter Eggs

DSC_0375

We all need a little treat now and then.  For me, my favorite treat is always peanut butter eggs or dark chocolate peanut butter cups. Swooooooon. I don’t have them often, but when I do, I prefer the mini ones because I can have more than one and not feel so bad. I also am like a squirrel and like to save them, placing them in weird places in our house (hiding them from my chocoholic husband).

We hosted a huge Easter gathering at our house this year and had 30 people in our tiny and cozy little abode.  It was a lot of fun because I had a game plan: only make stress free food! This would ensure that I could enjoy my family and not appear like a crazed woman. One of the stress free foods that I made were these amazing Dark Chocolate Peanut Butter Eggs.

Four Ingredient Dark Chocolate Peanut Butter Eggs // Big Eats Tiny Kitchen

Four Ingredient Dark Chocolate Peanut Butter Eggs // Big Eats Tiny Kitchen

My sister and I whipped up these easy peasy peanut butter eggs a day in advance. They didn’t take much time and they were a great tiny sweet treat for people to pop one, two, or five eggs into their mouth.

Did I mention that these Dark Chocolate Peanut Butter Eggs are made with only FOUR ingredients? FOUR.  They are very very very easy to make and very very very easy to eat. Too easy. But hey, on the bright side, they are made with all natural ingredients and are only 70 calories per egg. Boom!

Homemade Four Ingredient Dark Chocolate Peanut Butter Eggs

  • Servings: 60 eggs
  • Difficulty: Easy
  • Print

Ingredients

  • 2 cups creamy salted natural peanut butter
  • 1/2 cup honey
  • 1 tablespoon vanilla extract
  • 5 oz dark chocolate

Instructions

  1. Using either an electric mixer or a food processor, thoroughly mix the peanut butter, honey, and vanilla on high-speed for several minutes until the mixture turns into a thick ball of peanut butter dough. Depending on the time of year and humidity in your kitchen, a tablespoon of water may need to be added to the mixture so that it will come together like dough. You can also pull it out of the mixing bowl and work it by hand for it to come together at the end after mixing it.
  2. Place parchment paper or waxed paper on a rimmed baking sheet or inside several glass pyrex baking dishes.
  3. Take a tablespoon of the peanut butter dough and use your hands to shape into a ball or egg shape, if you are feeling eggy. Place the balls (or eggs) onto the parchment-lined baking sheet.  Continue making the peanut butter eggs or balls until all of the dough is used. Depending on the size of your eggs, this recipe makes between 50 and 60 peanut butter eggs. Chill the peanut butter eggs in the freezer for 1 hour or in the refrigerator overnight.
  4. When you are ready to coat the peanut butter eggs in chocolate, place the chocolate into a microwave safe bowl and microwave for 30 seconds, then stir. Microwave in 10 second intervals, stirring between until the chocolate is melted.
  5. Remove the peanut butter eggs from the freezer. Place one egg at a time into the chocolate and roll around until covered. Remove using a large fork placed under the egg and allow the excess chocolate to drip from the egg. Place the dipped egg on the parchment paper to harden. Store in the refrigerator until time to serve.

*Note – for a paleo-friendly version or for those that are allergic to peanuts, almond butter could be used instead.

Fresh and Easy Salsa

Fresh and Easy Salsa / Big Eats Tiny Kitchen

Put me in front of a bowl of chips and salsa, and it would take the strength of ten mules on steroids to pull me away. I’m serious. Chips and salsa are my go to snack…

Not saying it’s a good thing. Just sayin that your hand maaaaaay get gnawed on if you go for a chip or scoop of salsa while I’m diving in. Seriously. I can’t stop this dipping train!

And now that tomatoes are so prevalent in my garden, it’s time to get this crazy SALSA train started!!!

Fresh and Easy Salsa / Big Eats Tiny Kitchen

Fresh and Easy Salsa / Big Eats Tiny Kitchen

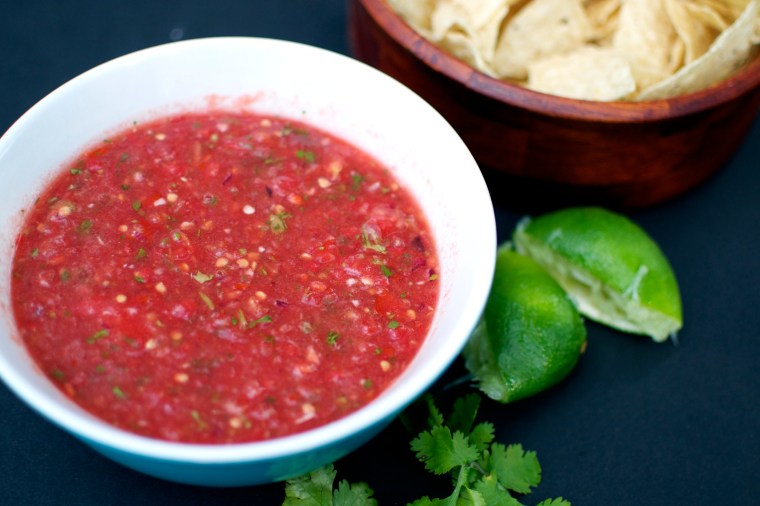
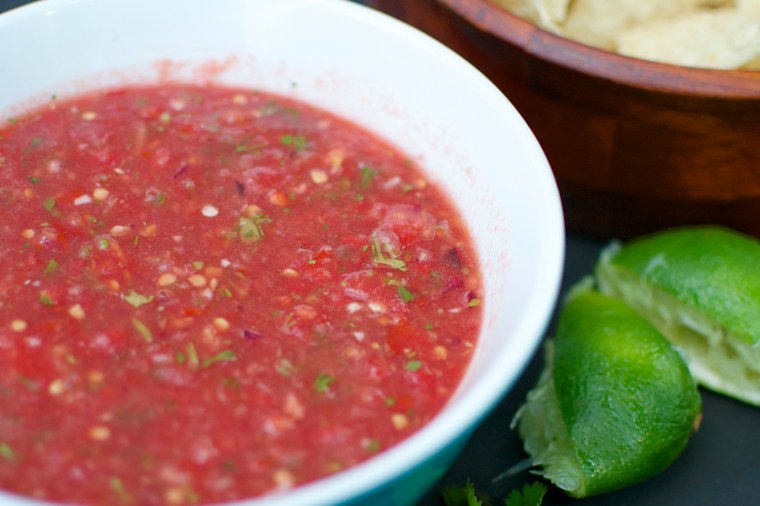
I used fresh roma tomatoes, but other varieties are juuuust fine. Plus, I’ll tell you a secret. This recipe can even be made in the winter with (gasp) canned tomatoes.  I have used some that I canned from my garden, but if you only have store-bought, go for the good kind! Muir Glen is my fave. The secret to this salsa is definitely good tomatoes AND lime juice.

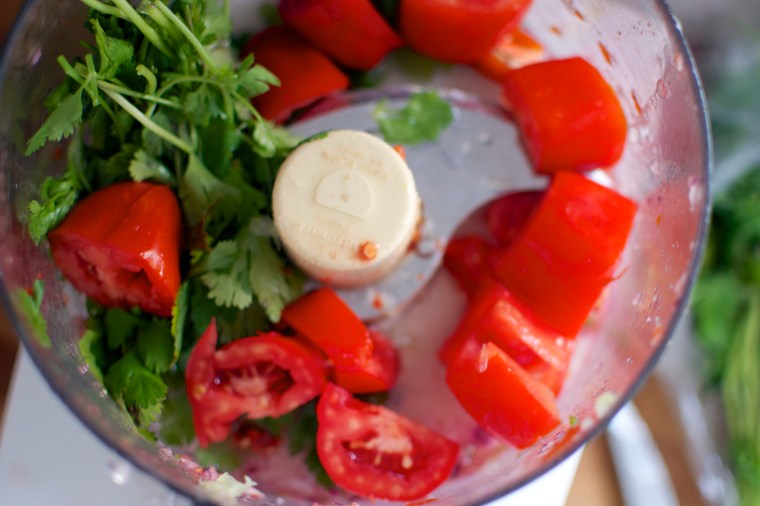
I whip up my salsa using a food processor but if you love to chop chop chop, then feel free to dice away. I like to reserve my energy for diving head first into the salsa bowl. If you do end up chopping up the ingredients, your salsa will just be more chunky….which is what I’m going to be if I don’t get my face out of this bowl of chips and salsa soon!

Give me more!

Fresh and Easy Salsa / Big Eats Tiny Kitchen

Fresh and Easy Salsa

  • Servings: 4 Cups
  • Difficulty: Easy
  • Print

Ingredients

  • 4 cups diced fresh tomatoes (about 15 roma tomatoes)
  • 1 small onion, chopped
  • 3 cloves of garlic
  • 2 jalapeños (chopped and seeds removed if you want mild salsa)
  • 1/4 bunch of cilantro
  • juice of 2 limes
  • 2 teaspoons salt (or to taste)

Instructions

  1. Place tomatoes in bowl of food processor and pulse a few times until tomatoes are fine diced. Transfer tomatoes to a medium-sized bowl.
  2. Place chopped onion, garlic, jalapeños, cilantro, and lime juice to bowl of food processor. Pulse for 15 seconds or until everything is chopped fine. Transfer contents to the medium bowl with the tomatoes. Stir well and add salt to taste. Cover and refrigerate until ready to serve. Can be made ahead of time.

Plum Sorbet

Plum Sorbet / Big Eats Tiny Kitchen

This week, I was the lucky recipient of a metric boat load of bite-sized cherry plums from a friend’s plum tree in her front yard!!!

So, what would YOU do with sacks and sacks of fresh tasty plums?  Well, besides pop them directly in your mouth…which happened a lot around here.

Plum Sorbet / Big Eats Tiny Kitchen

I decided to try something new….

Plum sorbet, ya’ll! Come and get it! It’s muggy and sticky outside. That means it is perfect weather for a tangy scoop of honey-sweetened Plum sorbet! And it’s dairy free!

You could easily replace the plums in this recipe with another in season fruit, like blueberries or strawberries or peaches! This is So delicious.

Plum Sorbet / Big Eats Tiny Kitchen

These plums that I used were perfectly tart and the honey provided juuuuust enough sweet balance. Also, I added a splash or two or three of champagne in the sorbet! Booze it up! Champagne or white wine in the sorbet provide the finished product a bubbly tang and help with the scoopability! Boom Boom!

Wait. This would be great as a Champagne Float! What? Yes please! If that is not a thing, it should be. Tip that pinky up, honey. Put your fancy hats on and get a big ol’ scoop of Plum Sorbet! Cheers!

DSC_0067

Plum Sorbet

  • Servings: 6
  • Difficulty: Easy
  • Print

Ingredients

  • 2 to 3 cups sliced plums, pits removed
  • 1/4 cup honey
  • pinch of salt
  • 1/3 cup champagne or white wine (or water)
  • 1/3 cup water

Instructions

  1. Add all ingredients to a blender or food processors. Purée until the mixture becomes smooth. Pour the plum puree through a fine mesh sieve to catch large pieces of skin. Place mixture into refrigerator for 30 minutes (or overnight) to chill.
  2. Place the plum purée into the bowl of a chilled ice cream machine and process according to the manufacturer’s instructions. It will take about 25 to 30 minutes. While the mixture is churning away, place a glass container into the freezer that will be big enough to place the processed sorbet into. After the sorbet is finished, either serve immediately or place into the air tight pre-chilled container and freeze for at least 2 hours to firm up.  The wine will help keep the sorbet from getting icy and will assist with scoopability if serving at a later time. Allow to sit out at room temperature for about 5 minutes after removing from the freezer, then scoop away!

Picnic Perfect Herby Deviled Eggs

Picnic Perfect Herby Deviled Eggs / Big Eats Tiny Kitchen

I’m constantly looking for easier and more efficient ways to do things. Must be the engineer in me. Well today, I have an amazing genius picnic tip.

Use an egg carton to transport deviled eggs. Genius!

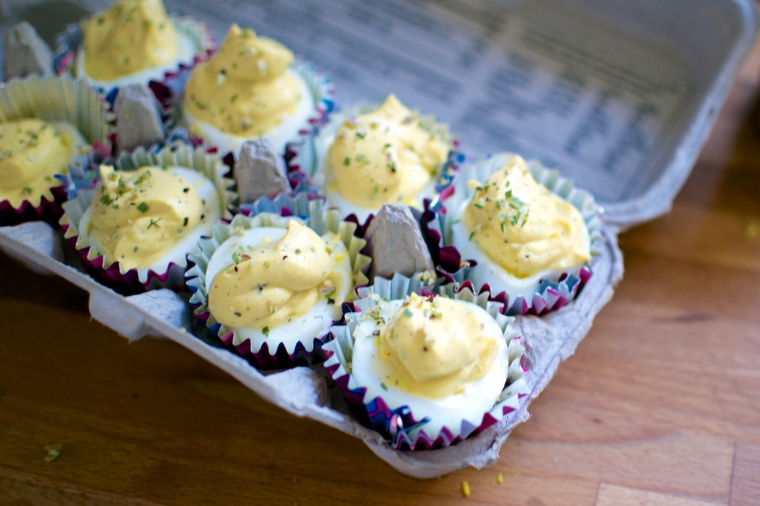
This weekend we had a tasty picnic with friends to celebrate the 4th of July. My hubby and I rode our bikes to the park and brought along some snacks, including deviled eggs. My solution to transport the deviled eggs was to use the egg carton as the perfect transport container.

I placed separate muffin liners in the carton to make these a less messy picnic dish. I also decided to use nearly the whole egg instead of cutting them in half. I cut the top third of the egg off and scooped out the yolk. The yolks were then mixed with greek yogurt (instead of mayo), herbs, salt, and Dijon mustard. I then scooped the yolk mixture into a baggy, cut off the edge, and pipetted the mixture into each egg white. Fancy pants picnic dish!

Picnic Perfect Herby Deviled Eggs / Big Eats Tiny Kitchen

I unfortunately do not have very many pictures of these puppies since I was running behind and had to rush to get these beauties loaded up in the egg carton and then head out on my bike to the picnic. But I will tell you that I will definitely be repeating this process for future deviled eggs that will be accompanying me to potlucks and picnics.

The only downside to this recipe is that deviled eggs go waaaay too fast. Womp Womp.

Herby Deviled Eggs (Grain Free, Gluten Free)

  • Servings: 12
  • Difficulty: Easy
  • Print

Ingredients

  • 12 eggs
  • 1/3 cup greek yogurt
  • 1/4 teaspoon sea salt
  • 1 teaspoon minced chives (some reserved to sprinkle on top)
  • 1 teaspoon minced parsley
  • 1 teaspoon Dijon mustard

Instructions

  1. Place eggs in a medium saucepan and add cold water until the eggs are covered by 1 inch of water. Bring to a rolling boil. Remove saucepan from heat, cover, and then let stand for 11 minutes. Drain the pot and run cod water over the boiled to cool them.
  2. Meanwhile, place remaining ingredients into the bowl of a food processor and mix together. Reserve some chives and parsley for sprinkling on top.
  3. Peel all of the eggs. To transport easily to a picnic, make whole deviled eggs by cutting off the top third of the egg. Remove yolks carefully with small spoon or butter knife, leaving the whites fully intact. Transfer yolks to bowl of food processor with greek yogurt mixture. Process until smooth.
  4. For easy picnic transport, line egg carton with individual muffin liners. Place intact egg whites into each separate muffin tin liner. Place egg yolk mixture into a sealable plastic back (like a ziplock). Cut the corner tip off of the bag for easy pipetting into each egg white. Sprinkle with remaining herbs. Place plastic wrap on top of filled eggs and refrigerate up to 8 hours.

Carne Asada Salad (Paleo Friendly and Gluten Free)

Carne Asada Salad / Big Eats Tiny Kitchen

Have you ever lost your mojo? Felt lost?

If you are frequent reader or friend of mine or even someone I have passed on the street, it has been a bit too obvious that I have lost my mojo.  I’m typically so goal-driven, mega type A, and awesome…or anal, whichever you deem it. But not for sometime. For a while I have felt like a feather in the wind with no direction, which is TERRIFYING to me. I think we all have a threshold of how much willpower we have and how much we can endure. And then one day you snap…for me it was the lack of ketchup in our house when I had made sweet potato fries…. FOR THE LOVE OF PETE WHY CAN”T I HAVE WHAT I WANT!

Too dramatic? naaaah.

Carne Asada Salad / Big Eats Tiny Kitchen

But there has to be a certain point when you just have to realize that life just is what it is. We get handed certain things in life and we can either roll around in it like a stinky pile of poop or we can make poop pie and throw it at someone that deserves it. I’ve decided to quite rolling in poop and throw it. Wait…I don’t think that came out right.

Well, you get what I’m saying right?  Take out your frustrations on others, am I right? That’s what friends are for? right? Friends? Thanks for being there for me. 🙂 No really. Thanks.

This week has been operation “get my mojo back”. If you have often felt like your mojo is gone, I challenge you to get it back by realizing that we can’t compare ourselves to others (even past versions of ourselves). We are where we are and we have to try to enjoy these moments, even the hard ones, because our time is short and our love is vast.

Carne Asada Salad / Big Eats Tiny Kitchen

Here are a few of the things I did to get mojo back this week that you can try:

  • Exercise – Go for a walk. Listen to the birds, see the trees in bloom, embrace the now.
  • Treat Yo’ self – Hello mani/pedi.
  • Cook – Try something simple and fresh for yourself and family. Your belly will thank you.
  • Laugh – This is the most important thing of all.

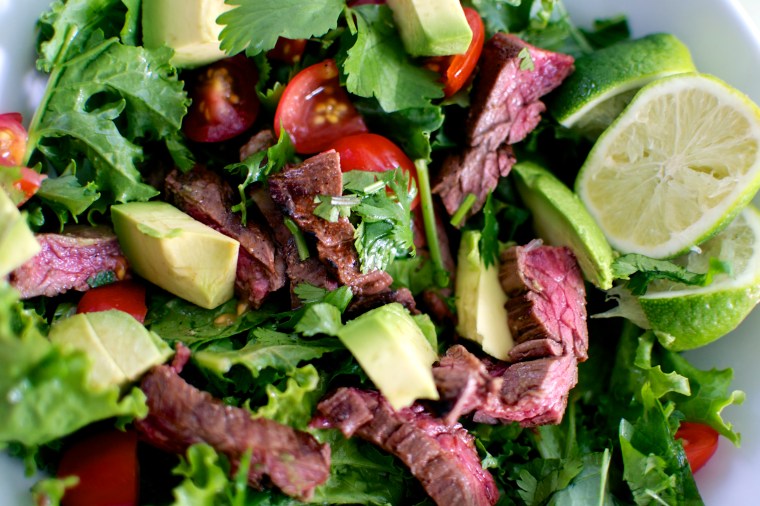
As part of my “get my mojo back” week, I decided to cook something fresh and simple. I thawed out a strip steak from our purchase of 1/4 of a COW. (I don’t know which fourth I got, but he’s tasty.)  Strip steaks are nice and thin and are great for carne asada! So I whipped up a quick carne asada marinade when I got home from work. Fresh limes are key to the marinade. Let your steak marinade for at least an hour and up to 4 hours. Fresh greens are abundant in the farmers market and in my garden so I decided to create a fresh salad instead of tacos.  I used fresh baby butter lettuce, baby kale, and cilantro that is growing in our garden and some other goodies that I picked up at the market to create a Carne Asada Salad that was quick, delicious, and something that I will be making many times during this grilling season. Feel free to modify your toppings, but focus on fresh and good quality items.

Carne Asada Salad / Big Eats Tiny Kitchen

Carne Asada Salad / Big Eats Tiny Kitchen

Strip steaks are thin and will not require a long time on the grill. For medium, you will likely only need to grill it 4 to 5 minutes per side, or less. Keep an eye on it. You could even cook your steaks inside in a cast iron skillet or grill pan if you don’t have a grill.

Carne Asada Salad (Gluten Free, Dairy Free, Paleo Friendly)

  • Servings: 2-4
  • Difficulty: Easy
  • Print

Marinade Ingredients

  • 1 lb strip steak (flank steak would work too)
  • 1 large clove of garlic, smashed and minced
  • juice of 1 large lime
  • 1 tablespoon apple cider vinegar
  • 1 teaspoon cumin
  • 1 teaspoon smoked paprika
  • 1/2 teaspoon coriander
  • 1/4 teaspoon cayenne powder
  • salt and pepper
  • 2 tablespoons olive oil

Salad Ingredients

  • Mixed greens (baby kale, spinach, arugula, butter lettuce, etc)
  • 1 bunch of cilantro, chopped
  • green onions, diced
  • 1 cup grape tomatoes, diced
  • crumbled feta (optional)
  • fresh limes
  • avocado
  • salsa

Instructions

  1. Place the strip steak in a large glass bowl or baking dish.  Do not use metal because it may react with the acids in the marinade. Salt and pepper on both sides. Combine the marinade ingredients in a small bowl and pour over the steak. Make sure that all of is covered and saturated with the marinade. Cover the bowl with plastic wrap and allow to marinate in the refrigerator for 1 to 4 hours. Pull out of the refrigerator and allow the steak to come to room temperature (about 30 minutes). 
  2. Preheat your grill or grill pan using medium-high heat or flame. Brush the grates of your grill with a bit of olive oil so that the steak does not stick to the grates. Remove the steak from the marinade and place onto the hottest part of the grill and cover the grill. Grill until the underside of the steak is browned, about 4 minutes depending on the thickness of your steak.  Flip the steak and cook on the other side for another 4 minutes.
  3. Remove the steak from the grill and allow to rest for 5 minutes. Thinly slice the steak across the grain on a diagonal. This will help the steak from being chewy.
  4. Prepare four salad bowls and place sliced steak on top. As another option, prepare these as tacos using grilled corn tortillas. Mmmmm! Happy eating!


Dijon and Cider Braised Pork Chops with Dill and Roasted Cabbage

Cider Braised Pork Chops with Dill and Roasted Cabbage

When I was younger, I never really ate pork chops. I’m not sure why, but it just wasn’t a staple at our house.  And similarly, they aren’t a staple in my home. But put them on a menu and that will most definitely be the first thing that I order.

My husband grew up on smothered pork chops and other down home cooking, so whenever we get pork chops from our meat CSA (community supported agriculture) program, he is elated.  So I’ve been working on my pork chop cooking repertoire. My favorite pork chop recipe thus far is based on a Horseradish and Cider Glazed Pork Chop recipe from Deb Perelman’s Smitten Kitchen Cookbook. It’s easy. It’s classic. It’s super yummy. I made a few tweaks to her recipe, where she calls for horseradish I subbed for Dijon mustard. A good Dijon tends to have a horseradish elemental flavor, so I figured this would be an adequate sub.   And what goes better with pork than cabbage? Not much…except Beer. 

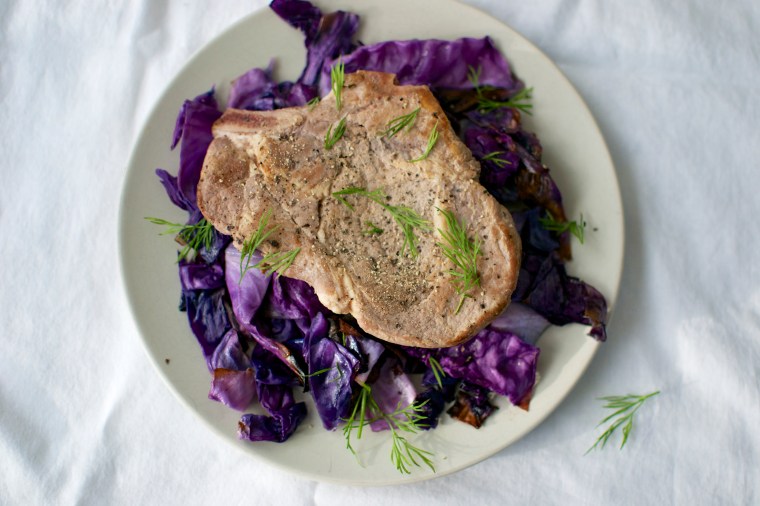
I love beautiful purple cabbage, and I love it even more ROASTED. It’s so easy to drizzle cabbage with a tie bit of olive oil and then throw it in the oven to roast away while you cook the pork chops on the stove top. We scarfed this meal down in no time. It’s pretty and easy and special enough for company.  Plus you won’t be spending all of your time in the kitchen. I also whole heartedly recommend the dill…fresh dill! It’s the finishing touch and boy howdy does it deliver.

Cider Braised Pork Chops with Dill and Roasted Cabbage

Dijon and Cider Braised Pork Chops with Dill and Roasted Cabbage

Serves 4

Adapted from Smitten Kitchen Cookbook

Ingredients

  • 1/2 cup cider vinegar
  • 1/2 cup of hard apple cider
  • 2 tablespoons Dijon mustard
  • 1/2 teaspoon sea salt
  • 4 bone in pork chops (1/2-inch thick), trimmed of fat, patted dry and liberally salted and peppered
  • 1 tablespoon olive oil
  • 1 tablespoon fresh dill
  • Roasted cabbage (recipe below)

Instructions

  1. In a small bowl, combine the cider vinegar, hard cider, Dijon mustard, and the salt. Set aside.
  2. Heat olive oil over medium-high heat in 12-inch skillet (cast iron works wonders), until oil just begins to smoke. Place pork chops into skillet and allow them to brown well on one side (about 3 minutes). Turn the pork chops and cook an additional minute on the other side. Transfer the browned pork chops to a plate and drain the skillet of any excess fat.
  3. Pour the apple cider glaze mixture into the skillet and bring to a simmer over medium heat. Cook until the mixture begins to thicken (about 2 to 4 minutes). Your spatula should leave a trail across the bottom of the pan when scraped through the glaze.
  4. Return the browned pork chops to the skillet with the thickened glaze. Turn the pork chops to coat both sides with the glaze. Continue to cook them over medium heat until the centers of the pork chops are cooked through (a temperature of 140 F). This should take about 5 minutes. Adjust seasonings in the glaze.
  5. Transfer pork chops to plates with roasted cabbage. Pour additional sauce on top of both the pork chops and the cabbage. Sprinkle with fresh dill.

Roasted Cabbage

Ingredients

  • 1/2 head of purple or green cabbage (i prefer the color of the purple cabbage)
  • 1 tablespoon olive oil (plus more for coating the roasting pan)
  • 1 tablespoon cider vinegar
  • 1/2 teaspoon salt

Instructions

  1. Preheat oven to 400 F.
  2. Slice cabbage into 1/4-inch slices and place into a large mixing bowl. Drizzle with oil, vinegar, and salt. Combine well and place onto an oiled roasting pan.
  3. Cook for 30 minutes, stirring halfway through.
  4. Remove from oven and place equal portions on plates.

Creamy Polenta with Braised Kale and Poached Egg

Creamy Polenta with Crispy Kale and Poached Egg

Lately I have been cooking and posting a lot of my comfort food recipes. Hearty soul-warming french onion soup, curry (this one and this one), creamy tapioca, lemon pudding…mmmmm. These are foods that not only keep me cozy, but also nourish my tired and warn out mind and body.

They may not be the typical comfort food that most american’s have come to know and love. No mac n’ cheese. No cream o’ something soups dumped in a casserole. Sorry, no big fat cinnamon rolls are coming out of my oven (womp womp). No biscuits and gravy piled on my plate. Although, there are a few times that I miss some of those items, I feel better feeding myself and my family cozy winter comfort foods that are wholesome, full of nutrients to keep our immune systems up, and not laden with preservatives or packed with empty calories.

Lately I’ve been on a polenta kick.  Erhmergerd. It’s creamy. It’s sensational. It can be cheesy. It can be buttery. Hellooooo! And all it is is slow cooked stoneground cornmeal, water, and salt. You can add butter (yes) and cheese (OH YA) as options to kick it into winter overdrive.

Creamy Polenta with Crispy Kale and Poached Egg

You will need to spend a bit of time upfront cooking the polenta, like 40 minutes. But you can swirl it, let it bubble away, then put a lid on the dang pot while it boils away (stirring every 10 minutes) and then it’s done. The great thing about polenta is that any leftovers can be reheated with a little liquid to return to its creamy holiness OR it can be cut and baked into awesome polenta cutlets.

Polenta can be topped with a myriad of things: braised short ribs, sautéed mushrooms, or, my fave, a poached egg with braised kale. This dish is perfect for both brunch or dinner.  Bonus, make it for brunch one day, and leftovers can be reheated for dinner the next day. Win Win!

Notes: For a great tutorial on easy poached eggs, check this out.

Creamy Polenta with Crispy Kale and Poached Egg

Creamy Polenta with Crispy Kale and Poached Egg (gluten free)

Adapted from The Kitchn

Serves 4

Ingredients

  • 4 cups of water
  • 1 teaspoon salt
  • 1 cup coarse ground yellow cornmeal (or polenta, not quick cooking)
  • 2 tablespoons butter
  • 1/2 cup parmesan cheese
  • 1 tablespoon olive oil
  • 1 bunch of kale, inner ribs removed and discarded, coarsely chop leaves (wash and dry)
  • 2 teaspoons white wine vinegar
  • 4 poached eggs (I use this method)
  • salt and pepper

Instructions

  1. Place water in a heavy saucepan over medium-high heat and bring to a vigorous boil. Add salt and stir. While wishing the water gently, pour the cornmeal into the boiling water in a steady stream. Turn the heat down to low and continue to whisk the cornmeal/polenta until it has thickened.
  2. Cover the pot and continue to cook for 30 to 40 minutes, stirring vigorously every 10 minutes. Once it is finished, stir in butter and cheese. Place lid on pot and let sit for up to 10 to 15 minutes until ready to use.
  3. While cooking the polenta, place a separate sauté pan over medium heat. Add 1 tablespoon of olive oil. Add the kale and season with salt and pepper. Stir the kale lightly until it is slightly wilted. Stir in the vinegar, cover the pan, and turn the heat to high. Cook the kale over high heat until it is tender (about 5 minutes). Turn the heat off and set aside.
  4. Poach or fry eggs according to desired consistency. For a great poached egg, follow these directions.
  5. To serve, place 1/3 to 1/2 cup of creamy polenta in bottom of bowl, top with braised kale, and one poached egg. Season with salt and pepper to taste.