Salmon Patties with Cilantro-Lime Sauce

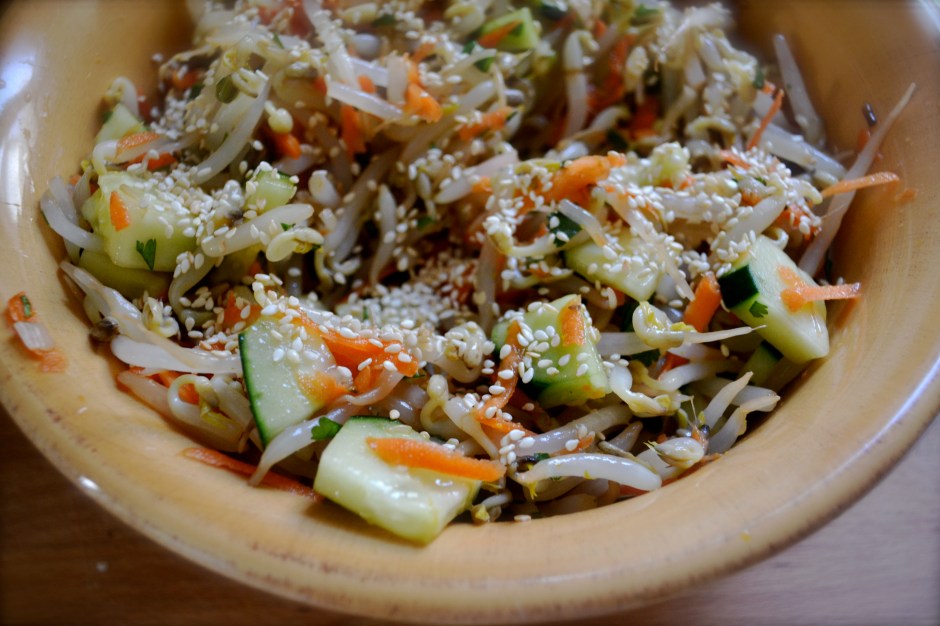
The weather can’t quite decide what it wants to do….warm, cold, warm….snow. And sometimes, this change occurs all in one day.  Sometimes I feel just as spastic as the weather. Unable to decide what to do, what to wear, what to cook….what type of apples to buy. Too many choices just clogs my brain up. Going into the bulk bin isle of Whole Foods is overwhelming to me. So many different types of beans, flours, sugars, grains, nuts, and snacks.

Sometimes it is best to keep things simple. So, in an attempt for simplicity, I present these salmon patties. Simple. Fresh. Quick. Healthy.

Using canned wild salmon makes these uber easy.  If you don’t have oat bran on hand, you can whirl some oatmeal in a food processor or use bread crumbs. Mix all the ingredients in a medium bowl, form into small palm-sized patties, and sauté in a grill pan for about 3 to 4 minutes on each side. Done!

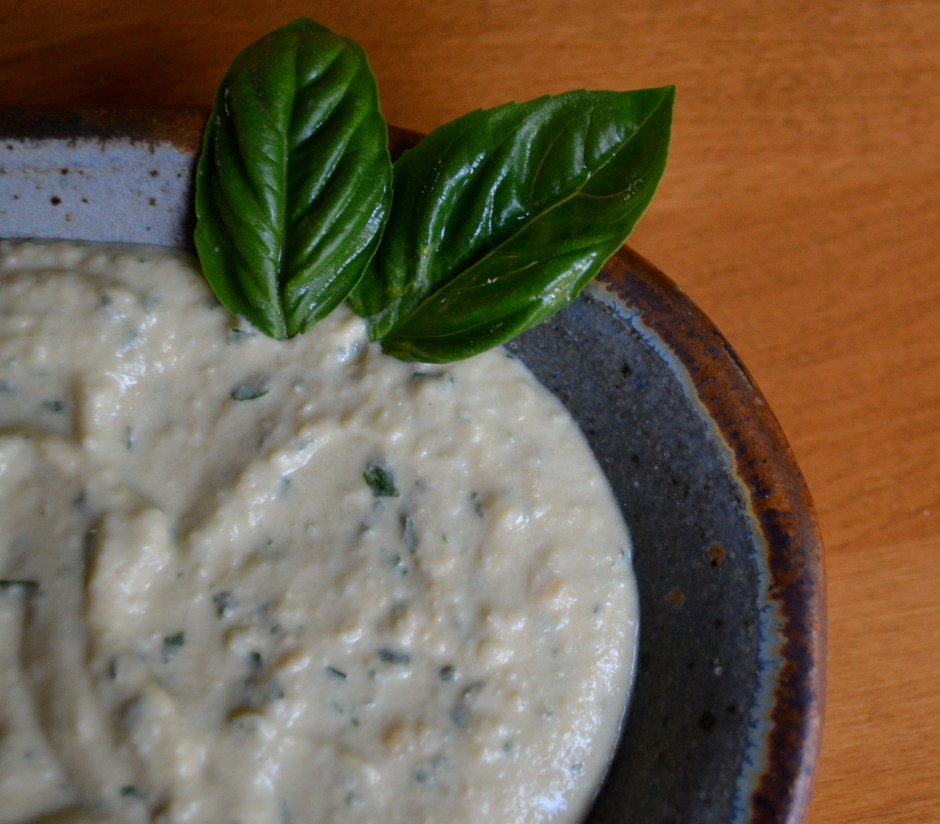
I also whipped up a greek yogurt sauce with cilantro and lime to serve on the side. But these salmon patties are so flavorful and fresh tasting that you really don’t need the sauce.

Salmon Patties with Cilantro-Lime Sauce

Makes: 2 servings

Prep/Cook Time: 15 minutes

Salmon Patty Ingredients

  • 1 (6 oz) can of canned wild salmon, drained and flaked
  • 1 scallion, thinly sliced (1 teaspoon of green parts set aside)
  • 1/4 cup of diced sweet red bell pepper (optional)
  • 1 tablespoon fresh cilantro or parsley, chopped
  • 1 egg white
  • 1 tablespoon lemon juice
  • 2 to 3 tablespoons oat bran (or oatmeal that has been processed into a fine meal from a food processor)
  • 1/8 teaspoon each of salt and pepper
  • sesame seeds (optional)

Cilantro-Lime Sauce Ingredients

  • 1/2 cup of plain greek yogurt
  • 1 tablespoon fresh cilantro
  • 1 teaspoon of reserved sliced scallion (green parts)
  • 2 teaspoons lime juice
  • pinch of salt

Instructions – Salmon Patties

  1. In medium bowl, combine all salmon patty ingredients (salmon through pepper). Stir. If mixture is too wet, then add additional oat bran.
  2. Form into small patties, about 2 inches in diameter and 1/2 inch thick. This should make about 4 to 6 small patties. Sprinkle patties with sesame seeds. Smaller patties cook faster and stay together better. Plus they are just cute.  Place patties on a plate. You can allow the patties to chill for an hour, if you have time. It isn’t necessary.
  3. Preheat griddle pan or skillet over medium heat. Spray with nonstick spray. Cook patties until golden brown on each side, about 3 to 4 minutes on each side.

Instructions – Cilantro-Lime Sauce

  1. Combine all of the sauce ingredients (yogurt through lime juice). Add salt to taste. Serve cilantro-lime sauce on the side of the salmon patties, about 2 tablespoons per person.

Seared Bean Sprout Salad with Sesame-Orange Dressing

What is a bean sprout? It’s the sprout from a germinated mung bean. Bean sprouts are usually used in asian cooking and provide a bright crunchy texture to a stir fry dish. I originally intended on sprouting my own mung beans (which is really easy), but I didn’t have time. It takes 5 to 7 days of soaking the mung beans in water (changing every 12 hours). But you can easily find bean sprouts at your local grocer or asian market.

Today’s recipe is brought to you by the Food Matters Project, which is a group of foodie bloggers dedicated to cooking our way through Mark Bittman’s Food Matters Cookbook. The original recipe was chosen by Dominica of Food Wine Love and was supposed to be Seared Bean Sprouts with Beef and Sesame-Orange Sauce. 

Although this looked both easy and delicious, I was on my way to a dinner party last night and needed to bring a side dish. I decided to turn the recipe into a bright and colorful salad, adding some shredded carrots, diced cucumber, and chopped cilantro. It was really easy to throw together and was definitely unique.

Check the FMP website to see what the other foodies chose to do with this recipe!

Seared Bean Sprout Salad with Sesame-Orange Dressing

Makes: 8 servings (as a side dish)

Salad Ingredients

  • 1 Tablespoon sesame seeds
  • 1 Tablespoon canola oil or coconut oil
  • 1 lb bean sprouts, rinsed
  • 1/4 teaspoon salt
  • 1 bunch of scallions, green and white parts chopped
  • 2 carrots, shredded
  • 1 cucumber, diced
  • 1/4 cup cilantro, chopped

Dressing Ingredients

  • 2 oranges, juiced
  • zest of 1/2 orange
  • 1/2 Tablespoon fresh ginger, minced or grated
  • 2 Tablespoon soy sauce
  • 1 teaspoon sesame oil
  • 1 teaspoon tahini paste
  • 1 Tablespoon rice wine vinegar
  • 1 Tablespoon honey

Instructions:

  1. Add 1 tablespoon of sesame seeds to a DRY skillet. Cook on medium heat for 3 to 5 minutes, lightly toasting sesame seeds. Remove and set aside.
  2. Place 1 tablespoon of oil in skillet and heat over medium heat. When oil is hot (not smoking), toss in bean sprouts and salt. Stir fry for 3 to 5 minutes, or until lightly browned. Remove and place in colander. Run cold water over sprouts to stop them from cooking. You want them to still be crips.
  3. Add the sprouts, cucumber, shredded carrot, cilantro, and scallions to a medium serving bowl.
  4. Combine all dressing ingredients into a mason jar or lidded jar. Shake well. Pour over salad and stir.  Chill until you are ready to serve it. Toss before serving and sprinkle with toasted sesame seeds.

Spicy Roasted Red Pepper and White Bean Spread

I love versatile things, like a great cardigan, real vanilla ice cream, pita bread, and mason jars.  These things can take on multiple functions and are a great base. That’s where today’s recipe fits in…a great base or launching point for many other recipes.

Today’s featured recipe is the third recipe from the Food Matters Project, a group of food bloggers focused on cooking through the Food Matters Cookbook by Mark Bittman. The original recipe, featured by Heather of girlichef, is Roasted Red Pepper and Walnut “Pesto”. The original recipe purees 8 roasted red peppers, walnuts, olive oil, and basil to form a pesto-like spread. I decided to do a variation and replace half of the roasted red peppers with cannelini beans and use almonds instead of walnuts (because that is what I had on hand). I wanted to move this recipe more towards hummus and add a kick with red pepper flakes.  The red pepper flakes help balance out the sweetness that occurs from the red peppers. I think the quantity of red peppers is a little much and could be reduced to two peppers.

This spread ends up being like the little black dress of condiments. I used it as a sandwich spread to amp up my veggie sandwich. And because this recipe makes quite a large batch, I had enough left to use as a pesto-like base to a pasta dish with roasted tomatoes, goat cheese, and extra basil (sorry no pictures of that awesomeness).

The primary component of this recipe is roasted red peppers. You can use jarred roasted red peppers, but it is also really easy to roast your own. Simply place them red peppers (whole) on a foil lined roasting pan. Turn your broiler on high or heat your oven to 450F. If using the broiler, the processes will only take about 15 minutes, but make sure your turn the peppers every 4 to 5 minutes, browning on all sides (see picture below). If you decide just to roast them in an oven preheated to 450F, this process will take about 45 minutes. After the skin is slightly charred, wrap in the aluminum foil from the pan and allow to sweat and cool. Unwrap after at least 10 minutes or until cooled off. Run the peppers under cold water and peel the skin off of the peppers. Remove the tops and deseed. And voila, you have roasted red peppers! These are good on pizza, sandwiches, hummus, pasta dishes, and so much more!

If you are intested in other variations on the FMP recipe, check the main website here.

Spicy Roasted Red Pepper and White Bean Spread (adapted from The Food Matters Cookbook by Mark Bittman)

Note: I liked this spread on sandwiches and as a dip for pita chips. It also works well tossed onto fettucini with some goat cheese and roasted tomatoes. The possibilities are pretty limitless.

Ingredients

  • 2 roasted garlic cloves (roast at the same time that you roast the red peppers)
  • 3/4 cup roasted almonds (or walnuts)
  • 1 15 oz cannelini beans (2 cups)
  • 3 roasted red bell peppers, skinned and deseeded
  • 1/2 cup fresh basil or parsley
  • 1 to 2 Tablespoons olive oil
  • 1 Tablespoon lemon juice
  • 1/4 teaspoon salt
  • red pepper flakes to taste

Instructions

  1. Roast red peppers as described above or use jarred roasted red peppers.
  2. Place garlic in food processor and pulse. Add almonds and pulse until a fine meal is formed.
  3. Add beans, basil, red peppers and puree. Drizzle olive oil and lemon juice into the puree. Pulse the food processor until all is combined. Add salt and red pepper flakes to taste.

Homemade Microwaved Seasoned Popcorn – BBQ Style

I love love love to snack. I’m a big fan of all things dippable and munchable. I also love bbq, which is especially great here in KC. So popcorn seasoned with my favorite BBQ rub is great snack item for me during the day when I need a good salty and spicey fix. I was pretty excited to find out that the second recipe in the Food Matters Project was Seasoned Popcorn, chosen by CookieandKate.

Years ago to save money, I quite buying bagged popcorn and started buying whole unpopped kernel corn. I began popping my own popcorn in a glass container or small brown paper bag (lunch-size), saving oodles of money and eliminating preservatives. Also, I had a tendency to mow down an entire massive bag of butter-laden popcorn, only to find myself incredibly thirsty with orange-stained fingers and unaware that I had ingested 6-servings in one sitting.

So if you are buying packages popcorn…stop! Popping your own is so simple, easy, and you can change up the seasoning to suit your snacking desires. Use 2 tablespoons of unpopped corn per person. Place the corn kernels and salt in a brown paperbag and fold over a few times. Microwave on high for about 3 minutes, or until there are 4 seconds between pops. Open the bag carefully because steam will build up.

Along with BBQ seasoning, I also like to top popcorn with shredded parmesan cheese, cracked pepper, and salt. I spray the popcorn with nonstick spray to help the topping stick. You can also melt some butter and pour over…so much better than butter flavor!

Check out the featured recipe for Seasoned Popcorn by Kate of CookieandKate. Go to the FMP website to see other great ideas for popcorn seasonings!

Homemade Microwaved Seasoned Popcorn (serves 2), from The Food Matters Cookbook by Mark Bittman

Note: The seasonings for popcorn can be limitless. For a sweet fix, top with cinnamon sugar. For a spicy kick, try curry powder. Cheesy? go for parmesan cheese or nutritional yeast (found in most health food stores, giving a good cheesy flavor).

Ingredients

  • 1/4 cup kernel corn
  • 1/4 teaspoon sea salt
  • topping of choice (shredded parmesan, cracked pepper, cinnamon sugar, bbq seasoning..etc).

Instruction

  • Place popcorn and salt in paperbag or glass lidded container. If in a paperbag, fold the top over several times.
  • Microwave on high for 3 to 4 minutes (or until there are 4 seconds between pops).
  • Be careful when opening the container because steam will have built up. Toss the popcorn with the seasonings.

Honey Chipotle-Glazed Roasted Root Vegetables

I have been reading through Mark Bittman’s Food Matters Cookbook. It is a large (almost overwhelming) compilation of over 500 recipes that are focused on incorporating more plant-based meals into your diet, reducing meat intake, and eliminating processed foods. If you have never heard of Mark Bittman, I recommend checking him out. He is a seasoned chef that has several cookbooks (including “How to Cook Everything”, “How to Cook Everything Vegetarian”), has a new York Times food column, and is a featured chef in several magazines, including Runner’s World (which is where I first discovered him and his yummy sweet potato muffins).

His recent cookbook is easy to read and leaves a lot of room for personal interpretation. So when I found out about The Food Matters Project, I was pumped to join in on the fun. The FMP is a compilation of several food bloggers that will be tackling a recipe from the cookbook each week. The FMP has a listing of the participating food bloggers and the scheduled recipes that we will be preparing. There will be a featured blogger each week and the rest of us will be doing our interpretations of the recipe, posting on our individual websites. Check in weekly to see the updates.

Today is the official launch of the project. The first recipe from the cookbook is “Chipotle-Glazed Squash Skewers” prepared by Sarah of 20somethingcupcakes. I decided to do a variation by skipping the squash skewers (say that 50 times fast) and applying the glaze to a variety of root veggies, such as parsnips, carrots, and butternut squash.

The result….AWESOME. Roasting the vegetables brings out a carmelized flavor. These are a great alternative to fries. They also would be great served over rice or quinoa, or even with some cheese in a quesadilla! Also, the honey-chipotle glaze was so delicious. It would be wonderful on a variety of veggies, salmon, or chicken.

For the original recipe (Chipotle-Glazed Squash Skewers), check out Sarah’s blog. To see the other participating food bloggers interpretations, check here!

Honey Chipotle-Glazed Roasted Root Vegetables

Ingredients

  • 1 1.5 to 2 lb butternut squash, skinned and cut into 1/2-inch thick by 2-inch long pieces (like french fries)
  • 2 medium parsnips, skinned and cut uniformly like the butternut squash
  • 2 medium carrots, skinned and cut uniformly like the butternut squash
  • 1/4 cup olive oil
  • 1 to 2 chipotle peppers in adobo sauce, reserving 2 tablespoons of adobo sauce (freeze remaining peppers from can)
  • 1 tablespoon honey (or maple syrup)
  • 1 clove of garlic, minced
  • salt and pepper
  • lime and cilantro (optional)

Instructions

  1. Preheat oven to 400 F. Spray a roasting pan with nonstick spray.
  2. Combine olive oil through garlic in a small bowl. Stir well. Start with one chipotle pepper. Taste the glaze, if you want it spicier, add another one.
  3. In a medium-large bowl, toss the diced root vegetables and the glaze together. Spread onto roasting pan in an even layer. Sprinkle with salt and pepper.
  4. Roast for 50 minutes. Remove and enjoy warm. Sprinkle with fresh squeezed lime and cilantro, if desired.

Spinach Cheese Balls

If you are looking for sneaking some veggies into an appetizer or if you need a great appetizer for your vegetarian friends, these spinach cheese balls are REDICULOUS. I think they have taken the place of my beloved sausage balls. Plus they are SUPER easy to whip up. I have made these three times during Christmas.

These taste so good and are packed with good greens that I didn’t feel too bad eating two or three or ten. Don’t judge!

I think these spinach cheese balls would be great on a sandwich, or in spaghetti as a vegetarian option for meatballs. You can make these ahead of time and freeze prior to baking. Pop the frozen balls in an oven preheated to 350 and bake for 20 to 25 minutes. They taste great when served with marinara sauce too.

Spinach Cheese Balls

Ingredients

  • 1 frozen package of spinach (10 oz), thawed and thoroughly drained
  • 2 cups of shredded mozzarella
  • 1/4 cup parmesan cheese, shredded
  • 1/4 cup whole wheat pastry flour or all-purpose flour (may need more depending on moistness of spinach)
  • 1/4 cup bread crumbs
  • 1/2 teaspoon garlic salt
  • 2 teaspoon italian seasoning
  • 1 egg, beaten
  • fresh ground pepper
  • Marinara sauce for dipping

Instructions

  1. Preheat oven to 400F. Spray a rimmed baking sheet with nonstick spray or line with parchment paper.
  2. Mix all ingredients (expect marinara dipping sauce) in a medium bowl. Shape into 1 inch balls. Place on baking sheet and bake for 15 to 20 minutes.

Apple Crisp

Now, the debate continues between desserts falling in the crisp, crumble or cobbler category. In my mind, a crisp has an oat based topping over a lot of fruit, a crumble has more flour based topping over fruit, and a cobbler is more biscuit-like or pastry topping that is mixed within the fruit.   Whatever you call it…I call it divine and “yes, I’ll have another”. I tend to like the crunchy oat-type topping desserts. But I will NEVER turn down a cobbler either.

Now, you should know that crisps and cobblers are s a weakness of mine and are a dessert that I will never share….again. I learned a valuable lesson when many moons ago, I decided to share an amazing peach cobbler with homemade ice cream with my husband. It turned into an ugly war of spoons in the middle of a restaraunt between my husband and I, ending in: (1) this amazing dessert being devoured in 0.2 seconds, (2) neither of us really knowing what the dessert actually tasted like because we were too concerned that the other person was getting MORE TOPPING!!! and the LAST BITE OF ICE CREAM EVEN THOUGH IT WAS SEGREGATED ONTO MY SIDE OF THE BOWL (I’m not bitter…well, maybe a little), and (3) Kiley teaching me a valuable lesson that you should NEVER SHARE THY COBBLER WITH A TOPPING AND ICE CREAM STEALER (eh hem…him, not me).

Anyways, since one of my best friends is getting married at the end of October, several of my oldest college girl friends got together this weekend for a bachelorette party – old school slumber party-style. To top the night off (along with plenty of candy, pizza, wine, and margaritas), I made an apple crisp, which we all dove head first into with a massive tub of vanilla ice cream. And no…i did not share my piece.

Note: This is an easy to put together dessert and you can use just about any fruit (berries, peaches, cherries, plums, rhubarb…I can go on…don’t tempt me).

Apple Crisp (serves 6)

Filling

  • 6 to 8 medium crisp tart apples, sliced (no need to remove peel)
  • 3 Tbsp lemon juice
  • 1/2 tsp cinnamon
  • dash of nutmeg
  • 3 Tbsp of brown sugar

Topping

  • 1 1/4 cup of rolled oats (not quick cooking)
  • 1 cup of whole wheat pastry flour (or all purpose)
  • 1/3 cup of brown sugar
  • 1 tsp cinnamon
  • 1/4 tsp salt
  • 4 Tbsp butter

Instructions

  1. Preheat oven to 375F and place rack in the center of the oven. Spray with a cooking spray, an 8 x 8 inch baking dish.
  2. Prepare topping by placing all of the topping ingredients (flour, spices, butter, oats) in a bowl or food processor. Mix until the mixture is crumbly (looks like coarse meal) and there are no large pieces of butter visible.  If you are not using a food processor, you can use two knives or your fingertips.  Set aside until you finish making the filling.
  3. For the filling, place the apple chunks in a large bowl. Toss with the lemon juice, cinnamon, and sugar. Transfer to the baking dish.  Spread the topping evenly over the apples.
  4. Bake for 30 to 40 minutes until the topping is brown and the filling is bubbly. mmmmm.
  5. Remove from oven and cool for 10 minutes.
  6. Keep guard for any cobbler thieves. Get the ice cream out and DIG IN!

Basil Hummus

Homemade hummus is very easy and very tasty. Plus, making it at home is economical and it doesn’t have all those pesky fillers and preservatives.  It does take an initial investment in tahini (sesame seed paste), but with just a simple whirl of your food processor…BAM, an easy dip or spread. This is also great for a quick lunch with some veggies or even to take on a picnic.

Hummus also tastes great on sandwiches. One of my favorite sandwiches is hummus stuffed in pita bread with fresh tomatoes, fresh cucumbers, and feta cheese. Mmmm.

Hummus is also very versatile. I love adding roasted red peppers, roasted garlic, or cayenne. However, in this recipe, I opted for a fresh kick and added basil from my garden. If you don’t have fresh basil, I would probably opt for adding a tablespoon of pesto instead. Personally, I don’t think dried basil would be good substitute for fresh basil in this recipe. But hey, you could give it a shot and prove me wrong. I dare ya.

Basil Hummus

Ingredients

  • 1 clove garlic
  • 15 oz can of garbanzo beans (or white navy or cannellini beans), drained and rinsed
  • 3 Tbsp lemon juice
  • 2 Tbsp tahini paste
  • 1/8 to 1/4 tsp salt (depending on how salty you prefer)
  • 1 Tbsp olive oil
  • 2 to 4 Tbsp water (to thin dip as desired)
  • 1/4 to 1/2 cup fresh packed basil leaves
Instructions
  1. Combine garlic, beans, lemon juice, tahini, oil, and salt in a food processor.
  2. Process until smooth. Gradually add water until the dip has reached the level of consistency that you prefer. Scrape down sides of the food processor bowl to blend all of the ingredients as needed.
  3. Add basil and process briefly until creamy and smooth.
  4. Transfer to a bowl, cover, and chill.
  5. Serve with sliced bell peppers, carrots, celery, and pita chips.