Slow Cooker Carnitas (Pulled Pork)

Is it just me or is there a juice frenzy going on?  I feel like everywhere I look and read online, everyone has caught the “juicing” bug.   Get the tiger juice master…juice your veggies…green juice…orange juice…juice your juice.

Not me….I personally like to CHEW my food.  Isn’t that what these chompers called teeth are for? chewing? masticating? gnawing?

DSC_0231

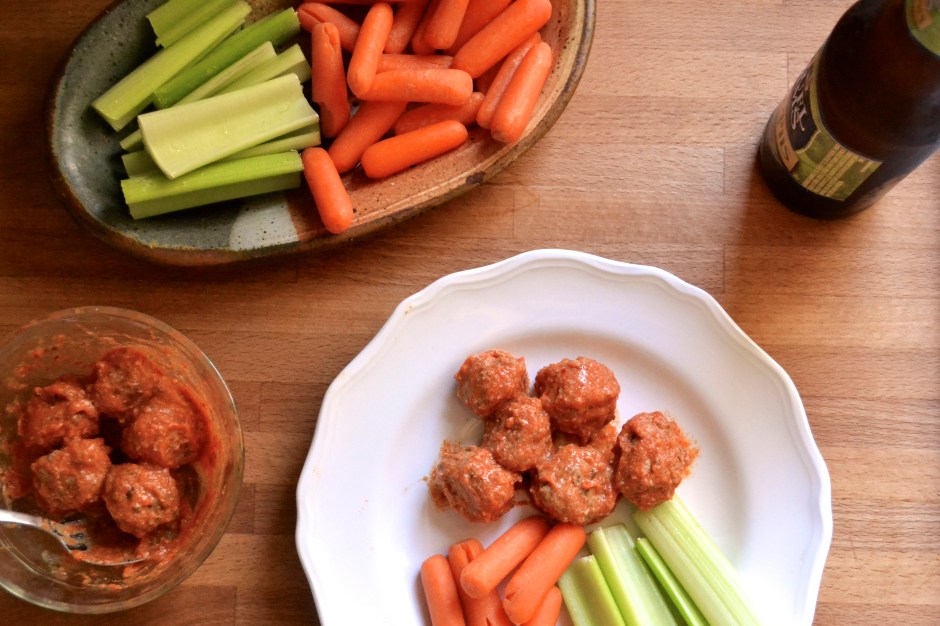
So if you are into chewing your food, then you will totally be into these carnitas (mexican-style pulled pork).  But it is the good kind of chewing. I’m not talking about chewing through leather, my friends. I’m talking about chewing tender and juicy fall-apart pork. USE THOSE BEAUTIFUL TEETH!

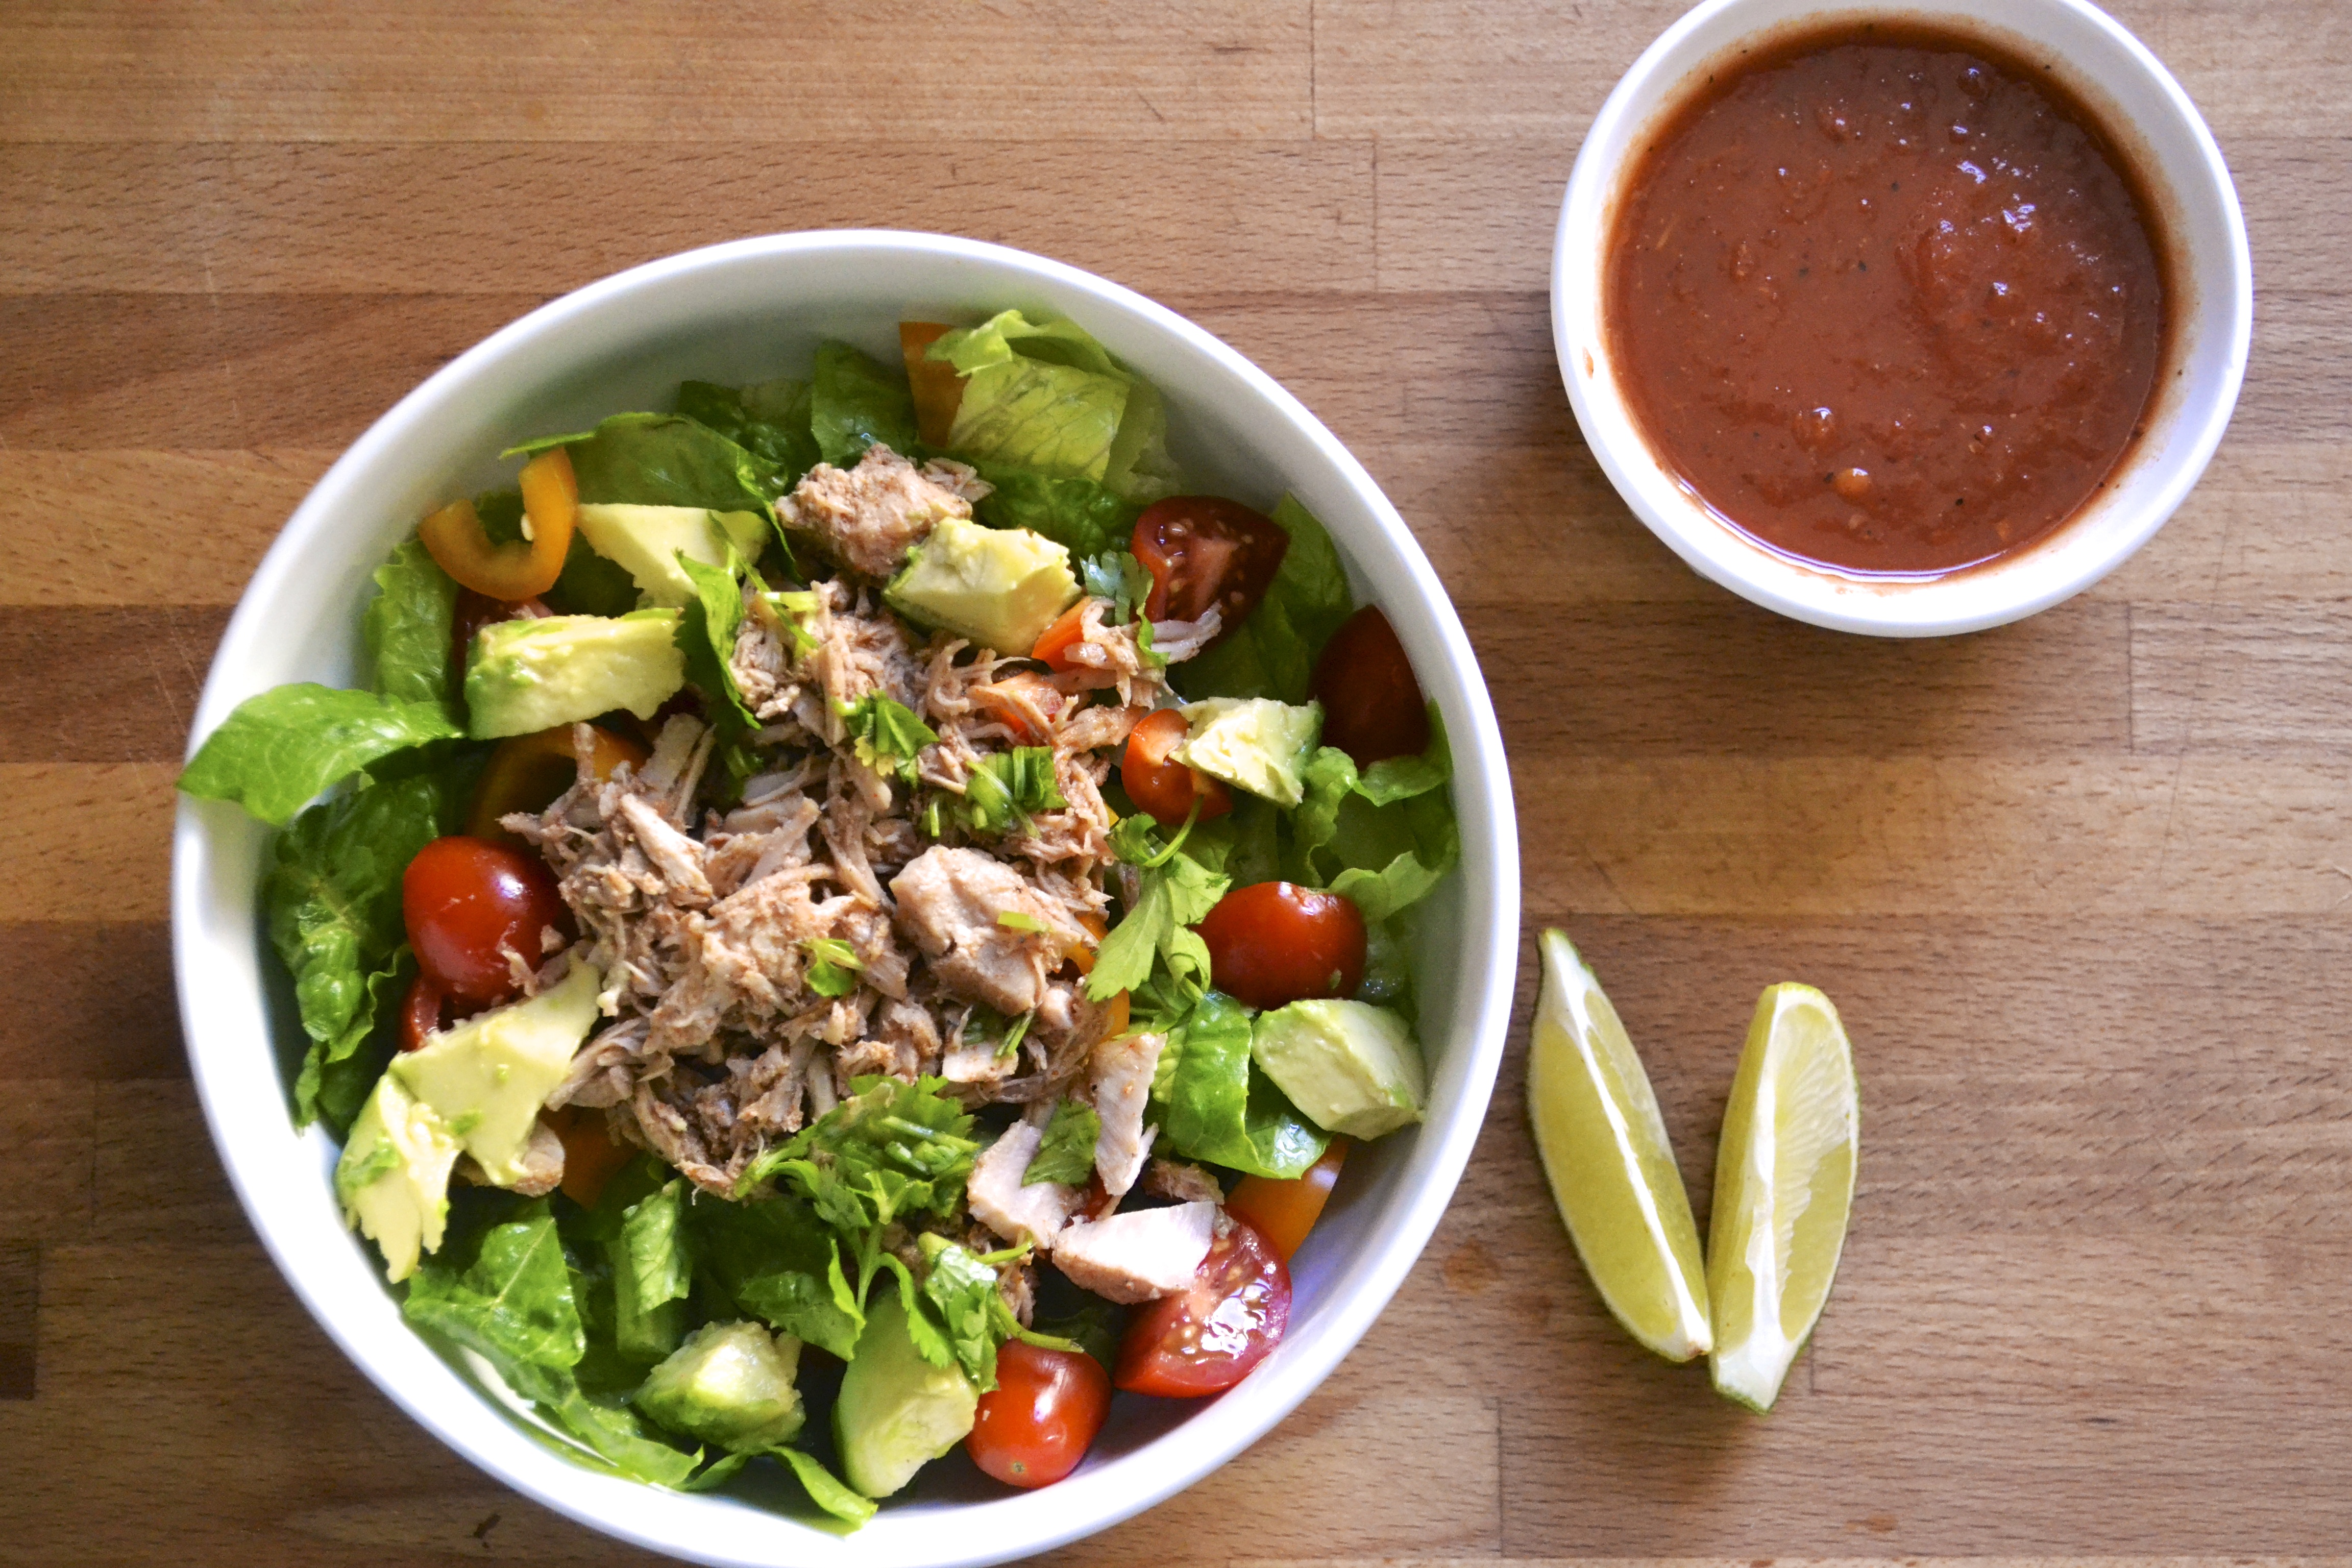
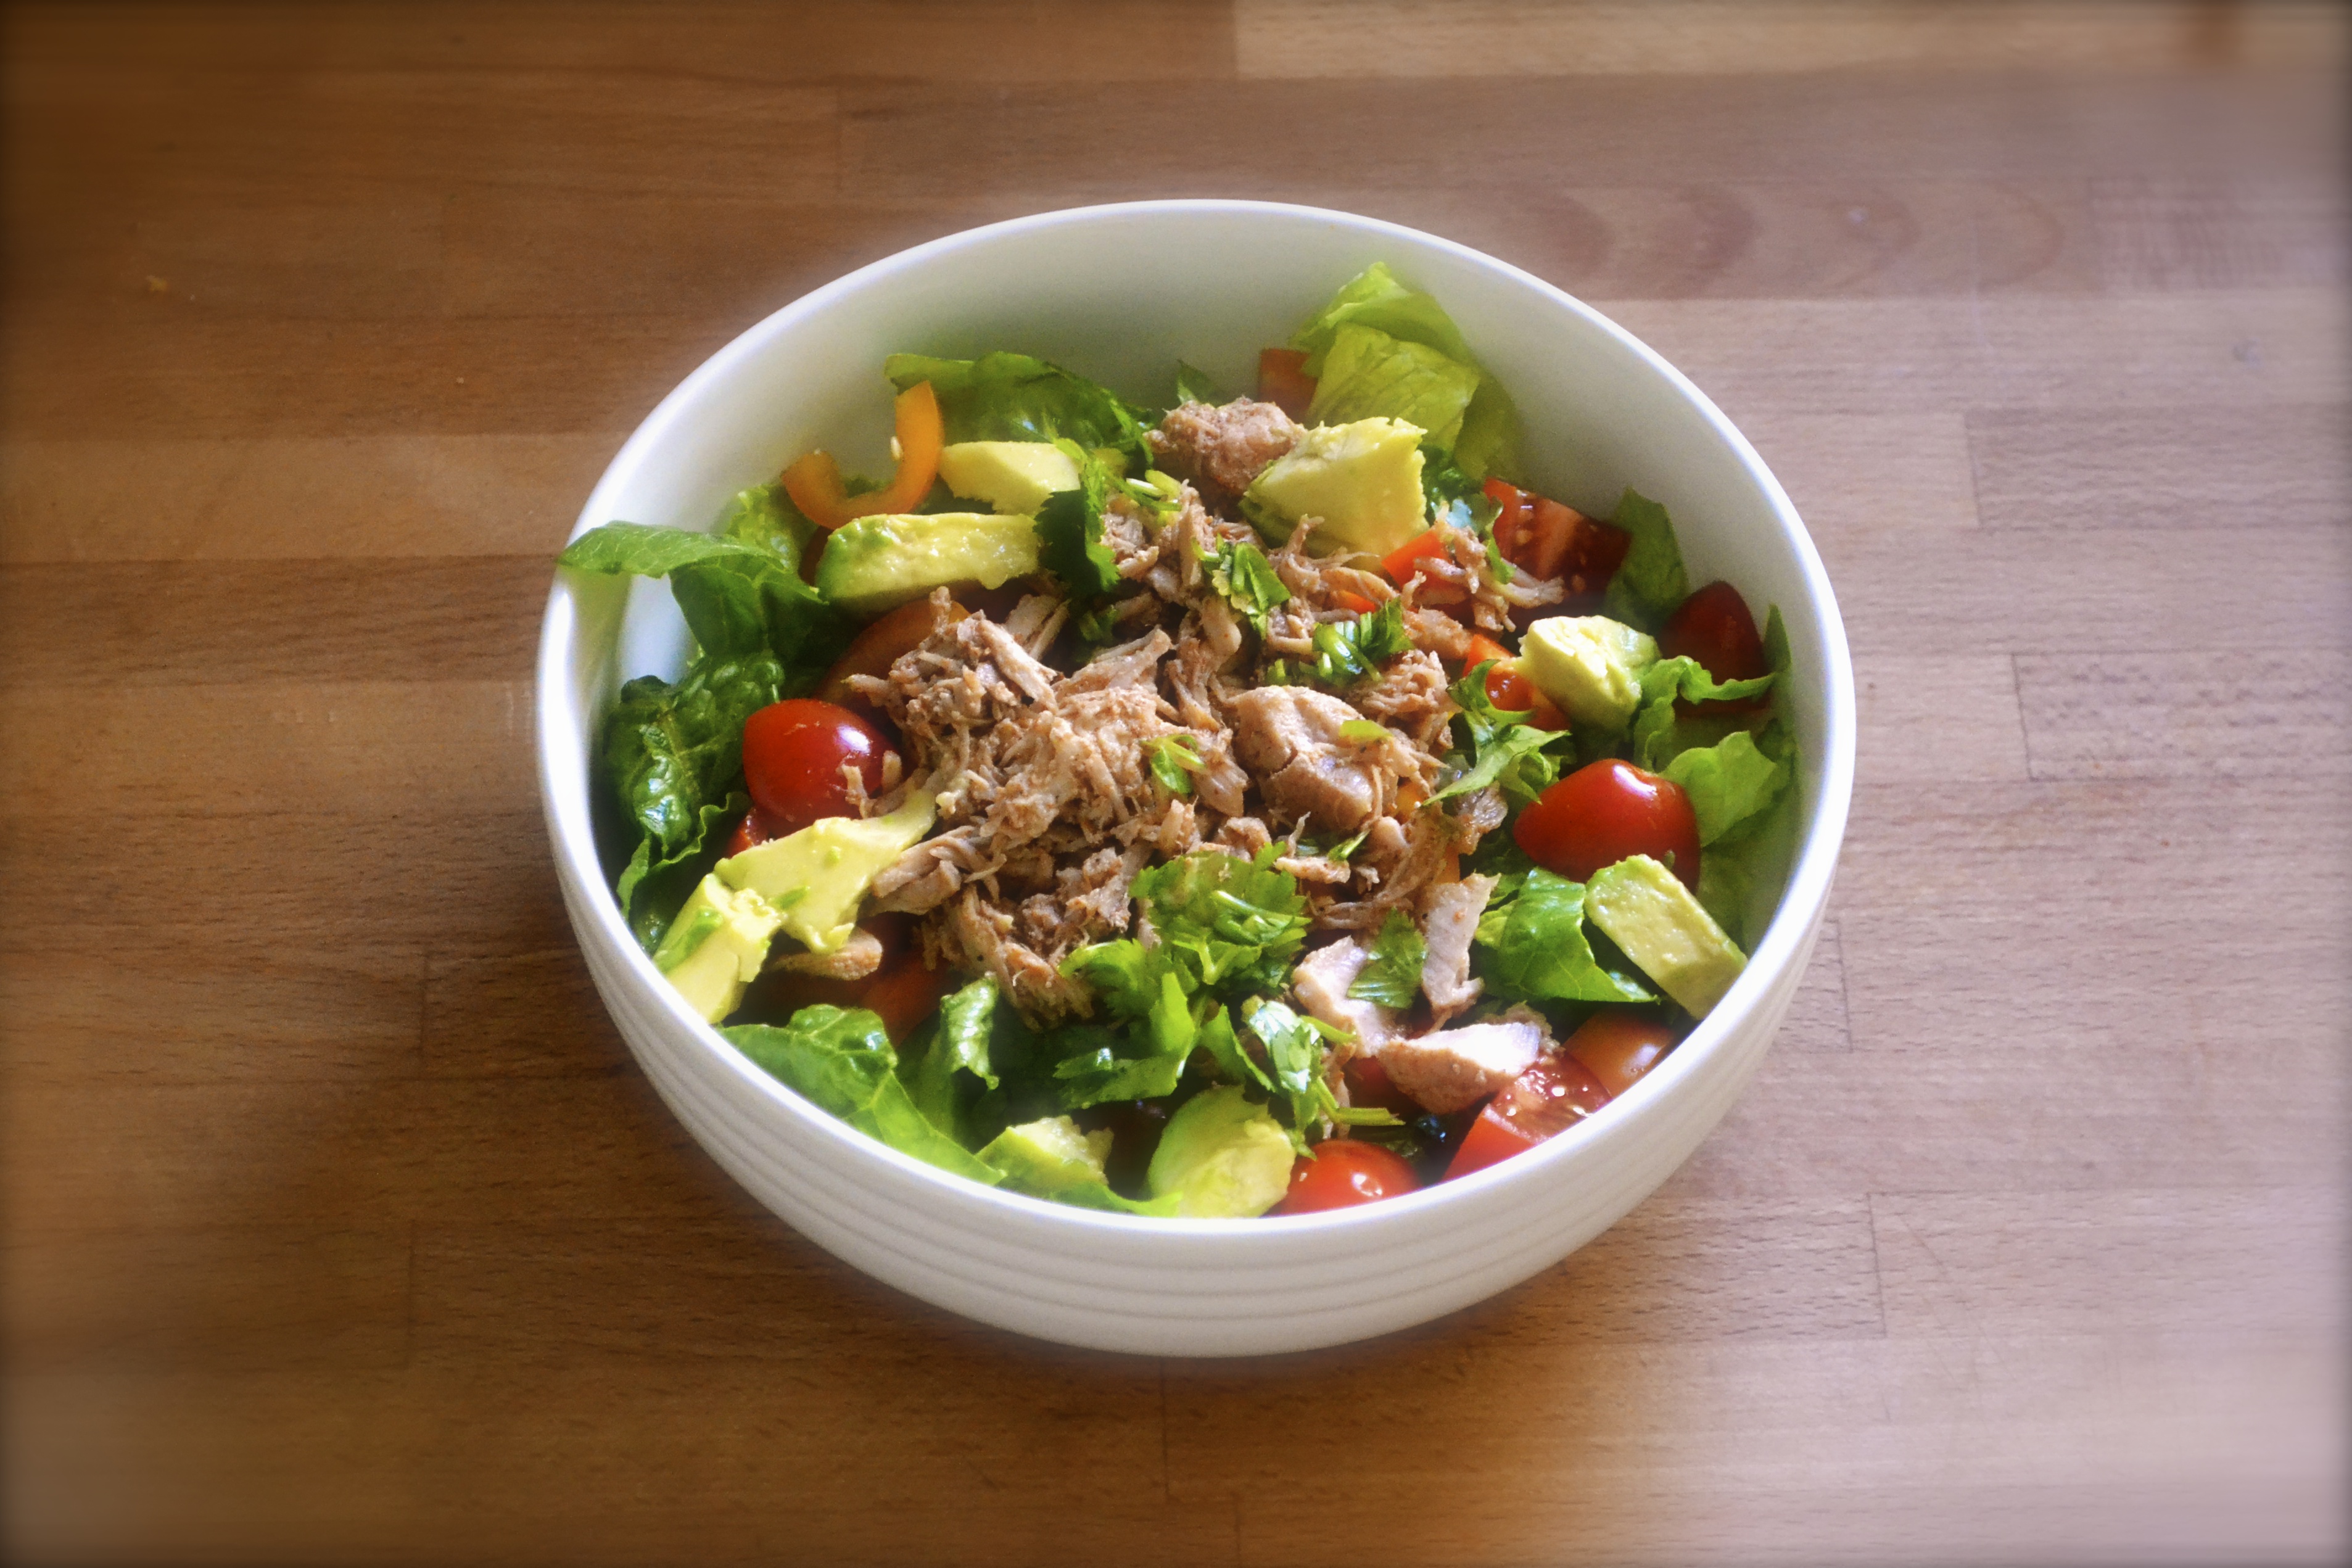
Want to please a crowd? Serve pulled pork. You’ll be a hero. They’ll write legends about you.  And even better…make it in your handy dandy crockpot.  Win win.  Throw in the roast in the morning…come home to drool-worthy smells.  It’s so versatile.  You can make tacos or taco salad bowls or bbq pulled pork or sliders or add it to chili or even mix it into scrambled eggs for breakfast. 

DSC_0249

DSC_0252

Even if you don’t need to feed a crowd, slow cooking a 4 to 5 lb pork roast will give you dinner options for the full week. Or call me and I’ll be over pronto for dinner. I’ll be your best friend. F-o-r-e-v-e-r!  Hear the crowd roar!  

You may be asking, “But carnitas typically have crisp edges!?!” “How do you get that in a slow cooker?” Oh honey… Easy Peasy!  Just before serving, finish the shredded pork roast under a broiler or high temp oven to get the crisp edges that we love so much.  Ya. This is a little trick that Cook’s Illustrated uses. Those people are geniuses!

You can even freeze the leftovers in small portions for later use.  Quick lunch or quick dinner options right at your awesome finger tips! You will never lose.  See…you are a hero!

DSC_0264

Slow Cooker Carnitas (Pulled Pork) 

Recipe adapted from Gimme Some Oven and Bon Appetit.

Serves 8 to 10

Ingredients

Slow Cooker Pulled Pork Ingredients:

  • 4 to 5 lbs boneless pork roast, cut into 2-inch pieces
  • 1 large white onion, diced
  • 1 Tablespoon chipotle powder (or 1 chipotle in adobo sauce)
  • 1 Tablespoon smoked paprika
  • 1 Tablespoon ground cumin
  • 1 teaspoon chili powder
  • 1 teaspoon dried oregano
  • 1 1/2 teaspoon salt
  • 1 teaspoon black pepper
  • 4 cloves garlic, minced
  • Juice of 2 limes (about 1/4 cup)
  • 1 cup of chicken broth (low sodium)

Instructions

  1. Toss pork in bowl of slow cooker with spices (chipotle powder through black pepper) to coat. Place onion pieces on top of cubed pork. Pour lime juice and chicken broth on top. Cover slow cooker.  Cook on low setting for 6 to 8 hours, or until meat is very tender and falling apart.
  2. Now for the crispy edges. Once the pork is cooked, preheat your broiler to high heat.  Line two baking sheets with aluminum foil. Set aside.
  3. Using a slotted spoon, transfer the pork from the slow cooker to a cutting board.   RESERVE THAT BROTH!!!! Use a fork or fingers to shred the pork into bite-sized pieces. Transfer the shredded pork to the prepared baking sheets, spreading it out evenly in a single layer.
  4. Broil one sheet at a time for about 5 minutes, or until the edges of the pork begin crisping up. Remove the sheet from the oven and use tongs to carefully toss the pork. Ladle some of the reserved broth (about 1/4 of a cup) over the pork. Return to the oven and broil an additional 5 minutes to finish the crisping processes.  Pull from oven. Repeat this process with the second pan.
  5. Transfer crisp carnitas to a platter and ladle more reserved juice on top.  For taco bowls, serve with avocado slices, cilantro sprigs, fresh lettuce, jalapeños, fresh salsa, and sliced red bell peppers, if desired.

Paleo Eggplant Lasagna

I’ll tell you a little secret.

The easiest way to get to my heart is to make me lasagna.

Yes, it is sad, but there is an expressway right to the center of my heart via layers of ricotta cheese, meat sauce, and ribbons of lasagna noodles.  I would eat it for breakfast, second breakfast, lunch, dinner, dessert…second dessert.

But alas, I have not had lasagna in so long.  My gluten sensitivity has slammed that door shut. Oh lasagna….*sigh* I miss you dearly.

DSC_0285

Growing up, my mom would make lasagna and homemade strawberry cake for my birthday.  It was a several hour affair.  Making the perfect lasagna is like building a log cabin.  There are so many steps, but it is so worth it in the end:

  • Boiling noodles;
  • Making the ricotta mixture;
  • Grating the mozzarella and parmesan cheese;
  • Making the fresh tomato and meat sauce;
  • Constructing the masterpiece;
  • Baking the amazing masterpiece for an hour;
  • THEN waaaaaaaaaaiting for it cool down!!!!!

UUUgh.  The roof of my mouth suffered many times from not being able to wait. But then…there it was. *Chorus Line Dancers* *Jazz Hands* “Ladies and Gents…I present to you….The Great Laaaasagnaaaaaa.” I dove head first into that big slice of layered heaven.  I always looked forward to that meal. Again…a moment of silence for my dear lasagna.

A few years ago, my husband surprised me with a homemade spinach lasagna for my birthday.  This man does not really cook…but he made it from scratch.  Oh it was delicious. It was comfort rolled up in layers of sauciness.  But that was the last time I had lasagna.  TWO YEARS.

DSC_0300

My birthday is at the end of the month and my innate need for lasagna has been getting strong.  I dream about it. I smell it in the air….in my car. I’m serious. I seriously started thinking that maybe I just smelled like lasagna?  Maybe I emit oregano and basil fumes.  I guess there are worse things to smell like.

Anyways, I decided to remedy my lasagna cravings by using strips of eggplant in place of the noodles.  I made an amazing and deliciously thick batch of meat sauce chunked with large pieces of mushrooms. Although there is no cheese or ricotta (blasphemy….I know…if you are a lasagna purist…please, turn your eyes), this cooked up to be layered, saucy, meaty heaven.  If you eat dairy, you could easily add a layer of cheese to this.

Slice the eggplant lengthwise in 1/4-inch thick slices. I prebaked my eggplant “noodles” in an oven at 375F for 10 minutes while I was making the sauce.  I haven’t tried making this without prebaking the eggplant. I’m sure it would work but would just require longer baking time once it is fully constructed.  After prebaking the eggplant slices and whipping up the meat sauce, the lasagna is ready to be BUILT!

  • Start with a layer of meat sauce in the bottom of a 9″ X 13″ baking dish.
  • Then place 3 to 4 slices of eggplant in a single layer across the bottom of the pan.
  • Add another portion of meat sauce,
  • Then add another layer of eggplant (stacking on top of the first layer).
  • Top the whole thing with the remaining sauce.
  • Bake at 375F for 25 to 30 minutes, or until bubbly and heated through.

Bonus features of my version of lasagna are that it takes a fraction of the time since there are no noodles to cook and no cheese to shred.  It also cooks in half the time. You could easily sub zucchini and/or yellow squash for the eggplant.

DSC_0281

Paleo Eggplant Lasagna (Grain Free, Gluten Free, Dairy Free)

Serves 6 to 8

Ingredients

  • 1 large globe eggplant, cut lengthwise into 8 1/4-inch slices
  • olive oil
  • 1 lb ground grass-fed beef
  • 1 medium onion, diced
  • 10 oz whole baby bella mushrooms, sliced
  • 4 to 6 cloves of garlic, minced
  • 2 15 oz cans of diced tomatoes (undrained)
  • 6 oz can of tomato paste
  • 1 tablespoon dried oregano
  • 1 tablespoon dried basil
  • 1 teaspoon dried thyme
  • 1 teaspoon kosher salt
  • 1/2 teaspoon ground black pepper
  • 1/4 cup fresh parsley (plus more for garnish)

Instructions

  1. Preheat oven to 375 F.  Spray two baking sheets with nonstick spray or line with parchment paper.  Set aside.
  2. Place eggplant pieces on prepared baking sheets in single layer. Brush both sides of eggplant slices with olive oil. Bake until eggplant slices are tender and beginning to brown, about 5 minutes per side. Watch closely and remove eggplant slices as needed if they are cooking too quickly or not long enough.   Remove baking sheets from oven and cool eggplant while preparing sauce. Eggplant can be roasted 1 day ahead and refrigerated.
  3. In a large sauce pan or pot, brown ground beef over medium heat.  Drain excess grease. Return pan to heat and add onion, garlic, and mushrooms.  Stirring frequently, brown and cook until onions and mushrooms are tender, about 5 to 10 minutes.  Add 2 cans of diced tomatoes with juice, tomato paste, oregano, basil, salt, pepper, and parsley.  Bring to a simmer. Allow to simmer for about 10 minutes, stirring frequently. Sauce can be made several days ahead and refrigerated.
  4. Spread 1/3 of the meat sauce (about 2 cups) in the bottom of a 9″ X 13″ glass pan.  Layer 4 slices of eggplant on top of the sauce.  Spread another 1 to 2 cups of sauce on top of the eggplant slices.  Arrange a second layer of eggplant slices directly on top of the first layer, stacking them. Spoon remaining sauce on top. This can be made 1 day ahead. Cover with foil and refrigerate until ready to cook.
  5. Bake eggplant lasagna until heated through, about 20 to 30 minutes if freshly made or 40 minutes if refrigerated. Serve hot topped with fresh parsley or basil.

*Nutritional Information (based on 8 total servings), 1 serving = 209 calories, 15 g carbohydrates, 11 grams fat, 15 grams protein

Flourless Brownie Bites (Grain Free)

Merry Christmas!

I hope you all are having a wonderful and cozy day.  My husband I made the trek from KC down to Oklahoma to visit my family.  My brother had back surgery a week ago and has been recovering.  It was wonderful getting to spend time with all of us together.

DSC_0282

We cooked, we ate, we laughed, we made our gingerbread house, and we watched christmas movies on repeat while my bro was horizontal in bed recovering. He’s getting around better and was able to eat dinner with us and walk around with his walker.

DSC_0301

We had to leave a day early because Oklahoma freaks out over the mere mention of a slight chance of snow. So thinking Snowmaggeddon is on its way, we had to make a mad dash up north to Kiley’s family’s house in Tulsa last night to try to miss this “massive” snow storm. We woke up this morning to clear skies and no snow. Womp womp.  But at least we are safe and sound in Tulsa with Kiley’s family now with the warmth of coffee and a fire in the fireplace.  We hope you and your families are warm, cozy, and enjoying time together and slowing down this season.

DSC_0324

I’m whipping up a batch of flourless bite-sized brownies. I love the tiny size for snacking.  There is no flour, only cocoa powder, melted chocolate, honey, eggs, and butter or coconut oil! They are super easy and can be topped with anything you have on hand. Yes…even bacon.  I topped some with bacon (it was a hit), some with crystallized ginger, others with toasted walnuts, and some with salted caramel (my fave). The recipe is inspired by the flourless brownies in my new favorite cookbook, Practical Paleo. The recipe is found below.

DSC_0302

Also, if you are looking for some last minute quick gluten-free recipes to make for Christmas dinner, I’ve gathered up a few of my favorites….

Gluten-Free Breakfast:

DSC_0173

Mexican Breakfast Casserole (Grain Free and Dairy Free)

Crustless Quiche (Grain Free and Dairy Free)

Pumpkin-Apple Muffins (Grain Free and Dairy Free)

German-Style Apple Walnut Pancake (Grain Free and Dairy Free)

Gluten-Free Appetizers:

DSC_0309

Spinach-Cheese Balls (Vegetarian and Grain Free)

Buffalo Chicken Meatballs (Grain Free and Dairy Free)

Nutty Coconut Date Balls (Vegetarian, Grain Free, and Dairy Free)

Gluten-Free Side Dishes:

DSC_0273

Kale Salad with Cranberries, Pecans, and Apples (Gluten Free and Vegan)

Roasted Cauliflower 

Grilled Delicata Squash with Kale (Gluten Free and Vegetarian)

Gluten-Free Desserts:

Ginger Chocolate Chip

Chewy Ginger Chocolate Chip Cookies (Gluten Free, Grain Free, and Dairy Free)

Fudge Brownies (Gluten Free and Vegan)

DSC_0334

Flourless Brownie Bites (adapted from Practical Paleo)

Makes 30 brownie bites

Ingredients

  • 4 ounces dark chocolate (I use 85% cocoa from Trader Joes), melted and cooled
  • 1/2 cup coconut oil or butter, melted and cooled
  • 1/2 cup honey or maple syrup
  • 1/2 cup unsweetened cocoa powder, sifted
  • 1 teaspoon vanilla extract
  • 3 eggs, beaten
  • 1/4 teaspoon salt
  • 1/4 teaspoon baking soda
  • Toppings or mix-ins: bacon, walnuts, crystallized ginger, caramel, unsweetened coconut, flaked salt

Instructions

  1. Preheat oven to 350F. Grease mini muffin tin with butter, coconut oil, or nonstick spray. Set aside.
  2. To melt the dark chocolate bar, break into small pieces and place in a microwave-safe bowl. Microwave on high at 30 second intervals, stirring in between, until the chocolate is melted. It takes me 2 minutes.
  3. In a medium-sized bowl, combine the melted dark chocolate, melted coconut oil (or butter), maple syrup, vanilla, and eggs. Slowly sift the cocoa powder over the wet ingredients, whisking it evenly to ensure there are no lumps. Stir in salt and baking soda.
  4. Spoon the brownie batter into the mini muffin tins (about 1 1/2 tablespoons per muffin tin), filling about 3/4ths full. Top the batter with the topping of your choice (chopped bacon pieces, walnuts, ginger, coconut, caramel pieces, kosher salt). Bake for 20 to 25 minutes, or until a toothpick inserted into the center comes out clean.

Crustless Quiche (Gluten Free and Dairy Free)

DSC_0193

Christmas morning we always eat QUICHE! THE great Christmas Quiche!  It’s a tradition.

We brew coffee, throw the great Christmas quiche in the oven, and unwrap presents. The quiche bakes and fills the house with wonderful smells.  Unfortunately, I can’t have the tasty pastry crust since I have a gluten sensitivity.  So…..we are going crustless.

DSC_0203

I found a few recipes for almond flour based crusts, which I have tried and love. But going crustless is uber eeeeazy peeeeazy and allows me to focus on what really matters…enjoying my family unwrapping presents!

You can throw this quiche together in the morning, or you can put it together the night before.  There are so many variations of this….add meat, add mushrooms, add other veggies that you have on hand.  The original recipe is adapted from my newest cookbook that my husband gave me, Practical Paleo.

Before we go any further, I have to tell you that I LOVE this cookbook.

If you are still trying to figure out what to get someone, this is an awesome gift for a anyone wanting to learn to cook with whole foods. The author, Diane Sanfilippo, also blogs at balanced bites. She gives a wonderful detailed approach on how to heal and treat certain allergies, digestive health, blood-sugar regulation, thyroid health, cancer recovery, auto immune disorders, migraines, hormone imbalances, etc. Her recipes are delicious, inspiring, and wholesome.

DSC_0205

This crustless quiche originally had zucchini and carrots. I used chopped spinach instead of zucchini. For Christmas, instead of throwing in raw spinach, I will saute the spinach with mushrooms and peppers before adding it eggs. Then I will throw it in the oven, grab a huge cup of coffee, and watch everyone unwrap their presents.

Crustless Quiche (Gluten Free and Dairy Free)

(adapted from Practical Paleo)

Serves 6 to 8

Ingredients

  • 12 eggs, beaten
  • 2 cups of spinach, chopped
  • 1 medium carrot, shredded
  • 1/2 teaspoon salt
  • 1/8 teaspoon ground sage (optional)

Instructions

  1. Preheat oven to 375F. Grease a 9X13 baking dish with either butter, coconut oil, or nonstick spray.  Set aside.
  2. Mix everything together in a large bowl. Pour into the prepared baking dish.  For the swirled effect, stir the mixture with a spoon or fork before baking.
  3. Bake for approximately 45 minutes or until a knife inserted in the middle comes out clean.

Gluten Free Buffalo Turkey Meatballs

I have to admit that I am really not that big of a fan of chicken wings. Don’t get me wrong, I love the flavor. It’s mainly the work that goes into gnawing on a bone for just a measly morsel of meat.  But, I also get why most guys like them…they feel like authentic cavemen. This is probably the same reason why they dig ribs too.  And turkey legs.

So what better way to get the meat AND the buffalo flavor without the mess? Meatballs. Buffalo Meatballs. These mini meatballs are perfect if you have a gaggle of people coming over at different times, because you can keep them warm and saucy in a crock pot.  They are an easy finger food and a HUGE hit!

I recommend using Frank’s hot sauce. It’s the best buffalo sauce that I’ve found. You can make these meatballs with either ground chicken or ground turkey.  However, I should note that ground chicken is a bit harder to form into balls. I used ground turkey in this recipe and found them to be easier to mold and deeeeelicious. Adding a tad bit of coconut milk to the buffalo sauce adds creaminess.  Don’t worry, it doesn’t impart a coconut flavor at all. But you could easily sub melted butter for the coconut milk, if you are into that sort of thing.

Gluten Free Buffalo Turkey Meatballs 

Makes about 70 mini meatballs

Ingredients

  • 2 lbs ground turkey (or chicken)
  • 1 large egg
  • 1/2 cup dried parsley
  • 1 Tablespoon smoked paprika
  • 1 teaspoon salt
  • 3 Tablespoons + 1/2 cup Frank’s hot sauce
  • 1 teaspoon garlic powder
  • 1/2 cup almond meal*
  • 1/4 cup coconut milk (or melted butter)

*Note – If you do not have almond meal, you can either use 1/4 cup of oat flour or 1/2 cup of bread crumbs.  However, these alternatives are not gluten-free, unless you use gluten-free oats and/or gluten-free bread crumbs.

Instructions

  1. Preheat the oven to 450F. Spray two 9X13-inch baking dishes with nonstick spray. Set aside.
  2. Combine the ground turkey, egg, 3 tablespoons of hot sauce, parsley, paprika, salt, garlic powder, and almond meal in a large mixing bowl and mix by hand until thoroughly incorporated.
  3. Roll the mixture into 3/4-inch round balls. Place the meatballs in the prepared baking dish.  Line them up carefully, keeping them in even rows vertically and horizontally to form a grid. The meatballs should be touching one another.
  4. Roast at 450F for 15 to 20 minutes, or until the meatballs are firm and cooked through. A meat thermometer should read 165°F in the center of the meatball.
  5. Carefully transfer the cooked meatballs into a warmed crock pot.  Add the remaining Frank’s hot sauce (1/2 cup) and coconut milk (or melted butter) to the crock pot. Toss to coat the meatballs. The meatballs are ready when the sauce is warmed or allow to cook on low until your guests arrive!

Nutty Coconut Date Balls

I love snacks. I would much rather eat several small meals than huge ones. Maybe because I loooove food and the thought of eating different types of food all day is quite a treat to me.

Also, being a runner, I get hunger pains and need a quick fix!  Eating my arm ain’t pretty, folks. You don’t want to see me get HANGRY.

This is basically my version of the coconut Lara bar.  These little balls are all over the food blogosphere, but I had never had a chance to make them until now.  For Food Matters Project Monday, Cheese Please chose Cheese-Nut Balls from Mark Bittman’s Food Matters Cookbook.  My hubby is dairy free, so I swapped out the cheese for dates and made individual snack bites.  These Nutty Coconut Date Balls are perfect little energy snack bites. The dates taste like caramel goodness with smacks of coconut.  Feel free to roll them into balls or press them into a sheet pan and cut them like bars. They make great travel food!

Coconut Pecan Date Balls

Ingredients

  • 1 cup dates, pitted
  • 3/4 cup chopped nuts (such as raw unsalted walnuts, pecans, macadamia nuts, almonds and/or cashews)
  • 1/2 cup shredded unsweetened coconut
  • 1/8 tsp sea salt
  • 1/8 tsp ground cinnamon

Instructions

  1. Add the dates one at a time through the feed tube of the food processor while it is running. The dates will turn into a date paste.
  2. Add the nuts. Process until the consistency appears like cake crumbs, but it will easily stick together when you press the mixture between your fingers.
  3. Add salt and coconut. Pulse until mixed.
  4. You can either make these into bars or balls. If making into balls, simply remove the blade from the food processor and take one tablespoon at a time of the mixture and roll it between your palms until a ball forms.  To make bars (like larabars), put the mixture into a shallow baking pan and press the mixture into it. Seal and store in an airtight container in the fridge until you are ready to serve it.   These will last up to 2 weeks in the fridge or longer in the freezer.

Raw Zucchini Salad with Sesame Ginger Sauce

This weekend was a bit tough for me to study. The fall air poured through our open windows. Every time I opened my book, other things called my name: the farmers market, flea market, the garden, zucchini bread, OU football, wine, lunch, wine, dinner, cleaning the bathroom, going for a 7 mile run, getting my toes painted, more wine, walking my dog, another glass of wine….are you seeing a pattern?  Maybe it was the wine that made it difficult? Naaaaaah.

While at the farmers market this weekend, we picked up a poop ton of sweet potatoes, zucchini, peaches, and apples!  So, when this week’s Food Matters Project recipe was Edamame Cakes with Soy Drizzle I decided to take this asian-inspired recipe to Zucchini Land and use up my new bounty of zucchini! This raw salad is uber easy, so fresh and quite beautiful too.  Use the shredder attachment of a food processor to make quick work of shredding up these veggies! Save those knuckles, people!

Note: Don’t add the sesame-ginger dressing until you are ready to serve the salad. The zucchini tends to “weep” and get soggy if it sits with the dressing on it for too long.

To see the original Food Matters Project recipe for Edamame Cakes with Soy Drizzle, check out Life with the Lushers. And be sure to see what the other bloggers came up with here.

Raw Zucchini Salad with Sesame Ginger Sauce

Serves 4 to 6 as a side

Raw Zucchini Salad Ingredients

  • 1 large zucchini, shredded (about 3 cups)
  • 1 red bell pepper, julienned
  • 1 carrot, shredded
  • 1 scallion, green and white parts chopped
  • 1/4 cup cilantro, chopped

Sesame-Ginger Sauce

  • 1 tablespoon coconut aminos or soy sauce
  • 1 tablespoon apple cider vinegar or rice wine vinegar
  • 1 teaspoon sesame oil
  • 1 teaspoon fresh grated ginger
  • 1 clove of garlic minced
  • juice of 1/2 fresh lime
  • salt and pepper to taste

Instructions

  1.  If you have a food processor with a shredding attachment, it will make shredding the zucchini and carrot a breeze. Place the shredded zucchini in a colander and allow to drain for about 30 minutes. Slice the red bell pepper really thin. Combine the zucchini, carrot, bell pepper, and cilantro in a medium bowl. Set aside.
  2. In a small bowl, mix sesame-ginger sauce ingredients and set aside.
  3. When you are ready to serve the salad, add the sesame-ginger sauce to the zucchini mixture. Season with salt and pepper. Serve immediately sprinkled with sesame seeds.

Cauliflower Tabbouleh

This is such a fresh and easy no cook salad and is inspired by the Food Matter’s Project.  I chose to use cauliflower that has been “riced” in a food processor instead of using the traditional bulgur.  Bulgur is a type of cracked wheat and is considered a whole grain. But in our recent quest to give up gluten, I used cauliflower as a stand in for grains and DAAAANG it’s good.  The fresh herbs and lemon make this a perky salad that is perfect for taking to a picnic, potluck, or for a labor day cookout!!!!!  Get on it.  Thanks to Sarah of Simply Whole Kitchen for choosing the Tabbouleh recipe for this week’s edition of Food Matters Project.  

So a small explanation on why we have gone gluten free….

For most of my husband’s life, he has been plagued with the worst seasonal allergies.  He should be the Bubble Boy. He was getting shots weekly until it became too costly, but then the weekly doses of Allergra D weren’t much cheaper either.  Migraines soon followed, nearly once a month…sometimes two or three a month.  They were debilitating and vomit-inducing. Appetizing, I know. 

Months ago, he eliminated grains and dairy from his diet, choosing a “paleo” life-style (only eating meat, vegetables, fruit, and nuts and eliminating grains, dairy, legumes).  Since going “primal”, I have been amazed at all the positive aspects.  His allergies? Vanished…his migraines? GONE. It was a miracle. His allergies were the result of inflammation caused by sensitivities to gluten, grains, and dairy.

Seeing his amazing transformation, I soon began to wonder if gluten was having an affect on me too.  I recently dived into gluten free living and have found that I feel a lot better when I do not consume wheat products.

Soooooooo, whether you have gluten sensitivities or not, I guarantee that you will enjoy this gluten and grain free tabbouleh salad during the final day of a great long weekend.

Cauliflower Tabbouleh (Grain Free)

Inspired by Roost and Mark Bittman

Serves 6 as a side dish

Ingredients

  • 1/2 head of cauliflower, discard stalk and dice florets into 1/2-inch pieces
  • 1/2 cup fresh parsley
  • 1/4 cup fresh mint
  • 1 to 2 cups of kale
  • 2 Tablespoons fresh lemon juice
  • 1 Tablespoon olive oil
  • 2 scallions, green and white parts diced
  • 1/2 cup diced sweet bell pepper (1/4-inch pieces)
  • 1/2 cup diced fresh tomatoes
  • 1/2 cup diced cucumber
  • 1/4 to 1/2 teaspoon salt (to taste)
  • fresh cracked pepper

Instructions

  1. Get out your food processor…don’t have one? I recommend investing in a good one because mine is my best friend! Sorry Guinness. Cut the cauliflower into 1/2-inch to 1/4 inch pieces before adding to the food processor.  Add diced cauliflower to food processor bowl. Pulse until the cauliflower resembles rice. Scrape the “riced” cauliflower into a medium bowl and set aside.  May need to do this in batches to ensure that all of the cauliflower is evenly “riced”.
  2. In the bowl of the food processor (no need to clean out) add packed parsley, mint, kale leaves, lemon juice, and olive oil. Process for about 1 minute. Add herb mix to the riced cauliflower. Gently stir to incorporate.
  3. Add the remaining ingredients (tomatoes, cucumbers, diced peppers, scallions) to the cauliflower-herb mixture. Gently stir to combine. Season with salt and pepper to taste.

Marinated Fig and Spinach Salad

I was a fig virgin a year ago….a fresh fig virgin. Mr Newton destroyed figs in my opinion. Those weird “cookies” were the only sweets in my house when I was young and I stayed waaaaaaaay away from them. Looking back, I guess that was a good thing. So maybe I should thank Mr Newton and my mom. Only having access to those piss poor “cookies” curbed my sweet tooth, that’s for sure.

Late last summer, I noticed fresh figs at the store.  They popped up like a secret and without any warning. My curiosity got the best of me and I brought home a small basket of fresh figs, unsure what to expect.  Cutting into that dark flesh revealed such a surprise. The lush pink center of a fresh cut fig is so beautiful. I ate the whole basket in one day.  I went back…bought more and brought them to anyone and everyone I could. I was a fig prophet. I wanted to yell from the rooftops and spread the word. “Behold…the FIG. It will save your life.” I couldn’t believe that I had been blind to this fruit in its raw form for 30 years.

Although dried figs are available in stores year round, fresh figs are available in late summer.  There are numerous varieties with the Black Mission fig being one of the more common varieties found in stores.  Each variety differs in color and texture.  They are a great source of potassium (helps regulate blood pressure), calcium, and fiber!  So if you can get your hands on some fresh figs right now…do it. Profess the amazingness of figs. Eat them fresh and feel like royalty. Bake them and feel indulgent!

This past week I was lucky enough to get my hungry paws on a FLAT OF FIGS!!!!  After gorging myself on plain raw figs, I marinated a few and added them to this amazing spinach salad.  Although I loved the added flavor of the marinated figs, this salad would be fabulous with just the fresh figs and the balsamic-dijon dressing drizzled on top.

Ooooh…and a side note, the balsamic-dijon marinade/dressing is prime!  I whip up an extra large batch and store it in a ball jam-size jar with a lid and take it to work with me for my lunch salads.  Addictive! It’s also good drizzled on sautéed mushrooms and baked chicken.

Hope everyone has a great Labor Day weekend!!!!

Marinated Fig and Spinach Salad

Serves 2

Ingredients

  • 1/4 cup of balsamic vinegar
  • 1 teaspoon of dijon mustard
  • dash of salt
  • 1/4 cup of olive oil
  • 6 fresh figs, stems removed and quartered
  • 4 handfuls of fresh spinach
  • 2 tablespoon of toasted walnuts, coarsely chopped
  • crumbled goat cheese (optional)
  • fresh cracked pepper

Instructions

  1. Mix vinegar, dijon mustard, and salt in a small bowl.  Add olive oil, whisking constantly. Add figs and stir gently. Allow to marinate for about 10 to 20 minutes while you are preparing other things.
  2. Divide spinach between two bowls. Place figs on top of spinach and drizzle with marinade. Top each bowl with 1/2 tablespoon of walnuts and fresh cracked pepper. Sprinkle with crumbled goat cheese, if that’s yo thang.

Basil Chicken Stir Fry

Life.

It is something that we are all given.  With that life, we make choices. With those choices, we affect our life but more importantly, we affect the lives of others.

This weekend was a hard one. My husband’s family suffered a great loss. An unexpected loss at that. Times like these reaffirm my belief that we should always let people know how much they mean to us.

After such a long weekend out of town, we arrived home this afternoon and I was hungry for fresh vegetables. A basic stir fry is the easiest way to use up whatever vegetables you have lingering in your fridge. Feel free to sub any fresh or frozen vegetables that you may have around or in the garden.

Stir Fry Tip Numero Uno – Cut all your veggies up in advance and have everything prepped and ready to go.

Stir Fry Tip Numero Dos – Have a good stir fry sauce recipe.

I have also included my basic stir fry sauce recipe which is adapted from the Moosewood Cookbook. Because we have recently given up soy products, I used coconut aminos in place of soy sauce.  It is available at any natural food grocer or online. This recipe would also taste great with coconut milk and curry. Mmmm.

For other stir fry ideas, check out the Food Matters Project here.

Basil Chicken Stir Fry

Serves 4

Basic Stir Fry Sauce:

  • 1/4 cup raw coconut aminos (or soy sauce)
  • 1/4 water
  • 1 teaspoon sesame oil
  • 1 tablespoon fresh ginger, grated
  • 2 to 3 cloves of garlic, minced
  • 1 tablespoon fresh lime juice

Basil Chicken Stir Fry Ingredients:

  • 2 to 3 tablespoons coconut oil (or grapeseed oil)
  • 1 lb chicken breast or thighs, cut into 1/2-inch pieces
  • 1/2 medium-sized onion, chopped
  • 1/4 teaspoon salt
  • 4 cups of vegetables: bell peppers (cut into 1/4-inch strips),  carrot (cut into thin slices), mushrooms (sliced), kale (chopped), spinach, green beans, cauliflower, cabbage, tomatoes, broccoli, etc.
  • 1/8 teaspoon red pepper flakes (or more depending on desired spiciness)
  • 1/3 cup fresh basil, sliced (plus more for topping)
  • sesame seeds (optional)

Instructions

  • Combine stir fry sauce ingredients in a small bowl and set aside.
  • Over medium heat, heat 1 tablespoon of coconut oil in a large skillet. Place diced chicken in skillet with half of the stir fry sauce. Cook until browned and cooked through (about 10 minutes). Stir frequently. When cooked through, remove chicken from skillet and place in a separate bowl.
  • In same skillet that the chicken just was removed from, add another tablespoon of coconut oil. Allow to melt (30 seconds). Turn heat to medium-high. Add onions and salt and stir fry for about 2 minutes.
  • Add all other vegetables except leafy greens (spinach, kale, chard) and tomatoes. Stir fry until they begin to get tender. Add tomatoes, leafy greens, and the remaining stir fry sauce to the skillet. Keep the heat medium-high. Stir frequently. The sauce will begin to thicken.
  • Add chicken, red pepper flakes, and basil. Stir until heated through and incorporated. Remove from heat. Top with additional basil and sesame seeds.