Tuna Salad

It has been a very busy week. I went back home to Oklahoma for five days to visit my family. It was a wonderful visit but has left me tired and unable to post this weeks recipe from the Food Matters Project, Cassoulet with Lots of  Veggies, chosen by Keely Marie. Don’t forget to check out the other food bloggers versions here.  I will return next monday with another great FMP recipe.

Instead I present you with an easy tuna salad recipe that I made for a quick lunch since I had nothing else in my cabinets except for a can of tuna and some random salad fixins in the fridge. This is fresh and a great lunch packed with protein. Don’t bother weighing yourself down with processed breads which will only leave you feeling tired in the afternoon.

Tuna Salad

Serves 2

Ingredients 

  • 1 can of dolphin-free, water-packed, low sodium tuna (6 oz)
  • 2 tablespoons of greek yogurt
  • 1/2 cup diced red bell peppers, divided
  • 1/4 cup diced celery
  • 1 green onion, white and green parts
  • 1 tablespoon lemon juice
  • fresh black pepper to taste
  • 4 cups of fresh spinach, rinsed and drained
  • diced veggies (carrot, tomato, cucumber, etc)
  • 2 teaspoons olive oil, divided
  • 1 tablespoon fresh parsley or cilantro, chopped
  • sunflower seeds

Instructions

  1. Mix tuna, greek yogurt, 1/4 cup bell pepper, celery, onion, lemon juice in a medium bowl. Add black pepper to taste.  Set aside or in the refridgerator until you are ready to assemble the salads.
  2. In two bowls, arrange the spinach, remaining 1/4 cup diced bell pepper, and other vegetables that you have on hand. Divide the tuna mixture and place half of it in each bowl on top of the spinach salad.
  3. Drizzle 1 teaspoon of olive oil on each salad. Sprinkle with fresh parsley or cilantro. Top with about 1 teaspoon of sunflower seeds on each salad.
  4. Chow down!

Coq au Vin with Vegetables

It’s Monday and another edition of the Food Matters Project.  I’m a little late in my post, but it has been hard to get behind the stove and cook when it is soooo gorgeous outside. We had nearly six days of straight drab and dreary rain and then the sun popped out this weekend in full spring fashion.  It was grill action time!

Unfortunately, that means I put off my Vegetables au Vin with Coq recipe from the FMP. It was chosen by Evi + Sam of the Fifth Floor Kitchen blog. It is the chicken and veggie version of Julia Child’s Beef Bourginogn, my ALL TIME FAVORITE INDULGENCE DISH. Although I love love love that dish, it takes a friggen lifetime to make.

Mark Bittman’s Vegetables au Vin with Coq takes a fraction of that time, clocking in at 40 minutes to an hour. In his recipe, he uses eggplants, mushrooms, onions, and green beans along with chicken and braised in a red wine sauce. I love recipes that allow me to drink while I cook.

My version uses a whole organic farm raised chicken ($2.50 to $3.50 per pound) which is cheaper than buying organic chicken breasts ($6 to $7 per pound). Use a good pair of kitchen shears to cut the bird up into 4 pieces (breasts and thighs). Save the wings, neck, back, and other parts to use in making homemade chicken stock by throwing those parts in a crockpot, filling with water, adding some carrots or celery for extra flave, and turning on low to cook overnight. Bam…homemade stock.

Instead of eggplant, I stuck with carrots, celery, mushroom, onions, green beans, and spring peas. Because green beans and spring peas do not take long to cook, I add them at the very end so that they aren’t mushy. Use a fruity wine, such as Pinot Noir.

Coq a Vin with Vegetables (adapted from Mark Bittman’s Food Matters Cookbook)

Ingredients

  • 2 tablespoon of olive oil
  • 1 whole chicken, cut into 4 pieces
  • 1 onion, chopped
  • 1 lb baby bella mushrooms, roughly chopped
  • 2 celery stalks, chopped
  • 2 medium carrots, chopped
  • 3 garlic cloves, minced
  • 2 cups chicken stock (preferable homemade)
  • 2 cups fruity red wine (such as pinot noir)
  • 2 bay leaves
  • 1 tablespoon fresh thyme, chopped
  • 2 tablespoon fresh parsley, chopped
  • 1 tablespoon sweet cream organic butter
  • 1 teaspoon fresh cracked pepper
  • 1 lb frozen green beans
  • 1 cup of frozen green peas

Instructions

  1. In a Dutch oven or large pot, add 1 tablespoon of olive oil and heat over medium-high heat. Add the chicken, turning and rotating as necessary. Once all sides are browned, remove the chicken from the pan.
  2. Add the rest of the olive oil, onions, carrots, celery, and mushrooms. Cook the vegetables for about 15 minutes, stirring occasionally, until they being to turn brown. Stir in the garlic and sauté for 1 to 2 minutes.
  3. Add the stock, wine, bay leaves, and herbs. At this time, return the chicken to the pot. Bring the liquid to a boil, then lower the temperature and allow it to cook for about 20 minutes. The chicken should be cooked through at this point, if not, cook for another 5-10 minutes.
  4. Remove the chicken from the pan and add butter to the liquid. Allow it to cook until it is reduced by half, and becomes saucy and thick. Add the green beans and peas. Cook for about 5 minutes. Sprinkle in pepper, or any additional salt. Remove the bay leaves.
  5. If you’re making this dish ahead, refrigerate it at this point. If you’ll be eating it soon (or when you’re reheating), then add the chicken back into the pot and allow to warm up for about 5 minutes. Garnish the dish with parsley when serving.

Kale Salad with Garlic Tahini Dressing

Lately, I can’t get enough of kale salad. It’s crunchy. It’s flavorful. It’s a party in the mouth.

This kale salad is topped with an awesome tahini dressing. The recipe is based on a salad that is featured at the Whole Foods salad bar. A friend shared their recipe with me and I have made this salad for three nights in a row now. And may or may not have licked the bowl….and dreamed about this salad….and then ate it at midnight. OK, I have a problem. I know. Don’t judge.

This salad will totally make up for the fact that I also hoovered a rack of ribs, right?

If you can, mix the kale and the dressing together and allow to sit for an hour or two before serving.

Kale Salad with Garlic Tahini Dressing

Ingredients

  • 3 cups of kale, ribs removed and torn into 1-inch pieces
  • 1 tablespoon of tahini paste (sesame seed paste)
  • 1 tablespoon of soy sauce
  • 1 tablespoon of apple cider vinegar
  • 2 tablespoons of lemon juice
  • 1 clove of garlic, minced and mashed
  • 1 teaspoon of good olive oil
  • 2 tablespoons of cilantro, chopped

Instructions

  1. Wash and remove center ribs from kale. Tear into pieces and place in a large bowl.
  2. In a small bowl, add tahini paste through olive oil. Mix until well blended.
  3. Pour dressing over kale and massage into kale. Let sit for at least 30 minutes and up to 3 hours.  Mix before serving. Sprinkle cilantro on top.  Eating this with an avocado on the side makes a perfect lunch.

Fruit-on-Bottom Yogurt Cups

I’m a snacker. I love to snack throughout the day, eating one snack around 10am and another one around 3pm.  Snacking keeps my blood sugar in check and also keeps me from eating everything in sight once I get home.  One of my favorite snacks is yogurt!

Prepackaged yogurt cups have a lot of added sugar and preservatives. You can save money and have a tastier treat by making your own. I buy organic plain yogurt. Plain greek yogurt is also a great alternative which has over twice the protein as plain yogurt and is ultra creamy. Buying bulk plain yogurt is a lot cheaper and you can keep it on hand to use in other recipes (as an alternative to sour cream in dips, on tacos).

Fruit-on-Bottom Yogurt Cups

Ingredients

Organic plain yogurt (greek style, whole fat, or low fat)

Yogurt Option Add-ins:

  • unsweetened applesauce (add a dash of cinnamon for a kick)
  • 1/4 cup fruit (blueberry, strawberry, blackberry, peaches, whatever you have), frozen or fresh
  • 1 teaspoon no added sugar fruit preserves
  • dried fruit (cranberries, figs, apples, apricots)
  • vanilla extract
  • fresh sliced or chopped nuts (almonds, walnuts, pecans, etc)

Instructions

  1. If using frozen fruit, thaw in the microwave for 15 to 30 seconds. Add fruit, preserves, or applesauce  (or combination of these ingredients) to the bottom of a container.
  2. Add 1/2 cup to 1 cup of plain yogurt. Top with a sprinkle of nuts, vanilla extract, or dried cranberries.

Curried Tomato and Sweet Potato Soup

It is SPRING! Hope you had a great weekend.

Happy Food Matters Monday. Today’s fabulous recipe is brought to you by the FMP project. The original recipe, Curried Tomato Soup with Hard Boiled Eggs, was chosen by Joanne of Eats Well With Others. This is a simple and delicious version of tomato soup.

Although tomatoes are definitely not in season right now, I luckily still had two mason jars of canned tomatoes in my cellar that I had canned this past summer.  You can easily substitute regular canned tomatoes.

The original recipe called for 3 cups of tomatoes, 2 potatoes, cauliflower, and hard boiled eggs.  Sorry, but the hard boiled eggs on top of a soup kind of freaked me out. If you want to give it a go, try it. I tried to poach an egg in the soup, and it turned out ok. But I probably wouldn’t do it again…but that’s just me.

My version has sweet potatoes that I had stored from the market and a mix of kale and swiss chard from my garden.  This just goes to show you how versatile this recipe, and most recipes, are. You can substitute whatever you have on hand or whatever is in season for most vegetables.

Curry powder and sweet potatoes are a match made in heaven!

Adding coconut milk gives his soup added creaminess.

I also pureed the soup using an immersion or hand blender which makes this soup ever more creamier. You can leave it chunky, if you prefer.

You could also reduce the amount of water in the recipe (use 1 cup instead of 3) and serve this over basmati rice!

Curried Tomato and Sweet Potato Soup (Adapted from Mark Bittman’s Food Matters Cookbook)

Time: 30 minutes

Serves: 4

Ingredients:

  • 2 tablespoons coconut oil (or vegetable oil)
  • 1 medium onion, diced
  • 1 garlic clove, minced
  • 1/2 teaspoon ground ginger (or 1 tablespoon of fresh grated ginger)
  • 2 tablespoons of curry powder
  • 1 teaspoon ground cumin
  • 1/2 teaspoon red pepper flakes
  • 1/2 teaspoon honey
  • 2 sweet potatoes, peeled and diced
  • 1 medium carrot, diced
  • 1 cup lite coconut milk
  • 3 cups vegetable broth or water
  • 3 cups of diced tomatoes (2 cans) with juice
  • 1 bunch of kale (1 to 2 cups), ribs removed and sliced in 1 inch ribbons
  • 4 tablespoons of chopped cilantro
  • salt and pepper to taste

Ingredients:

  1. Heat coconut oil in a heavy dutch oven over medium-high heat until melted. Add onions and cook for 3 to 5 minutes or until onions are translucent. Add garlic, ginger, curry powder, cumin, and red pepper flakes. Cook for an addition 1 minute or until spices become fragrant.
  2. Add diced sweet potatoes and carrot. Stir and cook for 2 minutes, coating potatoes.
  3. Add coconut milk, vegetable broth (or water), and diced tomatoes with juice. Bring to a boil. Lower heat and simmer with lid on pot for 15 to 20 minutes or until potatoes are tender.
  4. Use an immersion blender (hand blender) or a regular blender (or food processor) to puree most of the soup. If using an immersion blender, place the immersion blender into the pot and puree the soup until your get the desired consistency. If you are using a regular blender, remove a few cups at a time and puree in batches. Be careful to not splatter the hot soup. Add the pureed soup back to the pot.
  5. Add kale and cook over medium-low heat for an additional 5 to 10 minutes or until kale is tender. Add salt and pepper to taste.
  6. Ladle into 4 bowls. Top with chopped cilantro.

Sloppy Joes

I love hugs. Nothing is better than a hug when you feel alone, or scared, or stressed. I wish I could bottle hugs…sounds goofy, but it would be a best seller.  You’d buy one, right?   

Like handshakes, hugging can also be done incorrectly. The back pat…what is that! Some people are born huggers….their arms swallow you and pull you in.  With a hug, they show you how much you mean to them. 

To me, a good Sloppy Joe is like an awesome bear hug. The canned variety…well that’s a back pat…bleh.  

This Sloppy Joe recipe is adapted from Ellie Krieger. It was one of the first things that my husband started cooking for me after we got married. It is sweetened with molasses, spiced with jalapenos, and veggie-chunked with bell peppers and beans. Yes Beans. This is definite cowboy food.

They are so harty that we usually eat these puppies open faced with a fork. 

Ya Ya Ya, I know. What fun is it to eat it with a fork, you say. Well take it from me, I can’t eat ANYTHING without it ending up in my lap, hair, and behind my knees (weird, I know). So I must resort to a fork to keep from ruining ALL of my clothes. Or I  should just wear a bib.

Ok. I’ll wear a bib even when I use a fork. Don’t judge!

 Sloppy Joes  (adapted from Ellie Krieger)

Notes: The ingredient list looks long, but don’t get overwhelmed. It is super easy and the ingredients are located in your cupboard or fridge.

Makes: 4 servings

Prep/Cook Time: 30 minutes

Ingredients

  • 1 pound ground beef
  • 1 onion, diced
  • 1 bell pepper (any color that you have…I prefer yellow or red), diced
  • 1 jalepeno, diced (deseed if you are making this for kids or non-cowboys)
  • 3 cloves of garlic, minced
  • 1 6 oz can of tomato paste
  • 2 cups of water
  • 1 tablespoon molasses
  • 1 tablespoon worcestershire sauce
  • 1 tablespoon dijon mustard (or 1 teaspoon of mustard powder)
  • 1 tablespoon red wine vinegar
  • 2 cups (or one 15 oz can) of black beans or kidney beans
  • 3/4 teaspoon salt (or to taste)
  • 1/4 teaspoon ground black pepper
  • 4 whole wheat hamburger buns or whole grain bread

Instructions

  1. Brown ground beef in skillet over medium heat until no longer pink. Drain any grease from pan.
  2. Add onions, pepper, and jalapeño and cook until onions are translucent. Add minced garlic and cook for an additional minute.
  3. Mix tomato paste, water, molasses, worcestershire sauce, dijon mustard, and red wine vinegar in a small bowl until combined. Add to the skillet with the ground beef mixture. Simmer over medium-low heat for 10 minutes.
  4. Add beans, salt, and pepper. Heat until beans are warmed through, about 5 minutes. Remove from heat.
  5. Serve over whole wheat hamburger buns.

Warm Hummus Dip with Sweet Potato Chips

Today, I am going to share some recipes that are big money savers and healthy.  You will learn to cook dried beans, prepare a dip from those beans, and make sweet potato chips (from scratch) to transport that bean dip to your mouth.  This is, of course, Food Matters Monday and the main recipe (warm hummus) is brought to you by the Food Matters Project.

Number 1COOK BEANS FROM SCRATCH. Seriously. Easy and cheap. Yes, canned beans are cheap anyways, but cooking your own is cheaper, tastier, and healthier (no added salt and BPA from cans). One pound of dried beans (about 2.5 cups) will make over 6 cups of cooked beans. One pound of dried beans costs the same as one can (less than 2 cups) of beans.  Rinse and pick through 1 pound of dried beans (any variety), removing rocks and bad beans. Soak the beans overnight (at least 8 hours). Drain and rins, refilling the crockpot with the soaked beans and water (no salt) until the water is about 1 inch over the beans.  Cook in your crockpot on low all day while you are at work (8 to 10 hours).  Now, you will have a crap ton of beans. Separate the beans in freezer safe ziplock bags, placing 2 cup portions in each bag. Freeze. Pull them out when you need them in a dish, soup, or dip.

Number 2MAKE YOUR OWN HUMMUS. Stop buying store bought dips. Now. After you have made your own huge pot of garbanzo beans following the directions above, throw three cups of those beans, some of the cooking liquid, two heaping tablespoons of tahini (sesame paste), two tablespoons of olive oil, salt to taste, and several tablespoons of lemon juice into a food processor and whirl until smooth. Done. Hummus can be served both warm or cold. Really. Try it warm. You’ll dig it.

Hummus can be spiced a meriad of ways: roasted garlic, basil, roasted red peppers, curry powder…. I chose to separate my hummus into two dishes, adding smoked paprika to one batch and siracha garlic chili paste to the other. Following Mark Bittman’s recommendations in “Hummus Served Hot”, I warmed the paprika hummus over the stove for a new spin. I loved the creaminess that it added.

Number 3MAKE YOUR OWN CHIPS. I chose to do some sweet potato chips, seasoned with cumin, smoked paprika, and sea salt. So so so so addictive and delicious. They were great alone or dipped in the hummus. It is best to have a mandoline slicer to slice your vegetable about 1/8 inch thick. Also, another tip, keep the chips in a single layer on the baking sheet to keep them from getting soggy. They will crisp up much better when they are not crowded (speaking from experience).

So, branch out and try to make these things from scratch. Best treat in the world. You deserve it.

Check out Naturally Ella for the featured FMP recipe of Hummus Served Hot. Also, don’t forget to stop by the FMP website to see the other delicious spins on this recipe. Have a great Monday!

Warm Hummus Dip with Sweet Potato Chips (adapted from Mark Bittman’s The Food Matters Cookbook)

Hummus Ingredients

  • 3 cups of garbanzo beans (chickpeas)
  • 1/4 cup of reserved cooking liquid from beans (or water)
  • 2 heaping tablespoons of tahini (sesame paste)
  • 2 tablespoons of olive oil
  • 3 tablespoons of lemon juice
  • 1/2 to 3/4 teaspoon of sea salt

Hummus Instructions:

  1. Combine all ingredients in food processor. Process until smooth. Add salt to taste.
  2. Optional mix ins: Saute garlic in olive oil and add garlic-flavored olive oil. Add 1/2 tablespoon smoked paprika.

Sweet Potato Chips Ingredients:

  • 2 sweet potatoes, peeled and sliced on a mandolin slicer 1/8 inch thick
  • 1 tablespoon olive oil
  • 1/4 teaspoon smoked paprika
  • 1/8 teaspoon cumin
  • 1/8 teaspoon cayenne (optional)
  • 1 teaspoon of salt

Sweet Potato Chips Instructions:

  1. Preheat oven to 400 F.
  2. Combine sliced sweet potatoes and remaining ingredients in a medium bowl. Toss until all are covered with seasonings and olive oil.
  3. Place sweet potato chips in a single layer on two nonstick baking sheets, lined with parchment paper or sprayed with nonstick spray.
  4. Place on middle and top racks. Cook for 25 minutes, rotating sheets half way through cooking process.
  5. Remove from oven and allow to cool for 5 minutes. Sprinkle with salt, if necessary.

Salmon Patties with Cilantro-Lime Sauce

The weather can’t quite decide what it wants to do….warm, cold, warm….snow. And sometimes, this change occurs all in one day.  Sometimes I feel just as spastic as the weather. Unable to decide what to do, what to wear, what to cook….what type of apples to buy. Too many choices just clogs my brain up. Going into the bulk bin isle of Whole Foods is overwhelming to me. So many different types of beans, flours, sugars, grains, nuts, and snacks.

Sometimes it is best to keep things simple. So, in an attempt for simplicity, I present these salmon patties. Simple. Fresh. Quick. Healthy.

Using canned wild salmon makes these uber easy.  If you don’t have oat bran on hand, you can whirl some oatmeal in a food processor or use bread crumbs. Mix all the ingredients in a medium bowl, form into small palm-sized patties, and sauté in a grill pan for about 3 to 4 minutes on each side. Done!

I also whipped up a greek yogurt sauce with cilantro and lime to serve on the side. But these salmon patties are so flavorful and fresh tasting that you really don’t need the sauce.

Salmon Patties with Cilantro-Lime Sauce

Makes: 2 servings

Prep/Cook Time: 15 minutes

Salmon Patty Ingredients

  • 1 (6 oz) can of canned wild salmon, drained and flaked
  • 1 scallion, thinly sliced (1 teaspoon of green parts set aside)
  • 1/4 cup of diced sweet red bell pepper (optional)
  • 1 tablespoon fresh cilantro or parsley, chopped
  • 1 egg white
  • 1 tablespoon lemon juice
  • 2 to 3 tablespoons oat bran (or oatmeal that has been processed into a fine meal from a food processor)
  • 1/8 teaspoon each of salt and pepper
  • sesame seeds (optional)

Cilantro-Lime Sauce Ingredients

  • 1/2 cup of plain greek yogurt
  • 1 tablespoon fresh cilantro
  • 1 teaspoon of reserved sliced scallion (green parts)
  • 2 teaspoons lime juice
  • pinch of salt

Instructions – Salmon Patties

  1. In medium bowl, combine all salmon patty ingredients (salmon through pepper). Stir. If mixture is too wet, then add additional oat bran.
  2. Form into small patties, about 2 inches in diameter and 1/2 inch thick. This should make about 4 to 6 small patties. Sprinkle patties with sesame seeds. Smaller patties cook faster and stay together better. Plus they are just cute.  Place patties on a plate. You can allow the patties to chill for an hour, if you have time. It isn’t necessary.
  3. Preheat griddle pan or skillet over medium heat. Spray with nonstick spray. Cook patties until golden brown on each side, about 3 to 4 minutes on each side.

Instructions – Cilantro-Lime Sauce

  1. Combine all of the sauce ingredients (yogurt through lime juice). Add salt to taste. Serve cilantro-lime sauce on the side of the salmon patties, about 2 tablespoons per person.

Seared Bean Sprout Salad with Sesame-Orange Dressing

What is a bean sprout? It’s the sprout from a germinated mung bean. Bean sprouts are usually used in asian cooking and provide a bright crunchy texture to a stir fry dish. I originally intended on sprouting my own mung beans (which is really easy), but I didn’t have time. It takes 5 to 7 days of soaking the mung beans in water (changing every 12 hours). But you can easily find bean sprouts at your local grocer or asian market.

Today’s recipe is brought to you by the Food Matters Project, which is a group of foodie bloggers dedicated to cooking our way through Mark Bittman’s Food Matters Cookbook. The original recipe was chosen by Dominica of Food Wine Love and was supposed to be Seared Bean Sprouts with Beef and Sesame-Orange Sauce. 

Although this looked both easy and delicious, I was on my way to a dinner party last night and needed to bring a side dish. I decided to turn the recipe into a bright and colorful salad, adding some shredded carrots, diced cucumber, and chopped cilantro. It was really easy to throw together and was definitely unique.

Check the FMP website to see what the other foodies chose to do with this recipe!

Seared Bean Sprout Salad with Sesame-Orange Dressing

Makes: 8 servings (as a side dish)

Salad Ingredients

  • 1 Tablespoon sesame seeds
  • 1 Tablespoon canola oil or coconut oil
  • 1 lb bean sprouts, rinsed
  • 1/4 teaspoon salt
  • 1 bunch of scallions, green and white parts chopped
  • 2 carrots, shredded
  • 1 cucumber, diced
  • 1/4 cup cilantro, chopped

Dressing Ingredients

  • 2 oranges, juiced
  • zest of 1/2 orange
  • 1/2 Tablespoon fresh ginger, minced or grated
  • 2 Tablespoon soy sauce
  • 1 teaspoon sesame oil
  • 1 teaspoon tahini paste
  • 1 Tablespoon rice wine vinegar
  • 1 Tablespoon honey

Instructions:

  1. Add 1 tablespoon of sesame seeds to a DRY skillet. Cook on medium heat for 3 to 5 minutes, lightly toasting sesame seeds. Remove and set aside.
  2. Place 1 tablespoon of oil in skillet and heat over medium heat. When oil is hot (not smoking), toss in bean sprouts and salt. Stir fry for 3 to 5 minutes, or until lightly browned. Remove and place in colander. Run cold water over sprouts to stop them from cooking. You want them to still be crips.
  3. Add the sprouts, cucumber, shredded carrot, cilantro, and scallions to a medium serving bowl.
  4. Combine all dressing ingredients into a mason jar or lidded jar. Shake well. Pour over salad and stir.  Chill until you are ready to serve it. Toss before serving and sprinkle with toasted sesame seeds.

Huevos Rancheros with Black Beans

I loooooove breakfast. Lazy Sunday morning breakfast dates with my husband are the best thing on earth.  Our favorite breakfast joint back in Norman was a fabulous place called Turquoise Cafe. They were fresh, inventive, and used local ingredients. Brunch items included oatmeal brûlée, amazing huevos rancheros, and blue corn migas. I’d stab someone’s eye out with a spork for those migas or huevos. Ya, you heard me. Don’t stand in front of me and a good brunch, buddy.

But alas, Turquoise is no more (sniff sniff). It closed shortly after we moved due to some unfortunate circumstances. But, I still crave that food with a vengeance.

I have yet to find any breakfast joint in KC that comes close to Turquoise. We have searched near and far, and still nothing.

I set out to try to recreate the Huevos from that restaurant and I do believe that I have it down to a science, and, in my opinion, have perfected the recipe. Huevos Rancheros (Rachers Eggs) is a basic mexican breakfast that usually consists of fried eggs, tortillas, and cooked salsa.

I like to serve my huevos over black beans. This dish is SO freaking easy and quick. On a busy night, I often will whip this up for dinner. It seriously takes less than 10 minutes to put this meal together.

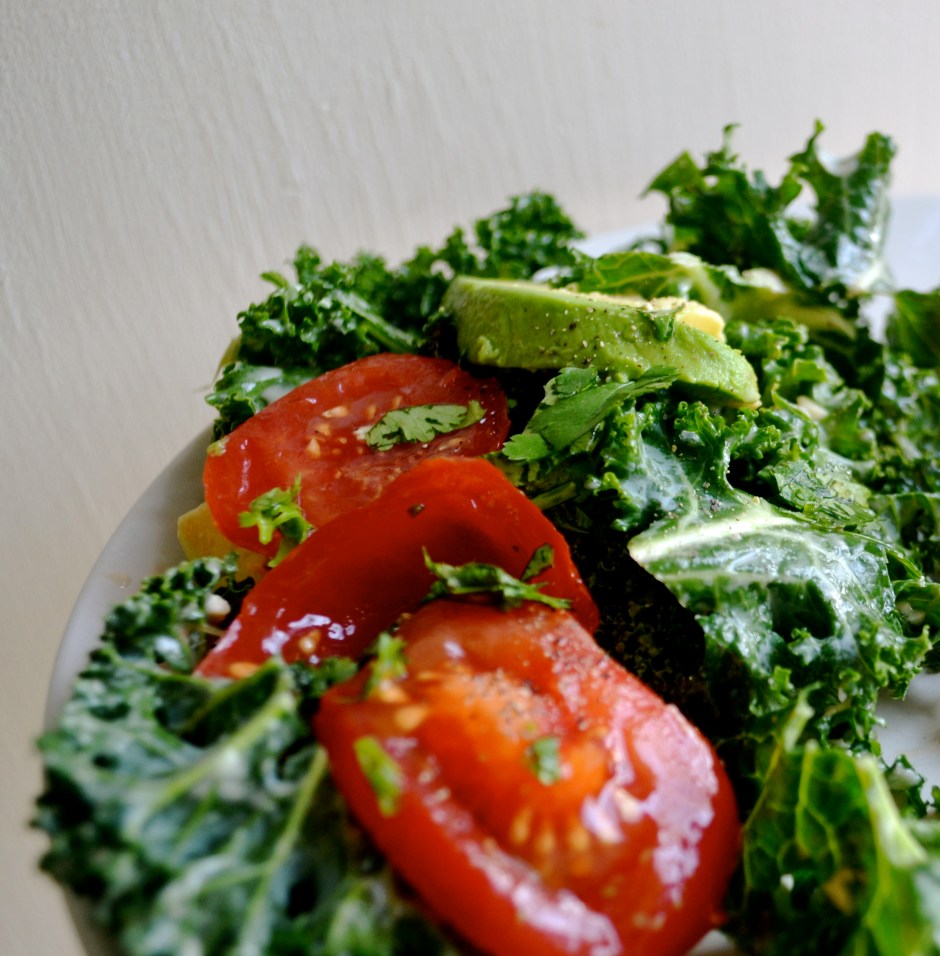
All you need is eggs, tortillas, cheese, black beans, and salsa. I think cilantro is a huge bonus but not a must. Luckily, my cilantro never gave up the ghost over our lackluster winter and I was able to run out there and nab some to sprinkle on the eggs.

Heat your oven to 350F and place tortillas with a sprinkle of cheese into the oven to melt the cheese. Use whatever cheese you have on hand: cheddar, pepper jack, goat cheese, or even parmesan….seriously.

I like to add a bit of ground cumin to black beans for a good earthy flavor, but it isn’t necessary if you do not have the spice. Add a bit of salsa to your black beans and heat in the microwave while the tortillas are warming in the oven. After the cheese is melted on the tortillas, put the tortillas on oven-proof serving plates and then place a bit of black beans down the middle of each tortilla. Lower the oven temp to 200 F and place the prepared plates in the oven to keep warm while making the eggs.

Fry or scramble some huevos (eggs) to top off the dish. I like my eggs over-medium with a great runny yolk. I recommend getting local, cage-free and farm fresh eggs, if possible. They taste and look so different than traditional store-bought eggs with amazing orange yolks instead of yellow. Mmmmm…love some good orange-yoked eggs for breakfast, lunch, and dinner.

Huevos Rancheros with Black Beans

Note: On the serving size, I usually eat one egg and one tortilla whereas my husband eats two eggs and two tortillas. So, adjust your portion size according to your crowd.

Serves 2 

Ingredients

  • 2 to 4 huevos (eggs)
  • 2 to 4 corn tortillas
  • 2 cups (1 15oz can) of black beans
  • 1/4 teaspoon ground cumin
  • 1/4 to 1/2 cup of cheese (whatever you have on hand)
  • 1/2 cup prepared salsa
  • Toppings – cilantro, green onions, extra cheese
  • salt and fresh cracked pepper

Instructions

  1. Preheat oven to 300 F. Place tortillas on a baking sheet. Spray tortillas on both sides with nonstick spray. Sprinkle a couple tablespoons of shredded cheese on each tortilla. Place in preheated oven. Once the cheese is melted (about 2 minutes), remove from oven. Reduce oven temp to 200F.
  2. Mix black beans, 1/4 cup salsa, cumin, and 1/8 teaspoon of salt in a medium microwavable bowl. Microwave (or heat on the stove in a saucepan) for about 2 minutes, or until warmed through. Stir.
  3. Place 1 to 2 cheese-topped tortillas on each serving plate. Place about 1/3 to 1/2 cup of warmed black beans down the middle of each melted cheese-topped tortilla. Set aside or place oven-proof plates in 200F oven to keep warm.
  4. Cook eggs over medium (or however you desire). Remove warmed plates from oven. Place one egg on top of black beans. Sprinkle with cilantro, green onions, and extra cheese. Serve with salsa.