Warm Hummus Dip with Sweet Potato Chips

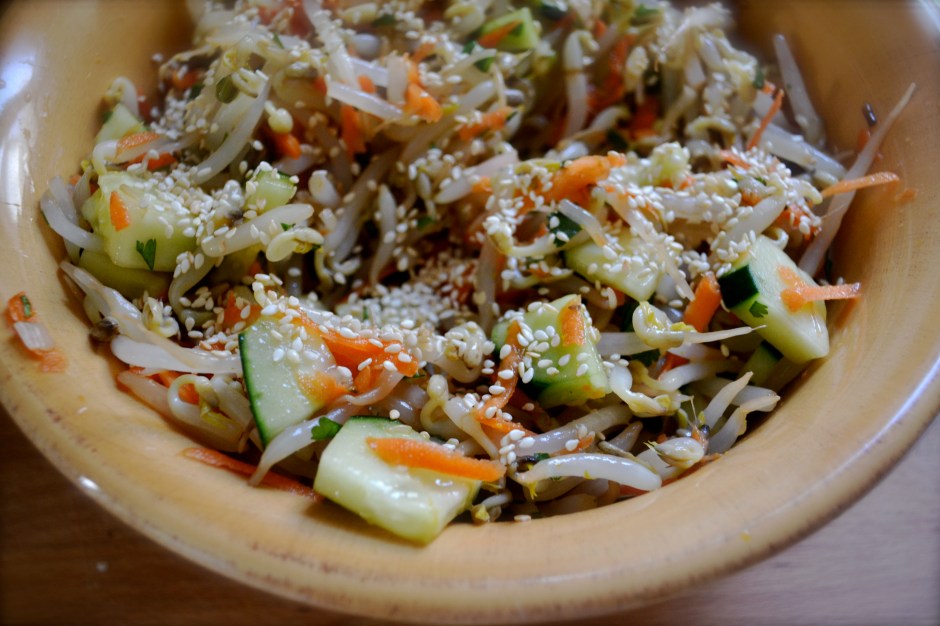
Today, I am going to share some recipes that are big money savers and healthy.  You will learn to cook dried beans, prepare a dip from those beans, and make sweet potato chips (from scratch) to transport that bean dip to your mouth.  This is, of course, Food Matters Monday and the main recipe (warm hummus) is brought to you by the Food Matters Project.

Number 1COOK BEANS FROM SCRATCH. Seriously. Easy and cheap. Yes, canned beans are cheap anyways, but cooking your own is cheaper, tastier, and healthier (no added salt and BPA from cans). One pound of dried beans (about 2.5 cups) will make over 6 cups of cooked beans. One pound of dried beans costs the same as one can (less than 2 cups) of beans.  Rinse and pick through 1 pound of dried beans (any variety), removing rocks and bad beans. Soak the beans overnight (at least 8 hours). Drain and rins, refilling the crockpot with the soaked beans and water (no salt) until the water is about 1 inch over the beans.  Cook in your crockpot on low all day while you are at work (8 to 10 hours).  Now, you will have a crap ton of beans. Separate the beans in freezer safe ziplock bags, placing 2 cup portions in each bag. Freeze. Pull them out when you need them in a dish, soup, or dip.

Number 2MAKE YOUR OWN HUMMUS. Stop buying store bought dips. Now. After you have made your own huge pot of garbanzo beans following the directions above, throw three cups of those beans, some of the cooking liquid, two heaping tablespoons of tahini (sesame paste), two tablespoons of olive oil, salt to taste, and several tablespoons of lemon juice into a food processor and whirl until smooth. Done. Hummus can be served both warm or cold. Really. Try it warm. You’ll dig it.

Hummus can be spiced a meriad of ways: roasted garlic, basil, roasted red peppers, curry powder…. I chose to separate my hummus into two dishes, adding smoked paprika to one batch and siracha garlic chili paste to the other. Following Mark Bittman’s recommendations in “Hummus Served Hot”, I warmed the paprika hummus over the stove for a new spin. I loved the creaminess that it added.

Number 3MAKE YOUR OWN CHIPS. I chose to do some sweet potato chips, seasoned with cumin, smoked paprika, and sea salt. So so so so addictive and delicious. They were great alone or dipped in the hummus. It is best to have a mandoline slicer to slice your vegetable about 1/8 inch thick. Also, another tip, keep the chips in a single layer on the baking sheet to keep them from getting soggy. They will crisp up much better when they are not crowded (speaking from experience).

So, branch out and try to make these things from scratch. Best treat in the world. You deserve it.

Check out Naturally Ella for the featured FMP recipe of Hummus Served Hot. Also, don’t forget to stop by the FMP website to see the other delicious spins on this recipe. Have a great Monday!

Warm Hummus Dip with Sweet Potato Chips (adapted from Mark Bittman’s The Food Matters Cookbook)

Hummus Ingredients

  • 3 cups of garbanzo beans (chickpeas)
  • 1/4 cup of reserved cooking liquid from beans (or water)
  • 2 heaping tablespoons of tahini (sesame paste)
  • 2 tablespoons of olive oil
  • 3 tablespoons of lemon juice
  • 1/2 to 3/4 teaspoon of sea salt

Hummus Instructions:

  1. Combine all ingredients in food processor. Process until smooth. Add salt to taste.
  2. Optional mix ins: Saute garlic in olive oil and add garlic-flavored olive oil. Add 1/2 tablespoon smoked paprika.

Sweet Potato Chips Ingredients:

  • 2 sweet potatoes, peeled and sliced on a mandolin slicer 1/8 inch thick
  • 1 tablespoon olive oil
  • 1/4 teaspoon smoked paprika
  • 1/8 teaspoon cumin
  • 1/8 teaspoon cayenne (optional)
  • 1 teaspoon of salt

Sweet Potato Chips Instructions:

  1. Preheat oven to 400 F.
  2. Combine sliced sweet potatoes and remaining ingredients in a medium bowl. Toss until all are covered with seasonings and olive oil.
  3. Place sweet potato chips in a single layer on two nonstick baking sheets, lined with parchment paper or sprayed with nonstick spray.
  4. Place on middle and top racks. Cook for 25 minutes, rotating sheets half way through cooking process.
  5. Remove from oven and allow to cool for 5 minutes. Sprinkle with salt, if necessary.

Salmon Patties with Cilantro-Lime Sauce

The weather can’t quite decide what it wants to do….warm, cold, warm….snow. And sometimes, this change occurs all in one day.  Sometimes I feel just as spastic as the weather. Unable to decide what to do, what to wear, what to cook….what type of apples to buy. Too many choices just clogs my brain up. Going into the bulk bin isle of Whole Foods is overwhelming to me. So many different types of beans, flours, sugars, grains, nuts, and snacks.

Sometimes it is best to keep things simple. So, in an attempt for simplicity, I present these salmon patties. Simple. Fresh. Quick. Healthy.

Using canned wild salmon makes these uber easy.  If you don’t have oat bran on hand, you can whirl some oatmeal in a food processor or use bread crumbs. Mix all the ingredients in a medium bowl, form into small palm-sized patties, and sauté in a grill pan for about 3 to 4 minutes on each side. Done!

I also whipped up a greek yogurt sauce with cilantro and lime to serve on the side. But these salmon patties are so flavorful and fresh tasting that you really don’t need the sauce.

Salmon Patties with Cilantro-Lime Sauce

Makes: 2 servings

Prep/Cook Time: 15 minutes

Salmon Patty Ingredients

  • 1 (6 oz) can of canned wild salmon, drained and flaked
  • 1 scallion, thinly sliced (1 teaspoon of green parts set aside)
  • 1/4 cup of diced sweet red bell pepper (optional)
  • 1 tablespoon fresh cilantro or parsley, chopped
  • 1 egg white
  • 1 tablespoon lemon juice
  • 2 to 3 tablespoons oat bran (or oatmeal that has been processed into a fine meal from a food processor)
  • 1/8 teaspoon each of salt and pepper
  • sesame seeds (optional)

Cilantro-Lime Sauce Ingredients

  • 1/2 cup of plain greek yogurt
  • 1 tablespoon fresh cilantro
  • 1 teaspoon of reserved sliced scallion (green parts)
  • 2 teaspoons lime juice
  • pinch of salt

Instructions – Salmon Patties

  1. In medium bowl, combine all salmon patty ingredients (salmon through pepper). Stir. If mixture is too wet, then add additional oat bran.
  2. Form into small patties, about 2 inches in diameter and 1/2 inch thick. This should make about 4 to 6 small patties. Sprinkle patties with sesame seeds. Smaller patties cook faster and stay together better. Plus they are just cute.  Place patties on a plate. You can allow the patties to chill for an hour, if you have time. It isn’t necessary.
  3. Preheat griddle pan or skillet over medium heat. Spray with nonstick spray. Cook patties until golden brown on each side, about 3 to 4 minutes on each side.

Instructions – Cilantro-Lime Sauce

  1. Combine all of the sauce ingredients (yogurt through lime juice). Add salt to taste. Serve cilantro-lime sauce on the side of the salmon patties, about 2 tablespoons per person.

Seared Bean Sprout Salad with Sesame-Orange Dressing

What is a bean sprout? It’s the sprout from a germinated mung bean. Bean sprouts are usually used in asian cooking and provide a bright crunchy texture to a stir fry dish. I originally intended on sprouting my own mung beans (which is really easy), but I didn’t have time. It takes 5 to 7 days of soaking the mung beans in water (changing every 12 hours). But you can easily find bean sprouts at your local grocer or asian market.

Today’s recipe is brought to you by the Food Matters Project, which is a group of foodie bloggers dedicated to cooking our way through Mark Bittman’s Food Matters Cookbook. The original recipe was chosen by Dominica of Food Wine Love and was supposed to be Seared Bean Sprouts with Beef and Sesame-Orange Sauce. 

Although this looked both easy and delicious, I was on my way to a dinner party last night and needed to bring a side dish. I decided to turn the recipe into a bright and colorful salad, adding some shredded carrots, diced cucumber, and chopped cilantro. It was really easy to throw together and was definitely unique.

Check the FMP website to see what the other foodies chose to do with this recipe!

Seared Bean Sprout Salad with Sesame-Orange Dressing

Makes: 8 servings (as a side dish)

Salad Ingredients

  • 1 Tablespoon sesame seeds
  • 1 Tablespoon canola oil or coconut oil
  • 1 lb bean sprouts, rinsed
  • 1/4 teaspoon salt
  • 1 bunch of scallions, green and white parts chopped
  • 2 carrots, shredded
  • 1 cucumber, diced
  • 1/4 cup cilantro, chopped

Dressing Ingredients

  • 2 oranges, juiced
  • zest of 1/2 orange
  • 1/2 Tablespoon fresh ginger, minced or grated
  • 2 Tablespoon soy sauce
  • 1 teaspoon sesame oil
  • 1 teaspoon tahini paste
  • 1 Tablespoon rice wine vinegar
  • 1 Tablespoon honey

Instructions:

  1. Add 1 tablespoon of sesame seeds to a DRY skillet. Cook on medium heat for 3 to 5 minutes, lightly toasting sesame seeds. Remove and set aside.
  2. Place 1 tablespoon of oil in skillet and heat over medium heat. When oil is hot (not smoking), toss in bean sprouts and salt. Stir fry for 3 to 5 minutes, or until lightly browned. Remove and place in colander. Run cold water over sprouts to stop them from cooking. You want them to still be crips.
  3. Add the sprouts, cucumber, shredded carrot, cilantro, and scallions to a medium serving bowl.
  4. Combine all dressing ingredients into a mason jar or lidded jar. Shake well. Pour over salad and stir.  Chill until you are ready to serve it. Toss before serving and sprinkle with toasted sesame seeds.

Flourless Fudge Brownies with Butterscotch Chips (Gluten Free)

I recently realized that I have been taking something small for granted. My thumbs. Ya. Those puppies are really useful.

This past weekend, I cut myself pretty bad on the knuckle of my thumb on my left hand. My whole left hand is bandaged up with butterfly sutures and gauze. Little things like brushing my teeth, tying my running shoes, and drinking coffee have become quite challenging.

So the lesson of the story, don’t take the little things for granted.

Like black beans, for example. I know, I know, I know….weird comparison, but black beans can be used for more than savory dishes like tacos, side dishes, and salads. They are the magic and secret ingredient in my flourless brownies. Shhhhhhhh!

I swear you would NEVER know if I didn’t tell you.  I adapted this recipe from a Whole Foods recipe and swapped the chocolate chips for butterscotch chips. I also cut down the quantity of butter, adding applesauce instead to keep them moist. The consistency of these brownies is more fudge-like.

These sweet treats taste amazing and have protein and fiber. They are so good that you will want to make these to show that you do not take black beans for granted. It’s also a great dessert to serve if you have any friends that have a gluten intolerance. To make this truly gluten free, make sure you use gluten free vanilla extract and gluten free butterscotch chips. Chocolate chips can be swapped for the butterscotch chips.  But seriously folks, go grab that extra can of black beans in your pantry and whirl up a batch of these.

Flourless Fudge Brownies with Butterscotch Chips (Gluten Free) (adapted from Whole Foods Recipes)

Makes: 16 servings

Ingredients

  • 1 15oz can of black beans, rinsed and rained
  • 1/4 cup butter, melted
  • 1/4 cup applesauce
  • 1/4 cup unsweetened cocoa powder
  • 1/2 sugar (I used turbinado sugar)
  • 2 eggs
  • 1 1/2 teaspoons vanilla extract
  • 1/8 teaspoon salt
  • 1/2 cup butterscotch chips

Instructions

  1. Preheat oven to 350 F. Spray an 8X8 dish with nonstick spray and set aside.
  2. Combine black beans, butter, applesauce, cocoa powder, eggs, and salt in a food processor. Puree until smooth.
  3. Remove blade from food processor. Stir in butterscotch chips.
  4. Pour into prepared pan. Bake for 35 minutes or until middle is set. Remove from oven and allow to cool for 5 to 10 minutes.

Healthy Chocolate and Banana Pudding Parfaits

This weekend I had a major pudding craving but did not want to resort to making the boxed variety (bleh) or standing over a stovetop trying to make it from scratch with lots of eggs, cream, and chocolate.  So began my search for both a healthy and easy pudding.

I found this interesting recipe for pudding in Mark Bittman’s Food Matters Cookbook. He uses tofu (stop rolling your eyes) instead of milk.  The recipe basically takes a block of firm tofu and divides it in two portions. Half of the tofu is blended with melted chocolate, sugar syrup, and vanilla. The other portion of tofu is blended separately with bananas, sugar syrup, and vanilla.  The food scientist in me was seriously curious. Would it be creamy? Would it be chocolaty? Would it be soy-y? The verdict…YES. YES. and not really.

The chocolate pudding had a slight soy aftertaste, but not near as bad as the aftertaste associated with soy milk. The flavors and thickness of both puddings improved as they chilled in the fridge. My husband liked the banana pudding the best. I liked them both, but actually liked the chocolate one a bit better (even though I’m not a big chocolate fan) only because it was slightly more firm and more “pudding-ish”.

Allow the two puddings to chill for ate least 30 minutes before making the parfaits. 

Adaptations: Next time I think I may replace the sugar syrup with almond milk and maple syrup or honey. I am also dreaming about a butterscotch variation….I will keep you posted on the results of the experiment. If you want to make _all_ chocolate or _all_ banana, then double the ingredients of the flavor that you want and do not include the ingredients of the one that you do not want.

 Healthy Chocolate and Banana Pudding Parfaits (serves 6), slightly adapted from Mark Bittman’s Food Matters Cookbook

Ingredients

  • 1 lb organic silken tofu (divided), drained
  • 1/2 cup sugar (I used turbinado sugar which gave a bit of a carmel flavor)
  • 1/2 cup water
  • 1/2 cup semi-sweet or bittersweet chocolate chips, melted
  • 1/2 teaspoon vanilla extract, divided
  • 2 ripe bananas
  • salt

Instructions

  1. Place sugar and water in a small saucepan. Heat to boiling over medium heat. Stir constantly until the sugar is completely dissolved. Remove from heat and allow to cool for at least 10 minutes.
  2. Drain the tofu and divide in half. Place half of the tofu with the melted chocolate, half of the vanilla, and half of the sugar syrup in a food processor or blender. Process until smooth. Add a dash or two of salt. Blend in and taste.  Place chocolate pudding in a bowl with a lid. Refrigerate for at least 30 minutes.
  3. Clean out the bowl of the food processor.
  4. Place the other half of the tofu in the food processor along with the bananas, the remaining vanilla extract, and the remaining sugar syrup. Puree until well blended. Add a dash or two of salt. Blend in and taste. Place banana pudding in a separate bowl with a lid. Refrigerate for at least 30 minutes.
  5. Layer pudding in small individual glasses with chocolate on the bottom and banana on the top.

Homemade Microwaved Seasoned Popcorn – BBQ Style

I love love love to snack. I’m a big fan of all things dippable and munchable. I also love bbq, which is especially great here in KC. So popcorn seasoned with my favorite BBQ rub is great snack item for me during the day when I need a good salty and spicey fix. I was pretty excited to find out that the second recipe in the Food Matters Project was Seasoned Popcorn, chosen by CookieandKate.

Years ago to save money, I quite buying bagged popcorn and started buying whole unpopped kernel corn. I began popping my own popcorn in a glass container or small brown paper bag (lunch-size), saving oodles of money and eliminating preservatives. Also, I had a tendency to mow down an entire massive bag of butter-laden popcorn, only to find myself incredibly thirsty with orange-stained fingers and unaware that I had ingested 6-servings in one sitting.

So if you are buying packages popcorn…stop! Popping your own is so simple, easy, and you can change up the seasoning to suit your snacking desires. Use 2 tablespoons of unpopped corn per person. Place the corn kernels and salt in a brown paperbag and fold over a few times. Microwave on high for about 3 minutes, or until there are 4 seconds between pops. Open the bag carefully because steam will build up.

Along with BBQ seasoning, I also like to top popcorn with shredded parmesan cheese, cracked pepper, and salt. I spray the popcorn with nonstick spray to help the topping stick. You can also melt some butter and pour over…so much better than butter flavor!

Check out the featured recipe for Seasoned Popcorn by Kate of CookieandKate. Go to the FMP website to see other great ideas for popcorn seasonings!

Homemade Microwaved Seasoned Popcorn (serves 2), from The Food Matters Cookbook by Mark Bittman

Note: The seasonings for popcorn can be limitless. For a sweet fix, top with cinnamon sugar. For a spicy kick, try curry powder. Cheesy? go for parmesan cheese or nutritional yeast (found in most health food stores, giving a good cheesy flavor).

Ingredients

  • 1/4 cup kernel corn
  • 1/4 teaspoon sea salt
  • topping of choice (shredded parmesan, cracked pepper, cinnamon sugar, bbq seasoning..etc).

Instruction

  • Place popcorn and salt in paperbag or glass lidded container. If in a paperbag, fold the top over several times.
  • Microwave on high for 3 to 4 minutes (or until there are 4 seconds between pops).
  • Be careful when opening the container because steam will have built up. Toss the popcorn with the seasonings.