Slow Cooker Apple, Fennel, and Pecan Cornbread Dressing (Gluten Free)

Slow Cooker Apple, Fennel, and Pecan Cornbread Dressing (Gluten Free) // Big Eats Tiny Kitchen

This year was my third year to host Friendsgiving here in Kansas City.  The first year, we had 11 friends and no kids gather in our small home and bring an amazing assortment of food…including jello shots. Over the years, some friends have moved away and others have moved in. We love welcoming new friends into our hearts and home. This year was much bigger with 15 adults and six children, as many of our friends have become parents. No jello shots this year. Womp Womp. Although the dynamic was slightly different, the joy and love was tremendous.

Friendsgiving 2012

Friendsgiving 2014

Time management is key to hosting a low stress and enjoyable holiday party. By organizing my dishes and using slow cooking techniques, I was able to enjoy the beautiful day and amazing friends that came to our home.

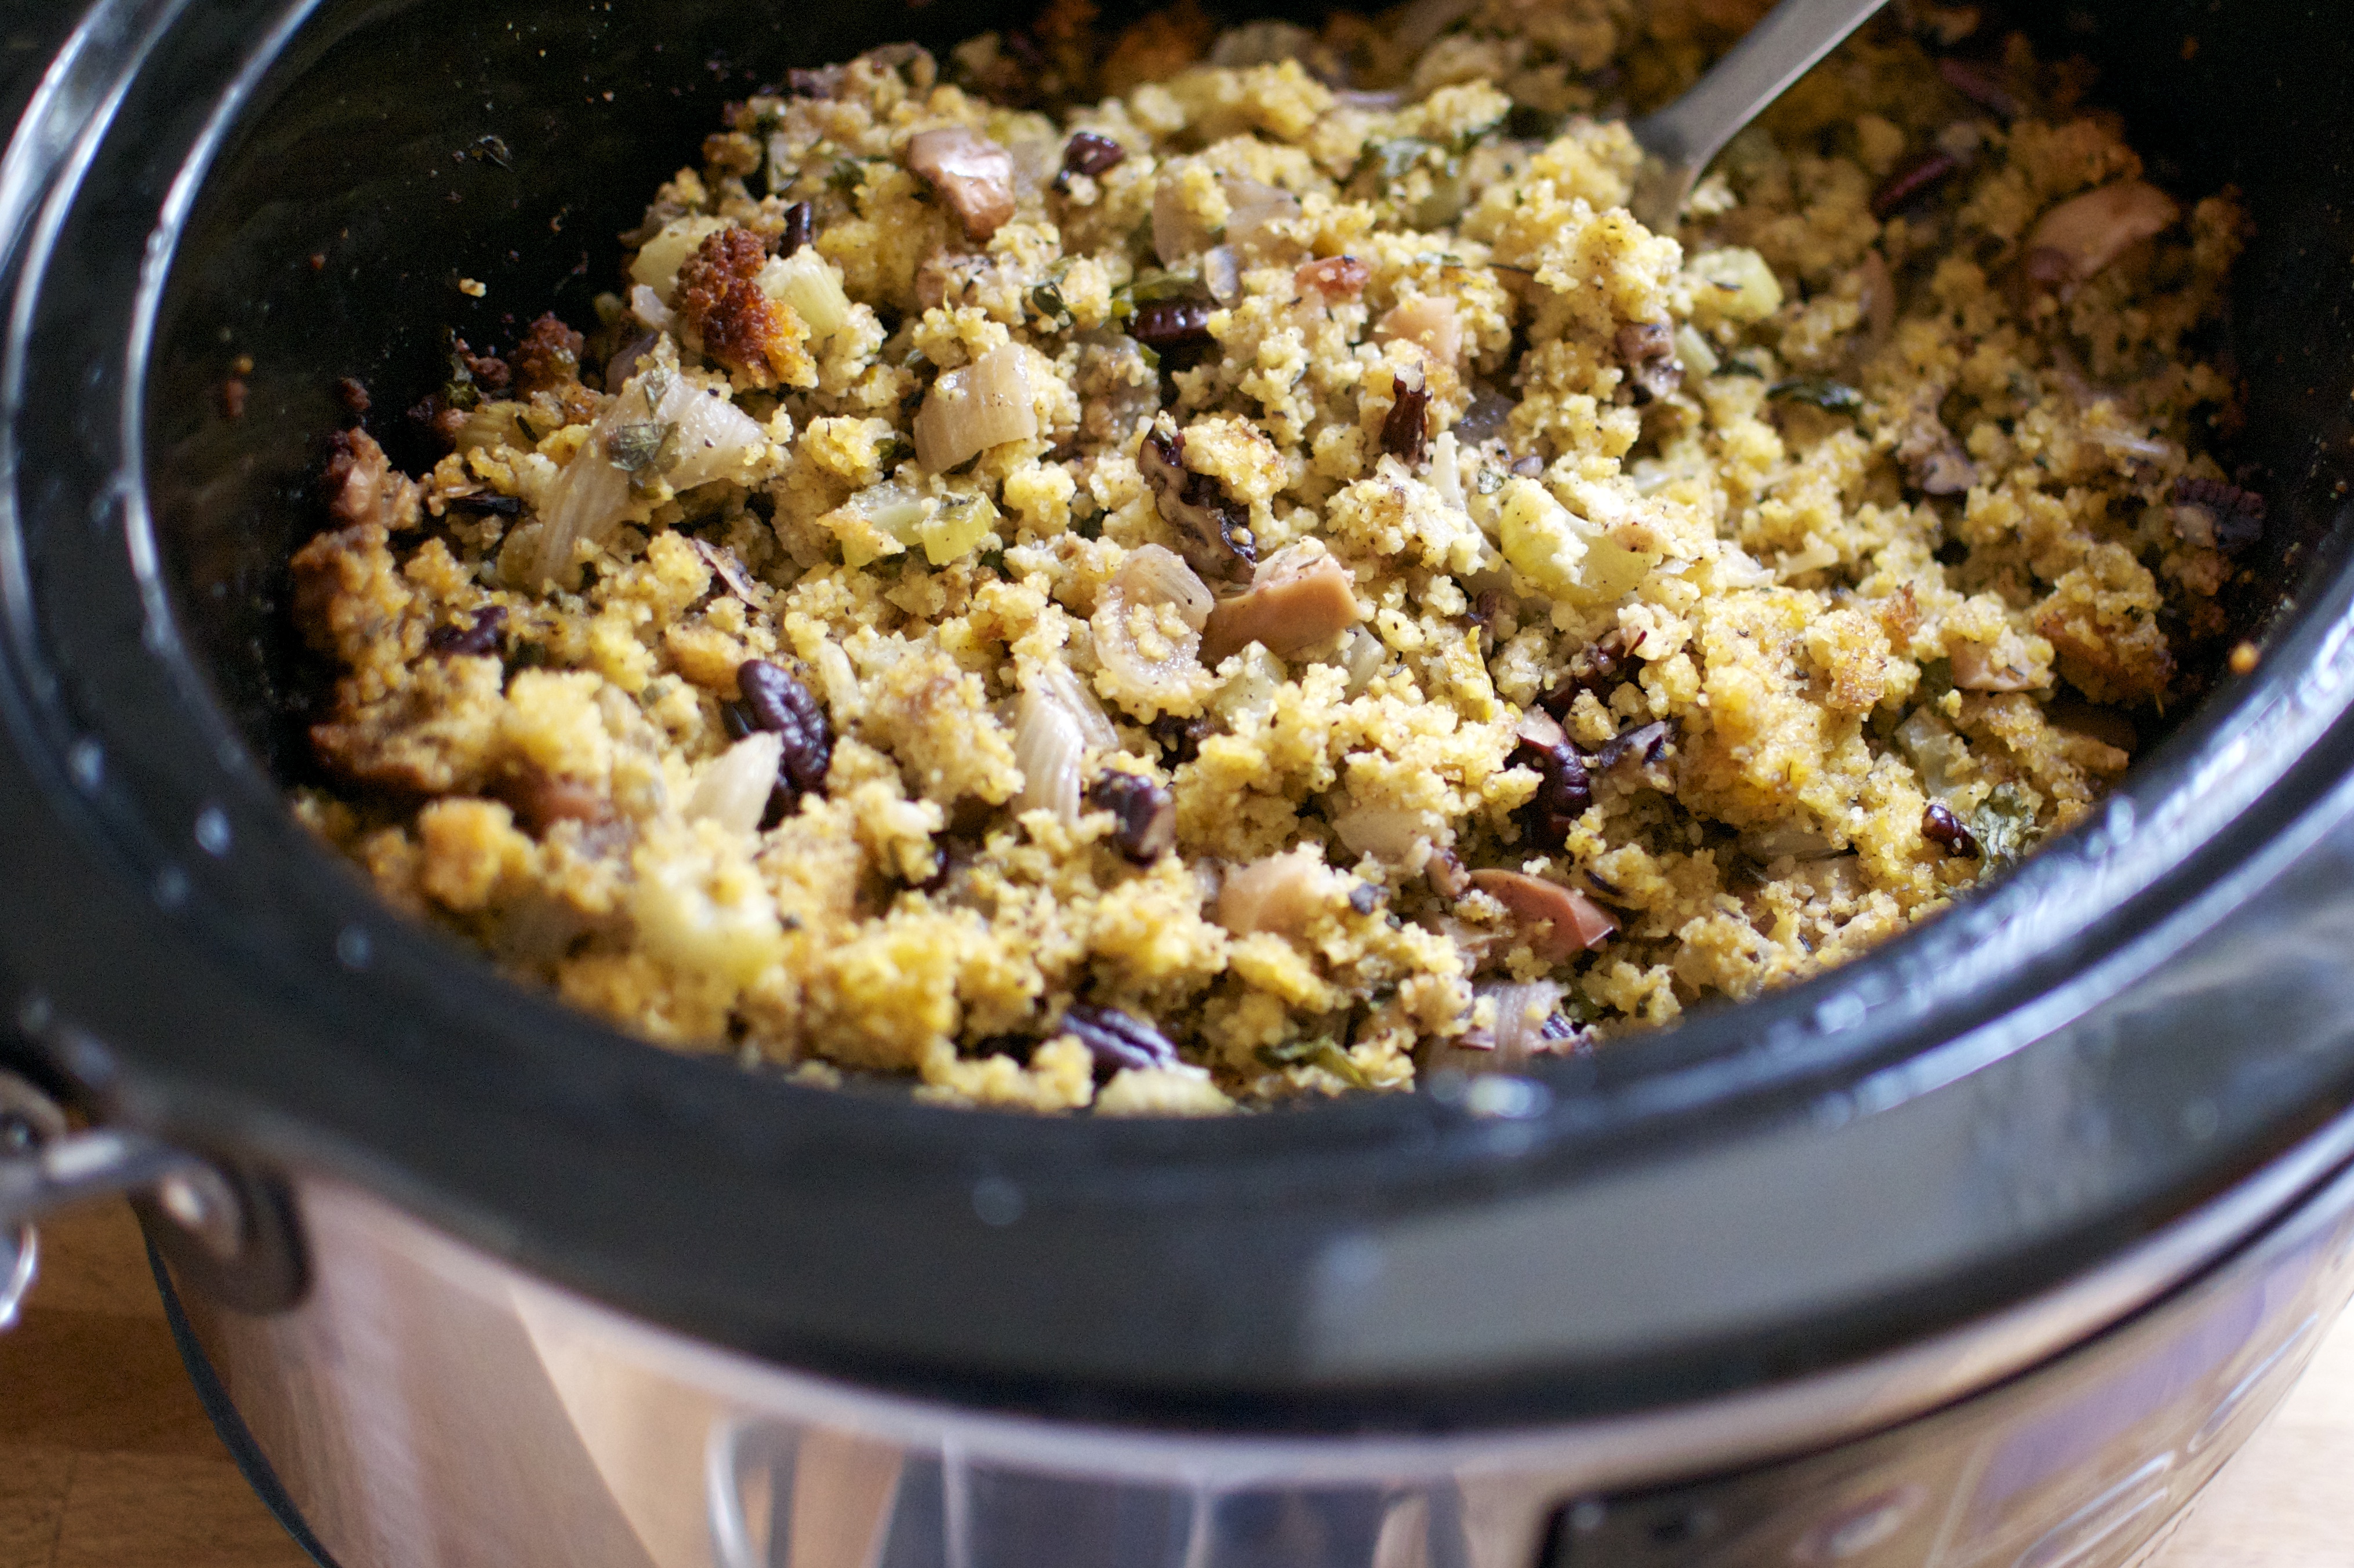
I spent the day preparing for a full house in my tiny space. Since my kitchen and my oven is quite small, I chose to roast a 7-lb pork shoulder in a roasting oven (life saver), roast a 4-lb free range chicken in my oven, and cook my cornbread dressing in my slow cooker. During the great cooking adventure, I did lose a breaker and a fuse a few times (and ended up placing my slow cooker with the cornbread dressing in a spare bedroom!). But it all turned out great and I kept my wine glass FULL.

Slow Cooker Apple, Fennel, and Pecan Cornbread Dressing (Gluten Free) // Big Eats Tiny Kitchen

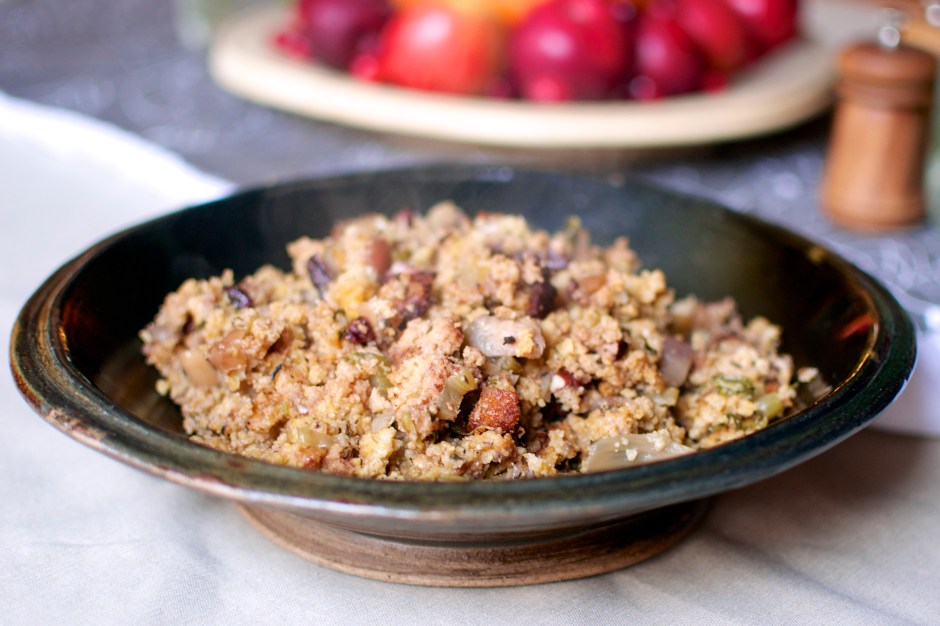
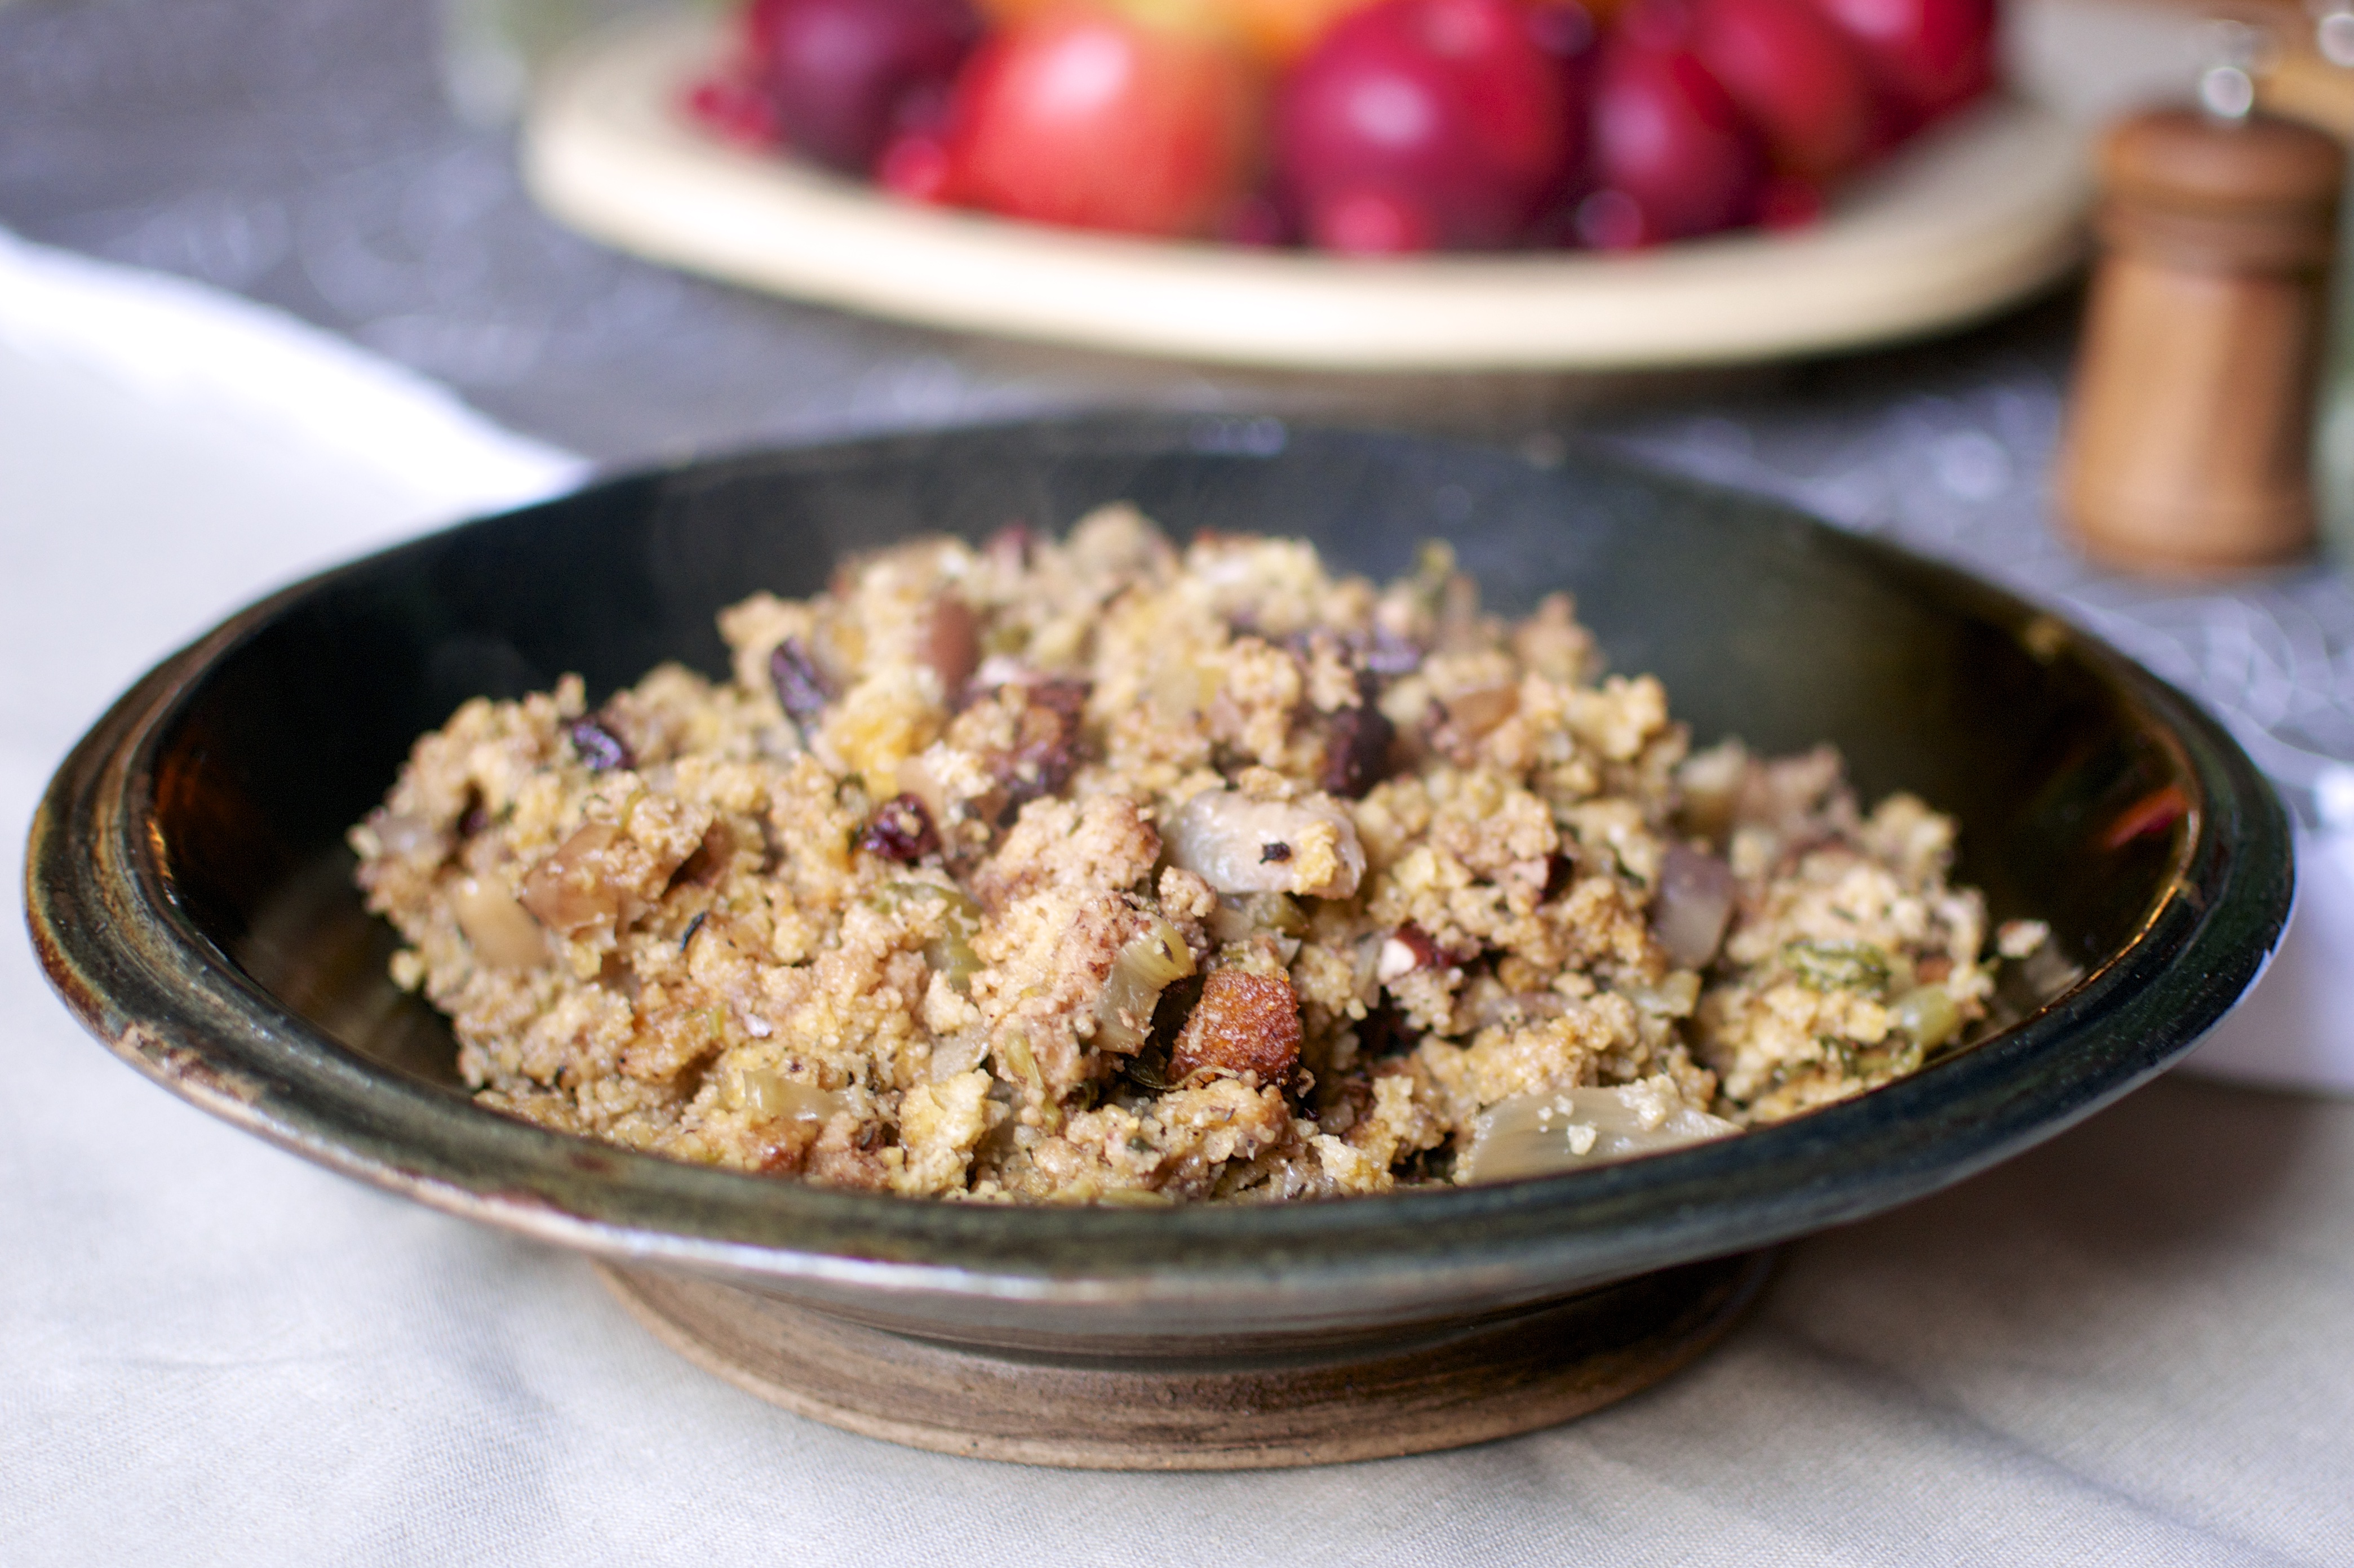
So let’s get to this Cornbread Dressing, shall we?

Apples, Fennel, and Pecans! Yeeeeeeaaaas. And don’t forget sage!

Slow Cooker Apple, Fennel, and Pecan Cornbread Dressing (Gluten Free) // Big Eats Tiny Kitchen

There are several parts of this dressing that can be made ahead of time. The Gluten Free Old Fashioned Cornbread can be made up to 2 days ahead. The aromatics in the dish (onions, celery, and fennel) can be braised in a little olive oil up to two days ahead of time as well. I mixed everything together and placed into my slow cooker and allowed to cook while I was getting other things together. This also kept the cornbread dressing warm until it was time to eat.

Slow Cooker Apple, Fennel, and Pecan Cornbread Dressing (Gluten Free) // Big Eats Tiny Kitchen

Slow Cooker Apple, Fennel, and Pecan Cornbread Dressing (Gluten Free)

  • Servings: 12
  • Difficulty: Easy
  • Print

Ingredients

  • 1 batch of old fashioned skillet cornbread
  • 1 tablespoon olive oil
  • 4 stalks of celery, diced
  • 1 bulb of fennel, slivered
  • 1 sweet onion, chopped
  • 2 medium apples, chopped
  • 1/2 cup of chopped pecans
  • 1/2 cup parsley, chopped
  • 1 tablespoon fresh sage, chopped
  • 1 teaspoon dried thyme, chopped
  • 1 1/2 cups chicken broth
  • 1 teaspoon salt
  • 1/2 teaspoon black pepper

Instructions

  1. Prepare cornbread at least one day ahead of time. Crumble up cornbread and place on a rimmed baking sheet. Allow to sit out at room temperature and dry out. Alternately, preheat oven to 250F and scatter cornbread in a single layer on the rimmed baking sheet and bake (stirring often) for about 1 hour or until the cornbread is dried out.
  2. Heat olive oil in a large skillet over medium-high heat. Add fennel, onion, and celery and cook, stirring often, and beginning to soften. Add apple, pecans, and herbs. Cook for about 1 minute. Remove from heat and gently stir in dried out cornbread and 1 1/2 cups of broth. Add salt and pepper to taste. 
  3. Spoon cornbread dressing mixture into a large slow cooker or crock pot. Cook on low for about 4 hours. Keep warm until ready to serve.

Advertisement

Easy Gluten Free Old Fashioned Skillet Cornbread

Gluten Free Skillet Cornbread // Big Eats Tiny Kitchen

As Thanksgiving is quickly approaching, I am preparing a two series post for my favorite Thanksgiving dish….cornbread dressing. Not stuffing. Dressssssing. What’s the diff, you ask?

Stuffing is stuffed inside your bird whereas dressing is a casserole cooked OUTSIDE your bird. Next, make that dressing with cornbread. None of this fancy BRIOCHE. What? Give me southern style cornbread dressing seasoned with plenty o sage!  YAAASSSS. But stay tuned, that’s my next post.

And for my next magic trick, I’ll make amazingly moist gluten-free cornbread. You ready??? aaaah. Put away those boxes of Iffy Jiffy. Serious. This is just as easy and better for you.  It’s perfect alongside chili, soup, and as a base for my Cornbread Dressing for Thanksgiving!  Oh and it’s fabulous with a dab of butter and some honey! holy Moses.

Gluten Free Corn Bread // Big Eats Tiny Kitchen

Gluten Free Skillet Cornbread // Big Eats Tiny Kitchen

So what is Old Fashioned Cornbread, you ask?

Welcome to cornbread 101!  I like to break cornbread (pun intended) into two different styles: Old Fashioned (or rather Southern Style) and Yankee Style (or Northern Style).

(1) Old fashioned cornbread is 100% cornmeal, buttermilk, and a touch of sweetener.

(2) Yankee style cornbread is a more cake-like cornbread that contains around 50% cornmeal, 50% all purpose flour, and a lot of sugar. Think yellow cake and Jiffy in cornbread Tender match. Good…but not cornbread to me.

I prefer a savory cornbread that tastes like CORNBREAD…not cake.

Old fashioned cornbread is also generally cooked in a well-seasoned cast iron skillet, adding extra flavor. If you don’t have a skillet (put it on your christmas list and get one), you can easily make this cornbread in a buttered 8X8 pan. However, I should note that something magical happens when the skillet of cornbread is finished. You open that hot oven to an amazing smell of buttery cornbread. Pulling out a hot skillet of hot cornbread from an oven makes me feel close to my grandmother and a different generation that didn’t know about cell phones, and Facebook, and go go go. It makes me wish that she was here with me as I slather a hot wedge of cornbread with extra butter.

Gluten Free Skillet Cornbread // Big Eats Tiny Kitchen

Easy Gluten Free Old Fashioned Skillet Cornbread

  • Servings: 8
  • Difficulty: Easy
  • Print

Ingredients

  • 2 cups stone ground gluten-free cornmeal*
  • 1 teaspoon baking soda
  • 1 teaspoon kosher salt
  • 2 tablespoons honey*
  • 2 eggs (at room temperature), beaten
  • 1 1/4 buttermilk*
  • 1/2 cup greek yogurt
  • 2 tablespoons unsalted butter

Instructions

  1. Preheat oven to 350F.  Place an 8-inch cast iron skillet into the preheating oven. (If you don’t have a cast iron skillet, butter an 8X8 baking dish and set aside.)
  2. In a large bowl, whisk cornmeal, salt, and baking soda. In a separate medium bowl, whisk eggs, buttermilk, honey, and greek yogurt until combined.
  3. Remove preheated skillet from oven. Place butter in the skillet, swirl around and allow to melt.
  4. Make a well in the center of your dry ingredients and pour the buttermilk mixture into the dry ingredients. Stir until combined and no dry ingredients remain.  Mixture will be slightly lumpy.
  5. Pour batter into the skillet. Place in preheated oven and bake for 25 to 30 minutes until top is golden brown. Test the doneness by placing a butter knife in the middle of the cornbread and removing it. It’s finished baking when the butter knife comes out clean. Let the cornbread cool for about 10 minutes. Serve warm!

*Notes:

  • For a more fluffy cake-like cornbread (yankee style), a half-cup of the cornmeal can be replaced with gluten-free flour such as oat flour, almond meal, rice flour, or a gf flour blend.
  • The honey can also be increased to one-fourth of a cup for a sweeter cornbread. I have also used maple syrup and coconut palm sugar with good results.
  • Buttermilk can be substituted with dairy or non-dairy milk and 1 tablespoon of apple cider vinegar.

Gluten Free Apple Spice Muffins with Walnut-Oat Streusel

Gluten Free Apple Spice Muffins // Big Eats Tiny Kitchen

Apples are here! And these Gluten Free Apple Spice Muffins are healthy, delicious, moist, and sweet.

Similar to the way people are feeling about post season baseball around here is the way I feel about Apple Season.

APPLE SEASON is Post Season to me! Am I right?  Let’s get pumped, people! Summer is over and HELLOOOOO apples. Crunchy, juicy, sweet/tart Apples.

I could seriously OD on apples more than chocolate… weird, huh?  Seriously, I can’t be the only one who has fantasies about going apple picking and bringing home loads of perfect apples and then baking them up in pies, muffins, cobblers, a la mode, cinnamon-spiked applesauce, or, hell, just eating them fresh ALL the TIME.  I’m drooling right now.

DSC_0223

Gluten Free Apple Spice Muffins // Big Eats Tiny Kitchen

I also have to admit that I get SO overwhelmed with all the apple varieties. Holy pooh on a stick! How can you choose?  I’m on the hunt for some interesting varieties this year.  Here in Missouri, there are lots of apple orchards that allow you to pick your own. I’m a big fan of the local varieties of Jonathan, Ozark Gold, Goldrush, and Enterprise. These varieties are good for eating and baking, having sweet/tart flavors with plenty of crunch. They don’t mush up when baked, which is a plus as well.

I used a combination of Jonathan and Golden Delicious when I baked up these luscious Gluten Free Apple Spice Muffins, but any variety should be fine. However, depending on the quality of apples you have access to, the final flavor will vary slightly.

Gluten Free Apple Spice Muffins // Big Eats Tiny Kitchen

I used a combination of two flours: gluten free oat flour and almond flour. I really like the balance of these two flours in muffins. The combo of these flours provide both fiber and protein, which are perfect for beginning your morning and staying satiated longer. And you get a great fall spice treat to start your day.

I used an interesting technique with these muffins. Instead of using store-bought applesauce, I created my own by pureeing one of the three apples in a food processor. After it was pureed, I then added the remaining two apples to the bowl of the food processor and pulsed the apples until they were chopped. If you don’t have a food processor, you can sub 1/2-cup of applesauce for one of the apples.

DSC_0228

Gluten Free Apple Spice Muffins // Big Eats Tiny Kitchen

And let’s also talk about this Walnut-Oat Streusel topping. Walnuts, oats, maple…mmmmm. You mustn’t skimp on this step, friends. Noo no no. Do this. I typically don’t top my muffins (because I’m lazy). But I took the extra 2 minutes (seriously…why do I not do this) and holy mama was it worth it.

Gluten Free Apple Spice Muffins // Big Eats Tiny Kitchen

Gluten Free Apple Spice Muffins

  • Servings: 12
  • Difficulty: Easy/Medium
  • Print

Gluten Free Apple Spice Muffins Ingredients

  • 2 cups gluten free oat flour (ground from gluten free rolled oats or use Bob’s Red Mill gluten free oat flour)
  • 1 cup almond flour (I use Honeyville)
  • 2 teaspoon baking powder
  • 1/2 teaspoon salt
  • 2 teaspoons ground cinnamon
  • 1/2 teaspoon ground ginger
  • 1/4 teaspoon ground nutmeg
  • 3 medium apples, cored and sliced in quarters
  • 1/3 cup greek yogurt (or dairy free yogurt)
  • 1/2 cup maple syrup
  • 2 tablespoons butter, melted (or coconut oil)
  • 4 eggs (at room temperature)

Walnut-Oat Streusel Topping Ingredients

  • 1/3 cup rolled gluten free oats
  • 1/3 cup chopped walnuts (or pecans)
  • 2 tablespoons maple syrup
  • 2 tablespoons butter or coconut oil, melted
  • 1/2 teaspoon cinnamon
  • 1/4 teaspoon salt

Instructions

  1. Preheat oven to 350 F. Line or grease a 12-muffin tin with liners and set aside.
  2. Place dry ingredients in a large bowl.
  3. Combine Walnut-Oat Streusel topping ingredients in a small bowl and set aside.
  4. In the bowl of a food processor, place pieces of one apple, greek yogurt, maple syrup, melted butter, and eggs.  Puree mixture until smooth. Add remaining pieces of two apples and pulse until the apples are in small chunks. Add wet ingredients to dry ingredients. Stir mixture until just combined.
  5. Scoop 1/3-cup of batter into each lined muffin tin to 3/4 full. Sprinkle streusel topping evenly on each muffin. Bake for 30 to 40 minutes, until muffins are browned and cooked all the way through. Remove from oven. After 15 minutes, move muffins to a cooling rack.

Roasted Red Pepper and Tomato Soup

Roasted Red Pepper and Tomato Soup (gluten free, paleo, and dairy free) // Big Eats Tiny Kitchen

My husband and I ran the KC half marathon this past Saturday. One of the best things about running in the early morning is getting to see the city wake up as the sun rises. You see a view that is typically missed while enjoying the coziness of bed. Chilly morning runs sound so much better, right? I’ll tell ya, that the early morning air was perfectly crisp for me. Plus the trees were all in full amazing bloom of color like they saved all their peak beauty just for us!

Roasted Red Pepper and Tomato Soup (gluten free, paleo, and dairy free) // Big Eats Tiny Kitchen

It’s crazy to realize that five years ago I completed the full marathon. *shudder* I will say that I definitely enjoy running half marathons MUCH better than full marathons….obvi. The full marathon is a torturous journey that I’m glad I did once…and will likely never repeat.  (Similar to trying to drink a pint of vinegar on a dare….great to do once, but never again.  Am I right?)

For some reason, I really like running half marathons. It’s a decent length of race to push my training and fitness level a little higher, while not ruining my life or body. Usually. This past training season I pulled a calf muscle three weeks ago but since I gave myself three weeks off from running, I was able to bust out the race. Needless to say, after running 13.1 miles this weekend, I’m in super recovery mode. Give me carbs, give me nutrients….more importantly, give me ice cream!

On Sunday, I did a lot of stretching, drank plenty of water, and worked in my yard enjoying the fall day. I also harvested the end of season crops and late bloomer tomatoes and peppers. I wasn’t sure what to do with my bounty until I remembered this delicious Smoky Red Pepper Soup in one of my favorite new cookbooks, Vibrant Food by Kimberly Hasselbrink. I decided to adapt the soup a bit and roast the peppers and tomatoes in the oven together and whip up this nutrient-dense soup to aide my recovery. Winner winner.

Roasted Red Pepper and Tomato Soup (gluten free, paleo, and dairy free) // Big Eats Tiny Kitchen

Roasted Red Pepper and Tomato Soup (gluten free, paleo, and dairy free) // Big Eats Tiny Kitchen

This soup is the easiest thing I’ve done all weekend.  It is so easy since all of the vegetables are roasted together on a single baking sheet under a broiler.  Then all of the roasted vegetables are then pureed with spices in either a high speed blender or in a stockpot using an immersion blender. So easy I could sleep and do this. Maybe I am.

The broiler gives a great smoky flavor to the tomatoes and peppers. It is also spiced with both smoked paprika and chipotle powder which add extra smoky punch of flavor.  If you are sensitive to spice or serving this to lil tikes, then I would recommend skipping the chipotle powder since it is a bit spicy.  This is perfect as a main meal with a dollop of greek yogurt or served as a first course with this kale salad with garlic tahini dressing or this Peruvian Roasted Chicken.

Oooh….or grilled cheeeeeeese pleeeeeease.  Sorry folks. As you can tell I’m in carbo load mode.  I’ll get back to being a green machine tomorrow.

You don’t have to run a half or full marathon to deserve this soup. It’s easy, light, and provides your body the nutrients it needs to get through these fall days. Get on it!

Roasted Red Pepper and Tomato Soup (gluten free, paleo, and dairy free) // Big Eats Tiny Kitchen

Roasted Red Pepper and Tomato Soup (Gluten Free and Dairy Free)

  • Servings: about 10 cups
  • Difficulty: Easy
  • Print

Ingredients

  • 4 medium sweet red bell peppers (about 2 pounds), quartered with seeds/membranes removed
  • 3 whole cloves of garlic (skins on)
  • 1 medium onion, quartered
  • 2 pounds of whole tomatoes (about 8 Roma tomatoes or 4 larger tomatoes)
  • 4 cups of vegetable broth
  • 2 teaspoons kosher salt
  • 2 teaspoons smoked paprika
  • 1 teaspoon ground cumin
  • 1/4 teaspoon chipotle powder (optional if you don’t like spicy dishes)
  • Optional toppings: plain greek yogurt, fresh cilantro, roasted pumpkin seeds

Instructions

  1. Preheat the broiler. Place oven rack in the upper portion of the oven about 6 to 8 inches from broiler.
  2. Place cut peppers skin side up, whole roma tomatoes, whole garlic, and quartered onions in a single layer on a rimmed baking sheet. Place the baking sheet in the oven on the top rack. Broil the veggies, watching carefully, for about 10 to 15 minutes until the pepper and tomato skins are mostly blackened on top.
  3. When the peppers are cool enough to touch, remove the pepper skins by running them under running water. Peel and remove the skin from the garlic as well.
  4. In a large dutch oven or stock pot over medium heat, heat the roasted vegetables, vegetable broth, salt, and spices.  Puree the soup smooth using an immersion blender. This step also can be performed using a high speed blender or food processor.
  5. Serve soup topped with greek yogurt, chopped cilantro, and toasted pumpkin seeds.

Note – Recipe adapted from Kimberley Hasselbrink’s Vibrant Food.

Gluten Free Carrot-Apple Muffins

Gluten Free Carrot-Apple Muffins / Big Eats Tiny Kitchen

My man and I just celebrated our 9th wedding anniversary last month.

Nine! Where did time go?

I am utterly surprised that my husband still looks at me with amazingly bright eyes and is still in love with me. For some reason he likes being married to a neurotic woman with an obsession for ketchup and oatmeal. Not together…separate. Anyways I digress, I really think I got the better end of the deal. He is definitely the best thing that has ever happened to me. Well, except at 5am when he sings random songs like “Highway to Hell” or “Baby Got Back”. (Really…we should have no singing rules until well after 8am, right? Right? or at LEAST after coffee!)

Gluten Free Carrot-Apple Muffins / Big Eats Tiny Kitchen

But honestly, anniversaries like this remind me that time is passing so quickly. I hope that I can breathe in as many details of my life and not take things for granted.  I want to laugh more and not take things so seriously. (Except the singing before 8am…I take that very seriously.)

For our anniversary, my husband got me a Vitamix (the ridiculously amazing and over-the-top blender that does everything that you ever imagined, including make creamy nut butter, process ice cream, puree smooooooth soups, grind fine flours, clean your house, complement your hair, and check your email). This blender is sheer madness!!!!  She’s like a personal assistant…that is also your best friend and doesn’t annoy you…ever.

Gluten Free Carrot-Apple Muffins / Big Eats Tiny Kitchen

What was one of the first things I did with my Vitamix? No smoothies. I made oat flour and then made carrot and apple muffins. Ya, you heard me…muffins. Real muffins, not smoothie muffins. Well…I didn’t bake the muffins in the Vitamix.  C’mon! Ridiculous. That’s the next version…the easy bake Vitamix.

I created these quick gluten-free carrot and apple muffins by placing chunks of carrots and apples in the bottom of the high-speed blender and slowly processing them until they were finely shredded. It took 15 seconds! SECONDS! And you save your fingers! This step could also be done in a food processor, or with a grater.  But it won’t take 15 seconds….maybe 1 minute more. Not bad at all.

The resulting muffins are moist and delicate. They are perfect for breakfast. You could even top them with a cream cheese frosting and serve them as cupcakes for dessert. I will definitely be turning this recipe into a cake soon. Especially since I can cut down the prep time with my blender!

Gluten Free Carrot-Apple Muffins / Big Eats Tiny Kitchen

Needless to say, although I thought that these high-speed blenders were a bit over the top, I’m not complaining that this beauty is now sitting on my counter waiting for me to make my next magical concoction.

Gluten Free Carrot-Apple Muffins

  • Servings: 9
  • Difficulty: Medium
  • Print

Ingredients

  • 2 medium carrots, cut into 1/2-inch pieces
  • 2 medium apples, cored and cut into eighths
  • 2 eggs, room temperature
  • 1/2 cup maple syrup
  • 2 tablespoons coconut oil (or butter), melted
  • 1/3 cup greek yogurt
  • 1 teaspoon vanilla
  • 1 cup oat flour (from ground gluten-free rolled oats)
  • 1/2 cup almond flour
  • 1 teaspoon baking soda
  • 1/4 teaspoon salt
  • 1 teaspoon ground cinnamon
  • 1/2 teaspoon ground ginger
  • 1/4 teaspoon ground nutmeg
  • 1/3 cup walnut pieces

Instruction

  1. Preheat oven to 350F. Place muffin liners in 9 cups of a muffin tin. Set aside.
  2. Place carrots and apples in the bowl of a food processor or high-speed blender. Process on low until carrot and apple are diced into fine pieces. Add eggs, maple syrup, coconut oil, greek yogurt, and vanilla to food processor or blender. Process or pulse until everything is well mixed.
  3. Place all dry ingredients (except walnuts) in a separate large bowl and whisk together.  Pour wet ingredients into dry ingredients in the large bowl. Stir all together until just mixed and no dry ingredients remain. Stir in walnuts.
  4. Spoon about 1/4-cup portions into each muffin tin liner. Bake for 30 to 40 minutes at 350F, or until a toothpick comes out clean when stuck into the center of a muffin. Allow to cool on a wire rack for 10 minutes. Store in a sealed container in the refrigerator for 3 days. May be frozen for up to 3 months.

Note – Recipe adapted from Edible Perspectives.

Cranberry, Ginger, and Maple Granola (Gluten Free)

Cranberry, Ginger, and Maple Granola (Gluten Free) / Big Eats Tiny Kitchen

Granola is where it’s at people! I’m in deep smit with this stuff…. but first let me tell you about my week!

My life was relaxing and simple this past week. I spent four gloriously relaxing days in Boothbay Harbor, Maine with friends in a seaside house that my amazing friend Lisa rented. It’s her favorite happy place and I’m eternally grateful that she shared the experience.

photo 4

I would wake up to a crisp breeze and the smell of the ocean. I would meander downstairs to the side room where light poured in through the million windows that faced the ocean and side yard.  I relaxed with fresh coffee, cool air, and great company. Breakfast consisted of greek yogurt, fresh fruit, and a friend’s homemade granola. This was perfectly light and fresh and served as the perfect fuel for each day. Then we would begin our days with long and beautiful walks along the seaside, over the ocean-worn rocks, and through forested trails. We would end the days sitting on a seaside dock with cool breeze, fresh lobstahs, wine, and plenty of laughter. It was perfect.

photo 1

photo 3

It’s ok to be jealous… I’m jealous of my memories. I want more of it. Four days wasn’t enough!

I was so thankful that my friend Susan brought her granola along to share! Everyone needs a great granola recipe in their pocket. It’s the perfect topping for yogurt and also a great portable snack to bring along hikes or…. to Maine! Never leave home without it. It should on the top of a list of the 10 essentials to bring on a trip….right up there with your compass. Am I right?

Cranberry, Ginger, and Maple Granola (Gluten Free) / Big Eats Tiny Kitchen

I decided to share my person granola recipe that I have tweaked and twisted around through the years. I really like adding as many goodies in my granola as possible.  From batch to batch, they taste different depending on what I have on hand in my cupboards.  This recipe is an adaptation of many many many recipes that I have used over the years. The main twist is that I use a trick from the Smitten Kitchen Cookbook, where an egg white is used to retain large clusters in the granola. The protein in the egg white are a great binding agent and cut down on the amount of oil needed.

Also, I like to kick up the nuts and seeds ratio and lower the amount of sweetener. Nuts and seeds increase the protein content of the granola which helps keep you satiated and controls blood sugar spikes. This recipe also only has 1/2 cup of sweetener.  I prefer to use maple syrup as the sweetener because it adds a great warming aroma and flavor to the granola, while being a 100%-natural sweetener.  You could also use honey or coconut palm sugar.

DSC_0056

And let’s NOT forget about the spices! Cinnamon, nutmeg, ground ginger and crystallized ginger are great additions, providing a warm punch of autumnal love to this healthy granola.  I added a handful of dried cranberries to the end mixture for great tart/sweet combo.  Dried cherries and/or dried apple chunks would also be great additions.

Cranberry, Ginger, and Maple Granola (Gluten Free) / Big Eats Tiny Kitchen

I love this granola in fist fulls or sprinkled on top of greek yogurt with fresh fruit or applesauce. I have also eaten it as homemade cereal.  It’s also an easy and quick dessert option sprinkled on baked fruit.

Cranberry, Ginger, and Maple Granola (Gluten Free)

  • Difficulty: Easy
  • Print

Ingredients

  • 3 cups gluten free rolled oats
  • 2 cups assorted nuts and seeds (I like a variation/mixture of different nuts and seeds such as pistachios, pumpkin seeds, slivered almonds, sunflower seeds, sesame seeds, and walnuts)
  • 1/2 cup ground flax seed
  • 1/2 cup unsweetened shredded coconut
  • 1 teaspoon ground cinnamon
  • 1/2 teaspoon ground ginger
  • 1/4 teaspoon salt
  • 1/2 cup maple syrup
  • 2 tablespoon coconut oil
  • 1 egg white
  • 1/2 cup dried cranberries
  • 1/4 cup diced candied ginger

Instructions

  1. Preheat oven to 275 F. Spray a rimmed baking sheet with nonstick spray. Set aside.
  2. Place all ingredients except egg white, cranberries, and candied ginger in a large bowl and mix well. Whisk the egg white in a separate small bowl until lightly frothy. Pour over granola and mix well.
  3. Spread out the granola mixture evenly onto prepared baking sheet. Place on middle rack in oven for 20 minutes.
  4. Remove from oven, lightly mix and try to not break up too many of the yummy granola clusters. Return to oven and bake an additional 20 minutes. Remove from oven and allow to cool completely.  Mix in cranberries and candied ginger. Place in an airtight container and keep tasty for up to 3 weeks!

Gluten Free Zucchini Lasagna

Gluten Free Zucchini Lasagna // Big Eats Tiny Kitchen

As fall starts to move in, I find myself in comfort mode.

I want to be cozy.

I want to wear wool socks.

I want comfy meals.

But I also don’t want to pack on some comfy pounds…can I have both?  Why can’t I just have the things I want!

It’s simple.

Gluten Free Zucchini Lasagna // Big Eats Tiny Kitchen

My comfort meal of choice is lasagna. It is hearty, comfy, and saucy. I miss the original butt busting version dearly, I do. But as an alternative, I love replacing the noodles in a typical lasagna with different vegetables. One of my favorite paleo versions uses roasted eggplants.  Aaaaaaand, my thighs are pretty thankful for this swap.

Gluten Free Zucchini Lasagna // Big Eats Tiny Kitchen

Gluten Free Zucchini Lasagna // Big Eats Tiny Kitchen

With zucchini being at the end of their peak season, I decided to whip up a lasagna using zucchini ribbons in place of lasagna noodles for a healthy and tasty lasagna without weighing you down. This version does a yummy layer of whole milk ricotta with parmesan cheese which I love. However, if you are avoiding dairy, you can easily skip the ricotta cheese mixture layer and this lasagna would still be a winner!

Gluten Free Zucchini Lasagna // Big Eats Tiny Kitchen

Gluten Free Zucchini Lasagna

  • Servings: 9
  • Difficulty: Medium
  • Print

Ingredients

  • 2 medium zucchini
  • 1 lb ground grass-fed beef or gluten free pork sausage
  • 1 medium onion, diced
  • 10 oz whole baby bella mushrooms, sliced
  • 1 diced bell pepper
  • 4 to 6 cloves of garlic, minced
  • 2 15 oz cans of diced tomatoes (undrained)
  • 6 oz can of tomato paste
  • 1 tablespoon dried oregano
  • 2 tablespoons dried basil
  • 1/2 teaspoon ground black pepper
  • 1/4 cup fresh parsley (plus more for garnish)
  • salt to taste
  • 1 cup whole milk ricotta
  • 1 large egg
  • 1/2 cup parmesan (divided)

Instructions

  1. Preheat oven to 350 F.
  2. Slice zucchini 1/8-inch thick using a mandolin slicer. Place in a single layer on a plate lined with paper towels or a clean kitchen towel. Sprinkle with salt and set them aside for 10 minutes to drain of excess moisture.  After 10 minutes, pat the zucchini slices with the clean towel to remove the moisture.
  3. In a large sauce pan or pot, brown the ground beef (or sausage) over medium heat until completely cooked. Drain excess grease. Return pan to heat and add onion, minced garlic, and sliced mushrooms.  Stirring frequently, brown and cook until onions, bell pepper, and mushrooms are tender, about 5 to 10 minutes.  Add 2 cans of diced tomatoes with juice, tomato paste, oregano, basil, salt, pepper, and parsley.  Bring to a simmer. Allow to simmer for about 10 minutes, stirring frequently. Sauce can be made several days ahead and refrigerated.
  4. In a small bowl, mix the ricotta, egg, and 1/4-cup parmesan.
  5. Spread 1/3 of the meat sauce (about 2 cups) in the bottom of a 9″ X 13″ glass pan.  Layer slices of zucchini on top of the sauce.  Spread another 1 to 2 cups of sauce on top of the zucchini slices.  Spread all of the ricotta mixture on top of the sauce layer. Then place a second layer of zucchini slices on top. Spoon remaining sauce on top. Top with remaining parmesan cheese. This can be made 1 day ahead. Cover with foil and refrigerate until ready to cook. (Note – you will need to remove from refrigerator at least 30 minutes prior to placing in oven.)
  6. Bake lasagna at 350 F for 30 minutes. (If the lasagna was made ahead of time and placed in the refrigerator, add 15 minutes to the cook time.) Serve hot topped with fresh basil and/or extra parmesan cheese.

Note – This recipe is easily adaptable for food intolerances or other diets.

Paleo-Friendly and Dairy Free Adaption: To make this paleo-friendly and dairy free, do not include the ricotta-cheese layer. The lasagna will still taste amazing.

Vegetarian Adaption: Remove the meat from the marinara sauce. Double the Riccotta-mixture for added protein.

Gluten Free Zucchini Lasagna // Big Eats Tiny Kitchen

Peanut Butter, Chocolate, and Honey No Bake Cookies (Gluten Free and Dairy Free)

No Bake Cookies // Big Eats Tiny Kitchen with Honey  (Gluten Free, Dairy Free)

These cookies are filled with my favorite flavors…Peanut Butter and Chocolate. I’m in absolute heaven.

When I was in college and times became super stressful, I would always turn to my grandma’s No-Bake Cookie recipe. It took less than 10 minutes to have a handful of devilishly delicious, misshapen, peanut butter-chocolatey goodness. And hey, it had oats in it…soooo it has to be good for me, right?

No Bake Cookies // Big Eats Tiny Kitchen with Honey  (Gluten Free, Dairy Free)
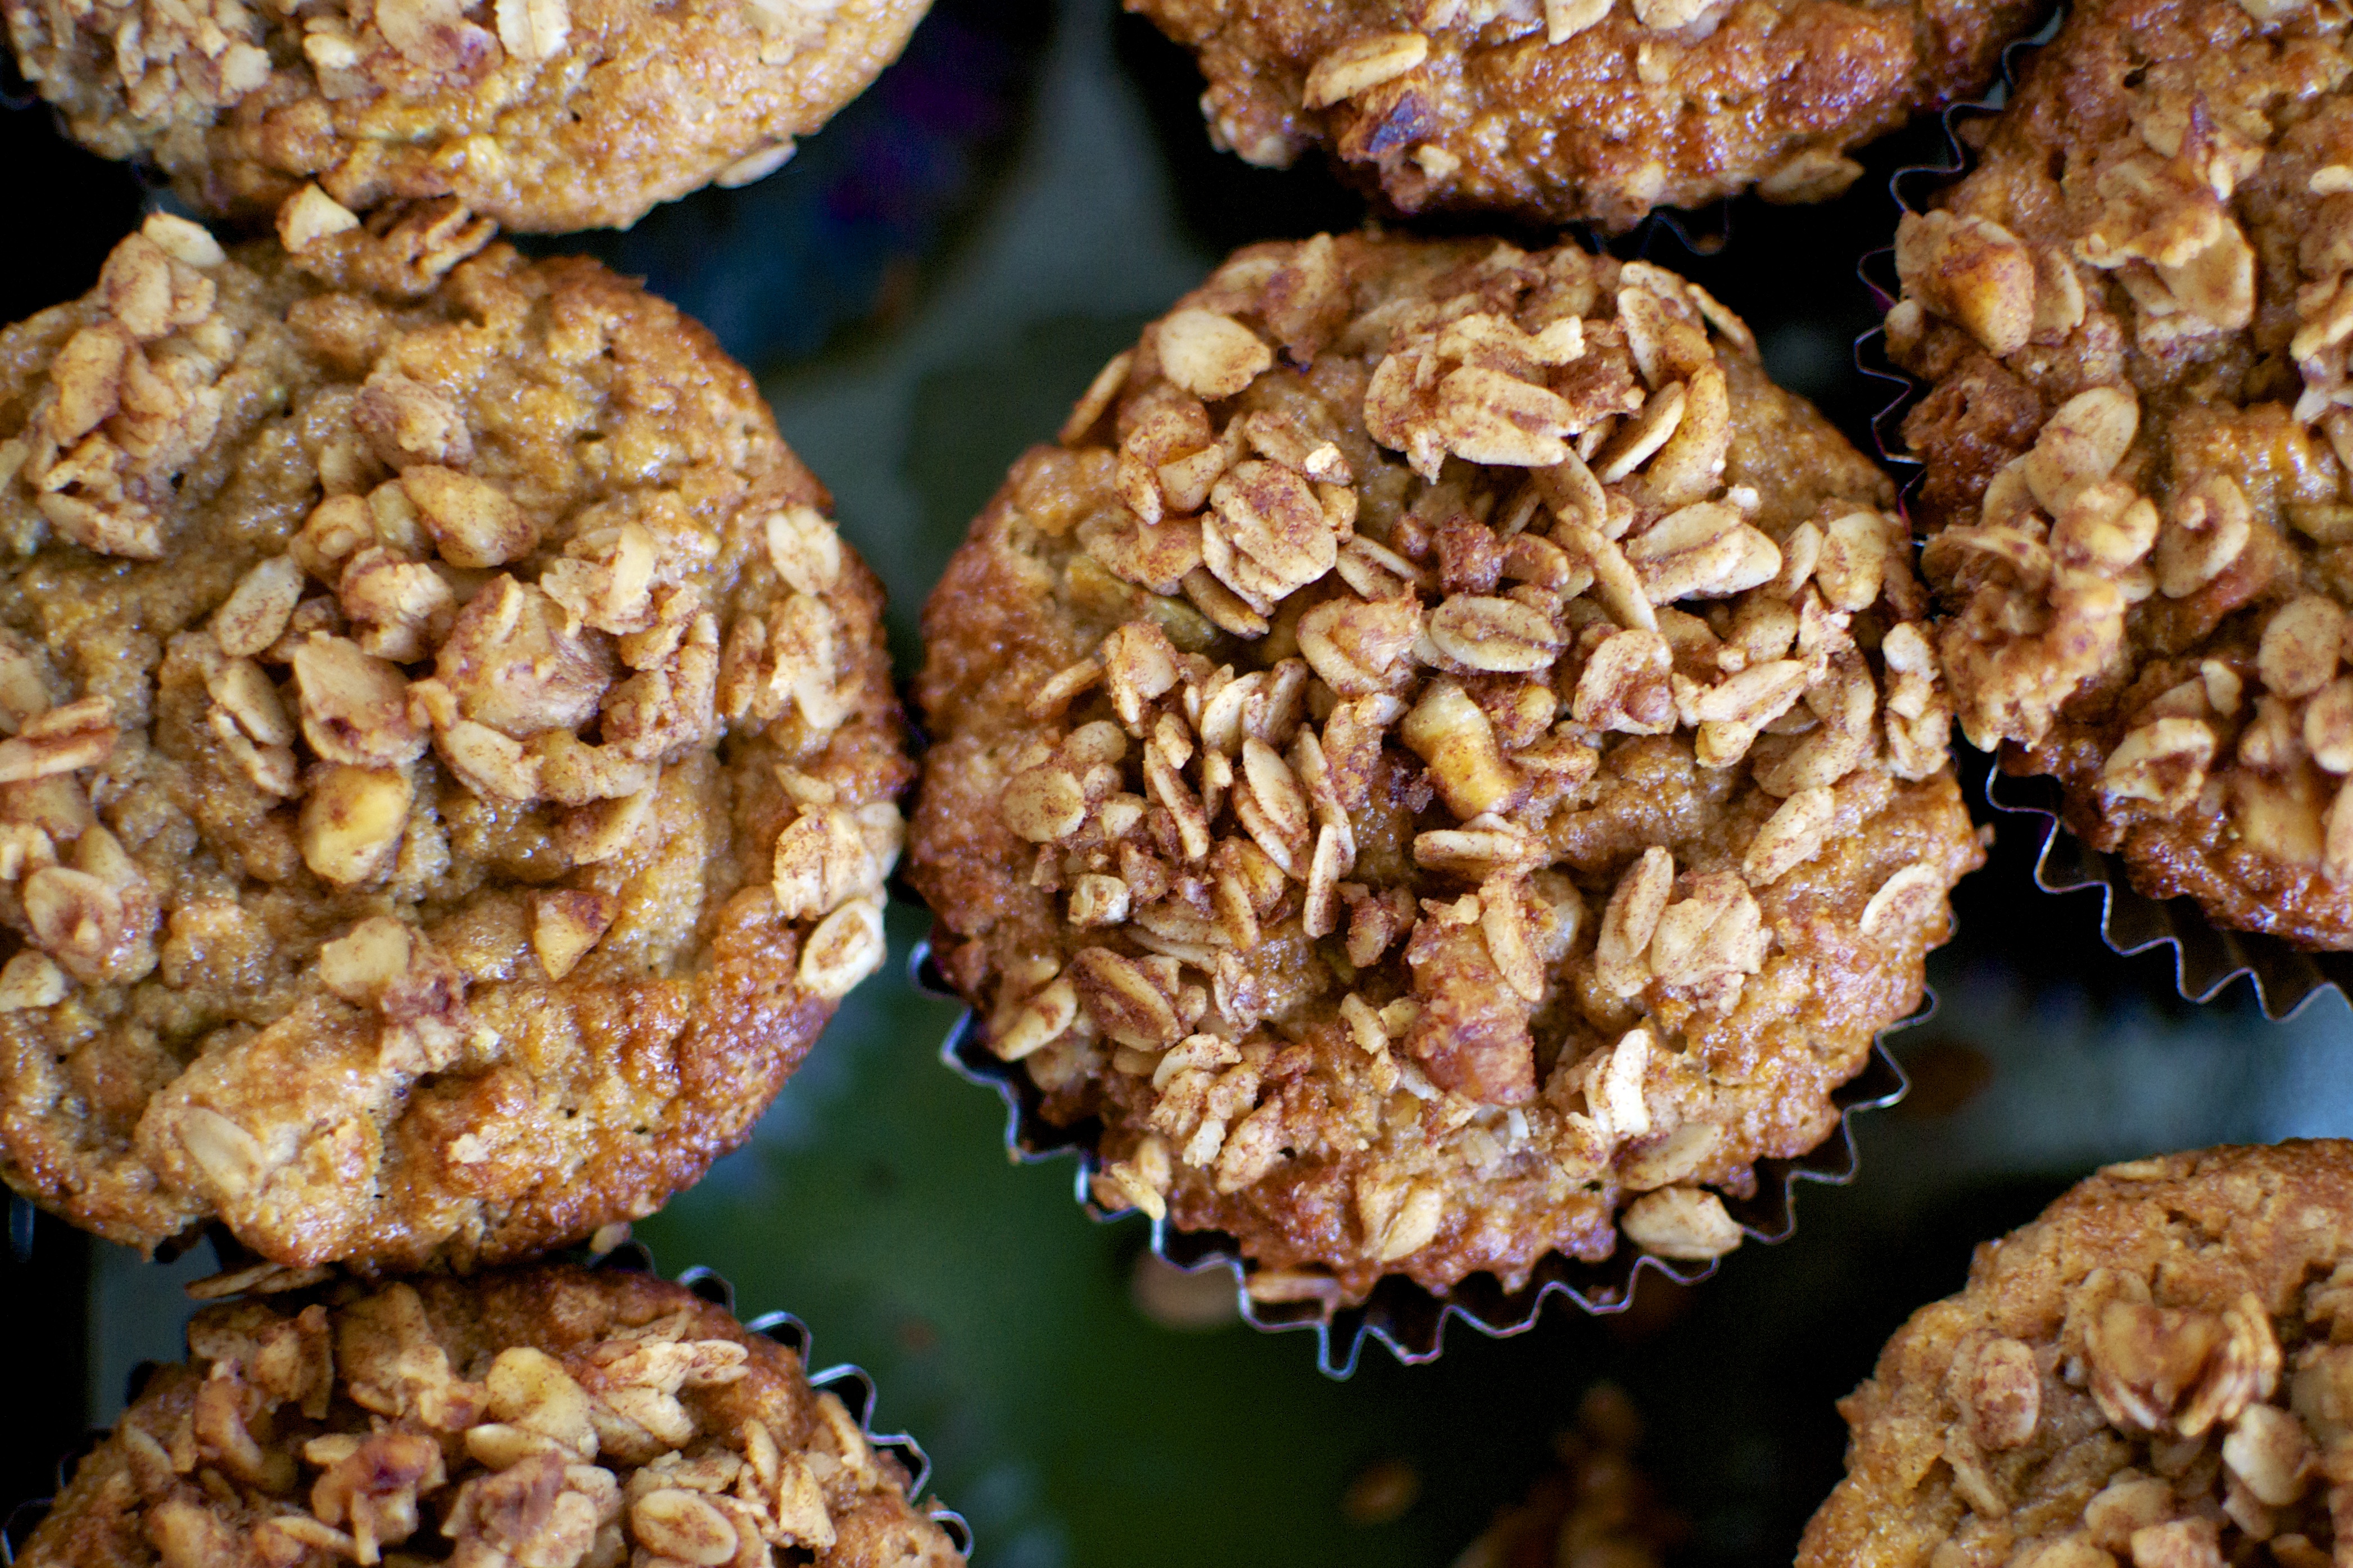
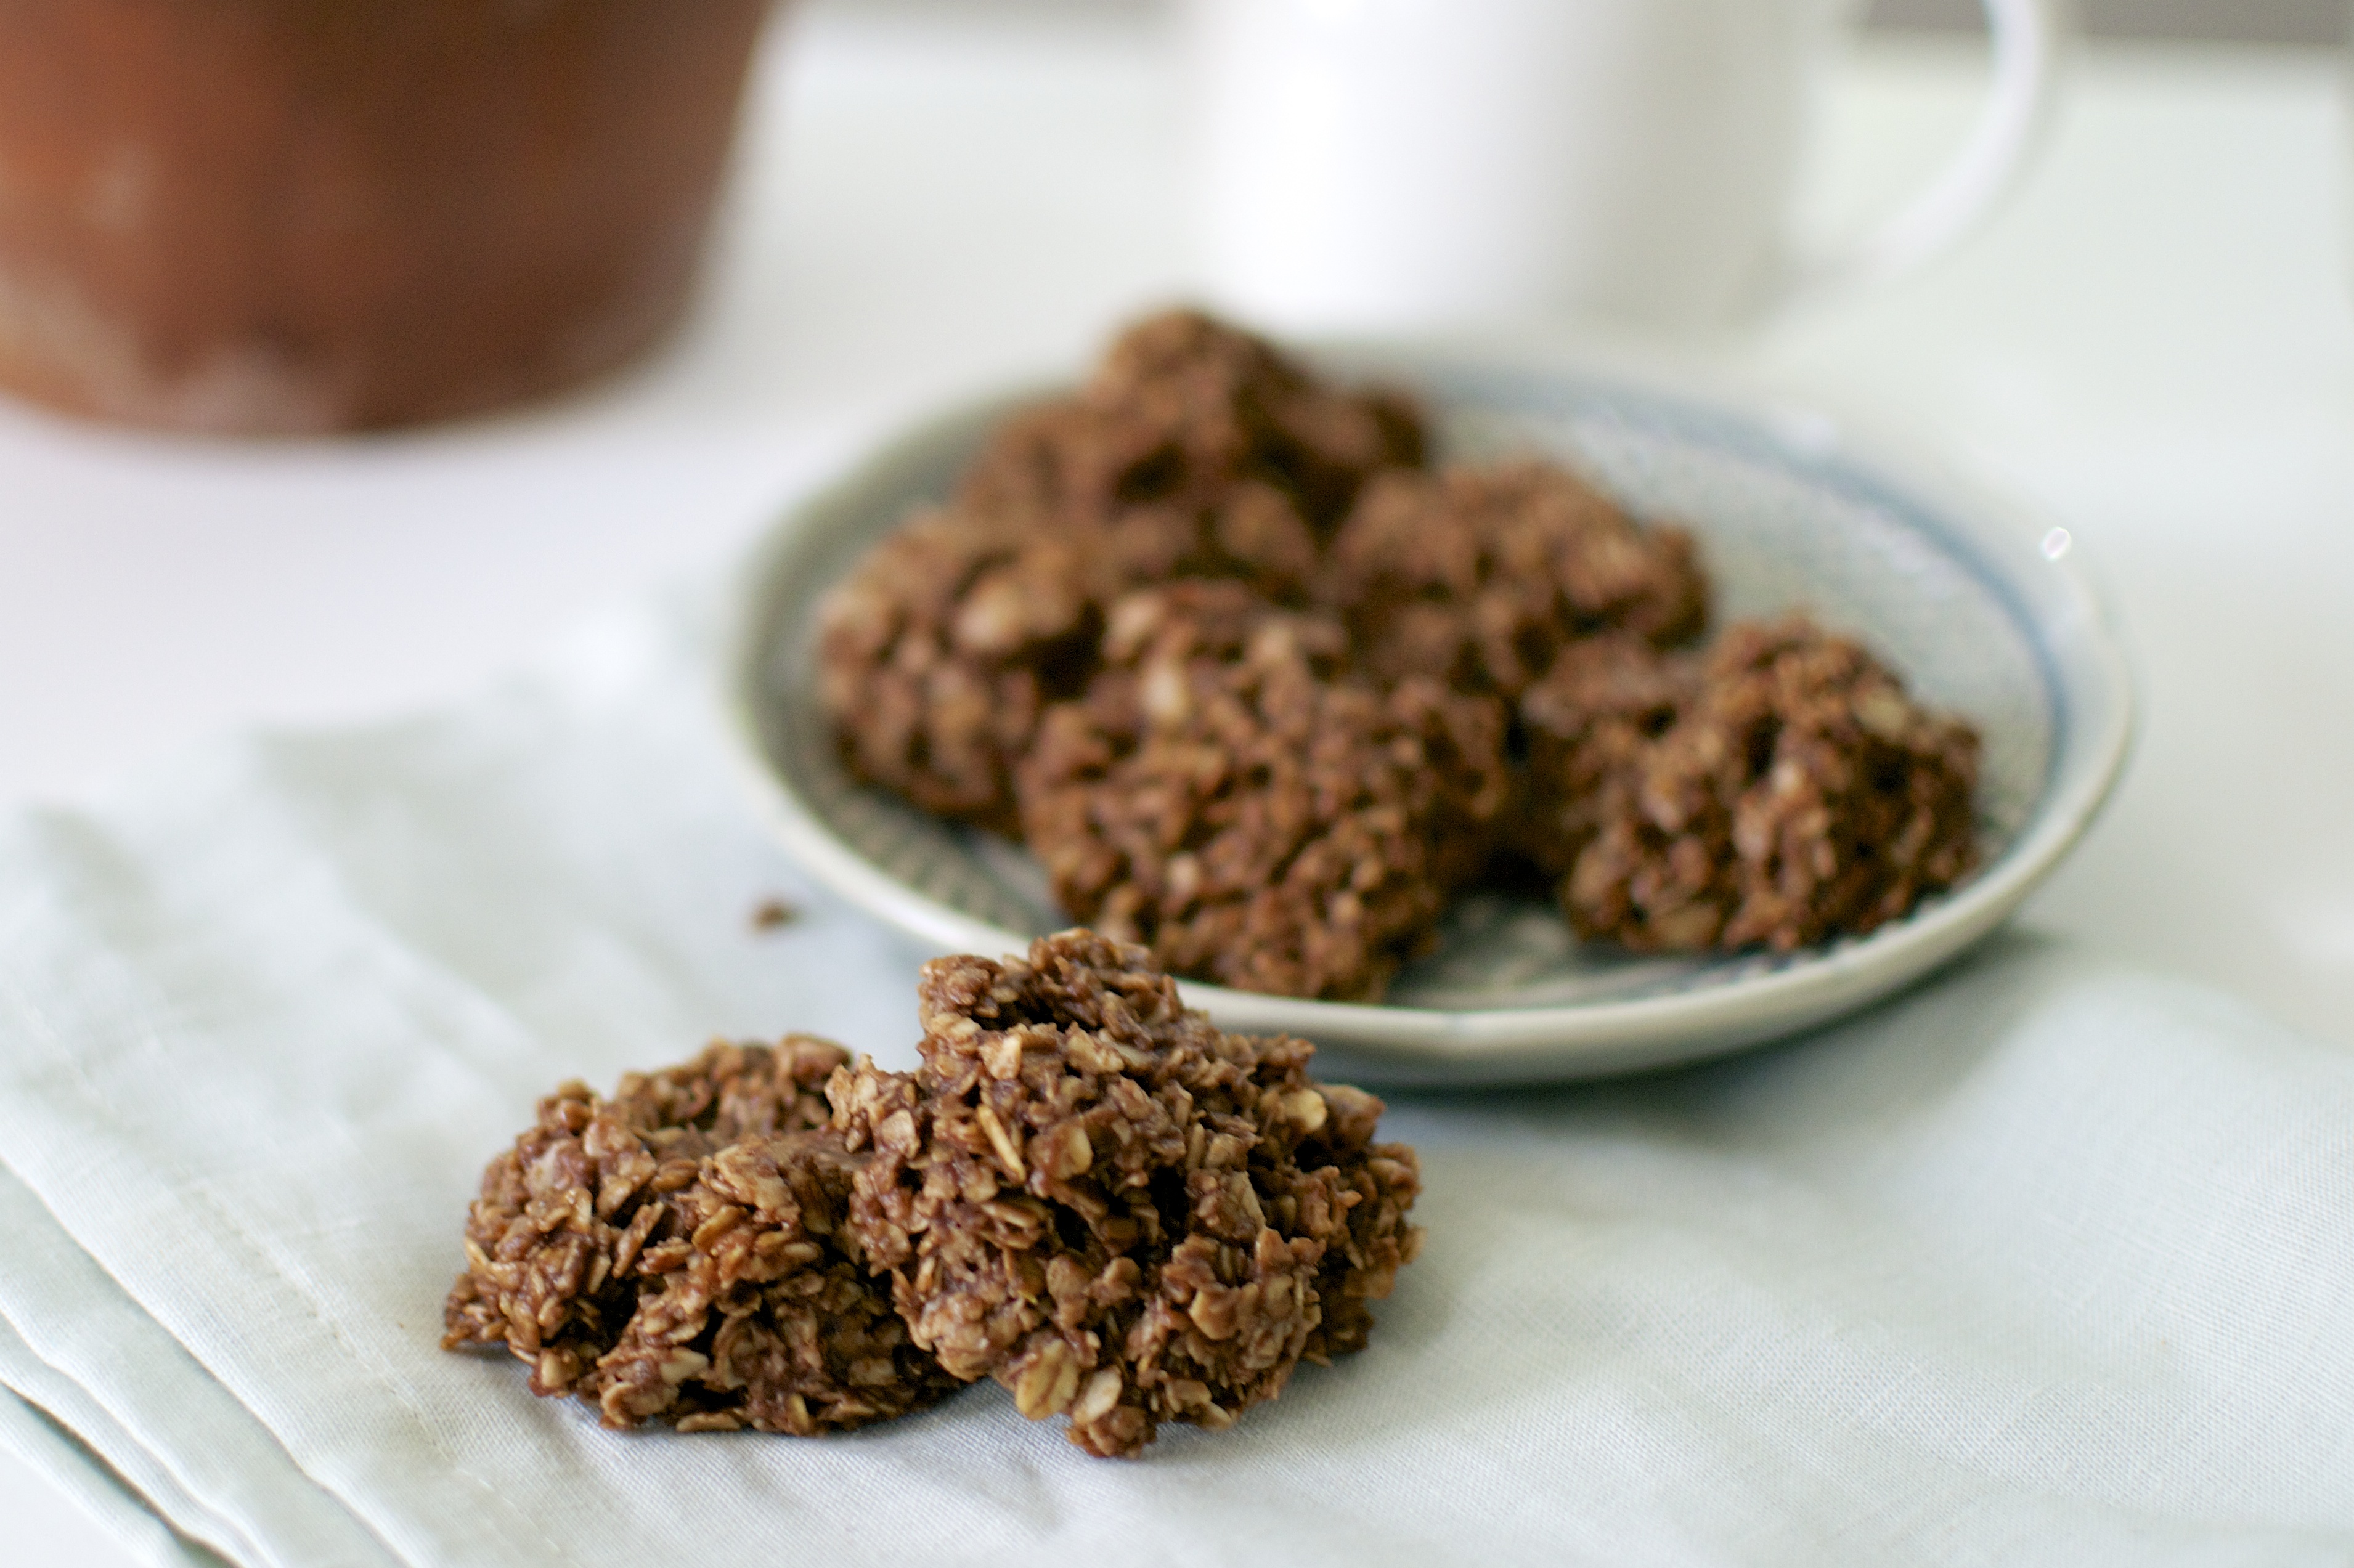
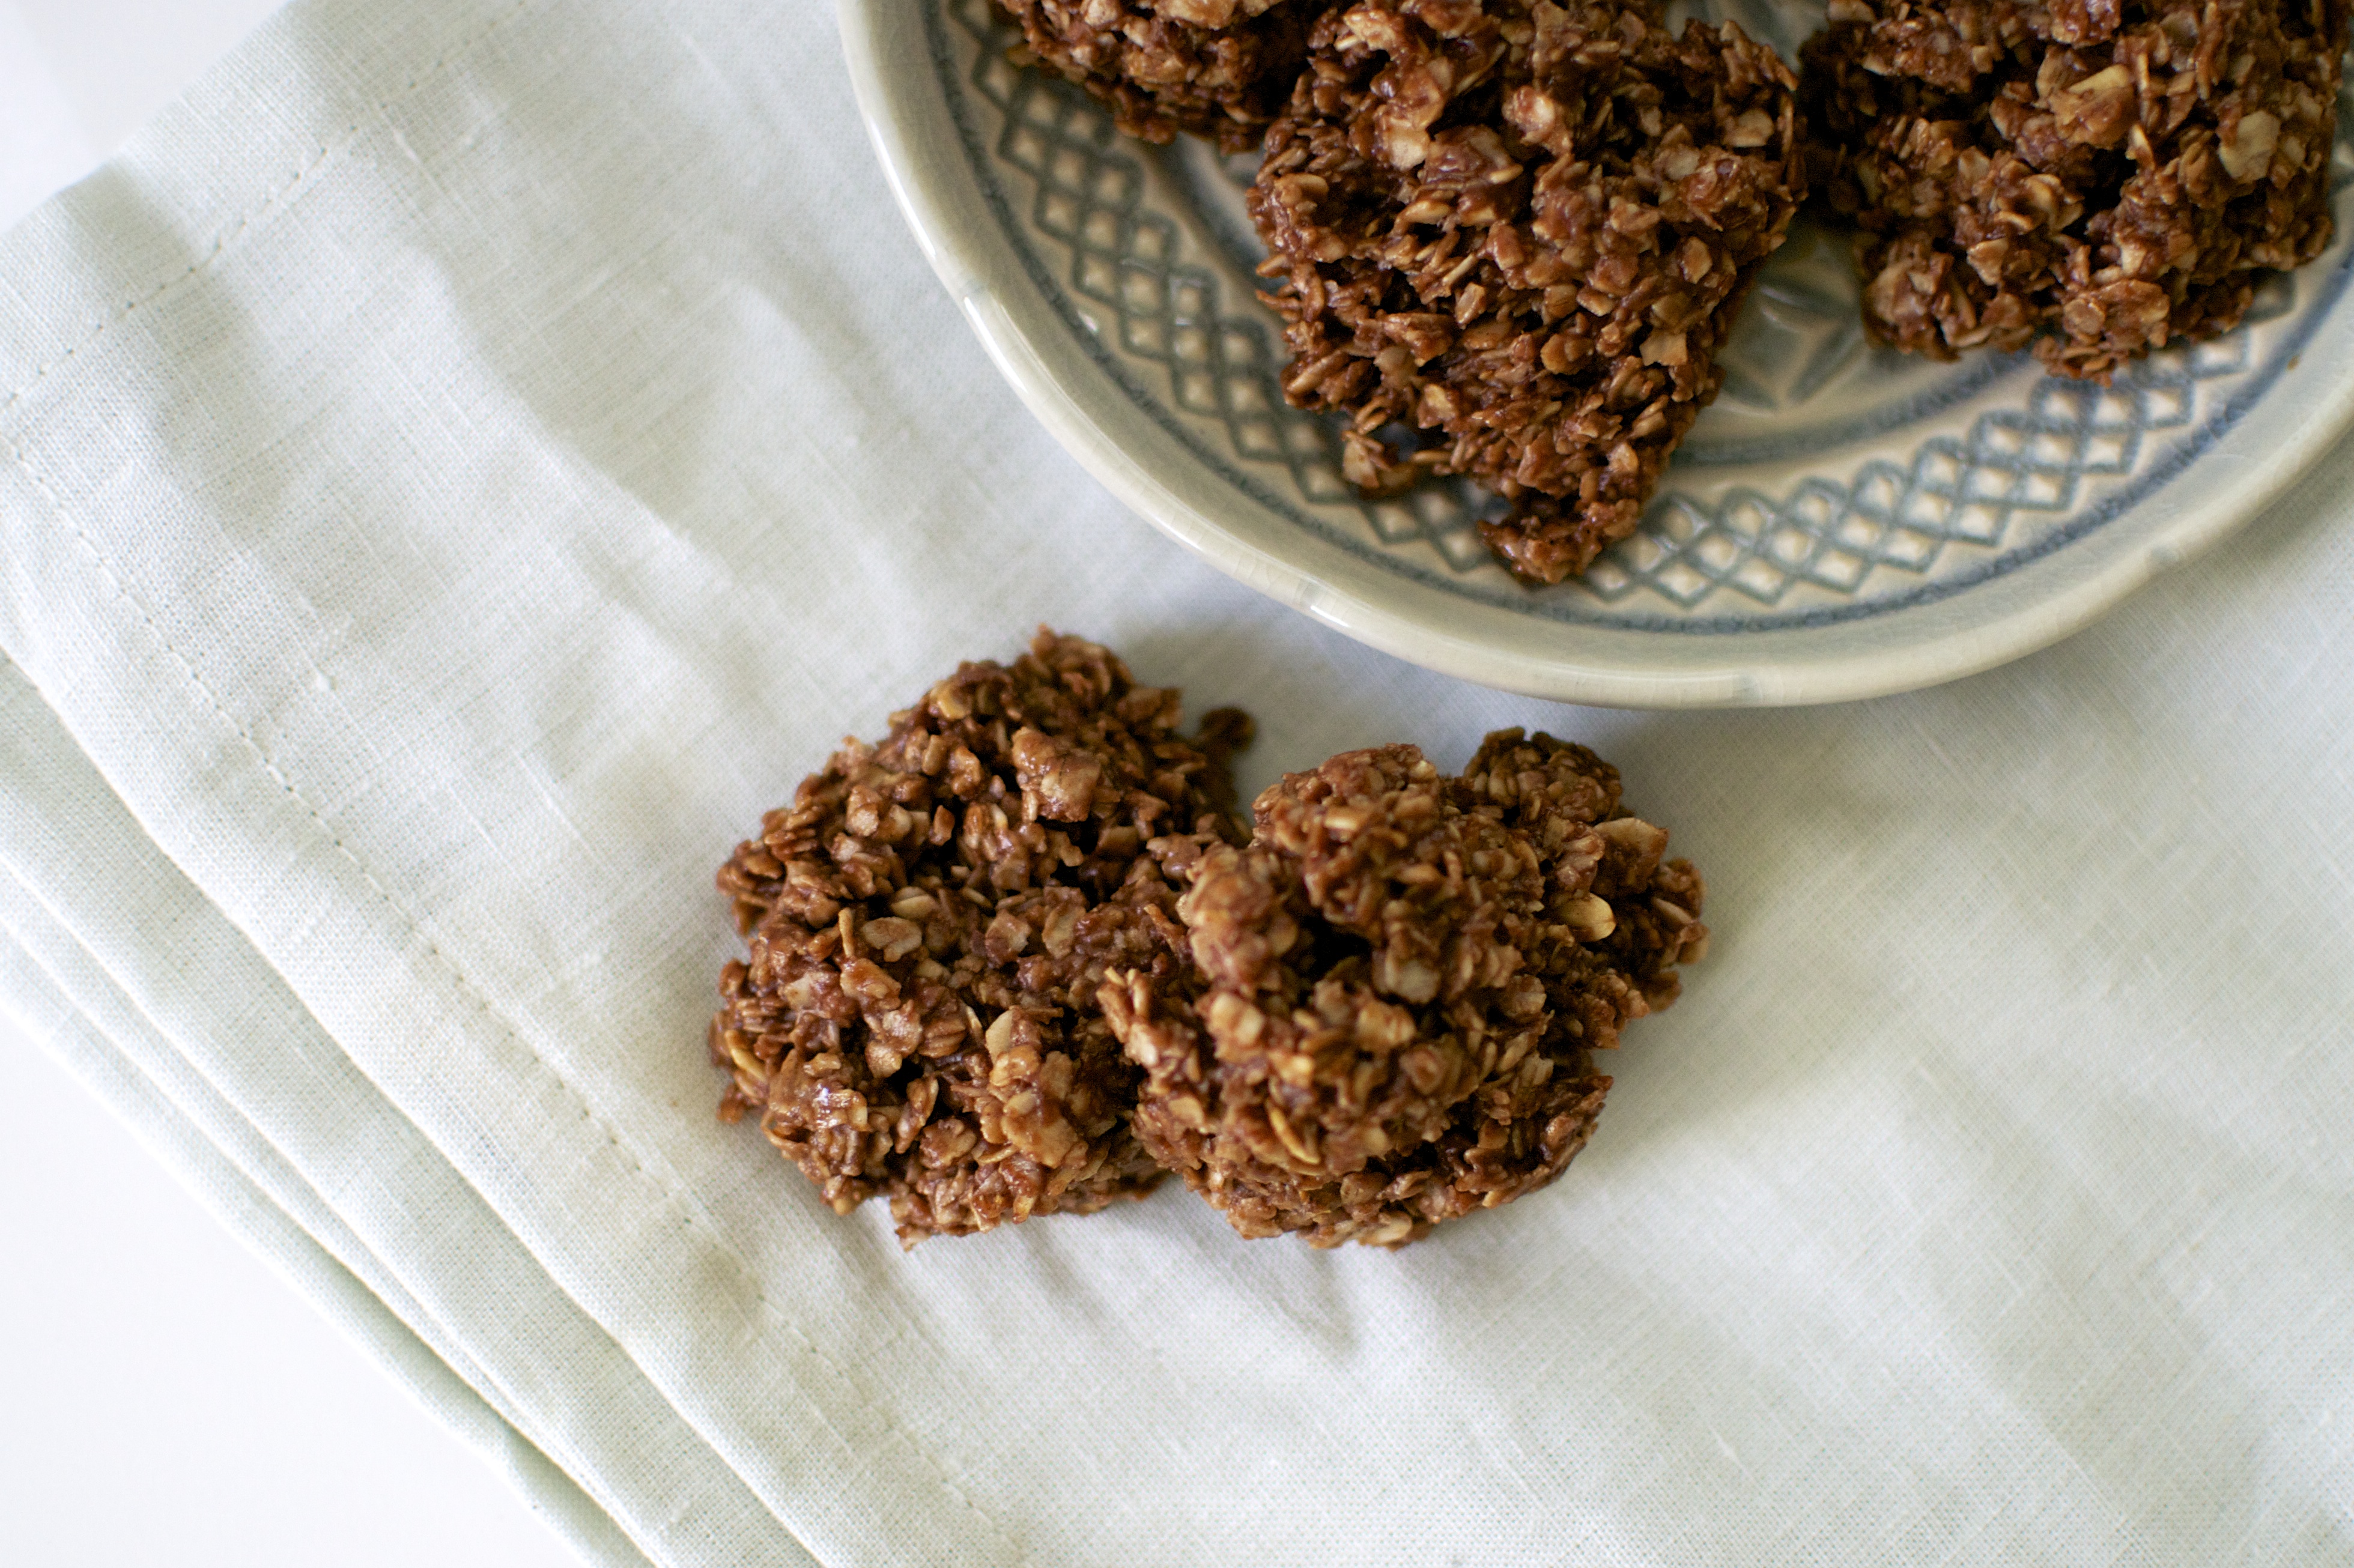
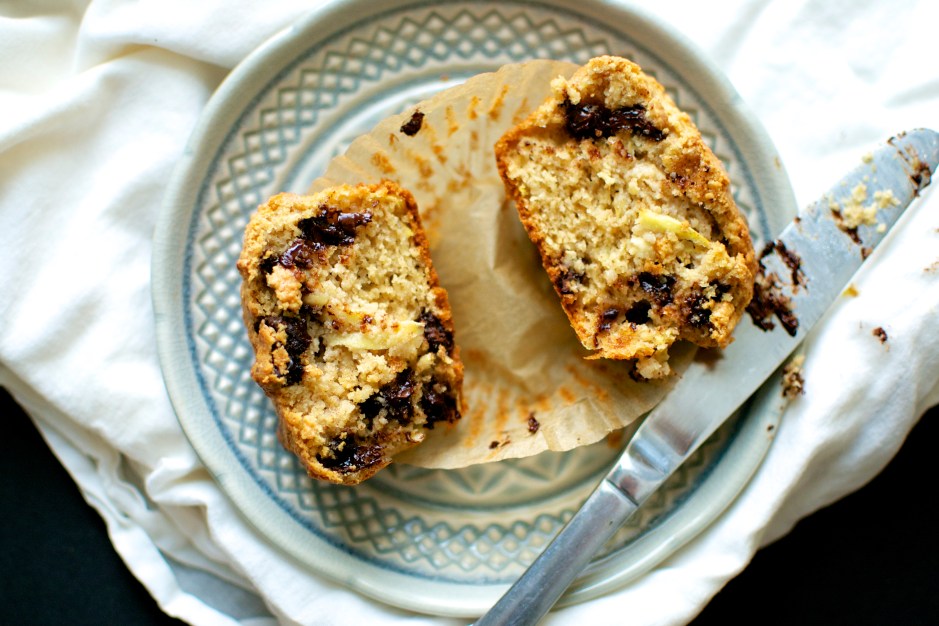
I recently had another hankering for these little oaty smorsels. But when I read her original recipe, I was shocked at the quantity of sugar! I decided to reevaluate and reinvent my grandmother’s (and so many other’s grandmothers) recipe. The original recipe contains:

  • 2 CUPS of sugar (yes…cups)
  • 1/2 cup of butter (ooooh yaaaaa)
  • 1/2 cup of milk
  • 1/4 cup of cocoa powder
  • 1 cup of peanut butter (likely Jiff)
  • 1 teaspoon vanilla
  • 3 cups of quick-cooking oats

No Bake Cookies // Big Eats Tiny Kitchen with Honey  (Gluten Free, Dairy Free)

Soooooo… whaaaa? Instead of the empty calories seen in the original cookie recipe, my reinvented cookies are full of nutritious and healthy ingredients. Honey. Coconut Oil. Cocoa Powder. Natural Peanut Butter.  Rolled Oats. Unsweetened Coconut. And my new No Bake Cookies are SO delicious. You don’t have to feel an ounce of guilt when eating one…or two…or three. Eat your feelings…and feel good about it.

No Bake Cookies // Big Eats Tiny Kitchen with Honey  (Gluten Free, Dairy Free)

Note – These cookies are made with coconut oil. Since coconut oil melts at room temperature, it is best to keep your leftover cookies in the fridge so that they are a set and solid…that is, if you have leftovers.

No Bake Cookies // Big Eats Tiny Kitchen (Gluten Free, Dairy Free)

Peanut Butter, Chocolate, and Honey No-Bake Cookies (Gluten Free, Dairy Free)

  • Servings: 30
  • Difficulty: Easy
  • Print

Ingredients

  • 1/2 Cup honey (or maple syrup)
  • 1/2 Cup coconut oil
  • 1/4 Cup cocoa powder
  • 1/2 Cup natural creamy peanut butter
  • 1/4 teaspoon salt
  • 3 Cups gluten free rolled oats
  • 1/2 Cup unsweetened shredded coconut
  • 1 teaspoon pure vanilla extract

Instructions

  1. Heat honey, coconut oil, and cocoa powder in a large pot over medium-high heat stirring constantly until boiling. Stop stirring and allow to boil for 1 minute. Remove from heat and stir in peanut butter and salt. Mix well.
  2. Add oats, shredded coconut, and vanilla extract to chocolate-peanut butter mixture. Stir well until  everything is thoroughly mixed together.
  3. Place parchment paper on a baking sheet or plate. Plop spoonfuls of the no-bake cookie mixture onto prepared pan/plate. If it is too warm in your kitchen, place the cookies in the fridge to set.  Because there is coconut oil in this recipe, the oil will tend to melt a bit at room temperature. Keeping the cookies in the fridge will ensure that they are firmer.

No Bake Cookies // Big Eats Tiny Kitchen with Honey  (Gluten Free, Dairy Free)

Homemade Bloody Mary Recipe

Homemade Bloody Mary Mix // Big Eats Tiny Kitchen

Last weekend, over the labor day holiday weekend, my husband and I escaped the hot KC summer and traveled to the amazing scenery of New Mexico. We were celebrating our NINTH wedding anniversary. It was magical. We spent several days in Taos and then ended our vacation in Santa Fe. I’m absolutely in love with the area. How could you not be???

The mountains.

The locals.

The adobes.

The FOOOOD!

Homemade Bloody Mary Mix // Big Eats Tiny Kitchen

Homemade Bloody Mary Mix // Big Eats Tiny Kitchen

It was prime time for roasting fresh hatch chiles!  Everywhere we went, I had green chile and red chile sauce (christmas style…which means both) slathered on everything.  I couldn’t get enough, breakfast, lunch, dinner, dessert, snacks, chile on chile on chile. I luckily brought back some fresh hatch chiles that I was able to snag at the Taos Farmers Market.

We came home to a plethora of tomatoes in our garden. The end of August and September typically leave most gardeners with so many tomatoes that you are looking for new and different ways to use them.  So I have a handy dandy new recipe idea for you and all your ton o’ tomatoes…Bloody Mary Mix. Ya..you heard me. I will be showing you how to use all of those tomatoes to make fresh tomato juice for your own homemade Bloody Mary Mix.

Homemade Bloody Mary Mix // Big Eats Tiny Kitchen

One really easy way to make tomato juice is using a juicer. Williams-Sonoma has a plethora of great juicer options (droooool). Unfortunately, I do not have a juicer. So I decided to puree my tomatoes (along with some onion, green chiles, and celery) and pass the puree through a sieve or fine mesh to separate the juice from the solids.  I was able to get 8 cups of juice from 12 cups of diced tomatoes.

And DON’T THROW AWAY THOSE SOLIDS…seriously.  Make fresh and easy salsa with the tomato solids! Two recipe dishes for one effort!  I added a handful of cilantro, a diced onion, diced jalapeños, lime juice, and salt to taste. Bam…salsa. A snack to go with your brunch drink. Amazing.

Additionally, I have included canning instructions below so that you can preserve your awesome homemade Bloody Mary Mix and drink it forever give it as gifts (if you can dare part with this amazing elixir). If you don’t have much canning equipment, check out this awesome selection of canning and preserving equipment from Williams-Sonoma too (double drool).

Homemade Bloody Mary Mix // Big Eats Tiny Kitchen

My homemade Bloody Mary Mix recipe has a New Mexican spin since I added roasted hatch green chiles. I roasted my own chiles by placing them over an open gas flame. The smokey hatch chiles provide a nice smokey addition of flavor! Warning – be careful when adding additional hot sauce to your Bloody Mary Mix because some hatch chiles can be HOT HOT HOT.

If you want to put up several jars of this Bloody Mary Mix, pint-sized jars of homemade Bloody Mary Mix make a great gift.  I know I would LOVE to get this mix as a gift. Oh ya. To make a great gift set, include the following:

  • Pint sized jar of Homemade Bloody Mary Mix (sealed and processed through hot batch canning)
  • Jelly jar of pickled green tomatoes (sealed and processed through hot bath canning) or a jar of jalapeño stuffed olives
  • Tiny baggy of kosher salt, ground pepper, and smoked paprika for the rim
  • Mini bottle of vodka

Homemade Bloody Mary Mix // Big Eats Tiny Kitchen

Voila! Best brunch gift ever.  Be sure to include directions for mixing up the homemade drink. One pint jar will make at least TWO Bloody Marys.

Note – the Homemade Bloody Mary Mix may start to separate (solids and liquid). This is ok…no big deal. Just swirl the mix prior to preparing your drinks. This may not be an issue if you use a juicer.

Homemade Bloody Mary Mix // Big Eats Tiny Kitchen

Homemade Bloody Mary Recipe

  • Servings: 6
  • Difficulty: Medium
  • Print

Ingredients

  • 12 cups of diced ripe tomatoes and juice
  • 1 medium shallot, diced
  • 3 stalks of celery plus leaves, chopped
  • 2 fresh roasted hatch green chiles (or 4 oz canned green chiles) (optional)
  • juice of 2 limes and 2 lemons
  • 2 to 3 tablespoons of grated fresh horseradish or prepared bottled horseradish
  • 2 to 3 tablespoons gluten free Worcestershire sauce
  • 1 tablespoon celery salt
  • 2 teaspoon smoked paprika
  • Hot sauce (such as Sriracha), to taste
  • 1/4 cup pickle juice (spicy pickle juice is super good)
  • 1 tablespoon freshly ground black pepper
  • 1 tablespoon kosher salt
  • 2 cups of vodka
  • Rim Seasoning: kosher salt, fresh ground pepper, smoked paprika
  • Optional Garnish: olives, jalapeño stuffed olives, pickled green tomatoes, lime wedges

Instructions

  1. Make Fresh Tomato Juice – Place chopped tomatoes, onion, celery, and roasted hatch chiles in a blender or food processor and puree.  This will likely need to occur in batches. Pass the pureed mixture in batches through a food mill or through a fine mesh sieve, capturing the juice in a large container. You should have about 8 cups of tomato juice.  Set solids aside to make this salsa. (Alternately to using a blender, you can use a juicer and juice the tomatoes, celery, shallot, and chiles).
  2. Make Mix – Add lemon juice, lime juice, grated horseradish, Worcestershire sauce, smoked paprika, and celery salt to the fresh tomato juice. Add hot sauce, salt, and fresh cracked pepper to taste. (To can and preserve the Bloody Mary Mix, see canning instructions below).
  3. Assemble Drinks – Mix 1 tablespoon each of salt, ground black pepper, and smoked paprika on a small flat plate. Dip the rim of each glass in water or lemon juice and then dip the rim of each glass in the paprika-salt mixture and twist the glass.   Fill each 8 ounce glass with ice to the rim. Pour 1 ounce of vodka and top off with bloody mary mix in each glass. An extra splash of hot sauce and pickle juice tastes grand.  Be sure to swirl around all the ingredients using a spoon or chopsticks.
  4. Garnish – Top and garnish the drinks as you wish…with limes, lemons, jalapeño stuffed olives, hot sauce, pickled green tomatoes, pickled green beans, bacon… ya bacon. It’s endless possibilities.

Canning Instructions: (See this tutorial on canning instructions for great details)

  1. Clean and heat canning jars.  Simmer lids for 10 minutes at around 180 F water. Preheat the water bath to a rolling boil.
  2. Fill pint-sized jars with Bloody Mary Mix, leaving 1/4-inch head space at the top of the jar. Wipe rim of jars.
  3. Apply the lids and screw on the canning rings.
  4. Lower the pint jars into the boiling water canning bath using a jar rack. Allow the water to come back to a gentle boil.  Place lid on canning bath and process pint jars for at least 45 minutes. (Note – If you’re canning a small batch of jars, it is best to use a smaller pot to process your jars to reduce breakage.)
  5. Remove from canning water bath using tongs. Allow to cool to room temperature. After your jars have cooled, check the seal by pressing down on the center of the lid. If the lid does not move and is concave, then you have a good seal. However, if the lid moves when pushed, then there is a bad seal and the jar needs to be processed again.

Gluten Free Chocolate Chip Zucchini Muffins

Gluten Free Chocolate Chip Zucchini Muffins // Big Eats Tiny Kitchen

Remember that time that you thought you tasted the best zucchini bread ever?

I think you were wrong. I’m so sorry to bust your bubble… but….

THIS gluten free zucchini bread recipe that I am presenting to you today is literally the best zucchini bread I have eeeever had. literally.

Ever. Had.

I’m serious. And I sort of think of my self as a zucchini bread expert. Not to brag, but I’m a bit of a big deal in the zucchini world. Just saying.

Gluten Free Chocolate Chip Zucchini Muffins // Big Eats Tiny Kitchen Gluten Free Chocolate Chip Zucchini Muffins // Big Eats Tiny Kitchen

But back to these muffins. These are soooooo good. And they are gluten free and only made with two types of flour: oat flour and almond flour. Ya. Gettyup!

After my first bite of these gluten free zucchini and chocolate chip studded muffins that are sweetened with pure maple syrup…I had to sit down, regain composure, and do a double take…and then shove the rest of it in my mouth. Gluten free eaters and gluten lovers alike will be amazed. They are moist, light, and fluffy.

Gluten Free Chocolate Chip Zucchini Muffins // Big Eats Tiny Kitchen

Gluten Free Chocolate Chip Zucchini Muffins // Big Eats Tiny Kitchen

I was really really really sad when I was finished with my muffin. It was the “watch your childhood best friend move away and all you could do is run to your room and write a letter as soon as possible so that she had it waiting for her when she got to her new home” kind of sad. And then I realized how thankful I was that there were 11 muffins left…shhhhhhh! I can’t say it too loud, or others will here and come steal my little precious precious precious zucchini muffins and their melty delicious chocolate chip bitsies.

Snack time just got a HUGE boost. You are welcome!

Gluten Free Chocolate Chip Zucchini Muffins // Big Eats Tiny Kitchen

Note – I made these muffins with a white skinned zucchini that I bought at the farmers market. Although the white skinned version was easier to shred, I missed the green flecks of zucchini skin in my muffins. But if you have pick eaters in your family, removing the skin of the zucchini or using a white skinned zucchini is a great way to add this vegetable to muffins without them knowing. Muahahha.

Gluten Free Chocolate Chip Zucchini Muffins // Big Eats Tiny Kitchen

Gluten Free Chocolate Chip Zucchini Muffins (Gluten Free and Dairy Free Option)

  • Servings: 12
  • Difficulty: Easy/Medium
  • Print

Ingredients

  • 2 cups grated zucchini meat (try to avoid the seeds)
  • 2 cups GF oat flour (grind 2 cups of GF rolled oats in a food processor to a fine oat flour)
  • 1 cup almond flour
  • 2 teaspoons baking powder
  • 1/2 teaspoon kosher salt
  • 1 teaspoon ground cinnamon
  • 4 eggs, at room temperature
  • 1/2 cup maple syrup (or honey)
  • 6 Tablespoons butter, softened (or melted and cooled coconut oil)
  • 1/4 cup plain greek yogurt (or applesauce)
  • 2 teaspoons pure vanilla extract
  • 1/2 cup dark chocolate chips

Instructions

  1. Remove items from refrigerator to come to room temperature.
  2. Preheat oven to 350 F. Place paper liners in 12-cup muffin tin. Set aside.
  3. Shred zucchini (with or without skin) in a bowl. Press with a clean towel to remove excess moisture. Set aside covered and allowing to drain.
  4. Place oat flour and almond flour, baking powder, salt, and cinnamon in a large bowl. Whisk together and set aside.
  5. In the bowl of a food processor or mixer, beat eggs for 1 to 2 minutes or until frothy. Add maple syrup and butter and process an additional minute until well incorporated. Add greek yogurt and vanilla. Pulse until combined.
  6. Add wet ingredients to dry ingredients. Mix together until just combined (don’t over mix). Gently stir in shredded zucchini and chocolate chips. Allow to rest for 1 minute.
  7. Fill muffin tins to 3/4 full. Place muffin tin on middle rack in preheated oven. Back for 35 to 40 minutes, or until tops are browned and slightly cracked. Remove from oven and allow to cool on cooling rack for at least 30 minutes (if you can!). Get ready for zucchini muffin heaven!

Note –

1. This recipe was inspired and adapted from Edible Perspectives Zucchini Chocolate Chip Cake.

2. Dairy Free – sub out the greek yogurt for applesauce and use coconut oil instead of butter. Dairy free chocolate chips can also be used in place of the regular chocolate chips.

3. These muffins will freeze well for up to 3 months. To thaw, place in microwave for 30 second intervals. Makes a quick and easy breakfast or after school/work snack.