Homemade Bloody Mary Recipe

Homemade Bloody Mary Mix // Big Eats Tiny Kitchen

Last weekend, over the labor day holiday weekend, my husband and I escaped the hot KC summer and traveled to the amazing scenery of New Mexico. We were celebrating our NINTH wedding anniversary. It was magical. We spent several days in Taos and then ended our vacation in Santa Fe. I’m absolutely in love with the area. How could you not be???

The mountains.

The locals.

The adobes.

The FOOOOD!

Homemade Bloody Mary Mix // Big Eats Tiny Kitchen

Homemade Bloody Mary Mix // Big Eats Tiny Kitchen

It was prime time for roasting fresh hatch chiles!  Everywhere we went, I had green chile and red chile sauce (christmas style…which means both) slathered on everything.  I couldn’t get enough, breakfast, lunch, dinner, dessert, snacks, chile on chile on chile. I luckily brought back some fresh hatch chiles that I was able to snag at the Taos Farmers Market.

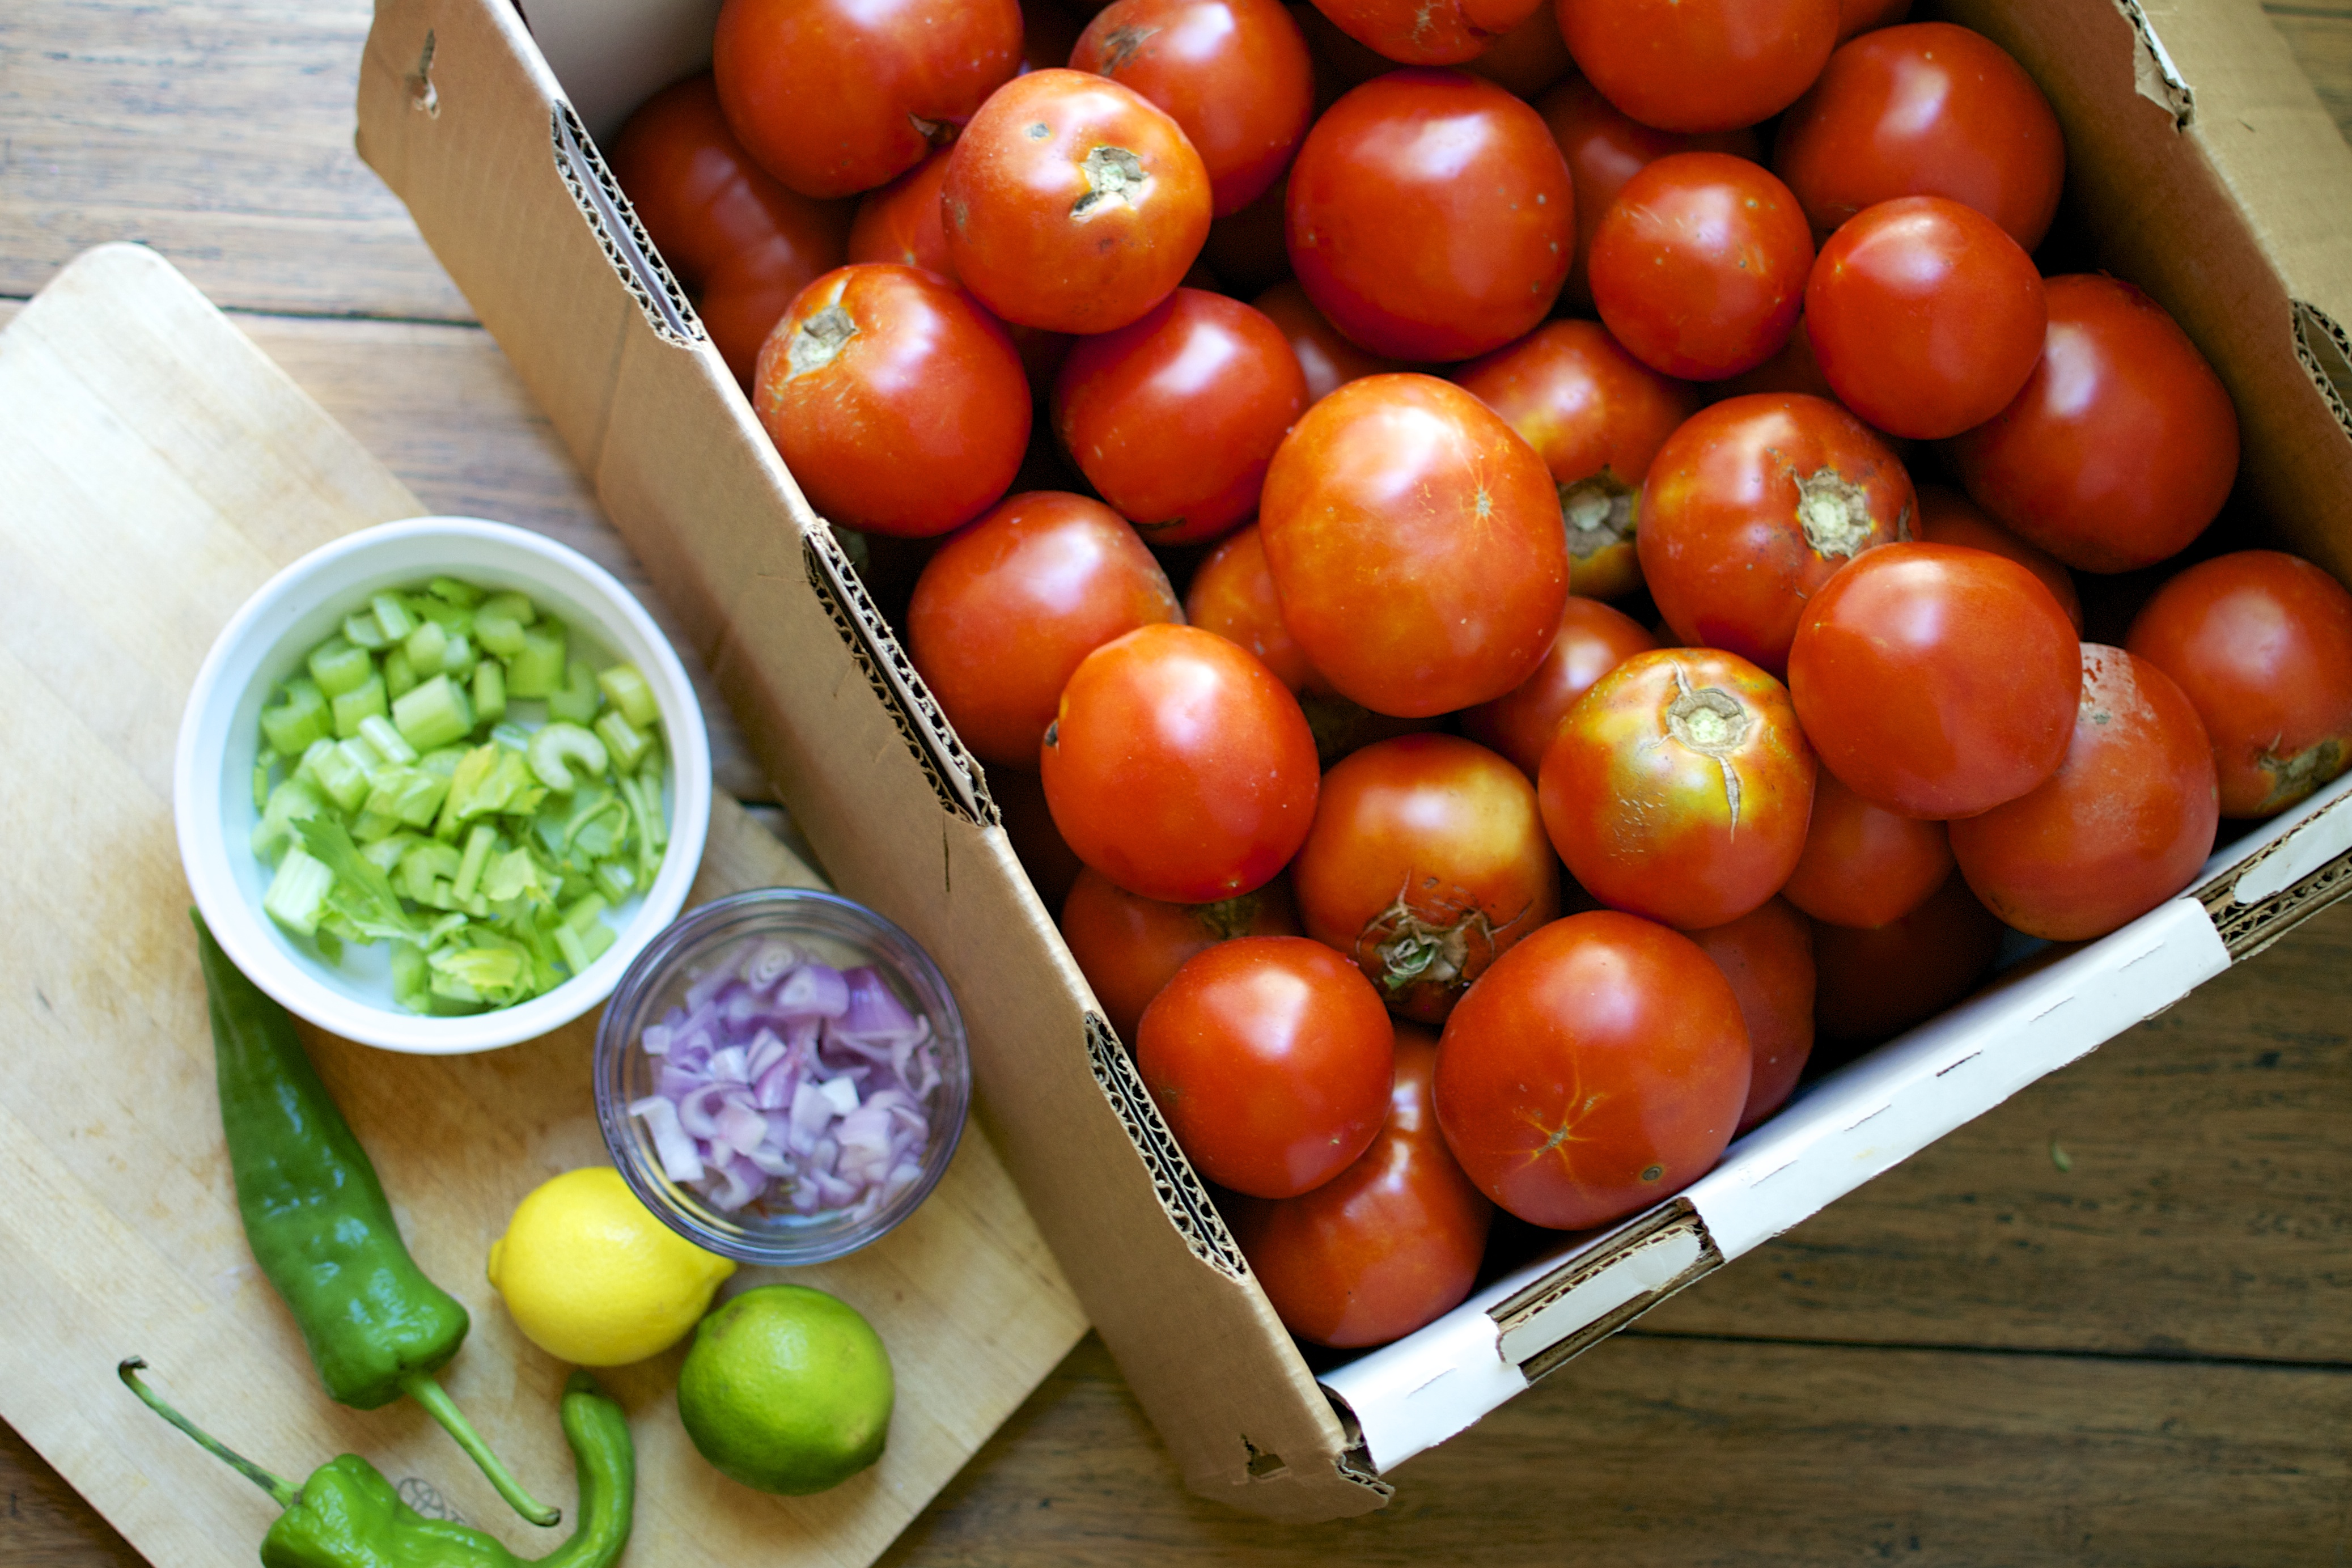
We came home to a plethora of tomatoes in our garden. The end of August and September typically leave most gardeners with so many tomatoes that you are looking for new and different ways to use them.  So I have a handy dandy new recipe idea for you and all your ton o’ tomatoes…Bloody Mary Mix. Ya..you heard me. I will be showing you how to use all of those tomatoes to make fresh tomato juice for your own homemade Bloody Mary Mix.

Homemade Bloody Mary Mix // Big Eats Tiny Kitchen

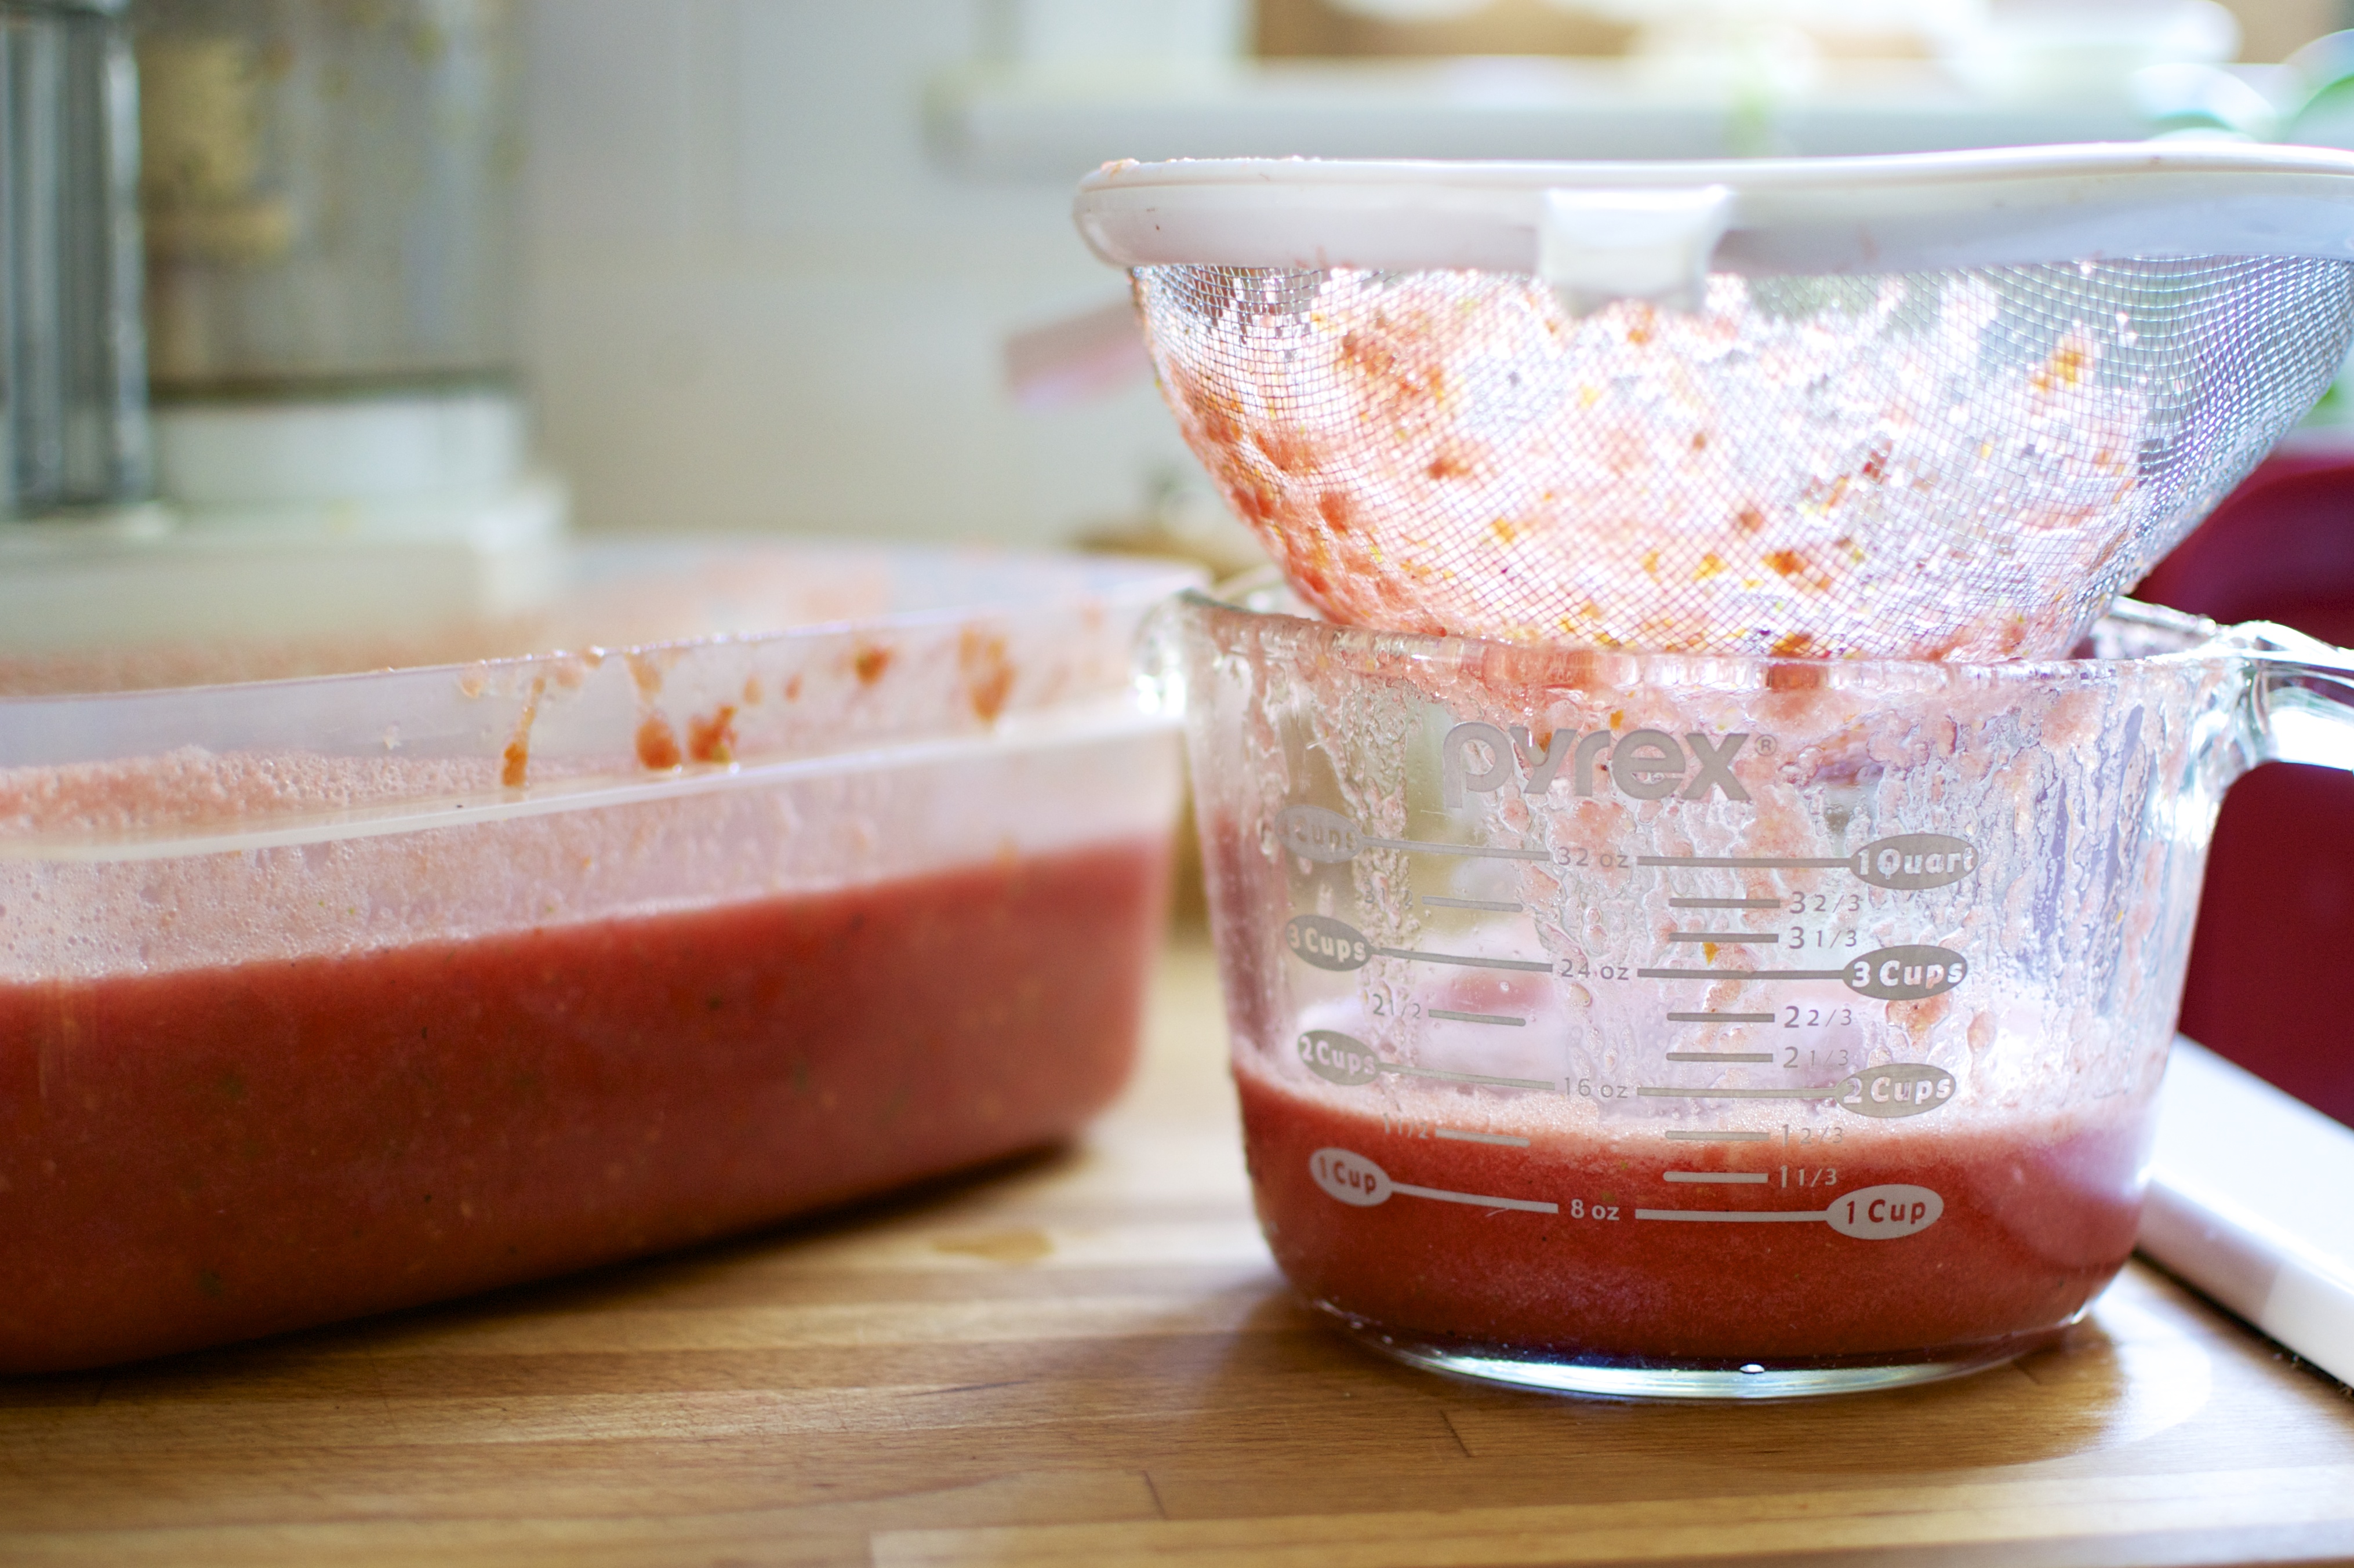
One really easy way to make tomato juice is using a juicer. Williams-Sonoma has a plethora of great juicer options (droooool). Unfortunately, I do not have a juicer. So I decided to puree my tomatoes (along with some onion, green chiles, and celery) and pass the puree through a sieve or fine mesh to separate the juice from the solids.  I was able to get 8 cups of juice from 12 cups of diced tomatoes.

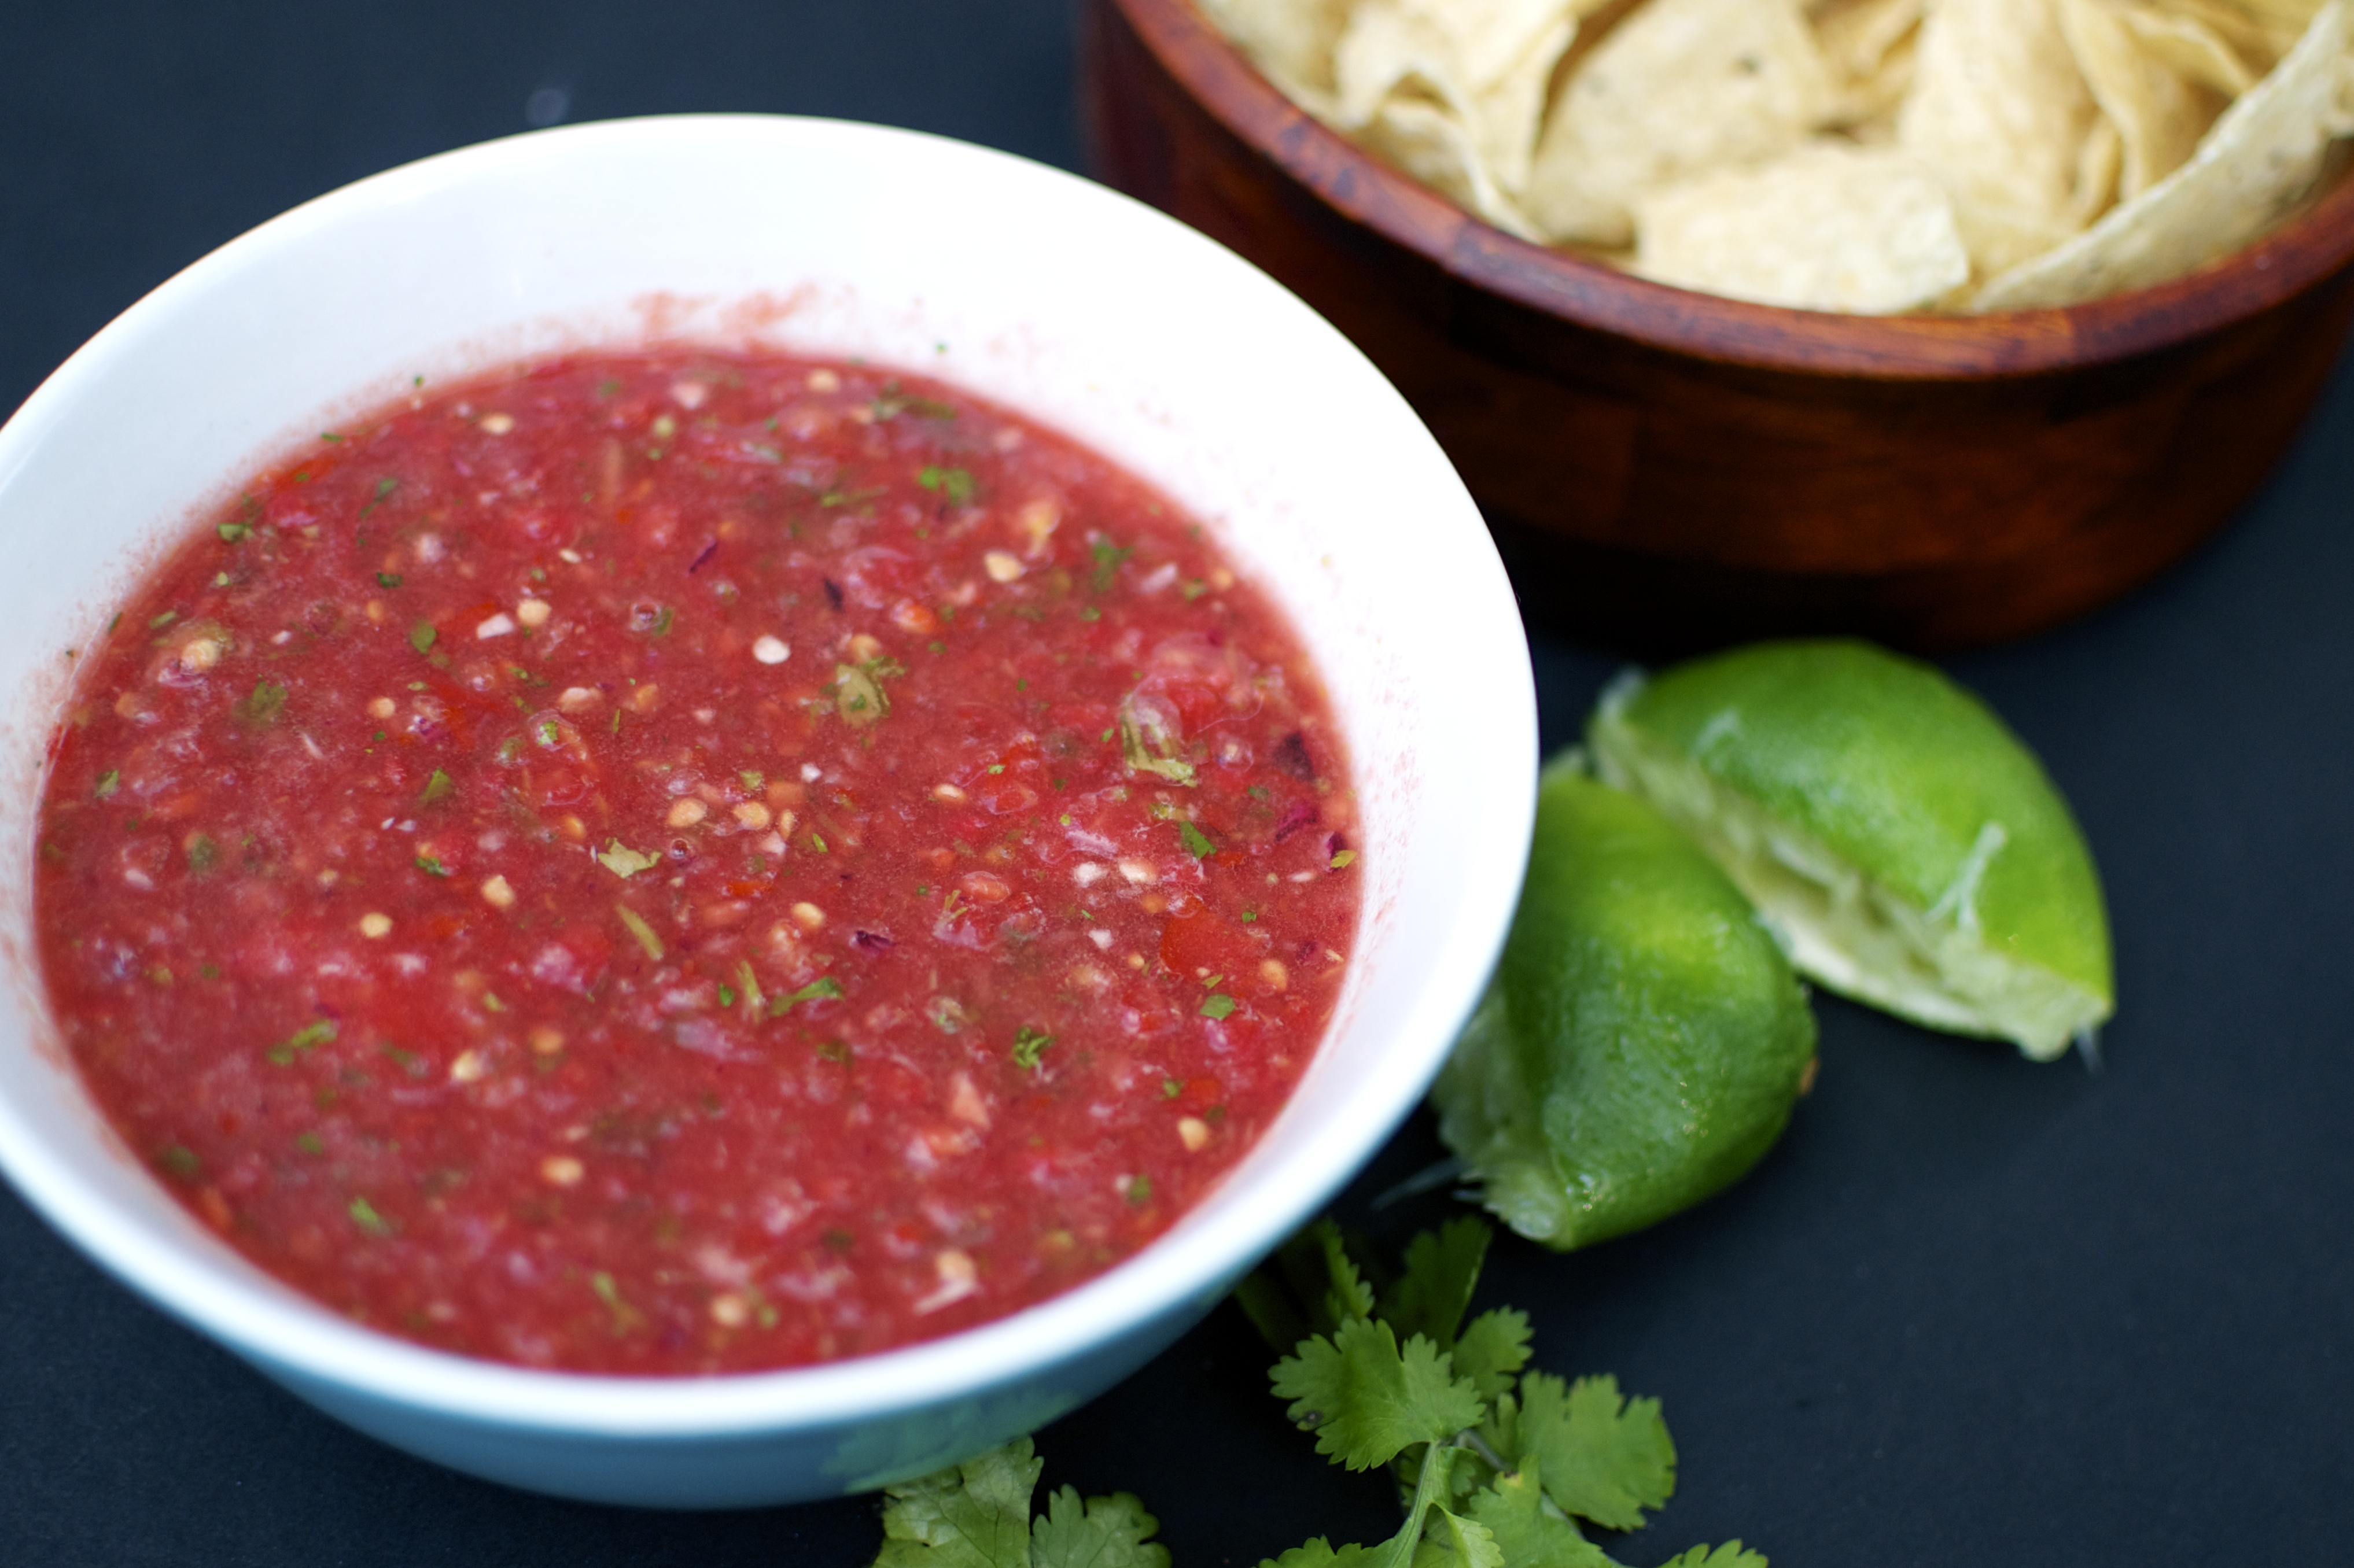
And DON’T THROW AWAY THOSE SOLIDS…seriously.  Make fresh and easy salsa with the tomato solids! Two recipe dishes for one effort!  I added a handful of cilantro, a diced onion, diced jalapeños, lime juice, and salt to taste. Bam…salsa. A snack to go with your brunch drink. Amazing.

Additionally, I have included canning instructions below so that you can preserve your awesome homemade Bloody Mary Mix and drink it forever give it as gifts (if you can dare part with this amazing elixir). If you don’t have much canning equipment, check out this awesome selection of canning and preserving equipment from Williams-Sonoma too (double drool).

Homemade Bloody Mary Mix // Big Eats Tiny Kitchen

My homemade Bloody Mary Mix recipe has a New Mexican spin since I added roasted hatch green chiles. I roasted my own chiles by placing them over an open gas flame. The smokey hatch chiles provide a nice smokey addition of flavor! Warning – be careful when adding additional hot sauce to your Bloody Mary Mix because some hatch chiles can be HOT HOT HOT.

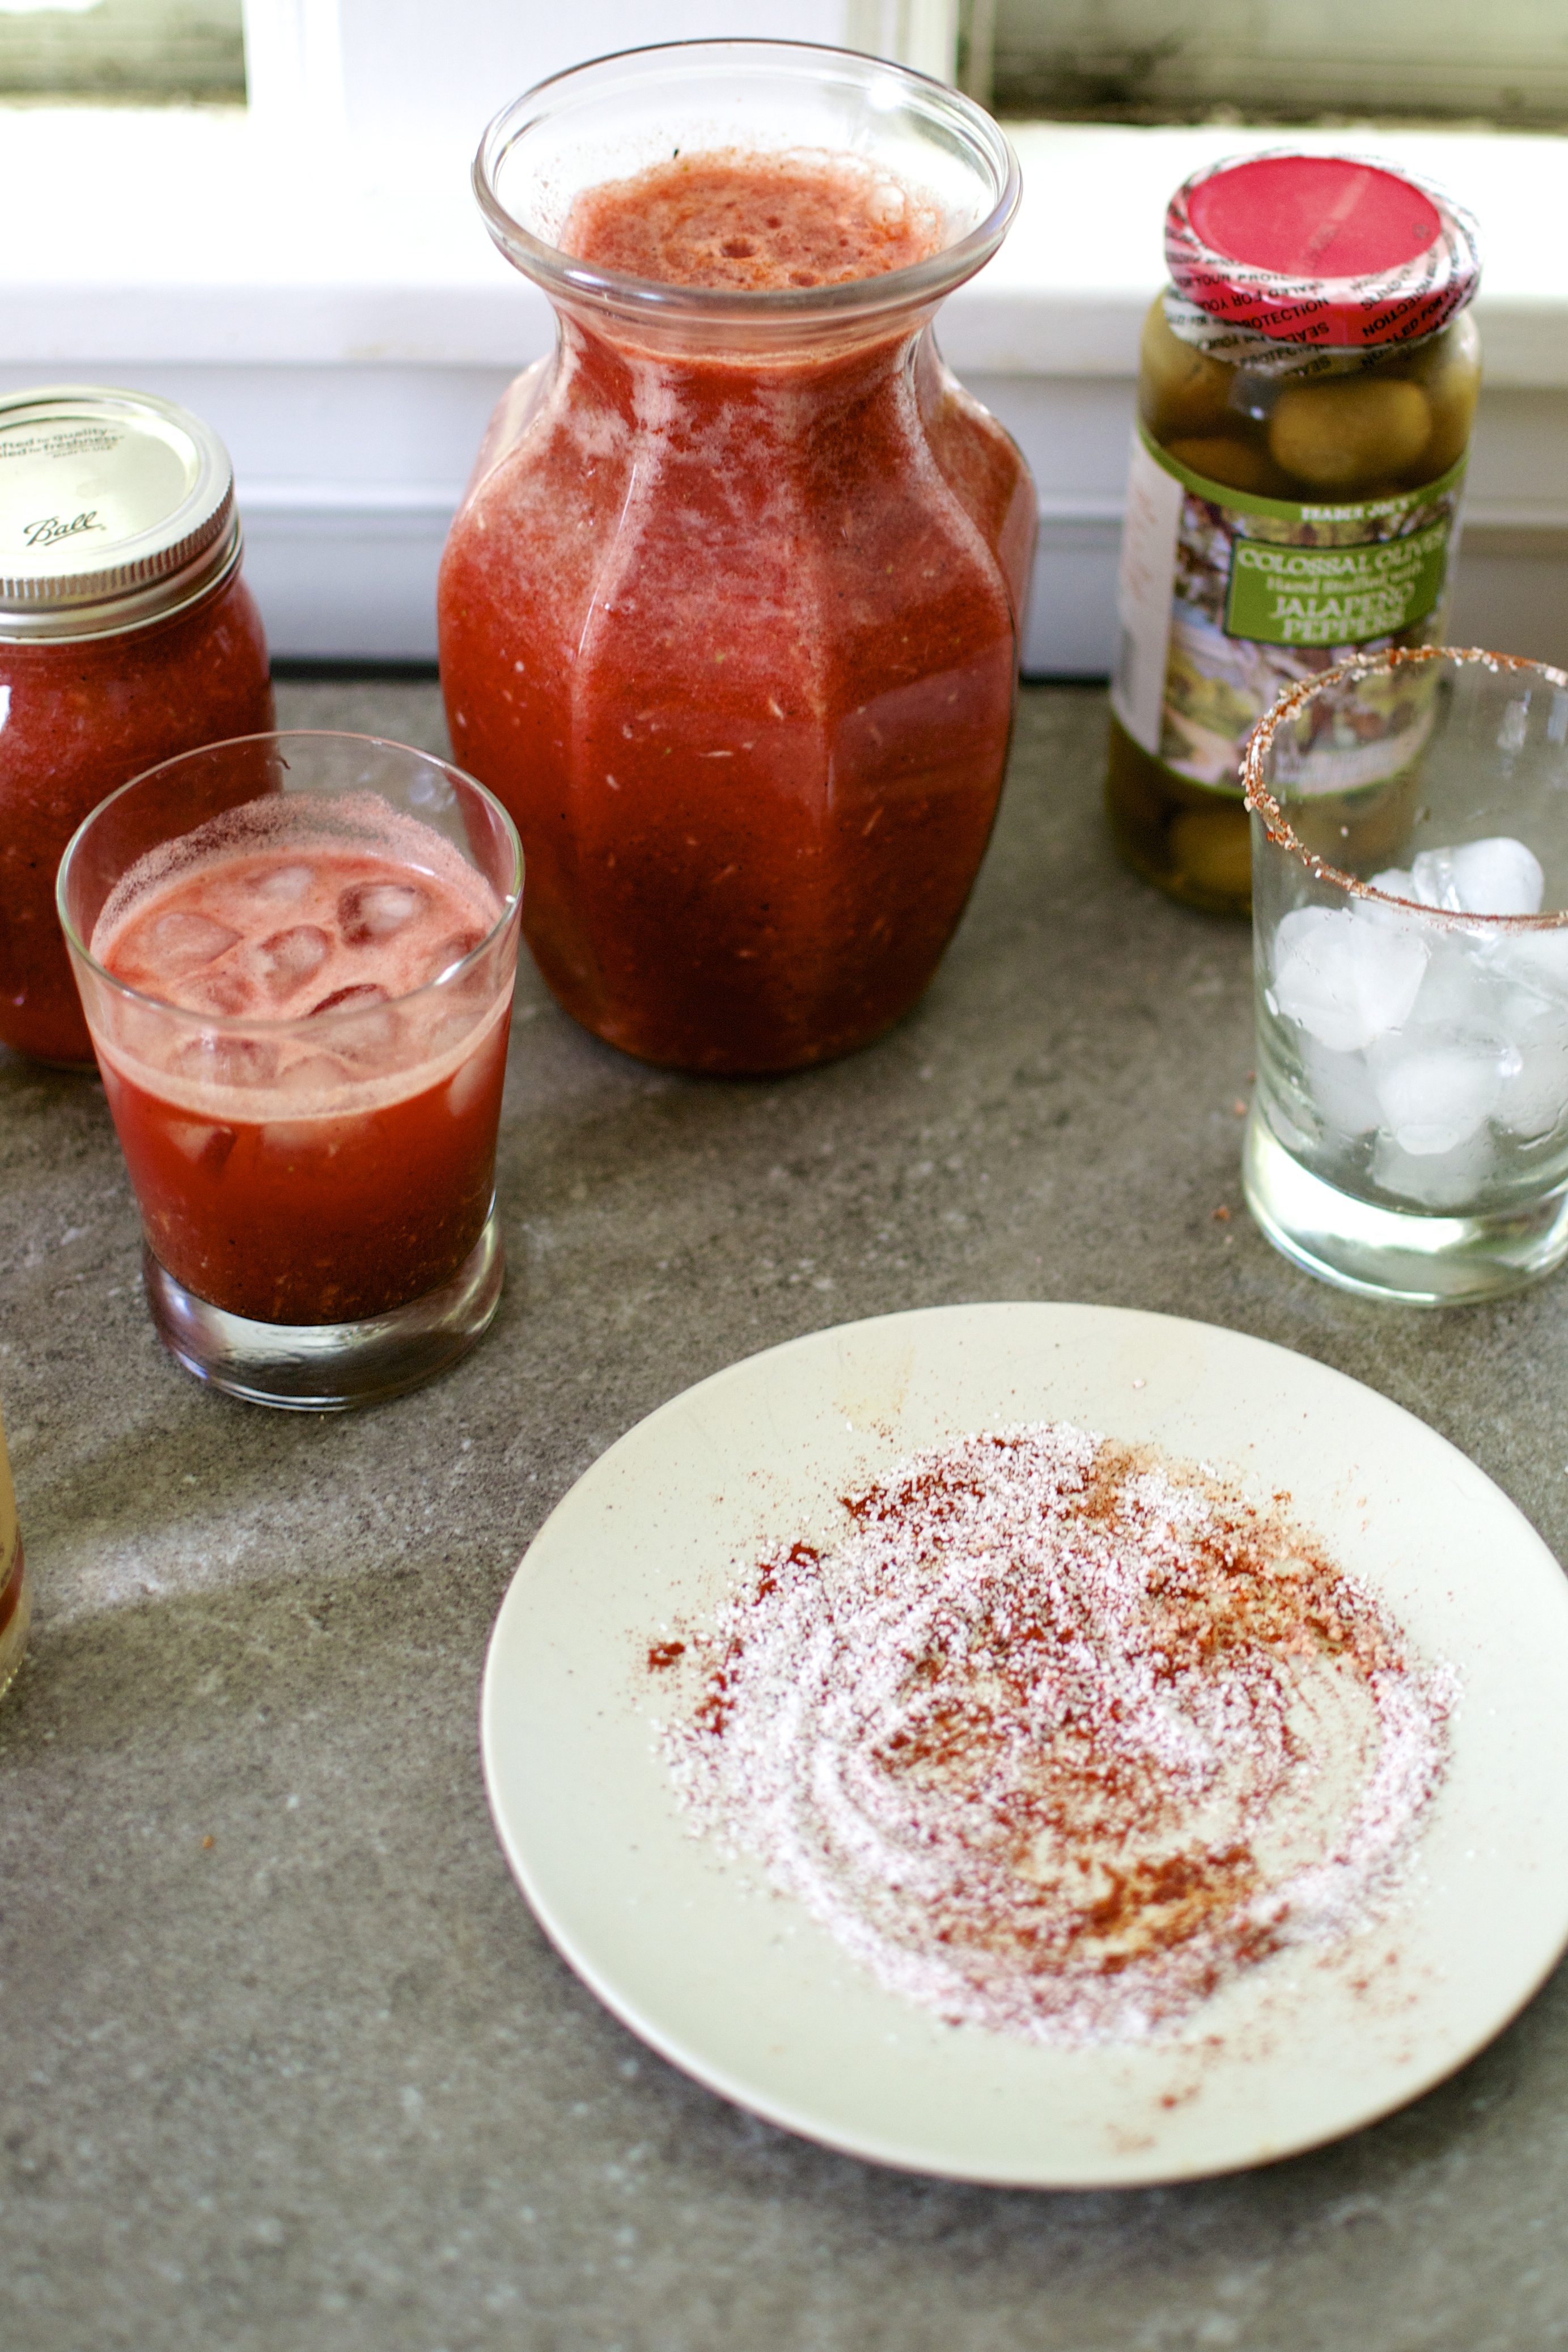
If you want to put up several jars of this Bloody Mary Mix, pint-sized jars of homemade Bloody Mary Mix make a great gift.  I know I would LOVE to get this mix as a gift. Oh ya. To make a great gift set, include the following:

  • Pint sized jar of Homemade Bloody Mary Mix (sealed and processed through hot batch canning)
  • Jelly jar of pickled green tomatoes (sealed and processed through hot bath canning) or a jar of jalapeño stuffed olives
  • Tiny baggy of kosher salt, ground pepper, and smoked paprika for the rim
  • Mini bottle of vodka

Homemade Bloody Mary Mix // Big Eats Tiny Kitchen

Voila! Best brunch gift ever.  Be sure to include directions for mixing up the homemade drink. One pint jar will make at least TWO Bloody Marys.

Note – the Homemade Bloody Mary Mix may start to separate (solids and liquid). This is ok…no big deal. Just swirl the mix prior to preparing your drinks. This may not be an issue if you use a juicer.

Homemade Bloody Mary Mix // Big Eats Tiny Kitchen

Homemade Bloody Mary Recipe

  • Servings: 6
  • Difficulty: Medium
  • Print

Ingredients

  • 12 cups of diced ripe tomatoes and juice
  • 1 medium shallot, diced
  • 3 stalks of celery plus leaves, chopped
  • 2 fresh roasted hatch green chiles (or 4 oz canned green chiles) (optional)
  • juice of 2 limes and 2 lemons
  • 2 to 3 tablespoons of grated fresh horseradish or prepared bottled horseradish
  • 2 to 3 tablespoons gluten free Worcestershire sauce
  • 1 tablespoon celery salt
  • 2 teaspoon smoked paprika
  • Hot sauce (such as Sriracha), to taste
  • 1/4 cup pickle juice (spicy pickle juice is super good)
  • 1 tablespoon freshly ground black pepper
  • 1 tablespoon kosher salt
  • 2 cups of vodka
  • Rim Seasoning: kosher salt, fresh ground pepper, smoked paprika
  • Optional Garnish: olives, jalapeño stuffed olives, pickled green tomatoes, lime wedges

Instructions

  1. Make Fresh Tomato Juice – Place chopped tomatoes, onion, celery, and roasted hatch chiles in a blender or food processor and puree.  This will likely need to occur in batches. Pass the pureed mixture in batches through a food mill or through a fine mesh sieve, capturing the juice in a large container. You should have about 8 cups of tomato juice.  Set solids aside to make this salsa. (Alternately to using a blender, you can use a juicer and juice the tomatoes, celery, shallot, and chiles).
  2. Make Mix – Add lemon juice, lime juice, grated horseradish, Worcestershire sauce, smoked paprika, and celery salt to the fresh tomato juice. Add hot sauce, salt, and fresh cracked pepper to taste. (To can and preserve the Bloody Mary Mix, see canning instructions below).
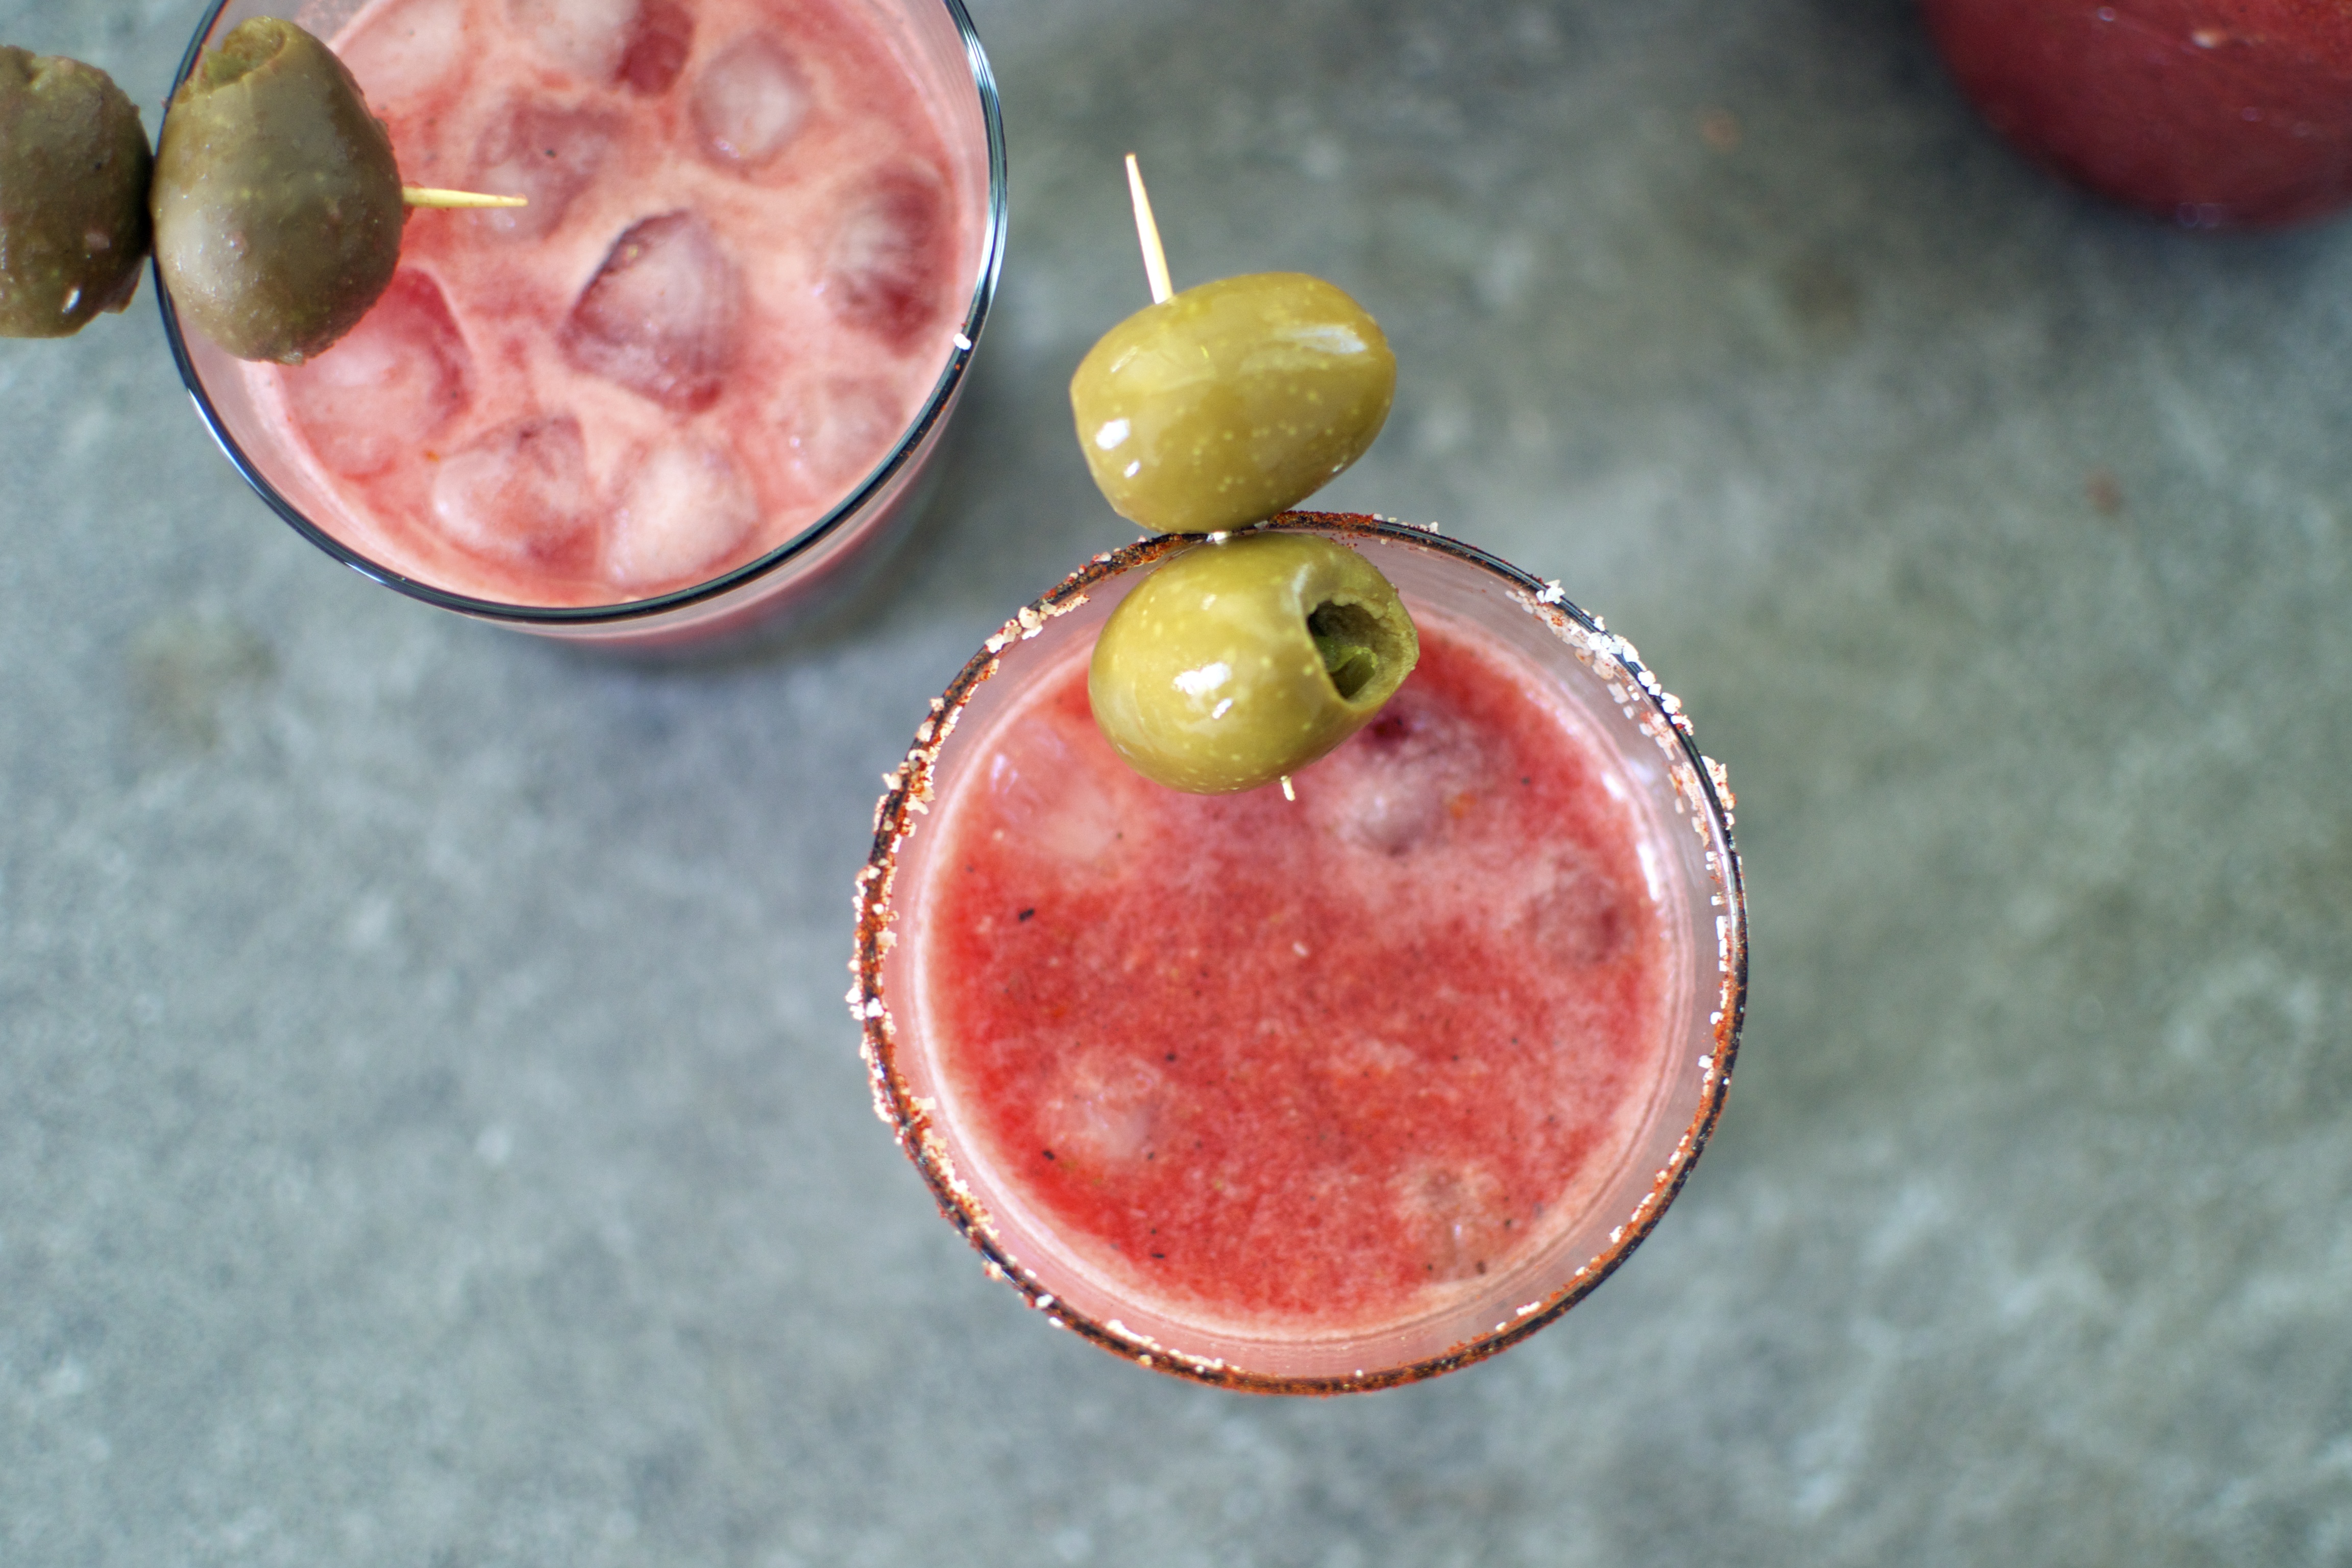
  3. Assemble Drinks – Mix 1 tablespoon each of salt, ground black pepper, and smoked paprika on a small flat plate. Dip the rim of each glass in water or lemon juice and then dip the rim of each glass in the paprika-salt mixture and twist the glass.   Fill each 8 ounce glass with ice to the rim. Pour 1 ounce of vodka and top off with bloody mary mix in each glass. An extra splash of hot sauce and pickle juice tastes grand.  Be sure to swirl around all the ingredients using a spoon or chopsticks.
  4. Garnish – Top and garnish the drinks as you wish…with limes, lemons, jalapeño stuffed olives, hot sauce, pickled green tomatoes, pickled green beans, bacon… ya bacon. It’s endless possibilities.

Canning Instructions: (See this tutorial on canning instructions for great details)

  1. Clean and heat canning jars.  Simmer lids for 10 minutes at around 180 F water. Preheat the water bath to a rolling boil.
  2. Fill pint-sized jars with Bloody Mary Mix, leaving 1/4-inch head space at the top of the jar. Wipe rim of jars.
  3. Apply the lids and screw on the canning rings.
  4. Lower the pint jars into the boiling water canning bath using a jar rack. Allow the water to come back to a gentle boil.  Place lid on canning bath and process pint jars for at least 45 minutes. (Note – If you’re canning a small batch of jars, it is best to use a smaller pot to process your jars to reduce breakage.)
  5. Remove from canning water bath using tongs. Allow to cool to room temperature. After your jars have cooled, check the seal by pressing down on the center of the lid. If the lid does not move and is concave, then you have a good seal. However, if the lid moves when pushed, then there is a bad seal and the jar needs to be processed again.

Advertisement

Gluten Free Chocolate Chip Zucchini Muffins

Gluten Free Chocolate Chip Zucchini Muffins // Big Eats Tiny Kitchen

Remember that time that you thought you tasted the best zucchini bread ever?

I think you were wrong. I’m so sorry to bust your bubble… but….

THIS gluten free zucchini bread recipe that I am presenting to you today is literally the best zucchini bread I have eeeever had. literally.

Ever. Had.

I’m serious. And I sort of think of my self as a zucchini bread expert. Not to brag, but I’m a bit of a big deal in the zucchini world. Just saying.

Gluten Free Chocolate Chip Zucchini Muffins // Big Eats Tiny Kitchen Gluten Free Chocolate Chip Zucchini Muffins // Big Eats Tiny Kitchen

But back to these muffins. These are soooooo good. And they are gluten free and only made with two types of flour: oat flour and almond flour. Ya. Gettyup!

After my first bite of these gluten free zucchini and chocolate chip studded muffins that are sweetened with pure maple syrup…I had to sit down, regain composure, and do a double take…and then shove the rest of it in my mouth. Gluten free eaters and gluten lovers alike will be amazed. They are moist, light, and fluffy.

Gluten Free Chocolate Chip Zucchini Muffins // Big Eats Tiny Kitchen

Gluten Free Chocolate Chip Zucchini Muffins // Big Eats Tiny Kitchen

I was really really really sad when I was finished with my muffin. It was the “watch your childhood best friend move away and all you could do is run to your room and write a letter as soon as possible so that she had it waiting for her when she got to her new home” kind of sad. And then I realized how thankful I was that there were 11 muffins left…shhhhhhh! I can’t say it too loud, or others will here and come steal my little precious precious precious zucchini muffins and their melty delicious chocolate chip bitsies.

Snack time just got a HUGE boost. You are welcome!

Gluten Free Chocolate Chip Zucchini Muffins // Big Eats Tiny Kitchen

Note – I made these muffins with a white skinned zucchini that I bought at the farmers market. Although the white skinned version was easier to shred, I missed the green flecks of zucchini skin in my muffins. But if you have pick eaters in your family, removing the skin of the zucchini or using a white skinned zucchini is a great way to add this vegetable to muffins without them knowing. Muahahha.

Gluten Free Chocolate Chip Zucchini Muffins // Big Eats Tiny Kitchen

Gluten Free Chocolate Chip Zucchini Muffins (Gluten Free and Dairy Free Option)

  • Servings: 12
  • Difficulty: Easy/Medium
  • Print

Ingredients

  • 2 cups grated zucchini meat (try to avoid the seeds)
  • 2 cups GF oat flour (grind 2 cups of GF rolled oats in a food processor to a fine oat flour)
  • 1 cup almond flour
  • 2 teaspoons baking powder
  • 1/2 teaspoon kosher salt
  • 1 teaspoon ground cinnamon
  • 4 eggs, at room temperature
  • 1/2 cup maple syrup (or honey)
  • 6 Tablespoons butter, softened (or melted and cooled coconut oil)
  • 1/4 cup plain greek yogurt (or applesauce)
  • 2 teaspoons pure vanilla extract
  • 1/2 cup dark chocolate chips

Instructions

  1. Remove items from refrigerator to come to room temperature.
  2. Preheat oven to 350 F. Place paper liners in 12-cup muffin tin. Set aside.
  3. Shred zucchini (with or without skin) in a bowl. Press with a clean towel to remove excess moisture. Set aside covered and allowing to drain.
  4. Place oat flour and almond flour, baking powder, salt, and cinnamon in a large bowl. Whisk together and set aside.
  5. In the bowl of a food processor or mixer, beat eggs for 1 to 2 minutes or until frothy. Add maple syrup and butter and process an additional minute until well incorporated. Add greek yogurt and vanilla. Pulse until combined.
  6. Add wet ingredients to dry ingredients. Mix together until just combined (don’t over mix). Gently stir in shredded zucchini and chocolate chips. Allow to rest for 1 minute.
  7. Fill muffin tins to 3/4 full. Place muffin tin on middle rack in preheated oven. Back for 35 to 40 minutes, or until tops are browned and slightly cracked. Remove from oven and allow to cool on cooling rack for at least 30 minutes (if you can!). Get ready for zucchini muffin heaven!

Note –

1. This recipe was inspired and adapted from Edible Perspectives Zucchini Chocolate Chip Cake.

2. Dairy Free – sub out the greek yogurt for applesauce and use coconut oil instead of butter. Dairy free chocolate chips can also be used in place of the regular chocolate chips.

3. These muffins will freeze well for up to 3 months. To thaw, place in microwave for 30 second intervals. Makes a quick and easy breakfast or after school/work snack.

Margarita Sherbet Popsicles

Margarita Sherbet Popsicles // Big Eats Tiny Kitchen

Summer colds are the worst. I guess a cold is never great to have, but it feels especially terrible when the weather is great outside but all you want to do is roll up in a ball of sheets and kleenex and NyQuil and watch The Notebook over and over and over.

Margarita Sherbet Popsicles // Big Eats Tiny Kitchen

Margarita Sherbet Popsicles

Recently I was knocked out with a cold virus that lasted over TWO weeks. I couldn’t shake it.  Just when I thought that I was getting better, it knocked me back down with a terrible hacking cough, or a sore throat from hell, or a migraine that felt like my head was run over by a ’64 Gran Turino.

When I’m sick there are a few “prescriptions” that I do religiously:

1. Saltwater gargle (it’s awful…but works)

2. Tea with honey

3. Lime popsicles

I decided to amp up my old store-bought lime popsicles and make my own…because OBVIOUSLY that is going to make me better. Why would going to a doctor or actually getting help do me any good?

Nope, I need the healing powers of lime juice, honey, and tequila…of course.

Margarita Sherbet Popsicles

Margarita Sherbet Popsicles

And these are sherbet popsicles…or sherbERRRT as I pronounce it. I used whole milk, but full fat coconut milk would work wonderfully to make these both dairy free and paleo-friendly treats. Also, the tequila is optional (why?), especially if these will be snacked on my some tiny tots.

Margarita Sherbet Popsicles // Big Eats Tiny Kitchen

Margarita Sherbet Popsicles

  • Servings: 6
  • Difficulty: Easy
  • Print

Ingredients

  • 3 limes, zested and juiced (1/2 cup lime juice and 1 Tablespoon lime zest)
  • 1/3 cup honey
  • 2 cups whole milk (or full fat coconut milk for dairy free)
  • 2 to 4 tablespoons silver tequila (optional)
  • 1/8 teaspoon salt

Instructions

  1. Whisk lime juice, lime zest, honey, and milk in a medium bowl until completely combined. Add tequila and salt to taste.
  2. Pour into popsicle molds, leaving 1/4 inch of space at the top for expansion.  Freeze for at least 4 hours. **See note below about molds.
  3. When ready to eat, run a bit of hot water over the popsicle mold and the popsicles will release!

**Note about popsicle molds – I have a simple popsicle mold that I bought at target. It comes with its own handles for each popsicle. However, this time I decided to use sticks and see how it would work for those of you without specific molds. I put the filled mold in the freezer for 1.5 hours until it began to firm up. Then I stuck the popsicle sticks into the mold. No need to soak the sticks ahead of time. 

Summer Squash Pasta with Creamy Basil-Cilantro Dressing

Summer Squash Pasta with Creamy Basil-Cilantro Dressing // Big Eats Tiny Kitchen

Many people have a love/hate relationship with summer squash. I am on the love side. I could easily eat way too much of this vegetable when it is roasted or grilled.

Recently I have seen many recipes featuring this summer bounty raw….hrmmmmm.   One of the most beautiful and intriguing raw squash recipes I have seen is from Kimberly Hasselbrink’s beautifully photographed and thoughtfully constructed cookbook, Vibrant Food. Her recipe for Summer Squash Pasta with Green Goddess Dressing instantly had me salivating and curious about the squash “pasta”.

Summer Squash Pasta with Creamy Basil-Cilantro Dressing // Big Eats Tiny Kitchen Summer Squash Pasta with Creamy Basil-Cilantro Dressing // Big Eats Tiny Kitchen

After I purchased a boat load of beautiful yellow summer squash at the farmer’s market this past weekend, I knew exactly what was on my To Do list of “things to go in my belly”. My version of this squash “pasta” dish is slightly adapted from the original recipe.  I used the herbs that I had on hand which were different from what the recipe called for: tarragon, parsley, basil, and chives. I instead used a mixture of basil, cilantro and chives. Delicious. I also used lime juice instead of the recommended combo of lemon juice and red wine vinegar. Although I’m sure the original is amazing, my version tasted like a bowl of summer bounty and was amazing. It shows that this recipe is adaptable and flexible with whatever you have on hand.

Summer Squash Pasta with Creamy Basil-Cilantro Dressing // Big Eats Tiny Kitchen

So stop serving soggy yellow squash casseroles and serve up this fresh raw squash pasta dish. It will impress everyone…even yourself. I would even venture to say that those that aren’t into yellow squash may change their mind after eating this dish.

Note – It is best served immediately after placing the dressing on the “noodles”.  It would also taste great with grilled chicken mixed in for a main course dinner.

Summer Squash Pasta with Creamy Basil-Cilantro Dressing

  • Servings: 4
  • Difficulty: Easy/Medium
  • Print

Ingredients

  • 2 to 3 medium summer squash (about 2 lbs)
  • 2 teaspoons salt, plus 1/4 teaspoon salt for dressing
  • 1/2 cup greek yogurt
  • 2 tablespoons olive oil
  • juice and zest of 1 lime
  • 3/4 cup fresh herbs (I used 1/4 cup each of basil, cilantro, and chives)
  • 1 garlic clove, minced
  • 1 jalapeño, seeded and minced (optional)
  • 1/4 cup shelled pistachios

Instructions

Note – For those of you with a cool spiralizer, you will easily be able to crank out squash pasta. However, I do not have this cool toy and still created squash noodles easily by using a mandolin slicer and then julienning the slices into thin noodle-like strands.

  1. Make squash noodles by Julienne slicing or spiralizer. Place squash noodles in a colander and sprinkle 2 teaspoons of salt on top. Allow to sit for 20 minute and drain excess liquid from squash. After 20 minutes, use a paper towel or clean kitchen towel to gently press excess liquid out of squash. Transfer squash to a medium bowl.
  2. Meanwhile, in the bowl of a food process, combine yogurt, olive oil, lime zest, lime juice, basil, cilantro, chives, garlic, jalapeño, and salt. Process until all ingredients are smooth and combined.
  3. Toss dressing with squash. Sprinkle with pistachios and extra herbs. Serve immediately.

Gluten Free Corn Fritters

Gluten Free Corn Cakes // Big Eats Tiny Kitchen

Shhhhhh…I broke my “don’t remove corn kernels from the cob” vow…again! I know I had previously posted that I wouldn’t do it again…but really, this should be okay too because I’m making corn FRITTERS which are like corn pancakes. Yeah! You can eat them at breakfast, lunch, or dinner. Sooo…what’s not to celebrate here? Who’s got two thumbs and loves fritters? This gal! Everyone loves a fritter!

These corn fritters are adapted from the most recent Bon Appetit issue which features Jalapeno-Corn Fritters plus other great recipe ideas for fresh corn. However, my recipe for corn fritters is gluten-free by  using 100% stone-ground yellow cornmeal. I also can’t stop myself from adding cilantro to everything in the summer, so that happened too. If you don’t dig cilantro, replace it with chives or scallions.

Gluten Free Corn Cakes // Big Eats Tiny Kitchen

Gluten Free Corn Cakes // Big Eats Tiny Kitchen

These corn fritters are very very very simple to whip up. Kids adore them! I promise. They are great as a base for fried eggs and garlicky greens for breakfast or with a dollop of greek yogurt and paprika as a snack. They also are really good alongside grilled salmon for dinner or spread with butter and honey for anytime of day.  ERMERGERD!

So get on it! Whip up some corn fritters now and make your mouth happy.

Gluten Free Corn Cakes // Big Eats Tiny Kitchen

Gluten Free Corn Cakes // Big Eats Tiny Kitchen

Gluten Free Corn Fritters

  • Servings: 4
  • Difficulty: Easy
  • Print

Ingredients

  • 2 eggs
  • 1/4 cup cornmeal or corn flour
  • 1/3 cup chopped cilantro (stems and leaves)
  • 1 garlic clove
  • 2 ears of corn, kernels removed (about 2 cups of fresh corn kernels)
  • 1/2 teaspoon salt
  • Oil or butter for cooking

Instructions

  1. Place eggs, cornmeal, cilantro, and garlic into the bowl of a food processor. Processes until well combined and cilantro is finely chopped. Add fresh corn kernels and salt. Pulse about 10 to 15 seconds until corn is chopped consistently but do not puree.
  2. Heat oil or butter in a nonstick or cast iron skillet. Spoon about 1/4 cup of batter into heated skillet. Cook corn fritters on each side for about 4 minutes or until well browned on both sides.

Bourbon Butter Pecan Ice Cream

Bourbon Butter Pecan // Big Eats Tiny Kitchen

Some days can go by without me noticing what the date actually is. But August 8th and August 9th never go by without me knowing. These dates creep up every year with a solemn presence to signify a defining moment.

Twenty six years ago, on 8/8/88, was the last day that my father was alive. As most dads do, he was a man that carved out a significant spot in my life despite being present for only 8 years of my life. I wanted to be just like him…loud, smart, athletic, intuitive, mechanical, reckless, thoughtful, artistic, funny, and tenacious.

This year, instead of focusing on his death, I want to celebrate his life. I want to celebrate his last day,  August 8th. I want to put a positive spin on these dates instead of remembering them morosely and feeling as though these dates also signify the death of my childhood.

Bourbon Butter Pecan // Big Eats Tiny Kitchen

Bourbon Butter Pecan // Big Eats Tiny Kitchen

Sorry to put a downer on today’s parade, but I’m hoping to bring it quickly up with an Ice Cream party. A BOURBON Butter Pecan Ice Cream Party to be exact. Butter pecan ice cream was my father’s favorite flavor. We would take long summer drives to the local Braum’s ice cream store in Oklahoma and share a butter pecan mix. This flavor gives me INSTANT childhood love and gratification.

So what better way to improve on any ice cream party than with BOOOZY ice cream. I think my dad would have approved of the boozy bourbon addition…in fact I KNOW he would have doubly approved. He probably would have even drizzled more on top like a bourbon float…hooooyah! Come and get it. So grab a spoon and dig in. Raise your ice cream goblets and glasses to THE man, Jimmy “James” “Jim” Hinman!

Cheers to you, Jimmy Hinman, and the brilliant and quick-burning roman candle life that you had. You touched so many lives in the short amount of time that you were alive. I’m jealous of those that knew you longer than I did, but thankful for the time that I did have.  You are missed every minute. 

Bourbon Butter Pecan // Big Eats Tiny Kitchen

Bourbon Butter Pecan Ice Cream

  • Servings: 6
  • Difficulty: Medium
  • Print

Ingredients

  • 1/2 cup chopped pecans
  • 1 tablespoon unsalted butter
  • 1/4 teaspoon kosher salt
  • 1 1/2 cups whole milk
  • 1 1/2 cups heavy cream
  • 1/2 cup maple syrup
  • 1 tablespoon cornstarch
  • 1/8 teaspoon kosher salt
  • 3 egg yolks
  • 2 Tablespoons bourbon
  • 1 teaspoon vanilla extract

Instructions

  1. In a dry skillet over medium heat, toast pecans for 3 to 4 minutes, stirring constantly. Add butter and turn off heat. Stir until butter is melted and pecans are coated. Sprinkle salt over pecans. Remove buttered pecans to a plate and allow to cool. Once they are cooled, store pecans in the refrigerator for up to 3 days.
  2. Place a large sealable container in the freezer. The ice cream mixture will go in this container when it is ready.
  3. Combine cornstarch with a few tablespoons of milk in a medium to large bowl. Whisk together until the cornstarch is completely dissolved and there are no more clumps. Add the egg yolks and whisk mixture together. Set aside.
  4. Heat milk, cream, and maple syrup in a saucepan over medium-high heat, stirring frequently, until mixture comes just to a boil. Remove saucepan from heat. Ladle a little bit of the milk mixture into the egg mixture, whisking constantly because you do not want to scramble the eggs. You are tempering the egg mixture. Add a few more ladles at a time of the milk mixture until the egg mixture is warmed and thoroughly combined. Now add the warmed egg mixture to the milk mixture in the sauce pan, whisking constantly for about 2 minutes. Do NOT allow to boil. The mixture will become thick enough to coat the back of a spoon (170 to 175°F ).
  5. Pour custard mixture through a fine-mesh sieve into a bowl and stir in vanilla and bourbon to taste. Place syran wrap on the surface of the custard in the bowl and allow to cool in the refrigerator for at least 3 hours.
  6. After the mixture is completely cool, process it in an ice cream maker according to the manufacturer’s instructions until almost firm. Pour in the buttered pecans and allow to process in the ice cream maker for about 5 more minutes. Transfer the ice cream to the pre-frozen airtight container and store in the freezer. Prior to serving, remove from freezer and allow to sit at room temperature for at least 5 minutes.

Fresh Corn, Tomato, and Quinoa Salad (Gluten Free)

Fresh Corn, Tomato, and Quinoa Salad // Big Eats Tiny Kitchen (Gluten Free)

I want to begin with an apology to my 8 year old self for this post because I’m breaking a BIG commandment with myself.

Thou shall NOT cut corn OFF the cob…ever.

My kid self would be appalled. I mean…WHY would anyone ever cut corn OFF of the cob. They are taking ALL of the fun out of eating corn.

When I was little and we had corn on the cob for dinner, it felt like a holiday. I would ask for more corn over a slice of pie any day. Weird child, I know. There was also a period in my young life when I think I didn’t have front teeth for over a year, but continued to gnaw down ear after ear of corn, while projecting kernel after kernel into the air in front of me like a machine gun.

Fresh Corn, Tomato, and Quinoa Salad // Big Eats Tiny Kitchen (Gluten Free)

Plus, when I was a kid and corn wasn’t on a cob, that it meant it came in a can…*shudder*. I haaaate canned corn. Sorry to all you canned corn eaters. But if you have ever had FRESH FRESH FRESH corn straight from the cob, it will change your life. So I feel like my childhood self might forgive me if she had ever had fresh corn directly from the farm.  To satisfy my inner child, I bought 12 ears so that most of them could be eaten directly from the cob.

Fresh Corn, Tomato, and Quinoa Salad // Big Eats Tiny Kitchen (Gluten Free)

A lesson in cutting corn from the cob. Place the cob slightly angled up and down OVER a bowl. Cut the kernels off with the blade of the knife pointed awaaaay from you, allowing the kernels to fall lovingly into the bowl. Otherwise, your kernels will catapult off of a plate onto the ground. We can’t let those kernels go to waste! All kernels need a home…a.k.a my belly!

Fresh Corn, Tomato, and Quinoa Salad // Big Eats Tiny Kitchen (Gluten Free)

Fresh Corn, Tomato, and Quinoa Salad // Big Eats Tiny Kitchen (Gluten Free)

Next thing about this salad is that it is a substantial and gluten free feast. It has quinoa which is a super food, or so I’ve been told. I love that bit of crunch that the cooled quinoa and fresh corn provide to this lush herby and fresh salad. It’s perfect for a gluten free and vegetarian option at a picnic lunch or a cool weeknight meal. You can make the quinoa ahead of time and just throw everything together prior to serving. Easy peasy. It also would be good with some grilled chicken on top, for those meat lovers like my dear hubby.

P.S. One or two or three things about the dressing! It is VERY good….like hide in a closet and drink it good. I was going for a type of green goddess style of herbaciousness. Feel free to mix up the herbs…cilantro, mint, tarragon, basil..whatevs. If you don’t have yogurt on hand, I think half an avocado would do well in this dressing. Aaaaand if you don’t have yogurt OR an avocado, throw in some soaked and drained nuts or sunflower seeds instead and give them a whirl in the food processor. You will just need to add water to make it the desired consistency.

Fresh Corn, Tomato, and Quinoa Salad // Big Eats Tiny Kitchen (Gluten Free)

Fresh Corn, Tomato, and Quinoa Salad (gluten free)

  • Servings: 4 as a main dish, 8 as a side dish
  • Difficulty: Easy/Medium
  • Print

Salad Ingredients

  • 1/2 cup quinoa, rinsed and drained (I used mixed quinoa, but any color would work here)
  • 2 ears of fresh corn, kernels removed from cob (about 2 cups)
  • 1 pint of cherry tomatoes, cut in half (I also added a big heirloom tomato because I loooove tomatoes)
  • 1 sweet bell pepper, thinly chopped
  • 1 medium carrot, thinly sliced
  • 2 cups of assorted greens (spinach, baby kale)
  • feta crumbles
  • Fresh basil and cilantro
  • salt and pepper to taste

Dressing Ingredients

  • 1/3 fresh basil and cilantro
  • 1/4 cup fresh chives
  • Juice of 2 limes
  • 2 tablespoons olive oil
  • 2 tablespoons greek yogurt
  • pinch of salt

Instructions

  1. Place rinsed quinoa and 1 cup of water in a small pot over medium heat. Allow to come to a boil. Cover, reduce heat, and cook for 10 to 15 minutes until water is fully absorbed. Remove quinoa from heat. Place cooked quinoa in a covered dish and refrigerate until cooled. Can be made several days ahead of time.
  2. In a medium bowl combine corn kernels, halved cherry tomatoes, carrot, sweet bell pepper, and greens.
  3. In a small food processor, add all dressing ingredients and process until desired consistency is achieved. Place dressing in a jar and refrigerate until ready to use.
  4. After the quinoa is cooled, add the quinoa and the dressing to the corn and tomato salad. Toss well. Sprinkle with feta, additional basil and cilantro. Season with additional salt and pepper to taste.

Fresh and Easy Salsa

Fresh and Easy Salsa / Big Eats Tiny Kitchen

Put me in front of a bowl of chips and salsa, and it would take the strength of ten mules on steroids to pull me away. I’m serious. Chips and salsa are my go to snack…

Not saying it’s a good thing. Just sayin that your hand maaaaaay get gnawed on if you go for a chip or scoop of salsa while I’m diving in. Seriously. I can’t stop this dipping train!

And now that tomatoes are so prevalent in my garden, it’s time to get this crazy SALSA train started!!!

Fresh and Easy Salsa / Big Eats Tiny Kitchen

Fresh and Easy Salsa / Big Eats Tiny Kitchen

I used fresh roma tomatoes, but other varieties are juuuust fine. Plus, I’ll tell you a secret. This recipe can even be made in the winter with (gasp) canned tomatoes.  I have used some that I canned from my garden, but if you only have store-bought, go for the good kind! Muir Glen is my fave. The secret to this salsa is definitely good tomatoes AND lime juice.

I whip up my salsa using a food processor but if you love to chop chop chop, then feel free to dice away. I like to reserve my energy for diving head first into the salsa bowl. If you do end up chopping up the ingredients, your salsa will just be more chunky….which is what I’m going to be if I don’t get my face out of this bowl of chips and salsa soon!

Give me more!

Fresh and Easy Salsa / Big Eats Tiny Kitchen

Fresh and Easy Salsa

  • Servings: 4 Cups
  • Difficulty: Easy
  • Print

Ingredients

  • 4 cups diced fresh tomatoes (about 15 roma tomatoes)
  • 1 small onion, chopped
  • 3 cloves of garlic
  • 2 jalapeños (chopped and seeds removed if you want mild salsa)
  • 1/4 bunch of cilantro
  • juice of 2 limes
  • 2 teaspoons salt (or to taste)

Instructions

  1. Place tomatoes in bowl of food processor and pulse a few times until tomatoes are fine diced. Transfer tomatoes to a medium-sized bowl.
  2. Place chopped onion, garlic, jalapeños, cilantro, and lime juice to bowl of food processor. Pulse for 15 seconds or until everything is chopped fine. Transfer contents to the medium bowl with the tomatoes. Stir well and add salt to taste. Cover and refrigerate until ready to serve. Can be made ahead of time.

Plum Sorbet

Plum Sorbet / Big Eats Tiny Kitchen

This week, I was the lucky recipient of a metric boat load of bite-sized cherry plums from a friend’s plum tree in her front yard!!!

So, what would YOU do with sacks and sacks of fresh tasty plums?  Well, besides pop them directly in your mouth…which happened a lot around here.

Plum Sorbet / Big Eats Tiny Kitchen

I decided to try something new….

Plum sorbet, ya’ll! Come and get it! It’s muggy and sticky outside. That means it is perfect weather for a tangy scoop of honey-sweetened Plum sorbet! And it’s dairy free!

You could easily replace the plums in this recipe with another in season fruit, like blueberries or strawberries or peaches! This is So delicious.

Plum Sorbet / Big Eats Tiny Kitchen

These plums that I used were perfectly tart and the honey provided juuuuust enough sweet balance. Also, I added a splash or two or three of champagne in the sorbet! Booze it up! Champagne or white wine in the sorbet provide the finished product a bubbly tang and help with the scoopability! Boom Boom!

Wait. This would be great as a Champagne Float! What? Yes please! If that is not a thing, it should be. Tip that pinky up, honey. Put your fancy hats on and get a big ol’ scoop of Plum Sorbet! Cheers!

DSC_0067

Plum Sorbet

  • Servings: 6
  • Difficulty: Easy
  • Print

Ingredients

  • 2 to 3 cups sliced plums, pits removed
  • 1/4 cup honey
  • pinch of salt
  • 1/3 cup champagne or white wine (or water)
  • 1/3 cup water

Instructions

  1. Add all ingredients to a blender or food processors. Purée until the mixture becomes smooth. Pour the plum puree through a fine mesh sieve to catch large pieces of skin. Place mixture into refrigerator for 30 minutes (or overnight) to chill.
  2. Place the plum purée into the bowl of a chilled ice cream machine and process according to the manufacturer’s instructions. It will take about 25 to 30 minutes. While the mixture is churning away, place a glass container into the freezer that will be big enough to place the processed sorbet into. After the sorbet is finished, either serve immediately or place into the air tight pre-chilled container and freeze for at least 2 hours to firm up.  The wine will help keep the sorbet from getting icy and will assist with scoopability if serving at a later time. Allow to sit out at room temperature for about 5 minutes after removing from the freezer, then scoop away!

Picnic Perfect Herby Deviled Eggs

Picnic Perfect Herby Deviled Eggs / Big Eats Tiny Kitchen

I’m constantly looking for easier and more efficient ways to do things. Must be the engineer in me. Well today, I have an amazing genius picnic tip.

Use an egg carton to transport deviled eggs. Genius!

This weekend we had a tasty picnic with friends to celebrate the 4th of July. My hubby and I rode our bikes to the park and brought along some snacks, including deviled eggs. My solution to transport the deviled eggs was to use the egg carton as the perfect transport container.

I placed separate muffin liners in the carton to make these a less messy picnic dish. I also decided to use nearly the whole egg instead of cutting them in half. I cut the top third of the egg off and scooped out the yolk. The yolks were then mixed with greek yogurt (instead of mayo), herbs, salt, and Dijon mustard. I then scooped the yolk mixture into a baggy, cut off the edge, and pipetted the mixture into each egg white. Fancy pants picnic dish!

Picnic Perfect Herby Deviled Eggs / Big Eats Tiny Kitchen

I unfortunately do not have very many pictures of these puppies since I was running behind and had to rush to get these beauties loaded up in the egg carton and then head out on my bike to the picnic. But I will tell you that I will definitely be repeating this process for future deviled eggs that will be accompanying me to potlucks and picnics.

The only downside to this recipe is that deviled eggs go waaaay too fast. Womp Womp.

Herby Deviled Eggs (Grain Free, Gluten Free)

  • Servings: 12
  • Difficulty: Easy
  • Print

Ingredients

  • 12 eggs
  • 1/3 cup greek yogurt
  • 1/4 teaspoon sea salt
  • 1 teaspoon minced chives (some reserved to sprinkle on top)
  • 1 teaspoon minced parsley
  • 1 teaspoon Dijon mustard

Instructions

  1. Place eggs in a medium saucepan and add cold water until the eggs are covered by 1 inch of water. Bring to a rolling boil. Remove saucepan from heat, cover, and then let stand for 11 minutes. Drain the pot and run cod water over the boiled to cool them.
  2. Meanwhile, place remaining ingredients into the bowl of a food processor and mix together. Reserve some chives and parsley for sprinkling on top.
  3. Peel all of the eggs. To transport easily to a picnic, make whole deviled eggs by cutting off the top third of the egg. Remove yolks carefully with small spoon or butter knife, leaving the whites fully intact. Transfer yolks to bowl of food processor with greek yogurt mixture. Process until smooth.
  4. For easy picnic transport, line egg carton with individual muffin liners. Place intact egg whites into each separate muffin tin liner. Place egg yolk mixture into a sealable plastic back (like a ziplock). Cut the corner tip off of the bag for easy pipetting into each egg white. Sprinkle with remaining herbs. Place plastic wrap on top of filled eggs and refrigerate up to 8 hours.