Paleo Roasted Banana Creamsicles

DSC_0213

In April, winter would not let go. We had two massive snow storms that dumped over 15 inches of snow each.  And now, it is nearing mid September and summer is being just as pesky and stubborn as winter. We have had the hottest days ALL summer this week with temps breaking triple digits. Really? Why can’t spring or fall be stubborn? Get feisty, fall! Take over…strong arm summer! Who’s the Boss? Not Tony Danza…It’s you, fall. Come ON!

*Stomp* *Stomp* I want to wear sweaters, eat chili, watch football!

DSC_0224

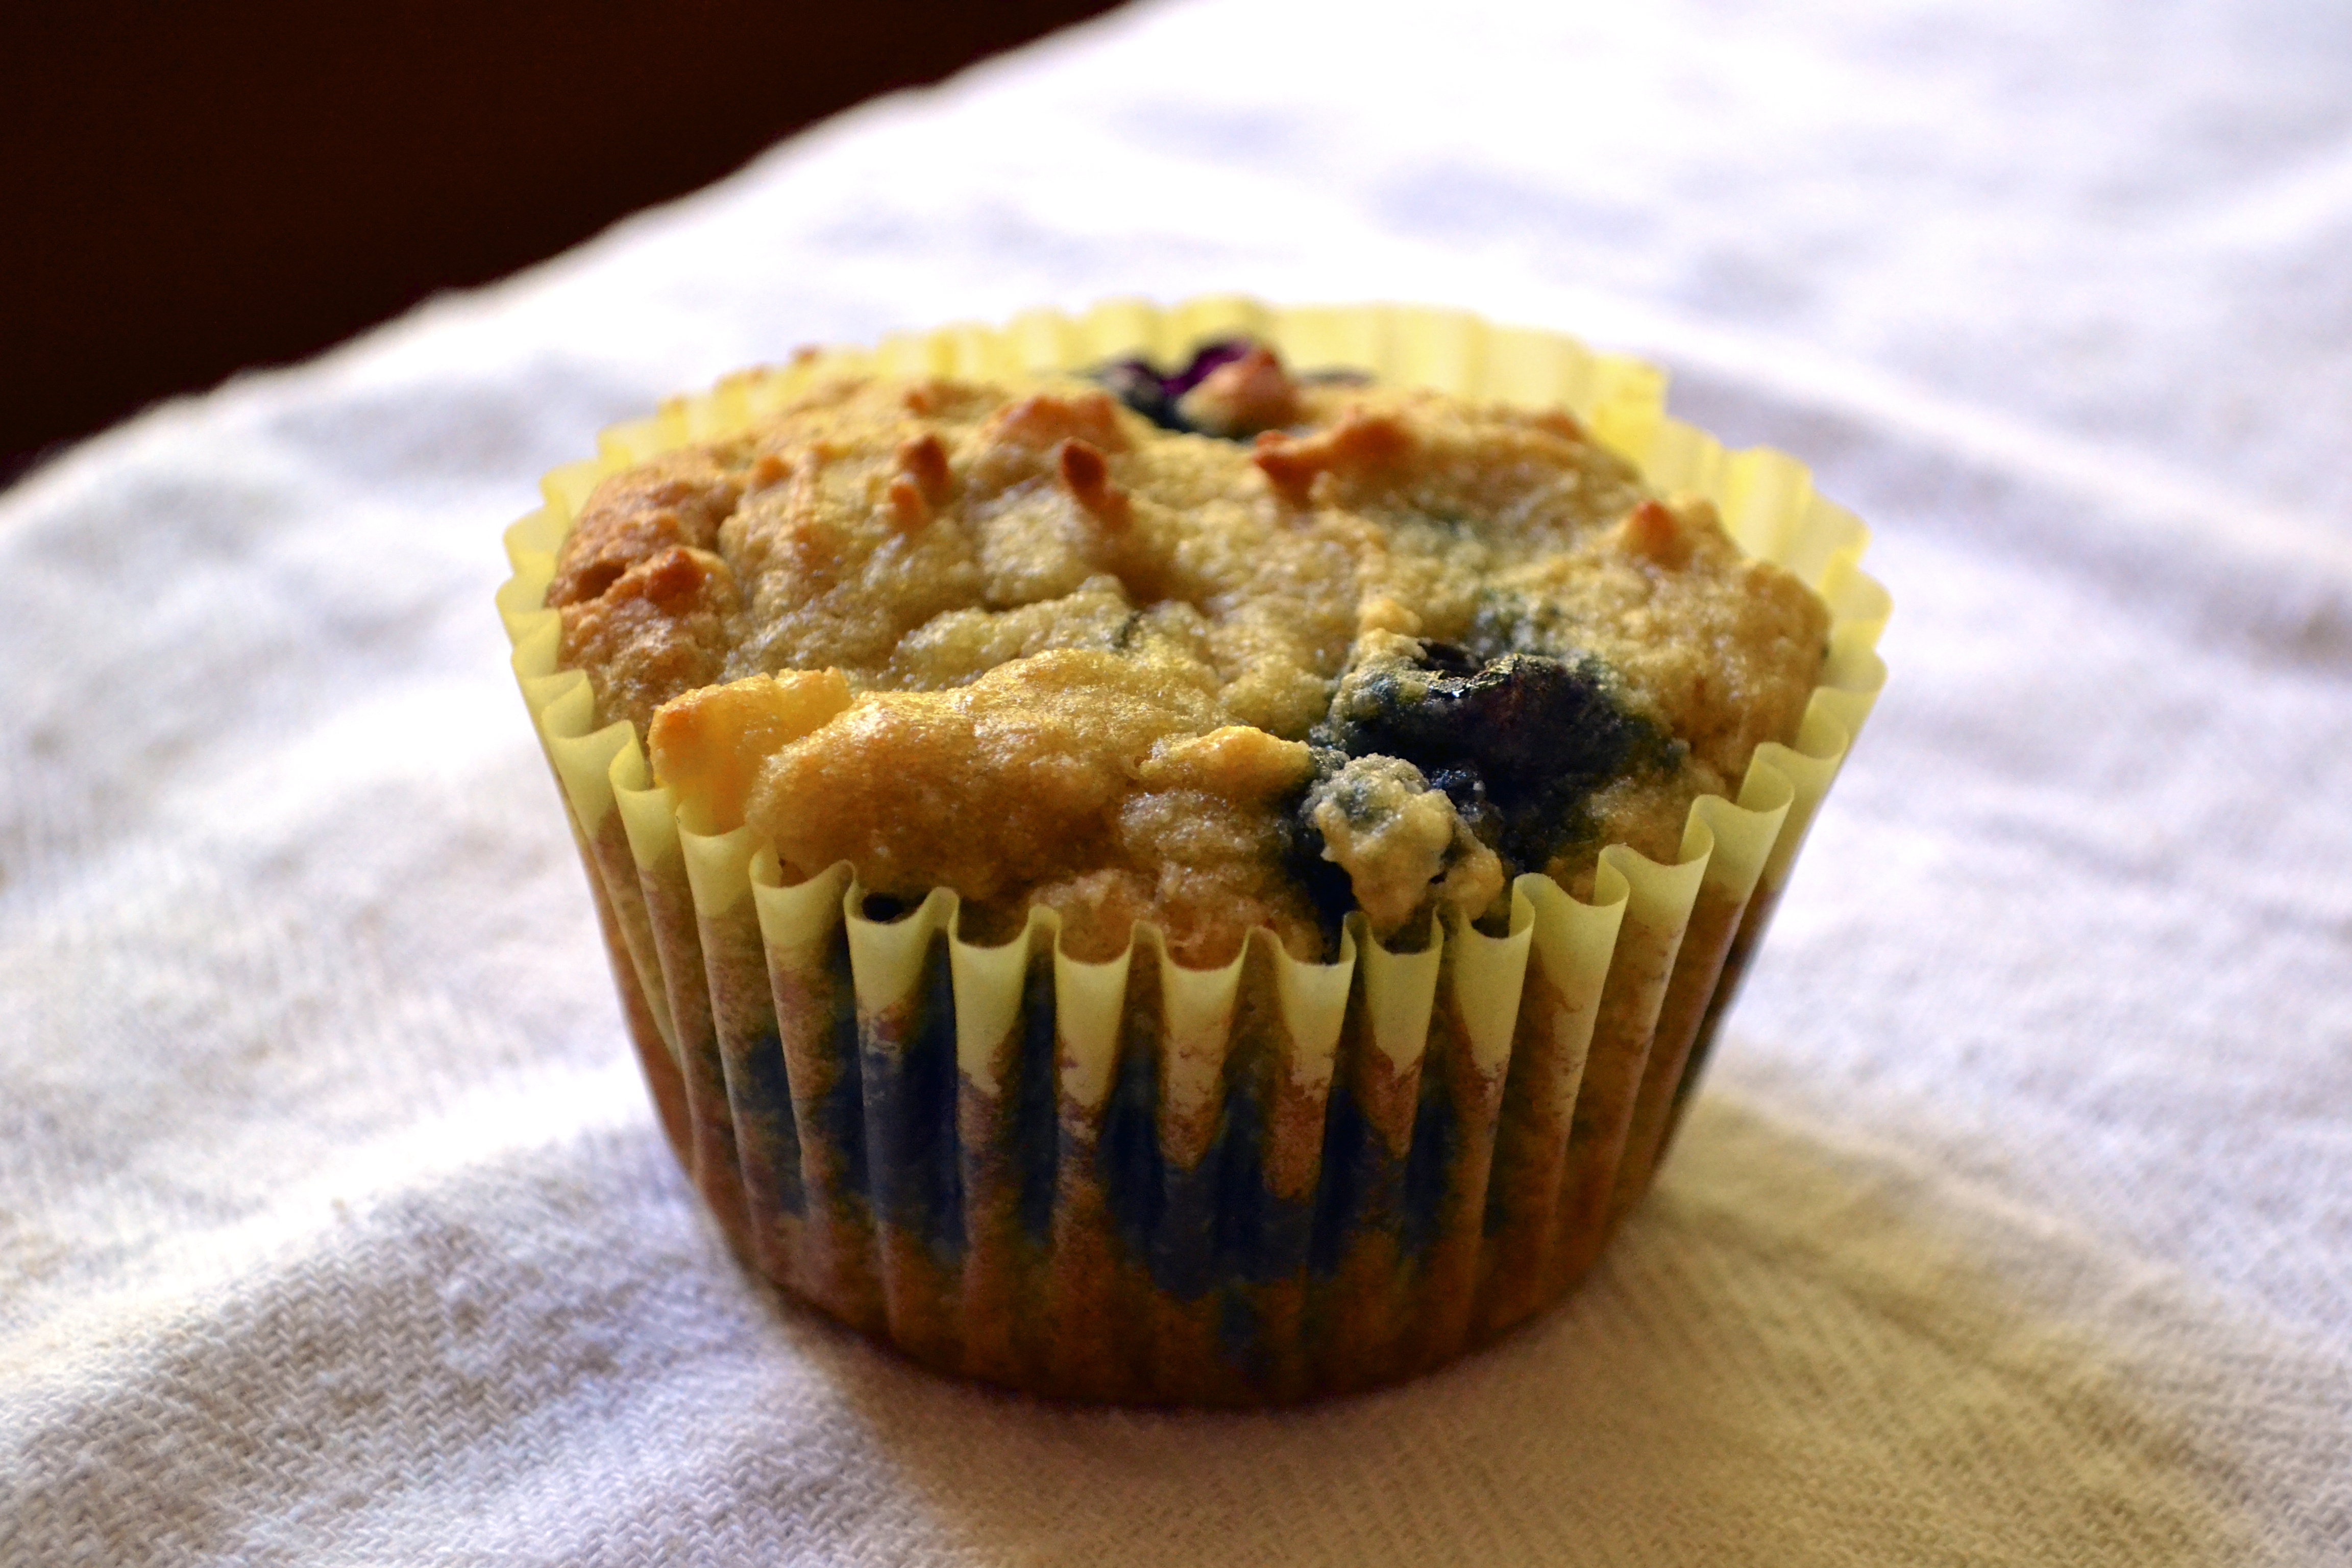
But alas…the heat persists. No rain. Just muggy and sweaty and sticky and mosquito heaven. Fine. SO instead of chili, I will settle for POPSICLES! And I suggest you do the same. Popsicles are really the best sweet treat there is because they are cheap, portable, kid-friendly, and healthy. The other thing I dig about popsicles is that they have built-in portion control.

DSC_0200 DSC_0205

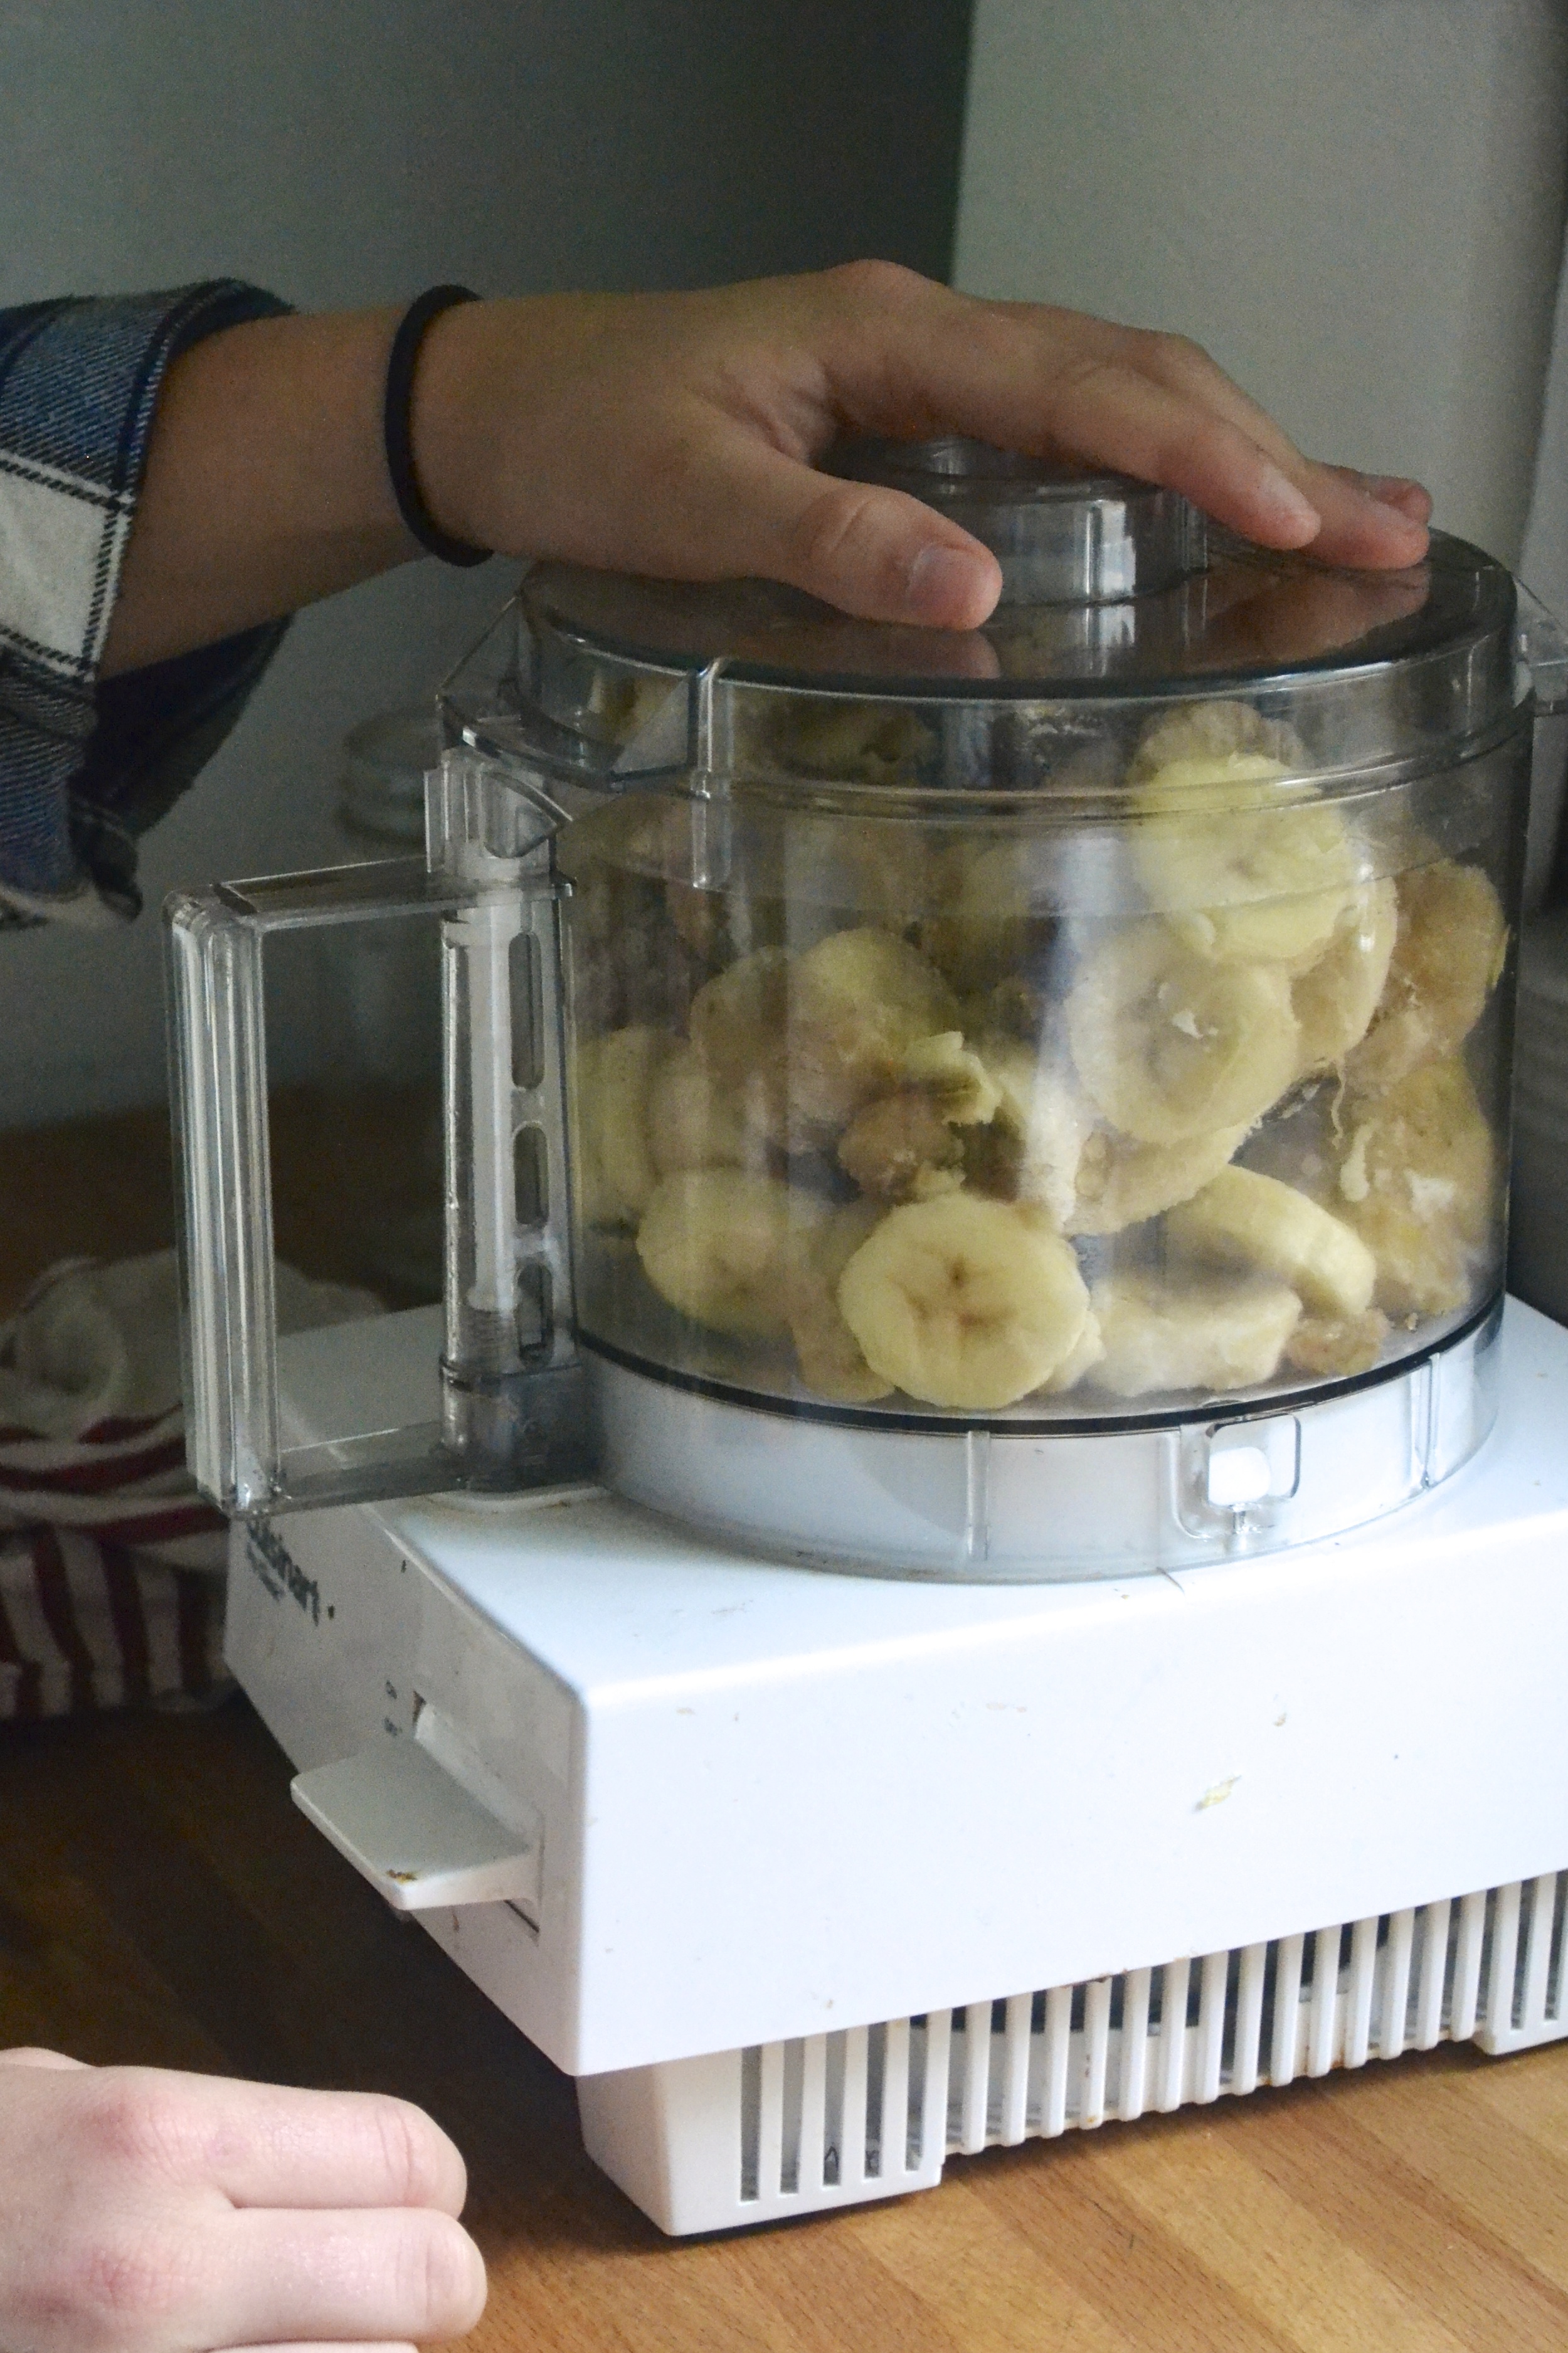
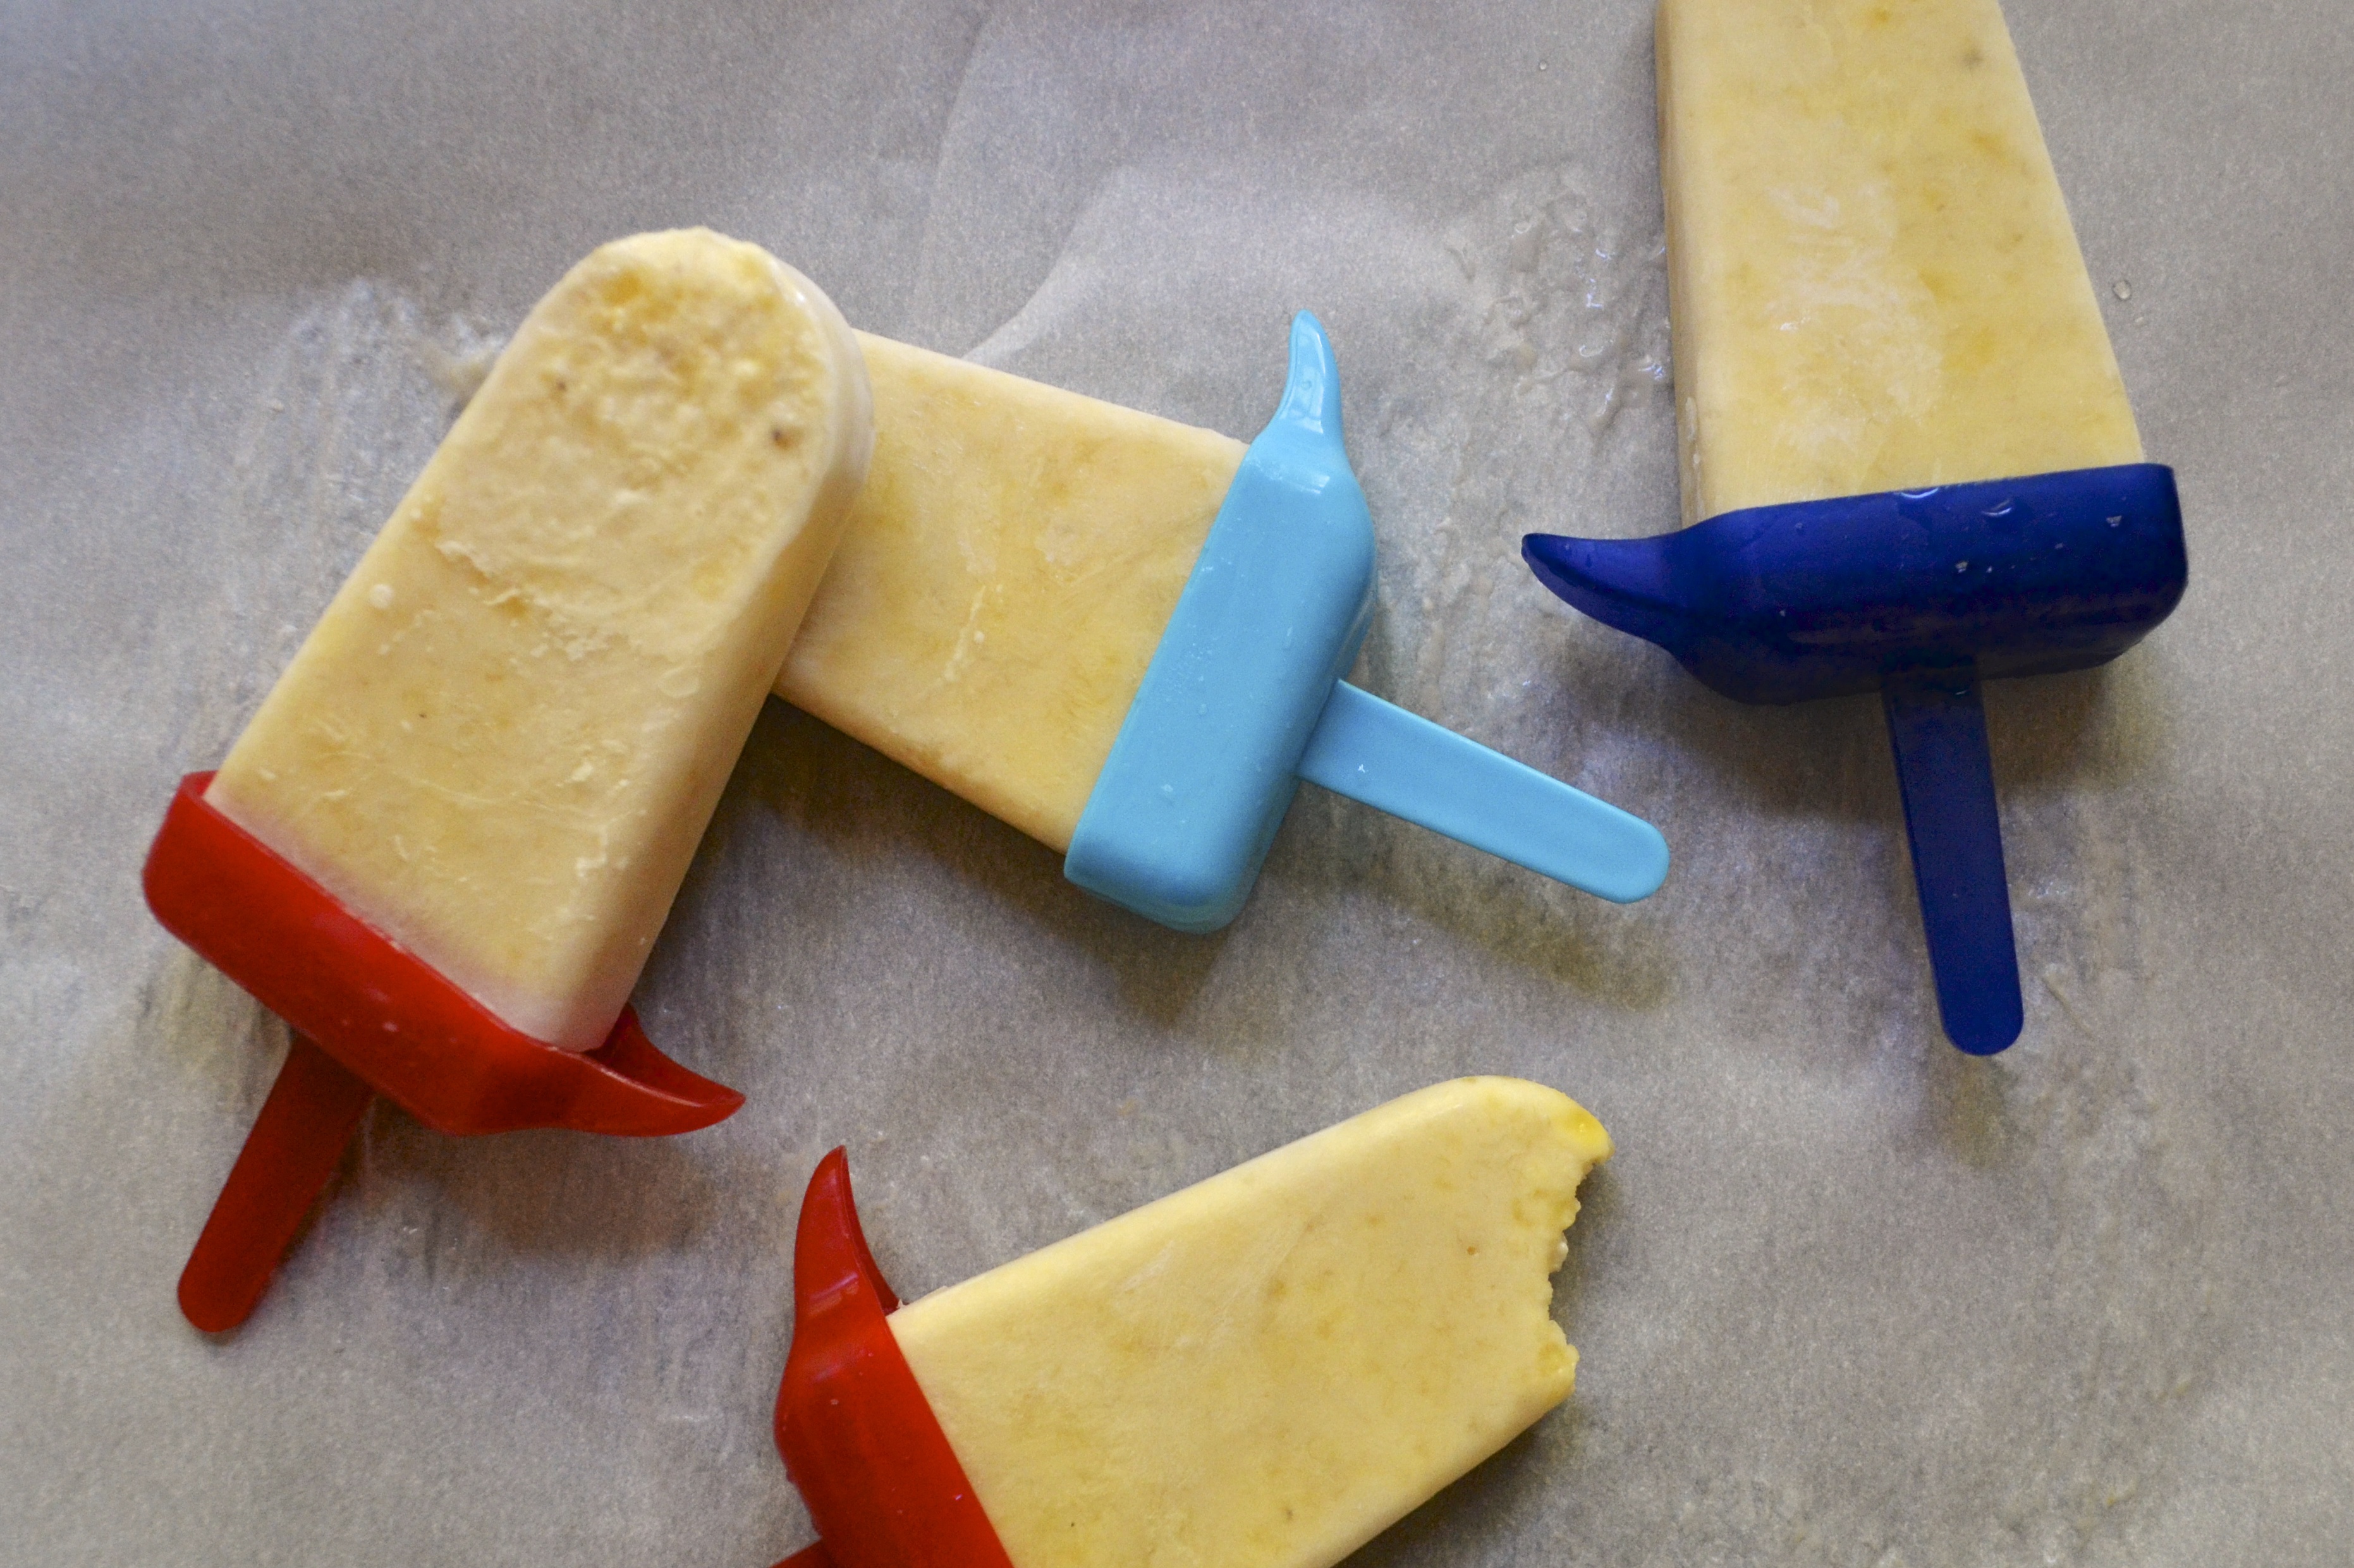
These popsicles are really swoon-worthy. I highly recommend roasting your bananas. It offers a whole new level and depth of bananananana-ness. Roasting bananas also is a great way to get under ripe bananas über sweet. They can either be roasted in an oven for 15 minutes or can be placed directly over an open gas flame (as shown above). There is no added sweetener in the popsicles because the roasted bananas take on a luscious caramelized flavor.  If you want much sweeter popsicles, you can add 1 tablespoon of honey. For the “cream” part of the creamsicles, I used light coconut milk to make it dairy free. You could also sub any dairy or nondairy milk instead.

DSC_0227

So cheers to the (hopefully) last days of summer. Tip your cups and popsicles and remember this sweaty weather when winter hits in a few months.

Note – I purchased my popsicle molds from World Market, but there are several BPA-free brands offered on amazon as well. Here is a great article on the Kitchn about top popsicle molds. If you do not have molds, have no fear. You can easily make popsicles with plastic cups and wooden popsicle sticks, as shown here

Paleo Roasted Banana Creamsicles

Ingredients

  • 3 bananas
  • 1 cup coconut milk
  • 1 teaspoon vanilla
  • pinch of salt

Instructions

  1. There are a few ways to roast bananas. (1) Place whole and unpeeled bananas on a foil lined roasting pan. Roast in a 350 F oven for 10 to 15 minutes. Remove and allow to cool. OR (2) Place whole and unpeeled banana directly on a gas flame of your oven. Use tongs to turn and blacken the banana evenly. This will take about 5 minutes per banana.
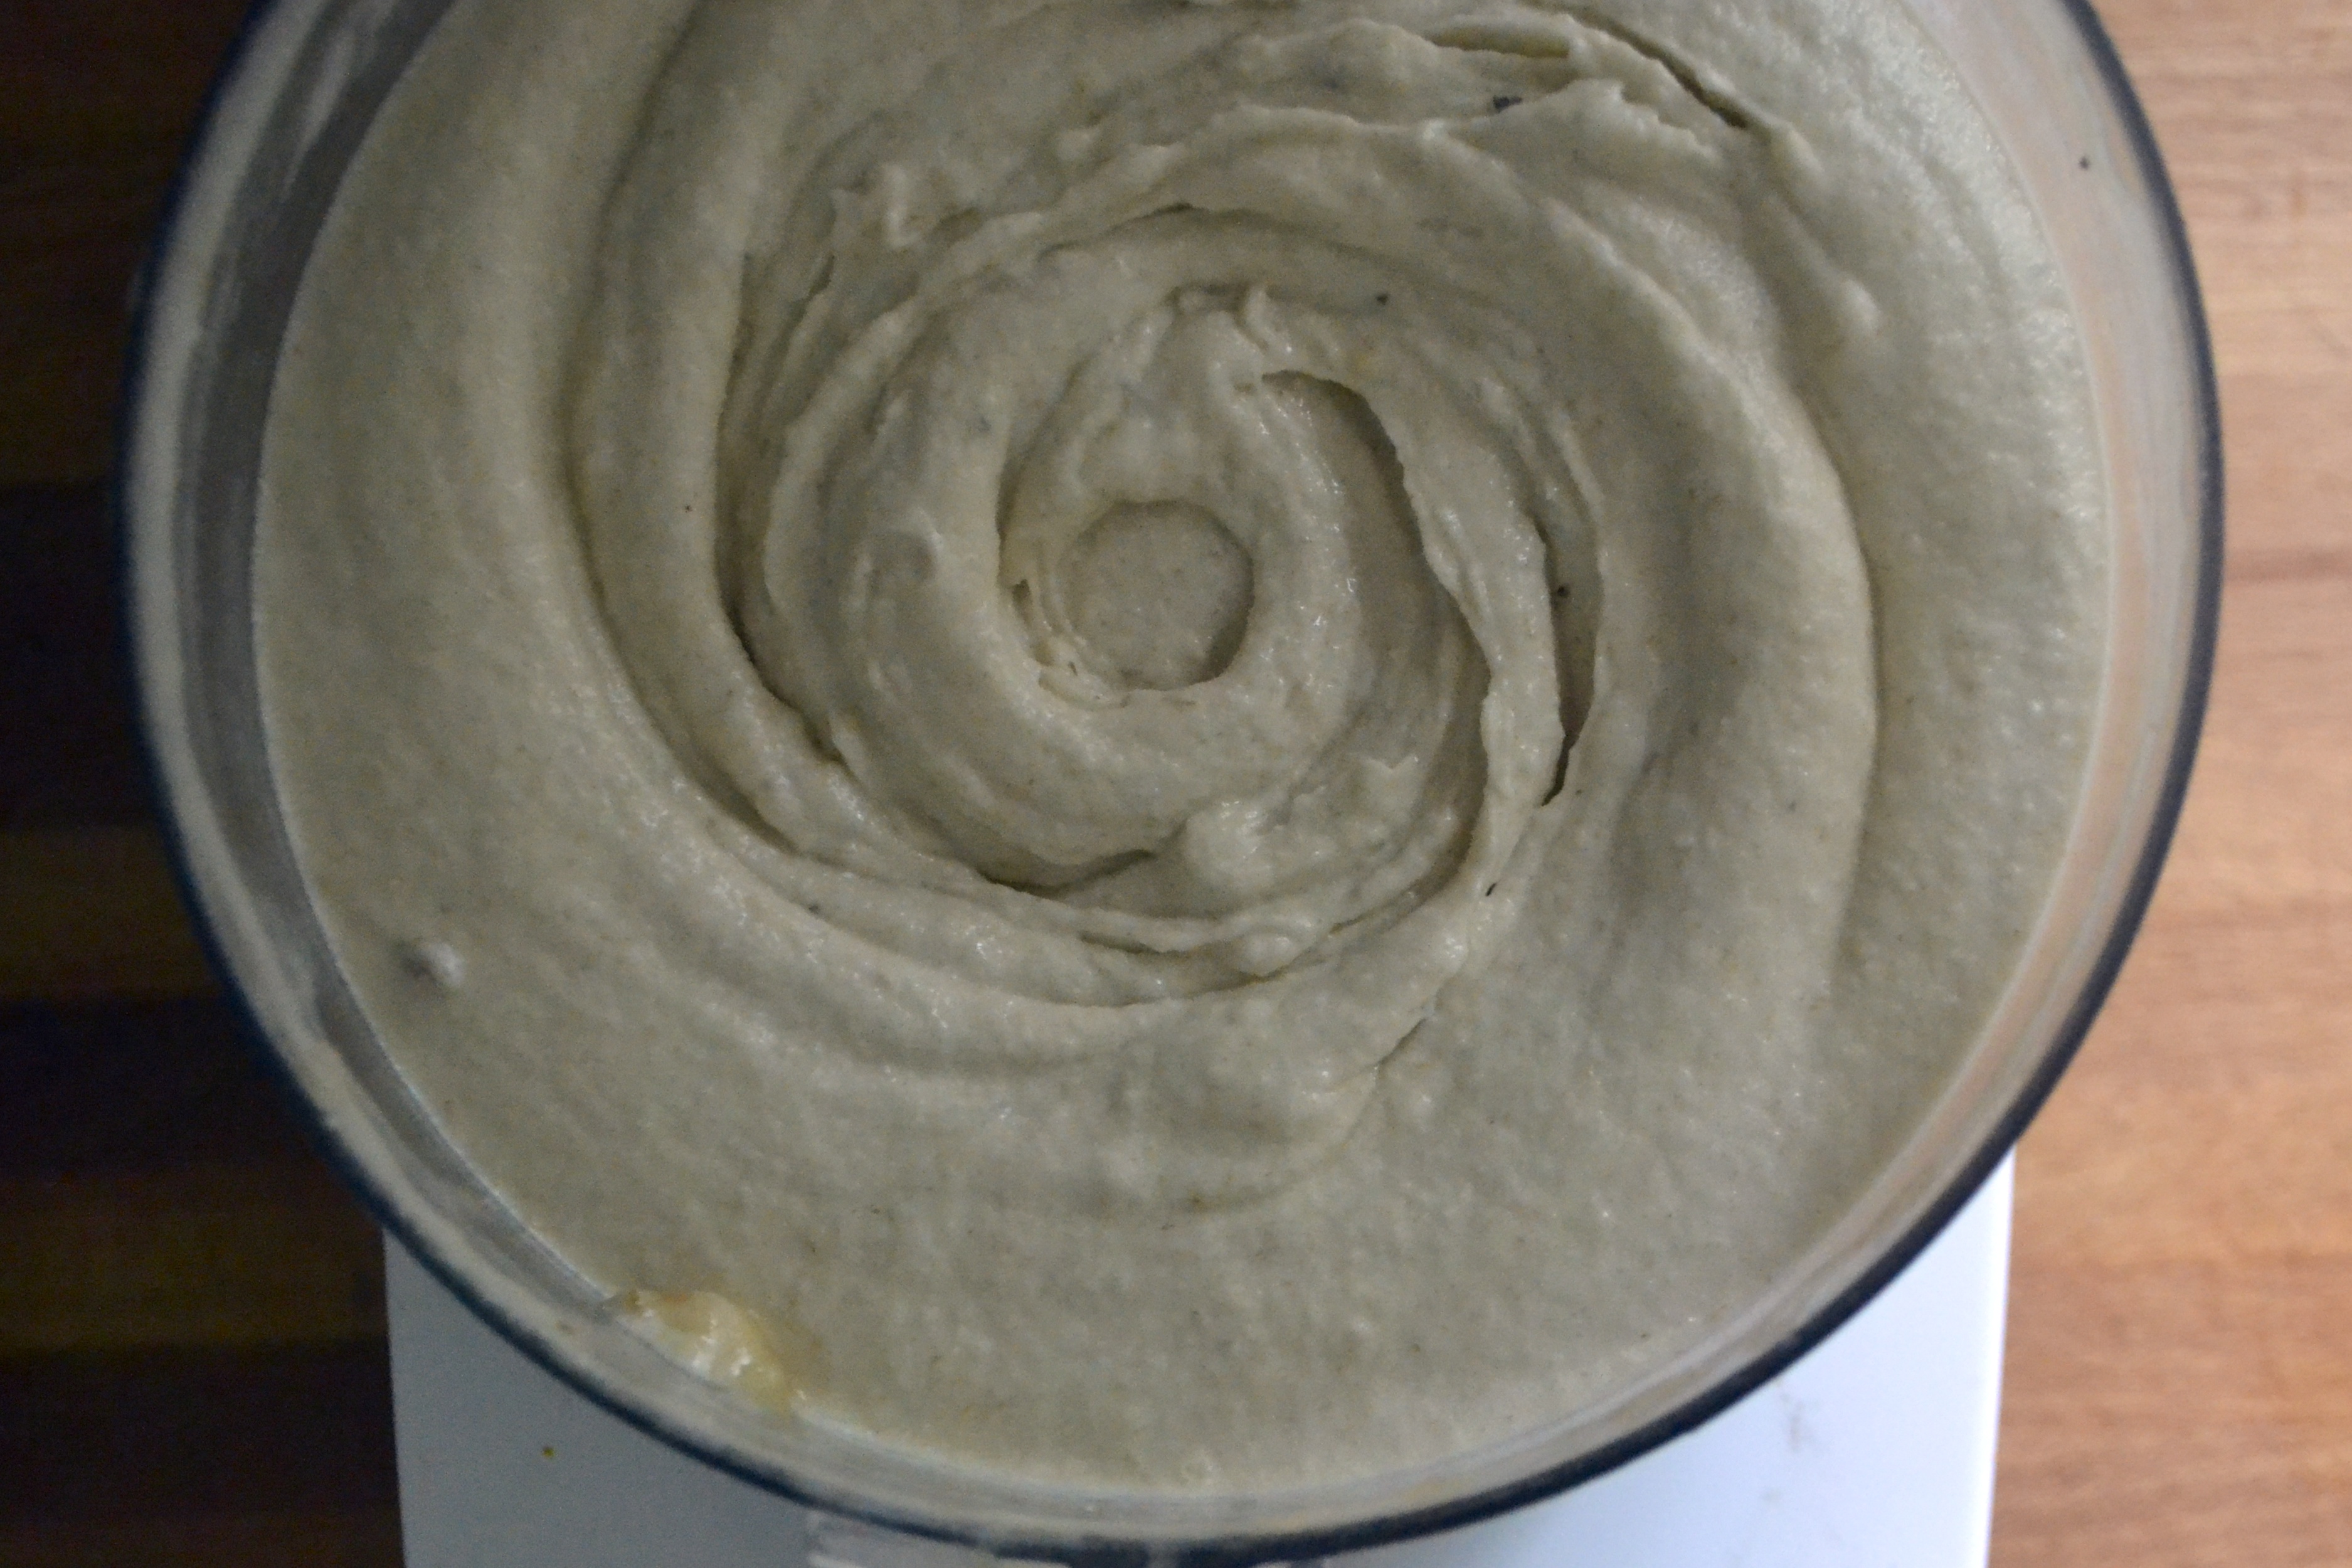
  2. Peel bananas and place them in a medium bowl. Mash bananas thoroughly with a potato masher or place in a blender and puree. Stir in coconut milk, salt, and vanilla.
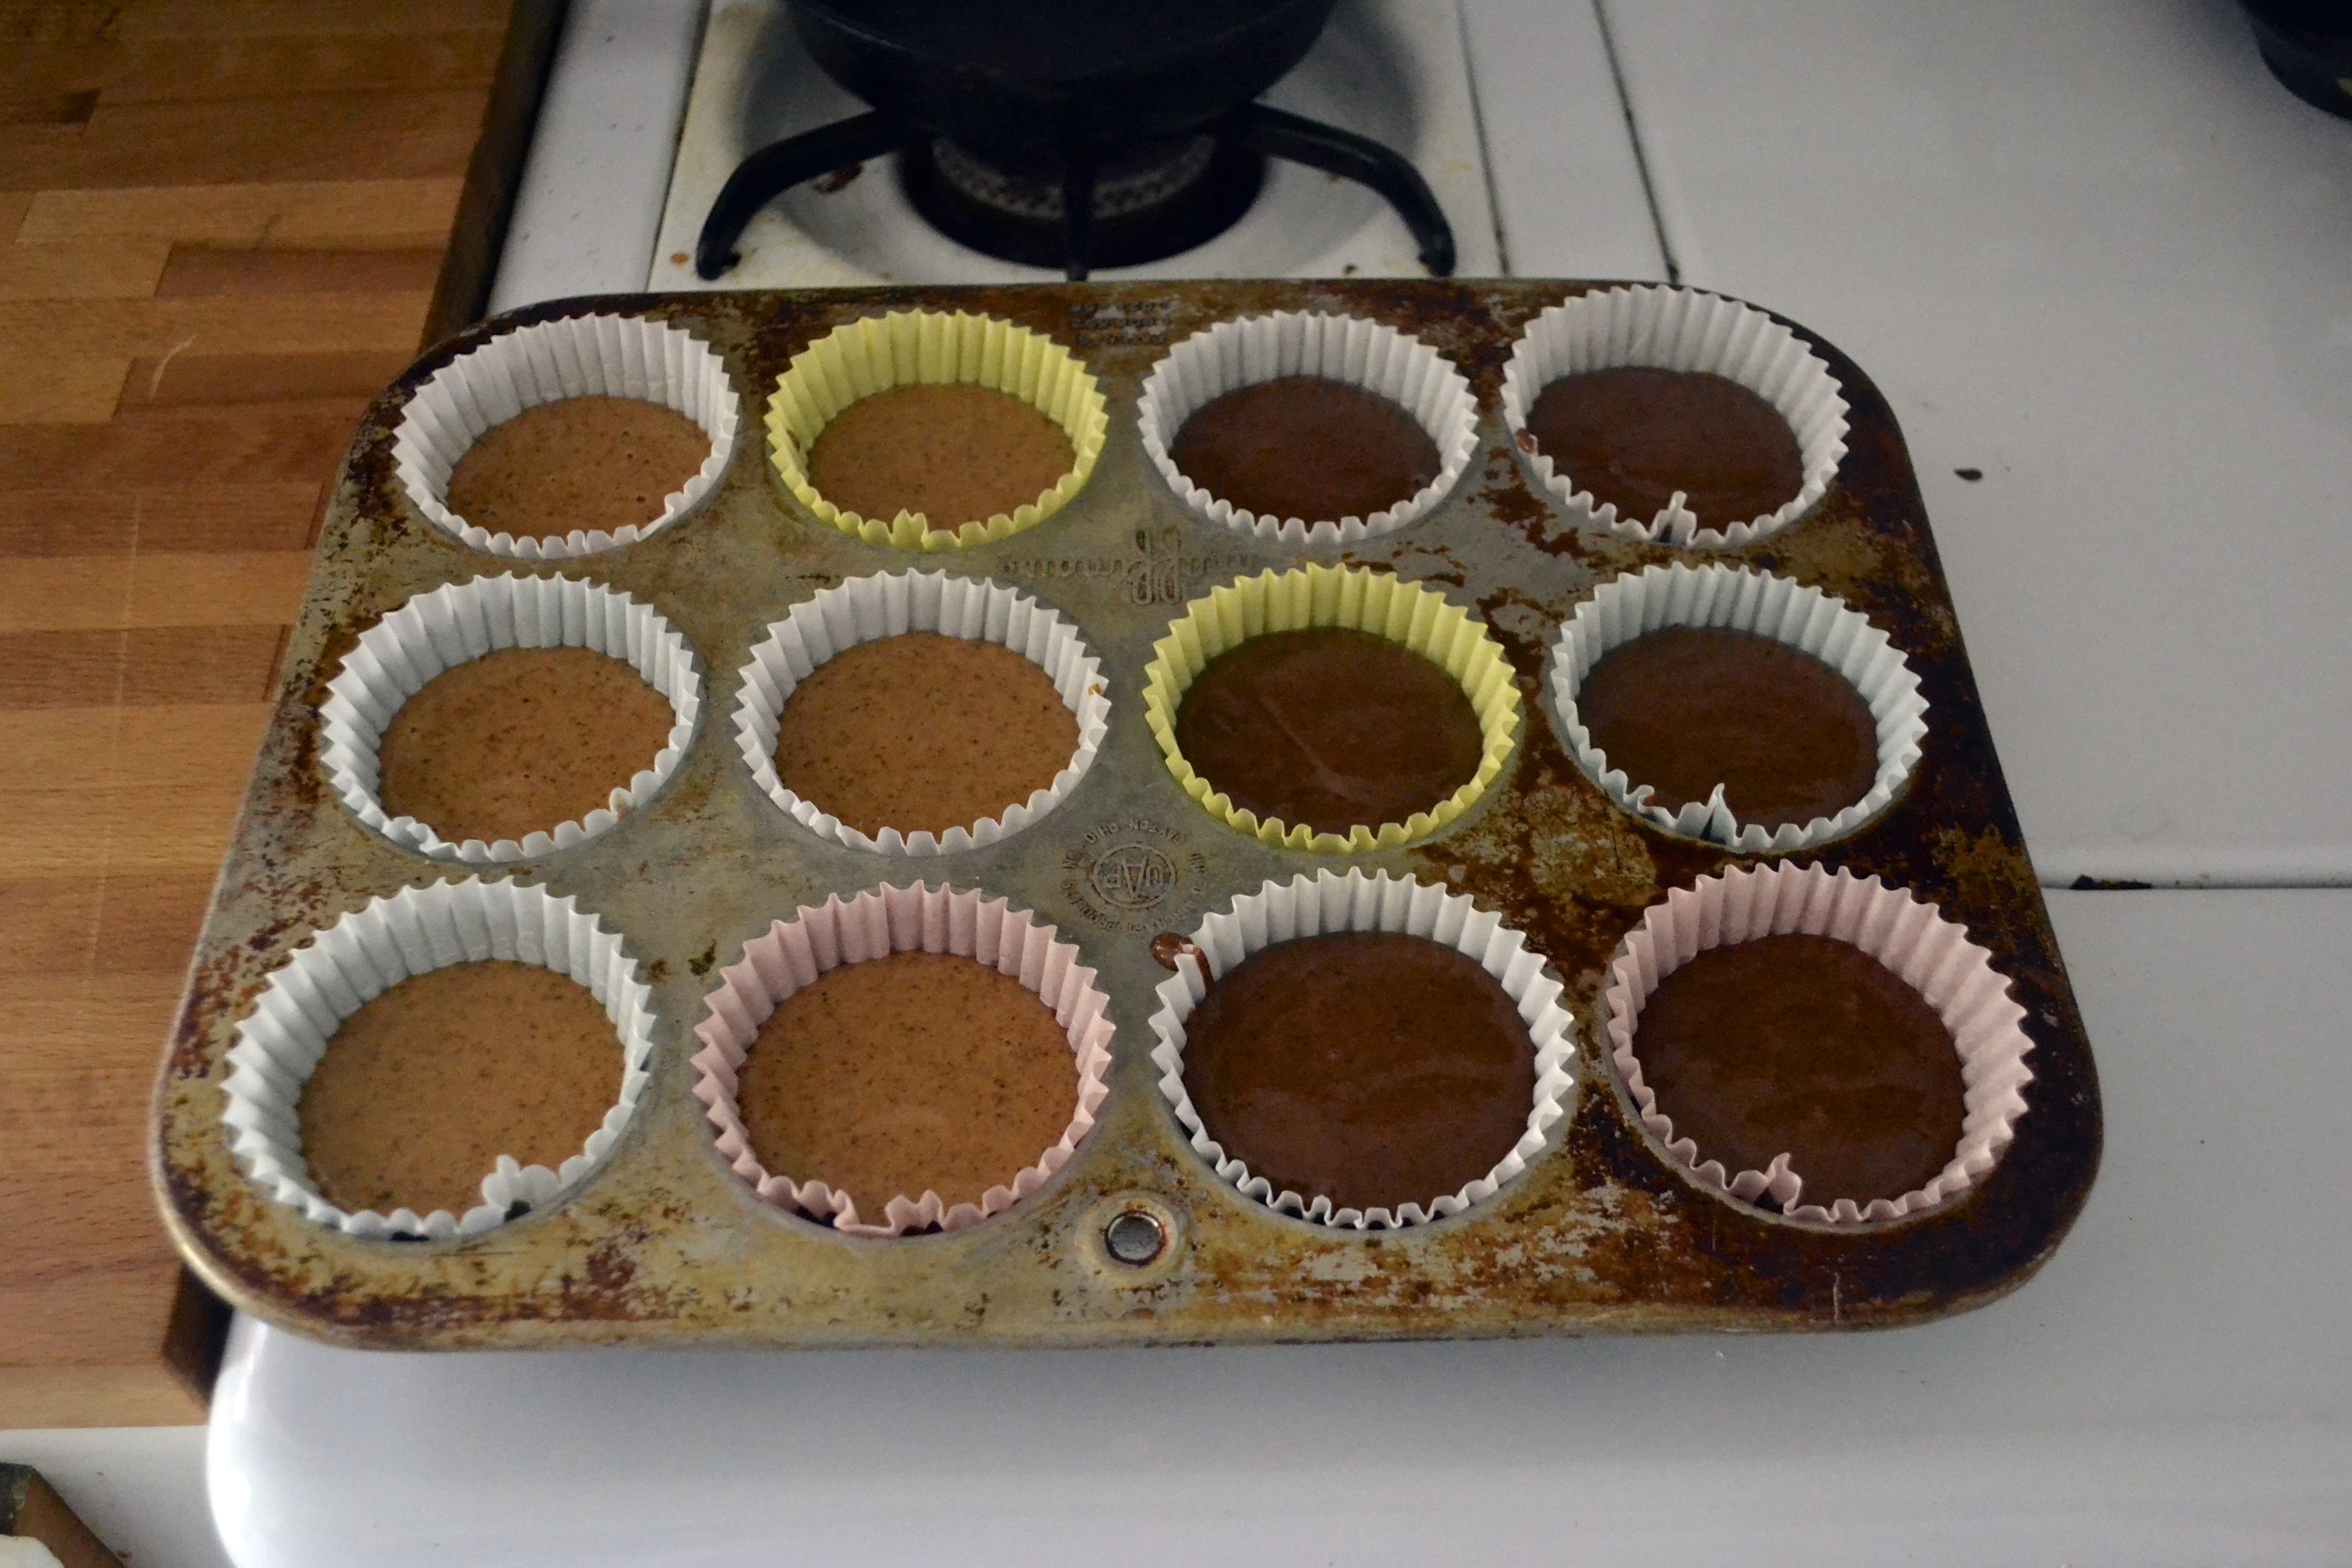
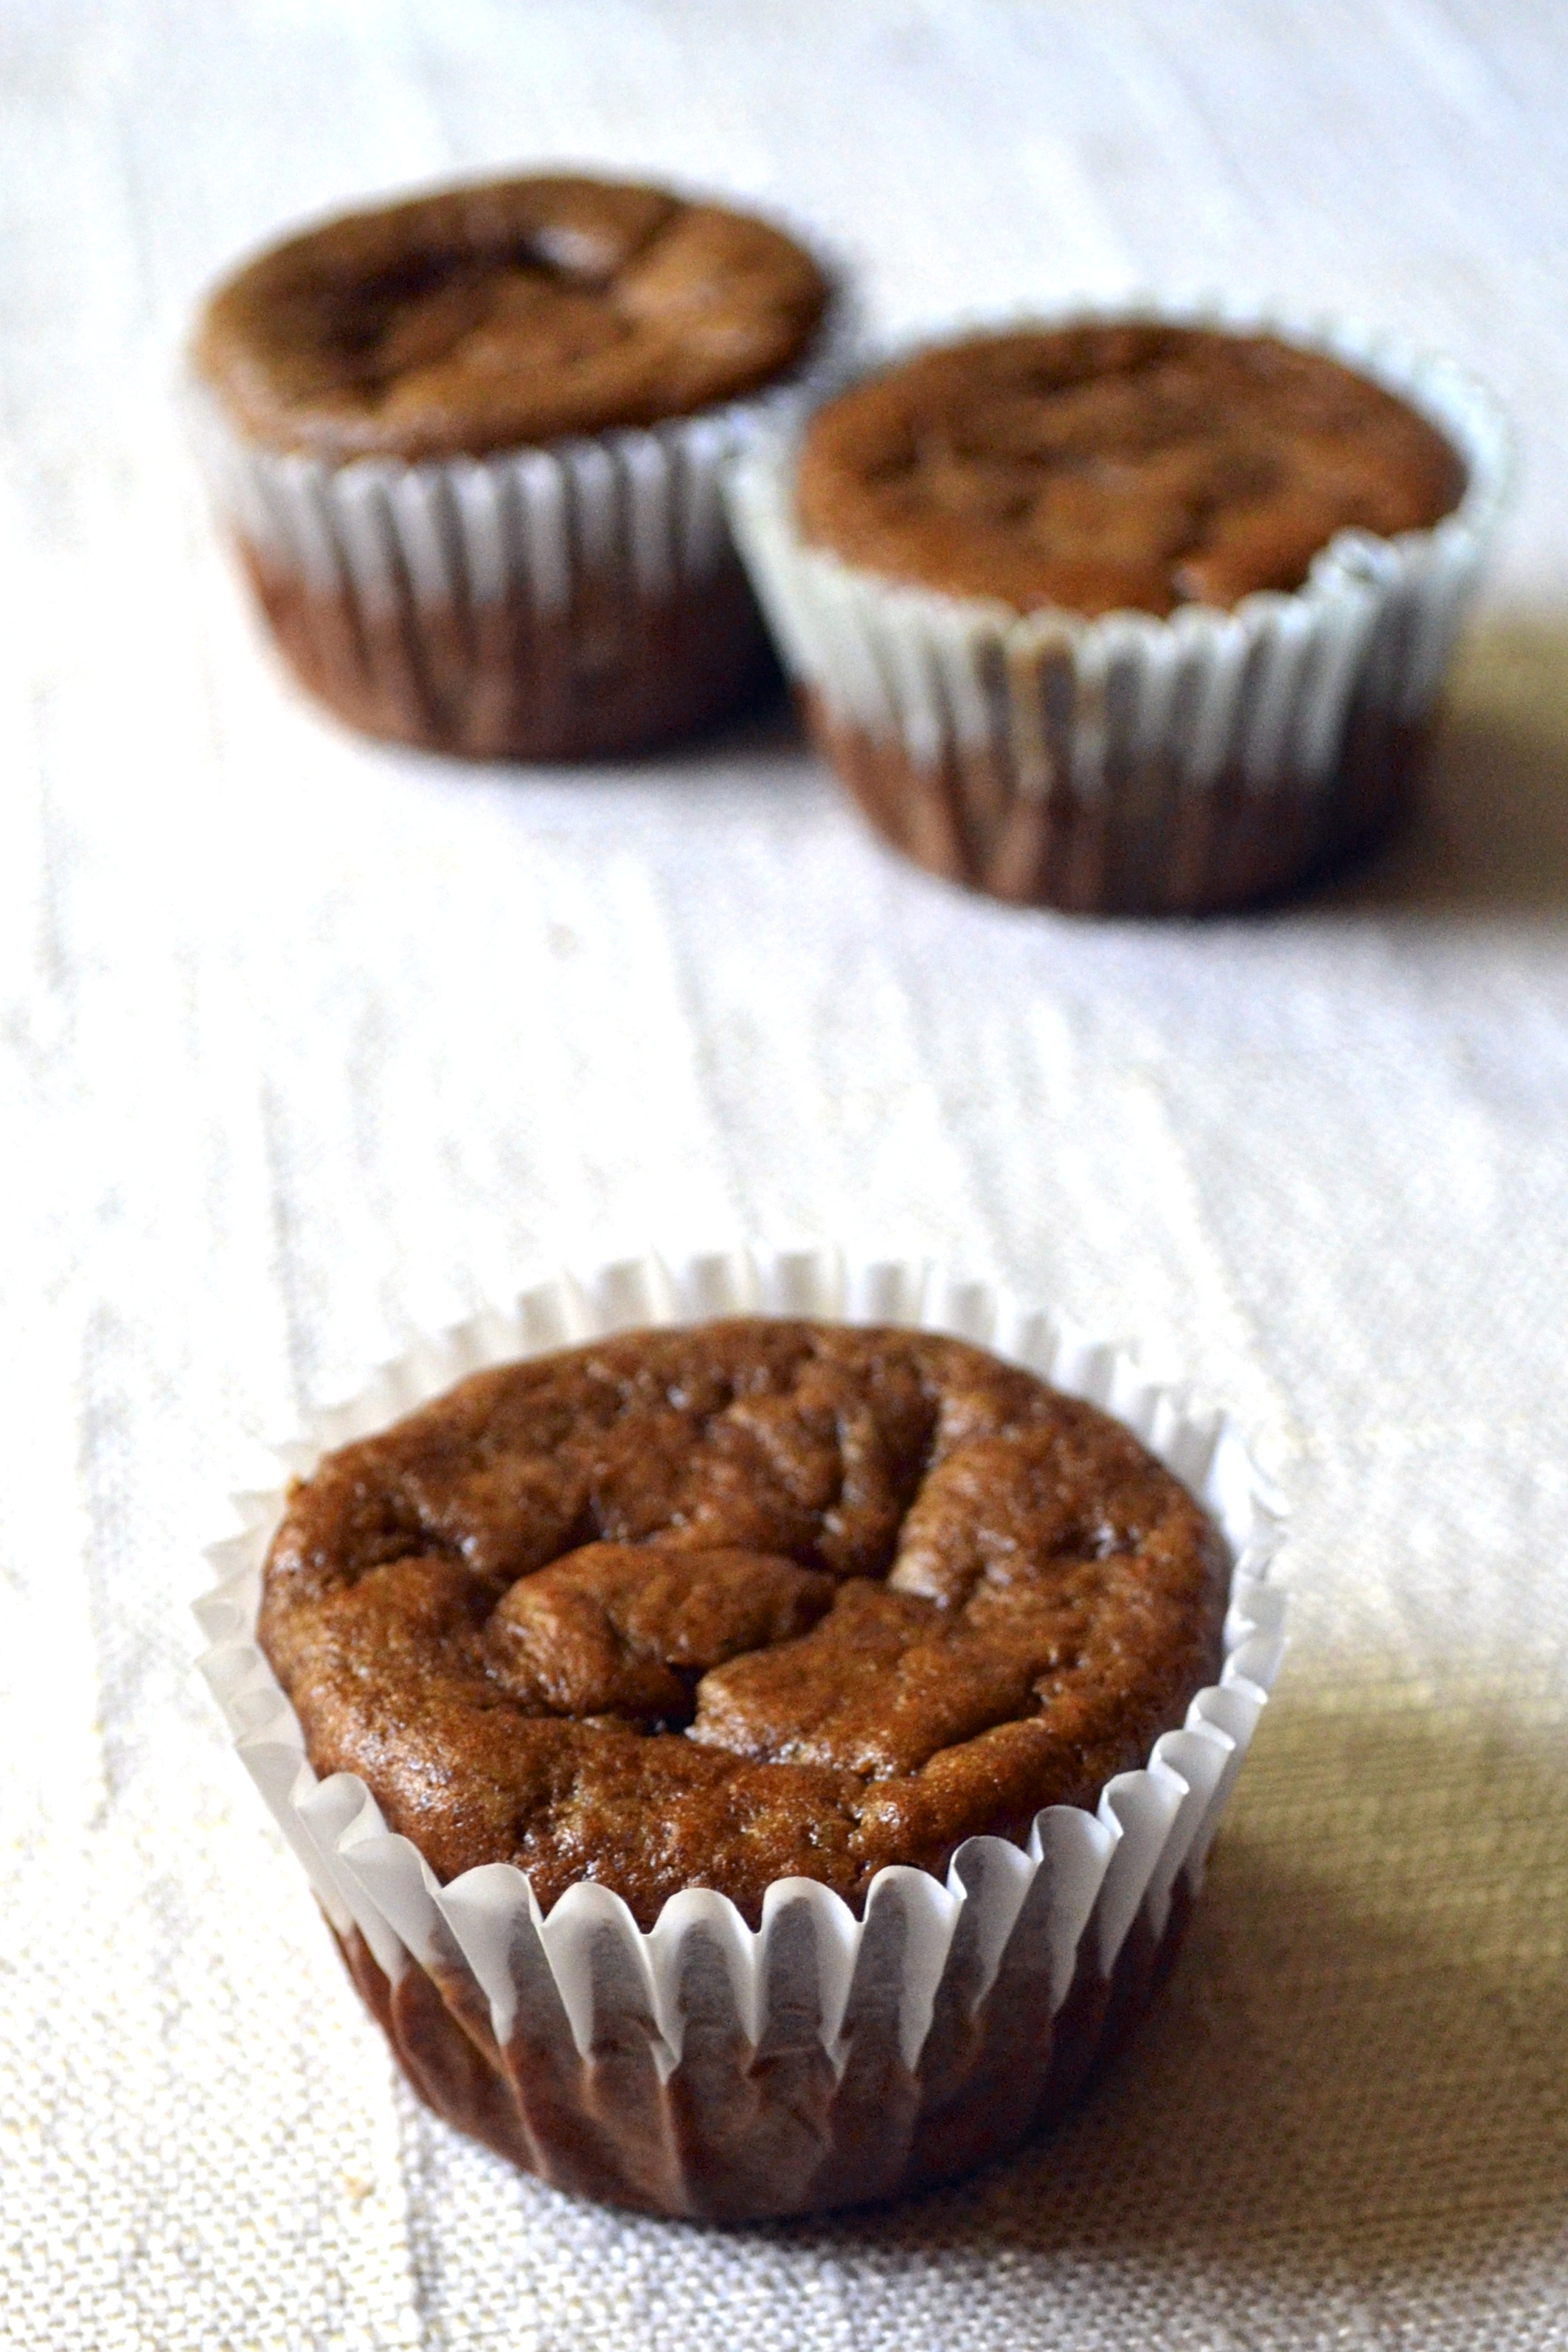
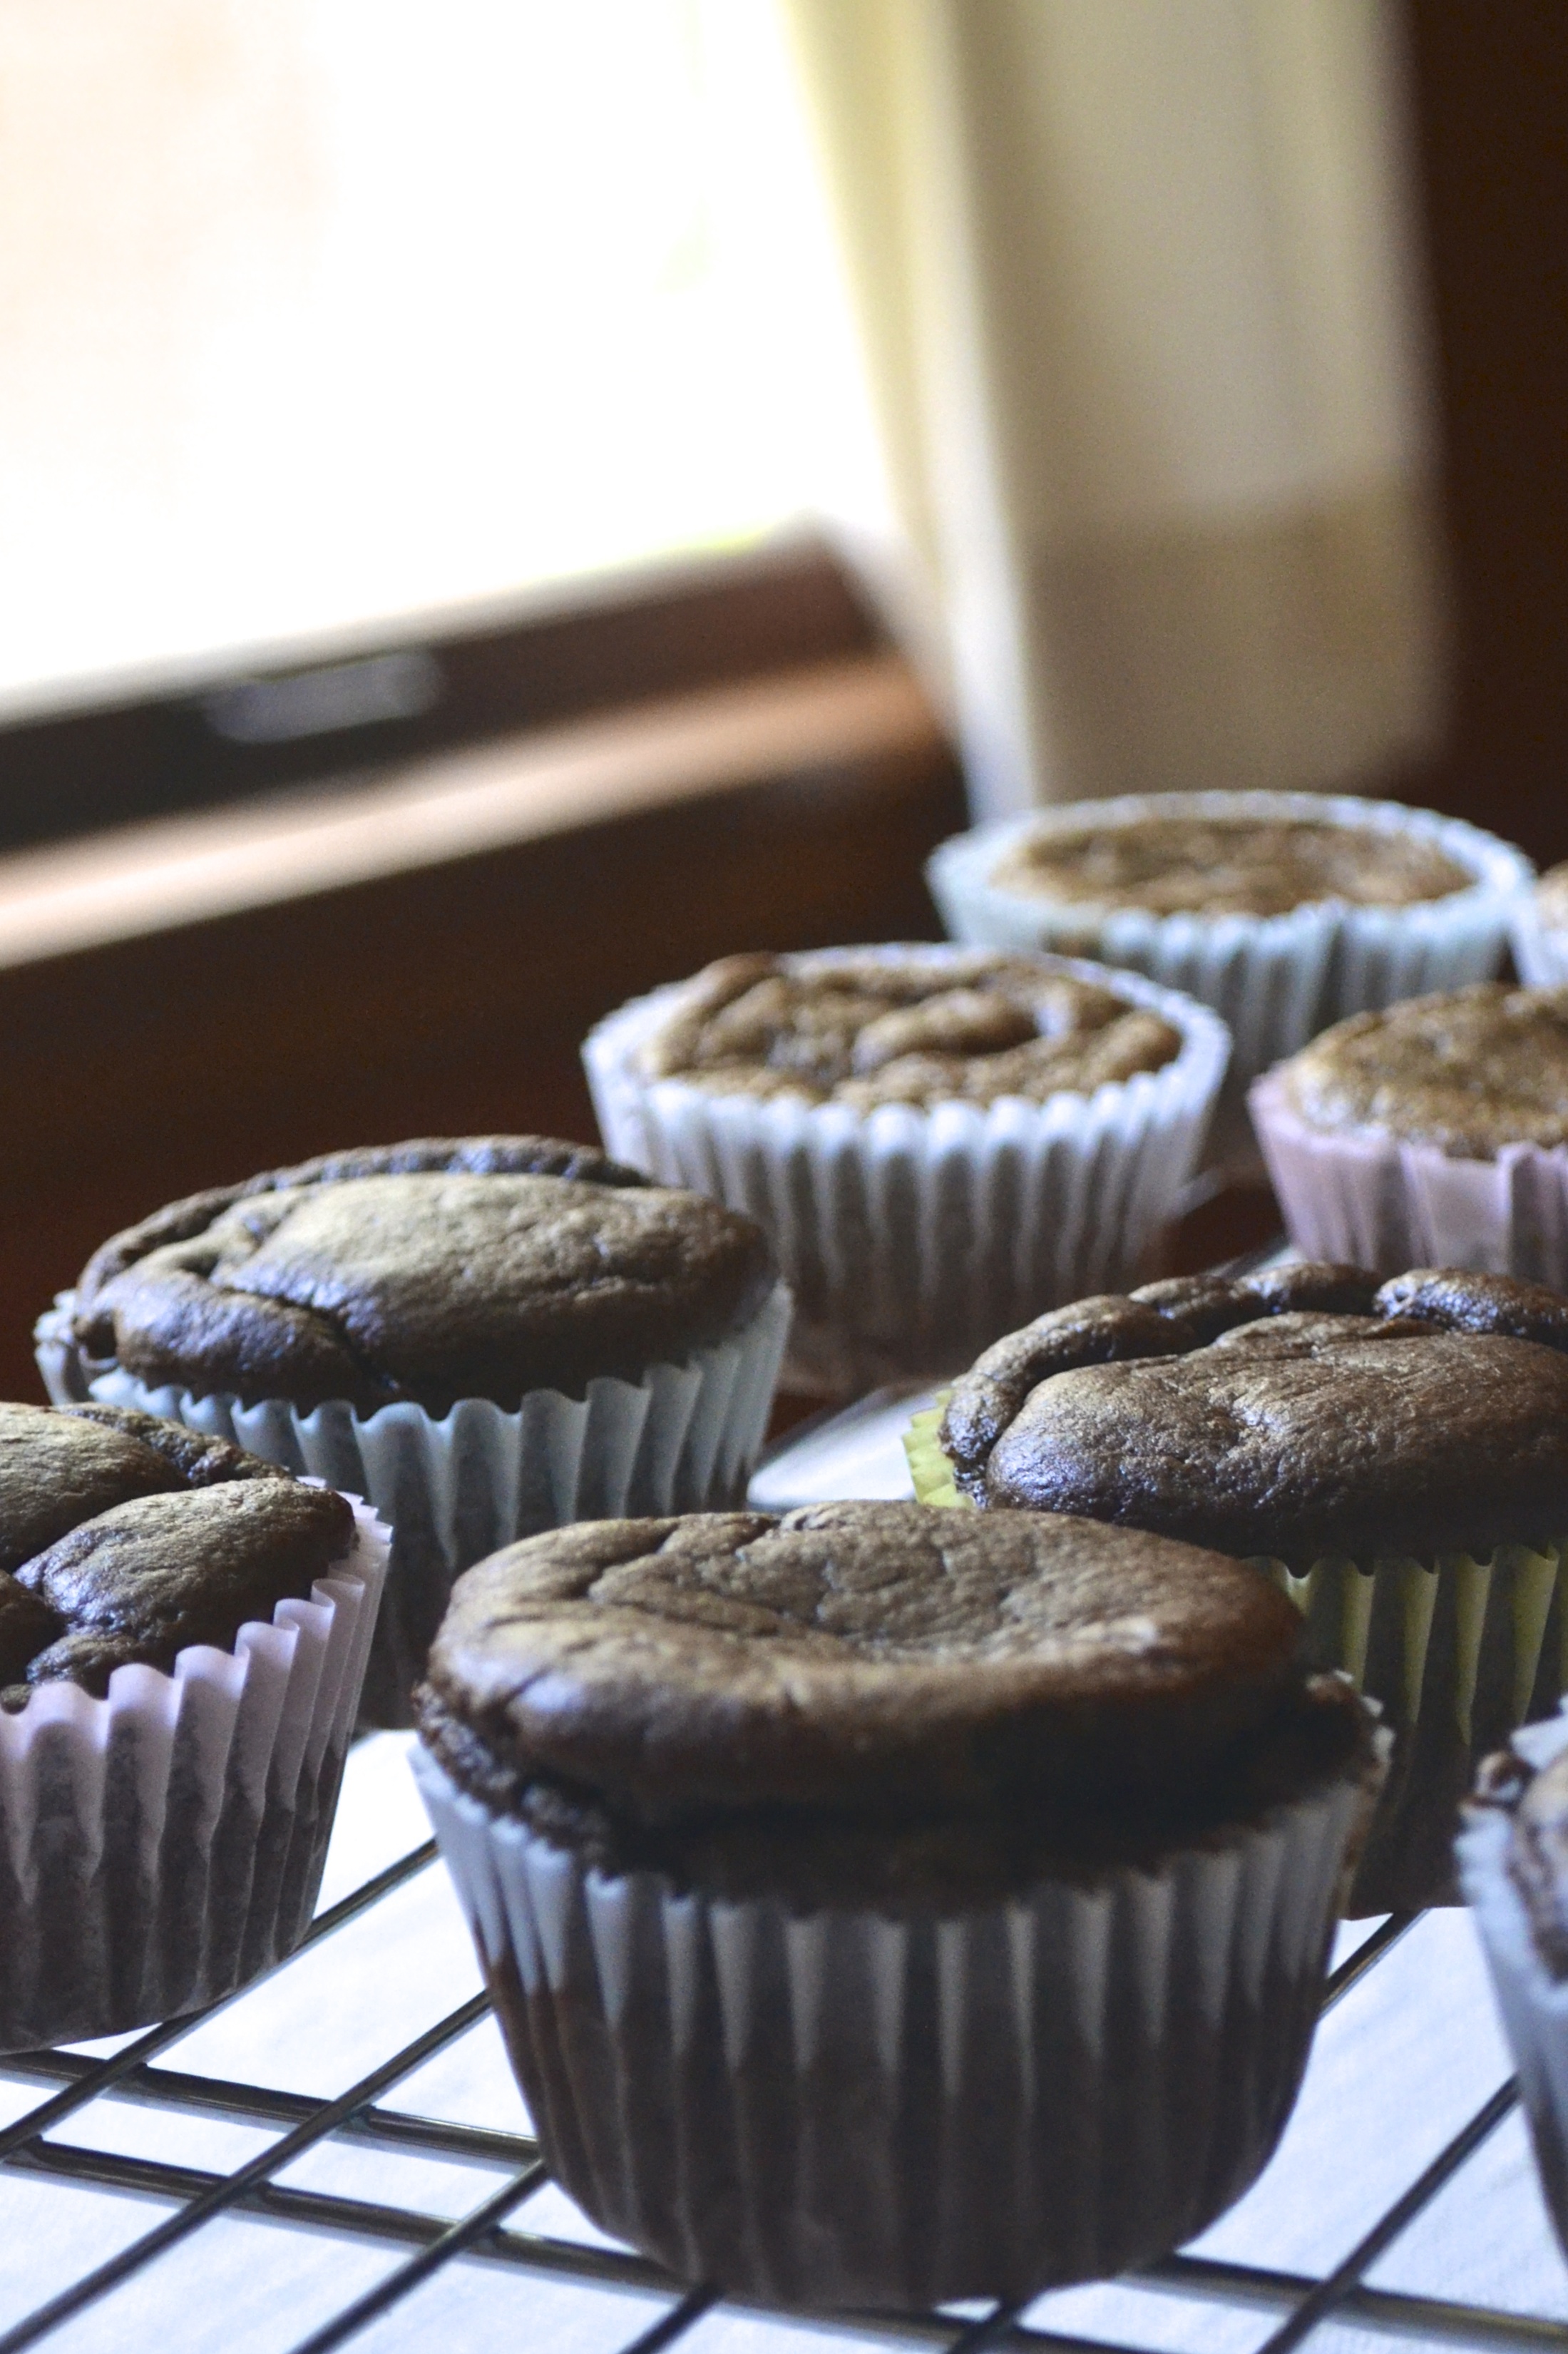
  3. Pour banana mixture into popsicle molds leaving 1/4-inch before the top to leave room for expansion.  For popsicle molds that contain bases with sticks or hold wooden sticks in place, snap on popsicle base and freeze until solid, about 4 to 5 hours. If you do not have popsicle mods, glasses or open paper cups can be used. For these types, pour popsicle mixture into the glasses or open cups and freeze until the popsicle is beginning to set (about 1 1/2 to 2 hours). Then insert wooden sticks and freeze until fully solid (another 3 to 4 hours).

Asian Pickled Vegetable Slaw

DSC_0231

My garden is BOOOOOMING. It’s September and temps are nearing 100F. UGH. But hey, like grandma always said, when life hands you a crap ton of vegetables, make pickles…and slaw…and pickled slaw…oh and salads…and pickled slaw for your salads. Right?

I am presenting you with a healthy and quick snacking tool to stash in your fridge. You can whip these out to snack on, to amp up a burger, boost a salad, or pizzazz a sandwich wrap.  Trust me, once you pop, you just can’t stop! Oh, and these are super kid friendly too.

DSC_0198

DSC_0202
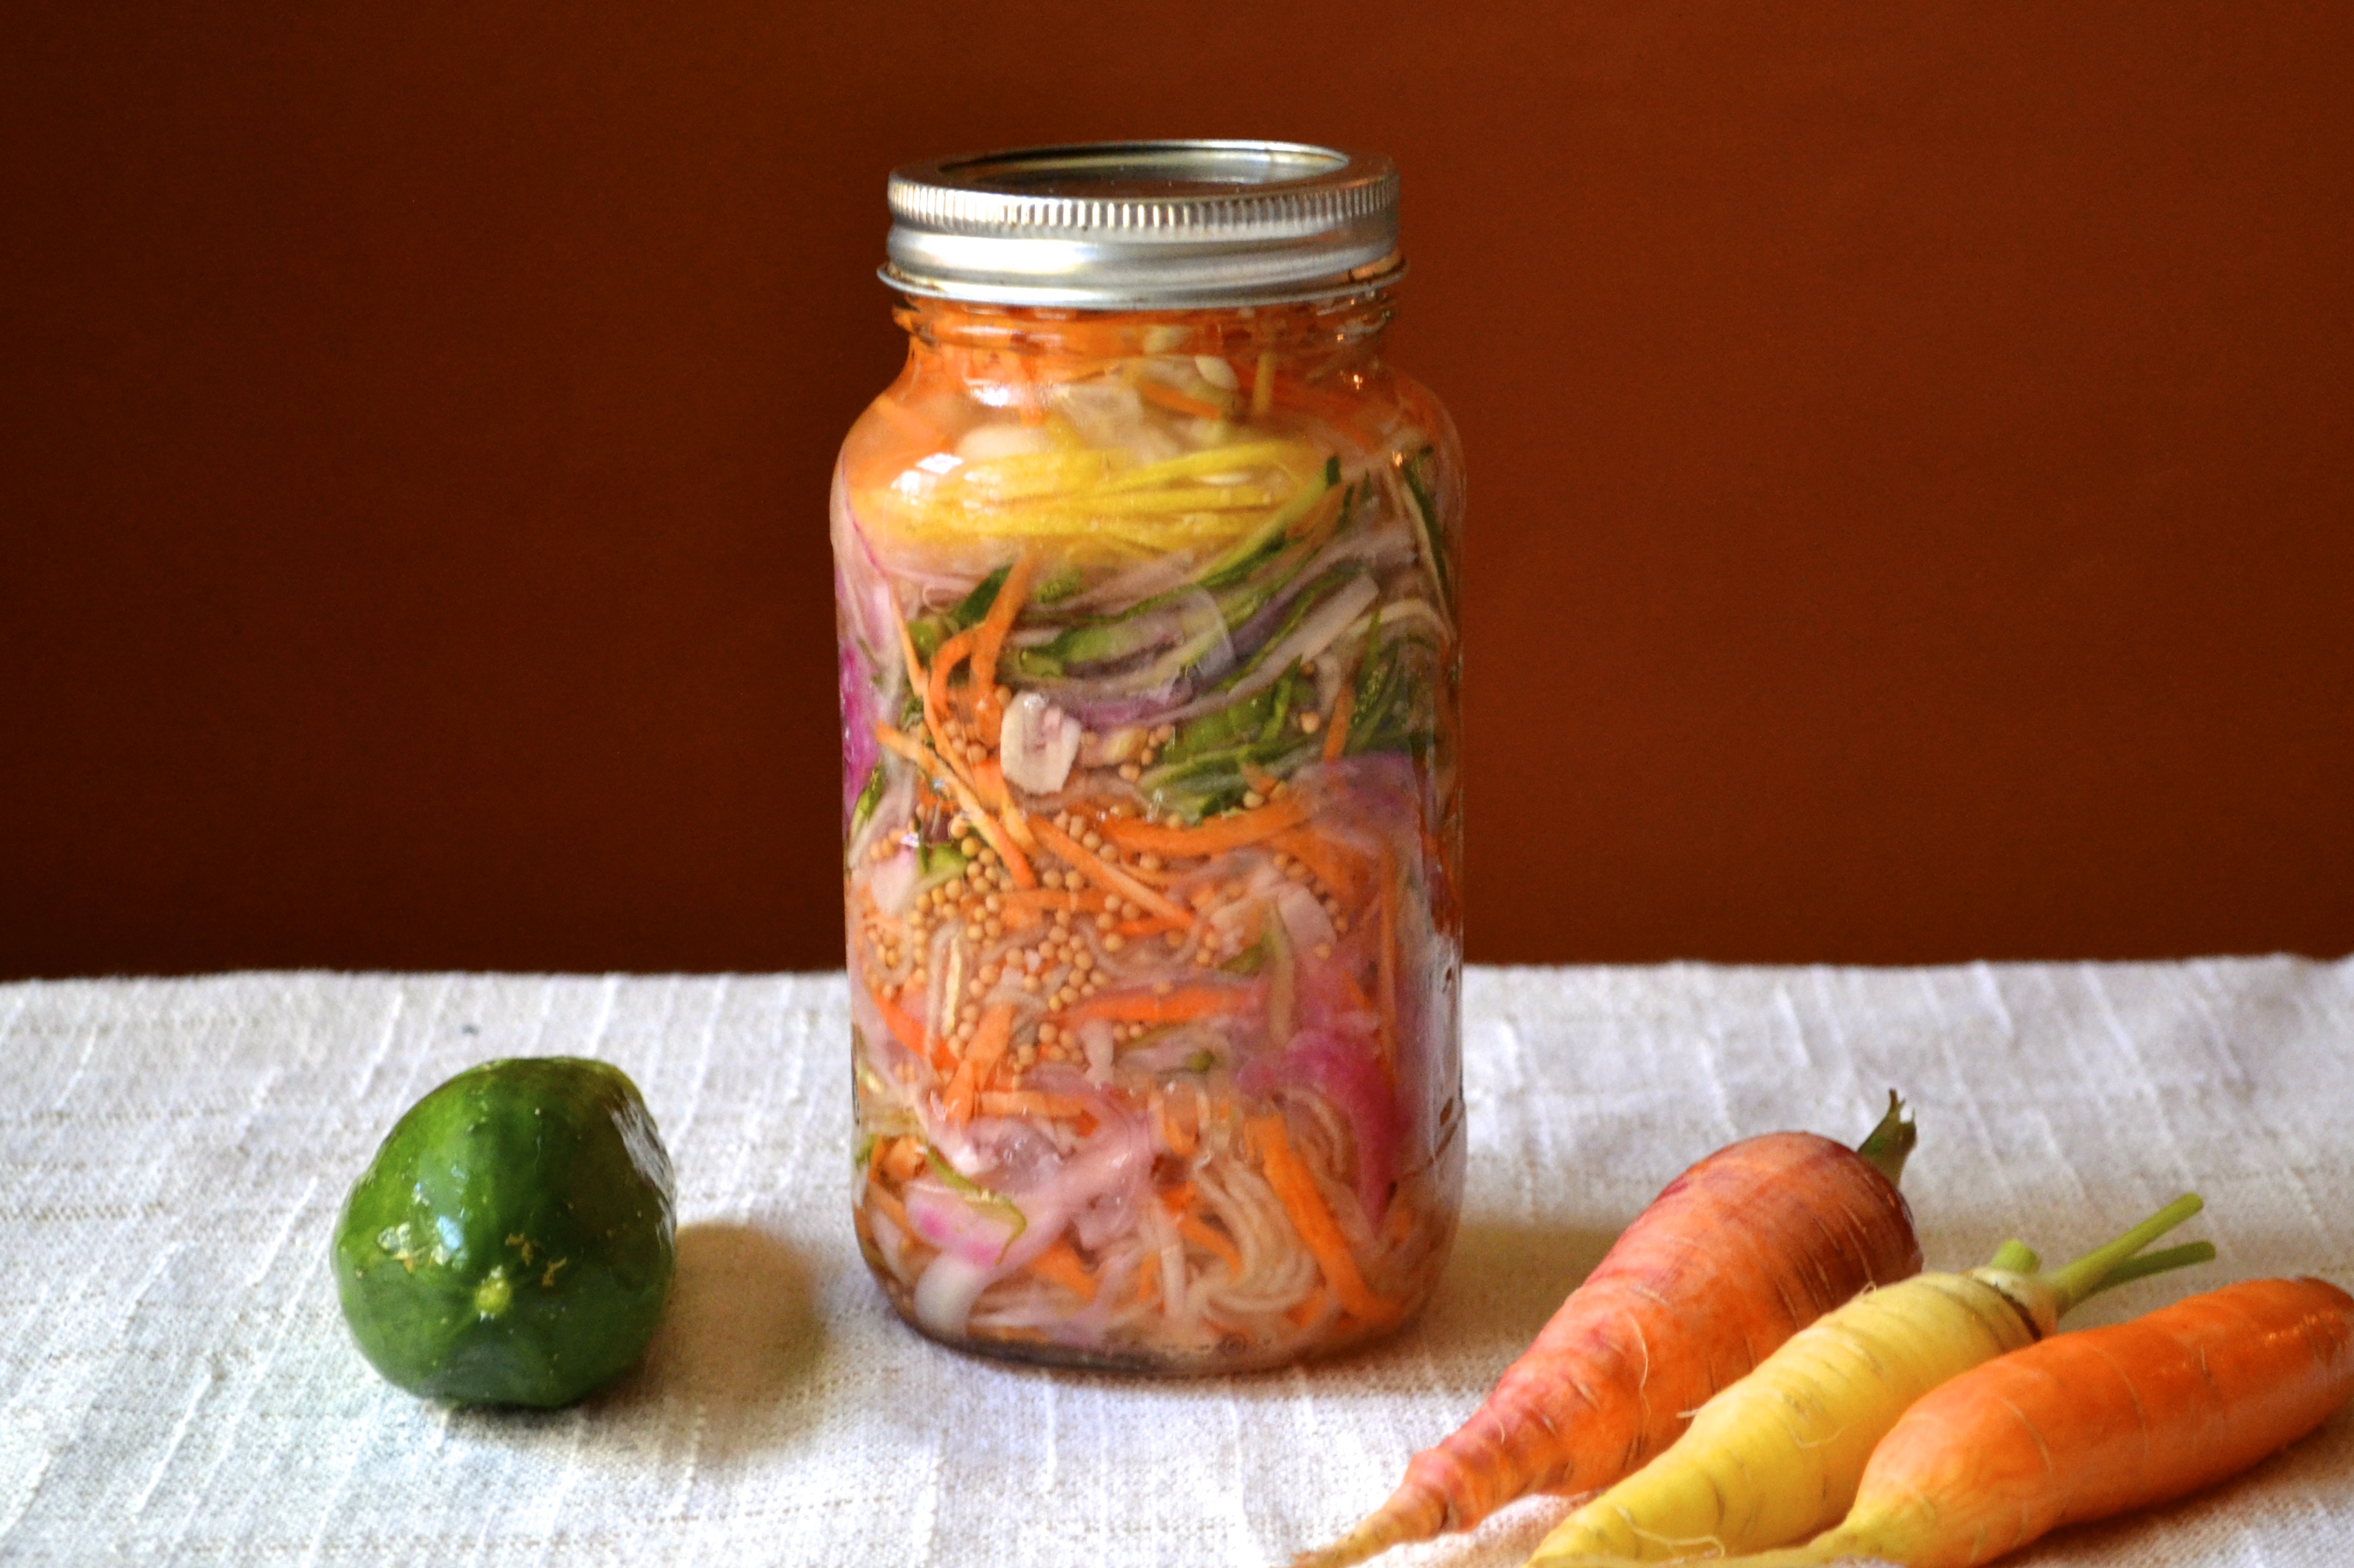
And…AND…did I mention that you do NOT need a canner. Quick fridge pickled slaw will be your BFF in no time. They are pickled within an hour, but taste best if you wait about 24 hours. These fridge pickled veggies will keep for a month (if they last that long without being devoured).

When making a batch..or two, just make sure you have about 3 to 4 clean pint jars with lids. Mix up the brine in a saucepan and allow to boil and then let it cool.  Stuff all of your delicious julienned veggies into the jars. Then, pour the brine over your veg mix, leaving about 1/4-inch head space. Seal up with your lid. Place in fridge. Wait. Shake. Wait. Wait. Shake. Eat. Eat. Be happy.

DSC_0215 DSC_0213

Note – The asian flare is primarily from the rice vinegar. I recommend buying an organic rice vinegar or at least one without added sugar, such as Eden Organics Brown Rice Vinegar. This recipe can easily be doubled and tripled if you want to make extra for giving the gift of pickled slaw to others. People will love you. This recipe can easily be made with 100% rice wine vinegar or 100% apple cider vinegar…actually, any vinegar would work. It will just change the flavor.

DSC_0227

Asian Pickled Vegetable Slaw (adapted from Smitten Kitchen)

Ingredients

Brine:

  • 1/2 Cup Rice Vinegar
  • 1/2 Cup Apple Cider Vinegar
  • 2 Tablespoons Kosher Salt
  • 2 Tablespoons Honey
  • 2 Tablespoons Yellow Mustard Seeds
  • 1 Cup distilled water

Vegetable Mixture Options (requires about 4 cups at least of shredded or julienned veggies):

  • Carrots
  • Cucumbers
  • Bell Peppers
  • Jalapeños
  • Onions
  • Garlic
  • Ginger
  • Radishes

Instructions

  1. First, cut up about 4 to 5 cups of fresh and colorful vegetables (see suggestions above). The vegetables can be slivered or julienned.
  2. Have at least 4 pint jars with lids cleaned and set aside.
  3. To make the brine, heat the vinegars, honey, salt, and mustard seeds in a saucepan until it begins to simmer. Make sure the saucepan is non-reactive. Once the salt and honey is dissolved, remove the pot from the heat and stir in the distilled water. Allow the brine to cool to a lukewarm temperature.
  4. Next, divide your vegetable slaw mixture evenly between your jars. Pour the brine over the vegetables. Seal with lids. Place in refrigerator for at least 24 hours and up to a month. The vegetables will taste pickled within an hour, but taste even better the next day or two. Make sure your vegetables are submerged in the brine for the maximum shelf life.

Lemony Apricot and Cherry Clafoutis (Grain Free, Gluten Free, Dairy Free, Paleo)

DSC_0271

I’m jumping straight into this dessert.

Number one: it’s pronounced cla-foooooo-teeeee.

Number two: it’s good.

Number three: it’s easy.

Number four: We jumped straight into this dessert before I could properly photograph it. Doh!

This french-based dessert is a mix between custard, flan, heaven. Traditionally, clafoutis contain a little bit of all purpose flour, whole milk, eggs, sugar, and whole cherries that have not been pitted. The pits give off an amazing almondy flavor. But who wants to be enjoying a creamy amazing dessert and then break a tooth when you bite into a surprise pit. And then have to spit. Mmmm. Fancy.

DSC_0249

DSC_0263

So when coming up with a grain free clafoutis recipe, using almond flour seemed like it would work wonderfully and provide that almond flavor naturally. I scoured through several different recipes and finally landed on this one from Gourmande in the Kitchen. I slightly adapted it, by adding the zest and juice of one lemon, a tablespoon of coconut flour to thicken the mixture (making it more sturdy and creamy), and honey instead of sugar.

DSC_0265

A friend brought me some fresh Michigan sweet cherries and apricots that she brought back from her vacation.  We ate most of the cherries, but I managed to squirrel away a batch for this clafoutis.  Halve and pit the cherries and apricots and then place them into the bottom of a cast iron skillet. You could also use a 9-inch pie pan, cake pan, or a shallow tart dish. Simply place all of the remaining ingredients into a blender or food processor and whirl together for one minute. Then bam! Pour the custard filling on top of the prepared fruit. Then pop this baby into the oven and 45 minutes later, you have a light, creamy, and amazing dessert. The best thing about this dessert is that you can prepare a stunning dessert for company without having to worry about it. You can focus on the main course, or a side dish…or your drink and company!

If you don’t have cherries, no worries, I also have prepared this clafoutis with blueberries. It would be awesome with any fruit that is in season…pears, apples, peaches, raspberries, blackberries…plums!

DSC_0274

Lemony Apricot and Cherry Clafoutis (adapted from Gourmande in the Kitchen)

Serves 6 to 8

Ingredients

  • butter or coconut oil for baking dish
  • 1/2 cup pitted cherries
  • 4 apricots, pitted and sliced in half
  • 1 cup coconut milk
  • 3 eggs
  • 1/2 cup almond flour
  • 1 tablespoon coconut flour
  • 1 teaspoon vanilla extract
  • 1/3 cup honey
  • juice and zest of 1/2 large organic lemon
  • 1/4 teaspoon sea salt

Instructions

  1. Preheat oven to 375 F. Butter or grease a 10-inch cast iron skillet or 8X8 inch pyrex dish or even a 9-inch round pie pan or cake pan will work.
  2. Place prepared and pitted cherries and apricots in the bottom of the prepared baking dish. Arrange in a single layer and evenly disperse the fruit.
  3. Meanwhile, place all of the remaining ingredients (coconut milk through salt) into either a blender, food processor, or bowl of a mixer. Blend or mix on high for 1 minute. Gently pour the mixture into the prepared baking dish on top of the fruit, being careful to not disturb or dislodge the fruit.
  4. Place into the preheated oven and bake for 35 to 40 minutes, or until set. Remove from oven and allow to cool for 10 minutes. Serve warm or at room temperature.

Heirloom Tomato Quiche with Rosemary Almond Flour Crust

DSC_0209

People! We have a lot to celebrate around here. The weather in Kansas City has been ridiculously amazing. Highs in the 70s…in AUGUST! I’m in heaven. My windows are wide open! I’m sitting on my back patio. I’m wearing long sleeves in the mornings! Could it get any better? Oh yes it can…

DSC_0195

We got our Google Fiber hooked up this week! My internet is Speeeeeeeedy McSpeederson!

AND my family sent me some fresh honey from the farm!!!!! YUM!

AND my husband started back as a teacher! High five hard working teachers!

AND my middle sister went off to college! High five college students!

AND I went and saw my first NFL game…GO CHIEFS (even though you lost…:( )

AND the Royals are dominating… wild card spot here we come!

AND my tomatoes are FINALLY turning red…after sitting green for eveeeeer…

AND one of my best friends is having her baby!!!!! Right. Now.

Well…*looks at watch* maybe in a few hours. *checks phone*

DSC_0197

DSC_0200

I’m anxiously waiting for this beautiful baby girl. She is 13 days past her due date. COME ON lil’ lady!!!! So, I’m cleaning my house, scrubbing my floors….*checks phone*

Mowing my lawn, pulling weeds…. *checks phone*

Pulling more weeds….*checks phone*

Tweezing my eyebrows…. *checks phone*

DSC_0202

You get the picture. The arrival of this beautiful baby girl is more exciting than the onset of my amazing juicy heirloom tomatoes. Ya…Mirabel, you are that special and your KC family can NOT wait to meet you.

*check phone* Still no word.

Ok, so, since Mira still hasn’t come, let’s talk about this heirloom tomato Quiche. I used my basic almond flour tart crust and filled it with a thinly sliced Cherokee purple tomato, fresh herbs, and fresh farm eggs. I have made this for the past several weekends. The rosemary crust and fresh heirloom tomatoes are splendid together. This is definitely a winning brunch recipe that is perfect whip up when you have company. And don’t think quiche is just for breakfast, I ate this puppy for lunch and dinner!

*checks phone*

DSC_0213

Heirloom Tomato Quiche with Rosemary Almond Flour Crust (Grain Free, Gluten Free, Dairy Free, Paleo Friendly)

Serves 6

Ingredients

  • 1 9-inch savory rosemary almond flour tart shell
  • 1 large heirloom tomato (I used cherokee purple)
  • 1/4 cup fresh herbs (such as basil, chives, parsley), chopped
  • 6 eggs
  • 1/2 teaspoon salt
  • 1/4 teaspoon dijon mustard
  • 1/8 teaspoon cracked pepper

Instructions

  1. Preheat oven to 350 F. Prebake rosemary almond flour tart shell (or crust of your choice) for 10-15 minutes. Remove from oven and allow the tart crust to cool on a wire rack while you prepare the filling.
  2. Slice one large heirloom tomato in half. Then slice in very thin slices, perpendicular to the first cut so that you have thin half moons (as shown in the pictures above). Place a few layers of paper towels onto a large plate. Lay out the tomato slices in a single layer on top of the paper towels to drain some of the extra juice. Sprinkle lightly with salt. Allow to sit for about 5 minutes.
  3. In a medium bowl, combine the eggs, herbs, salt, dijon mustard, and pepper.
  4. Place the tart crust on a rimmed baking sheet (to catch any flow over of the quiche filling). In the slightly cooled tart crust, place the tomatoes in a single layer in a circular fan patter on the bottom of the tart crust. Pour the egg mixture evenly over the tomatoes. Using the rimmed baking sheet with the filled quiche into the preheated oven. Bake for 45-55 minutes, keeping an eye on it. It will be done with the center of the quiche is set. Transfer to a wire rack and cool for 10 to 20 minutes. Serve warm.

Rosemary Almond Flour Tart Crust

I’m on a mission to take life slower. Sometimes things move so quickly that I get caught up in trying to get everything done perfectly and on time and I miss the important things that are going on around me. I forget to breathe. I forget the basics. I focus on the wrong things.

This weekend I decided to slow down, to be present, to breathe.

DSC_0219

DSC_0221

Hang my clothes out on the line.

Read a book.

Spend meaningful time with dear friends.

Eat butter pecan ice cream and remember my father.

Remember the basics.

Hold my husband’s hand.

Eat simply. And simply eat.

DSC_0222

DSC_0226

Bake something wholesome…. like a savory tart, which is where this basic tart crust came into my life this weekend. Everyone should have a basic pie crust and tart crust recipe up their sleeves. And bonus for the gluten and grain free gang, almond flour makes a wonderful flaky and light crust.

DSC_0205

This basic tart crust is based on a fabulous recipe from the Gluten-Free Almond Flour Cookbook by Elana Amsterdam. (Which is a great book for those who are breaking into the world of almond flour baking.) This basic tart crust recipes is easily adaptable to go to the savory side or the sweet side. Currently my fave way to serve this tart crust is by adding fresh herbs from the garden and filling it with eggs and heirloom tomatoes. Simple. Done. And leftovers will be breakfast for the upcoming week! Man, I’m liking this simple life.

For other savory fillings, you could use this crust for a quiche crust or as an open pot pie crust! However, if going sweet, eliminate the black pepper and rosemary and add a tablespoon of honey. This would be simply great filled with lemon curd. Mmmm.

DSC_0232

Rosemary Almond Flour Tart Crust (Adapted from Gluten-Free Almond Flour Cookbook)

Makes 1 9-inch tart crust

Ingredients

  • 1 1/2 cups almond flour (I use Honeyville)
  • 1/4 teaspoon salt
  • 2 teaspoons fresh chopped rosemary
  • 1/8 teaspoon ground black pepper (optional)
  • 1/3 cup coconut oil (or butter), softened
  • 1 to 2 Tablespoons cold water

Instructions

  1. Preheat oven to 350 F. Lightly butter or oil a 9-inch tart pan and set aside.
  2. Place the dry ingredients into a medium bowl and combine with a wire whisk.   Add softened coconut oil and mix with a spoon until combined. Add in the ice water, starting with just 1 tablespoon. Combine with your hands until the mixture begins to hold together. If the dough is not holding together, add a second tablespoon of cold water. Press into a ball. If making ahead, you can cover the ball of dough in plastic wrap at this stage and place in the fridge for a few hours until you are ready to bake it.
  3. Place the dough ball into the prepared tart pan. Starting from the center of the dough, press into the tart pan evenly working your way out to the sides. Press the dough up the sides evenly. Pierce the bottom of the crust with a fork a few times.
  4. If making a tart crust that will be cooked after it is filled, then you will want to partially bake the crust. However, if you are filling the tart with something that will not bake after it is filled, then you will need to fully bake this crust.  Place the tart crust in a preheated 350 F oven and either partially bake for 15 minutes or fully bake for 30 minutes or until the tart is lightly golden brown.
  5. Remove from oven and allow to cool on a wire rack for 5 to 10 minutes before filling.

Paleo Zucchini Brownies

I like surprises. Do you like surprises? Good. I have one for you.  Be ready to have your mind space blown.

Zucchini brownies.

DSC_0235

We are gettin’ craaaaazy today. Adding veggies to brownies. Ya, you heard me. I know stuffing a brownie with healthy zucchini might not be your idea of a great surprise, but I promise this brownie won’t disappoint you.

These are cakey-style brownies. So for you fudgey-style brownie lovers (like me) these are not those, buuuuut they are incredibly delicious. Plus, they are stuffed with wholesome nutritious zucchini, almond butter, maple syrup, and raw cacao powder! Ya, these are likely the healthiest brownies out there. They are really close to zucchini bread but with a double chocolate edge that comes from the cacao powder and diced dark chocolate bites. Mmmmmm. Can I get an AMEN?!?

DSC_0226

DSC_0239

If you don’t have almond butter, any nut butter would work. For the nonPaleo peeps and those not allergic to peanuts, these would be delish with peanut butter swapped in for the almond butter. But if your nut butter is not all natural (or has salt and added sweetener), be sure to eliminate the salt and reduce the sweetener in the below recipe to account for it.

Don’t worry. I won’t tell anyone that you ate these for breakfast.

DSC_0238

Paleo Zucchini Brownies (adapted from Fast Paleo)

Ingredients

  • 1 cup creamy unsalted and unsweetened almond butter (or any nut butter)
  • 1 egg
  • 1/3 cup honey or maple syrup
  • 1 teaspoon vanilla
  • 1 teaspoon baking soda
  • 1/8 teaspoon kosher salt
  • 2 Tablespoons cacao or cocoa powder
  • 1 1/2 cups shredded zucchini
  • 1/4 cup chopped dark chocolate or chocolate chips

Instructions

  1. Preheat oven to 350 F. Grease an 8 X 8 baking dish and set aside.
  2. Shred 1 to 2 zucchini with either a grater or a shredder attachment on a food processor. Set aside.
  3. In a medium bowl, combine almond butter, egg, maple syrup, and vanilla. Mix well. Stir in baking soda, salt, and cacao powder. After well mixed, stir in shredded zucchini and chopped dark chocolate.
  4. Pour into prepared 8X8 baking dish. Bake for 20 to 25 minutes in preheated 350 F oven. The brownies are done with the center is set. Remove from oven and allow to cool for 5 to 10 minutes.

Almond Flour Blueberry Peach Muffins

DSC_0223

I don’t know what evokes more tasty, comforting memories: peach cobbler or blueberry muffins.  Both make me giddy. Both make me drool. Both make me scramble to the kitchen and wait impatiently for them to get out of the oven and promptly take too quick of a bite which then results in me burning the crap out of my mouth.

Every. Dang. Time.

And do I learn, people?

No.

DSC_0202

DSC_0191

A friend of mine went blueberry picking and graciously parted with a few of her fresh, sweet, awesome blueberries.  I also had some fresh Missouri peaches at the house. Oh YaH!

Are you guys thinking what I’m thinking? YAH! Let’s burn the crap out of our mouths with hot sexy blueberry peach muffins!!!!! YAH.  Wait….that’s not what you were thinking? Seriously? Well it should be. Cuz that’s what we are going to DO! Tell your mouth to get ready.

DSC_0205

DSC_0219

What do we want? BLUEBERRY PEACH MUFFINS. When do we want them? NOW!

Fresh blueberries + fresh peach + lemon zest = dreamy

DSC_0194

While these muffins were cooking, I sat and waited and watched through the oven door as they rose. I smelled the ridiculous spell-binding, blueberry-peach aroma as  it wafted through my house. My stomach growled. I couldn’t take it! I nearly pulled them out of the oven too early because I WANTED THEM NOW! I was drooling.

But once they were finished, I pulled them out…I let them cool (for 2 seconds) and then I took a bite and felt those bursts of blueberries, the zip of lemon zest, the fresh juicy peaches…. And then it hit me.  OOOOOOW…crap…burnt again…but…Mmmmmmm. The burned roof of my mouth and seared finger tips forget the pain easily when tempted and provided with such awesomeness.

DSC_0213

Almond Flour Blueberry Peach Muffins (Grain Free, Gluten Free, Paleo-Friendly, Dairy Free)

Ingredients

  • 2 1/2 C almond flour (I use Honeyville blanched almond flour)
  • 3/4 teaspoon baking soda
  • 1/4 teaspoon kosher salt
  • zest of 1 lemon (organic preferably)
  • 3 eggs
  • 1/4 C maple syrup or honey
  • 2 Tablespoons grass-fed butter or coconut oil (melted)
  • 1/2 C unsweetened applesauce
  • 1 ripe peach, diced (ok to leave skin on)
  • 1/2 to 1 C blueberries (fresh or frozen)

Instruction

  1. Preheat oven to 350 F. Place 12 muffin liners in a 12 regular-sized muffin tin. Set aside. (I ran out of muffin liners half way through so I just sprayed coconut oil inside the muffin cups that were not lined.)
  2. In a medium bowl, combine almond flour, baking soda, salt, and zest. In a separate bowl, combine together wet ingredients, which include eggs (slightly beaten), maple syrup or honey, melted butter or coconut oil (allow to slightly cool before adding to eggs or you will scramble those suckers), and applesauce. Add dry to wet and stir until combined. Stir in peaches and blueberries carefully!
  3. Spoon about 1/4 cup of batter into each lined muffin tin. Bake for 15 to 20 minutes at 350F. Muffins will be set in the center and lightly browned on edges. Remove from oven and allow to cool in muffin tin for 5 minutes. Then move to cooling rack (if you can stand it) and allow to cool the rest of they way…about 30 minutes…or if you are me, 30 seconds.

Notes:

* The base recipe for these delicious muffins is adapted from an awesome blog called Power Hungry.

Jalapeño Bacon Jam

Heaven in a jar. Spicy + Smokey + Sweet + Salty.

I am going to give you a huge warning. Once you begin making this, your house will turn into a drool zone. People will come from all over. If you make it, they will come. Headlights will line up your street. People will pay admission to just be near you. It is the Field of Dreams of Jams. True story.

DSC_0015

DSC_0001

After researching and researching different versions of this amazing jam, there are several ways to make it. I really think you could stir nearly anything into it and get something magical. No matter what, it will be hard for you to not devour in one sitting or even while you are cooking it. Seriously.

Typically this jam consists of:

  • bacon (duh),
  • onions (I used red but yellow would work too),
  • vinegar (many recipes used cider vinegar but I opted for balsamic),
  • sugar (I used maple syrup + 1 tablespoon of molasses…several recipes use a combo of brown sugar + maple, you could definitely play around with the ratios here)
  • liquid (I used water, but Martha used strong brewed coffee)
  • Optional spices (I added a jalapeño, but I also think some chipotle powder or other spicy add-ins would be redonculous like this recipe)

So without further ado…I present to you, the heavenly and amazing Jalapeño Bacon Jam!  *Jazz Hands*

We had several people over and slathered it on burgers…erhmehgeeerd. SO GOOD. Somehow there was magically one tablespoon left. So I squirreled it away for my lunch the next day and topped a baked sweet potato with it. *swoooon*

DSC_0022

Notes on storage – This should keep in a jar with a tight fitting lid in the refrigerator for 3 weeks or the freezer for up to 6 months. But if this stuff is around longer than two days, I will be AMAZED at your self control. And don’t be surprised if it gets stolen…don’t look at me???

Jalapeño Bacon Jam (adapted from Martha Stewart and Homesick Texan)

Ingredients

  • 1 lb bacon (nitrate free if possible), cut into 1/2-inch pieces
  • 1 tablespoon reserved bacon grease
  • 2 red onions (about 2 1/2 cups), diced
  • 3 cloves garlic, minced
  • 2 jalapeños, deseeded and diced (about 1/4 cup)
  • 1 cup of water
  • 1/3 cup balsamic vinegar
  • 1/4 cup real maple syrup
  • 1 tablespoon unsulphured molasses
  • salt and cracked pepper

Instructions

  1. Cut the bacon slices into 1-inch strips. Over medium-high heat, cook the bacon in a dutch oven stirring frequently until the bacon is browned but not crispy. Use a slotted spoon to transfer the bacon to a paper-towel lined plate. Drain the bacon grease but reserve about 1 tablespoon.
  2. Add onions, jalapeño, and garlic to the dutch oven and cook over medium heat until the onions become translucent. This should take about 5 minutes.  Add bacon and remaining ingredients. Simmer on low for 1 to 2 hours, stirring occasionally. If jam gets too dry, add additional water 1/4 cup at a time. After it is good and thick, remove it from heat and allow to cool.
  3. If you want the jam to be a finer consistency, add it to a food processor and pulse a few times (not too much).  I personally liked mine a bit chunky. Transfer to a jar with a tight-fitting lid. Store in refrigerator for 3 weeks or in the freezer for 6 months. But if this stuff lasts longer than one or two days in your house, bravo to your self control!

Paleo Chocolate Banana Ice Cream Sandwich

I grew up in the smack dab middle of Oklahoma. And Oklahoma summers are HOT. And Windy. And LONG. We often experienced over a month or two straight of days exceeding 100 degrees!  The only cure for those days is a body of water, air conditioning, and ICE CREAM.  Or just ice. Lots of ice ice baby.

DSC_0040

DSC_0029

Unfortunately I did not grow up around any body of water nor a creek (pronounced crick). Instead of lakes or ‘cricks’ or rivers….I grew up running in and out of a water sprinkler attached to our water hose in our front yard. I would jump over and over and over the stream as it sprayed into my face.  The only thing that would make me stop the water dance was when the homemade ice cream machine would finally stop churning. I would inhale fresh ice cream with it dripping all over my face as the sprinkler water quickly evaporated from my hair and swimsuit. By the time I had devoured my ice cream, I was bone dry and ready for another round of the great water sprinkler dance.

Even though I’m older (much), my priorities of summer remain the same. But sometimes, waiting for fresh churned ice cream is not possible…also, my butt loves to hoard it. Stupid butt. So in order to deny my butt the pleasure of hoarding all of the ice cream AND to cut down on time to prepare homemade ice cream, I came up with a BRILLIANT ice cream sandwich that is gluten free, grain free, dairy free, paleo-friendly.  Bonus…they taste like the classic ice cream sandwich (or even better in my opinion).

DSC_0004

DSC_0006

My criteria for this recipe were: (1) simple to make; (2) gluten free and dairy free; and (3) the cookies couldn’t be rock hard. There is nothing worse in my opinion than biting into an ice cream sandwich and having all of the ice cream squeeeeeze out the sides and into my lap and floor and face and shoes and toes and other odd crevices. UGH. Or is that just me?

DSC_0013

I’m serious…these puppies are amazing. I woke up in the middle of the night with this idea. I would patent the crap out of these if I could. I’m THAT excited about it. Pretty sad, huh? My little sister was in town for the weekend and once I proclaimed my amazing recipe idea to her, she immediately replied “LET’S DO IT”. Such conviction! I love it.

DSC_0010

DSC_0011

The “ice cream” is just 5 to 6 frozen bananas that have been pureed into an amazing banana sorbet. Simple. One ingredient. Then the banana ice cream is sandwiched between two simple chocolate-nut butter cookie-cakey layers. I have made the cookie layer using peanut butter and almond butter.

DSC_0016

DSC_0017

So first things first, go peel and chop up a crap-ton of bananas and throw them into the freezer. I always have a huge gallon bag of frozen bananas ready to go. Anytime one is nearing the “great for banana bread stage” I just chop it up and add it to the ziplock freezer bag. Insta- banana ice cream whenever I want!

DSC_0034

Paleo Chocolate Banana Ice Cream Sandwich 

Ingredients

  • 1 cup of creamy nut butter (almond butter or peanut butter)
  • 1/3 cup honey
  • 1 egg
  • 1/2 teaspoon baking soda
  • 1/4 teaspoon salt
  • 1 teaspoon vanilla
  • 2 tablespoons cocoa powder
  • 5 to 6 sliced frozen bananas

Instructions

  1. Preheat oven to 325 F. Line a rimmed baking sheet with parchment paper. Set aside.
  2. In a medium bowl, mix together the almond butter, honey, and egg until combined. Stir in the baking soda, salt, vanilla, and cocoa powder until well mixed. Spread cookie mixture with a spatula onto prepared pan evenly to 1/4-inch thick.  The batter will be thick like dough. Keep pressing it until it evenly covers the bottom of the pan. Bake for 12 to 15 minutes (times vary between ovens) or until edges appear done and a toothpick inserted in the middle comes out clean. Remove from oven and allow to cool completely. I placed the cookie sheet into the freezer while I made the banana ice cream.
  3. Once cookie is cooled, make the banana ice cream. For the banana ice cream, place the sliced bananas into the bowl of a good food processor or into a blender. Blend on high or process for a few minutes. Bananas will turn into a creamy sorbet.
  4. Using a serrated knife, cut the cookie in half crosswise. Use a spatula and spoon out the banana ice cream and place onto one side of the cookie. Spread evenly. Then carefully lift and place the other side of the cookie (flat side up) on top of the ice cream-covered side. Smooth sides and wrap tightly in plastic wrap and freeze for at least 2 hours.
  5. When ready to serve, unwrap the ice cream sandwich. Using a serrated knife, cut into 12 rectangles. Freeze leftovers wrapped in plastic wrap.

Almond Butter Banana Muffins

I am a bit of a hoarder.  I’m definitely a food hoarder, but also a hoarder of things. My husband thinks it is junk.  Which it isn’t! But seriously, I keep things in boxes that I have never looked at for the past four years that we have lived here.  I find myself holding on to things because… “don’t you dare get rid of it because I am saving that chair just in case some day I want to paint it red and have a tea party”. Yes…that really came out of my mouth.

DSC_0001

He recently decided to have a garage sale…or an “Alissa’s Things Sale” as I refer to it. He doesn’t hold on to anything. When we got married, he moved into my house with a single box. I had a U-Haul trailer that could have fit a plane. So needless to say, purging is a hard thing for me. I remember every gift someone gave to me. I can’t seem to part with it even if that person totally does not remember giving it to me. They probably just picked it up randomly and thought “crap, it’s her birthday…uhm…ya, here’s a chicken tea pot…she eats chicken…she drinks tea…CHICKEN TEA POT!”.  And here I am 15 years later with the ugliest tea pot and refusing to get rid of it. Until one day I wake up and the love of my life is selling all of my precious belongings (crap) and other people are walking away with my chicken tea pot!  *sob*

DSC_0003

DSC_0015

It was a similar feeling for me when I made the switch a year ago to give up gluten. Making the switch to being gluten free can be tough sometimes. It’s hard to not feel like an outsider when everyone is laughing and enjoying cake and big plates of lasagna. Family gatherings and cookouts and office parties offer a plethora of pasta salads and cupcakes and brownies and bread and crackers.  I would end up being the person in the corner snacking on carrots and a bag of nuts that I had stashed away in my purse like a squirrel.  BECAUSE I AM A HOARDER.

One day I decided to PURGE! I threw away everything that contained wheat or even traces of wheat.  It felt awesome.  I began researching and arming myself with easy recipes to bring to gatherings. So now I always offer to bring something that I know that I can eat and that will blow the socks off of others that have no idea how great gluten free food can be.

DSC_0010

This recipe uses nut butter in place of flour! No flour, no oil, no butter.  Basically it is just almond butter and bananas and honey and eggs. Those purged cabinets probably have these simple ingredients in them.  These muffins are rediculously good and rediculously easy!  I have made them with almond butter and also with peanut butter. Both are fabulous.  You can also add cocoa powder to the batter for chocolate cupcakes!

Almond Butter Banana Muffins

Ingredients

  • 1 cup almond butter* (see note below)
  • 2 ripe bananas, mashed (about 1 cup)
  • 2 eggs, lightly beaten
  • 1 teaspoon baking soda
  • 1 teaspoon vanilla
  • 1/2 teaspoon sea salt
  • 1/4 cup honey
  • 1/2 teaspoon cinnamon (optional)
  • 2 tablespoons cocoa powder (optional)

Instructions

  1. Preheat oven to 350 F. Prepare a 12 cup muffin tin with muffin liners. Set aside.
  2. In a medium bowl, combine the banana, eggs, and almond butter until well mixed. Add the remaining ingredients except the cocoa powder. With half of the batter, fill 6 muffin liners 3/4 full. I use a 1/4 cup to measure for each. With the remaining muffin batter, add the cocoa powder. Fill the remaining 6 muffin cups to 3/4 full with the chocolate batter.
  3. Bake for 15 minutes at 350F. Muffins will be firm a slightly golden, but fluffy. Allow to cool for 10 minutes then remove from the muffin pan to a wire rack.

*Notes

  1. I have also made these with peanut butter and they were great. I assume other nut butters would work too. If you have a nut allergy, sunbutter (sunflower seed butter) would be a good substitute.
  2. I recommend all natural and unsweetened nut butters. However, if you aren’t using all natural nut butters (that is, if they have added sweeteners) then lower the overall amount of added honey in the recipe.
  3. These are also delicious as cupcakes!