Tilapia Fish Tacos

Tilapia Fish Tacos  / Big Eats Tiny Kitchen
Tilapia Fish Tacos / Big Eats Tiny Kitchen

I still remember the first time I heard someone mention fish tacos. It was nearly 15 years ago. My face contorted and I wanted to vom in my mouth. Tasty, huh.  They didn’t sound appetizing…at…all. I imagined tacos that were a combo of Long John Silvers and Taco Bell…bleeeeeeh. But I went for it and took the fish taco challenge.

Thank goodness that was not what they turned out to be. They were fresh. They were NOT breaded. They were spicy with a fresh vinegary slaw on top. And did I mention the cilantro? and lime juice? And grilled corn tortillas? Ya, there was no turning back. I was a fish taco convert. I wanted to tell everyone about the magic of wrapping a blackened tilapia filet into a corn tortilla with cilantro and lime juice. I was ready to shove them in any doubters face.

Tilapia Fish Tacos (Gluten Free)

But now it is hard to go to a restaurant and NOT find fish tacos on their menu. I don’t have to convince anyone that they aren’t a greasy batch of deep fried fish wrapped in a gordita. Not a taco!

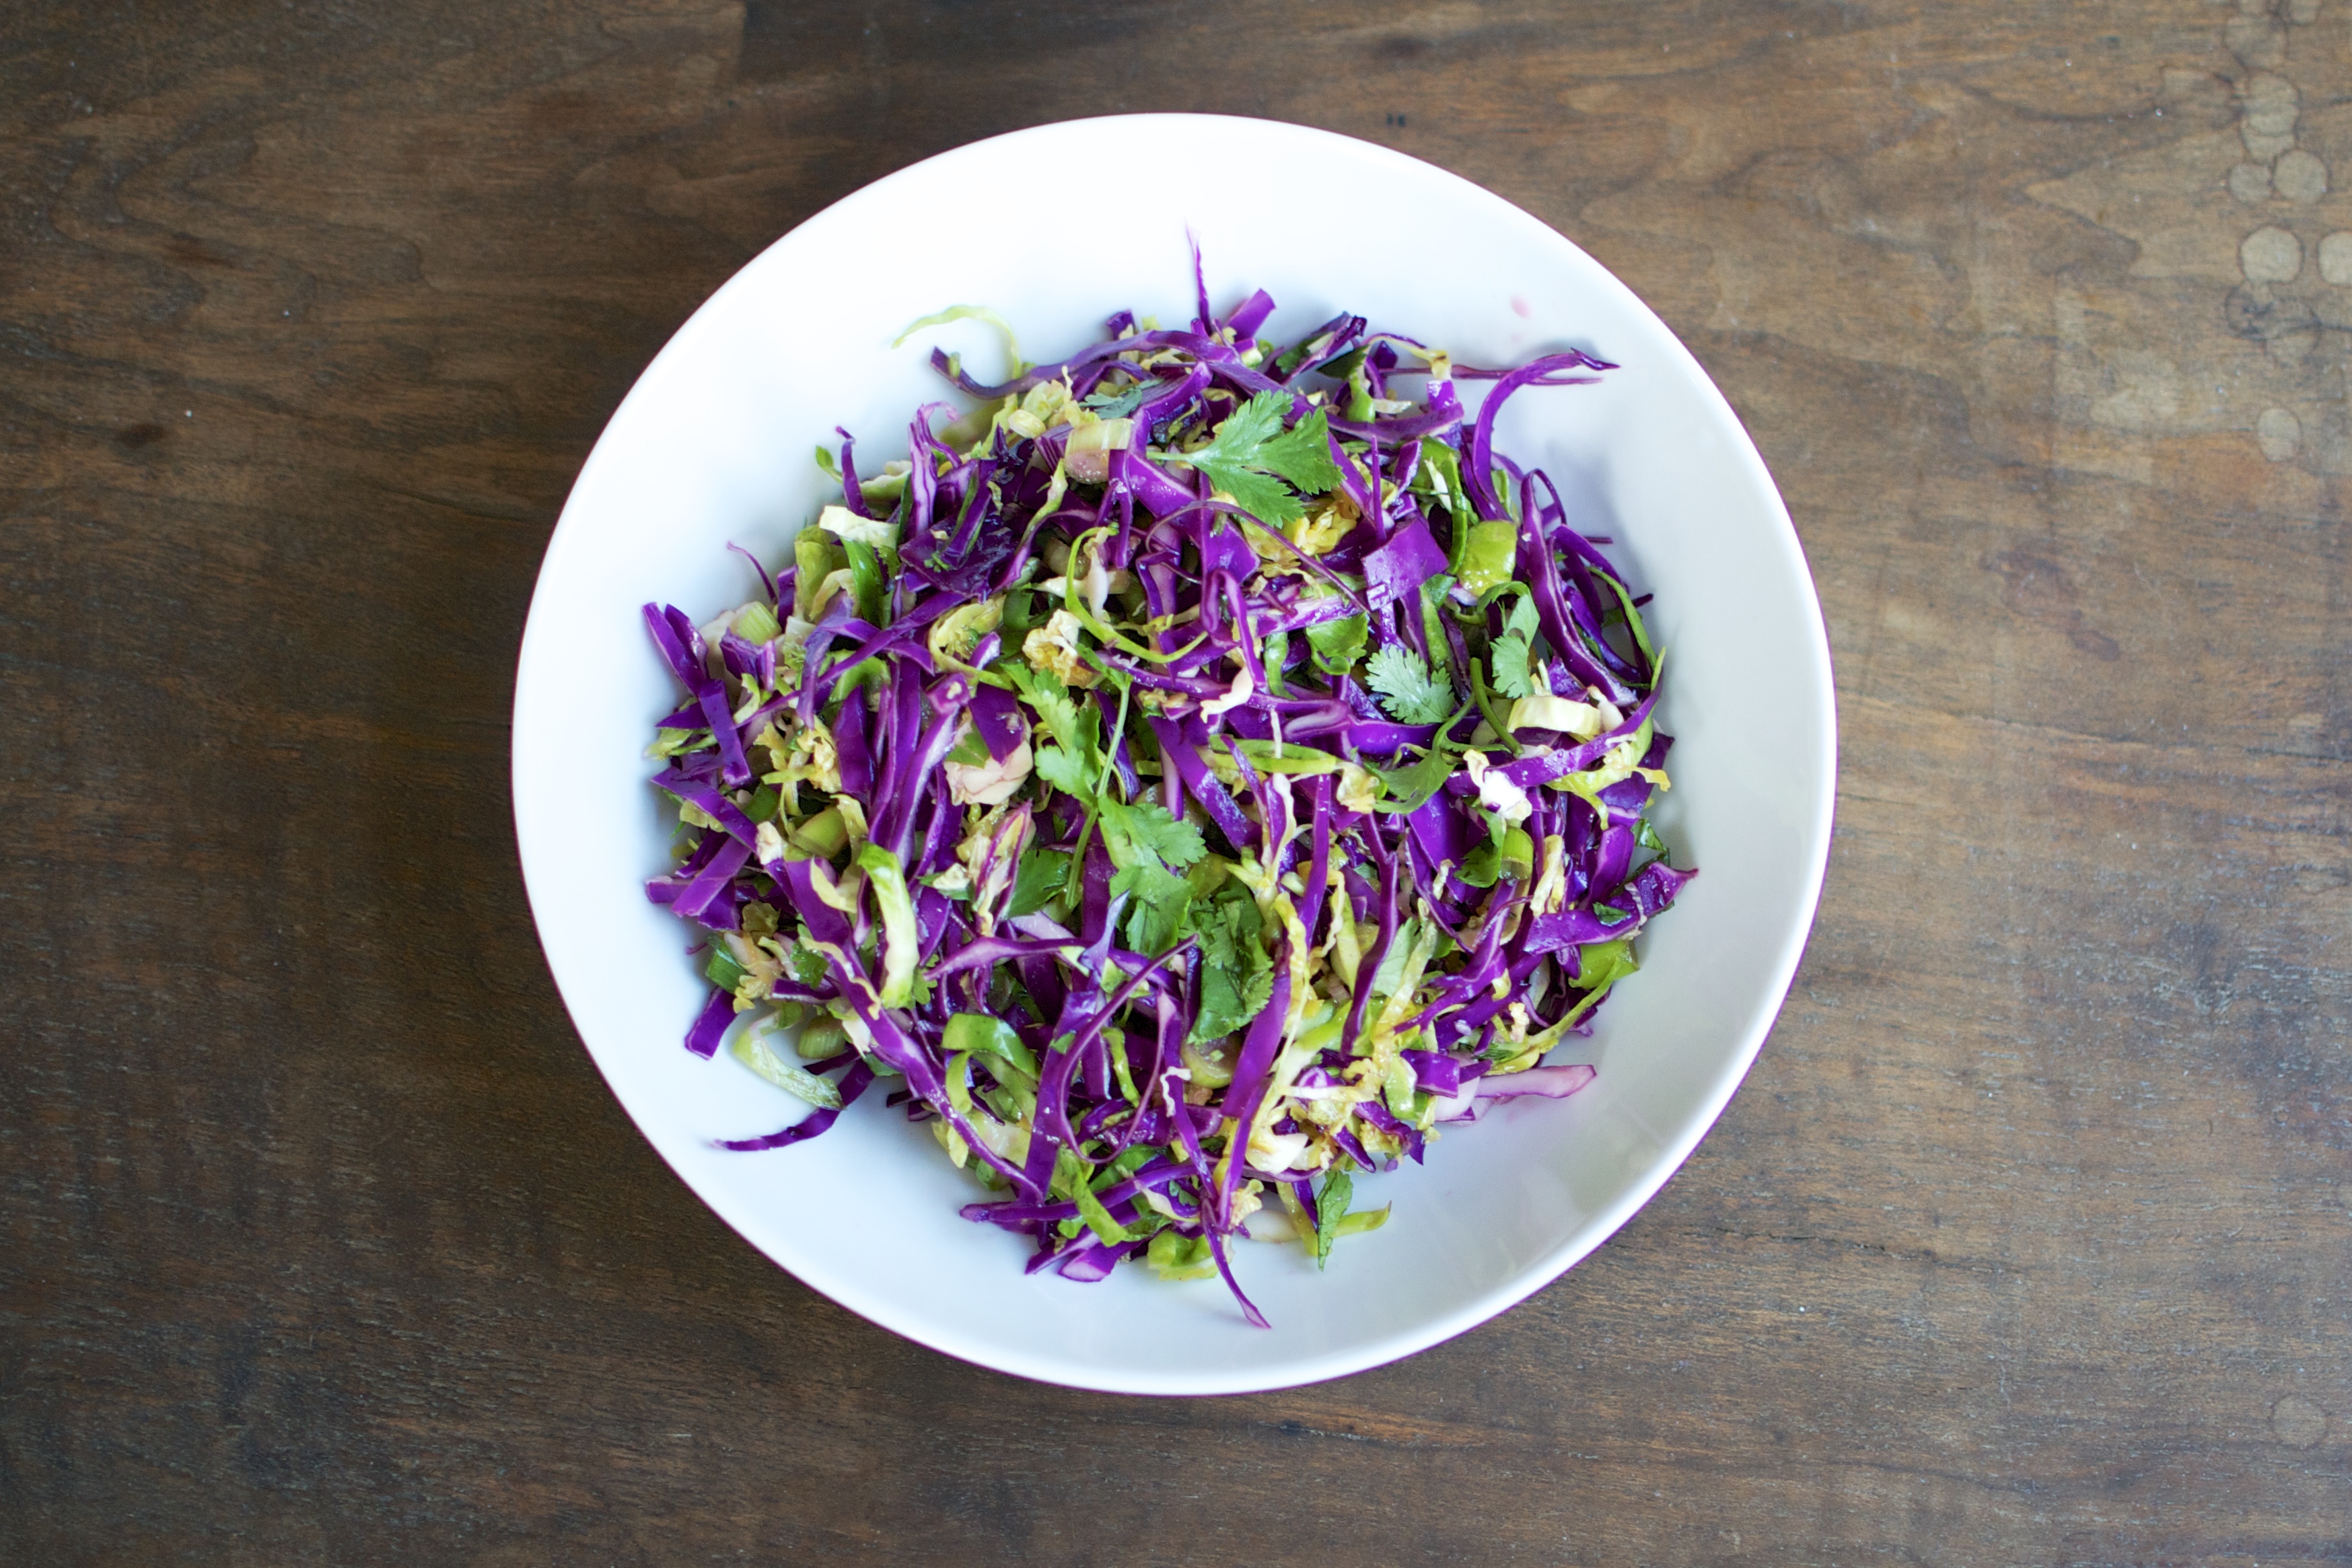
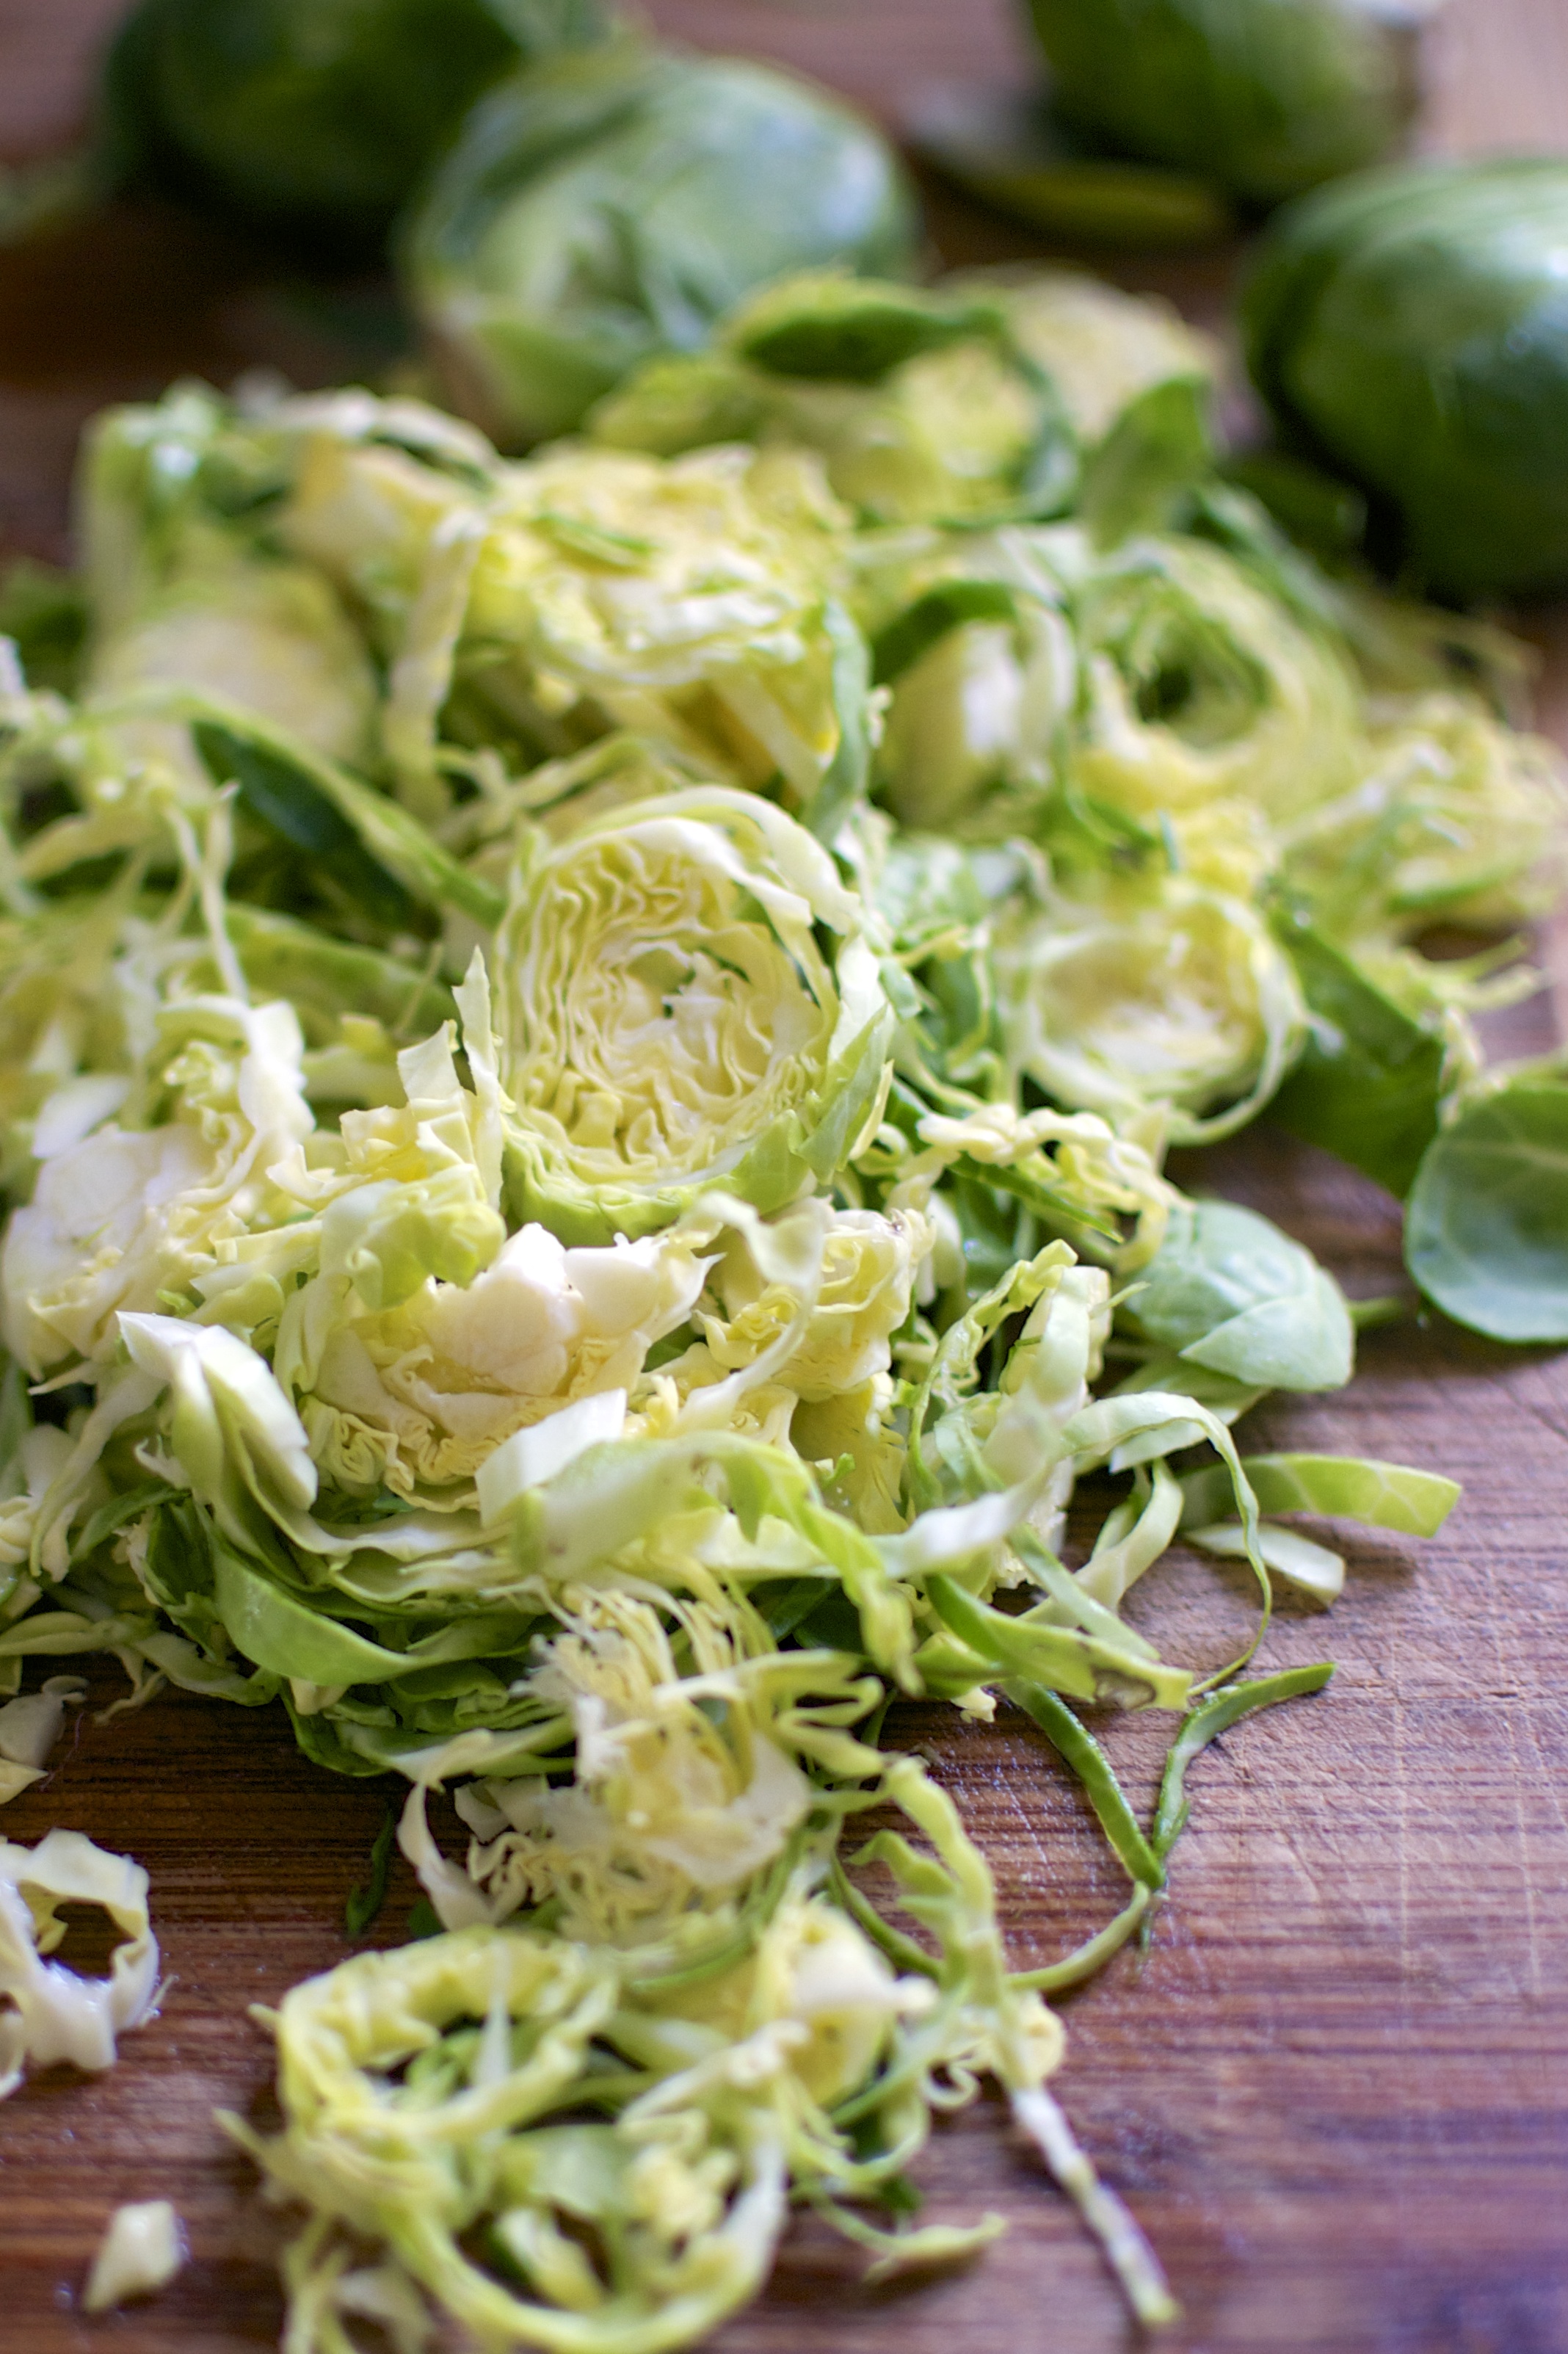
I make fish tacos all the time for solo dinners and for guests, blowing their minds and introducing them to the great fish taco movement. I make them similar to the first ones that I had in California so many years ago. Bursts of freshness are with every bite. Definitely don’t skimp on the lime or the cilantro! Top them with a great fresh vinegary slaw, such as this brussels sprout slaw or this cabbage slaw. I also love whipping up a mango salsa to accompany them.  Mmmmm. So what are you waiting for? Go start converting people to the fish taco revolution!

Tilapia Fish Tacos (Gluten Free)

Tilapia Fish Tacos

Serves 4

Ingredients

  • 1 tablespoons smoked paprika
  • 1 teaspoon garlic powder
  • 2 teaspoons ground thyme
  • 2 teaspoons ground oregano
  • 1 Tablespoon chile powder
  • 1 Tablespoon ground cumin
  • 1/2 teaspoon salt
  • 12 oz tilapia filets
  • 1/2 cup chopped fresh cilantro
  • 3 limes
  • crumbled feta
  • Slaw – such as Brussels sprout and cabbage slaw
  • 8 corn tortillas

Instructions

  1. Preheat oven to 350F.
  2. Combine seasonings in a small bowl (paprika through salt).
  3. Pat the tilapia dry and then sprinkle seasoning on top and bottom of filets. Place tilapia filets on a parchment paper lined baking sheet. Bake for 10 to 15 minutes, or until fish begins to flake apart with a fork.
  4. Remove the fish from the oven. Flake into large chunks.
  5. To prepare the tortillas, either place them in a single layer in the oven for just 1 to 2 minutes or place over an open gas flame to grill them slightly on the edges. I don’t like to microwave my tortillas because they turn out rubbery.
  6. Now it’s time to MAKE YOUR TACOS! Place fish into tortilla and top with slaw, fresh cilantro, and a generous fresh squeeze of lime juice.
Advertisement

Detox Salad Bowl with Lemony Dill Sunflower Seed Dressing

DSC_0359

I’ve lost my mojo and I just feel lost. I even feel lost in the kitchen. Of all places, that was a place I felt I could always turn to and whip something up full of desire and love and enjoyment. But not lately.

I went three weeks without going to the grocery store. THREE WEEKS. We were down to just a dozen eggs and frozen green beans…. worst omelette ever!

I couldn’t bring myself to go to the store. Even if I had gone, I would have just stared blankly at the isles and probably came home with another dozen eggs. It was the weirdest feeling to open my refrigerator and not have anything fresh in it…and then to not want to immediately drive my sorry little butt to the store or market and stock up on something…ANYTHING!

Roasted Parsnip, Cauliflower, and Fennel Soup / Big Eats Tiny Kitchen

And then a friend asked me a magical question….She asked me to cook with her. Zing. Cook. With. Someone. That was it! I needed a cooking partner! Someone to inspire me!

Her idea was to pick a delicious recipe in one of our old food magazines and to cook it with her in her AMAAAAZING kitchen. So I slowly started reopening and rereading my old dust-collecting magazines. And then slowly but surely, I started getting ideas. I felt my cooking desire was like the Grinch’s heart slooooowly expanding and growing. It just kept growing and growing and growing until I found myself at the farmers market on Saturday buying fennel, golden beets, radishes, arugula, kale….frothing at the mouth at all the herbs!  it was like a veggie frenzy!

DSC_0371

Who knows how all of these vegetables will fit together but I’m feeling mighty salady and detoxy right now. It was great to finally NOT eat eggs for every meal. I whipped up a quick Detox Salad Bowl of fresh spring vegetables and devoured it. Now I’m dreaming and dreaming of the new salads that I can create with my rag tag bunch of vegetables. Maybe I can get out of this funk one recipe at a time.

DSC_0373

Detox Salad Bowl with Lemon-Dill Sunflower Seed Dressing (Gluten Free, Dairy Free, Paleo Friendly)

  • Servings: 2-4
  • Difficulty: Easy
  • Print

Ingredients

  • 4 cups of greens (spring greens, spinach, kale, arugula, chard, etc)
  • 2 medium carrots, shredded
  • 1 cucumber, sliced thin
  • 1/4 head of red cabbage, sliced thin
  • 1/2 fennel bulb, sliced thin
  • 1 avocado
  • Lemony Dill Sunflower Seed Dressing (recipe below)
    • 1/2 cup sunflower seeds
    • 1/2 cup warm water
    • 2 tablespoons apple cider vinegar
    • juice and zest of 1/2 lemon
    • 1 tablespoon fresh chopped dill

Instructions

  1. Place all ingredients except avocado into a single large bowl or into separate serving bowls. Slice avocado and distribute evenly among bowls.
  2. In a separate small bowl, combine sunflower seeds and warm water for 10 minutes. Pour soaked sunflower seeds, soaking water, cider vinegar, lemon juice, and dill in the bowl of a food processor or high speed blender. Blend well for about 3 minutes. Makes about 1 cup.
  3. Pour Lemon-Dill Sunflower Seed dressing over salad and enjoy. Place leftover dressing in the refrigerator.

Beet, Fennel, Grapefruit and Avocado Salad

Beet, Fennel, Grapefruit, and Avocado Salad / Big Eats Tiny Kitchen

Hi. It’s spring…nearly summer. And do you know what that means? VEGGIES! Fresh amazing veggies. They are sprouting up everywhere in my garden. Beets and carrots and spinach and kale and cilantro and cucumbers and tomatoes! I can’t wait.

This weekend I enjoyed renewing my Saturday ritual of going to the Farmer’s Market bright and early and drooling over the produce and transplants that the local farmers had brought.  It makes salad making an adventure. Not your boring ol’ iceberg here…no spring rocket, and baby leaf kale, and beautiful sorel! Throw in some herbs, roasted beets, and avocado…yaaaaa, NOW you have heaven.

Beet, Fennel, Grapefruit, and Avocado Salad / Big Eats Tiny Kitchen

Beet, Fennel, Grapefruit, and Avocado Salad / Big Eats Tiny Kitchen

Beet, Fennel, Grapefruit, and Avocado Salad

Inspired by Pinch of Yum and my Blood Orange and Avocado Salad

Salad Ingredients

  • 1 large beet
  • 1 fennel bulb
  • olive oil
  • salt and pepper
  • 4 cups of raw kale, washed, destemmed and cut into 1-inch pieces (or spring lettuce mix)
  • 1 grapefruit, peeled and cut into sections
  • 1 cucumber, cut into thin slices
  • 1 avocado
  • 1/2 cup fresh cilantro, chopped
  • 1/4 cup fresh dill, chopped
  • 1/2 cup walnuts, toasted and chopped (optional)
  • 1/4 cup of crumbled feta

Dressing Ingredients

  • 2 tablespoons cider vinegar (or lemon juice or lime juice)
  • 2 tablespoons olive oil
  • pinch of salt
  • 1 tablespoon grapefruit juice (reserved from cutting up grapefruit for salad)

Instructions

  1. Preheat oven to 400 F. Line two baking sheets with parchment paper or with nonstick spray. Wash the beet thoroughly and scrub the outside very well. Remove the top and bottom of the beet. Cut in half and continue to cut up the beet until you obtain even 1-inch cubes. Place into a large bowl and drizzle with about 1/2-tablespoon of olive oil and salt and pepper. Place beet cubes onto one of the prepared baking sheets. Place in the oven and bake for 35 to 45 minutes.
  2. Wash the fennel bulb thoroughly. Remove the bottom root portion. Slice longways into even 1/4-inch width slices. Place in a clean bowl and drizzle with 1/2-tablesppon of olive and salt and pepper. Place the fennel slices onto the second prepared baking sheet. Place in the oven and bake for 20 to 30 minutes.
  3. When the fennel and beets are done roasting, remove from the oven and allow to cool to room temperature. Set aside. Can be made up to 2 days ahead of time and kept refrigerated.
  4. Wash kale and massage with hands in a large bowl. Gently toss in the grapefruit pieces, cucumber, cilantro, and dill.
  5. Combine dressing ingredients into a small bowl and whisk until combined. Just before ready to serve, pour dressing ingredients over the kale, grapefruit, and cucumber. Add roasted beets and fennel and toss all ingredients together gently so as not to stain everything red.
  6. When you are ready to serve the salad, add the avocados and gently combine everything because the avocados will melt and mush quickly into the salad. Top with any additional herbs, walnuts, and feta.

Chocolate and Peanut Butter Macaroons (Grain Free)

Chocolate and Peanut Butter Macaroons / Big Eats Tiny Kitchen

Sorry for the long delay in between posts. Recently life has been tough at times but life also has been very good. When I am going through a roller coaster of emotions and dead lines and choices and what not, I consume chocolate and peanut butter. Doctors orders.

But when life is good…I also eat chocolate and peanut butter.

Chocolate and Peanut Butter Macaroons / Big Eats Tiny Kitchen

Chocolate and Peanut Butter Macaroons / Big Eats Tiny Kitchen

The combination sends warm fuzzies through my body. It’s a choco-pb hug for my soul. I get my best soul hugs from those crack-like addictive Reese’s PB eggs that spring forth from every corner around this time of year. I can stay away from Reese’s (nearly) the rest of the year, but throw them in an egg shape! Holy frijoles, I can’t stop. My eyes pop out of my head all googley and I froth at the mouth and I protect them like a squirrel, hiding my Reese’s eggs in weird and unassuming places.

These cookies are the wonderful love child of two of my favorite cookies: No bake cookies + macaroons. Whoa. Whoa.

Let this happen.

Make them egg shaped. They are better for you than those other choco-pb eggs and just as addictive.

Chocolate and Peanut Butter Macaroons / Big Eats Tiny Kitchen

It will make you love life even when there are a few major down moments.

Chocolate and Peanut Butter Macaroons (Grain Free and Diary Free)

Adapted from Against All Grain

Makes 2 dozen cookies

Ingredients

  • 2 1/2 cups unsweetened shredded coconut
  • 1/3 cup honey
  • 1/2 cup unsweetened cocoa powder
  • 2 tablespoons natural creamy unsweetened peanut butter*
  • 1 egg white
  • salt

Instructions

  1. Preheat oven to 325F. Place a piece of parchment paper onto a rimmed baking sheet. Set the baking sheet aside.
  2. In a large bowl, combine the coconut, honey, cacao powder, peanut butter, and a pinch of salt.
  3. Place egg white and another pinch of salt in a medium bowl. Using a whisk or electric beaters, beat the egg white for about 2 minutes until soft peaks form. Combine meringue with other ingredients in the large bowl.
  4. Using a melon baller, scoop out cookies and place them onto the parchment paper. Bake for 30 minutes. Remove from oven and allow to cool for at least 1 hour on a wire cooling wrack.

*Note – To make these Paleo friendly, use either almond butter or sunflower seed butter in place of the peanut butter. 

Dijon and Cider Braised Pork Chops with Dill and Roasted Cabbage

Cider Braised Pork Chops with Dill and Roasted Cabbage

When I was younger, I never really ate pork chops. I’m not sure why, but it just wasn’t a staple at our house.  And similarly, they aren’t a staple in my home. But put them on a menu and that will most definitely be the first thing that I order.

My husband grew up on smothered pork chops and other down home cooking, so whenever we get pork chops from our meat CSA (community supported agriculture) program, he is elated.  So I’ve been working on my pork chop cooking repertoire. My favorite pork chop recipe thus far is based on a Horseradish and Cider Glazed Pork Chop recipe from Deb Perelman’s Smitten Kitchen Cookbook. It’s easy. It’s classic. It’s super yummy. I made a few tweaks to her recipe, where she calls for horseradish I subbed for Dijon mustard. A good Dijon tends to have a horseradish elemental flavor, so I figured this would be an adequate sub.   And what goes better with pork than cabbage? Not much…except Beer. 

I love beautiful purple cabbage, and I love it even more ROASTED. It’s so easy to drizzle cabbage with a tie bit of olive oil and then throw it in the oven to roast away while you cook the pork chops on the stove top. We scarfed this meal down in no time. It’s pretty and easy and special enough for company.  Plus you won’t be spending all of your time in the kitchen. I also whole heartedly recommend the dill…fresh dill! It’s the finishing touch and boy howdy does it deliver.

Cider Braised Pork Chops with Dill and Roasted Cabbage

Dijon and Cider Braised Pork Chops with Dill and Roasted Cabbage

Serves 4

Adapted from Smitten Kitchen Cookbook

Ingredients

  • 1/2 cup cider vinegar
  • 1/2 cup of hard apple cider
  • 2 tablespoons Dijon mustard
  • 1/2 teaspoon sea salt
  • 4 bone in pork chops (1/2-inch thick), trimmed of fat, patted dry and liberally salted and peppered
  • 1 tablespoon olive oil
  • 1 tablespoon fresh dill
  • Roasted cabbage (recipe below)

Instructions

  1. In a small bowl, combine the cider vinegar, hard cider, Dijon mustard, and the salt. Set aside.
  2. Heat olive oil over medium-high heat in 12-inch skillet (cast iron works wonders), until oil just begins to smoke. Place pork chops into skillet and allow them to brown well on one side (about 3 minutes). Turn the pork chops and cook an additional minute on the other side. Transfer the browned pork chops to a plate and drain the skillet of any excess fat.
  3. Pour the apple cider glaze mixture into the skillet and bring to a simmer over medium heat. Cook until the mixture begins to thicken (about 2 to 4 minutes). Your spatula should leave a trail across the bottom of the pan when scraped through the glaze.
  4. Return the browned pork chops to the skillet with the thickened glaze. Turn the pork chops to coat both sides with the glaze. Continue to cook them over medium heat until the centers of the pork chops are cooked through (a temperature of 140 F). This should take about 5 minutes. Adjust seasonings in the glaze.
  5. Transfer pork chops to plates with roasted cabbage. Pour additional sauce on top of both the pork chops and the cabbage. Sprinkle with fresh dill.

Roasted Cabbage

Ingredients

  • 1/2 head of purple or green cabbage (i prefer the color of the purple cabbage)
  • 1 tablespoon olive oil (plus more for coating the roasting pan)
  • 1 tablespoon cider vinegar
  • 1/2 teaspoon salt

Instructions

  1. Preheat oven to 400 F.
  2. Slice cabbage into 1/4-inch slices and place into a large mixing bowl. Drizzle with oil, vinegar, and salt. Combine well and place onto an oiled roasting pan.
  3. Cook for 30 minutes, stirring halfway through.
  4. Remove from oven and place equal portions on plates.

Lime Cilantro Brussels Sprout Slaw

Lime Cilantro Brussels Sprout Slaw / Big Eats Tiny Kitchen

We are all getting antsy around here. Am I right? I hate getting taunted with a few days of warm weather, then blasted with too many days of cold. It’s a terrible tease. Tulips are peaking out of the ground. Trees are beginning to bud. Patio weather one day and then fire-place/wool socks/snuggy weather the next. Ugh.

Does anyone else feel a little bipolar weather insanity coming on?  My body and cravings are in a constant state of flux… Sun!!!!! Give me fresh veggies! Give me fresh fruit! More spring greens!!!!

OOOOoooooh wait…clouds? Snow? Blaaaah. Carb me up it’s cold! Where’s the chili? Where’s the chowder? Salad, really???? Why is it not covered in cheese? Helloooo! I like my cupcake handles, thank you very much! Gotta keep some padding on this bod against the polar vortex!

Wait. But NO! Let’s think positive. Let’s all send out SPRING THOUGHTS. (Don’t roll your eyes! I’m trying to quit being so crabby….I said trying, people).

Lime Cilantro Brussels Sprout Slaw / Big Eats Tiny Kitchen

Lime Cilantro Brussels Sprout Slaw / Big Eats Tiny Kitchen

Wish for camping. Wish for tulips. Wish for gardening. Wish for the smell of grills. Wish for the sound of neighbors chatting with each other. Wish that your lawn will mow itself (get a goat). Wish that those cupcake handles will magically disappear once bathing suite season rears its ugly head (or maybe swimming t-shirts will come back in style).

Lime Cilantro Brussels Sprout Slaw / Big Eats Tiny Kitchen

As you send out your good vibes into the world, here is my positive food vibe. I used one of my fave winter veggies, brussels sprouts, to make a springy slaw! Lime and cilantro pump this puppy up another notch. Red cabbage makes this a total beauty to serve.  Oh ya, give me a badge! Healthy and Hawt!

Personally, I love this slaw on my fish tacos. Mmmmmm….recipe to come later. So put down the carbs and chili for just a few minutes and try to get a positive spring mind.

Maybe if we all think positive, spring will finally move in for good. But summer will stay asleep for a loooong time.

Lime Cilantro Brussels Sprout Slaw / Big Eats Tiny Kitchen

Lime Cilantro Brussels Sprout Slaw

Serves 4

Ingredients

  • 1/2 lb medium-sized brussels sprouts, ends trimmed
  • 1/2 head small red cabbage
  • 1/4 cup cilantro, chopped
  • 2 green onion, white and green parts sliced
  • juice of 1 large lime (about 2 to 3 tablespoons)
  • 1 to 2 tablespoons olive oil
  • 1/4 teaspoon salt

Instructions

  1. Remove any brown or spotted out leaves of the sprouts. The sprouts can be shredded several different methods: shredded in a food processor (using the slicing blade), sliced as thin as possible using a good knife, or using a mandolin slicer. Place in a large bowl.
  2. Shred half of a head of small red cabbage or slice as thin as possible. Add the shredded cabbage, cilantro, and green onions to the large bowl.
  3. In a small bowl, whisk lime juice, salt, and olive oil together. Pour dressing over shredded veggies. Toss and allow to sit at room temperature for at least 30 minutes, stirring occasionally to distribute the dressing. Eat up!

Grain Free Samoa Bars

Grain Free Samoa Bars

It’s Girl Scout cookie season. People are walking around with goofy grins, Do-Si-Do crumbs on their shirts, stupid Thin-Min-covered fingers, Tagalong-scented breath, and boxes of Samoas stuffed in their sock drawers so that no one else will get THEIR cookies. Or is this just me?

And who came up with those names anyways? Do-Si-Do? Tagalong? What is a Samoa even?

Grain Free Samoa Bars

But in reality I’m jealous. Seethingly jealous. I can’t have any of them. I just stare with dark, wide-eyed, frothing and foaming desire.

But this year, the ol’ Girl Scouts gave the gluten-free crowd a consolation prize and came out with a GF cookie. I was pumped, until I found out it was a shortbread. Womp womp. Really? Shortbread?  That all you got? No badge for you! Get back in the kitchen. TRY AGAIN.

Grain Free Samoa Bars

DSC_0384

Never fear. After being challenged by a friend that Grain Free Samoas would not be good, I woke up on Saturday morning with a mission. A cookie mission.

These cookies deserve a badge! A medal! An Oscar, even! They make you THINK they are the real deal, but alas…they have no wheat, no grains, no processed sugar. Ya…SUCK IT TRABECK!

Grain Free Samoa Bars

Instead of making single cookie-disks, I opted for bars. Because seriously, these puppies disappear so quickly into your mouth that cutting out little stupid tire shaped cookies is not worth it. Lets save time. Let’s make bars! The shortbread crust is perfect and crisp. I saved even more time by not dipping each bar in chocolate and instead spread the chocolate layer between the shortbread crust and the caramel coconut layer. The caramel coconut layer is a delicious concoction of honey and a smidge of molasses that has been cooked down to an amber-caramel-heavenly syrup.

These do take a bit of time to make each part. But the wait and work is WELL worth it. So make a batch, hide several (because they will go fast if you share them), turn on the Oscars, grab a yummy Samoa bar, and do your best Matthew McConaughey impersonation….”alright, alright, alright”.

Grain Free Samoa Bars

Grain Free Samoa Bars

Makes 16 small bars

Shortbread Crust Ingredients (inspired by Deliciously Organic)

  • 1 1/2 Cup almond flour (such as Honeyville)
  • 2 Tablespoons coconut flour
  • 2 Tablespoons arrowroot powder
  • 1/2 teaspoon unflavored gelatin
  • 1/2 teaspoon sea salt
  • 4 Tablespoons unsalted butter, at room temperature
  • 2 Tablespoons honey

Chocolate Layer

  • 1 Cup semisweet or dark chocolate, chopped

Coconut Caramel Topping (adapted from Against All Grains)

  • 1/2 Cup honey
  • 1 Tablespoon molasses
  • 2 Tablespoons unsalted butter
  • 1/2 Cup coconut milk or heavy cream
  • 1/2 teaspoon sea salt
  • 2 Cups unsweetened shredded coconut

Chocolate Drizzle

  • 1/2 Cup semisweet or dark chocolate

Instructions:

  1. Preheat oven to 350 F. Place parchment paper in the bottom of an 8-inch by 8-inch baking dish. Set aside.
  2. Combine crust ingredients in a medium bowl until just combined. The mixture will be crumbly. Press the crust evenly into the bottom of the prepared baking dish. Bake on the middle rack of the oven at 350 for 15 minutes or until light golden brown.
  3. Meanwhile, place the unsweetened coconut on a rimmed baking sheet in an even layer. Place on the top rack to toast. Toast the coconut for about 5 to 7 minutes, keeping an eye on it so that it doesn’t burn. Remove the toasted coconut from oven when golden brown and allow to cool on a wire rack.
  4. After the crust is finished baking, pull the crust from the oven. Turn the oven off. Sprinkle 1 cup of chopped chocolate onto the warm crust. Place back into the warm oven for 1 to 2 minutes. Remove from the oven and use a rubber spatula to spread the melted chocolate evenly over the shortbread crust. Set on a wire rack and allow to cool. Place in refrigerator after cooled.
  5. For the caramel sauce, place honey and molasses in a small saucepan over medium heat. Bring to a low bubbling boil for about 7 minutes, swirling frequently to caramelize evenly. Remove from heat and stir in butter, coconut milk, and salt until smooth and completely combined. Stir in toasted coconut.
  6. Remove cooled shortbread crust from the refrigerator. Spread the coconut caramel mixture on top of the chocolate covered crust.
  7. Microwave remaining chocolate in a microwave safe dish for about 2 to 3 minutes, in 30 second intervals, stirring in between intervals. Once the chocolate is completely melted, drizzle the chocolate (using a spoon or fork) over the Samoa bars. Cool bars completely in refrigerator for at least 1 hour.
  8. Use parchment paper to pull out the bars from the baking dish. Place on a cutting board and cut into 12 to 16 bars. Place bar in hand and shove into mouth. Mmmmm. 🙂

Creamy Polenta with Braised Kale and Poached Egg

Creamy Polenta with Crispy Kale and Poached Egg

Lately I have been cooking and posting a lot of my comfort food recipes. Hearty soul-warming french onion soup, curry (this one and this one), creamy tapioca, lemon pudding…mmmmm. These are foods that not only keep me cozy, but also nourish my tired and warn out mind and body.

They may not be the typical comfort food that most american’s have come to know and love. No mac n’ cheese. No cream o’ something soups dumped in a casserole. Sorry, no big fat cinnamon rolls are coming out of my oven (womp womp). No biscuits and gravy piled on my plate. Although, there are a few times that I miss some of those items, I feel better feeding myself and my family cozy winter comfort foods that are wholesome, full of nutrients to keep our immune systems up, and not laden with preservatives or packed with empty calories.

Lately I’ve been on a polenta kick.  Erhmergerd. It’s creamy. It’s sensational. It can be cheesy. It can be buttery. Hellooooo! And all it is is slow cooked stoneground cornmeal, water, and salt. You can add butter (yes) and cheese (OH YA) as options to kick it into winter overdrive.

Creamy Polenta with Crispy Kale and Poached Egg

You will need to spend a bit of time upfront cooking the polenta, like 40 minutes. But you can swirl it, let it bubble away, then put a lid on the dang pot while it boils away (stirring every 10 minutes) and then it’s done. The great thing about polenta is that any leftovers can be reheated with a little liquid to return to its creamy holiness OR it can be cut and baked into awesome polenta cutlets.

Polenta can be topped with a myriad of things: braised short ribs, sautéed mushrooms, or, my fave, a poached egg with braised kale. This dish is perfect for both brunch or dinner.  Bonus, make it for brunch one day, and leftovers can be reheated for dinner the next day. Win Win!

Notes: For a great tutorial on easy poached eggs, check this out.

Creamy Polenta with Crispy Kale and Poached Egg

Creamy Polenta with Crispy Kale and Poached Egg (gluten free)

Adapted from The Kitchn

Serves 4

Ingredients

  • 4 cups of water
  • 1 teaspoon salt
  • 1 cup coarse ground yellow cornmeal (or polenta, not quick cooking)
  • 2 tablespoons butter
  • 1/2 cup parmesan cheese
  • 1 tablespoon olive oil
  • 1 bunch of kale, inner ribs removed and discarded, coarsely chop leaves (wash and dry)
  • 2 teaspoons white wine vinegar
  • 4 poached eggs (I use this method)
  • salt and pepper

Instructions

  1. Place water in a heavy saucepan over medium-high heat and bring to a vigorous boil. Add salt and stir. While wishing the water gently, pour the cornmeal into the boiling water in a steady stream. Turn the heat down to low and continue to whisk the cornmeal/polenta until it has thickened.
  2. Cover the pot and continue to cook for 30 to 40 minutes, stirring vigorously every 10 minutes. Once it is finished, stir in butter and cheese. Place lid on pot and let sit for up to 10 to 15 minutes until ready to use.
  3. While cooking the polenta, place a separate sauté pan over medium heat. Add 1 tablespoon of olive oil. Add the kale and season with salt and pepper. Stir the kale lightly until it is slightly wilted. Stir in the vinegar, cover the pan, and turn the heat to high. Cook the kale over high heat until it is tender (about 5 minutes). Turn the heat off and set aside.
  4. Poach or fry eggs according to desired consistency. For a great poached egg, follow these directions.
  5. To serve, place 1/3 to 1/2 cup of creamy polenta in bottom of bowl, top with braised kale, and one poached egg. Season with salt and pepper to taste.

Lemony Coconut Tapioca Pudding

Lemony Tapioca Pudding / Big Eats Tiny Kitchen

I am in need of a vacation. It’s mid February and the skies are dismal and the temperatures are even more dismal.

So I have decided to create a vacation atmosphere in my home. Cozy, comfy, and relaxing. I curl up with a great record, a cozy blanket, and something creamy….like pudding. This tapioca pudding has the bright flavor of lemon. It reminds me of a random warm day in the 50s or 60s that comes along in the middle of winter and makes you want to run wild outside after having been locked inside from snow mounds and drifts of snow. Actually, at this point, I would go running around outside like a lunatic if it hit 40 degrees outside. I’ve got my bongos ready…I think it might hit 42 today. YES.

Lemony Tapioca Pudding / Big Eats Tiny Kitchen

So like I was saying. Lemons. Nothing is more refreshing and spring-like in flavor like lemons. This tapioca pudding has what every dismal winter day needs…a ray of sunshine and a warm breeze. But combine that with creamy tapioca pudding and you have comfort in a bowl.

Lemony Tapioca Pudding / Big Eats Tiny Kitchen

DSC_0295

I prefer to use small pearl tapioca, fresh honey, and a mixture of coconut milk and 2 percent milk. But for a completely dairy free version, by all means, use combination of other dairy free milks.

Lemony Coconut Tapioca Pudding

Adapted from Smitten Kitchen

Ingredients

  • 3 cups of coconut milk (or half coconut milk and half 2% milk)
  • 1/4 teaspoon kosher salt
  • 1/3 cup small pearl tapioca or granulated tapioca (I used this type)
  • 1 egg yolk, lightly beaten
  • 1/4 cup honey
  • 1/2 teaspoon gluten free vanilla extract
  • 1 tablespoon of lemon juice
  • zest from 1 lemon
  • toasted coconut (optional)

Instructions

  1. Combine coconut milk, salt, tapioca pearls, egg yolk, and honey in a medium saucepan. Place over medium heat and bring to a simmer while stirring frequently.  Turn heat down and allow to simmer softly for 20 minutes, stir frequently and make sure the bottom does not burn.  The tapioca will begin to thicken quickly at the end.
  2. Once the tapioca mixture is thick like gravy, remove from heat. Stir in the vanilla and lemon zest. Portion out 1/2 cup servings into separate pudding cups. Allow to cool in the refrigerator for a few hours or overnight. Serve alone or with extra lemon zest and/or toasted coconut on top.

Lemony Tapioca Pudding / Big Eats Tiny Kitchen

Grain Free Meyer Lemon Pudding Cake

Meyer Lemon Pudding Cakes (Paleo Friendly, Diary Free, Grain Free) - Big Eats Tiny Kitchen

I tend to have issues with making big decisions. I freeze when provided with too many choices. I try to logically narrow down the choices. I over think it. I marinate and choke over it.

I do this with nearly e.v.e.r.y.t.h.i.n.g. Cars. Houses. Jobs. Kids. Men. Shoes. Food. Does this come with a picture menu?

Apples at the store…. Pink lady? Gala? Fuji? Granny smith? wait..what do Rome apples taste like? or Empire? crap… or do I like Jonathon? no…wait… golden delicious are on sale… sold.

Meyer Lemon Pudding Cakes (Paleo Friendly, Diary Free, Grain Free) - Big Eats Tiny Kitchen

Sometimes I want cake. Other times I want something more creamy…pudding? Ugh… decisions. So here is where this cake is a winner on all fronts in my mind. It gives me the best of both worlds. This cake is the amazing love child between the most airy cake and the creamiest lemon curd-like pudding. I get pudding AND cake all in one bite. I get sweet AND tart all at once. I made these little Meyer lemon pudding cakes in two small 6-ounce ramekins and 1 larger gratin dish.

Meyer Lemon Pudding Cakes (Paleo Friendly, Diary Free, Grain Free) - Big Eats Tiny Kitchen

There is one tiny problem: trying to not devour the whole cake at once. They taste like sunshine bursting through a cold blustery day and warming you to the bone. Meyer lemons have a thinner rind, are slightly orangish in color, and are a bit sweeter than their bright yellow typical lemon counterparts. The first bite of these Meyer lemon pudding cakes was like capturing childhood in tiny ramekins. Cabin fever shmabin fever! These Meyer lemon pudding cakes will make you forget the dull skies that loom.

Meyer Lemon Pudding Cakes (Paleo Friendly, Diary Free, Grain Free) - Big Eats Tiny Kitchen

I loosely based my recipe on a Food and Wine recipe. To make this recipe grain free and dairy free (paleo friendly), I used coconut oil instead of butter, palm sugar instead of white sugar, almond milk instead of dairy milk, and a combination of almond flour/coconut flour in place of AP flour.  The cakes have a carmel-like color which I attribute to the dark coconut palm sugar.  Despite the caramel and faint yellow color of the pudding, these lil’ cuties are ridiculously good and will surely perk you up from any winter blues that you may be experiencing.  Cheers.

Meyer Lemon Pudding Cakes (Paleo Friendly, Diary Free, Grain Free) - Big Eats Tiny Kitchen

Grain Free Meyer Lemon Pudding Cake

Adapted from Food and Wine

Serves 6

Ingredients

  • 2 Tablespoons coconut oil (or grass fed butter), at room temperature
  • 2/3 cup coconut palm sugar
  • 3 large eggs, yolks separated from whites in separate bowls
  • 1 cup non-dairy milk (such as coconut milk or unsweetened almond milk)
  • 1/3 cup fresh Meyer lemon juice (from 2 lemons)
  • 1 Tablespoon fresh Meyer lemon zest (plus extra for serving)
  • 1/3 cup almond flour (such as Honeyville)
  • 1 Tablespoon coconut flour
  • 1/4 teaspoon salt
  • Optional Toppings: lemon zest, powdered sugar, coconut whip, or greek yogurt

Instructions

  1. Preheat the oven to 350ºF. Lightly butter six 6-ounce individual ramekins or a 9-inch pie dish. Set  the dishes inside a larger roasting pan and bring a kettle of water to a boil to create a bain-marie to evenly cook the pudding cakes.
  2. In another bowl, whisk the coconut oil (or butter) and palm sugar until creamed. Add one egg yolk at a time until combined. Gently whisk in the almond milk, lemon juice, and lemon zest until well combined. Stir in the almond flour and coconut flour and whisk until smooth.
  3. In the bowl of an electric mixer fitted with a whisk attachment, beat egg whites and salt until  stiff and soft peaks form. Gently fold in half of the beaten egg whites into the cake batter using a rubber spatula to lighten it. Carefully fold in the remaining egg whites. The batter should be light and fluffy at this point and will not resemble normal cake batter.
  4. Pour the cake batter into the prepared baking dishes. Since this cake will not rise, fill the dishes to the top if necessary.  Place the baking dishes into the larger roasting pan. Pour the boiling water from the kettle (step 1) into the roasting pan so that the water comes halfway up the outside of the ramekins or pie dish.  You can also fill the roasting pan with water while it is in the oven to keep from splashing water into the filled ramekins.
  5. Bake until the cake is puffed and golden, 50 to 60 minutes for a single pie dish, or 30 to 35 minutes for 6 small cakes. The top will become golden and the middle of the cake will barely jiggle when shaken. Pull out of the oven and allow to cool for 20 to 30 minutes on a wire rack. Serve the cake warm and fresh from the oven sprinkled with extra lemon zest.