Beef Curry with Sweet Potatoes and Cauliflower

There are several people who have had a huge hand in transforming the way I cook and approach food. Michael Pollan has definitely had a hefty part in it.  That is why I was so excited to finally hear him speak this weekend about his new book, Cooked.  He is one of the leading voices of the local food movement, eating “real” food, and getting back into the kitchen and cooking with your family. I love it.

DSC_0032

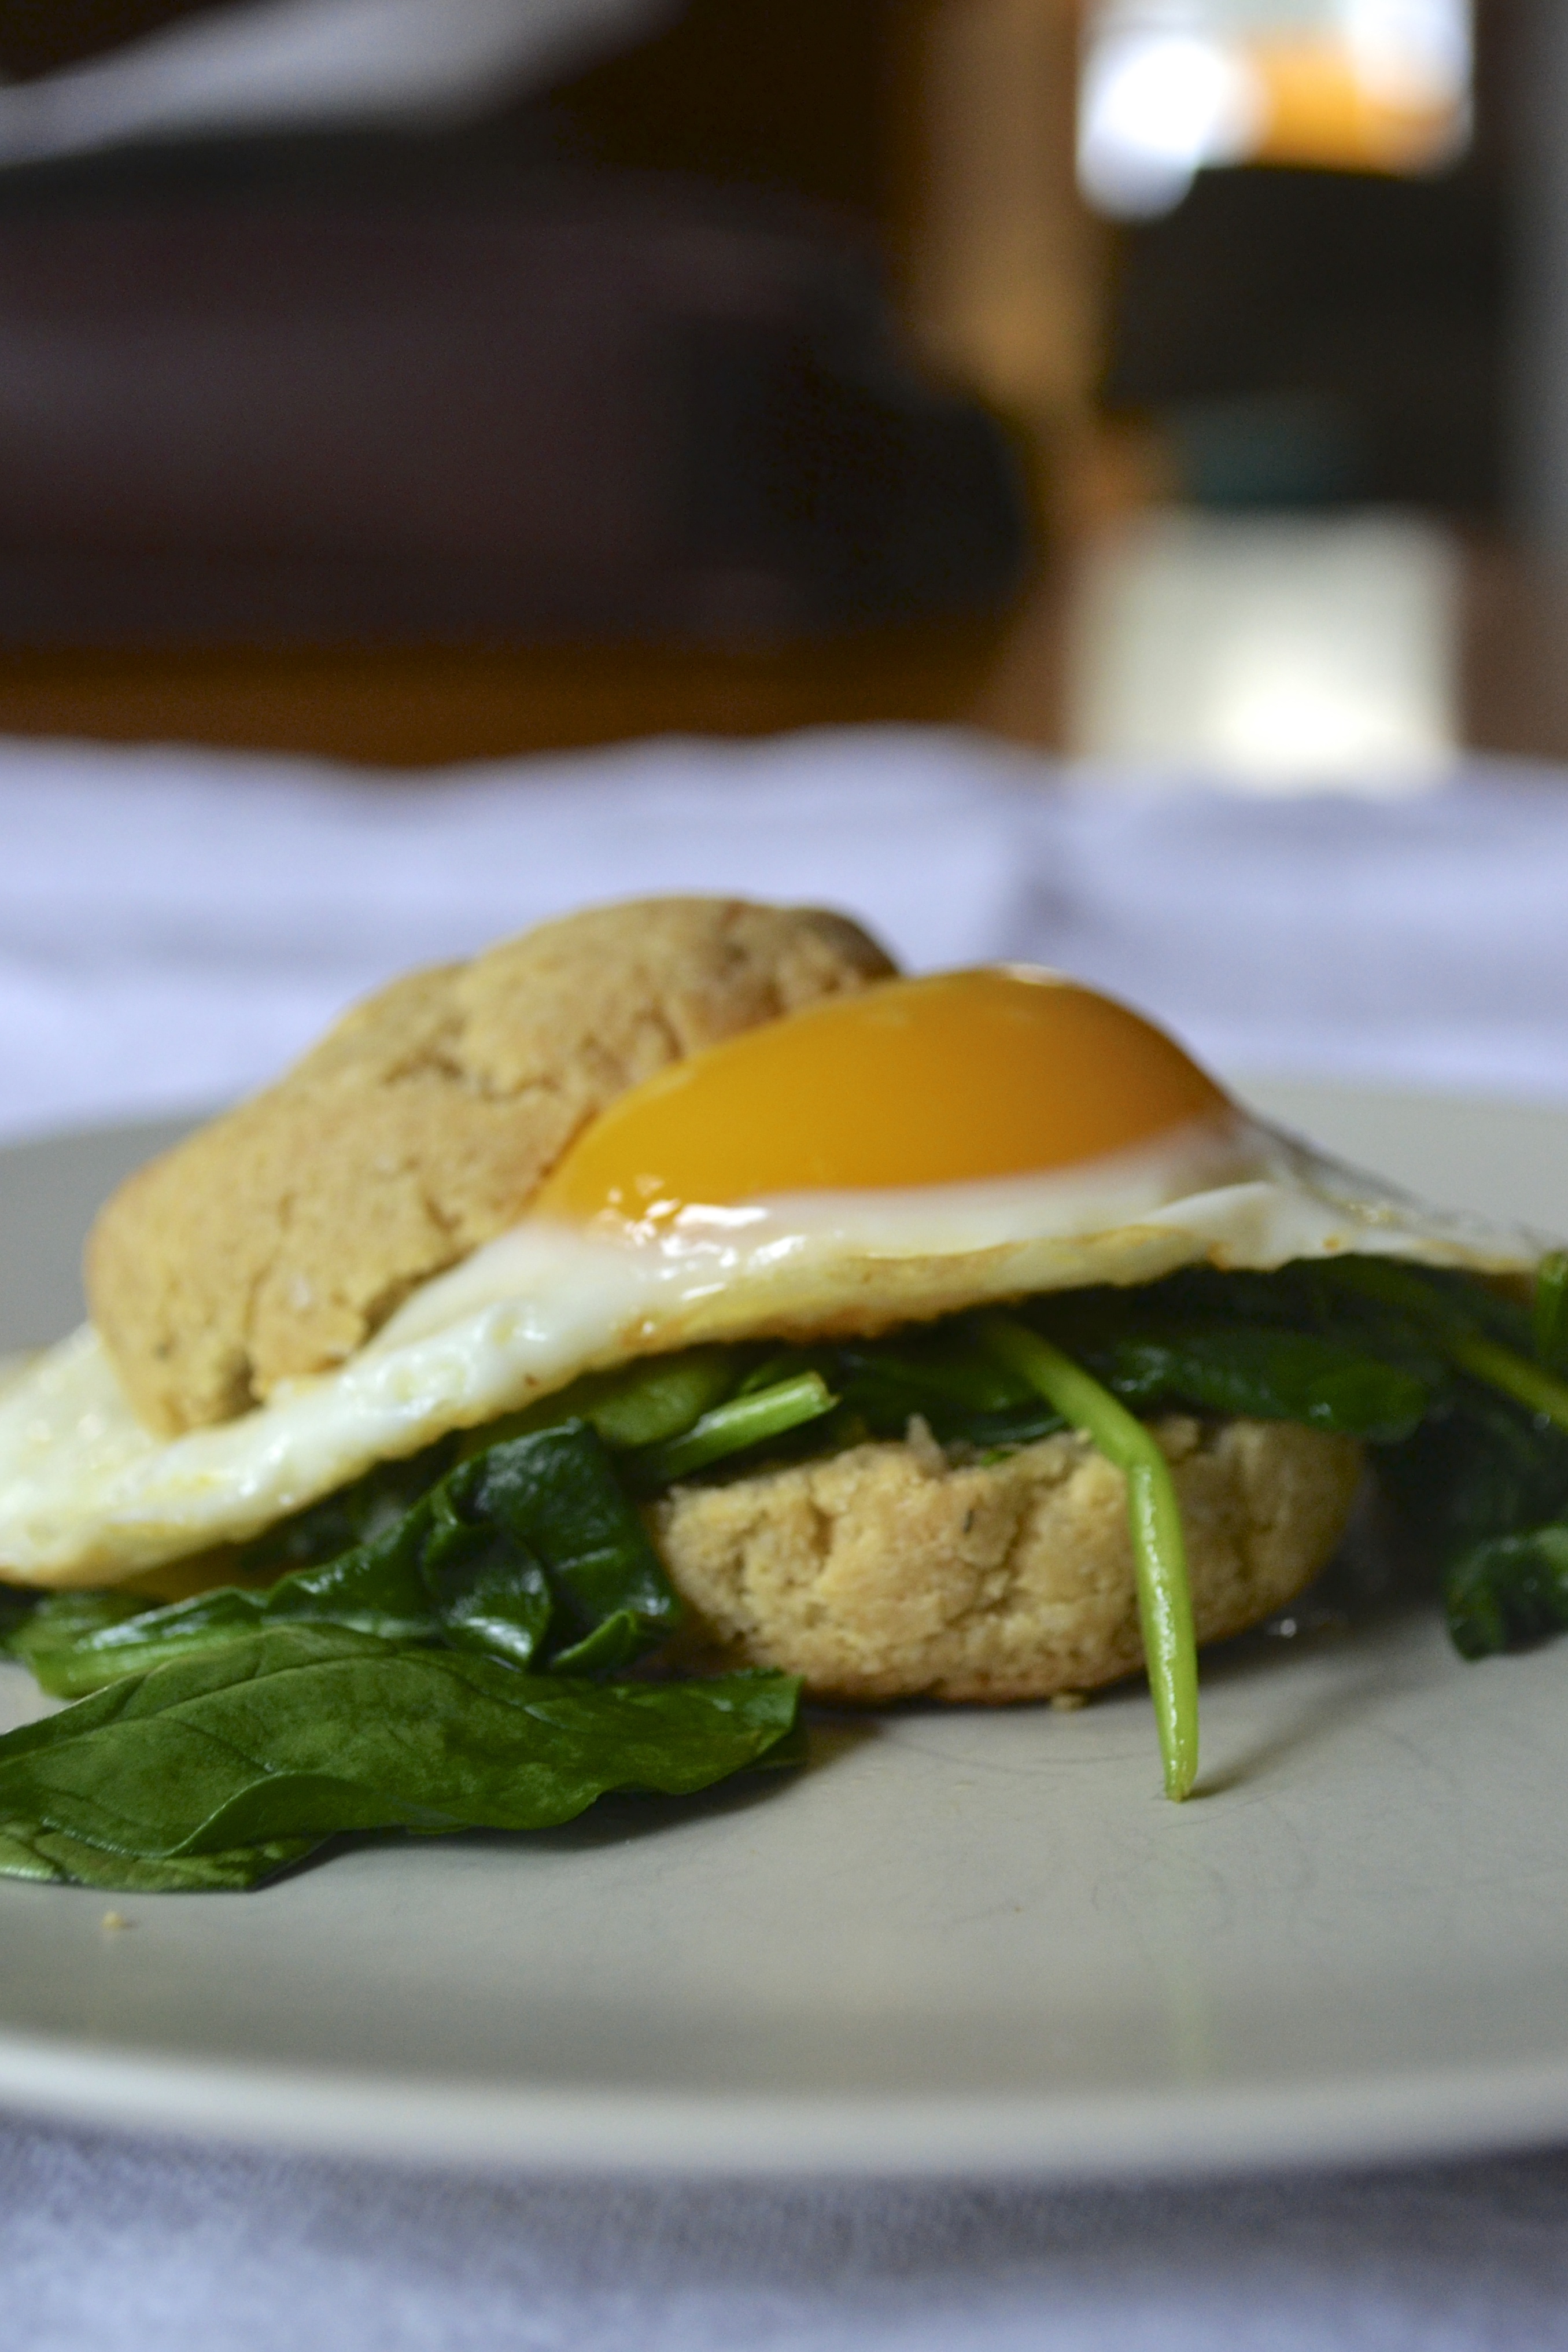
Before we left Oklahoma and moved to Kansas City, I thought I ate rather healthy. But I was still consuming a lot of processed food.  I think a lot of people think this way, even when they still eat a lot of processed foods because the box saaaaays it’s healthy. Right? and why would a box or advertising lie to me? right? bonjour? But despite cooking “healthy”, I was getting sicker and sicker every day, literally.  Everything I ate seemed to put my stomach into knots or stabbing pain or worse. I began an elimination diet. I came up with a new theory every day. At first I thought it was fatty meat…no meat! Then it was beans.. no beans! then it was dairy…. so I became vegan…. and by the end, I seriously was eating only oatmeal and sweet potatoes for months….MONTHS. 

DSC_0027

And then I read Michael Pollan’s In Defense of Food. At the same time, my cousin Sarah gave me an amazing book by Barbara Kingsolver, Animal Vegetable Miracle. Reading these books were like discovering a deodorant that finally works, or finding the perfect pair of jeans, or realizing that you left ten bucks in your coat pocket last winter!  If you are looking for a summer read, I recommend these books. Life…changed.

I immediately eliminated all processed foods. I was on a hunt for local sources of meat and produce.  Everything changed…for the better. My health improved. My relationship with food was so much better. I discovered vegetables I had never heard of…what the crap is celeriac???? I grew a garden (helloooo rhubarb), learned to can, make pickles, and preserve food anyway possible. I basically got in touch with my inner grandma. I love it.  My inner grandma loves it. My tummy loves it.

DSC_0015Sweet_potatoes

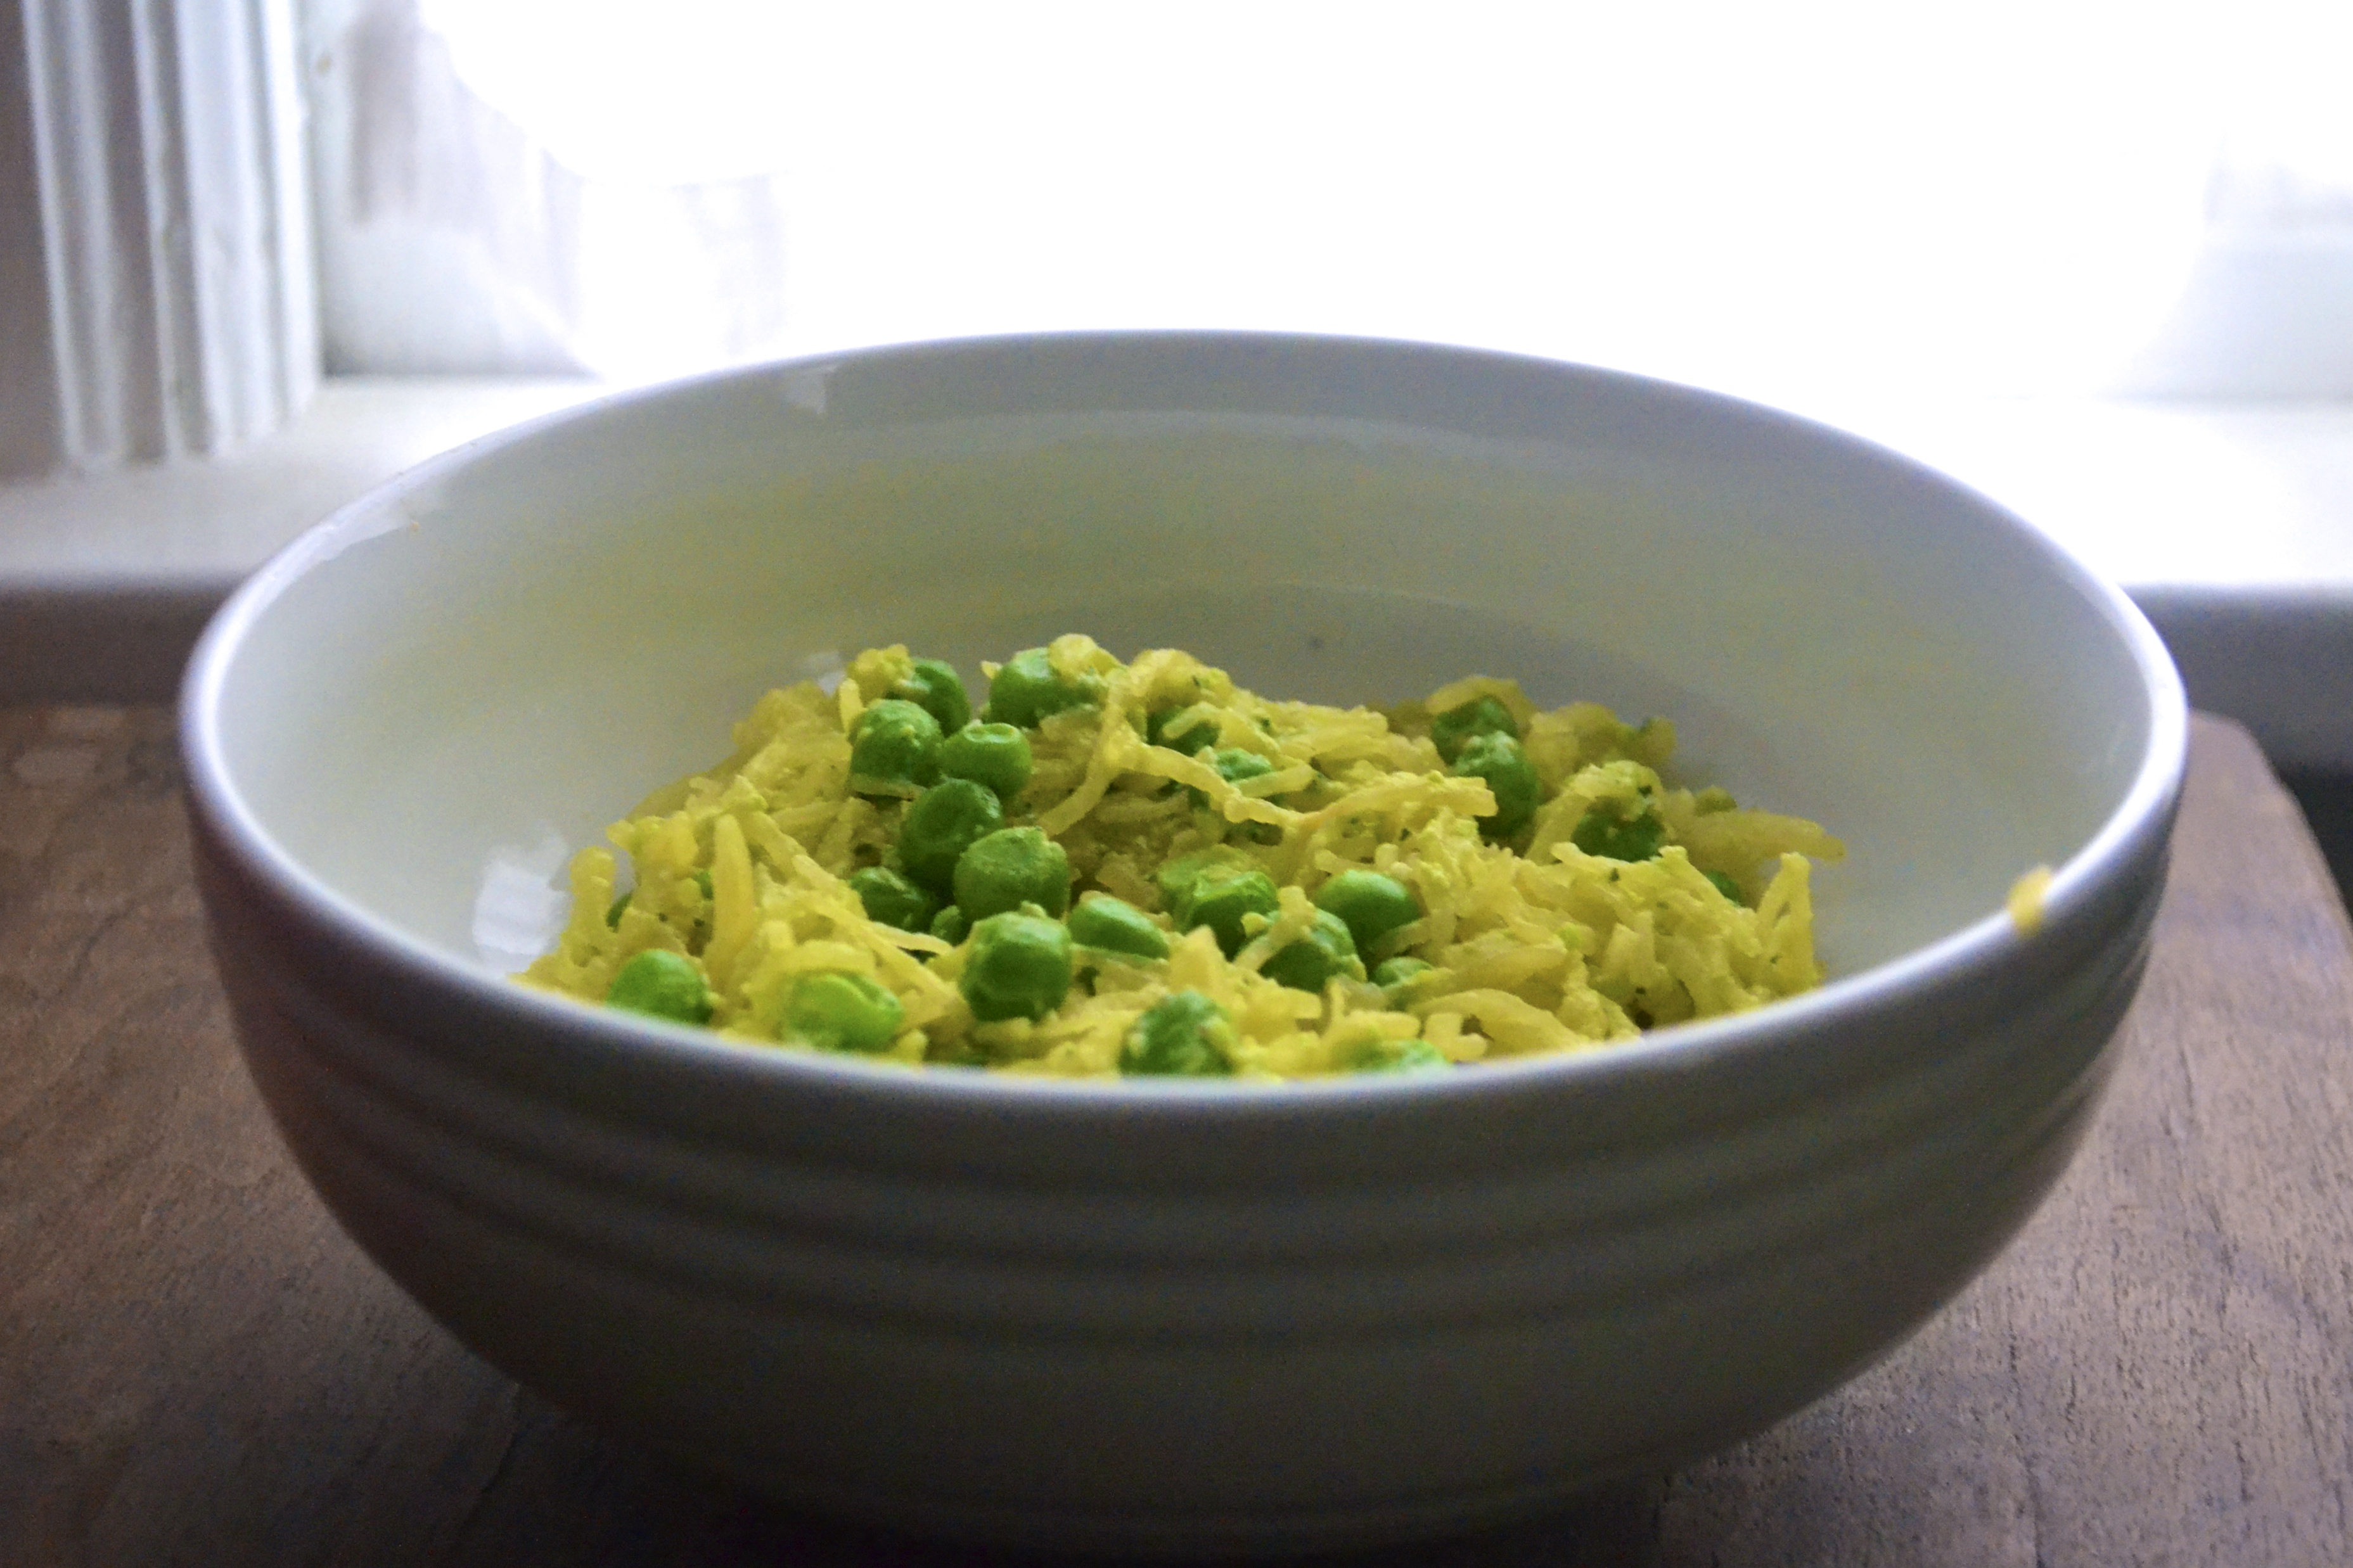
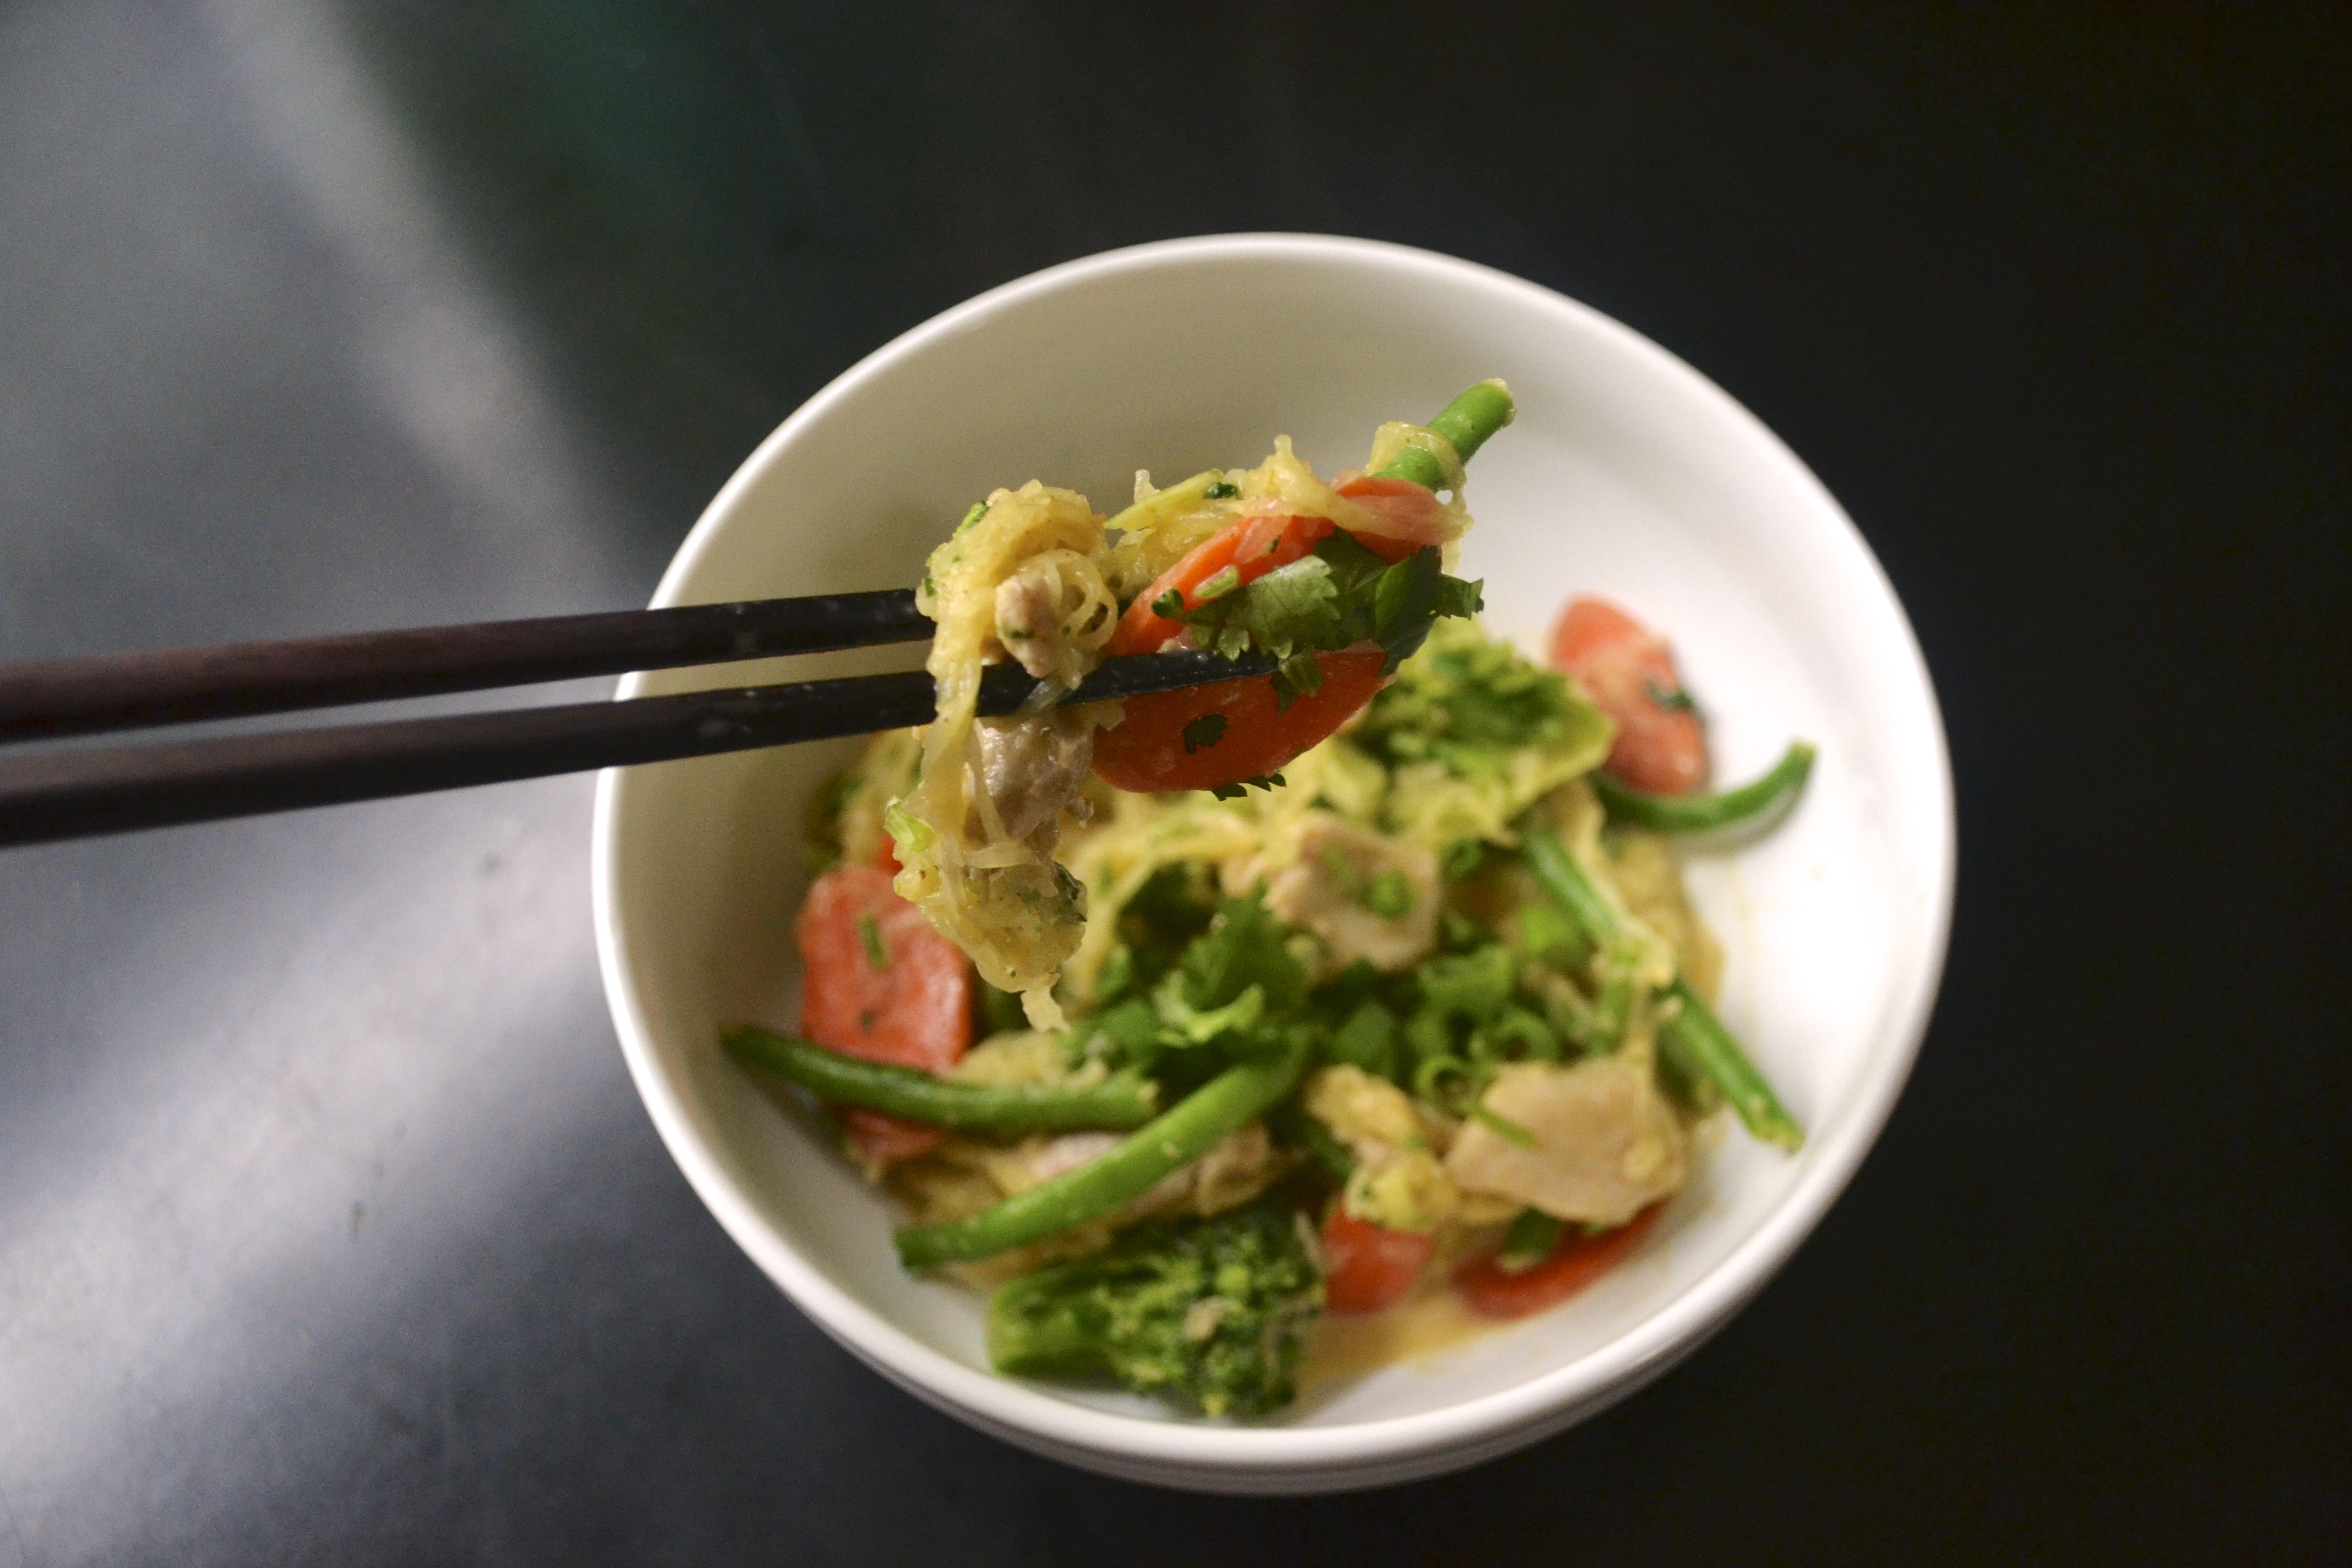
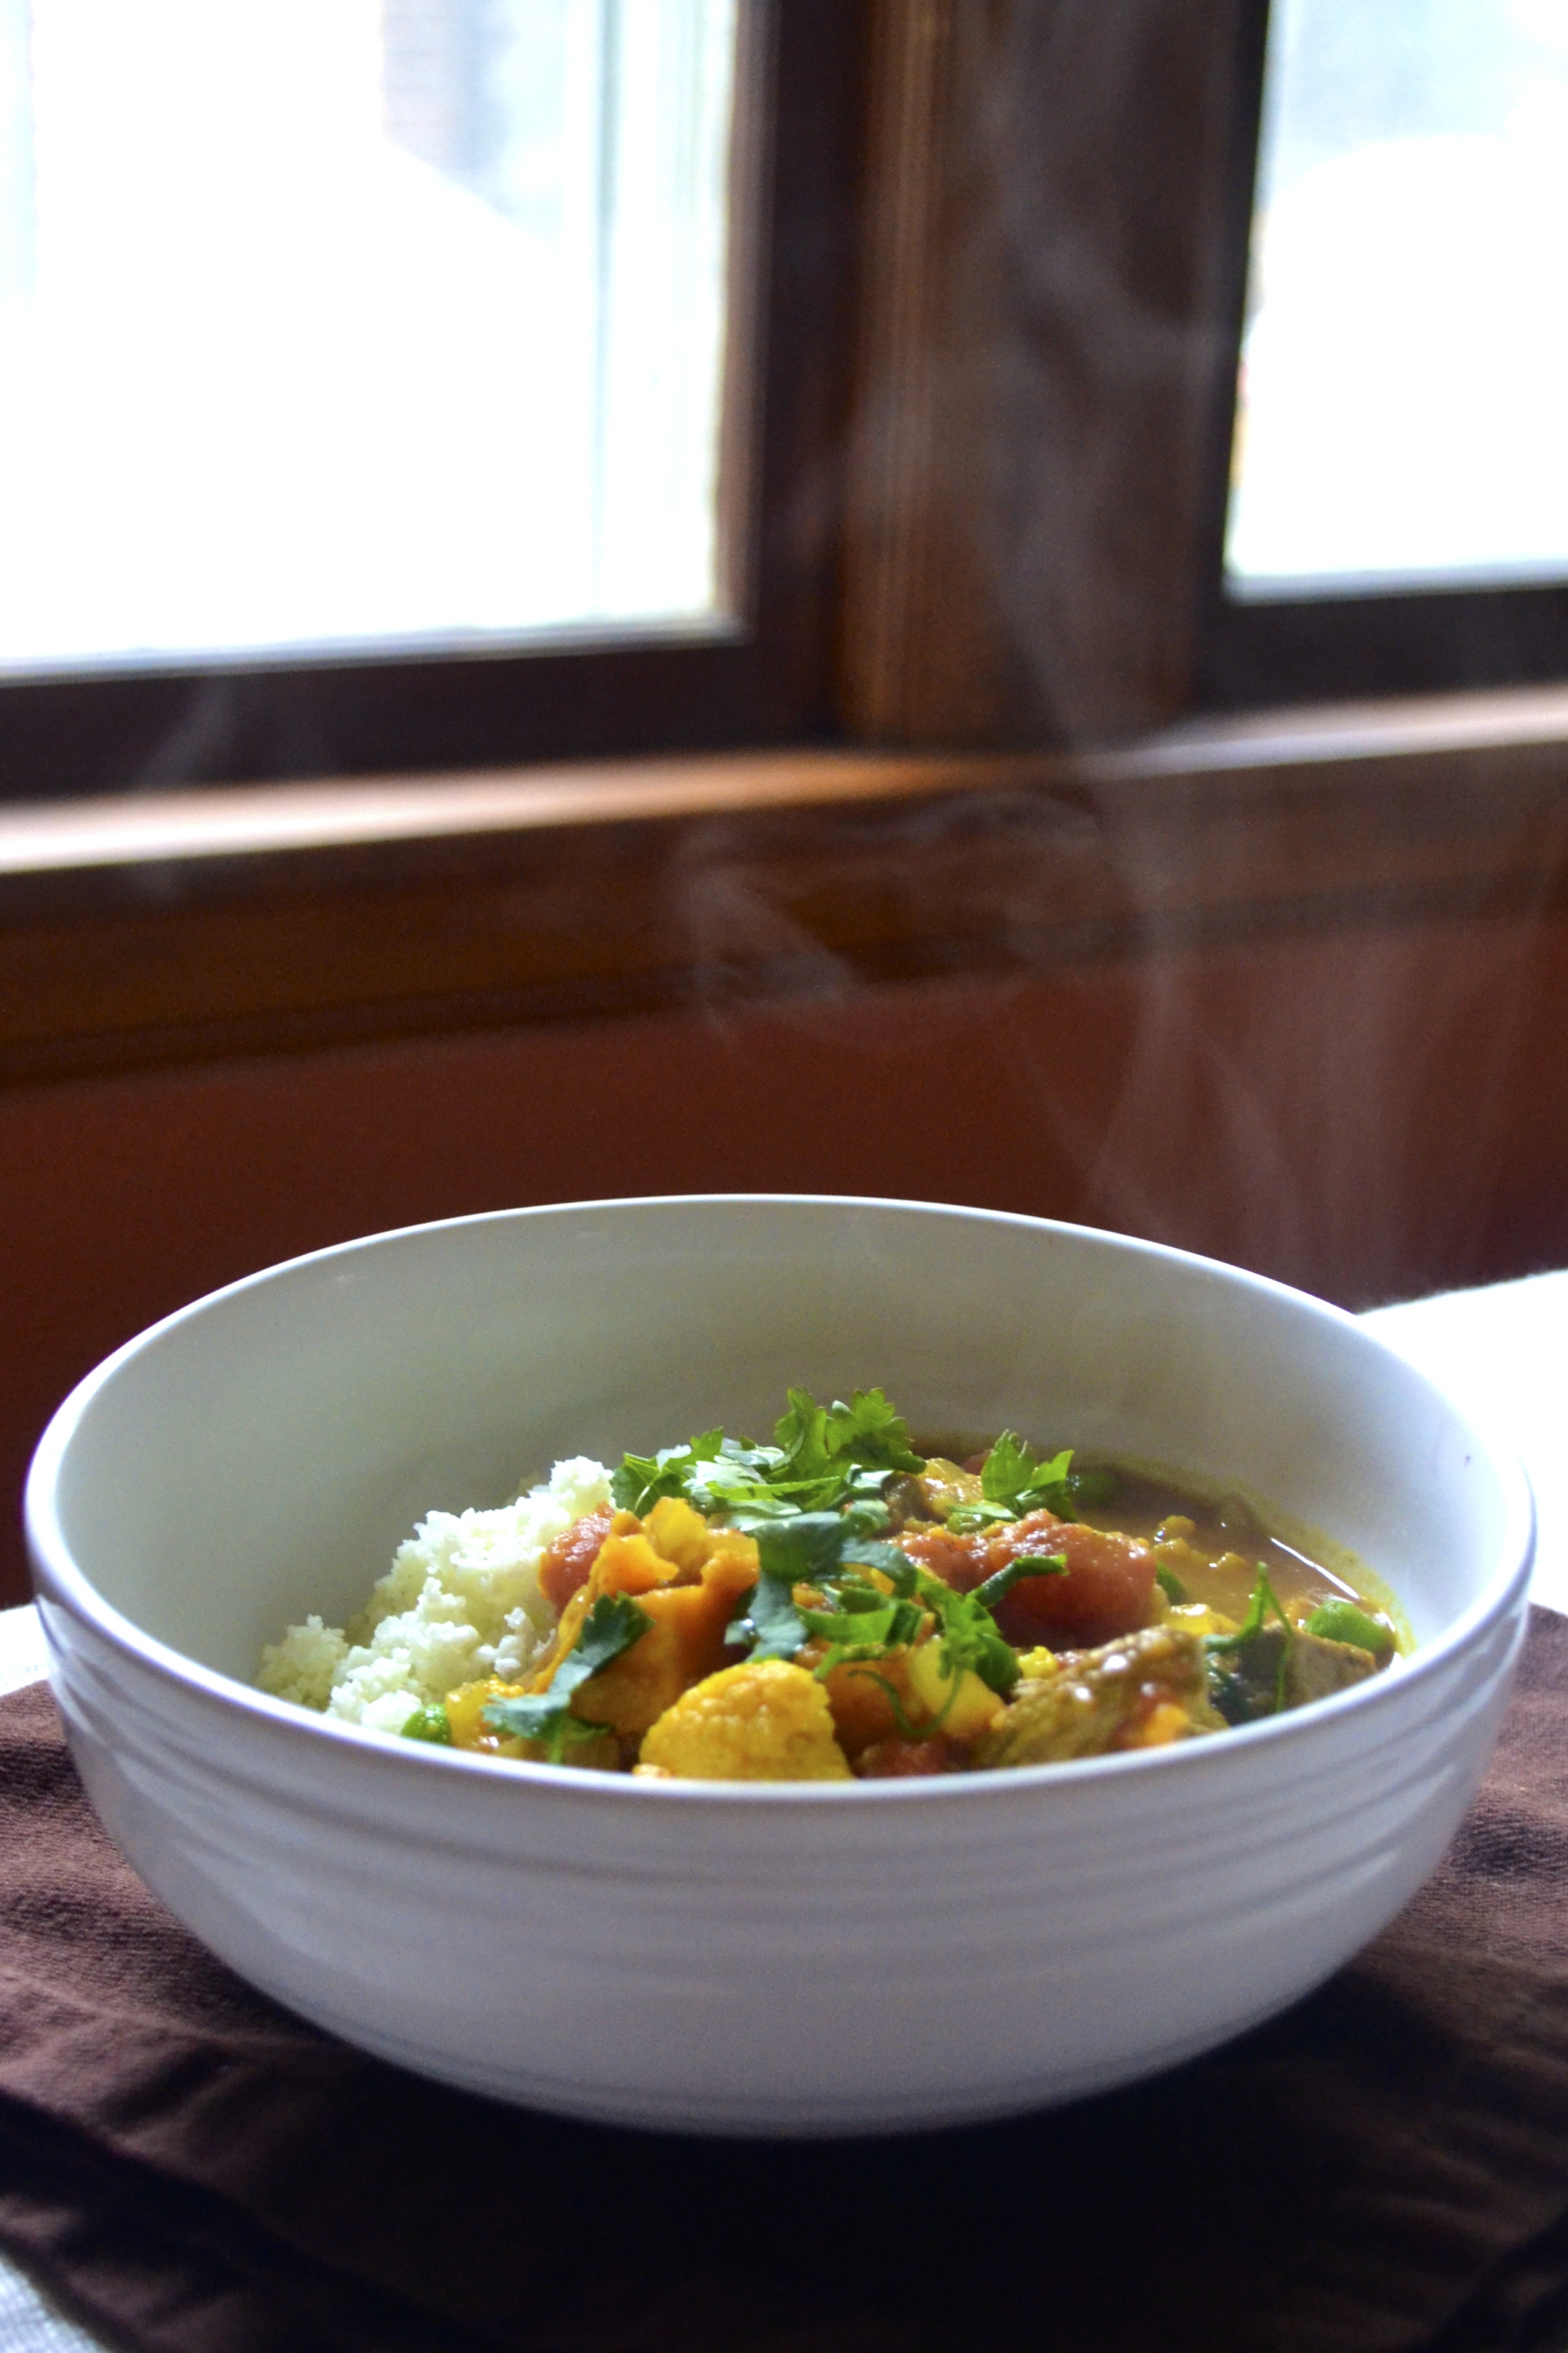
Fresh produce doesn’t always require a lot of spices because their natural flavor is enough. However, during this odd time between winter and spring, fresh produce includes greens, or peas, or tubers, or something that was canned from last year’s garden.  Don’t be afraid by the long list of ingredients in this curry recipe. I promise this meal comes together rather quickly and yields an amazingly fresh and flavorful meal.  Serve with rice or, for a grain free option, make ‘riced’ cauliflower (recipe below).

DSC_0022

Beef Curry with Sweet Potatoes and Cauliflower (adapted from Food & Wine, January 2012)

Serves 4 to 6

Ingredients

  • 1 Tablespoon coconut oil
  • 1 lb grass-fed sirloin steak, cut into 1-inch pieces
  • 1 large or 2 medium onions, about 1 cup diced
  • 3 medium cloves garlic, minced
  • 2 tablespoons madras curry powder
  • 2 teaspoons turmeric
  • 1 teaspoon ground ginger
  • 1/4 teaspoon cayenne
  • 1 teaspoon salt
  • 1 14 0z can diced tomatoes with juice
  • 1 14 oz can unsweetened coconut milk (light okay)
  • 2 tablespoons apple cider vinegar
  • 1 cup water or broth
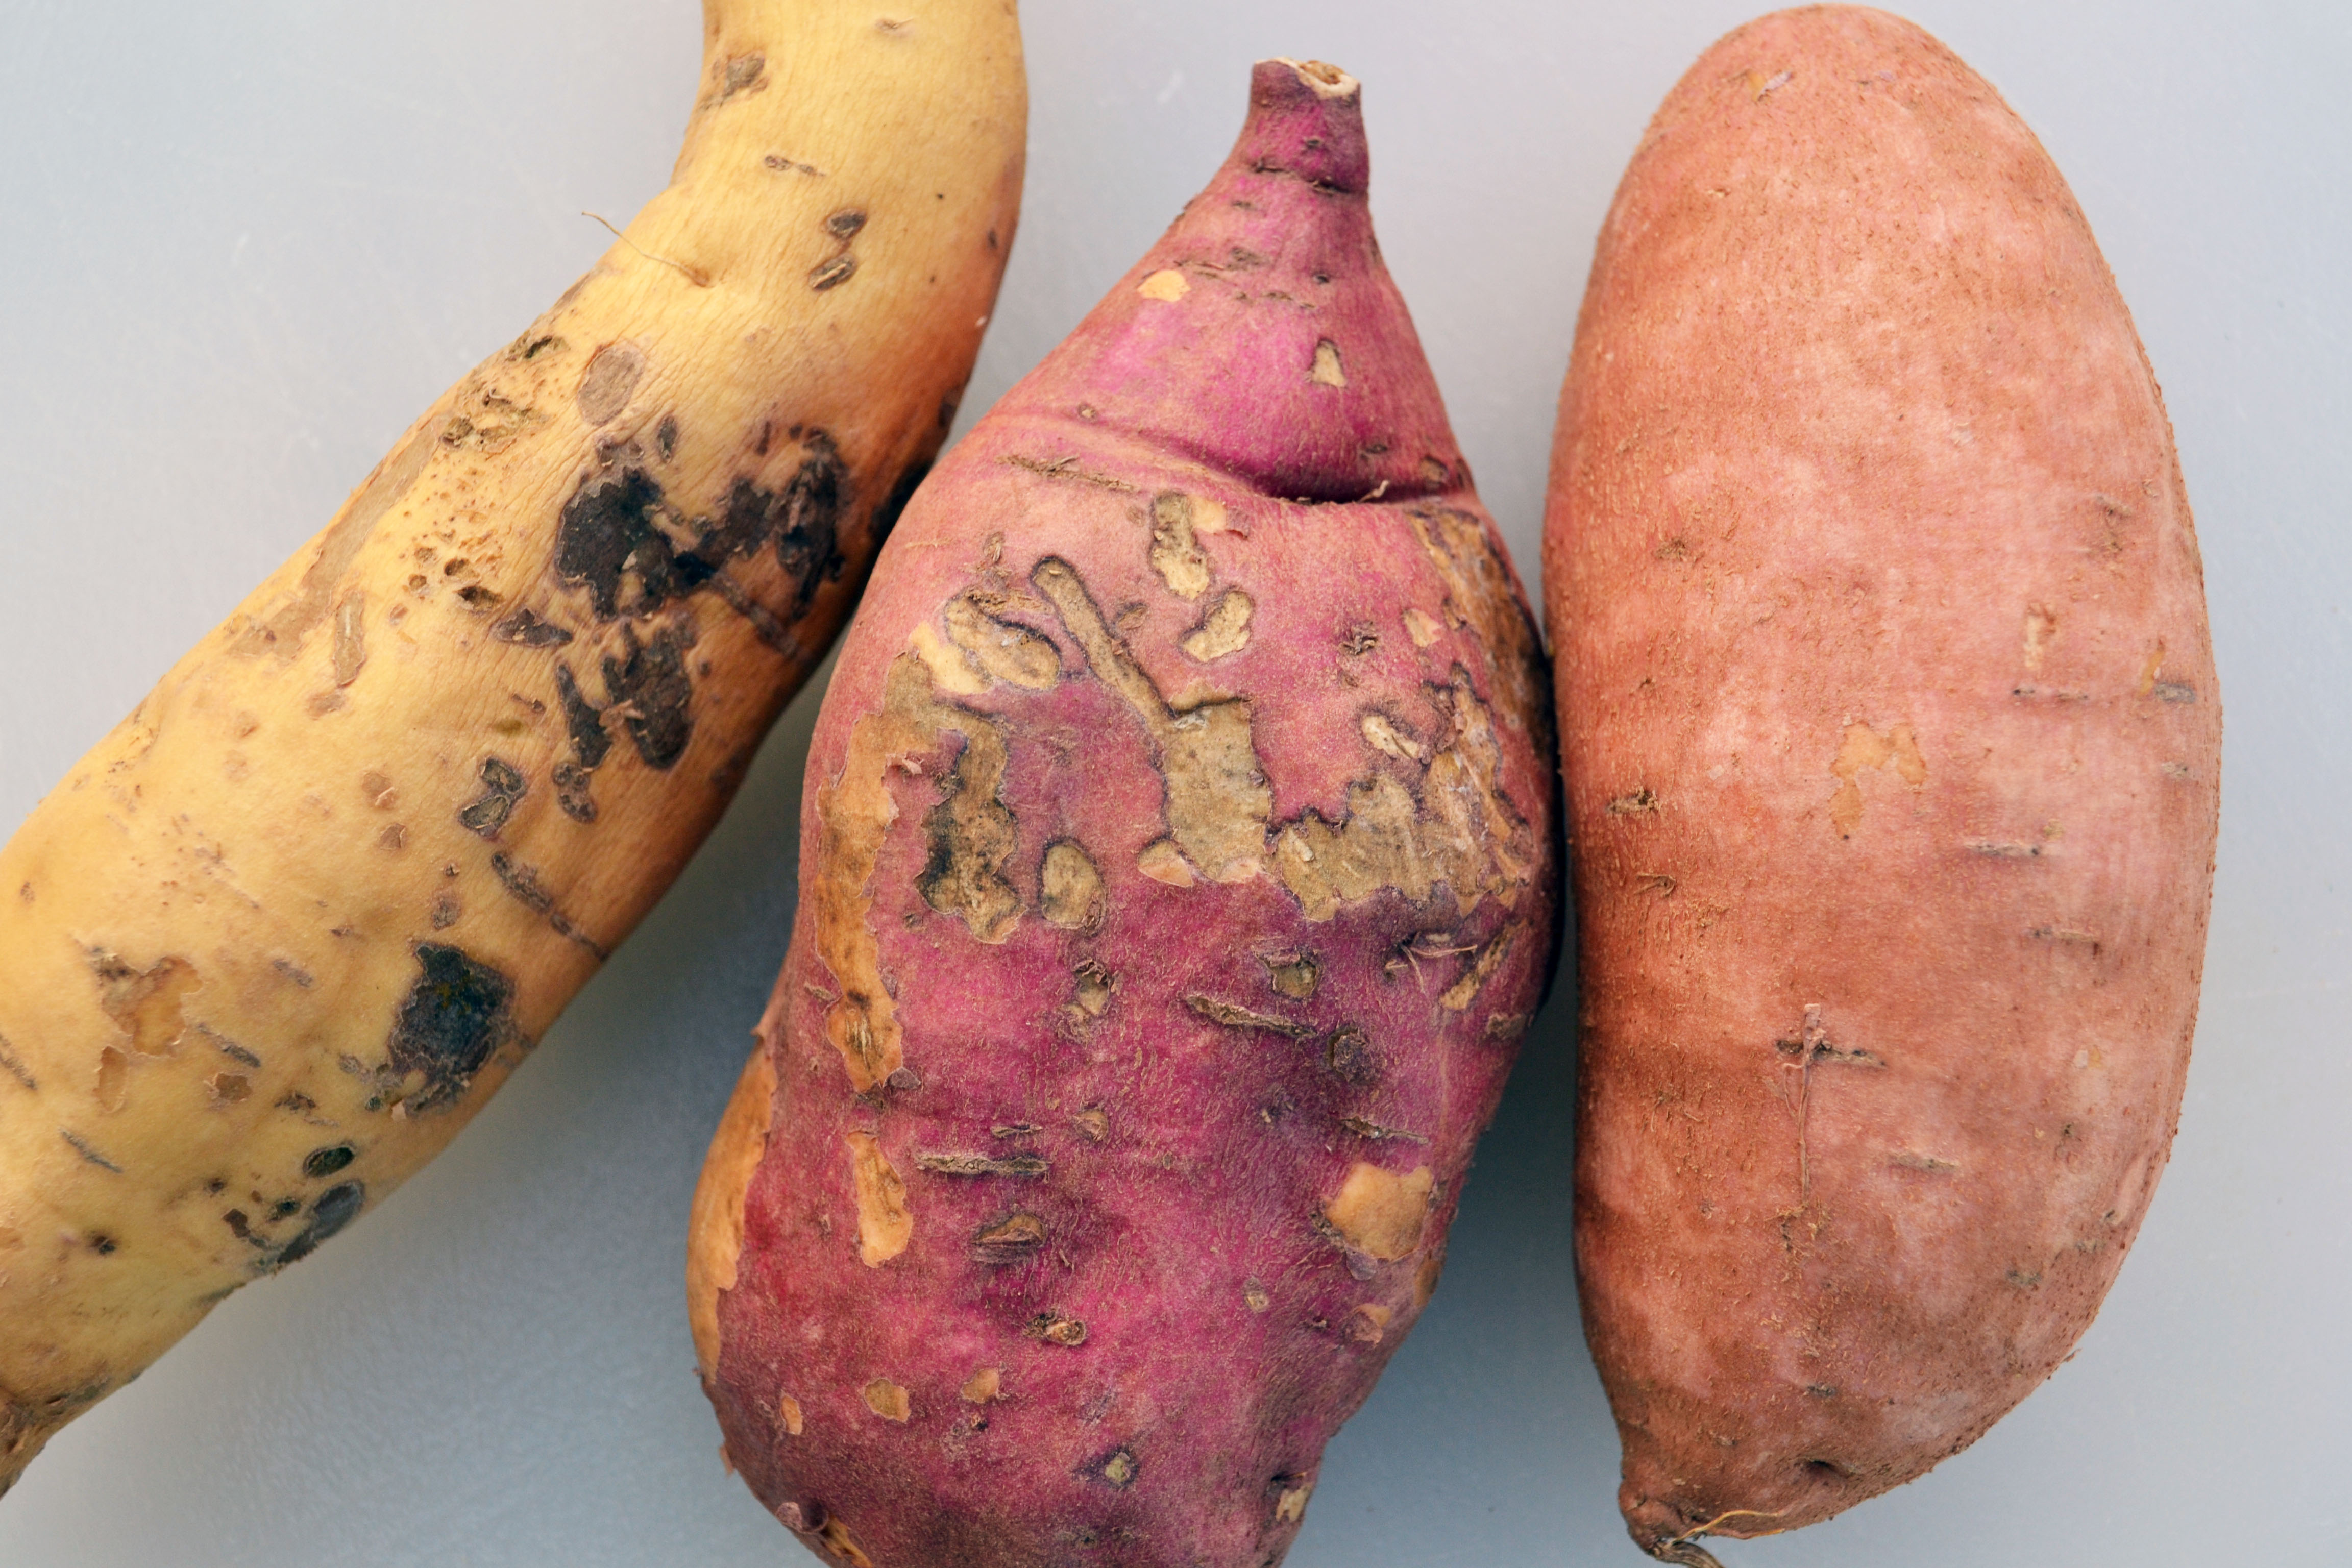
  • 1 medium sweet potato, 1-inch dice
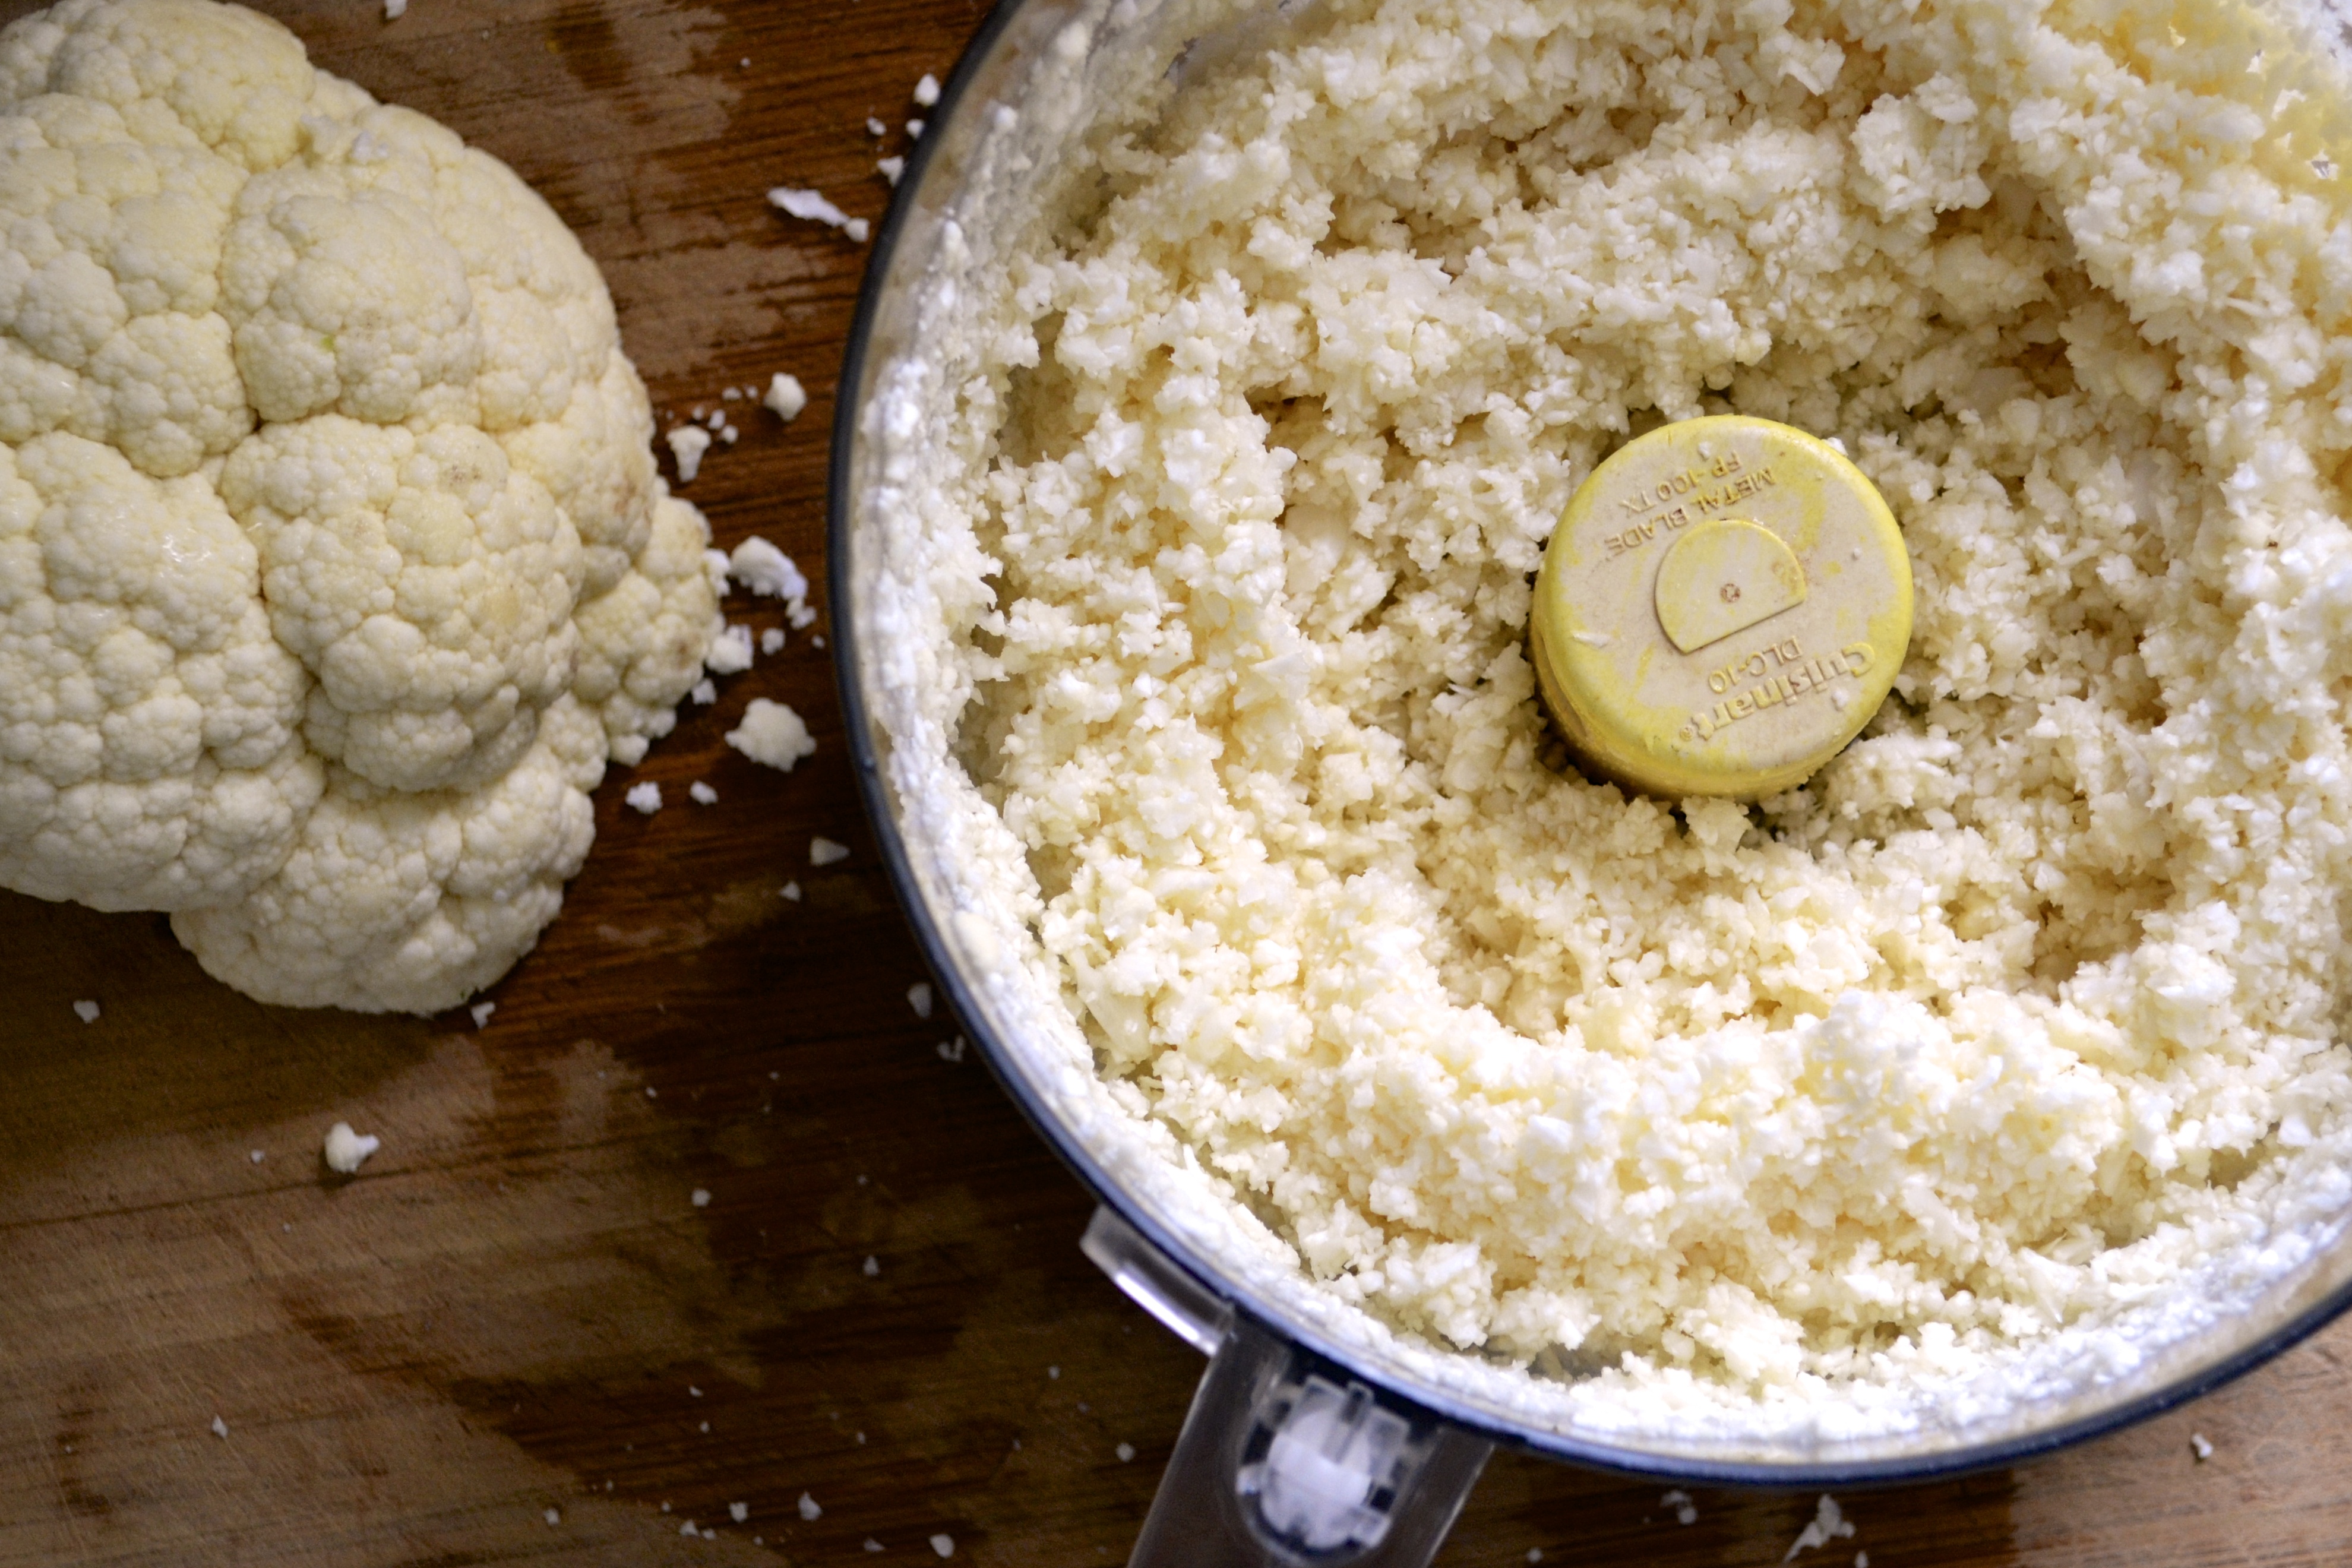
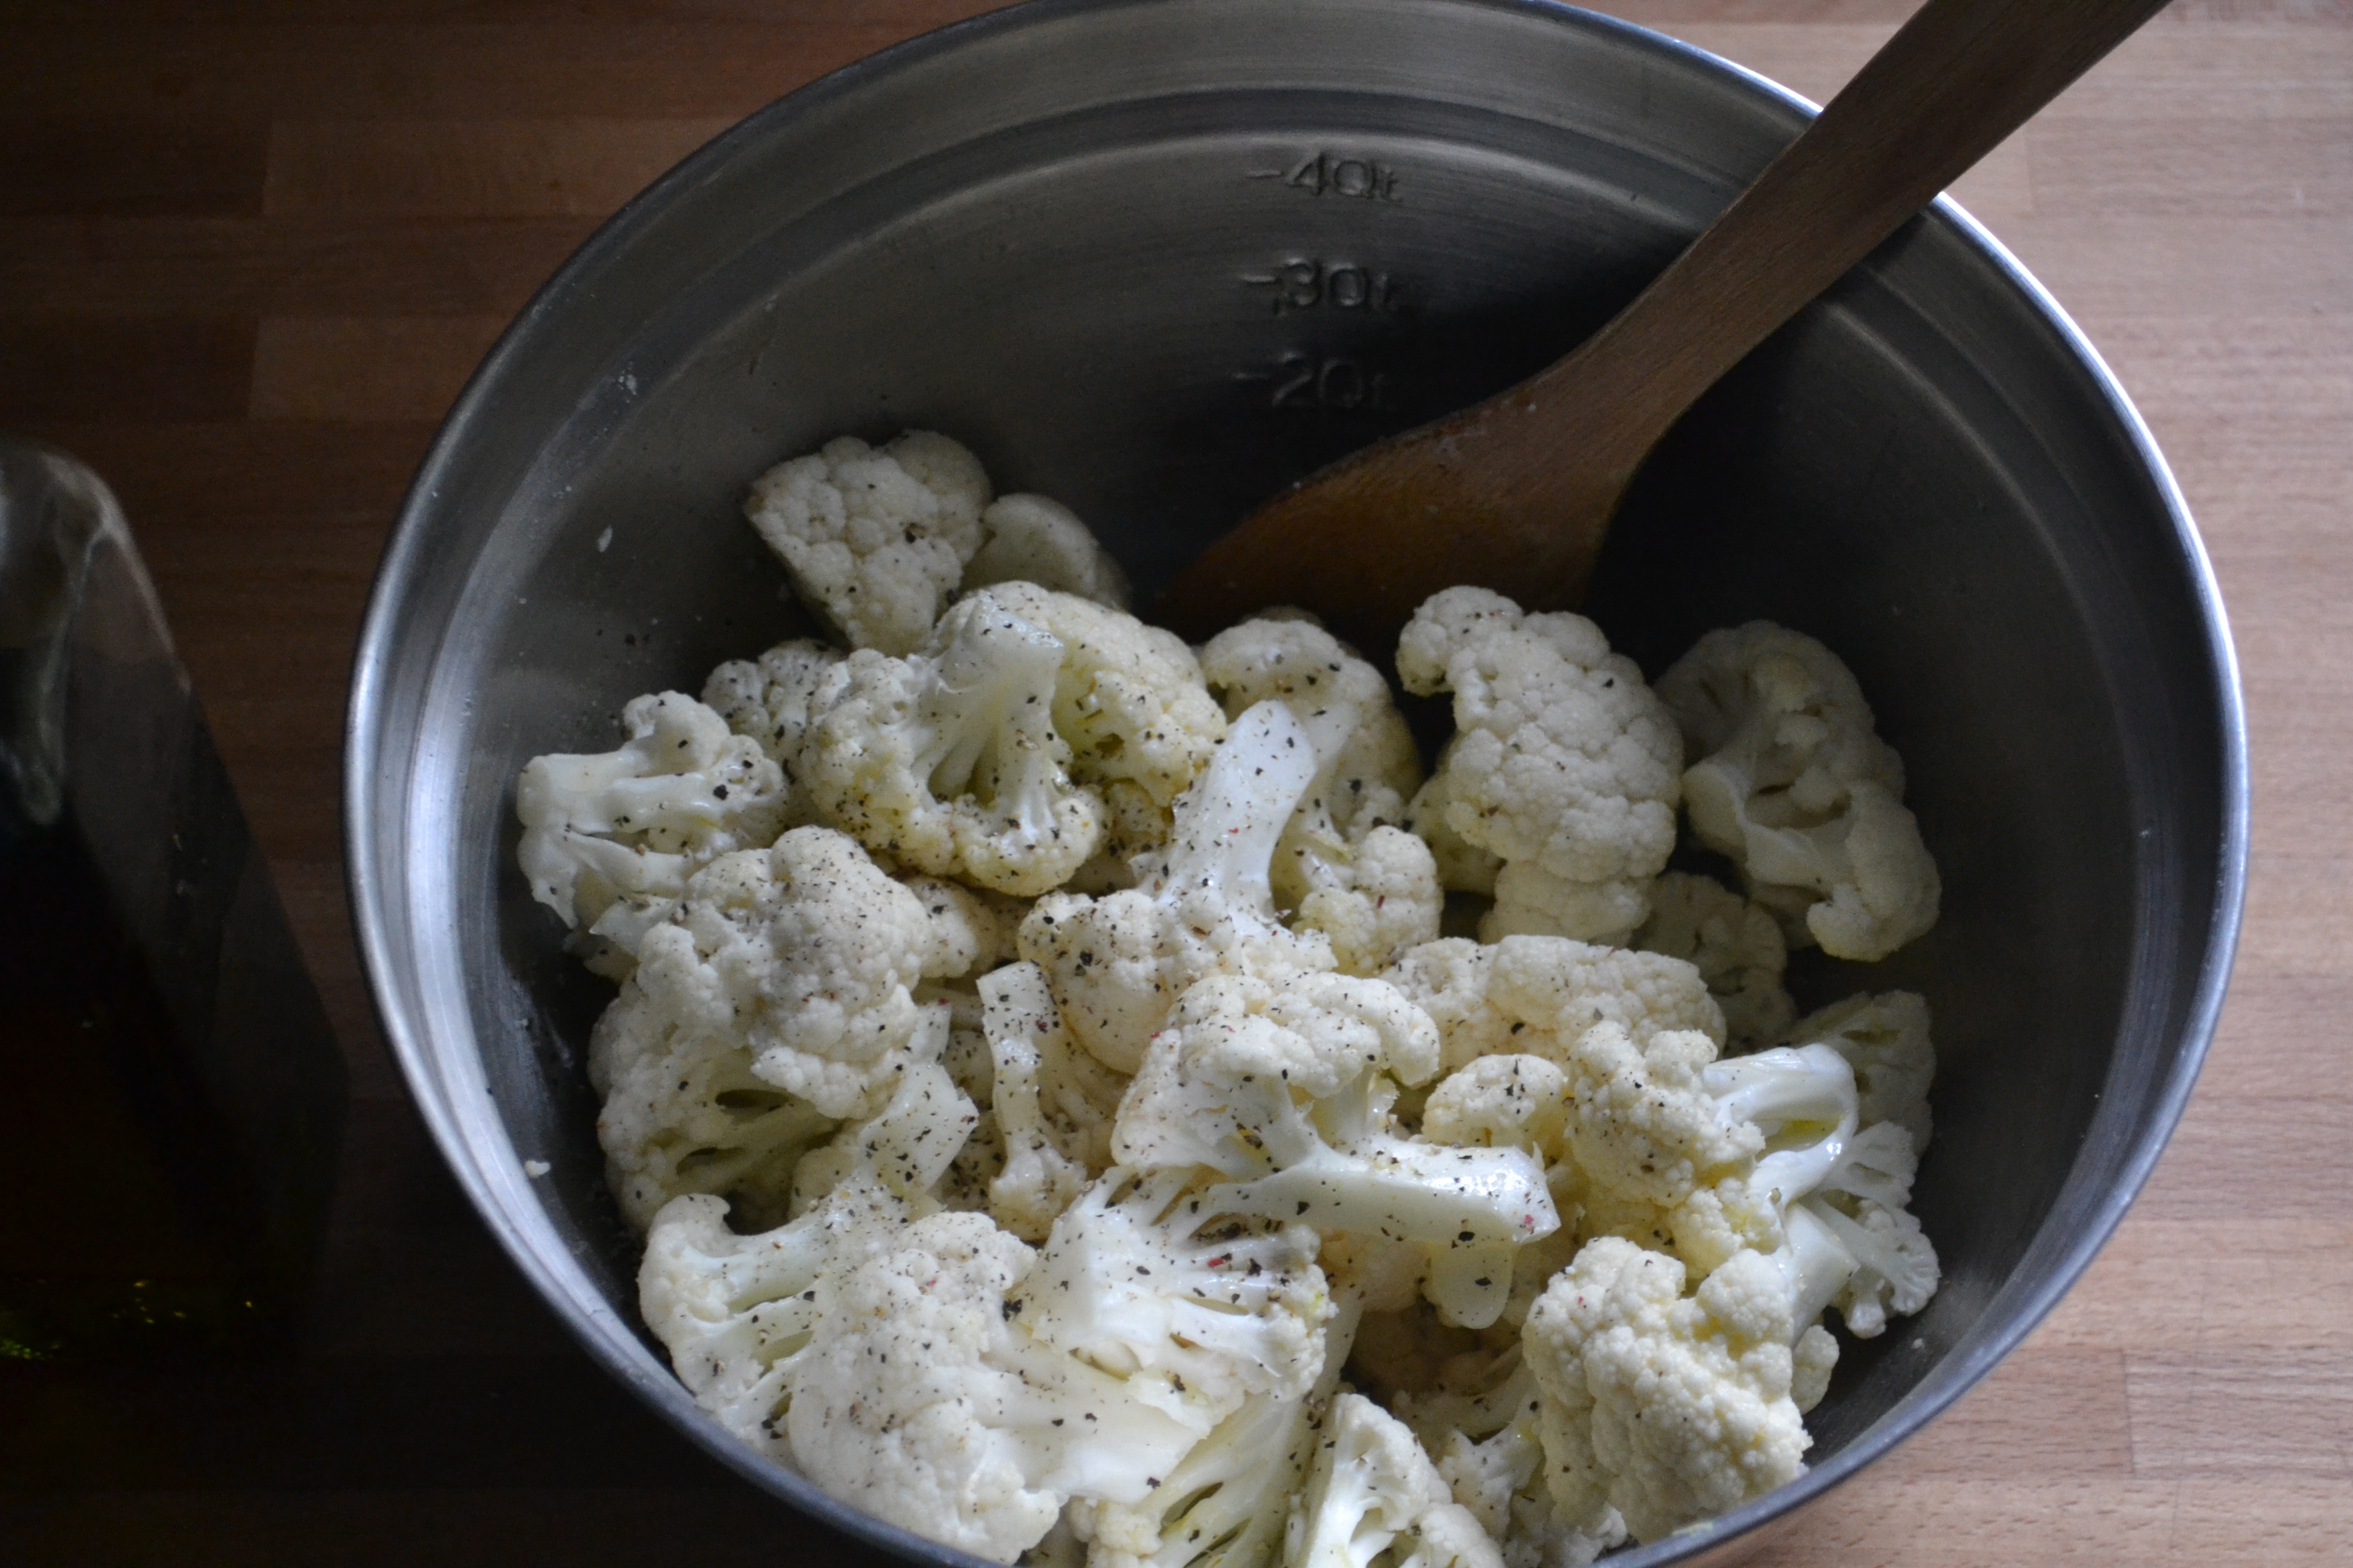
  • 1 head of cauliflower, chopped into 1/2-inch pieces*
  • 1 1/2 cup frozen peas
  • cilantro (optional)

Instructions

  1. Heat coconut oil in dutch oven over medium-high heat.  Add diced sirloin steak and brown the pieces on all sides, about 5 minutes. 
  2. Add onion, curry powder, turmeric, ginger, and salt and stir frequently until onion is softened (about 5 minutes). Add garlic and stir constantly and cook for an additional minute.
  3. Add canned tomatoes, coconut milk, apple cider vinegar, water, diced sweet potatoes, and half of the diced cauliflower. Bring to a boil. Reduce heat to moderate heat and continue cooking covered until potato and cauliflower are tender (about 15 minutes).
  4. Turn heat to low. Mash some of the potatoes with the back of a spoon.
  5. Stir in frozen peas. Turn heat off and place lid on dutch oven, allowing peas to cook through for a few minutes. Add additional salt, pepper, and cayenne to taste.
  6. Serve in bowls with chopped cilantro and riced cauliflower (or regular rice). Directions for riced cauliflower are provided below.

*Riced Cauliflower – Place the other half of the diced cauliflower into the bowl of the food processor. Pulse for a few seconds at a time until you get rice-sized pieces. Do not over process or it will become puree cauliflower.  Place in a microwaved-safe dish with a lid slightly ajar and microwave for 3 minutes. Stir.

Spring Pea Pesto with Spaghetti Squash

Are you ready to have your mind blown….with peas?

Go get peas right now. Wait…come back. Go get them after I finish telling you about the magic of pea pesto.  Not a fan of peas? I’m begging you to try them again. This is not the mushy pea goosh of your childhood. This is a dish that captures the fresh flavors of spring…peas, mint, lemon…and puts them together in a creamy pesto. I served my magic pesto on a bed of healthy spaghetti squash “noodles.”

DSC_0034

I heart all things pesto…basil pesto, kale pesto, broccoli pesto, pesto pesto. What’s not to love about throwing a bunch of items in a blender, whirling it around, and getting something that will jazz up just about anything. But my heart has been stolen by pea pesto.  Plus it’s uber green and cute.

DSC_0023

DSC_0032

I whipped this dish up rather quickly this past week. It would be perfect for a busy weeknight meal. You can use both fresh or frozen peas for the pesto. Reserve about 1/2 cup of peas for serving with the squash “noodles”.  Make the pesto while the spaghetti squash is cooking in the microwave. I think this dish would be amazing with seared scallops or shrimp.

OK, so I now relinquish you to go get peas. Eat up! Spring is here.

Spring Pea Pesto with Spaghetti Squash

Serves 4

*Note – I used cashews to make the pesto a bit creamier. However, walnuts, almonds, or pine nuts would also work in this pesto.

Ingredients

  • 1 medium-sized spaghetti squash
  • 1 1/2 cups of fresh or thawed frozen shelled peas
  • 1/3 cup cashews*
  • 1/4 cup packed fresh mint
  • Juice of 1/2 lemon
  • 1/4 teaspoon salt
  • 2 tablespoons olive oil

Instructions

  1. SQUASH NOODLES – Place whole spaghetti squash in microwave for 2 minutes.  Remove from microwave and cut spaghetti squash in half lengthwise.  Scoop out the seeds. In a large microwave-safe glass container, place the two halves cut side down. Pour 1-4/ to 1/2 cup of water into the base of the container (about 1/4 inch deep). Microwave on high for a total of 10 to 12 minutes (depending on the size of your squash). Check on the squash halfway through the cook time. When the squash is soft to the touch, it is done. It will be extremely hot, so allow it to rest for about 10 minutes. Make your pesto during this time. Once it is cooled down, scrape out the insides with a fork to get your squash “noodles.” Set your “noodles” aside.
  2. PESTO – Set aside 1/2 cup of peas for later use. For the pea pesto, place 1 cup of peas, cashews, mint, lemon juice, and salt in the bowl of a food processor.  Process for 2 to 3 minutes until mixture is well blended, scraping down the sides of the bowl as needed. With machine running, drizzle in the olive oil.  The pesto can be made ahead of time and frozen or kept in the refrigerator for up to a week.
  3. ASSEMBLY – To construct the “pasta” dish, add the pesto to the cooked spaghetti squash noodles. Stir in the reserved 1/2 cup of peas.  Salt and pepper to taste.  Garnish with slivers of mint.  This would also be great with shrimp or seared scallops!

Paleo Hazelnut Banana Ice Cream (Dairy Free)

Two ingredients! That is all this ice cream contains. TWO! In reality, when it comes down to it, you only need one ingredient: frozen bananas. But I had to get all fancy and throw some roasted hazelnuts into the food processor…Oh ya…NO ice cream maker! 

DSC_0399

Frozen bananas + whatever you fancy + food processor = soft serve ice cream

If you don’t have a food processor, a blender would also do the job.  This ice cream is basically instantaneous gratification in soft serve form! 

DSC_0400

It does take a small amount of forthought…freezing bananas. But seriously…we all have those lingering black bananas that need a home (and not banana bread..again).  I simply chop my spent bananas up into bite-sized pieces, throw them into a baggy, and freeze ’em. 

DSC_0402

This past weekend, after I finished a hellacious 10 mile run (IN THE STRONGEST WIND STORM EVER), I ate this hazelnut banana ice cream for my recovery meal. It was the best treat after such a tough run.  I was too hungry to even think or else I would have thrown cocoa into the ice cream too…. next time!

Paleo Hazelnut Banana Ice Cream (Dairy Free)

Serves 2

Ingredients

  • 2 frozen bananas
  • 1/8 cup roasted hazelnuts

Instructions

  1. Place frozen bananas and hazelnuts into the bowl of a food processor. Process for 1 to 2 minutes, until the banana turns creamy like soft serve ice cream.  
  2. Spoon into two bowls and EAT!

Grain Free Lemon Tart

Are you ready?  Like REEEEEALLY ready? Because this isn’t your standard lemon tart. It is a TART tart.  A creamy tart with pucker power but tempered with sweet agave nectar. It is the princess of tarts that will make you dream of fresh flowers, warm picnics, and lemon trees even when it is still stupid cold outside.

DSC_0407

I have been slightly obsessed with lemon tarts lately.  I made piss poor lemon bars last weekend and was out for vengeance.  I didn’t like the filling and was dead set on making a creamier version that could be placed into a tart crust.  So the hunt began for a lemon tart recipe that satisfied my obsession.  I studied several recipes and finally settled on an amalgamation of Julia Child’s Tarte Au Citron, Cookie and Kate’s Honey-Sweetened Citrus Curd, and Dave Lebovitz’s Lime Meringue Tart.

In the end, the curd recipe was adapted from Kathryn’s recipe.  I swapped agave nectar for the honey because I didn’t have honey on hand.  Kathryn’s curd was a bit sweeter than this lemon curd, which could be due to the sweetener swap. If you prefer a sweeter lemon curd, you might stick with honey which will provide that pronounced honey flavor or you could increase the quantity from 1/3 cup to 1/2 cup.  But I liked using the neutral-flavored agave nectar which allowed the tartness of the lemons to be the leading lady of the lemon curd. I also love tart things over sweet. Give me Sour Patch Kids any day of the week over Smarties. EEW.

DSC_0421

DSC_0431

When making the curd, be careful when using the direct heat method to thicken the curd. Use nonreactive saucepan and either a wooden spoon or metal wire whisk. Plastic will make your curd curdle like curdly curdy curd. Hehe.  Just keep your heat on low and STIR constantly with a wire whisk. It’ll be fine.  However, if you get a little bit of cooked egg or lemon pulp in the curd, you can always strain the curd before placing it into the tart crust.  This lemon curd can also be made in advance and refrigerated for several weeks. It’s SO dreamy stirred into greek yogurt.

The almond flour-based tart crust pairs incredibly well with the lemon curd filling.  This grain free tart crust is amazing and can be used as a basic crust for a multitude of fillings.  I adapted the recipe from the Gluten-Free Almond Flour Cookbook by Elana Amsterdam.  I used Dave Lebovitz’s method for making a basic french tart crust where he places butter, oil, water, sugar, and salt in a bowl and melts it in a hot oven before adding the flour. The butter begins to brown, giving it a wonderful complex and nutty flavor. So simple!

DSC_0422

I also should note that this is a prebaked tart crust. Because almond flour tends to burn easily, keep the heat slightly lower when prebaking and allow the shell to slightly brown.  After filling it with the prepared lemon curd, bake the filled tart until the filling has set (about 10 minutes).  If the edges of the tart begin to brown too quickly, place aluminum foil around the crust edge to protect it from burning.

You can top the lemon tart with meringue (like me) or fresh seasonal fruit. Once my blueberry and raspberry bushes begin to fruit, you can bet your butt that I will be topping these tarts with a gaggle of berries. But in the mean time, I piped a small amount of meringue around the edge of the tart using 2 reserved egg whites. I made a metric poop-ton (actual measurement) of meringue and was sad to see it go to waste.  I nearly made a second and third tart JUST to give that beautiful meringue a home.

DSC_0437

Grain Free Lemon Tart (adapted from recipes from Cookie and Kate and Dave Lebovitz)

Serves 8

Tart Crust Ingredients

  • 3 Tablespoons unsalted grass-fed butter, cut into pieces
  • 1 Tablespoon coconut oil
  • 1 Tablespoon water
  • 2 Tablespoons agave nectar or honey
  • 1/2 teaspoon sea salt
  • 1 1/2 cups almond flour
  • 1/4 teaspoon baking soda
  • 1/2 teaspoon vanilla extract

Lemon Curd Filling Ingredients

  • 4 tablespoons unsalted butter, cut into small pieces
  • 3 large eggs
  • 3 egg yolks (reserve whites for meringue)
  • 1/3 cup agave nectar (or honey)
  • 2/3 cup fresh lemon juice (about 3 to 4 large lemons)
  • 1 Tablespoon lemon zest
  • pinch of salt

Meringue Ingredients

  • 2 reserved egg whites 
  • pinch of salt
  • 3 Tablespoons agave nectar or honey

Tart Crust Instructions:

  1. Preheat oven to 350F. 
  2. Place butter, coconut oil, water, agave nectar, and salt in a Pyrex bowl.
  3. Place bowl in preheated oven for 10 to 15 minutes.  Allow the butter and coconut oil to begin bubbling. The butter will begin to brown on the edges (a.k.a. browned butter).
  4. Remove the Pyrex bowl from the oven.  Be careful because the bowl will be hot.  Add almond flour, vanilla extract, and baking soda and stir quickly until a ball forms.
  5. Transfer dough ball to a 9-inch tart mold with a removable bottom. Use your fingers to spread dough into the base and up the edges of the tart pan. Prick the bottom all over with the tines of a fork.
  6. Partially bake for 7 to 10 minutes at 350 F.  You don’t want to fully bake or it will get too brown when later baking the filled tart.
  7. Remove the partially baked tart shell from the oven. Set aside and allow to fully cool before filling.

Lemon Curd Instructions:

  1. In a saucepan over low heat, heat butter, lemon juice, zest, and salt until butter is melted, but not boiling.
  2. In a medium bowl, whisk eggs, egg yolks, and agave nectar for 1 to 2 minutes until combined and slightly frothy.
  3. Temper the egg mixture by adding a bit of the heated butter-lemon juice mixture to the eggs and whisking constantly.  This will warm the egg mixture without cooking your eggs.  After the eggs are slightly warmed and tempered, add them slowly to the warm butter-lemon juice mixture, whisking constantly.
  4. Increase the heat and cook over medium-low heat, whisking constantly until the lemon curd mixture begins to thickens with a consistency of jelly. DO NOT LET IT BOIL!!! It is done the whisk is lifted from the curd and the mixture holds its shape when it falls back into the saucepan from the whisk (see picture below).
  5. Remove the curd from heat. Place the prebaked tart shell onto a rimmed baking tray.  (Be careful with the tart shell and the removable bottom!!! I have ruined a few tart crusts by accidentally pushing through the mold.) Scrape the filling into the prebaked tart shell.
  6. Bake at 350 F for 10 minutes. Remove from the oven.  You can either top with marshmallowy meringue (recipe below) or fresh seasonal fruit. Allow to cool completely before slicing.

DSC_0412

DSC_0416

Marshmallowy Meringue (makes 3 cups):

  1. Heat 3 tablespoons of agave nectar in a microwave safe dish for 30 seconds (watch out because this might boil over).
  2. Add 2 egg whites and a pinch of salt to the bowl of a mixer. Turn on high and whip with whisk attachment until soft peaks form. Gradually drizzle in the heated agave nectar and a few drops of vanilla. The meringue will become shiny and slightly stiff.
  3. Scrape the meringue either into a pastry bag fitted with a fancy tip or (like me) scoop it into a Ziploc bag and cut the end off of the corner. Pipe the meringue in a ring around the tart. Or you can also spread the meringue with a spatula around the tart. (You will have meringue left over which either can be used for a second tart or stored in a mason jar in the refrigerator for 24 hours).
  4. Turn on the broiler in the oven. Place the tart under the broiler, watching VERY carefully because it will brown quickly! After the top begins to brown and darken, remove the tart from the oven and cool completely before slicing.

Paleo Pad Thai (Gluten Free, Grain Free, Dairy Free, Paleo)

This past weekend, while a blizzard was slamming into KC, we visited my family in Oklahoma City. The only thing this cold weather is good for is staying inside, cuddling, and cooking.  However, my middle sister and I ventured into the cold blustery winds for a long training run in preparation for the OKC half marathon. Running with her made it worthwhile.  I was also able to get some great cooking time in with my brother (who makes the BEST salsa) and my youngest sister.  My youngest sister is such a great cook and she’s only 14! We made a butternut squash and lamb stew and some paleo cobbler.  MMmmmmm. The recipes should show up soon.   

But seriously…April is next week. Easter is this weekend.  Spring has not sprung.  It’s on vacation and evidently it is having a great time not showing up anywhere around here! Winter is sticking around like a cold-hearted and deceptive ex girlfriend that just WON’T GET THE HINT. 

No one needs your cold wind, 10-foot snow drifts, one lane roads, icy sidewalks, gloomy skies…

We’ve moved on. We want something new.

DSC_0380

I want green grass!

I want to grill out!

I want patio weather!

I want to see the tulips that I planted and not all this stupid snow! 

I want to show off my super dayglow white legs, people!   *STOMP STOMP STOMP* Gimme it!

DSC_0368

My grumptastic attitude was especially fueled this morning when I slipped and fell hard on my back, elbow, ass, and shoulder after getting home from an early morning workout.  This just added to my ailments. I was already walking around like a fight gone bad from shoveling 1,000 pounds of snow from the loooooongest driveway in the world and hauling half a cow (dead, butchered, and frozen into steaks, roasts, and other deliciousness) down into our basement and into my deep freezer. I hurt. So. Bad.

DSC_0364 

DSC_0360

I guess I should quite being such poop bomb and just embrace it. If only I could sit around all day and drink hot cocoa with peppermint schnapps, then I would be OK with crap weather. GRRR. 

If you are also fighting the persistent winter doldrums, then I suggest you embrace it and make some comfort food.  This Paleo Pad Thai is the best thing to amp up that attitude.  Using spaghetti squash in place of noodles turns this comfort food dish into a healthy anytime dish!  The Thai Nut Sauce is addictive and would be great as a dip.  Enjoy!

DSC_0389

Paleo Pad Thai (adapted from The Clothes Make The Girl)

Serves 6

  • 1 medium-sized spaghetti squash (yields 3 to 4 cups of squash noodles)
  • 1 Tablespoon coconut oil
  • 2 lbs chicken meat (breasts or thighs), cut into 1/2-inch pieces
  • 2 medium carrots
  • 4 to 6 cups of mixed veggies (such as broccoli, green beans, mushrooms, bell peppers)
  • 1/2 cup chopped cilantro
  • 1/2 cup chopped green onions, green and white parts
  • Thai nut sauce (recipe below)
  • fresh lime slices for serving
  • salt to taste

Thai Nut Sauce

  • 1/3 cup almond butter (smooth or chunky)
  • 1/3 cup canned coconut milk (light or full fat)
  • 2 cloves of garlic, minced
  • 1/2 inch piece of fresh garlic, minced
  • 1 Tablespoon fish sauce
  • juice of 2 limes
  • 1 teaspoon sesame seed oil
  • 1 to 2 tablespoons siracha sauce
  • salt to taste

Instructions

  1. Microwave the spaghetti squash for 1 1/2 minutes. Cut in half and scoop out the seeds. Place the halved squash cut-side down into a large glass casserole dish with 1/4 cup water. Microwave for an additional 12 to 14 minutes.  Remove from microwave and allow to cool for about 5 to 10 minutes, or until you can handle it.  Once it has cooled, use a fork to scrape the inside of the squash and remove the squash flesh or “noodles” from the skin.  Place into a medium bowl and set aside.
  2. In the bowl of a food processor, combine all of your sauce ingredients. Set aside or place in the refridgerator.
  3. In a dutch oven or large pot, heat coconut oil over medium-high heat. Cook chicken pieces until no longer pink, stirring frequently. Add carrots and cook for 2 to 3 minutes. Add remaining vegetables and cook until warmed through (about 5 to 10 minutes). In the winter, I use an assortment of frozen vegetables.  Reduce heat to medium-low and add squash “noodles”, green onions, and Thai nut sauce, stirring to combine.  Allow to heat through and add salt/pepper/Thai chili paste to taste.
  4. Serve with additional lime wedges, green onions, and cilantro.

Cauliflower Pizza Crust (Grain Free, Gluten Free, Paleo)

Pizza, beer, and a movie is my idea of a perfect date night.  I’ve been hunting around for a good grain free pizza crust recipe.  Who knew cauliflower would come to the rescue!

DSC_0317

Cauliflower is like the working mother of five or even fifteen.  It can transform into so many different things…mash it, roast it, puree it, rice it, grill it. And now I’m adding one more thing to the list…crust it…that is, pizza crust, my friends. I was really amazed at how much this tasted like pizza.

DSC_0294DSC_0300DSC_0309

Get out your handy dandy food processor and rice that cauliflower. Combine the riced cauliflower with eggs, seasonings, and some almond flour.  Preheating a pizza stone and applying the cauliflower pizza “dough” onto the preheated stone helps produce a crisper crust. Prebake to get a golden crust. Then top with whatever toppings you choose.  I have included my easy homemade pizza sauce recipe as well.  Friday pizza night is back on!

DSC_0315

Cauliflower Pizza Crust (slightly adapted from Love and Lemons)

  • 1 cauliflower, diced in 1/2-inch pieces
  • 2 eggs
  • 1/2 teaspoon each of garlic powder, onion powder, salt
  • 1 teaspoon each of oregano and parsley
  • 3/4 cup almond flour

Homemade Pizza Sauce

  • 1 6 oz can of organic tomato paste
  • 1 cup of water
  • 1 tablespoon each of oregano, basil, and parsley
  • 1 teaspoon each of garlic powder and onion powder
  • 1/4 teaspoon ground black pepper
  • salt to taste

Instructions

  1. 1. Preheat oven to 450 degrees. Place a pizza stone in the oven and allow to preheat.
  2. Chop cauliflower into 1/2-inch pieces. Place cauliflower flourettes into the food processor and pulse for a “riced” consistency. Don’t go too far or you will puree it. Remove from food processor and place the riced cauliflower into a microwave save bowl. Microwave for 3 minutes.
  3. Add remaining ingredients and mix  to form into a wet ball. If it is too sticky to handle, add more almond flour. Gently knead it a few times to help it come together. Remember…this is cauliflower, NOT all purpose flour so it will not resemble typical pizza dough.
  4. Remove the preheated pizza stone from the oven or use a baking sheet. Place parchment paper on top of the stone or baking sheet. Press the cauliflower “dough” ball onto the pizza stone or baking sheet lined with parchment paper. Gently mold it into a 1/4-inch thick circle.
  5. Bake at 450 F for 20 to 25 minutes until golden brown.
  6. For the pizza sauce, combine all ingredients into a medium bowl. Top the baked pizza crust with the homemade pizza sauce.Then top with your favorite ingredients. We topped ours with cheese (not paleo, but I really wanted some melty cheese), pepperoni, jalapeño, and mushrooms.
  7. Bake for about 10 minutes.

DSC_0305

Poached Eggs on Broiled Portobello Mushrooms

DSC_0226

Let’s get fancy….but not toooooo fancy.

This recipe is adapted from Sophie Dahl’s cookbook “Voluptous Delights”, a beautiful cookbook that features sexy, delicious, and seasonal food! This cookbook makes easy food look sophisticated and sexy.

She uses Portobello mushroom caps in place of english muffins in a lighter version of an Eggs Benedict.  Portobello mushroom caps are huge and meaty and a great way to rock your breakfast world.  This breakfast makes you feel like you are at a top class brunch spot.

DSC_0248 DSC_0245

But what really takes the breakfast to the next level is the perfect poached egg!  Check out the tutorial here

This breakfast is fancy enough to serve to a group for brunch. It is also easy enough to make for just yourself on a lazy weekend when you would rather just sit around in wool socks drinking coffee, filling out the crossword puzzle, staring at the dust on your shelves that just does not go away by itself…uuugh…, wondering when your taxes will just do themselves, dreaming about cabins that you want to build when you win the lottery, watching reruns of HGTV and wishing that maybe someone will come “crash” your home, and helping yourself to another mimosa because hey you need your fruit serving for the day!

DSC_0251

Poached Eggs on Broiled Portobello Mushrooms (Gluten Free, Grain Free, Dairy Free, Paleo) (adapted from Sophie Dahl)

Serves 2

Ingredients

  • 2 Portobello mushroom caps, stems and gills removed
  • 2 eggs
  • 2 to 4 cups of fresh spinach, cleaned
  • olive oil
  • salt and pepper
  • 1/2 teaspoon fresh thyme

Instructions

  1. Preheat oven to 450 degrees F. Line a baking sheet with parchment paper. Place cleaned Portobello caps stem side up on the parchment paper. Drizzle with 1 teaspoon of olive oil each and sprinkle with salt and pepper. Bake for 10 to 15 minutes. 
  2. While Portobello caps are roasting, poach eggs as shown here or cook as desired.
  3. Add about 1 teaspoon of olive oil to small skillet placed over medium heat. Sauté spinach until slightly wilted, about 3 minutes. Remove skillet from heat.
  4. Remove mushroom caps from oven when done. Place one mushroom cap on each plate. Divide wilted spinach between the two mushroom caps. Top with the poached egg. Season with salt, pepper, and fresh thyme.

Grain Free Chocolate Chip Walnut Cookies

Sometimes we all just need a cookie.

DSC_0266

DSC_0277

Sometimes nothing else cures a long day or a rough week like homemade chocolate chip cookies.

But being gluten free, warm chocolate chip cookies became a ghostly memory that haunted me with melty goodness.  Were they that good? Maybe not. Maybe I just beefed it up in my imagination. Like ALF…I mean really…that show could NOT have been as great as I remember it. A hand puppet alien? Really.  Anyone?

And then my girlfriend Tessa made a fresh batch of chocolate chip cookies made with almond flour. I was floored. It was like a hug wrapped up in a cookie. It was soft. It was chewy. It tasted like the real thing! Like the kind that my mom would make on cold winter days.

And then it happened…

I snapped. I couldn’t stop thinking about those COOKIES. Those amazing cookies.

DSC_0255

DSC_0258

I woke up in the middle of the night. COOKIES.

I smelled them in my dreams. COOKIES.

I kept coming up with bad excuses to make them. HEY, Let’s celebrate me getting gas in my car! COOKIES? Hey honey, you look great in plaid…COOKIES???  I’m so sorry that you worked on a Saturday….COOKIES?????

DSC_0274

They solved all my problems last week.  I had to hide a few in the freezer so that my cookie-monster husband didn’t eat them all.  So for special occasions I will warm a few up….like “hey, I organized my sock drawer and found most of the missing socks”….Time for a cookie and a milk stout!

DSC_0271

Grain Free Chocolate Chip Walnut Cookies (slightly adapted from Against All Grain)

Makes 2 dozen small cookies

Ingredients

  • 1/4 cup butter or ghee
  • 1/3 cup honey
  • 1 large egg, room temperature
  • 2 teaspoons vanilla
  • 1 1/2 cups blanched almond flour (such as Honeyville)
  • 2 tablespoons coconut flour
  • 1/2 teaspoon baking soda
  • 1/2 teaspoon sea salt
  • 1/2 cup chocolate chips (use Enjoy Life chocolate chips for dairy free)
  • 1/4 cup walnut pieces

Instructions

  1. Preheat oven to 350 degrees F. Prepare a baking sheet with parchment paper or a silpat mat. Set aside. 
  2. In a large bowl, combine melted butter, eggs, and honey. Whip with a fork until combined and creamy.  Add almond flour, coconut flour, baking soda, and salt. Mix until a dough forms. Stir in the chocolate chip pieces and walnut pieces until combined.
  3. Using a tablespoon, scoop out dough and place on parchment paper or silpat mat on prepared baking sheet. Flatten out cookie dough slightly with either the back of the spoon or your fingers. The cookies won’t spread during the cooking process. Therefore create the shape that you want before you bake the cookies.
  4. Bake for 12 to 15 minutes at 350 degrees F until lightly browned on edges.  Remove from baking sheet and allow to cool on wire rack.

Almond Flour Biscuits (Grain Free, Gluten Free, Paleo)

In most diners in small Oklahoma towns, B&G…that is biscuits and gravy…is a standard side that comes with your breakfast. You typically can get two eggs, bacon, toast, pancakes aaaaand B&G for under $7. Oh I forgot hash browns…you always get hash browns.  Oh and you will get a stretcher to roll yourself onto and go into a food coma.

But ooooh that B&G. I dream about it. Even though it is presented as a mere “garnish” to that HUUUGE breakfast, it so amazing. The gravy is so thick. The biscuits are so light, so fluffy, so buttery.   Sure it packs a huuuge caloric and carbalicious load on the badunkadunk. But let’s not ruin my B&G dreams.

DSC_0197

After realizing that I had a gluten intolerance, I thought I would never have a soft, flaky, buttery, amazing, warm biscuit again. I have tried making grain free biscuits using coconut flour, but I was less than impressed. Tropical flavored biscuits are a far cry from flaky biscuit heaven.

But I couldn’t give up. I found this basic almond flour biscuit recipe on Elana’s Pantry.  Victory!!!! These almond flour biscuits are much closer to my beloved southern biscuits…flaky and buttery.   I made the basic biscuit recipe and also adapted a batch by adding cinnamon and raisins. Mmmmmm.

DSC_0179

DSC_0206

Don’t expect these to taste like real buttermilk biscuits, people…once you give up gluten…those suckers are gone. But these grain free biscuits are the closest I have tasted.  I just have to remember that by giving up gluten, I have gained so much in the way of health, tummy comfort, and hormone balance! So with that in mind, these come in really close to the read deal in taste. Plus they stand head and shoulders over the “real deal” when it comes to health, protein power, and the fact that they don’t pack on the poundage on the budunkadunk.

Now I just need to tackle a gluten-free gravy….I’m not so sure that is going to be possible. But challenge accepted!

DSC_0188

Almond Flour Biscuits (adapted from Elana’s Pantry)

Makes 8

Basic Ingredients

  • 2 1/2 cups almond flour (I use Honeyville)
  • 1/2 teaspoon sea salt
  • 1/2 teaspoon baking soda
  • 1/4 cup butter or ghee (or coconut oil)
  • 2 Tablespoons honey
  • 2 eggs (at room temperature)

Cinnamon-Raisin Biscuits Add-ins:

  • 1 teaspoon ground cinnamon
  • 1/2 cup raisins

Instructions

  1. Preheat oven to 350 degrees F. Place parchment paper (or silpat mat) on a baking sheet and set aside.
  2. Combine all the dry ingredients (almond flour, baking soda, salt, and optional cinnamon) and blend well with a fork. In a separate bowl, whisk together all the wet ingredients (honey, butter, eggs) and combine with the dry ingredients. Mix until a dough forms. (If making cinnamon raisin biscuits, stir in raisins now).
  3. For easier handling, roll the dough into a ball and place it in the freezer for about 10 minutes.
  4. Take the dough out and form biscuits with your hands using a 1/4-cup scoop, rolling into a ball and flattening to about 1 inch thickness. Or place the dough between two pieces of parchment paper and roll it to a thickness of about 1 inch and cut the biscuits with a cookie cutter.
  5. Place the biscuits on the prepared parchment paper on the baking sheet.  Bake at 350 F for about 12-15 minutes, or until they’re browned on the outside and a toothpick stuck into the center of the biscuit comes out clean.

Mushroom, Spinach, and Sausage Crustless Quiche (Gluten Free and Dairy Free)

Want to have brunch with me this morning?

Please? I’ve made a delicious Quiche.  It’s crustless, but I promise you won’t miss the crust.

Go on…pull up a chair…keep your pjs on…I made an extra pot of coffee.  I even have a fire in the fireplace. It’s cozy. No need to put pants on. You are my guest!

DSC_0261

DSC_0267

It’s biting cold outside, but in the kitchen it smells of coffee, bacon, and love. Quiche love.  Warm and creamy and hearty and filling Quiche that is baking just for you.  No no no…it was no trouble at all. Whipped it up quick and threw it in the oven. Here…need more coffee? Let’s talk.

DSC_0258

I’m sorry that things have been so tough lately.  Life is crazy and terrible sometimes. But just for this morning, let’s not think of those things. Let’s dream. Let’s remember the great times and the blessings that we have. Let’s remember our small victories.

Need some more coffee? Cream? Sugar?

I missed you.  I’m so glad that you came over.

Need another slice of bacon? Seriously…I made extra. Next time I’ll make us a mimosa.

We should do this more often.

DSC_0263

Mushroom, Spinach, and Sausage Crustless Quiche (Gluten Free and Dairy Free)

Serves 4 to 6

Ingredients

  • 1/2 teaspoon salt
  • 1/4 teaspoon fresh black pepper
  • 8 eggs
  • 1/3 cup coconut milk (low fat or full fat)
  • 2 Tablespoon butter, bacon grease, or olive oil
  • 10 oz baby bella mushrooms, sliced
  • 1/2 teaspoon dried thyme
  • 1 spicy italian chicken sausage, diced
  • 1 package of fresh spinach (or kale) (3 to 4 cups)

Instructions

  1. Preheat oven to 375 F. Butter a 9-inch pie pan or cake pan and set aside.
  2. In a medium bowl, whisk eggs, salt, pepper, and coconut milk. Set aside.
  3. In a heavy skillet, heat butter over medium heat. Add mushrooms and thyme in a single layer and sauté until browned. Don’t crowd them. Toss in sausage and brown (about 2 minutes) stirring often. Add spinach on top of cooked mushrooms and sausage. Stir and cook until spinach is slightly wilted, about 1 to 2 minutes. Remove skillet from heat. Add a pinch of salt and pepper to taste.
  4. Spoon and spread the mushroom, sausage, and spinach evenly into the prepared pie pan. Top this with the egg mixture.
  5. Bake for 35 to 40 minutes, or until slightly golden brown on edges, puffed, and set in the middle. Serve warm or at room temperature.  Leftovers are great reheated for breakfast or lunch.