Flourless Chocolate Cake with Candied Hazelnuts

Grain Free Chocolate Flourless Cake

We moved to Kansas City nearly five years ago. FIVE years. what?

When we moved here, we knew no one. It was just me, Kiley, and our furry son Guinness. My aunt and uncle live within an hour from KC, which helped the transition of moving away from my family in Oklahoma. Our first winter was long and cold. Ice crystals formed on the INSIDE of the windows in our drafty rent house. Kiley and I sat around in matching blue Snuggies hoping that our fingers would thaw out eventually.

Grain Free Chocolate Flourless Cake

Trying to make friends as you get older is a funny and actually hard thing. It’s like dating all over again. But we don’t have college as a buffer. I found myself trying to pick up strangers in the grocery store… “So…you like avocados too? Ya…. Want to be friends?”

I didn’t know how to make friends. I’m awkward. I’m an engineer. I suck at small talk. My cousin gave me pointers on making friends…I kid you not.

Grain Free Chocolate Flourless Cake

Grain Free Chocolate Flourless Cake

Join a club. Go to a class. Ya. Ok… I knew I could do it, right? I’m friendly. I like people. Right?

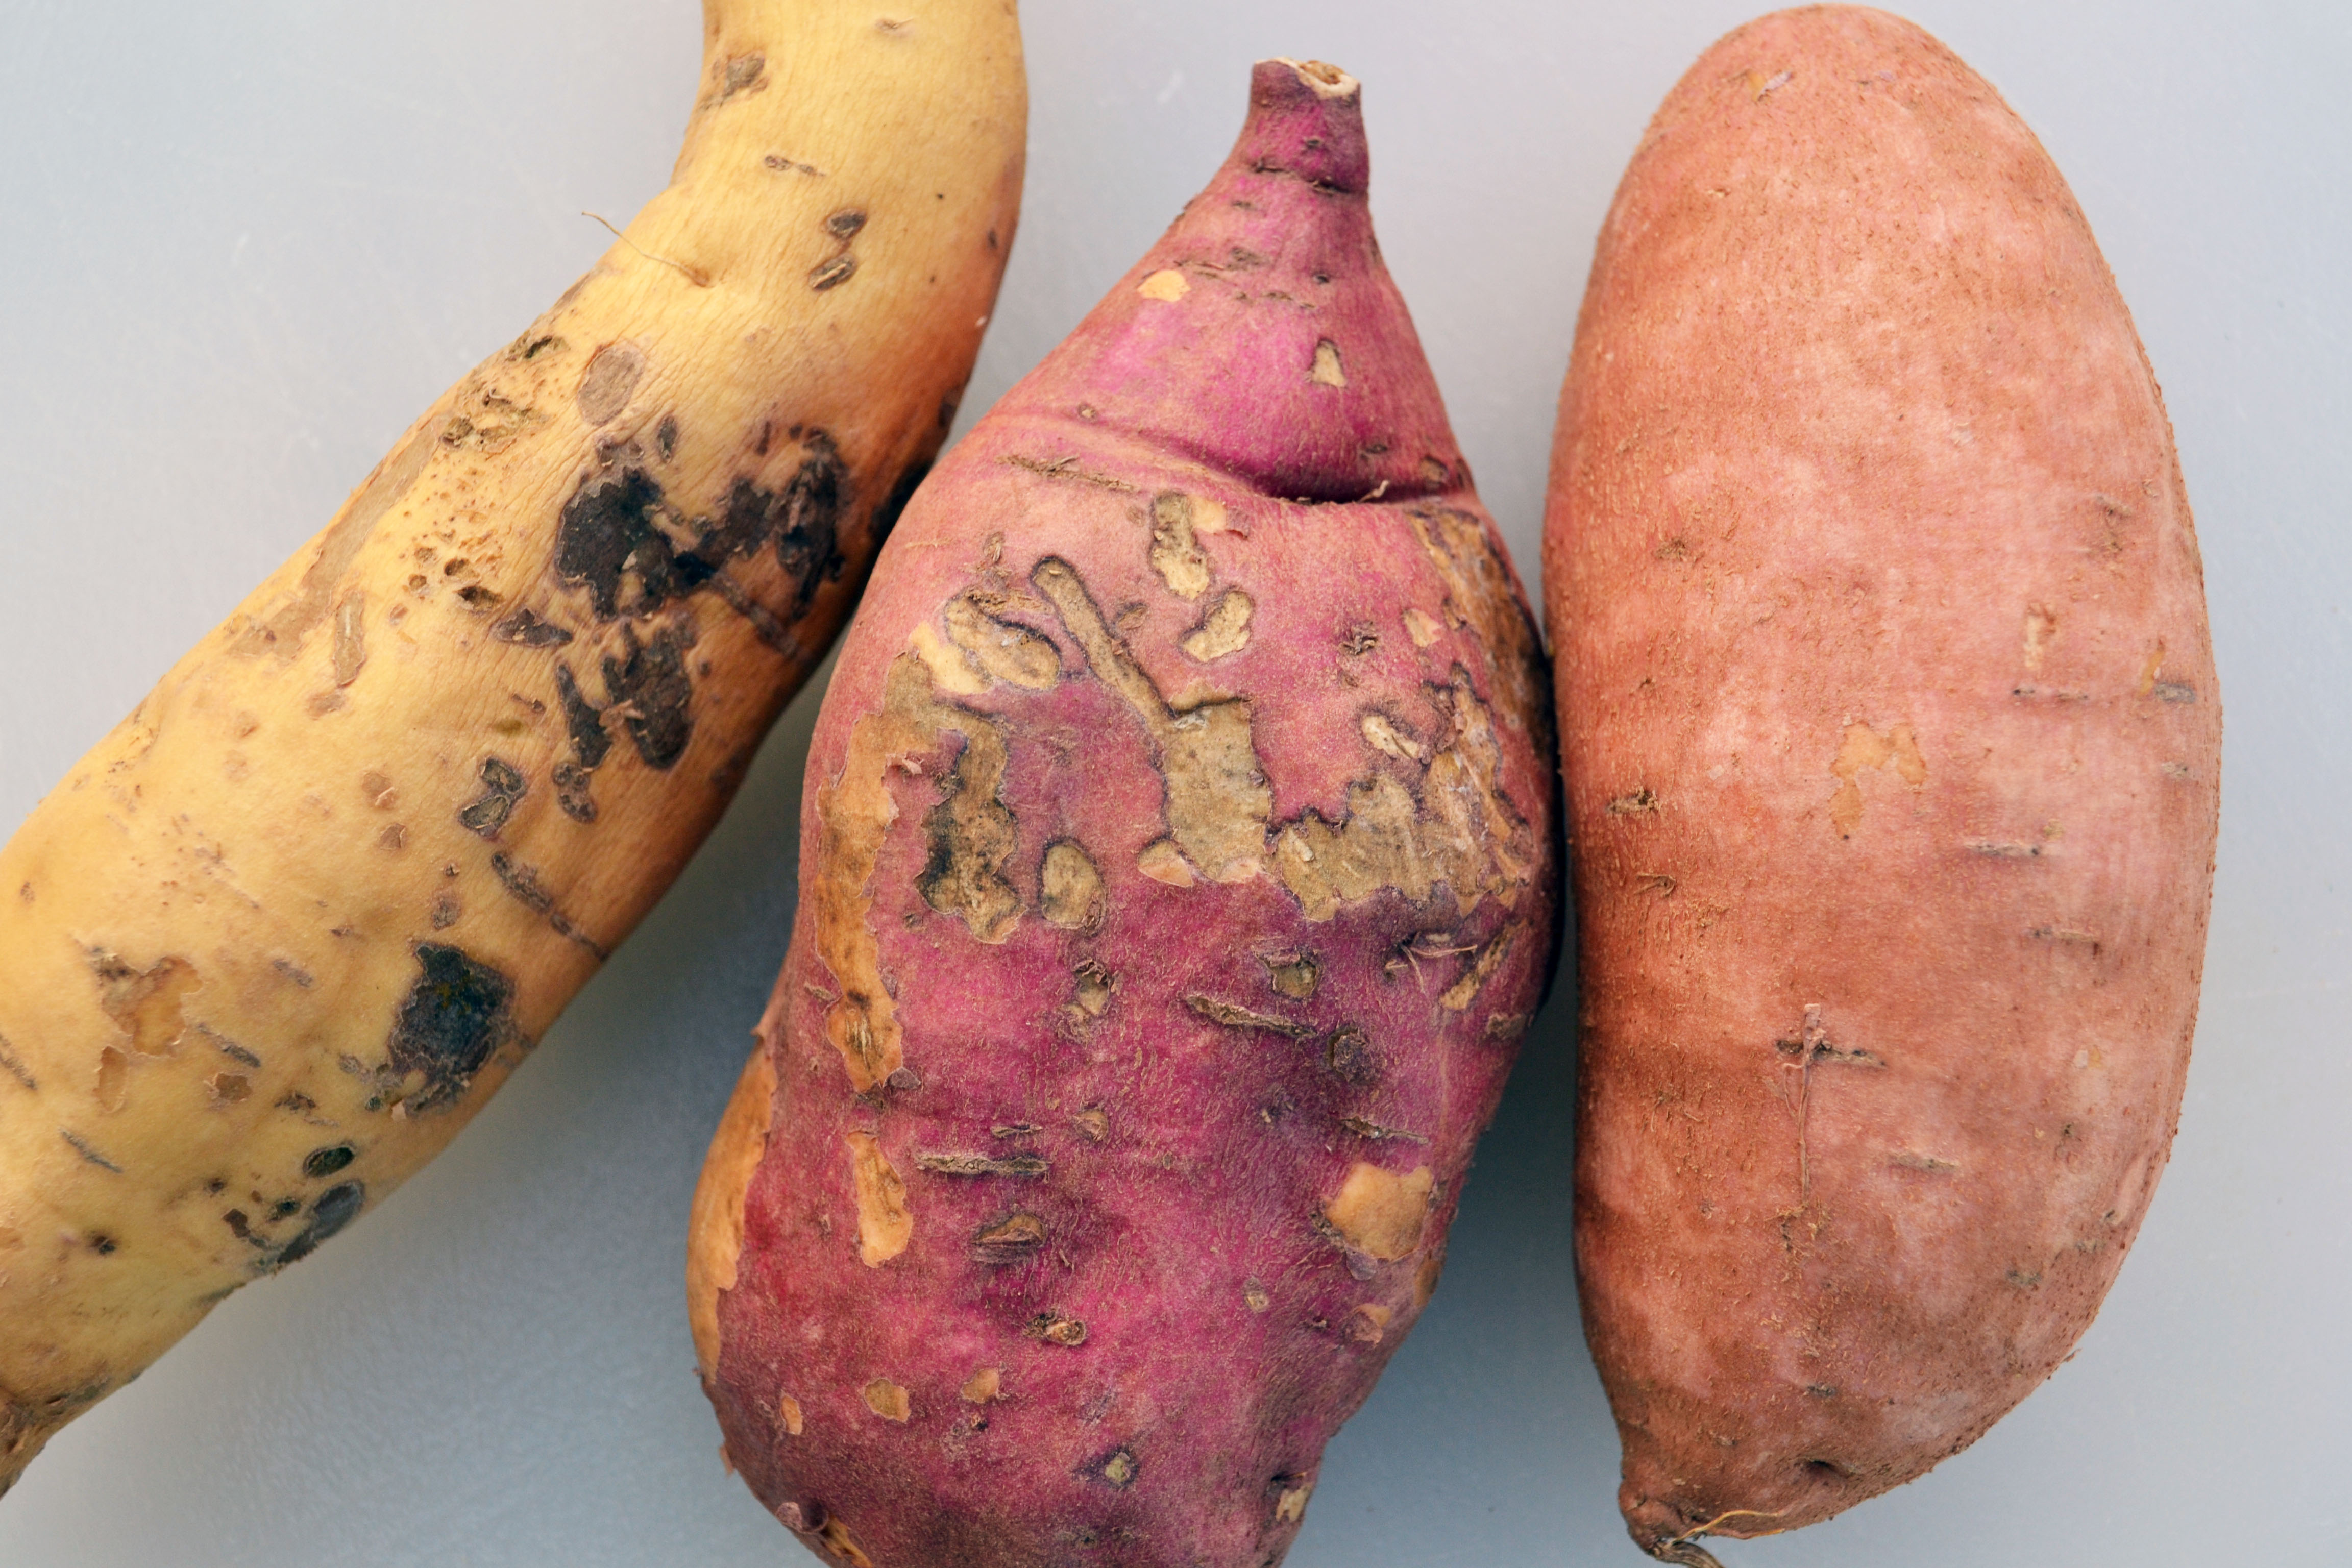
So I went to a gardening class, a cooking class, canning and preserving classes, knitting classes. Basically I met every 70 year old in KC. I planted sweet potatoes with all of them too. They are awesome (the sweet potatoes and my grannies), but they don’t make great “couple” friends. And they eat dinner at 4pm. I eat at 5pm people…who eats at 4pm and at a buffet. I do NOT do buffets. They have jello surprise. *Shudder*

Candied Hazelnuts

Grain Free Chocolate Flourless Cake Needless to say, after five years I feel incredibly lucky to have developed quite a family of friends. Friends that feel as though we known each other for ever. Friends that feel more like family ever day. Friends that all wear blue on the same day by accident to have a great joint birthday celebration for my girlfriend Tessa and my husband.

DSC_0384

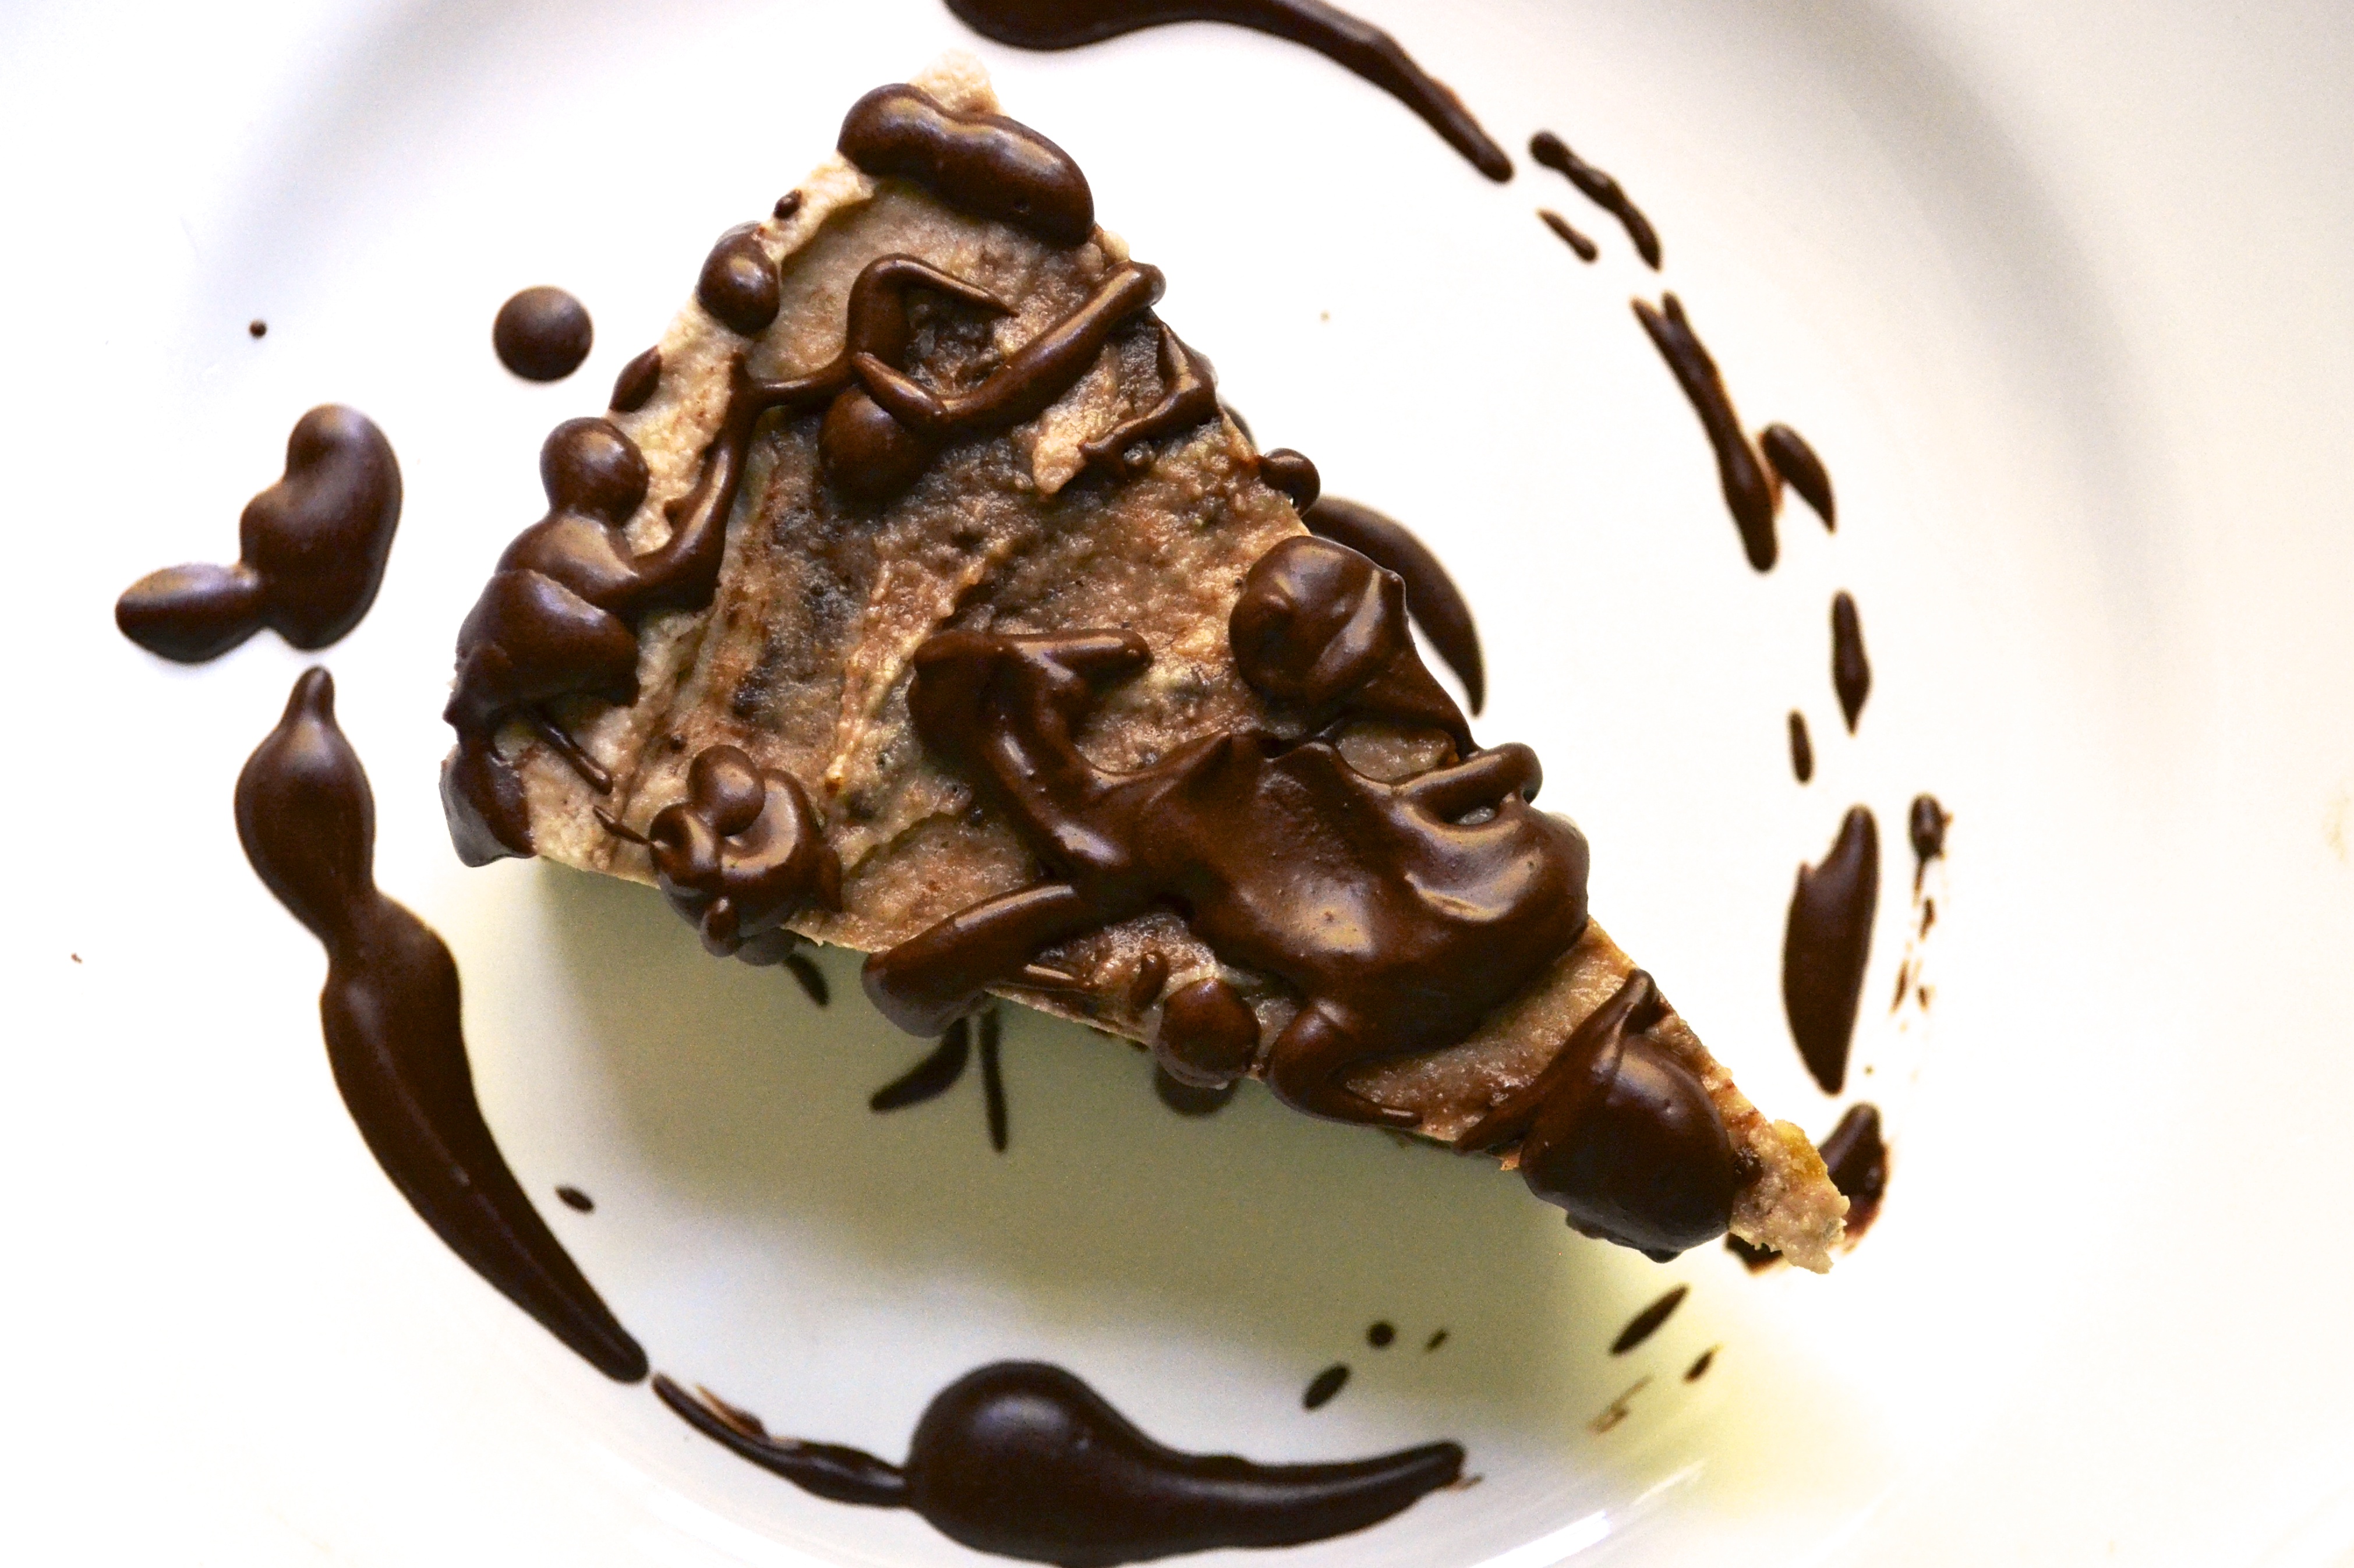
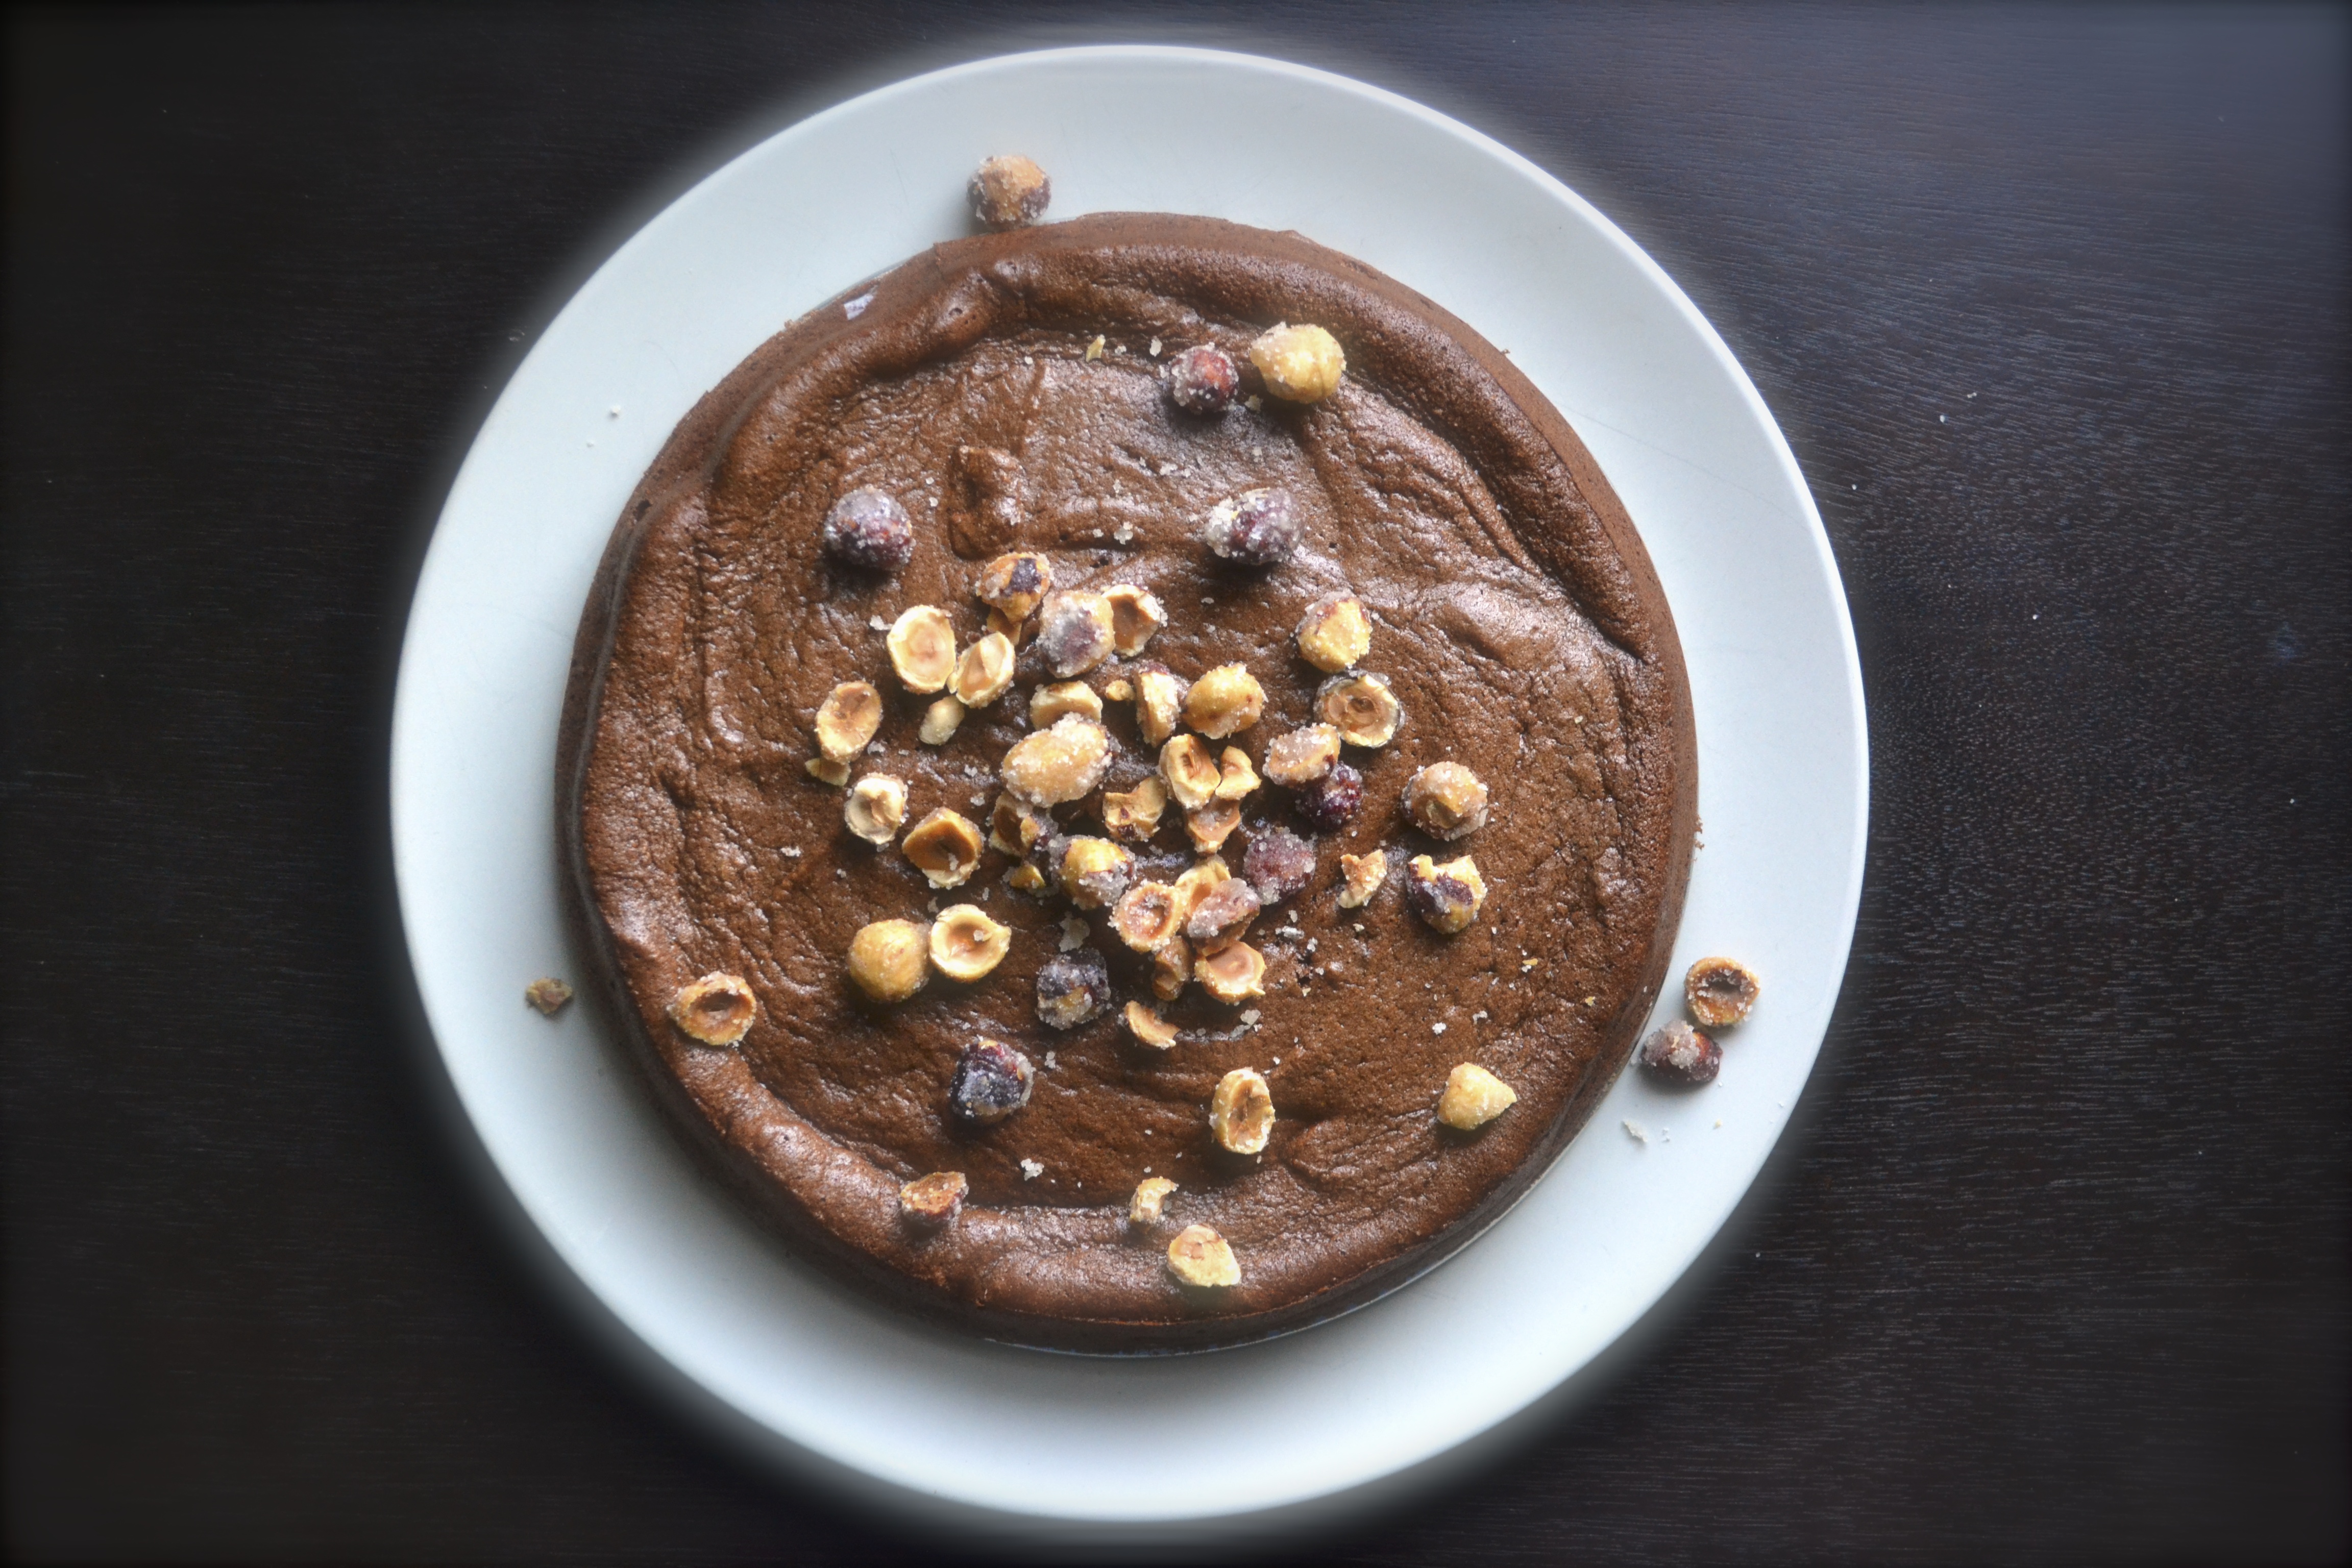
And just like my 70 year BFFs taught me, you always have to make birthdays special. My grandma taught me well and that’s why I always like to make a fabulous birthday cake for anyone on their special day! This Flourless Chocolate Cake was adapted from the ever inspiring and talented Deb Perelman of Smitten Kitchen.  I tweaked a few things, added a pinch of cayenne and also topped with addictive candied hazelnuts. This cake has a wow factor that will impress anyone. So consider whipping this up for anyone that is special in your life that you want to just say….

“I’m so thankful that you are alive. This world is a better place because of you…so let’s have CAKE.”

Grain Free Chocolate Flourless Cake

Flourless Chocolate Cake with Candied Hazelnuts

(adapted from the Smitten Kitchen Cookbook)

Cake Ingredients

  • 6 tablespoons unsalted grass-fed butter
  • 5 ounces semisweet or dark chocolate (I used 70% cocoa), diced into pieces
  • 4 large eggs, separated (at room temperature)
  • 1/3 cup maple syrup
  • 1/4 teaspoon gluten-free vanilla extract
  • 1/4 teaspoon flaky sea salt
  • 1/8 teaspoon ground cinnamon (optional)
  • 1/8 teaspoon ground cayenne (optional)
  • candied hazelnuts for topping (see recipe below)

Instructions

  1. Preheat oven to 350 F. Line an 8-inch round springform pan with a circle of parchment paper and generously butter the sides of the pan. Set aside.
  2. In a medium saucepan over medium-high heat, brown the butter by melting it and stirring frequently. Allow the butter to continue to cook and foam. Brown bits will begin to form at the bottom of the saucepan after about 3 minutes. Remove the saucepan with the browned butter from the heat and add the chocolate pieces. Stir until the chocolate is entirely melted. To cool the chocolate mixture to room temperature, transfer the melted chocolate mixture to a heat resistant bowl (glass is best) and nest it in a larger bowl of cold or ice water. Be careful to not allow the cooling water to get into the melted chocolate. Stir the cooling chocolate frequently so that it cools evenly.
  3. In a large bowl, beat the room temperature egg yolks, maple syrup, and vanilla together until the mixture becomes thick. Slowly mix in the chocolate mixture, cinnamon, and cayenne to the egg yolk mixture until it becomes extremely thick.
  4. In the bowl of an electric mixture, beat the four egg whites and salt until firm peaks form. Gently stir in one third of the egg white mixture into the chocolate mixture until evenly combined. Gently fold in the remaining egg white mixture and try to keep the batter as light as possible.
  5. Pour the batter into the prepared pan. Bake in the preheated oven in the middle rack for 20 to 25 minutes, or until the top has formed a thin domed crust. To test, stick a skewer in the middle of the cake and it will come out clean when done. Cool for five minutes and then invert the cake onto a serving plate. Sprinkle with crushed candied hazelnuts.

Candied Hazelnuts

(Note – can be made up to 1 day ahead of time and stored in an airtight container)

  • 1/3 cup raw hazelnuts
  • 1/2 cup palm sugar or evaporated cane sugar
  • 2 tablespoons water
  • pinch flaky sea salt

Instructions

  1. Preheat oven to 350 F. Spread the hazelnuts onto a baking sheet and toast them for 10 minutes, stirring every few minutes to allow for even toasting. Remove the hazelnuts from the oven and allow to cool. Remove the skins by rubbing the nuts in a dry dish towel or between the palms of your hands.
  2. Place parchment paper over a plate and have a set of small tongs ready to be used. In a small heavy saucepan, cook the sugar and water (do not stir) over medium heat until the sugar melts and turns a caramel color (about 3 to 5 minutes). Add the sea salt and hazelnuts. Stir and allow the caramel to coat the hazelnuts. Turn the heat off. Remove the hazelnuts one by one with the tongs and place them onto the parchment paper, making sure that they do not touch each other. Cool the nuts completely (or place in the fridge). Once cooled, the nuts will easily fall off of the parchment paper.
  3. To break into pieces, place the candied hazelnuts into a ziplock bag and seal. Use the bottom of a glass or a hammer, and smash them (don’t pulverize) into large chunks. Keep in an airtight container until ready to use.
Advertisement

Miso Harissa Roasted Butternut Squash and Beets with Kale

Miso-Harissa Roasted butternut squash and beets

I spent last week in the great city of Omaha for a new project at work. There is something amazing about being able to get out of the office and work with my hands, learn new things, meet new people, and wear my favorite boots…steal-toed boots. Ya, that’s right. Grrrrr!

Miso-Harissa Roasted butternut squash and beets

My biggest problem of being on the road is trying to eat well. Seriously, you put big plates of food, and booze, and fries in front of my face and I will inhale them! You’d think that I was a ranch hand or a growing teen boy from Nebraska. I tried to order grilled salmon and salads whenever I could, but…. oh fries…and ketchup…and breweries!

Miso-Harissa Roasted butternut squash and beets

Needless to say, my body and belly are thankful to be home, eating more wholesome foods and detoxing. To help with the wholesomeness, I roasted a butternut squash and beets with a miso-harissa dressing. Toss the roasted veggies with some fresh kale and extra dressing, and that, my friends, is a bowl-full of healing greens!

Miso-Harissa Roasted butternut squash and beets

Miso Harissa Roasted Butternut Squash and Beets with Kale (adapted from 101 Cookbooks)

Ingredients

  • 1 medium-sized butternut squash, peeled and cut into 1/2-inch cubes
  • 3 medium-sized beets, scrubbed, stems removed, and cut into 1/2-inch cubes
  • 3 Tablespoons extra virgin olive oil
  • 2 Tablespoons white miso paste
  • 1 Tablespoon harissa paste
  • 3 Tablespoons fresh lemon juice
  • 1 teaspoon ground cumin
  • 1 teaspoon honey
  • 1 bunch of kale, washed and destemmed

Instructions

  1. Preheat oven to 400 F. Grease a shallow roasting pan and set aside.
  2. Whisk together olive oil, miso paste, harissa paste, lemon juice, cumin, and honey in a small bowl. In a larger bowl, combine the cubed butternut squash and the cubed beets with 1/3 cup of the miso-harissa mixture. Once the cubed vegetables are well coated, spread evenly on the roasting pan in a single layer. Roast the vegetables for 30 to 40 minutes at 400 F, stirring halfway through. Remove the roasted vegetables from the oven.
  3. Chop the washed and destemmed kale into 1-inch pieces. Place the kale into a large bowl and stir the remaining miso-harissa mixture into the kale until it is well coated. Add the warm roasted vegetables to the kale.

Crockpot Curry Beef and Sweet Potato Stew

DSC_0313

Most of you know that my favorite kitchen invention is the Crockpot. I have raved about this domestication blessing before. Once temps jump a little lower, I pull this amazing beauty from beneath my counter and place her in her designated spot, front and center on the counter. BAM. Fall and winter scream for ROASTS and STEWS and CHILI! Nothing is better than coming home from work with dinner ready to go. Thank you my lil’ crockpot friend.

The crockpot is great for those tougher cuts of meat that need to be cooked low and slow. This Curried Beef and Sweet Potato Stew was inspired by a recipe for Crockpot Curried Short Ribs in my favorite new cookbook from Danielle Walker of Against All Grain. If you haven’t gotten her cookbook, go…now…run…fast. It’s awesome and filled with the most lovely food porn you will see, especially for grain free meals! Amazing.

DSC_0324

DSC_0319

The original recipe slow cooks short ribs in coconut milk and asian curry spices, which sounded divine. However, because I didn’t have all of the ingredients, the recipe quickly morphed into something new. The beauty of crockpots and imagination means that stew meat, sweet potatoes, coconut milk, and indian curry spices turns out to be one helluva meal! I have made curry stews with beef and sweet potatoes before, but this one was by far the creamiest because of my fabulous friend, the crockpot.

DSC_0321

The house was filled with warming spicy aroma all day. You can increase or decrease the heat based on the quantity of curry powder and optional cayenne powder. We are SPICY people over here, so things get amped up till our knee pits sweat. Because THAT is living, people. Oh, and we served this stew over cauliflower “rice”. Check out this post for preparation methods. Mmmmm.

Crockpot Curried Beef and Sweet Potato Stew (adapted from the Against All Grain Cookbook)

Ingredients

  • 1 to 2 pounds grass-fed beef stew meat (seasoned with salt and pepper)
  • 1 medium onion, chopped
  • 4 cloves garlic, minced
  • 1 14 oz can diced organic tomatoes (no salt added)
  • 1 medium sweet potato, cut into 1/4-inch cubes
  • 1/2 cup cilantro leaves
  • 1 6 oz can organic tomato paste
  • 1 13.5 oz can coconut milk (light or full fat)
  • 2 to 3 Tablespoons curry powder (such as madras)
  • 1/4 teaspoon cayenne powder (optional)
  • 1/2 teaspoon salt
  • 1/4 teaspoon ground pepper

Instructions

  1. Place the seasoned stew meat in the bottom of a slow cooker. Top with onion, garlic, tomatoes, and sweet potato. Stir in cilantro leaves and stems. In a medium bowl, whisk the coconut milk, tomato paste, curry powder, salt and ground pepper until well mixed. Pour the coconut mixture into the slow cooker over the meat and vegetables.
  2. Cook for at least 8 hours on low, stirring the mixture every once and awhile.
  3. Serve over cauliflower “rice” or regular rice and top with additional cilantro leaves.

Grain Free Pumpkin Apple Coffee Cake

Pumpkin and Apple Coffee Cake - Big Eats Tiny Kitchen

It’s fall and we all know what that means. It is comfy time.

It is sweater time!

It is jeans time!

It is WOOL SOCKS time!!!!!

It is pumpkin time!

But first, before I roll into pumpkin flavored everything….I have to tell you about my big accomplishment. This weekend I went on a fall cleaning and organizing mission. This is monumental, people. I peeled everything out of all of our closets and was ready for a massive PURGE. Usually when I do a “purge” I just sit around staring at old memorabilia and becoming even more attached to the T-shirts that I bought 15 years ago but haven’t worn in 10 years. But seriously, folks…how can you get rid of a shirt that says “Not everything is flat in Kansas“!!?!?! I know! Precious. My point exactly.

Man, you guys just get me.

So this weekend’s purge was different. I properly purged. (No, don’t worry I didn’t get rid of that awesome T-shirt.) But I DID manage to organize everything in our closets (a.k.a shove-crap-wherever-it-would-fit space) and get rid of:

  • Other not-so-cool shirts,
  • Expired medicine (goodbye Benedryl from 1990),
  • Stained things (note to self – QUIT buying white things…ketchup loves it too much),
  • Single socks that have permanently lost their partner (let’s have a moment of silence for all of the poor sock widows), and
  • A metric boat load of half-marathon race packets with sample bottles of weird things, etc.

As I stuffed and crammed these unwanted and unnecessary items into either goodwill sacks or the trash, I wondered why have I held on to this crap for so long? Holding onto stuff is an interesting thing. I put a big importance on odd things, but seriously not EVERYTHING has to be a gem, does it? At this rate I will need to get a separate storage unit just to store my “awe remember when…” items.

But now I feel fabulous and comfy. I’m wearing my comfy old T-shirt and a pair of wool socks that I lost. My closet is clean, stacked, organized, and comfy. Everything is just…comfy.

Comfy like the fall weather blowing around the leaves outside.

Comfy like old love letters from my husband that I found in a shoe box at the back of my closet.

Comfy like my favorite broken-in sweatshirt that I found crammed underneath a suitcase (okay, so I didn’t purge EVERYTHING…baby steps, people).

Comfy like nearly anything pumpkin flavored!

Pumpkin and Apple Coffee Cake - Big Eats Tiny Kitchen

We all get bitten by the pumpkin bug every year! I have held off for quite a bit, but now it is on like a pumpkin thong. Hrmmm….wait. Bad idea. A pumpkin thong would NOT be comfy. Scratch that…

Just make this pumpkin apple coffee cake instead. I promise that the scent of it will make you swoon. You will want to wrap up with a comfy blanket, have a warm cup of coffee, and grab a big square of this warm coffee cake.

This coffee cake recipe is adapted from my Pumpkin and Apple Almond Flour Muffins and the Peach Streusel Topped Coffee Cake recipe featured in the fabulous Against All Grain Cookbook. It is moist and light with warm spices to fill your belly.  I whipped this up for a football brunch watch party last weekend. My house smelled SO good while it baked and for days afterwards.  I definitely think I will make this again for the holidays (or tomorrow).

Pumpkin and Apple Coffee Cake - Big Eats Tiny Kitchen

Note – To make this recipe, I used Honeyville blanched almond flour. I prefer this brand because it makes baked goods lighter and flufflier than almond meal. I have not tried this recipe with other brands or with almond meal. If you try it with another brand or almond meal, please let me know how it turned out. This coffee cake takes nearly an hour to bake. If you need something that cooks in less time, try my delicious Pumpkin and Apple Almond Flour muffin recipe.

Pumpkin and Apple Coffee Cake - Big Eats Tiny Kitchen

Pumpkin Apple Coffee Cake (Grain Free, Gluten Free, Dairy Free, Paleo-Friendly)

Coffee Cake Ingredients

  • 2 cups blanched almond flour (I use Honeyville)
  • 2 Tablespoons coconut flour
  • 1 teaspoon baking soda
  • 1/4 teaspoon kosher salt
  • 1 Tablespoon ground cinnamon
  • 1/2 teaspoon ground nutmeg
  • 1/4 teaspoon ground ginger
  • 1/8 teaspoon ground cloves or allspice
  • 3 eggs (room temperature)
  • 1/3 cup maple syrup (or honey)
  • 3/4 cup canned pumpkin puree (not pumpkin pie mix)
  • 1/4 cup unsweetened applesauce
  • 2 Tablespoon coconut oil (or grass-fed butter), melted
  • 1 teaspoon vanilla extract
  • 2 medium apples (dice one and thinly slice the other)
  • Streusel topping (recipe below)

Instructions

  1. Preheat oven to 325 F. Grease a 9X9 inch square pan or 9-inch round springform cake pan with coconut oil. Set aside.
  2. In a medium bowl, combine dry ingredients (flours, salt, baking soda, and spices) with a whisk. Set aside.
  3. In the bowl of a stand mixer or food processor, mix the eggs and the maple syrup on medium speed until eggs become frothy (about 2 minutes). Add remaining wet ingredients (pumpkin, applesauce, oil, vanilla). Mix until all ingredients are combined. Stir dry ingredients into wet ingredients. Stir in diced apples (about 1 cup). Spread mixture into the prepared pan. Place thin apple sliced on top. Sprinkle streusel topping evenly over the top.
  4. Place pan on middle rack of the preheated oven. Cook at 325 F for 55 minutes, or until a toothpick inserted into the middle comes out clean.  Remove from oven and allow to cool for 5 to 10 minutes. Serve warm or at room temperature. Store leftovers in the refrigerator for up to 3 days.

Streusel Topping (adapted from Against All Grain Cookbook)

  • 1/3 cup pecans or walnuts
  • 1 Tablespoon coconut oil
  • 1 Tablespoon maple syrup
  • 1 teaspoon ground cinnamon
  • 1/8 teaspoon salt

Instructions

  1. Combine all of the streusel ingredients into the bowl of a small food processor. Pulse a few times until the nuts are chopped finely and the streusel comes together.
  2. Sprinkle ingredients onto the coffee cake or store in a sealed container in the refrigerator for 1 day.

Paleo Zucchini Brownies

I like surprises. Do you like surprises? Good. I have one for you.  Be ready to have your mind space blown.

Zucchini brownies.

DSC_0235

We are gettin’ craaaaazy today. Adding veggies to brownies. Ya, you heard me. I know stuffing a brownie with healthy zucchini might not be your idea of a great surprise, but I promise this brownie won’t disappoint you.

These are cakey-style brownies. So for you fudgey-style brownie lovers (like me) these are not those, buuuuut they are incredibly delicious. Plus, they are stuffed with wholesome nutritious zucchini, almond butter, maple syrup, and raw cacao powder! Ya, these are likely the healthiest brownies out there. They are really close to zucchini bread but with a double chocolate edge that comes from the cacao powder and diced dark chocolate bites. Mmmmmm. Can I get an AMEN?!?

DSC_0226

DSC_0239

If you don’t have almond butter, any nut butter would work. For the nonPaleo peeps and those not allergic to peanuts, these would be delish with peanut butter swapped in for the almond butter. But if your nut butter is not all natural (or has salt and added sweetener), be sure to eliminate the salt and reduce the sweetener in the below recipe to account for it.

Don’t worry. I won’t tell anyone that you ate these for breakfast.

DSC_0238

Paleo Zucchini Brownies (adapted from Fast Paleo)

Ingredients

  • 1 cup creamy unsalted and unsweetened almond butter (or any nut butter)
  • 1 egg
  • 1/3 cup honey or maple syrup
  • 1 teaspoon vanilla
  • 1 teaspoon baking soda
  • 1/8 teaspoon kosher salt
  • 2 Tablespoons cacao or cocoa powder
  • 1 1/2 cups shredded zucchini
  • 1/4 cup chopped dark chocolate or chocolate chips

Instructions

  1. Preheat oven to 350 F. Grease an 8 X 8 baking dish and set aside.
  2. Shred 1 to 2 zucchini with either a grater or a shredder attachment on a food processor. Set aside.
  3. In a medium bowl, combine almond butter, egg, maple syrup, and vanilla. Mix well. Stir in baking soda, salt, and cacao powder. After well mixed, stir in shredded zucchini and chopped dark chocolate.
  4. Pour into prepared 8X8 baking dish. Bake for 20 to 25 minutes in preheated 350 F oven. The brownies are done with the center is set. Remove from oven and allow to cool for 5 to 10 minutes.

Paleo Banana Ice Cream Cake

It’s already the middle of July and this weekend was the first time that I put a bathing suit on.  Honestly, between you and me…this doesn’t have to happen again.

DSC_0242

Why do bathing suits have to be so UNFLATTERING! Ugh.

I should just wear a T-shirt or a trash bag.

But Oh well….I guess I didn’t get too upset, because after swimming all day, all I wanted was ICE CREAM.  So I promptly made this amazing dairy free and grain free banana ice cream cake to go along with ribs that we smoked.  Maybe this is why my bathing suit is unflattering?  Ice cream cake + ribs?

Naaaaah.

DSC_0252

DSC_0219

DSC_0222

This cake is amazing. Creamy. Dreamy. Guiltless. It is made with cashews, bananas, dates, hemp seeds, raw cacao powder! Ya…shhhh….it’s good for you.

So I will just serve myself up another slice of cake…banana ice cream cake, that is. And I will eat it in my ugly, weird fitting, old bathing suit. And be happy.

Very happy.

DSC_0255

Paleo Banana Ice Cream Cake (adapted from This Rawsome Vegan Life)

Crust Ingredients

  • 1/2 C raw pecans
  • 1/4 C hemp seeds
  • 2 Tbsp cacao powder
  • 1/4 tsp salt
  • 1 C pitted dates

Caramel Ingredients

  • 1 C pitted dates, soaked in hot water for 10 minutes
  • 1/4 C water
  • 1/8 tsp salt

Chocolate Ingredients

  • 1/4 C cacao powder
  • 1/4 C water
  • 2 Tbsp coconut oil
  • 2 Tbsp honey or maple syrup or agave nectar

Filling Ingredients

  • 2 C frozen bananas (3 to 4)
  • 2 C raw cashews, soaked for 3 to 4 hours (or overnight)
  • 1/2 C water or nondairy milk
  • 1/3 C maple syrup or honey
  • 1/3 C coconut oil
  • 1/8 tsp salt
  • 1 tsp vanilla

Instructions

  1. Crust – In a food processor, place nuts, hemp seeds, raw cacao powder (or cocoa powder), and salt.  Pulse until the ingredients combine to make a flour like consistency. Add dates and process for a few minutes until it forms into a paste.  The mixture should hold together when you pinch a small amount between your fingers.  In a springform pan, place wax paper or syran wrap on the bottom. Press crust evenly into the bottom of the springform pan only slightly coming up the sides. Set in the freezer while preparing the filling.
  2. Caramel Sauce – Clean out food processor. Place soaked dates and 1/4 cup of water in the bowl of the food processor. Process for several minutes until a caramel-like substance is formed.  Add additional liquid as necessary. Add salt. Spoon into a separate bowl. Clean food processor bowl for next step.
  3. Banana Ice Cream Filling – Microwave the coconut oil in a small Pyrex dish for 30 seconds until mostly melted. Place all of the filling ingredients (except the caramel sauce) into the bowl of the food processor and blend on high-speed for several minutes until very smooth.
  4. Chocolate Sauce – In a separate bowl, combine cacao powder and 1 tablespoon of warm water. Stir carefully until a fudgey mixture is formed. Add warm water 1 tablespoon at a time until a drizzleable (is this a word???) fudge sauce is formed.  Stir in melted coconut oil at a tablespoon at a time. Keep mixture warm or it will harden. Pop in microwave if necessary.
  5. Assembly – Remove the crust from the freezer. Pour about two-thirds of the cashew mixture onto the crust and smooth evenly with a rubber spatula. Swirl in half of caramel mixture and alternate with 1/3 of chocolate mixture using a butter knife. Top with remaining filling. And swirl in remaining caramel sauce and another 1/3 of chocolate sauce. Drizzle any remaining chocolate sauce on top. Place in freezer for about 2 hours or until solid.
  6. Serving – To serve, remove from freezer about 30 minutes before serving.  Heat a smooth and sharp knife under hot water and cut the pie into 8 slices. Serve with any additional chocolate sauce. Store any remaining pie in the freezer.

Almond Butter Banana Muffins

I am a bit of a hoarder.  I’m definitely a food hoarder, but also a hoarder of things. My husband thinks it is junk.  Which it isn’t! But seriously, I keep things in boxes that I have never looked at for the past four years that we have lived here.  I find myself holding on to things because… “don’t you dare get rid of it because I am saving that chair just in case some day I want to paint it red and have a tea party”. Yes…that really came out of my mouth.

DSC_0001

He recently decided to have a garage sale…or an “Alissa’s Things Sale” as I refer to it. He doesn’t hold on to anything. When we got married, he moved into my house with a single box. I had a U-Haul trailer that could have fit a plane. So needless to say, purging is a hard thing for me. I remember every gift someone gave to me. I can’t seem to part with it even if that person totally does not remember giving it to me. They probably just picked it up randomly and thought “crap, it’s her birthday…uhm…ya, here’s a chicken tea pot…she eats chicken…she drinks tea…CHICKEN TEA POT!”.  And here I am 15 years later with the ugliest tea pot and refusing to get rid of it. Until one day I wake up and the love of my life is selling all of my precious belongings (crap) and other people are walking away with my chicken tea pot!  *sob*

DSC_0003

DSC_0015

It was a similar feeling for me when I made the switch a year ago to give up gluten. Making the switch to being gluten free can be tough sometimes. It’s hard to not feel like an outsider when everyone is laughing and enjoying cake and big plates of lasagna. Family gatherings and cookouts and office parties offer a plethora of pasta salads and cupcakes and brownies and bread and crackers.  I would end up being the person in the corner snacking on carrots and a bag of nuts that I had stashed away in my purse like a squirrel.  BECAUSE I AM A HOARDER.

One day I decided to PURGE! I threw away everything that contained wheat or even traces of wheat.  It felt awesome.  I began researching and arming myself with easy recipes to bring to gatherings. So now I always offer to bring something that I know that I can eat and that will blow the socks off of others that have no idea how great gluten free food can be.

DSC_0010

This recipe uses nut butter in place of flour! No flour, no oil, no butter.  Basically it is just almond butter and bananas and honey and eggs. Those purged cabinets probably have these simple ingredients in them.  These muffins are rediculously good and rediculously easy!  I have made them with almond butter and also with peanut butter. Both are fabulous.  You can also add cocoa powder to the batter for chocolate cupcakes!

Almond Butter Banana Muffins

Ingredients

  • 1 cup almond butter* (see note below)
  • 2 ripe bananas, mashed (about 1 cup)
  • 2 eggs, lightly beaten
  • 1 teaspoon baking soda
  • 1 teaspoon vanilla
  • 1/2 teaspoon sea salt
  • 1/4 cup honey
  • 1/2 teaspoon cinnamon (optional)
  • 2 tablespoons cocoa powder (optional)

Instructions

  1. Preheat oven to 350 F. Prepare a 12 cup muffin tin with muffin liners. Set aside.
  2. In a medium bowl, combine the banana, eggs, and almond butter until well mixed. Add the remaining ingredients except the cocoa powder. With half of the batter, fill 6 muffin liners 3/4 full. I use a 1/4 cup to measure for each. With the remaining muffin batter, add the cocoa powder. Fill the remaining 6 muffin cups to 3/4 full with the chocolate batter.
  3. Bake for 15 minutes at 350F. Muffins will be firm a slightly golden, but fluffy. Allow to cool for 10 minutes then remove from the muffin pan to a wire rack.

*Notes

  1. I have also made these with peanut butter and they were great. I assume other nut butters would work too. If you have a nut allergy, sunbutter (sunflower seed butter) would be a good substitute.
  2. I recommend all natural and unsweetened nut butters. However, if you aren’t using all natural nut butters (that is, if they have added sweeteners) then lower the overall amount of added honey in the recipe.
  3. These are also delicious as cupcakes!

Beef Curry with Sweet Potatoes and Cauliflower

There are several people who have had a huge hand in transforming the way I cook and approach food. Michael Pollan has definitely had a hefty part in it.  That is why I was so excited to finally hear him speak this weekend about his new book, Cooked.  He is one of the leading voices of the local food movement, eating “real” food, and getting back into the kitchen and cooking with your family. I love it.

DSC_0032

Before we left Oklahoma and moved to Kansas City, I thought I ate rather healthy. But I was still consuming a lot of processed food.  I think a lot of people think this way, even when they still eat a lot of processed foods because the box saaaaays it’s healthy. Right? and why would a box or advertising lie to me? right? bonjour? But despite cooking “healthy”, I was getting sicker and sicker every day, literally.  Everything I ate seemed to put my stomach into knots or stabbing pain or worse. I began an elimination diet. I came up with a new theory every day. At first I thought it was fatty meat…no meat! Then it was beans.. no beans! then it was dairy…. so I became vegan…. and by the end, I seriously was eating only oatmeal and sweet potatoes for months….MONTHS. 

DSC_0027

And then I read Michael Pollan’s In Defense of Food. At the same time, my cousin Sarah gave me an amazing book by Barbara Kingsolver, Animal Vegetable Miracle. Reading these books were like discovering a deodorant that finally works, or finding the perfect pair of jeans, or realizing that you left ten bucks in your coat pocket last winter!  If you are looking for a summer read, I recommend these books. Life…changed.

I immediately eliminated all processed foods. I was on a hunt for local sources of meat and produce.  Everything changed…for the better. My health improved. My relationship with food was so much better. I discovered vegetables I had never heard of…what the crap is celeriac???? I grew a garden (helloooo rhubarb), learned to can, make pickles, and preserve food anyway possible. I basically got in touch with my inner grandma. I love it.  My inner grandma loves it. My tummy loves it.

DSC_0015Sweet_potatoes

Fresh produce doesn’t always require a lot of spices because their natural flavor is enough. However, during this odd time between winter and spring, fresh produce includes greens, or peas, or tubers, or something that was canned from last year’s garden.  Don’t be afraid by the long list of ingredients in this curry recipe. I promise this meal comes together rather quickly and yields an amazingly fresh and flavorful meal.  Serve with rice or, for a grain free option, make ‘riced’ cauliflower (recipe below).

DSC_0022

Beef Curry with Sweet Potatoes and Cauliflower (adapted from Food & Wine, January 2012)

Serves 4 to 6

Ingredients

  • 1 Tablespoon coconut oil
  • 1 lb grass-fed sirloin steak, cut into 1-inch pieces
  • 1 large or 2 medium onions, about 1 cup diced
  • 3 medium cloves garlic, minced
  • 2 tablespoons madras curry powder
  • 2 teaspoons turmeric
  • 1 teaspoon ground ginger
  • 1/4 teaspoon cayenne
  • 1 teaspoon salt
  • 1 14 0z can diced tomatoes with juice
  • 1 14 oz can unsweetened coconut milk (light okay)
  • 2 tablespoons apple cider vinegar
  • 1 cup water or broth
  • 1 medium sweet potato, 1-inch dice
  • 1 head of cauliflower, chopped into 1/2-inch pieces*
  • 1 1/2 cup frozen peas
  • cilantro (optional)

Instructions

  1. Heat coconut oil in dutch oven over medium-high heat.  Add diced sirloin steak and brown the pieces on all sides, about 5 minutes. 
  2. Add onion, curry powder, turmeric, ginger, and salt and stir frequently until onion is softened (about 5 minutes). Add garlic and stir constantly and cook for an additional minute.
  3. Add canned tomatoes, coconut milk, apple cider vinegar, water, diced sweet potatoes, and half of the diced cauliflower. Bring to a boil. Reduce heat to moderate heat and continue cooking covered until potato and cauliflower are tender (about 15 minutes).
  4. Turn heat to low. Mash some of the potatoes with the back of a spoon.
  5. Stir in frozen peas. Turn heat off and place lid on dutch oven, allowing peas to cook through for a few minutes. Add additional salt, pepper, and cayenne to taste.
  6. Serve in bowls with chopped cilantro and riced cauliflower (or regular rice). Directions for riced cauliflower are provided below.

*Riced Cauliflower – Place the other half of the diced cauliflower into the bowl of the food processor. Pulse for a few seconds at a time until you get rice-sized pieces. Do not over process or it will become puree cauliflower.  Place in a microwaved-safe dish with a lid slightly ajar and microwave for 3 minutes. Stir.

Roasted Salsa Verde (Tomatillo Sauce)

Winter is still trying to hold strong. But despite the lingering cold and the random flurries of snow that we had a few days ago, I am ready for margaritas, lime, tacos, and salsa verde!

DSC_0007

DSC_0013

Salsa verde is a simple tangy green sauce made from tomatillos. It is amazing drizzled on nearly anything. Growing up in Oklahoma, I was blessed with access to great mexican food.  It became my staple for preparing easy dinners.  Tacos, enchiladas, carne asada, tostadas…but then you add salsa verde and magic happens. Whoa!

DSC_0014

Just wanted to share this recipe with you! Now if you will excuse me…I have a margarita to attend to. Mmmm.

Roasted Salsa Verde (Tomatillo Sauce)

Ingredients

  • 1.5 lbs tomatillos
  • 1 medium onion, cut into eighths
  • 3 garlic cloves
  • 1 small jalapeño
  • 1/2 cup cilantro
  • 1/2 lime, juiced
  • 1/2 teaspoon salt
  • 1/2 to 1 cup of water (depending on desired consistency)

Instructions

  1. Preaheat oven to 400 F. 
  2. Remove husks from tomatillos. Place tomatillos, onion, jalapeño, and garlic on roasting pan. Roast for 15 to 20 minutes. Remove from oven and allow to cool slightly.
  3. Add all ingredients to bowl of food processor. Process until smooth. Serve with chips, on roasted chicken, or as a sauce for enchiladas.

Grain Free Lemon Tart

Are you ready?  Like REEEEEALLY ready? Because this isn’t your standard lemon tart. It is a TART tart.  A creamy tart with pucker power but tempered with sweet agave nectar. It is the princess of tarts that will make you dream of fresh flowers, warm picnics, and lemon trees even when it is still stupid cold outside.

DSC_0407

I have been slightly obsessed with lemon tarts lately.  I made piss poor lemon bars last weekend and was out for vengeance.  I didn’t like the filling and was dead set on making a creamier version that could be placed into a tart crust.  So the hunt began for a lemon tart recipe that satisfied my obsession.  I studied several recipes and finally settled on an amalgamation of Julia Child’s Tarte Au Citron, Cookie and Kate’s Honey-Sweetened Citrus Curd, and Dave Lebovitz’s Lime Meringue Tart.

In the end, the curd recipe was adapted from Kathryn’s recipe.  I swapped agave nectar for the honey because I didn’t have honey on hand.  Kathryn’s curd was a bit sweeter than this lemon curd, which could be due to the sweetener swap. If you prefer a sweeter lemon curd, you might stick with honey which will provide that pronounced honey flavor or you could increase the quantity from 1/3 cup to 1/2 cup.  But I liked using the neutral-flavored agave nectar which allowed the tartness of the lemons to be the leading lady of the lemon curd. I also love tart things over sweet. Give me Sour Patch Kids any day of the week over Smarties. EEW.

DSC_0421

DSC_0431

When making the curd, be careful when using the direct heat method to thicken the curd. Use nonreactive saucepan and either a wooden spoon or metal wire whisk. Plastic will make your curd curdle like curdly curdy curd. Hehe.  Just keep your heat on low and STIR constantly with a wire whisk. It’ll be fine.  However, if you get a little bit of cooked egg or lemon pulp in the curd, you can always strain the curd before placing it into the tart crust.  This lemon curd can also be made in advance and refrigerated for several weeks. It’s SO dreamy stirred into greek yogurt.

The almond flour-based tart crust pairs incredibly well with the lemon curd filling.  This grain free tart crust is amazing and can be used as a basic crust for a multitude of fillings.  I adapted the recipe from the Gluten-Free Almond Flour Cookbook by Elana Amsterdam.  I used Dave Lebovitz’s method for making a basic french tart crust where he places butter, oil, water, sugar, and salt in a bowl and melts it in a hot oven before adding the flour. The butter begins to brown, giving it a wonderful complex and nutty flavor. So simple!

DSC_0422

I also should note that this is a prebaked tart crust. Because almond flour tends to burn easily, keep the heat slightly lower when prebaking and allow the shell to slightly brown.  After filling it with the prepared lemon curd, bake the filled tart until the filling has set (about 10 minutes).  If the edges of the tart begin to brown too quickly, place aluminum foil around the crust edge to protect it from burning.

You can top the lemon tart with meringue (like me) or fresh seasonal fruit. Once my blueberry and raspberry bushes begin to fruit, you can bet your butt that I will be topping these tarts with a gaggle of berries. But in the mean time, I piped a small amount of meringue around the edge of the tart using 2 reserved egg whites. I made a metric poop-ton (actual measurement) of meringue and was sad to see it go to waste.  I nearly made a second and third tart JUST to give that beautiful meringue a home.

DSC_0437

Grain Free Lemon Tart (adapted from recipes from Cookie and Kate and Dave Lebovitz)

Serves 8

Tart Crust Ingredients

  • 3 Tablespoons unsalted grass-fed butter, cut into pieces
  • 1 Tablespoon coconut oil
  • 1 Tablespoon water
  • 2 Tablespoons agave nectar or honey
  • 1/2 teaspoon sea salt
  • 1 1/2 cups almond flour
  • 1/4 teaspoon baking soda
  • 1/2 teaspoon vanilla extract

Lemon Curd Filling Ingredients

  • 4 tablespoons unsalted butter, cut into small pieces
  • 3 large eggs
  • 3 egg yolks (reserve whites for meringue)
  • 1/3 cup agave nectar (or honey)
  • 2/3 cup fresh lemon juice (about 3 to 4 large lemons)
  • 1 Tablespoon lemon zest
  • pinch of salt

Meringue Ingredients

  • 2 reserved egg whites 
  • pinch of salt
  • 3 Tablespoons agave nectar or honey

Tart Crust Instructions:

  1. Preheat oven to 350F. 
  2. Place butter, coconut oil, water, agave nectar, and salt in a Pyrex bowl.
  3. Place bowl in preheated oven for 10 to 15 minutes.  Allow the butter and coconut oil to begin bubbling. The butter will begin to brown on the edges (a.k.a. browned butter).
  4. Remove the Pyrex bowl from the oven.  Be careful because the bowl will be hot.  Add almond flour, vanilla extract, and baking soda and stir quickly until a ball forms.
  5. Transfer dough ball to a 9-inch tart mold with a removable bottom. Use your fingers to spread dough into the base and up the edges of the tart pan. Prick the bottom all over with the tines of a fork.
  6. Partially bake for 7 to 10 minutes at 350 F.  You don’t want to fully bake or it will get too brown when later baking the filled tart.
  7. Remove the partially baked tart shell from the oven. Set aside and allow to fully cool before filling.

Lemon Curd Instructions:

  1. In a saucepan over low heat, heat butter, lemon juice, zest, and salt until butter is melted, but not boiling.
  2. In a medium bowl, whisk eggs, egg yolks, and agave nectar for 1 to 2 minutes until combined and slightly frothy.
  3. Temper the egg mixture by adding a bit of the heated butter-lemon juice mixture to the eggs and whisking constantly.  This will warm the egg mixture without cooking your eggs.  After the eggs are slightly warmed and tempered, add them slowly to the warm butter-lemon juice mixture, whisking constantly.
  4. Increase the heat and cook over medium-low heat, whisking constantly until the lemon curd mixture begins to thickens with a consistency of jelly. DO NOT LET IT BOIL!!! It is done the whisk is lifted from the curd and the mixture holds its shape when it falls back into the saucepan from the whisk (see picture below).
  5. Remove the curd from heat. Place the prebaked tart shell onto a rimmed baking tray.  (Be careful with the tart shell and the removable bottom!!! I have ruined a few tart crusts by accidentally pushing through the mold.) Scrape the filling into the prebaked tart shell.
  6. Bake at 350 F for 10 minutes. Remove from the oven.  You can either top with marshmallowy meringue (recipe below) or fresh seasonal fruit. Allow to cool completely before slicing.

DSC_0412

DSC_0416

Marshmallowy Meringue (makes 3 cups):

  1. Heat 3 tablespoons of agave nectar in a microwave safe dish for 30 seconds (watch out because this might boil over).
  2. Add 2 egg whites and a pinch of salt to the bowl of a mixer. Turn on high and whip with whisk attachment until soft peaks form. Gradually drizzle in the heated agave nectar and a few drops of vanilla. The meringue will become shiny and slightly stiff.
  3. Scrape the meringue either into a pastry bag fitted with a fancy tip or (like me) scoop it into a Ziploc bag and cut the end off of the corner. Pipe the meringue in a ring around the tart. Or you can also spread the meringue with a spatula around the tart. (You will have meringue left over which either can be used for a second tart or stored in a mason jar in the refrigerator for 24 hours).
  4. Turn on the broiler in the oven. Place the tart under the broiler, watching VERY carefully because it will brown quickly! After the top begins to brown and darken, remove the tart from the oven and cool completely before slicing.