Red Wine and Balsamic-Braised Pot Roast

It is no secret that I love to cook.  My main reason for cooking is that I love to eat feed people.

But the thing is that I’m a cheap cook.  I typically like to scavenge my cabinets for what we already have in order to come up with a meal.  Don’t get me wrong, I keep my pantry well stocked so that I have plenty of options. However, part of the fun is coming up with new things to cook based on what I have on hand. So when I read recipes with ingredients I do not have or expensive cuts of meat or out of season ingredients, I typically don’t make it.

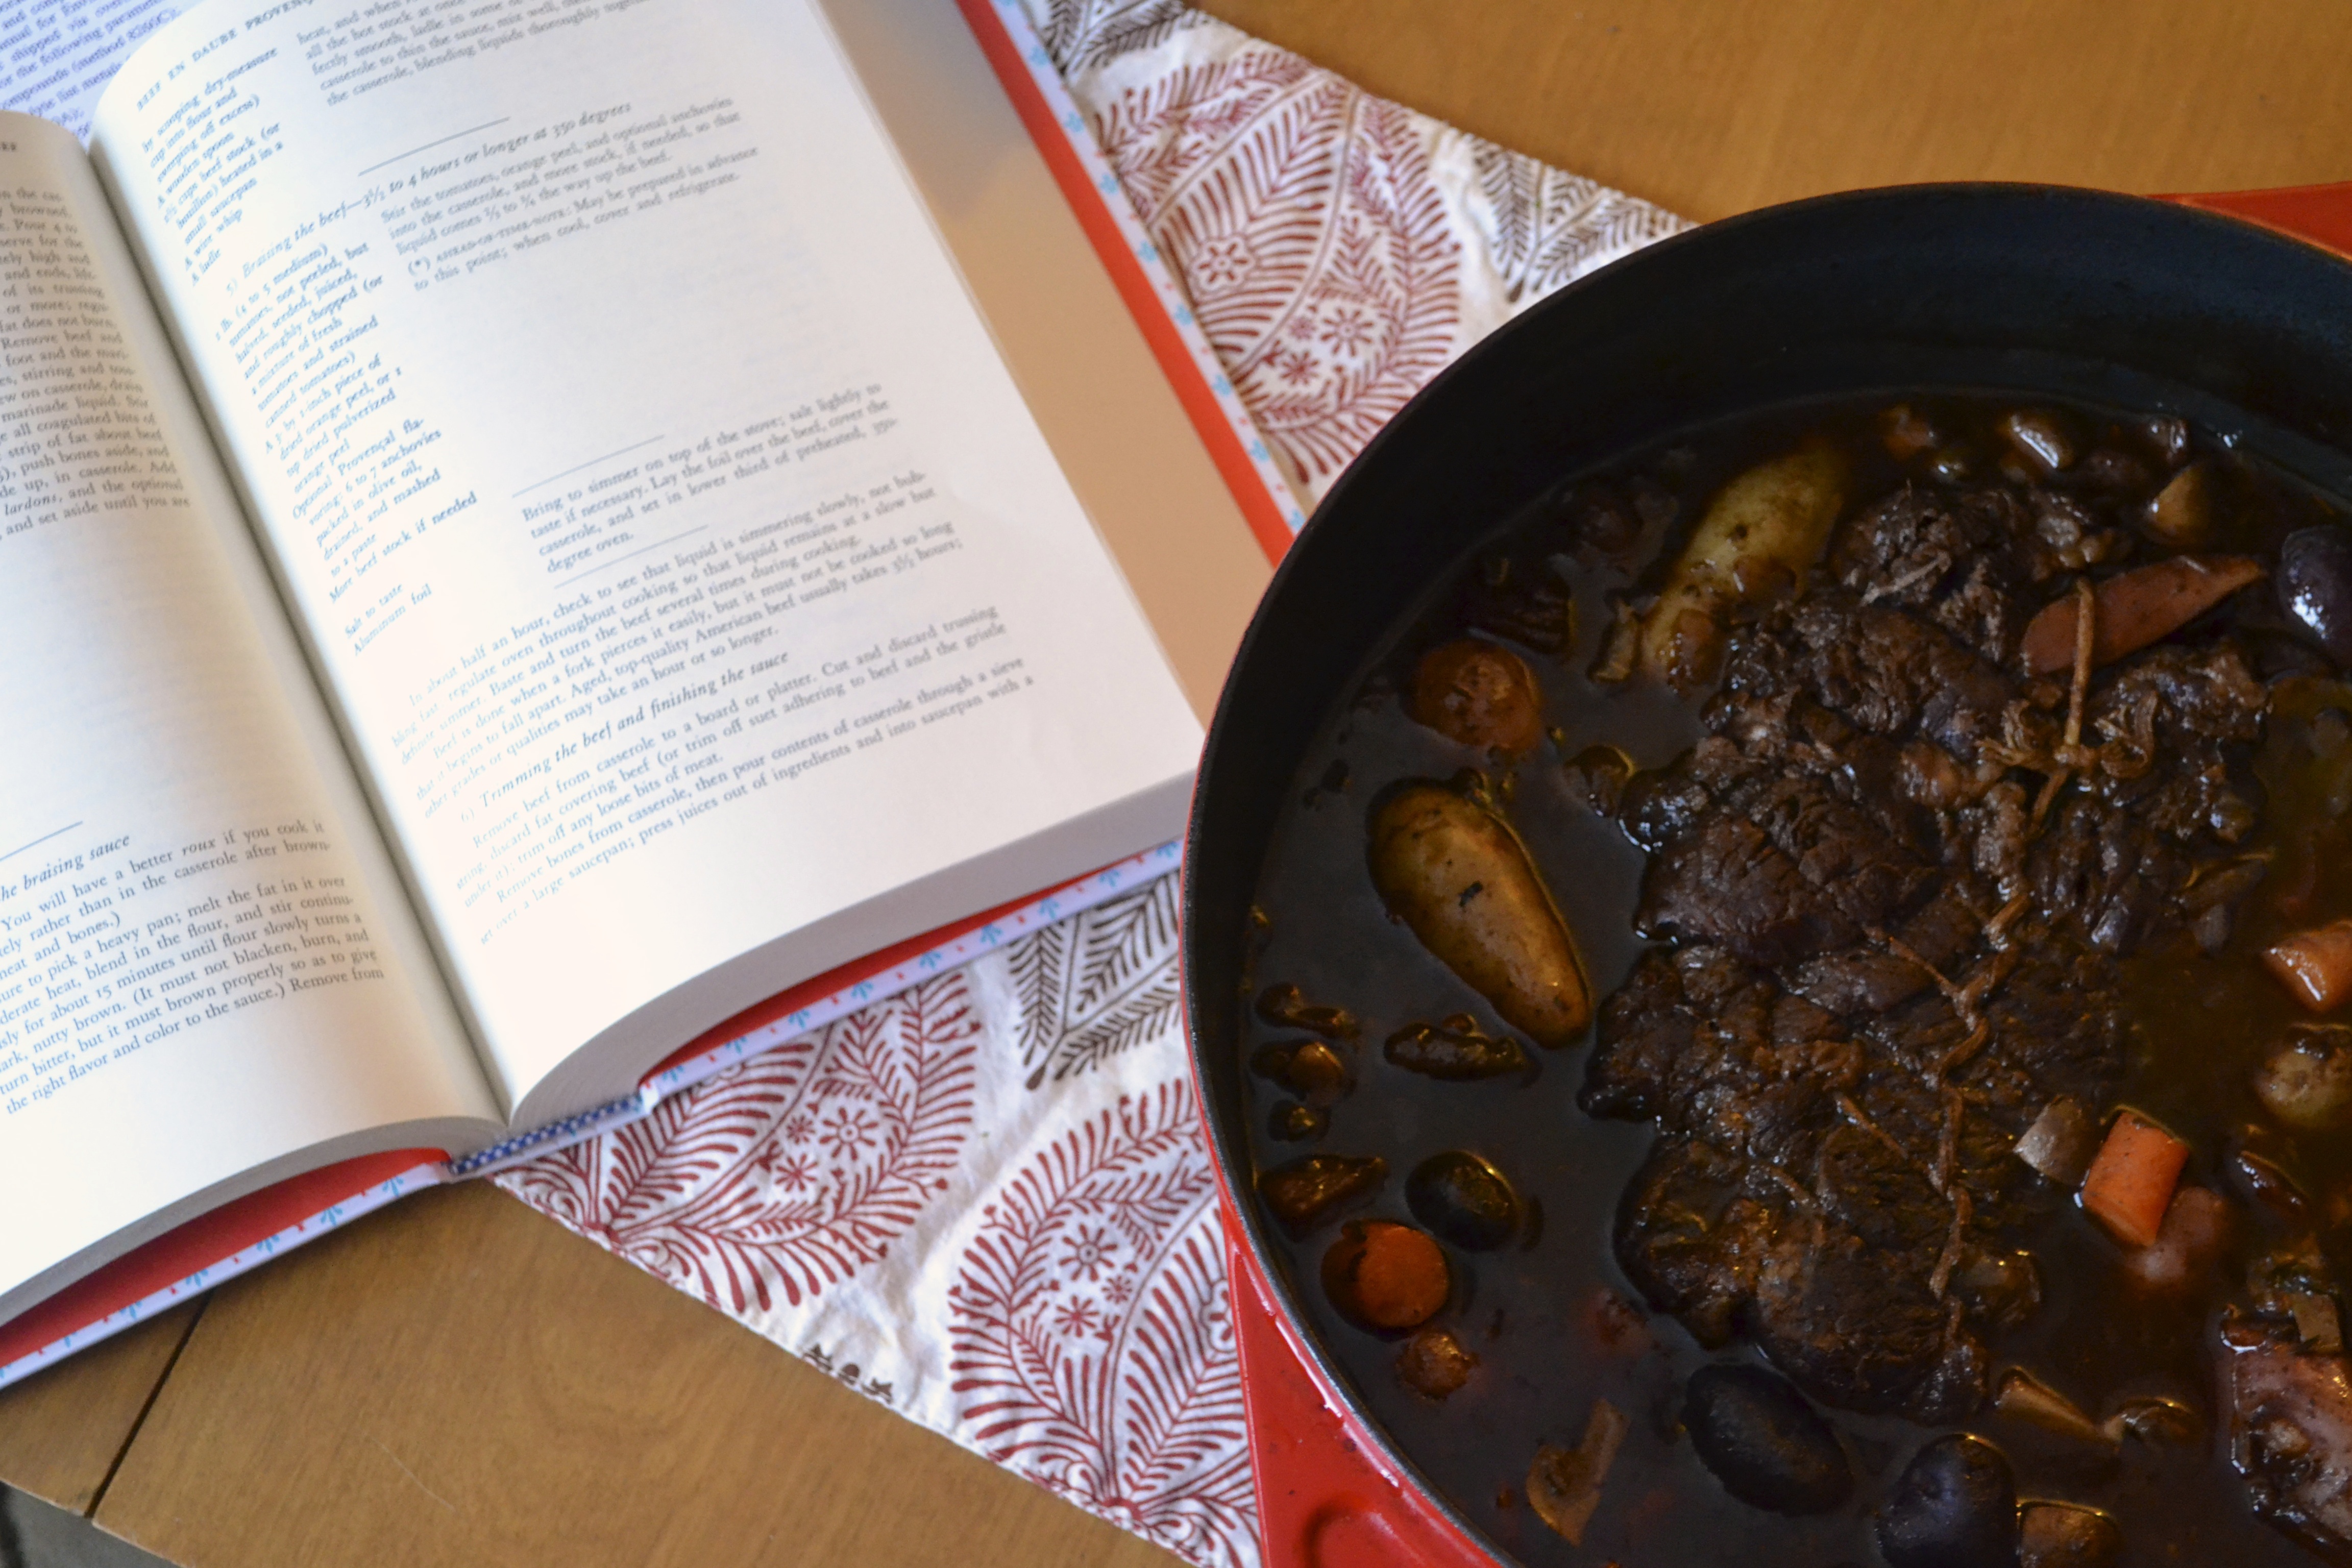
But lately, I have been wanting to work on certain “cooking school” basic techniques.  This means that I actually need to study master recipes and stock up on ingredients specific to that meal. And who better to learn basic cooking techniques from than the master herself…Julia. Yes, Julia Child and her fabulous “Mastering the Art of French Cooking” series are the best assets to any home cook wanting to improve their skills.  My husband bought me the set for Christmas!!!  I have been wanting to master Julia’s basic braised beef pot roast recipe (Boeuf En Daube A La Provencale). It is basically the love child of Beef Bourgingone and the best pot roast you can imagine. Comfort food at its best. 

Special Equipment – A few items that you will need include:

  • twine to tie up the roast (my butcher did this for us),
  • cheesecloth for making an herb bouquet (I actually didn’t have any and just threw my herbs into the sauce…I fail at basic techniques!),
  • a bottle of full-bodied red wine such as a Burgundy, Beaujolais, Cotes-du-Rhone…(I used half and drink the rest..DOH),
  • aluminum foil or parchment paper, and
  • 5 or 6-quart dutch oven with a tight fitting lid.

DSC_0263

DSC_0268

I adapted the original recipe to a 2.5 lb roast (instead of a 6 pounder) and did not use flour in the roux to make it gluten free. Julia would gasp, but the sauce at the end was still magnificent and thick even though it was not thickened with a flour roux.

This really was the BEST roast I have ever eaten. And although I didn’t follow Julia’s recipe to a T (tisk tisk), it was stunning. So I get a big fat F for setting out to “master” basic techniques not actually “following” that said recipe…but GAH…some of those steps just seem extraneous. Seriously….using beef knuckles to flavor my sauce? Julia…come ON! It has a bottle of wine and bacon grease! IT HAS FLAVOR!

So maybe I will never be a master chef, but dang it…my family is well fed!

DSC_0277

Julia’s Notes – If you want to serve this roast the day you cook it, allow 5 hours from the moment you put the roast into the oven to the moment you will be serving it.  Cooking time is dependent on the type and quality of the meat. There are several cuts of beef that work for braising: top round, chuck roast, shoulder/arm roast, bottom round or eye or round, sirloin tip, or middle of brisket. Have your butcher trim and tie the roast tight with twine.

Make-Ahead Notes – This is a great dish to make for a crowd because the braised beef can be made ahead of time (up to a day or two in advance), with the flavors improving each day. To make ahead, prepare the dish through the oven-braising (Step 5). Allow the dish to cool to room temperature, then cover and refrigerate for up to three days. To serve, gently reheat the roast in the pot until the juices are once again liquified. Transfer the meat and vegetables to a baking dish, moisten with some of the juices, cover, and heat in a 325°F oven until warmed through. While the meat and vegetables are warming, proceed with Step 6 as directed below to make a sauce from the juices.

DSC_0299

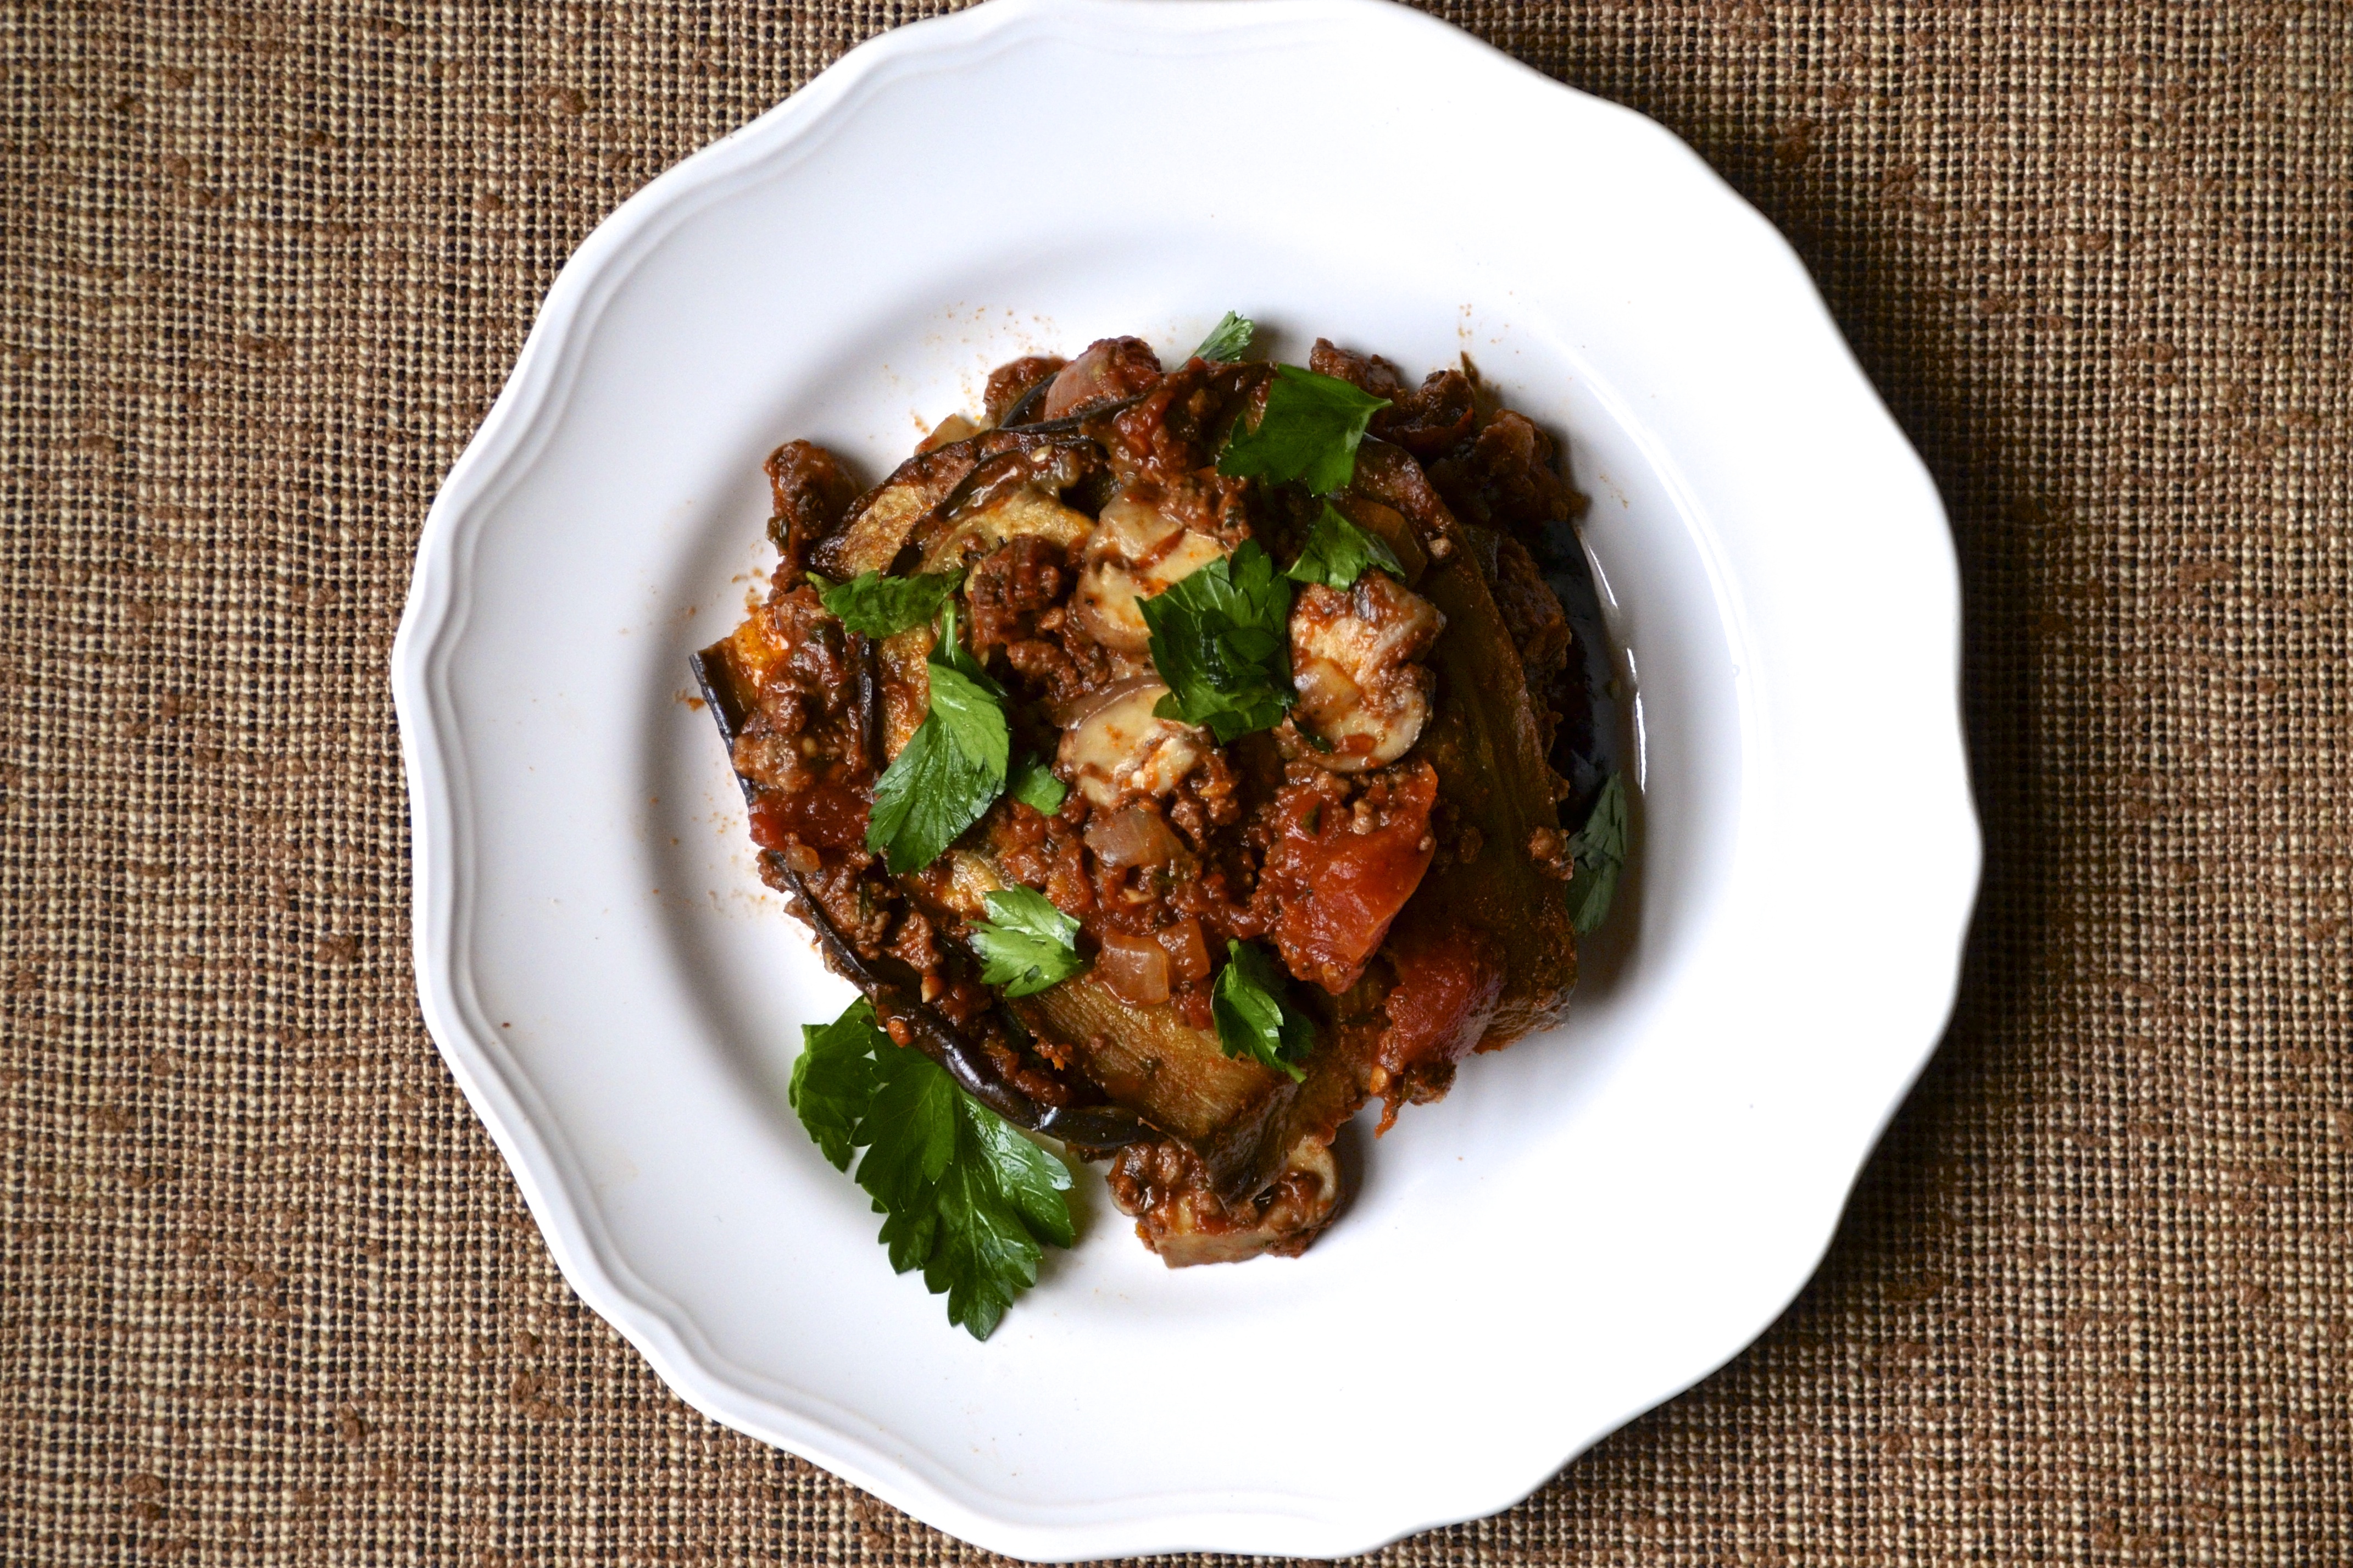
Red Wine and Balsamic-Braised Pot Roast (Gluten Free, Grain Free, Paleo)

(Adapted from Mastering the Art of French Cooking by Julia Child and Simone Beck and from Fine Cooking)

Ingredients

  • Herb bouquet, tied in washed cheesecloth: 3 smashed garlic cloves, 2 bay leaves, 6 peppercorns, 2 sprigs of thyme, 1/2 teaspoon each of dried marjoram and oregano, strip of orange zest or rind of 1 clementine orange
  • 2 Tablespoons bacon grease
  • 1 2-3 lb boneless beef chuck roast, tied tight with twine
  • Kosher salt and fresh ground pepper
  • 2 medium onions, halved, peeled, and thinly sliced
  • 3/4 cup dry red wine
  • 1/2 cup balsamic vinegar
  • 1 1/2 cups beef broth
  • 1 can (14 1/2 oz) diced tomatoes, undrained
  • 2 cups diced carrots (3/4-inch pieces)
  • 1 lb small fingerling potatoes (1 to 2-inches long)
  • 10 oz crimini mushrooms, quartered
  • 2 Tablespoon capers

Instructions

  1. Preheat oven to 300F.  Set a rack on the lower third of the oven.
  2. Herb Bouquet – To make the herb bouquet, cut a large single-layer square of cheesecloth and rinse it to remove any loose fibers. Spread the cheesecloth flat and add to the center the smashed garlic, thyme sprigs, bay leaves, peppercorns, dried herbs, and orange zest. Gather the edges to form a pouch and tie tightly with kitchen twine. Set aside.
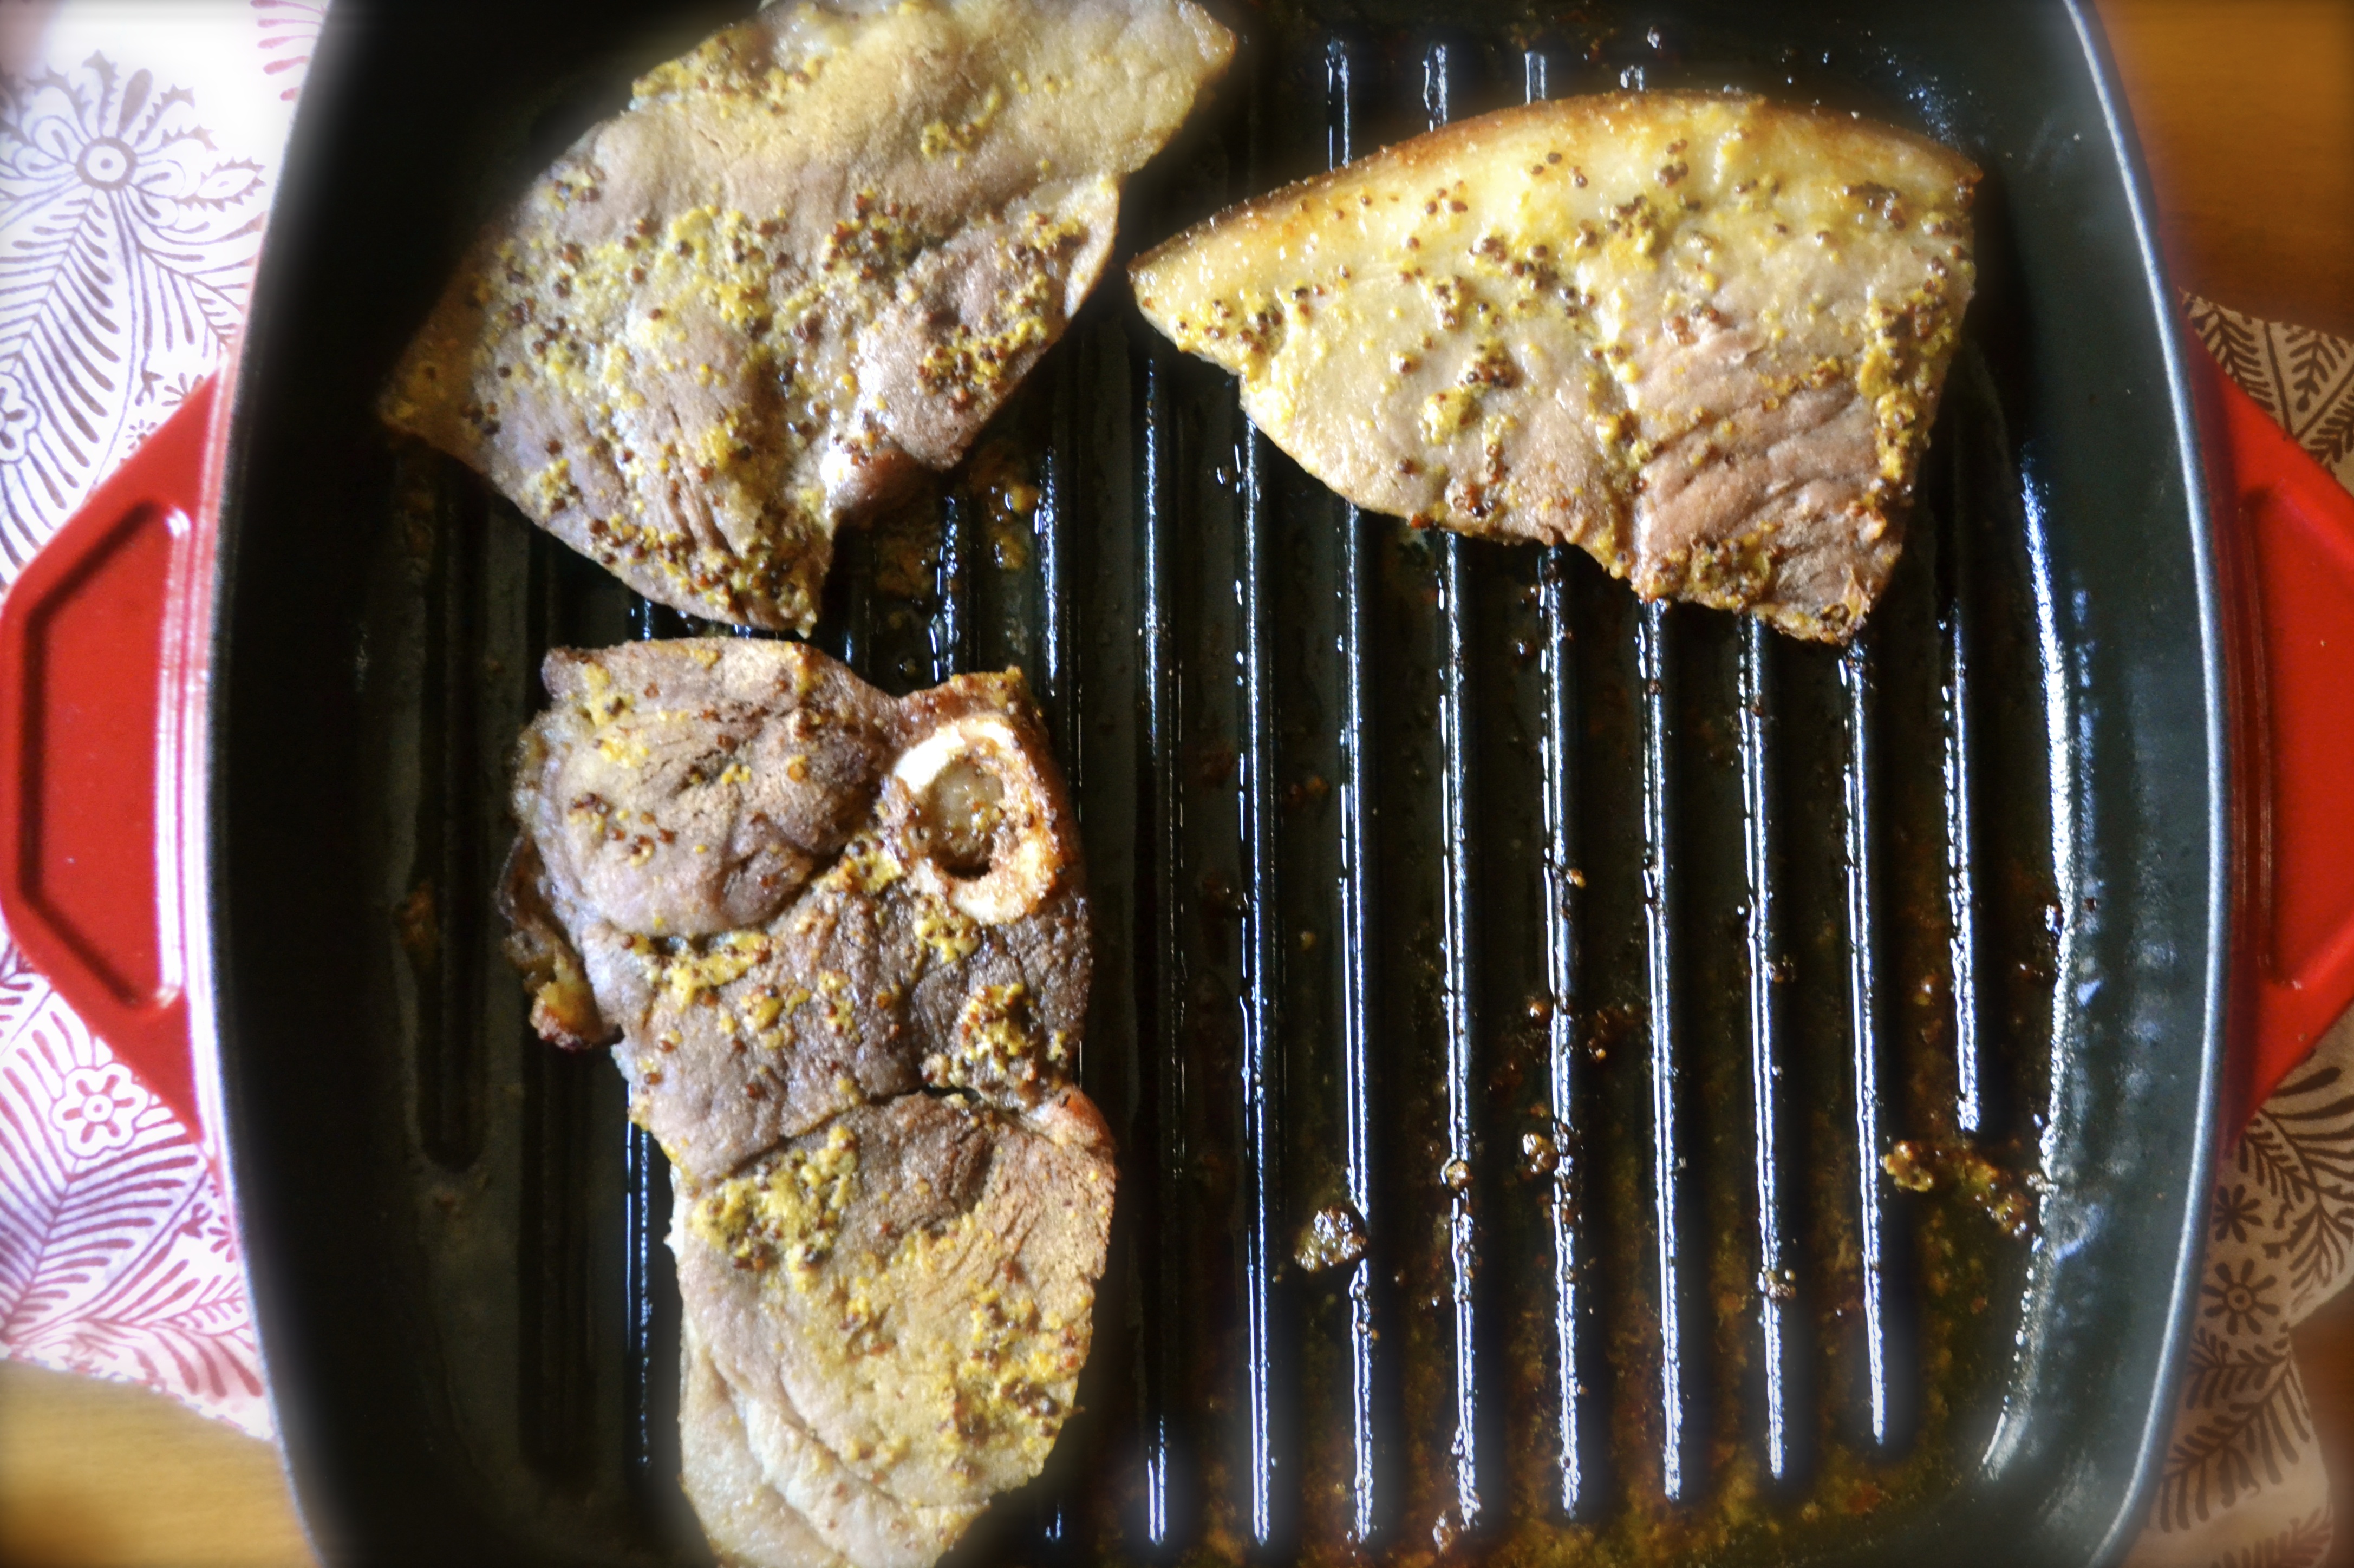
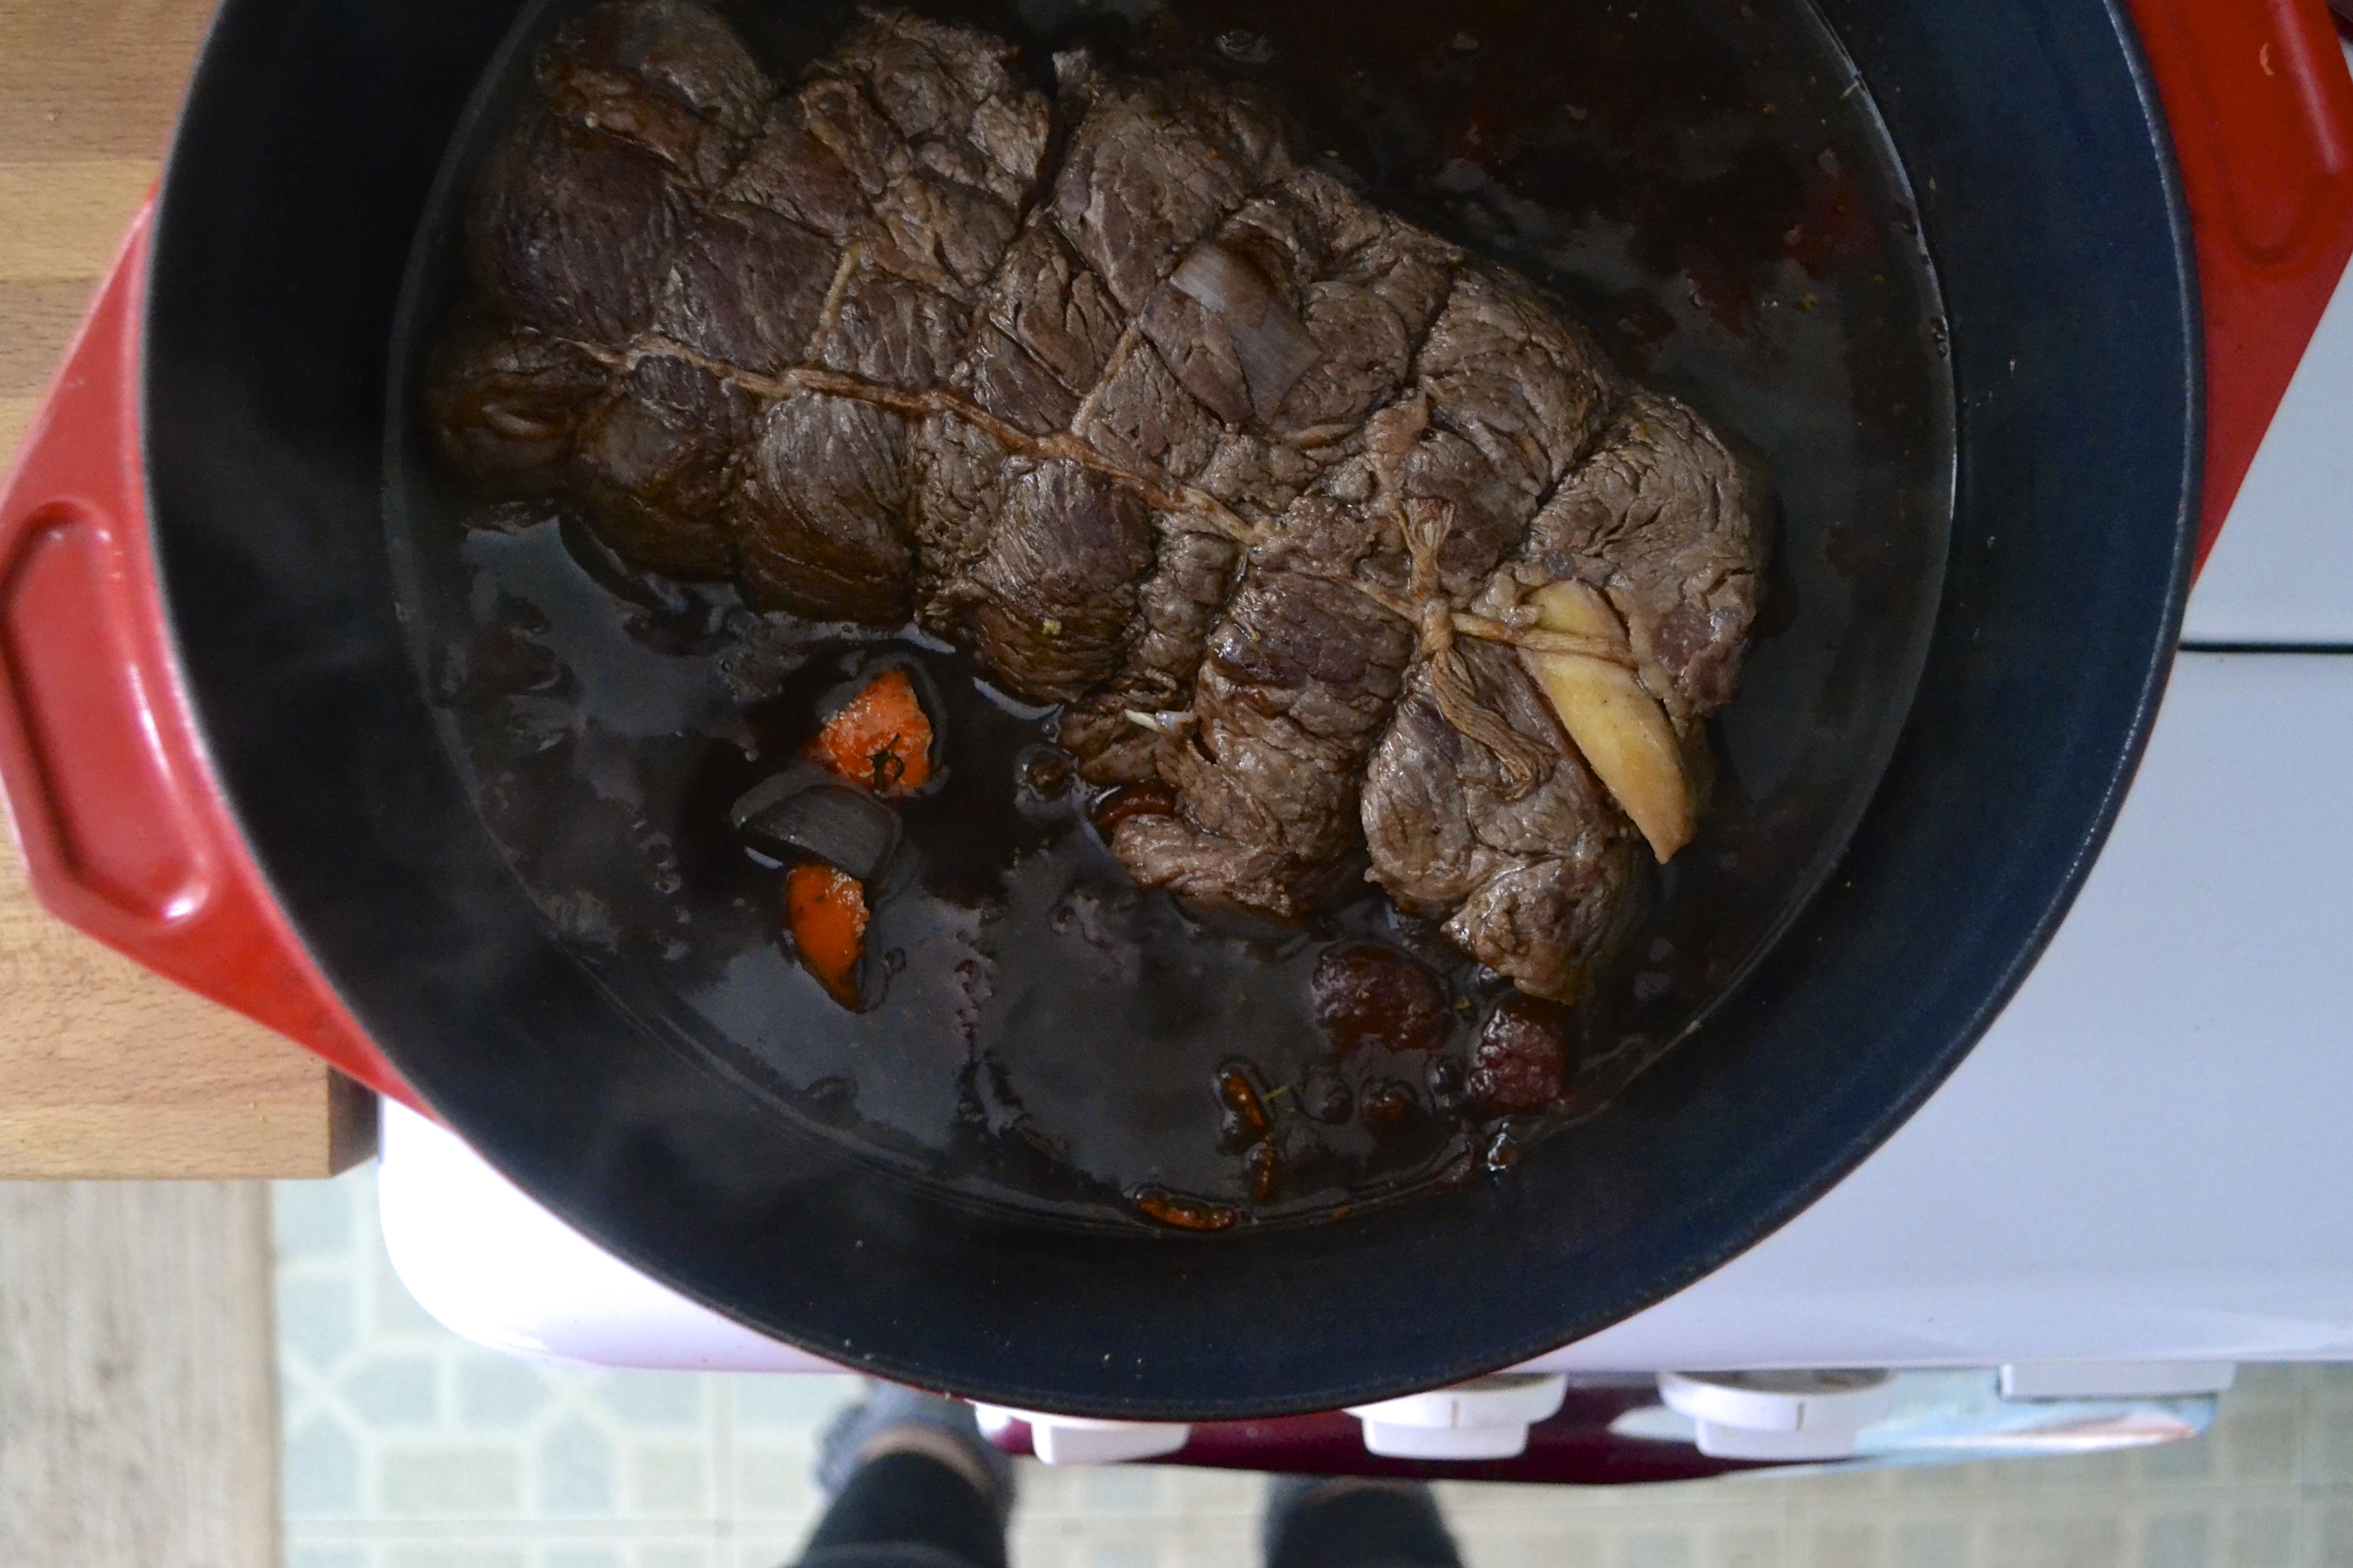
  3. Searing the Beef – Pat the roast dry with paper towels and season with salt and pepper. In a 5- to 6-quart Dutch oven with a tight-fitting lid, heat the bacon grease (or olive oil) over medium-high heat. Brown the well-dried meat thoroughly on all sides and ends, lifting and turning with tongs and using the trussing strings. This should take about 5 minutes per side or about 10 minutes total. The meat should sizzle but not scorch; adjust the heat accordingly. Add more fat or oil if needed. When browned, transfer the meat to a large plate. Set aside.
  4. Preparing the Braising Liquid – Lower the heat to medium, add the onions and cook until they start to soften, about 5 minutes. Add the red wine, balsamic vinegar, beef broth, and the cheesecloth pouch of herbs.  Bring to a simmer and scrape with a wooden spoon to dislodge all coagulated bits of brown flavor into the liquid. Return the meat to the pot, along any juices that have accumulated. Stir the tomatoes and more stock, if needed, so that the liquid comes to 2/3 of the way up the beef. Bring the liquid to a simmer on top of the stove.
  5. Braising the Beef – Cover the beef and the pot with a sheet of foil, pushing the foil down so it touches the meat. Set the lid in place. Slide the pot into the lower third of the preheated oven and cook for 2 hours, turning the roast with tongs after 1 hour. Check to make sure that the liquid in the pot is simmering slowly, not bubbling fast: regulate oven throughout cooking so that the liquid remains at a slow but definite simmer. After two hours, turn the roast over once more and baste. Then,  scatter the carrots, potatoes, and mushrooms into the braising liquid around the roast. Recover the pot with foil, making sure that it touches the meat, and the lid. Place back into the oven and continue braising, covered with the foil and the lid, until the meat is fork-tender, about an hour longer.  Test for doneness by spearing the meat toward the center with a carving fork. Pull out the fork carefully: If it lifts the meat along with it, continue cooking for another 20 to 30 minutes. According to Julia, for good quality American beef, the entire cooking process generally takes 3 1/2 hours. Other grades or qualities may take longer.
  6. Making the Sauce – Transfer the pot roast and vegetables to a shallow platter and place a tent of foil over it. Strain the remaining liquid into a measuring cup, discarding the spent onion and the cheesecloth herb bouquet. Spoon off any fat that rises to the surface. Wipe out the dutch oven with a paper towel. Return the strained juices to the pot and bring to a simmer over medium heat. If the flavor seems weak, simmer the sauce vigorously over medium-high heat for 5 to 15 minutes to reduce the volume and concentrate the flavor. Season the thickened sauce with salt and pepper to taste. Whisk in the chopped parsley and capers.
  7. Serving – Julia says to cut the twine from the pot roast and carve the meat across the grain into 1/4- to 1/2-inch-thick slices. I like mine to fall apart in large chucks, but that’s just me. For family serving, arrange the meat on a serving platter and place vegetables around it. Ladle about half the sauce over all, and serve. Retain the remaining sauce in a gravy boat and pass around the table to drink pour on top.

Dijon Ham Steaks with Apples

Snow snow snow snow!!!! Winter is not giving up in Kansas City with predictions of 10 to 15 inches of snow and zero visibility. Plus, we are not just getting metric boat loads of snow, but….(cue deep booming echoing voice) THUNDER SNOW.  It sounds more like an X Men character or superhero name or maybe they should add this as the next movie in the Mad Max movie serious….Return of Thunder Snow….anyone? come on!

Ham steak

DSC_0176

It’s really strange to see the light snow falling and hear booming thunder outside.  They have canceled and closed everything around here including schools, work, gyms, ceremonies. The grocery stores have been like war zones the last few days with people stocking up for Snowmeggedon.  So now there is nothing left to do but hunker down, cook up a hearty breakfast, put a fire in the fireplace, add a roast in the oven to cook low and slow, and cuddle with my favorite boys…Guinness and Kiley.

DSC_0183

Even if you aren’t getting (booming voice) THUNDER SNOOOOOW…. you can still make a heart-warming breakfast that deserves being stranded in a snowy mountain cabin with a warm fire in the fireplace.  My local Community Supported Agriculture (CSA) meat supplier provides us with 12 to 16 oz bone-in ham steaks.  We like to brown these in a cast iron skillet for breakfast.  In the summer, I like to cook these steaks on the grill.  When cooking indoors in a skillet, I cut the ham steak into four equal portions to cook evenly and quicker.  A simple Dijon sauce and butter-sauted apples pair well with the ham. This is even good as a quick dinner.

DSC_0184

Dijon Ham Steaks with Apples (Adapted from Gourmet, 1999)

Serves 4

Ingredients

  • 12 to 16 oz uncooked ham steak (1/4-inch thick), trimmed of fat and cut into 4 portions
  • 1 Tablespoon whole grain mustard
  • 1 Tablespoon Dijon mustard
  • 2 Tablespoons butter
  • 2 small apples (or 1 large), cored and sliced in 1/4-inch slices

Instructions

  1. Preheat oven to 250°F.
  2. In a small bowl, mix whole grain mustard and Dijon mustard. Spread mustard mixture on top of ham steak.
  3. Heat 1 tablespoon butter in a skillet over moderately high heat. Add ham steaks to skillet and sauté until browned (about 5 to 6 minutes). If your ham steak is thicker than 1/4-inch, cook a little longer. Transfer browned ham to a heat-proof dish, loosely covered with foil, and place in preheated oven to keep warm while apples cook.
  4. Add remaining tablespoon butter to skillet and sauté apple slices, turning once, until golden and tender, about 4 minutes total. Remove ham from oven. Top each piece of ham with apple slices. Serve with fried eggs for a fabulous fancy country breakfast.

Curried Chicken and Butternut Squash Soup

In April, I will be running in the Oklahoma City Half Marathon with my sister Jill. This will be the fourth year that we have participated. The first year we ran the race was her freshman year in High School and now she is a senior!!!!  Valedictorian too!  Now that I live over 5 hours away and do not get to visit as often I would like, running in a long race with her is good quality time together…you know running in rain and sleet, loosing toe nails…the typical sisterly bonding type of stuff.  You can see in the picture below how much she enjoys our yearly tradition of running 13.2 miles for fun! She is so lucky to have me, right? RIGHT????

38982_145613598782297_1485931_n

April is creeping up fast and my training schedule is beginning to ramp up.  I do CrossFit at least 3 times per week, 1 small run mid-week, and 1 long run on the weekend. This means I need quick and nourishing meals throughout the week that provide nutrients to fuel and refuel my training schedule.

Long endurance training sessions (60-90+ minutes) cause inflammation and deplete our bodies of stored glycogen.  My old refueling routine was through breads, pasta, pancakes, and pizza…but NO MORE.  This will be my first endurance event to do while maintaining a strict Paleo lifestyle.  So, I am refueling with healthy fats, eating grass-fed protein, and incorporating plenty of whole foods and vegetables that contain complex carbohydrates: sweet potatoes, butternut squash, and other winter squash.

DSC_0166

I whipped up this Curried Chicken and Butternut Squash soup last weekend after I finished a cold 8 mile run.  It warmed my frozen fingers and buns. This soup was the perfect recovery meal full of muscle-building protein and glycogen-restoring butternut squash.  I used leftover shredded chicken from a roasted chicken that I had made earlier in the week. 

DSC_0185

Another perk of this meal is that this soup is easy on the pocket-book and nourishes your family.  It also freezes well!  Feeding your family healthy and unprocessed meals can add up, but it is important. My money-saving tip of the week is to buy whole organic free range chickens rather than chicken parts.  This will save you at least $3 bucks PER POUND.  Roast or poach the whole chicken, then shred the chicken for using later in multiple meals.

Wait…..DON’T THROW THAT CHICKEN CARCASS AWAY! Throw it in a crockpot on low with water and some onions, carrots, celery…whatever and make homemade chicken stock overnight as described here.  I’m not afraid to admit that I have actually taken a chicken carcass home (not for voodoo) from a friend’s house to specifically make chicken stock. Should I be afraid to admit this? Maaaaybe…but, folks, I am also the gal that proudly carries around a coupon book….so I am not ashamed. I stand proud…with lots of change in my pocket! And a full belly filled with healthy restoring soup. Mmmm!

Curried Chicken and Butternut Squash Soup

Serves 6 to 8

Ingredients

  • 2 Tablespoons coconut oil, butter, or ghee
  • 2 medium onions, diced
  • 3 cloves of garlic, minced
  • 1 red bell pepper, diced
  • 2 Tablespoons curry powder (I used madras curry powder)
  • 3 cups diced butternut squash (about 1 small, or 1/2 large)
  • 6 cups low sodium chicken broth or vegetable broth
  • 2 whole chicken breasts or 2 chicken thighs or 2 to 3 cups of leftover precooked shredded chicken
  • 2 to 3 handfuls of fresh spinach
  • 1/3 cup diced fresh cilantro

Instructions

  1. In a heavy stockpot or dutch oven, heat coconut oil over medium heat. Add onions, stirring often, and sauté until translucent (about 5 to 10 minutes).
  2. Add garlic, bell pepper, curry powder, and butternut squash and cook for another 5 minutes, stirring often so that the mixture does not burn. Once the vegetables start to soften a bit, add the broth. Bring to a boil. Add chicken.  Lower heat and simmer covered for 15 to 20 minutes, or until chicken is cooked through and squash is tender when pierced with a fork. 
  3. If you added whole chicken breasts or thighs, remove them from the soup and place them on a cutting board. Let them cool slightly (about 5 minutes). Shred the chicken using either your hands or two forks.  Add the shredded chicken back to the soup.
  4. Add spinach and cilantro.  Cook for about 3 minutes, or until the spinach becomes wilted. Serve with additional cilantro.

Blood Orange and Avocado Salad

I like simple things….

t-shirt and jeans…

a warm day in the middle of a cold spell…

a hug after a long day…

and winter citrus! 

Winter citrus is an anomaly to me: bright and flavorful fruits that are at their peak when everything else is dormant.  I can’t seem to get enough grapefruit, Meyer lemons, clementines, oranges, and especially blood oranges!  Have you had a blood orange? Eating them is like a secret escape to my own tropical island. Where’s my mai tai? Where’s my pool?  Where’s my hammock????

DSC_0186

The salad I made is adapted from Alice Water’s amazing avocado and grapefruit salad from her-must have cookbook The Art of Simple Food.  A girlfriend of mine had this cookbook and I poured over it every time I was at her house. And then I received a copy for my birthday!!!  The recipes are so simple and so flavorful.

DSC_0197

I swapped blood oranges in for the grapefruit and served it over a bed of mixed greens. Using blood oranges makes me feel like I just bedazzled my salad.  I whipped this up for a quick lunch and took it to work, eating with some leftover salmon. It totally made feel like I was on vacation in the tropics and not sitting inside an office cage in the middle of winter peering out a tiny jail-sized window. Womp womp.

Hrmmm….note to self…get a hammock for my office….and more winter citrus!

Blood Orange and Avocado Salad (adapted from The Art of Simple Food by Alice Waters)

Serves 4 as a side

Ingredients

  • 4 to 6 cups of mixed salad greens, washed and dried
  • 2 Blood oranges
  • 1 Avocado
  • 1/4 cup white wine vinegar
  • 1/4 cup extra-virgin olive oil
  • salt and pepper

Instructions

  1. Divide the salad greens evenly among four plates.
  2. With a sharp knife, peel the rind from the blood oranges down to the flesh. Slice in thin rounds. Divide the orange slices evenly among four plates.
  3. Cut the avocados in half and remove the pits. Sprinkle the inside lightly with salt. Inside the skin, slice the avocados in 1/4-inch slices. Carefully scoop from skin and divide the avocado slices evenly among the four plates.
  4. In a small lidded jar, add vinegar and olive oil with a pinch of salt and pepper. Shake well. Drizzle the vinaigrette lightly over each salad. Store leftover vinaigrette in the refrigerator for up to 3 days.

Mushroom, Spinach, and Sausage Crustless Quiche (Gluten Free and Dairy Free)

Want to have brunch with me this morning?

Please? I’ve made a delicious Quiche.  It’s crustless, but I promise you won’t miss the crust.

Go on…pull up a chair…keep your pjs on…I made an extra pot of coffee.  I even have a fire in the fireplace. It’s cozy. No need to put pants on. You are my guest!

DSC_0261

DSC_0267

It’s biting cold outside, but in the kitchen it smells of coffee, bacon, and love. Quiche love.  Warm and creamy and hearty and filling Quiche that is baking just for you.  No no no…it was no trouble at all. Whipped it up quick and threw it in the oven. Here…need more coffee? Let’s talk.

DSC_0258

I’m sorry that things have been so tough lately.  Life is crazy and terrible sometimes. But just for this morning, let’s not think of those things. Let’s dream. Let’s remember the great times and the blessings that we have. Let’s remember our small victories.

Need some more coffee? Cream? Sugar?

I missed you.  I’m so glad that you came over.

Need another slice of bacon? Seriously…I made extra. Next time I’ll make us a mimosa.

We should do this more often.

DSC_0263

Mushroom, Spinach, and Sausage Crustless Quiche (Gluten Free and Dairy Free)

Serves 4 to 6

Ingredients

  • 1/2 teaspoon salt
  • 1/4 teaspoon fresh black pepper
  • 8 eggs
  • 1/3 cup coconut milk (low fat or full fat)
  • 2 Tablespoon butter, bacon grease, or olive oil
  • 10 oz baby bella mushrooms, sliced
  • 1/2 teaspoon dried thyme
  • 1 spicy italian chicken sausage, diced
  • 1 package of fresh spinach (or kale) (3 to 4 cups)

Instructions

  1. Preheat oven to 375 F. Butter a 9-inch pie pan or cake pan and set aside.
  2. In a medium bowl, whisk eggs, salt, pepper, and coconut milk. Set aside.
  3. In a heavy skillet, heat butter over medium heat. Add mushrooms and thyme in a single layer and sauté until browned. Don’t crowd them. Toss in sausage and brown (about 2 minutes) stirring often. Add spinach on top of cooked mushrooms and sausage. Stir and cook until spinach is slightly wilted, about 1 to 2 minutes. Remove skillet from heat. Add a pinch of salt and pepper to taste.
  4. Spoon and spread the mushroom, sausage, and spinach evenly into the prepared pie pan. Top this with the egg mixture.
  5. Bake for 35 to 40 minutes, or until slightly golden brown on edges, puffed, and set in the middle. Serve warm or at room temperature.  Leftovers are great reheated for breakfast or lunch.

Mexican Chicken and Lime Soup

I came down with a horrendous cold last week. My head felt like it was in a vice grip.  Thinking about going on a walk made me too tired.  So all I did was lay on the couch, become a Pinterest addict, and watch guilty pleasures including Downton Abbey, Wes Anderson movies, Lady and the Tramp, and, of course, Varsity Blues.

DSC_0224

The two things I wanted to eat were tapioca pudding (a childhood comfort food) and chicken soup…warm brothy chicken soup.  I didn’t get the tapioca (boooh) but I did get chicken soup. I found this Mexican Lime Soup on Pinterest. This amazing brothy and spicy soup hit the spot. 

Note – Be sure to use fresh limes to obtain the 1/4 cup of lime juice. Oh and serve with a fresh avocado. Game changer! I can also see this easily being compiled into a slow cooker and cooked all day.  DSC_0227

Mexican Chicken and Lime Soup (Gluten Free, Grain Free, Dairy Free, Paleo-Friendly, Whole30 Compliant) (slightly adapted from Williams Sonoma)

Serves 4 to 6

Ingredients

  • 4 limes juiced to yield 1/4 cup lime juice, extra slices for serving
  • 1 tablespoon olive oil
  • 1 yellow onion, diced
  • 4 to 6 cloves of garlic, minced
  • 1 red bell pepper, diced
  • 1 jalapeño, seeded and diced
  • 3 cups low sodium organic chicken broth (homemade is best)
  • 3 cups water
  • 1 lb boneless chicken breasts and/or thighs
  • 1 teaspoon dried mexican oregano
  • 1/3 cup diced cilantro
  • salt and pepper to taste

Instructions

  1. In a large heavy pot or dutch oven, heat olive oil over medium heat. Add onion and saute until translucent, about 5 minutes.  Add garlic, red bell pepper, and jalapeño and cook for an additional 2 to 3 minutes, stirring frequently.  
  2. Add broth, water, oregano, and lime juice and bring to a full boil. Add chicken. Bring back to a boil, lower heat to medium-low and cover. Cook for 10 to 15 minutes, or until chicken is cooked through and no longer pink.
  3. Remove cooked chicken from pot with tongs and place on a cutting board. Shred into pieces with two forks. Add the shredded chicken back to pot. Turn off heat and add fresh chopped cilantro. Serve soup with diced avocado, fresh cilantro, and sliced limes.

Slow Cooker Carnitas (Pulled Pork)

Is it just me or is there a juice frenzy going on?  I feel like everywhere I look and read online, everyone has caught the “juicing” bug.   Get the tiger juice master…juice your veggies…green juice…orange juice…juice your juice.

Not me….I personally like to CHEW my food.  Isn’t that what these chompers called teeth are for? chewing? masticating? gnawing?

DSC_0231

So if you are into chewing your food, then you will totally be into these carnitas (mexican-style pulled pork).  But it is the good kind of chewing. I’m not talking about chewing through leather, my friends. I’m talking about chewing tender and juicy fall-apart pork. USE THOSE BEAUTIFUL TEETH!

Want to please a crowd? Serve pulled pork. You’ll be a hero. They’ll write legends about you.  And even better…make it in your handy dandy crockpot.  Win win.  Throw in the roast in the morning…come home to drool-worthy smells.  It’s so versatile.  You can make tacos or taco salad bowls or bbq pulled pork or sliders or add it to chili or even mix it into scrambled eggs for breakfast. 

DSC_0249

DSC_0252

Even if you don’t need to feed a crowd, slow cooking a 4 to 5 lb pork roast will give you dinner options for the full week. Or call me and I’ll be over pronto for dinner. I’ll be your best friend. F-o-r-e-v-e-r!  Hear the crowd roar!  

You may be asking, “But carnitas typically have crisp edges!?!” “How do you get that in a slow cooker?” Oh honey… Easy Peasy!  Just before serving, finish the shredded pork roast under a broiler or high temp oven to get the crisp edges that we love so much.  Ya. This is a little trick that Cook’s Illustrated uses. Those people are geniuses!

You can even freeze the leftovers in small portions for later use.  Quick lunch or quick dinner options right at your awesome finger tips! You will never lose.  See…you are a hero!

DSC_0264

Slow Cooker Carnitas (Pulled Pork) 

Recipe adapted from Gimme Some Oven and Bon Appetit.

Serves 8 to 10

Ingredients

Slow Cooker Pulled Pork Ingredients:

  • 4 to 5 lbs boneless pork roast, cut into 2-inch pieces
  • 1 large white onion, diced
  • 1 Tablespoon chipotle powder (or 1 chipotle in adobo sauce)
  • 1 Tablespoon smoked paprika
  • 1 Tablespoon ground cumin
  • 1 teaspoon chili powder
  • 1 teaspoon dried oregano
  • 1 1/2 teaspoon salt
  • 1 teaspoon black pepper
  • 4 cloves garlic, minced
  • Juice of 2 limes (about 1/4 cup)
  • 1 cup of chicken broth (low sodium)

Instructions

  1. Toss pork in bowl of slow cooker with spices (chipotle powder through black pepper) to coat. Place onion pieces on top of cubed pork. Pour lime juice and chicken broth on top. Cover slow cooker.  Cook on low setting for 6 to 8 hours, or until meat is very tender and falling apart.
  2. Now for the crispy edges. Once the pork is cooked, preheat your broiler to high heat.  Line two baking sheets with aluminum foil. Set aside.
  3. Using a slotted spoon, transfer the pork from the slow cooker to a cutting board.   RESERVE THAT BROTH!!!! Use a fork or fingers to shred the pork into bite-sized pieces. Transfer the shredded pork to the prepared baking sheets, spreading it out evenly in a single layer.
  4. Broil one sheet at a time for about 5 minutes, or until the edges of the pork begin crisping up. Remove the sheet from the oven and use tongs to carefully toss the pork. Ladle some of the reserved broth (about 1/4 of a cup) over the pork. Return to the oven and broil an additional 5 minutes to finish the crisping processes.  Pull from oven. Repeat this process with the second pan.
  5. Transfer crisp carnitas to a platter and ladle more reserved juice on top.  For taco bowls, serve with avocado slices, cilantro sprigs, fresh lettuce, jalapeños, fresh salsa, and sliced red bell peppers, if desired.

Paleo Eggplant Lasagna

I’ll tell you a little secret.

The easiest way to get to my heart is to make me lasagna.

Yes, it is sad, but there is an expressway right to the center of my heart via layers of ricotta cheese, meat sauce, and ribbons of lasagna noodles.  I would eat it for breakfast, second breakfast, lunch, dinner, dessert…second dessert.

But alas, I have not had lasagna in so long.  My gluten sensitivity has slammed that door shut. Oh lasagna….*sigh* I miss you dearly.

DSC_0285

Growing up, my mom would make lasagna and homemade strawberry cake for my birthday.  It was a several hour affair.  Making the perfect lasagna is like building a log cabin.  There are so many steps, but it is so worth it in the end:

  • Boiling noodles;
  • Making the ricotta mixture;
  • Grating the mozzarella and parmesan cheese;
  • Making the fresh tomato and meat sauce;
  • Constructing the masterpiece;
  • Baking the amazing masterpiece for an hour;
  • THEN waaaaaaaaaaiting for it cool down!!!!!

UUUgh.  The roof of my mouth suffered many times from not being able to wait. But then…there it was. *Chorus Line Dancers* *Jazz Hands* “Ladies and Gents…I present to you….The Great Laaaasagnaaaaaa.” I dove head first into that big slice of layered heaven.  I always looked forward to that meal. Again…a moment of silence for my dear lasagna.

A few years ago, my husband surprised me with a homemade spinach lasagna for my birthday.  This man does not really cook…but he made it from scratch.  Oh it was delicious. It was comfort rolled up in layers of sauciness.  But that was the last time I had lasagna.  TWO YEARS.

DSC_0300

My birthday is at the end of the month and my innate need for lasagna has been getting strong.  I dream about it. I smell it in the air….in my car. I’m serious. I seriously started thinking that maybe I just smelled like lasagna?  Maybe I emit oregano and basil fumes.  I guess there are worse things to smell like.

Anyways, I decided to remedy my lasagna cravings by using strips of eggplant in place of the noodles.  I made an amazing and deliciously thick batch of meat sauce chunked with large pieces of mushrooms. Although there is no cheese or ricotta (blasphemy….I know…if you are a lasagna purist…please, turn your eyes), this cooked up to be layered, saucy, meaty heaven.  If you eat dairy, you could easily add a layer of cheese to this.

Slice the eggplant lengthwise in 1/4-inch thick slices. I prebaked my eggplant “noodles” in an oven at 375F for 10 minutes while I was making the sauce.  I haven’t tried making this without prebaking the eggplant. I’m sure it would work but would just require longer baking time once it is fully constructed.  After prebaking the eggplant slices and whipping up the meat sauce, the lasagna is ready to be BUILT!

  • Start with a layer of meat sauce in the bottom of a 9″ X 13″ baking dish.
  • Then place 3 to 4 slices of eggplant in a single layer across the bottom of the pan.
  • Add another portion of meat sauce,
  • Then add another layer of eggplant (stacking on top of the first layer).
  • Top the whole thing with the remaining sauce.
  • Bake at 375F for 25 to 30 minutes, or until bubbly and heated through.

Bonus features of my version of lasagna are that it takes a fraction of the time since there are no noodles to cook and no cheese to shred.  It also cooks in half the time. You could easily sub zucchini and/or yellow squash for the eggplant.

DSC_0281

Paleo Eggplant Lasagna (Grain Free, Gluten Free, Dairy Free)

Serves 6 to 8

Ingredients

  • 1 large globe eggplant, cut lengthwise into 8 1/4-inch slices
  • olive oil
  • 1 lb ground grass-fed beef
  • 1 medium onion, diced
  • 10 oz whole baby bella mushrooms, sliced
  • 4 to 6 cloves of garlic, minced
  • 2 15 oz cans of diced tomatoes (undrained)
  • 6 oz can of tomato paste
  • 1 tablespoon dried oregano
  • 1 tablespoon dried basil
  • 1 teaspoon dried thyme
  • 1 teaspoon kosher salt
  • 1/2 teaspoon ground black pepper
  • 1/4 cup fresh parsley (plus more for garnish)

Instructions

  1. Preheat oven to 375 F.  Spray two baking sheets with nonstick spray or line with parchment paper.  Set aside.
  2. Place eggplant pieces on prepared baking sheets in single layer. Brush both sides of eggplant slices with olive oil. Bake until eggplant slices are tender and beginning to brown, about 5 minutes per side. Watch closely and remove eggplant slices as needed if they are cooking too quickly or not long enough.   Remove baking sheets from oven and cool eggplant while preparing sauce. Eggplant can be roasted 1 day ahead and refrigerated.
  3. In a large sauce pan or pot, brown ground beef over medium heat.  Drain excess grease. Return pan to heat and add onion, garlic, and mushrooms.  Stirring frequently, brown and cook until onions and mushrooms are tender, about 5 to 10 minutes.  Add 2 cans of diced tomatoes with juice, tomato paste, oregano, basil, salt, pepper, and parsley.  Bring to a simmer. Allow to simmer for about 10 minutes, stirring frequently. Sauce can be made several days ahead and refrigerated.
  4. Spread 1/3 of the meat sauce (about 2 cups) in the bottom of a 9″ X 13″ glass pan.  Layer 4 slices of eggplant on top of the sauce.  Spread another 1 to 2 cups of sauce on top of the eggplant slices.  Arrange a second layer of eggplant slices directly on top of the first layer, stacking them. Spoon remaining sauce on top. This can be made 1 day ahead. Cover with foil and refrigerate until ready to cook.
  5. Bake eggplant lasagna until heated through, about 20 to 30 minutes if freshly made or 40 minutes if refrigerated. Serve hot topped with fresh parsley or basil.

*Nutritional Information (based on 8 total servings), 1 serving = 209 calories, 15 g carbohydrates, 11 grams fat, 15 grams protein

Roasted Brussels Sprouts with Cranberries and Pecans

So let me tell you a story about a notorious vegetable called Mr Brussel.

Mr Brussel was bulky and brawny. A bad boy in the vegetable kingdom. Not many people liked him. He kind of had multiple personalities or at least was pretty moody.  Some days he was bitter. Other days he was bland. But generally, most of the time he was smothered and tired and wilted and just overcooked. Bleh.

DSC_0167

Then one day Mr Brussel went to the Roasting Pan, a new pub.  He had heard stories of this place changing other veggies, but he thought that it was a myth.  Rumors stirred about Madame Cauli Flower and her infamous roasted makeover.

So Mr Brussel decided to give it a shot.

He went in. He stayed awhile. He lingered. He rested. He was massaged in some olive oil. He got braised and roasted.

Then when he got out of the Roasting Pan, something amazing happened. He was sweet and delicious and caramelized. He was a changed veggie. He was the Ryan Gosling of vegetables…well, maybe not THAT far…but close.

DSC_0172

The moral of the story, people?  Turn Mr Brussels from bleh to BAM by:

  • cutting those tiny cabbage-like veggies into quarter segments,
  • drizzling with olive oil,
  • sprinkling with salt and pepper, and
  • roasting in an oven!

That’s it. Oh the magic of the great Roasting Pan.

DSC_0179

For this recipe, I tossed my roasted brussels sprouts with cranberries, pecans, and a balsamic drizzle.  But don’t stop there. There are plenty of other ways to prepare these….maybe bacon? roasted garlic? parmesan? Harissa?  Yes!  Branch out. Give Mr Brussels another try. He won’t disappoint you.

Roasted Brussels Sprouts with Cranberries and Pecans (adapted from Whole Foods Market recipes)

Serves 6 as a side

Ingredients

  • 1 lb of fresh brussels sprouts, trimmed and quartered
  • 1 to 2 tablespoons of olive oil
  • 1/4 teaspoon salt and pepper each
  • 1/3 cup dried cranberries
  • 1/4 cup chopped pecans
  • 1 tablespoon balsamic vinegar

Instructions

  1. Preheat oven to 400 F.  Line a roasting pan with aluminum foil.  
  2. In a medium bowl, toss the brussels sprouts with olive oil, salt and pepper. Spoon the brussels sprouts in a single layer onto  the roasting pan.  Roast for 30 minutes. Stir the brussels sprouts. Add the pecans and cranberries onto the roasting pan. Add the pan back into the oven and cook for an additional 5 minutes. Stir well until brussels sprouts are well cooked.
  3. Remove from oven and toss with balsamic vinegar.

Paleo Cranberry and Apple Cobbler

My heart is heavy on this last day of December and this last day of 2012. I’m staying in my pajamas and watching the snow fall. The snow falls so peaceful outside my window, yet I know that sometimes there is no peace and life is just not fair.  

DSC_0234

My thoughts go out to everyone who has lost someone this year. My thoughts go out to those that are lost. My thoughts go out to those that are enduring hardships that are unfathomable. 

There are so many cruel and unfair things that occur and I always ask “why?”…but sometimes there is no reason. It’s just the way it is.  I only hope that there is something better that hopefully will come out of tragedy.

DSC_0239

DSC_0253

So I make this cobbler for my friends that are struggling right now, my friends that are enduring an unfathomable loss, my friends that are lost in life.  I make this cobbler to hopefully bring comfort into their hearts and to warm their souls.

Paleo Cranberry and Apple Cobbler (Grain Free, Gluten Free, and Diary Free) (adapted from Beeckman 1802 Heirloom Cookbook)

Filling:

  • 12 oz bag of fresh cranberries
  • 3 medium apples, cored and diced
  • 1/4 cup crystallized ginger, diced
  • 1 cup water
  • 1/3 cup honey
  • 2 tablespoons arrowroot powder

Topping:

  • 1 cup almond flour
  • 1/4 cup chopped walnuts
  • 1 teaspoon ground cinnamon
  • 1/8 teaspoon sea salt
  • 1/4 cup coconut oil, melted

Instructions:

  1. Preheat oven to 350F.  Grease a 9X9-inch baking dish with butter, coconut oil or nonstick spray.  Set aside.
  2. In a medium saucepan, combine cranberries, apples, crystallized ginger, water, and honey. Heat over medium heat until the mixture begins to boil and the cranberries pop. Cook for 5 to 10 minutes.  Remove from heat and stir in arrowroot powder. Pour the hot cranberry mixture into the baking dish and set aside.
  3. In a separate medium bowl, combine all of the topping ingredients. Mix well.  Spoon the topping mixture evenly over the filling.
  4. Bake at 350F for 30 to 40 minutes. The cobbler will begin to bubble and the topping should lightly brown.  Remove from oven and allow to cool for a few minutes.  Best when served with vanilla coconut ice cream!