Plum Sorbet

Plum Sorbet / Big Eats Tiny Kitchen

This week, I was the lucky recipient of a metric boat load of bite-sized cherry plums from a friend’s plum tree in her front yard!!!

So, what would YOU do with sacks and sacks of fresh tasty plums?  Well, besides pop them directly in your mouth…which happened a lot around here.

Plum Sorbet / Big Eats Tiny Kitchen

I decided to try something new….

Plum sorbet, ya’ll! Come and get it! It’s muggy and sticky outside. That means it is perfect weather for a tangy scoop of honey-sweetened Plum sorbet! And it’s dairy free!

You could easily replace the plums in this recipe with another in season fruit, like blueberries or strawberries or peaches! This is So delicious.

Plum Sorbet / Big Eats Tiny Kitchen

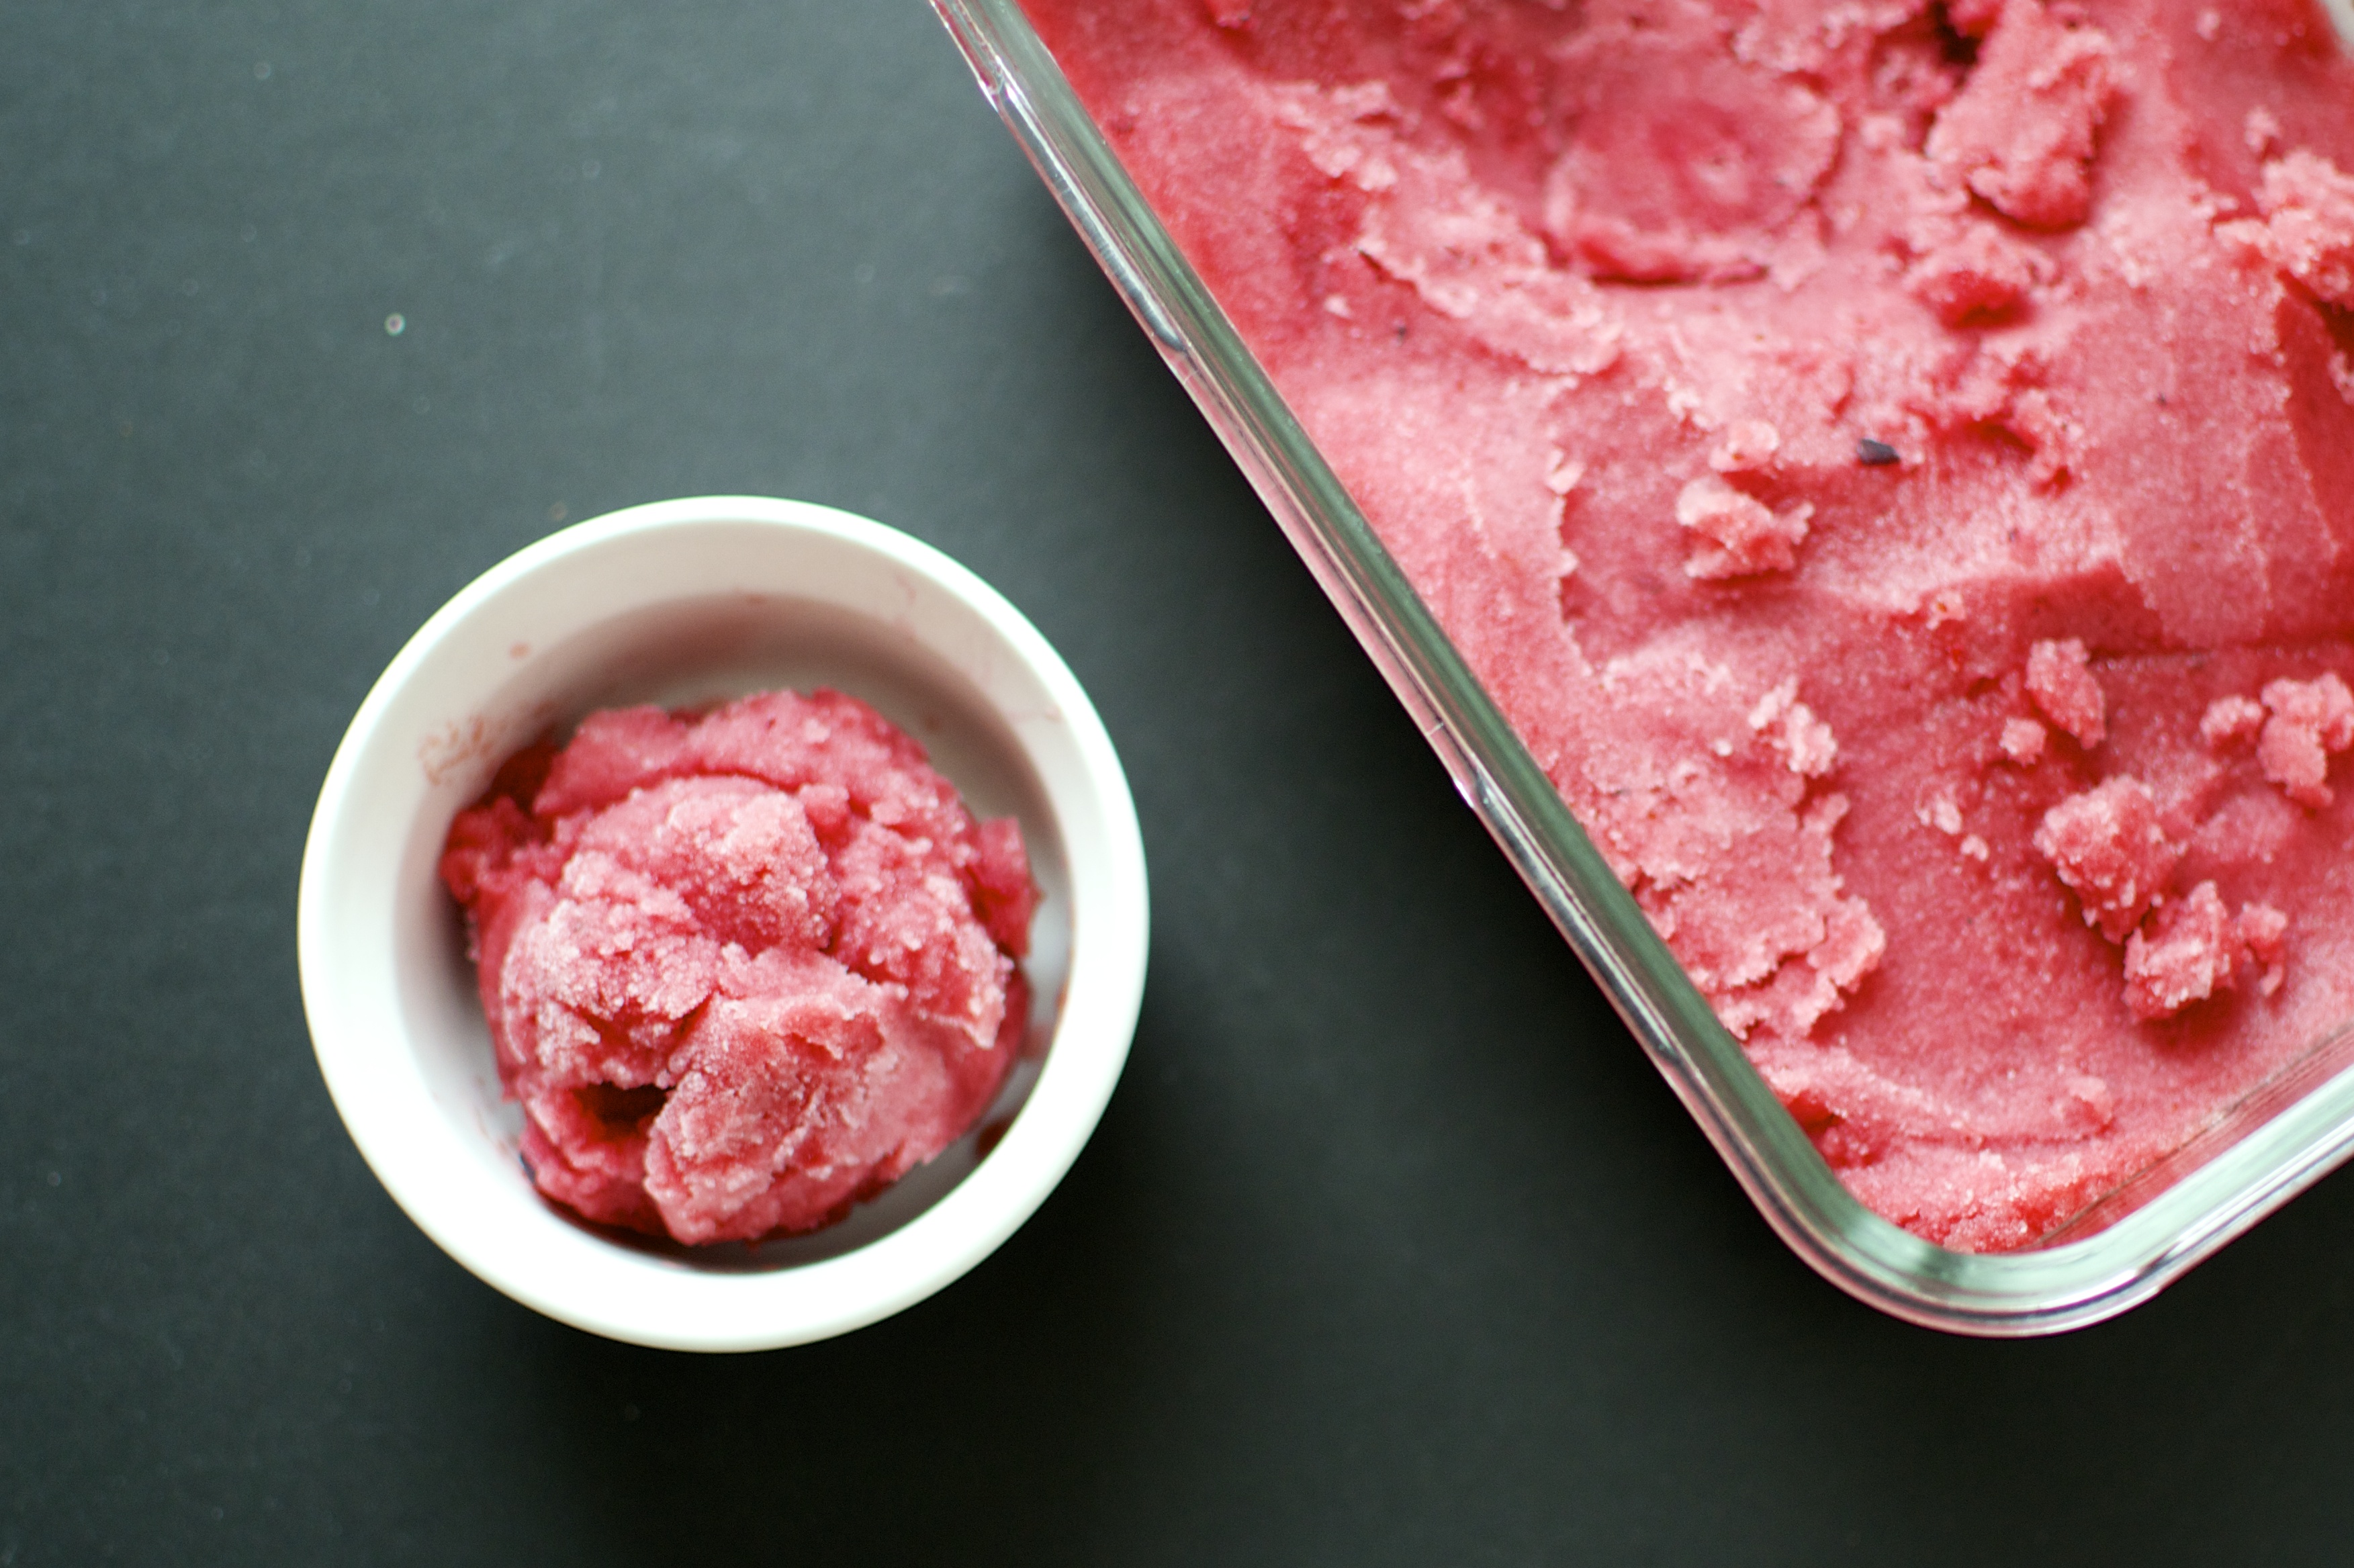
These plums that I used were perfectly tart and the honey provided juuuuust enough sweet balance. Also, I added a splash or two or three of champagne in the sorbet! Booze it up! Champagne or white wine in the sorbet provide the finished product a bubbly tang and help with the scoopability! Boom Boom!

Wait. This would be great as a Champagne Float! What? Yes please! If that is not a thing, it should be. Tip that pinky up, honey. Put your fancy hats on and get a big ol’ scoop of Plum Sorbet! Cheers!

DSC_0067

Plum Sorbet

  • Servings: 6
  • Difficulty: Easy
  • Print

Ingredients

  • 2 to 3 cups sliced plums, pits removed
  • 1/4 cup honey
  • pinch of salt
  • 1/3 cup champagne or white wine (or water)
  • 1/3 cup water

Instructions

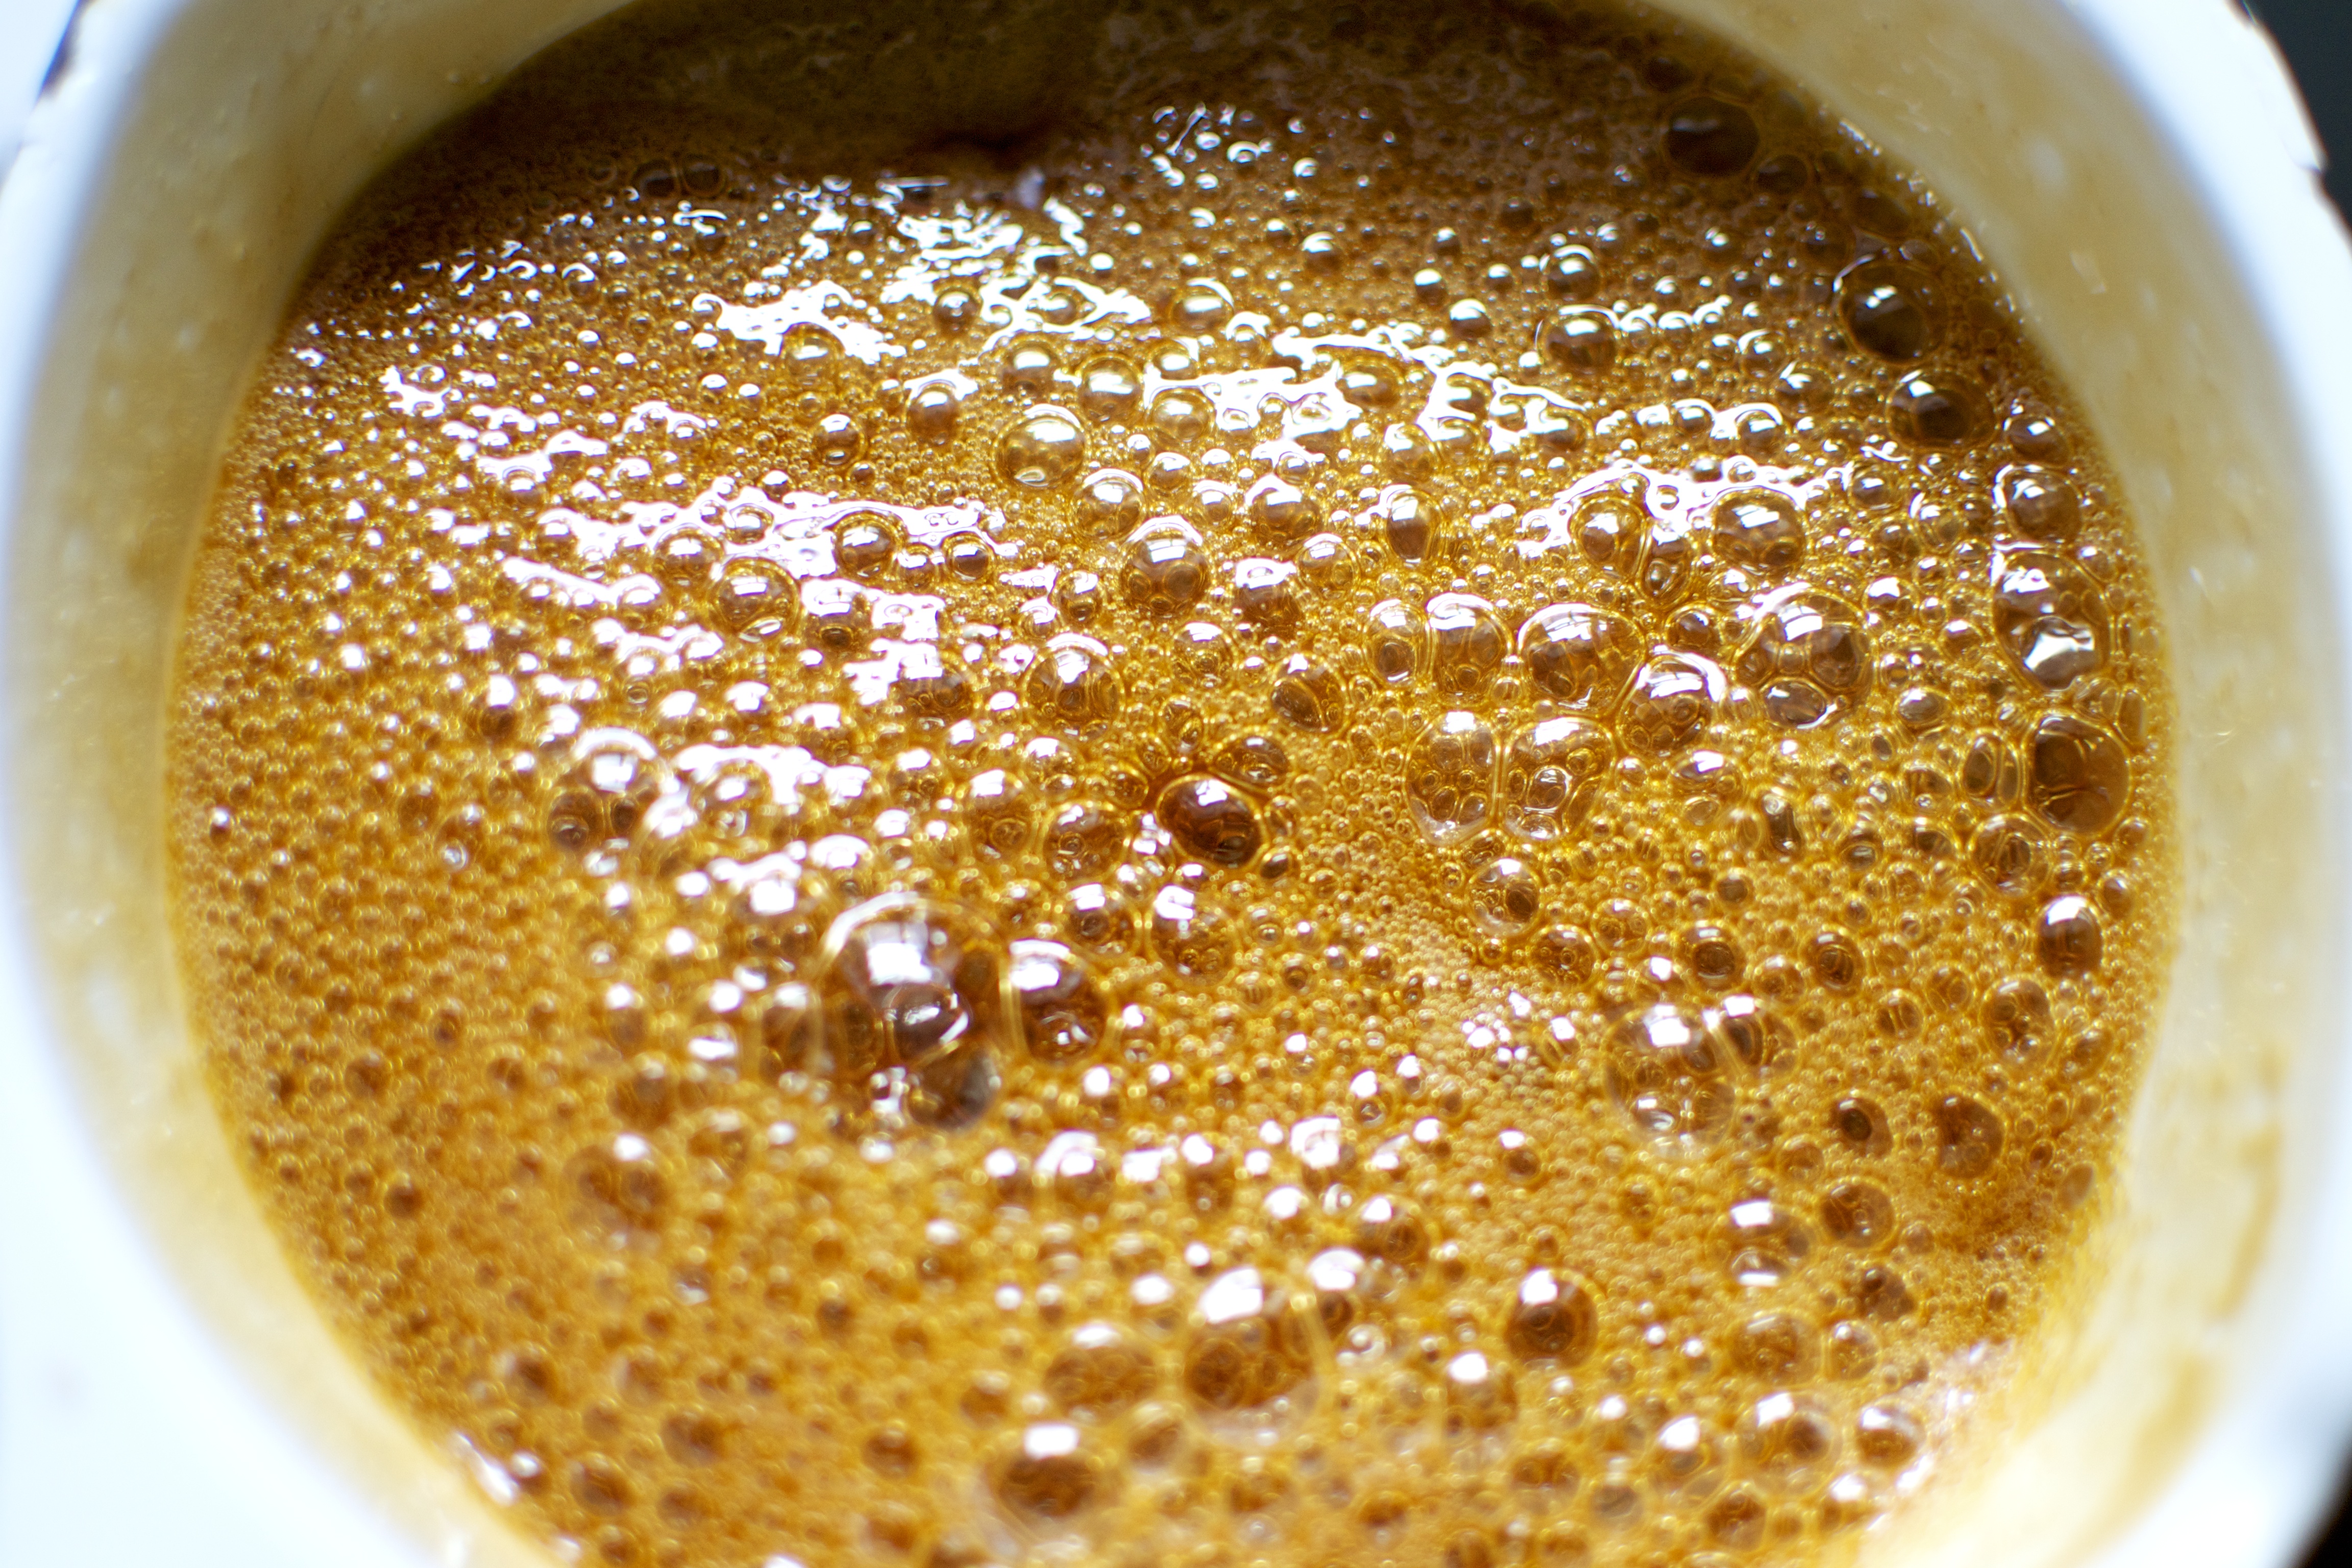
  1. Add all ingredients to a blender or food processors. Purée until the mixture becomes smooth. Pour the plum puree through a fine mesh sieve to catch large pieces of skin. Place mixture into refrigerator for 30 minutes (or overnight) to chill.
  2. Place the plum purée into the bowl of a chilled ice cream machine and process according to the manufacturer’s instructions. It will take about 25 to 30 minutes. While the mixture is churning away, place a glass container into the freezer that will be big enough to place the processed sorbet into. After the sorbet is finished, either serve immediately or place into the air tight pre-chilled container and freeze for at least 2 hours to firm up.  The wine will help keep the sorbet from getting icy and will assist with scoopability if serving at a later time. Allow to sit out at room temperature for about 5 minutes after removing from the freezer, then scoop away!

Picnic Perfect Herby Deviled Eggs

Picnic Perfect Herby Deviled Eggs / Big Eats Tiny Kitchen

I’m constantly looking for easier and more efficient ways to do things. Must be the engineer in me. Well today, I have an amazing genius picnic tip.

Use an egg carton to transport deviled eggs. Genius!

This weekend we had a tasty picnic with friends to celebrate the 4th of July. My hubby and I rode our bikes to the park and brought along some snacks, including deviled eggs. My solution to transport the deviled eggs was to use the egg carton as the perfect transport container.

I placed separate muffin liners in the carton to make these a less messy picnic dish. I also decided to use nearly the whole egg instead of cutting them in half. I cut the top third of the egg off and scooped out the yolk. The yolks were then mixed with greek yogurt (instead of mayo), herbs, salt, and Dijon mustard. I then scooped the yolk mixture into a baggy, cut off the edge, and pipetted the mixture into each egg white. Fancy pants picnic dish!

Picnic Perfect Herby Deviled Eggs / Big Eats Tiny Kitchen

I unfortunately do not have very many pictures of these puppies since I was running behind and had to rush to get these beauties loaded up in the egg carton and then head out on my bike to the picnic. But I will tell you that I will definitely be repeating this process for future deviled eggs that will be accompanying me to potlucks and picnics.

The only downside to this recipe is that deviled eggs go waaaay too fast. Womp Womp.

Herby Deviled Eggs (Grain Free, Gluten Free)

  • Servings: 12
  • Difficulty: Easy
  • Print

Ingredients

  • 12 eggs
  • 1/3 cup greek yogurt
  • 1/4 teaspoon sea salt
  • 1 teaspoon minced chives (some reserved to sprinkle on top)
  • 1 teaspoon minced parsley
  • 1 teaspoon Dijon mustard

Instructions

  1. Place eggs in a medium saucepan and add cold water until the eggs are covered by 1 inch of water. Bring to a rolling boil. Remove saucepan from heat, cover, and then let stand for 11 minutes. Drain the pot and run cod water over the boiled to cool them.
  2. Meanwhile, place remaining ingredients into the bowl of a food processor and mix together. Reserve some chives and parsley for sprinkling on top.
  3. Peel all of the eggs. To transport easily to a picnic, make whole deviled eggs by cutting off the top third of the egg. Remove yolks carefully with small spoon or butter knife, leaving the whites fully intact. Transfer yolks to bowl of food processor with greek yogurt mixture. Process until smooth.
  4. For easy picnic transport, line egg carton with individual muffin liners. Place intact egg whites into each separate muffin tin liner. Place egg yolk mixture into a sealable plastic back (like a ziplock). Cut the corner tip off of the bag for easy pipetting into each egg white. Sprinkle with remaining herbs. Place plastic wrap on top of filled eggs and refrigerate up to 8 hours.

Paleo Curried Pumpkin Seed Crusted Chicken

Paleo Curried Pumpkin Seed Crusted Chicken

Things have been pretty busy for me lately. We recently traveled to Pittsburgh to see two of our dearest friends and our twin godsons that are 16 months old! So adorable. It was a fun-filled weekend that had me taking naps EVERY day. Twin boys…whoooosh. Then I was in Omaha for work. THEN my two awesome kid sisters came and visited me.

When I’m running around full steam, on the road, and on air planes, I need a good snack. I recently tried SuperSeedz, gourmet pumpkin seeds, and I absolutely LOVE them. I took them on the road with me and shared my new addiction with everyone. They are so delicious and have tons of different flavors. They are one of the best gluten free and paleo-friendly treats on the market.

Paleo Curried Pumpkin Seed Crusted Chicken

I’m typically not a big person on doing giveaways, but I am completely in deep smit with these pumpkin seeds.  So if you are looking for a tasty snack that is loaded with protein and nutrients, you have to try these!

Paleo Curried Pumpkin Seed Crusted Chicken

Paleo Curried Pumpkin Seed Crusted Chicken

For a sweet treat, try the chocolate flavored Cocoa Joe! ERHMERGERD! Or spice it up with the Curry Flavored seeds. I really liked these seeds so much that I used the curry flavored pumpkin seeds as a nut crust for a paleo version of chicken fingers! Super kid friendly and easy for the whole family to help prepare.

SuperSeedz and I are giving away a FREE box of all of the delicious flavors that SuperSeedz offers! It’s an amazing snack box full of tasty treats.  There are two different ways to enter this giveaway.

Receive up to 2 entries if you:

  1. Subscribe to Big Eats Tiny Kitchen blog by email. 
  2. Leave a comment below about your favorite way to use pumpkin seeds. Extra points for creativity!

The fine print: You have until midnight CST on Sunday, July 6th, 2014, to leave a comment or subscribe to my blog for chances to win the box of tasty treats. I will notify the winner by email on Monday, July 7th, 2014. To claim the prize, the winner must reply within 7 days with a valid mailing address or another winner will be selected at random. Good luck!

Paleo Curried Pumpkin Seed Crusted Chicken (Grain Free, Gluten Free, Paleo-Friendly)

  • Servings: 4
  • Difficulty: Easy
  • Print

Note – A food processor or blender is necessary for this recipe.

Ingredients

  • 2 lbs of chicken breasts or thighs, boneless and skinless
  • 1/2 cup roasted and salted pumpkin seeds (I used Super Seedz Curry Flavor)
  • 1/2 cup unsweetened shredded coconut
  • 1 teaspoon curry powder (or any seasoning that you prefer)
  • 1/4 teaspoon kosher salt
  • 2 eggs

Instructions

  1. Preheat oven to 400 F. Spray a roasting pan with nonstick spray or line with parchment paper. Set aside.
  2. Process 1/2 cup pumpkin seeds in a food processor for 1 minute or until seeds resemble bread crumbs. Add coconut, curry powder, and salt and pulse until combined. Pour pumpkin seed mixture onto a large plate.
  3. Whisk two eggs in a medium bowl. Dredge chicken in egg to fully coat. Take egg-coated chicken and lay onto plate with pumpkin seed mixture. Coat chicken on both sides with pumpkin seed mixture thoroughly. Place coated chicken onto roasting pan.
  4. Cook chicken for 35 to 45 minutes at 400 F (until chicken is cooked through), flipping halfway through cooking time. Remove from oven when cooked through and allow to cool for 5 minutes.


Gluten Free Strawberry-Rhubarb Cream Pie

Gluten Free Strawberry-Rhubarb Cream Pie / Big Eats Tiny Kitchen

Are you ready for a pie that is great to eat for breakfast, lunch, dinner, brunch, late lunch…or would that be linner? Go with it. Let’s chow down on the best that the season has to offer: strawberries and rhubarb.

My rhubarb plant is growing like a banshee in my yard. If you can plant a rhubarb plant, do it. They come back year after year after year, giving you stalks of tart goodness. My variety is green, which is quite a bit tarter (is that a word) than the red variety. But I dig it combined with strawberries, peaches, blackberries…whatever.

Gluten Free Strawberry-Rhubarb Cream Pie / Big Eats Tiny Kitchen Gluten Free Strawberry-Rhubarb Cream Pie / Big Eats Tiny Kitchen

Let’s make a PIE! A Breakfast PIE! Ya…you heard me! No judging here.

The crust has lemon zest, almond flour, coconut palm sugar, an egg, and butter. Love the citrusy burst that the lemon provides. After mixing up the crust, we are going to reserve part of the crust for the crumble top. Super easy peasy.

DSC_0351

The filling of this cream pie is adapted from Joy the Baker’s Cherry Pie Bars, which contains a custard created from greek yogurt, eggs, and lemon.  So this pie has some protein power too! Breakfast plus. Oh and instead of using all purpose flour (like the original recipe), I chose to stabilize the custard with arrowroot powder. Low carb plus! (Note: cornstarch could be used as well if you do not have any issues with corn grains.)

Gluten Free Strawberry-Rhubarb Cream Pie / Big Eats Tiny Kitchen

Gluten Free Strawberry-Rhubarb Cream Pie / Big Eats Tiny Kitchen

This pie has been the best thing about my mornings…and evenings…and lunches. Dallop with an extra scoop of greek yogurt if you want. Cheers to summer freshness.

Gluten Free Strawberry-Rhubarb Cream Pie / Big Eats Tiny Kitchen

A few notes about this pie:

1. The coconut palm sugar is processed in a food processor for 1 to 2 minutes to make a fine sugar powder. This helps with dispersing it throughout the crust and crumble. If you do not have coconut palm sugar, you could like swap out for another sweetener like honey or maple syrup, however I have not tried this and it will change the consistency of your crust given that honey is a liquid.

2. I used fresh fruit. If using frozen, be sure to thaw and drain it thoroughly or else you’ll have a soggy goop. TRUST ME. I did it. Tastes great, but looks less appetizing.

3. To make this completely grain free, replace the oats with your favorite chopped nut such as walnuts or pecans.


Gluten Free Strawberry-Rhubarb Cream Pie

  • Servings: 8
  • Difficulty: Moderate
  • Print

Crust Ingredients

Filling Ingredients

  • 2 eggs
  • juice of 1 small lemon
  • 1/2 Cup greek yogurt
  • 2 Tablespoons coconut palm sugar (maple syrup or honey)
  • 1 teaspoon gluten free vanilla extract
  • 3 Tablespoons arrowroot powder
  • 1 Cup diced rhubarb
  • 1 pint strawberries, halved

Topping

  • 1/2 Cup gluten free oats

Instructions

  1. Preheat oven to 350 F. Grease an 8″X8″ pan or 9″ pie plate with butter and set aside.
  2. In a food processor, process the palm sugar for 1 to 2 minutes until it becomes a fine powder. Add almond flour, salt, and lemon zest. Pulse to combine. Add diced butter to food processor and pulse until combined and appears to be sandy texture. Add egg to food processor and process until mixture forms a type of “dough” ball, the consistency of cookie dough. Reserve 1/4 cup of dough and set aside. Take remaining crust dough and spread along the bottom of the prepared pie pan or baking dish. Place in preheated oven and bake for 20 minutes, or until golden brown.
  3. Meanwhile, combine all filling ingredients except rhubarb and strawberries in a medium bowl. Mix well. Add rhubarb and halved strawberries to yogurt mixture. Set aside.
  4. In the bowl of the food processor, use reserved 1/4 cup crust dough and combine with 1/2 cup gluten free oats. Pulse the food processor a few times until the oats and the dough are combined to form a crumble topping.
  5. When the crust is finished pre baking, pour the yogurt topped strawberries and rhubarb into the pie crust. Evenly disperse the yogurt mixture and fruit into the pan. Sprinkle oat crumble over the top of the pie evenly. Place the pie back into the oven for 40 to 45 minutes. Oat crumble will be golden brown and center of pie will be firm. Remove from oven and allow to cool for 15 minutes. Serve either warmed or cooled. Refrigerate leftovers.
Notes:

1. Recipe adapted and inspired from Joy The Baker’s Cherry Pie Bars.

2. Recipe can be made grain free by replacing the gluten free oats with walnuts or pecans. The greek yogurt can be replaced with 1/2 cup of full fat coconut milk.

3. Cooking times may vary based on altitude and types of ovens.

Thai Chicken Salad with Spicy Peanut Sauce Dressing

Thai Chicken Salad / Big Eats Tiny Kitchen

One of my all time favorite salads that I make is my Spring Roll Salad with Thai Dressing. It is the perfect salad to make when herbs are springing forth from the ground in full force. It’s packed with fresh mint, fresh cilantro, and fresh basil.  I jam all of those fresh beauties in the salad and top with carrots, cucumber, and spring onions and just POUR that beautiful thai dressing in my mouth..I mean, on the salad. But seriously, I could totally gorge myself on that stuff.

If you don’t have fresh herbs growing, you can totally grab some at the farmers market in large beautiful bunches. But I recommend growing some in pots. Super easy and incredibly rewarding to be able to use fresh herbs in a flash. They are easy to grow from seed or purchasing starters at your local gardening store.

Thai Chicken Salad / Big Eats Tiny Kitchen

Thai Chicken Salad / Big Eats Tiny Kitchen

Anywho, I decided to take my amazing herbalicious spring roll salad to a new level. I topped it with grilled chicken that had been marinated in a thai flavored marinade for an hour. My husbands words after eating this salad were “This is the best salad I’ve ever eaten in my life.”  Who can’t love a great juicy grilled chicken and amazing peanut sauce! Heaven.

So this is seriously an easy peasy dinner, folks. Maybe not as easy as scrambled eggs but soooo much more tasty. Marinate the chicken for at least an hour or as long as overnight. You can use bone in or boneless, heck you can even go with breasts, thighs, legs, wings…whatever you want. I want judge if you’re a thigh person over a boob person. It’s cool. We are being super easy over here. Note: if you choose bone in breasts or thighs, it will take longer to grill than boneless. But who cares…we are grilling. Grab a brew, throw your meat on the grill, cheers to summer. That stupid winter is over. And here comes that ungrateful sticky humidity. Get ready!

Thai Chicken Salad / Big Eats Tiny Kitchen

While the chicken is grilling, throw your greens, herbs, and veggies together in separate bowls or one massive bowl. Whip up the Spicy Peanut Dressing. Add water to the peanut dressing as needed to get it to the consistency that you want. Set it aside and let everyone pour the sauce at their leisure. You may want to make extra!

Pull the chicken off the grill, let sit for a few minutes, then cube it up. Add it to the salads.

Pour dressing. Pour some more. C’mon!

Done.

Eat.

Lick bowl.

Dream about peanut dressing until the time you get it. Or is that just me? Life sure is better with fresh herbs and peanut dressing!

Thai Chicken Salad with Spicy Peanut Sauce Dressing (Gluten Free, Dairy Free)

  • Servings: 2-4
  • Difficulty: Easy
  • Print

Chicken Marinade Ingredients

  • 1.5 to 2 lbs chicken breasts or chicken thighs (I used 4 boneless skinless chicken breasts)
  • 2 Tablespoons nam pla (thai fish sauce) (I use red boat…great write up on it here)
  • 2 Tablespoons gluten-free tamari (or coconut aminos)
  • 1 tablespoon rice wine vinegar
  • juice from 1 lime
  • 1 tablespoon fresh ginger
  • 1 teaspoon coriander
  • 1 tablespoon curry paste (red or green works)

Spring Salad Ingredients

(basically this Thai Spring Roll Salad of mine)

  • Mixed greens (lettuce, baby kale, arugula, etc)
  • shredded carrots
  • cucumber
  • green onions
  • red bell pepper
  • avocado
  • fresh limes
  • fresh mint, cilantro, and basil
  • Thai Spicy Peanut Sauce Dressing (substitute peanut butter, almond butter, or sunflower seed butter in the dressing depending on your dietary needs)

Instructions

  1. Place chicken in a resealable plastic bag or shallow glass dish. Mix marinade ingredients in a small dish and pour over the chicken. Cover and allow to marinate in the refrigerator or an hour or overnight.
  2. Preheat the grill (or preheat oven to 425 F). Remove chicken from the marinade and allow excess marinade to drain. Place chicken on hot grill for 4 to 5 minutes per side, or until a thermometer reads 155 F within the thickest part of the chicken breast or thigh. If baking, place the chicken on a prepared baking sheet and bake for 25 to 30 minutes, until chicken is cooked through. Remove cooked chicken from grill or oven and allow to sit for 5 minutes. Cut into bite sized pieces.
  3. Mix ingredients for the spicy peanut dressing together in a small bowl or small food processor. You can use almond butter or sunflower seed butter in place of the peanut butter based on dietary needs. Add water as needed to obtain the consistency that you desire for dressing. Set aside.
  4. Assemble salad ingredients in separate bowls or in a single bowl. Top with cubed grilled chicken. I like mine with extra herbs, sliced avocado, and a big squeeze of lime too. Then pour the peanut dressing on top. I even go for an extra dash of siracha to boot. Mmmm. Enjoy!


Detox Salad Bowl with Lemony Dill Sunflower Seed Dressing

DSC_0359

I’ve lost my mojo and I just feel lost. I even feel lost in the kitchen. Of all places, that was a place I felt I could always turn to and whip something up full of desire and love and enjoyment. But not lately.

I went three weeks without going to the grocery store. THREE WEEKS. We were down to just a dozen eggs and frozen green beans…. worst omelette ever!

I couldn’t bring myself to go to the store. Even if I had gone, I would have just stared blankly at the isles and probably came home with another dozen eggs. It was the weirdest feeling to open my refrigerator and not have anything fresh in it…and then to not want to immediately drive my sorry little butt to the store or market and stock up on something…ANYTHING!

Roasted Parsnip, Cauliflower, and Fennel Soup / Big Eats Tiny Kitchen

And then a friend asked me a magical question….She asked me to cook with her. Zing. Cook. With. Someone. That was it! I needed a cooking partner! Someone to inspire me!

Her idea was to pick a delicious recipe in one of our old food magazines and to cook it with her in her AMAAAAZING kitchen. So I slowly started reopening and rereading my old dust-collecting magazines. And then slowly but surely, I started getting ideas. I felt my cooking desire was like the Grinch’s heart slooooowly expanding and growing. It just kept growing and growing and growing until I found myself at the farmers market on Saturday buying fennel, golden beets, radishes, arugula, kale….frothing at the mouth at all the herbs!  it was like a veggie frenzy!

DSC_0371

Who knows how all of these vegetables will fit together but I’m feeling mighty salady and detoxy right now. It was great to finally NOT eat eggs for every meal. I whipped up a quick Detox Salad Bowl of fresh spring vegetables and devoured it. Now I’m dreaming and dreaming of the new salads that I can create with my rag tag bunch of vegetables. Maybe I can get out of this funk one recipe at a time.

DSC_0373

Detox Salad Bowl with Lemon-Dill Sunflower Seed Dressing (Gluten Free, Dairy Free, Paleo Friendly)

  • Servings: 2-4
  • Difficulty: Easy
  • Print

Ingredients

  • 4 cups of greens (spring greens, spinach, kale, arugula, chard, etc)
  • 2 medium carrots, shredded
  • 1 cucumber, sliced thin
  • 1/4 head of red cabbage, sliced thin
  • 1/2 fennel bulb, sliced thin
  • 1 avocado
  • Lemony Dill Sunflower Seed Dressing (recipe below)
    • 1/2 cup sunflower seeds
    • 1/2 cup warm water
    • 2 tablespoons apple cider vinegar
    • juice and zest of 1/2 lemon
    • 1 tablespoon fresh chopped dill

Instructions

  1. Place all ingredients except avocado into a single large bowl or into separate serving bowls. Slice avocado and distribute evenly among bowls.
  2. In a separate small bowl, combine sunflower seeds and warm water for 10 minutes. Pour soaked sunflower seeds, soaking water, cider vinegar, lemon juice, and dill in the bowl of a food processor or high speed blender. Blend well for about 3 minutes. Makes about 1 cup.
  3. Pour Lemon-Dill Sunflower Seed dressing over salad and enjoy. Place leftover dressing in the refrigerator.

Beet, Fennel, Grapefruit and Avocado Salad

Beet, Fennel, Grapefruit, and Avocado Salad / Big Eats Tiny Kitchen

Hi. It’s spring…nearly summer. And do you know what that means? VEGGIES! Fresh amazing veggies. They are sprouting up everywhere in my garden. Beets and carrots and spinach and kale and cilantro and cucumbers and tomatoes! I can’t wait.

This weekend I enjoyed renewing my Saturday ritual of going to the Farmer’s Market bright and early and drooling over the produce and transplants that the local farmers had brought.  It makes salad making an adventure. Not your boring ol’ iceberg here…no spring rocket, and baby leaf kale, and beautiful sorel! Throw in some herbs, roasted beets, and avocado…yaaaaa, NOW you have heaven.

Beet, Fennel, Grapefruit, and Avocado Salad / Big Eats Tiny Kitchen

Beet, Fennel, Grapefruit, and Avocado Salad / Big Eats Tiny Kitchen

Beet, Fennel, Grapefruit, and Avocado Salad

Inspired by Pinch of Yum and my Blood Orange and Avocado Salad

Salad Ingredients

  • 1 large beet
  • 1 fennel bulb
  • olive oil
  • salt and pepper
  • 4 cups of raw kale, washed, destemmed and cut into 1-inch pieces (or spring lettuce mix)
  • 1 grapefruit, peeled and cut into sections
  • 1 cucumber, cut into thin slices
  • 1 avocado
  • 1/2 cup fresh cilantro, chopped
  • 1/4 cup fresh dill, chopped
  • 1/2 cup walnuts, toasted and chopped (optional)
  • 1/4 cup of crumbled feta

Dressing Ingredients

  • 2 tablespoons cider vinegar (or lemon juice or lime juice)
  • 2 tablespoons olive oil
  • pinch of salt
  • 1 tablespoon grapefruit juice (reserved from cutting up grapefruit for salad)

Instructions

  1. Preheat oven to 400 F. Line two baking sheets with parchment paper or with nonstick spray. Wash the beet thoroughly and scrub the outside very well. Remove the top and bottom of the beet. Cut in half and continue to cut up the beet until you obtain even 1-inch cubes. Place into a large bowl and drizzle with about 1/2-tablespoon of olive oil and salt and pepper. Place beet cubes onto one of the prepared baking sheets. Place in the oven and bake for 35 to 45 minutes.
  2. Wash the fennel bulb thoroughly. Remove the bottom root portion. Slice longways into even 1/4-inch width slices. Place in a clean bowl and drizzle with 1/2-tablesppon of olive and salt and pepper. Place the fennel slices onto the second prepared baking sheet. Place in the oven and bake for 20 to 30 minutes.
  3. When the fennel and beets are done roasting, remove from the oven and allow to cool to room temperature. Set aside. Can be made up to 2 days ahead of time and kept refrigerated.
  4. Wash kale and massage with hands in a large bowl. Gently toss in the grapefruit pieces, cucumber, cilantro, and dill.
  5. Combine dressing ingredients into a small bowl and whisk until combined. Just before ready to serve, pour dressing ingredients over the kale, grapefruit, and cucumber. Add roasted beets and fennel and toss all ingredients together gently so as not to stain everything red.
  6. When you are ready to serve the salad, add the avocados and gently combine everything because the avocados will melt and mush quickly into the salad. Top with any additional herbs, walnuts, and feta.

Chocolate and Peanut Butter Macaroons (Grain Free)

Chocolate and Peanut Butter Macaroons / Big Eats Tiny Kitchen

Sorry for the long delay in between posts. Recently life has been tough at times but life also has been very good. When I am going through a roller coaster of emotions and dead lines and choices and what not, I consume chocolate and peanut butter. Doctors orders.

But when life is good…I also eat chocolate and peanut butter.

Chocolate and Peanut Butter Macaroons / Big Eats Tiny Kitchen

Chocolate and Peanut Butter Macaroons / Big Eats Tiny Kitchen

The combination sends warm fuzzies through my body. It’s a choco-pb hug for my soul. I get my best soul hugs from those crack-like addictive Reese’s PB eggs that spring forth from every corner around this time of year. I can stay away from Reese’s (nearly) the rest of the year, but throw them in an egg shape! Holy frijoles, I can’t stop. My eyes pop out of my head all googley and I froth at the mouth and I protect them like a squirrel, hiding my Reese’s eggs in weird and unassuming places.

These cookies are the wonderful love child of two of my favorite cookies: No bake cookies + macaroons. Whoa. Whoa.

Let this happen.

Make them egg shaped. They are better for you than those other choco-pb eggs and just as addictive.

Chocolate and Peanut Butter Macaroons / Big Eats Tiny Kitchen

It will make you love life even when there are a few major down moments.

Chocolate and Peanut Butter Macaroons (Grain Free and Diary Free)

Adapted from Against All Grain

Makes 2 dozen cookies

Ingredients

  • 2 1/2 cups unsweetened shredded coconut
  • 1/3 cup honey
  • 1/2 cup unsweetened cocoa powder
  • 2 tablespoons natural creamy unsweetened peanut butter*
  • 1 egg white
  • salt

Instructions

  1. Preheat oven to 325F. Place a piece of parchment paper onto a rimmed baking sheet. Set the baking sheet aside.
  2. In a large bowl, combine the coconut, honey, cacao powder, peanut butter, and a pinch of salt.
  3. Place egg white and another pinch of salt in a medium bowl. Using a whisk or electric beaters, beat the egg white for about 2 minutes until soft peaks form. Combine meringue with other ingredients in the large bowl.
  4. Using a melon baller, scoop out cookies and place them onto the parchment paper. Bake for 30 minutes. Remove from oven and allow to cool for at least 1 hour on a wire cooling wrack.

*Note – To make these Paleo friendly, use either almond butter or sunflower seed butter in place of the peanut butter. 

Creamy Roasted Parsnip, Cauliflower, and Fennel Soup (Gluten Free, Vegan, and Paleo-Friendly)

Roasted Parsnip, Cauliflower, and Fennel Soup / Big Eats Tiny Kitchen

I have a divided house when it comes to silky smooth soups that only contain vegetables and no cream. Pureed smooth, they show off the amazing flavor of just the vegetables without anything masking their natural deliciousness. I love them…a lot. They are creamy without being loaded with cream. They are smooth and comforting and light. I want them in my belly.

The other person in this house does not like them because, well…they are creamy without being loaded with cream and they are smooth and light and in his words, “like baby food”. He wants heartiness. He wants carbs. He wants meat. He wants cream. He wants butter. He wants bacon. Do I live with Paula Dean?

Roasted Parsnip, Cauliflower, and Fennel Soup / Big Eats Tiny Kitchen

Roasted Parsnip, Cauliflower, and Fennel Soup / Big Eats Tiny Kitchen

And I craaaave creamy soups that have NO cream but are just ALL vegetables. I love smooth and creamy tomato soup, or carrot soup, or butternut squash soup. And every time I make them, my poor hubs has to eat this nourishing amazing bowl of yumminess and smile and leave ALL the leftovers for me. GOOD. Best lunches EVER. He can have his can of tuna and weird packages of sardines for lunch. Meanwhile, I will enjoy my creamy roasted soups and everyone at work will smell them and say “whoa…what are you having?”. In a good way. At least, that’s how it plays out in my head.

I stumbled on this Parsnip and Apple soup the other day on the most beautiful blog called Golubka Kitchen and I instantly began drooling. I couldn’t get the soup out of my brain box. I adapted it to roast the parsnips and I swapped out the potatoes for cauliflower. I found fennel on sale at the store and so I through it in as well to round out the awesome white soup. I recommend saving some of the fennel fronds and some thyme for topping these delicious bowls of comfort. The soup is also yummy with a good drizzle of olive oil.

Roasted Parsnip, Cauliflower, and Fennel Soup / Big Eats Tiny Kitchen

Roasted Parsnip, Cauliflower, and Fennel Soup / Big Eats Tiny Kitchen

So despite knowing that I have a divided house on smooth and creamy dreamless soups, I MADE it. and I loooooved it. I recommend you do the same, because then you will have a few days worth of amazing lunches and they get stuck with canned tuna.

Creamy Roasted Parsnip, Cauliflower, and Fennel Soup (Vegan, Gluten Free, and Paleo-Friendly)

Adapted from Golubka Kitchen

Serves 4 as a side or 2 as a main dish

Ingredients

  • 1/2 lb parsnips, peeled and cut into 1/2-inch rounds
  • 1/2 large head of cauliflower, roughly chopped (about 2 cups)
  • 1/2 large fennel bulb, sliced into 1/2-inch wide slices
  • 2 medium apples, peeled, cored, and cut into eighths
  • 2 garlic cloves, peeled and smashed
  • 1 tablespoon olive oil (plus more for drizzling on finished soup bowls)
  • 1/2 teaspoon salt (plus more for seasoning)
  • 1/2 teaspoon ground cumin
  • 1 Tablespoon fresh thyme leaves (plus more for garnish)
  • 3 to 4 cups low sodium chicken broth
  • salt and pepper to taste
  • Toppings: thyme leaves, olive oil, yogurt, quinoa

Instructions

  1. Preheat oven to 400 F. Spray a roasting pan with nonstick spray or line with parchment paper.
  2. Place chopped parsnips, cauliflower florets, fennel slices, apple slices, and garlic cloves in a large mixing bowl. Drizzle with olive oil and salt. Toss to coat evenly and then spread evenly on baking sheet. Roast for 25 to 30 minutes, tossing at 15 minutes.
  3. Remove from oven. Place half of vegetables into a blender or food processor along with half of the chicken stock, cumin, and thyme. Blend well for 2 to 3 minutes until the mixture is smooth. Transfer the pureed mixture to a medium stock pot. Blend next batch of roasted vegetables and remaining chicken stock for 2 to 3 minutes. Transfer remaining soup puree to stock pot.
  4. Heat soup in stockpot over medium heat. Bring to a simmer. Add additional liquid if soup is too thick. Adjust seasonings as needed.
  5. Distribute evenly into bowls and top with a drizzle of olive oil and thyme leaves. I added some quinoa to mine for a more substantial dinner.

Grain Free Samoa Bars

Grain Free Samoa Bars

It’s Girl Scout cookie season. People are walking around with goofy grins, Do-Si-Do crumbs on their shirts, stupid Thin-Min-covered fingers, Tagalong-scented breath, and boxes of Samoas stuffed in their sock drawers so that no one else will get THEIR cookies. Or is this just me?

And who came up with those names anyways? Do-Si-Do? Tagalong? What is a Samoa even?

Grain Free Samoa Bars

But in reality I’m jealous. Seethingly jealous. I can’t have any of them. I just stare with dark, wide-eyed, frothing and foaming desire.

But this year, the ol’ Girl Scouts gave the gluten-free crowd a consolation prize and came out with a GF cookie. I was pumped, until I found out it was a shortbread. Womp womp. Really? Shortbread?  That all you got? No badge for you! Get back in the kitchen. TRY AGAIN.

Grain Free Samoa Bars

DSC_0384

Never fear. After being challenged by a friend that Grain Free Samoas would not be good, I woke up on Saturday morning with a mission. A cookie mission.

These cookies deserve a badge! A medal! An Oscar, even! They make you THINK they are the real deal, but alas…they have no wheat, no grains, no processed sugar. Ya…SUCK IT TRABECK!

Grain Free Samoa Bars

Instead of making single cookie-disks, I opted for bars. Because seriously, these puppies disappear so quickly into your mouth that cutting out little stupid tire shaped cookies is not worth it. Lets save time. Let’s make bars! The shortbread crust is perfect and crisp. I saved even more time by not dipping each bar in chocolate and instead spread the chocolate layer between the shortbread crust and the caramel coconut layer. The caramel coconut layer is a delicious concoction of honey and a smidge of molasses that has been cooked down to an amber-caramel-heavenly syrup.

These do take a bit of time to make each part. But the wait and work is WELL worth it. So make a batch, hide several (because they will go fast if you share them), turn on the Oscars, grab a yummy Samoa bar, and do your best Matthew McConaughey impersonation….”alright, alright, alright”.

Grain Free Samoa Bars

Grain Free Samoa Bars

Makes 16 small bars

Shortbread Crust Ingredients (inspired by Deliciously Organic)

  • 1 1/2 Cup almond flour (such as Honeyville)
  • 2 Tablespoons coconut flour
  • 2 Tablespoons arrowroot powder
  • 1/2 teaspoon unflavored gelatin
  • 1/2 teaspoon sea salt
  • 4 Tablespoons unsalted butter, at room temperature
  • 2 Tablespoons honey

Chocolate Layer

  • 1 Cup semisweet or dark chocolate, chopped

Coconut Caramel Topping (adapted from Against All Grains)

  • 1/2 Cup honey
  • 1 Tablespoon molasses
  • 2 Tablespoons unsalted butter
  • 1/2 Cup coconut milk or heavy cream
  • 1/2 teaspoon sea salt
  • 2 Cups unsweetened shredded coconut

Chocolate Drizzle

  • 1/2 Cup semisweet or dark chocolate

Instructions:

  1. Preheat oven to 350 F. Place parchment paper in the bottom of an 8-inch by 8-inch baking dish. Set aside.
  2. Combine crust ingredients in a medium bowl until just combined. The mixture will be crumbly. Press the crust evenly into the bottom of the prepared baking dish. Bake on the middle rack of the oven at 350 for 15 minutes or until light golden brown.
  3. Meanwhile, place the unsweetened coconut on a rimmed baking sheet in an even layer. Place on the top rack to toast. Toast the coconut for about 5 to 7 minutes, keeping an eye on it so that it doesn’t burn. Remove the toasted coconut from oven when golden brown and allow to cool on a wire rack.
  4. After the crust is finished baking, pull the crust from the oven. Turn the oven off. Sprinkle 1 cup of chopped chocolate onto the warm crust. Place back into the warm oven for 1 to 2 minutes. Remove from the oven and use a rubber spatula to spread the melted chocolate evenly over the shortbread crust. Set on a wire rack and allow to cool. Place in refrigerator after cooled.
  5. For the caramel sauce, place honey and molasses in a small saucepan over medium heat. Bring to a low bubbling boil for about 7 minutes, swirling frequently to caramelize evenly. Remove from heat and stir in butter, coconut milk, and salt until smooth and completely combined. Stir in toasted coconut.
  6. Remove cooled shortbread crust from the refrigerator. Spread the coconut caramel mixture on top of the chocolate covered crust.
  7. Microwave remaining chocolate in a microwave safe dish for about 2 to 3 minutes, in 30 second intervals, stirring in between intervals. Once the chocolate is completely melted, drizzle the chocolate (using a spoon or fork) over the Samoa bars. Cool bars completely in refrigerator for at least 1 hour.
  8. Use parchment paper to pull out the bars from the baking dish. Place on a cutting board and cut into 12 to 16 bars. Place bar in hand and shove into mouth. Mmmmm. 🙂